All Activity
- Past hour
-
.thumb.jpg.885191d302e6c3704c848a8f5ac3a612.jpg) Can users see other people's public routes? Not implemented. I haven't spent much time on this feature, other than the distinction between "public" and "unlisted". Right now there's no exposure or search for the "public" ones. The primary use-case is "past a link in the forum", which works for both public and unlisted routes. How would you expect "discovery" to work? search, browse, pins-on-map ? (any of those should be ~easy) Can users import routes from other sources? Not yet... how would it work? GPX-style import should be super easy, at least for coarse GPX without a lot of waypoints. If you have an idea or application in mind, happy to discuss. re: vibecoded: it's currently private, I'm tryin to decide what to do about it. Are you thinking to make a Beeline-like WatchOS app with turn-by-turn? Gemini says: Because it's a Google platform, Google Maps is deeply integrated into Wear OS right out of the box and gives you full turn-by-turn navigation, including a live, interactive map view on your wrist, standard text directions, and haptic turn alerts. It also works fully standalone if you have a LTE/cellular model. I assume you want to simplify the experience somehow, with more like the Beeline arrow and a distance to next turn?
Can users see other people's public routes? Not implemented. I haven't spent much time on this feature, other than the distinction between "public" and "unlisted". Right now there's no exposure or search for the "public" ones. The primary use-case is "past a link in the forum", which works for both public and unlisted routes. How would you expect "discovery" to work? search, browse, pins-on-map ? (any of those should be ~easy) Can users import routes from other sources? Not yet... how would it work? GPX-style import should be super easy, at least for coarse GPX without a lot of waypoints. If you have an idea or application in mind, happy to discuss. re: vibecoded: it's currently private, I'm tryin to decide what to do about it. Are you thinking to make a Beeline-like WatchOS app with turn-by-turn? Gemini says: Because it's a Google platform, Google Maps is deeply integrated into Wear OS right out of the box and gives you full turn-by-turn navigation, including a live, interactive map view on your wrist, standard text directions, and haptic turn alerts. It also works fully standalone if you have a LTE/cellular model. I assume you want to simplify the experience somehow, with more like the Beeline arrow and a distance to next turn? - Today
-

Software: the perfect routing/mapping app for group rides?
demoray replied to Austin David's topic in General Fabrication
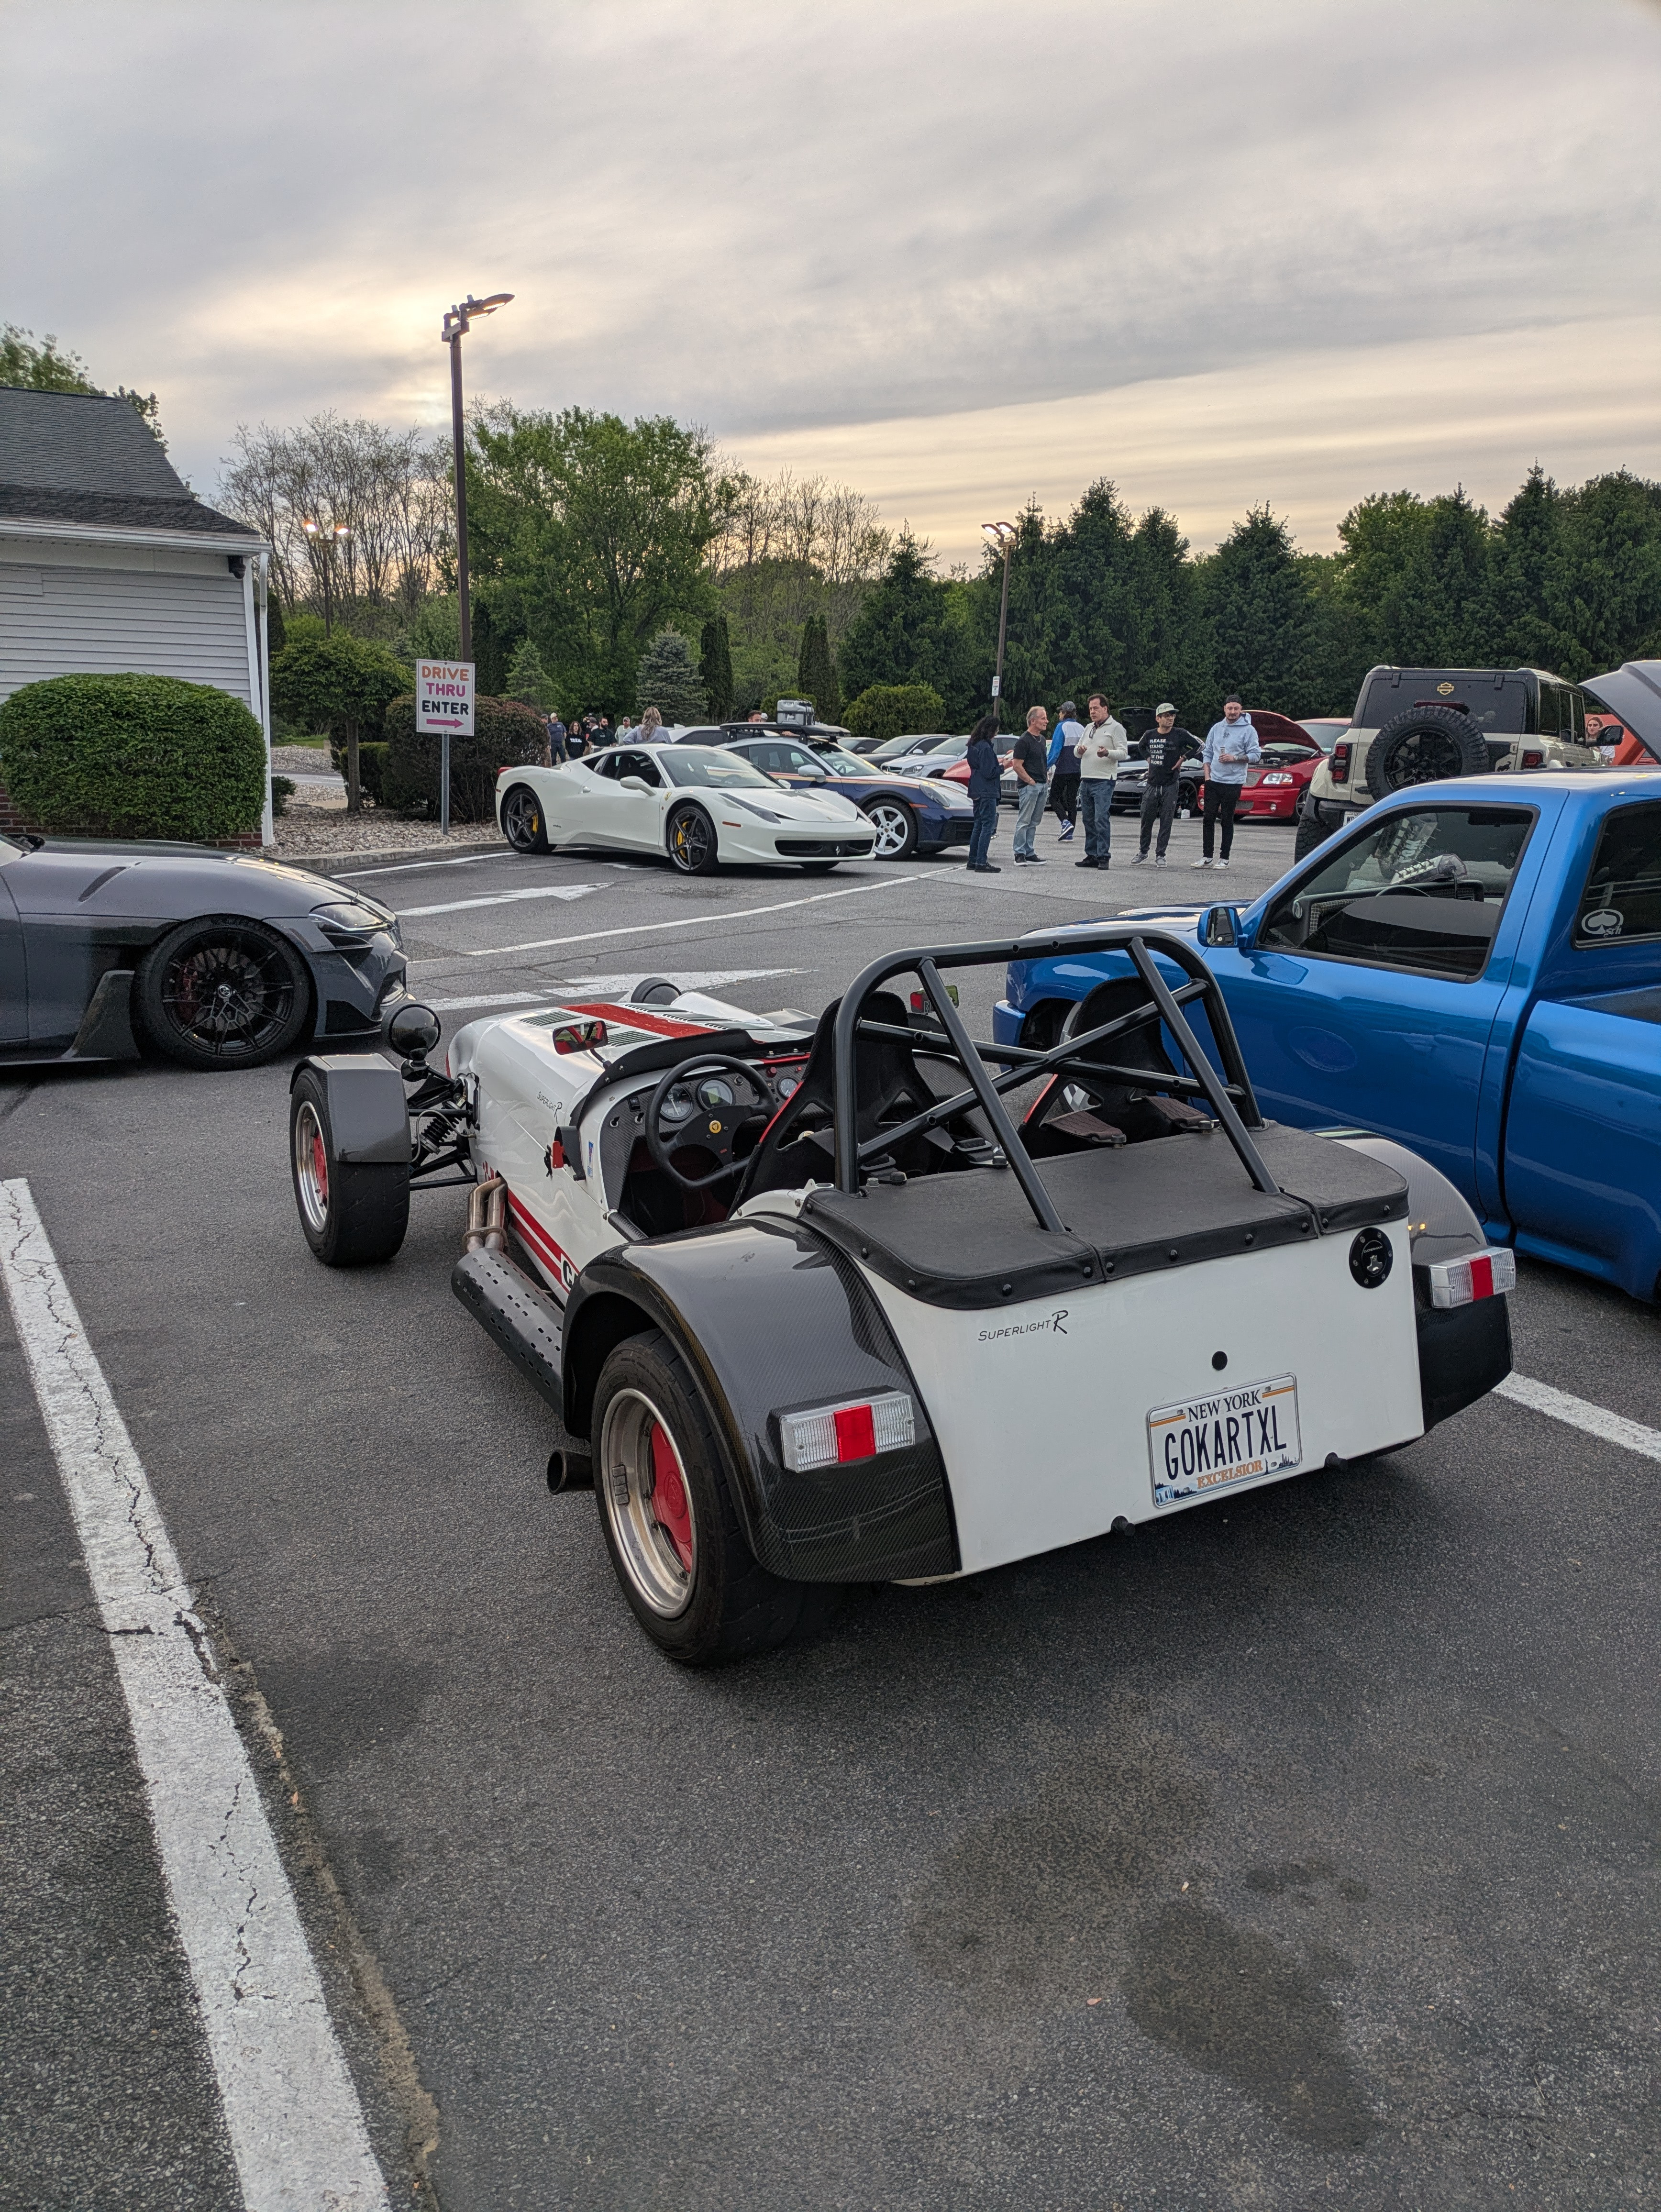
Very cool. I put a quick route from near home to a place that has cheap burger specials. This looks pretty straight forward to use. If it's vibe coded, care to share it on GitHub? I'm looking to do something related. I'm looking to build the other side of this, an app that shows the turn by turn akin to BeeLine that runs on Google Watch that supports GPX. Can users see other people's public routes? Can users import routes from other sources? -
 I have to let the 2nd chance offer take it's time until Monday afternoon
 -
Well..... It did not reach reserve on BAT, I was really disappointed after seeing the amount of followers and watchers, but I guess that is the way it goes.
-
 Sorry about your result. Will you be reposting here?
 -
Aallair joined the community
-
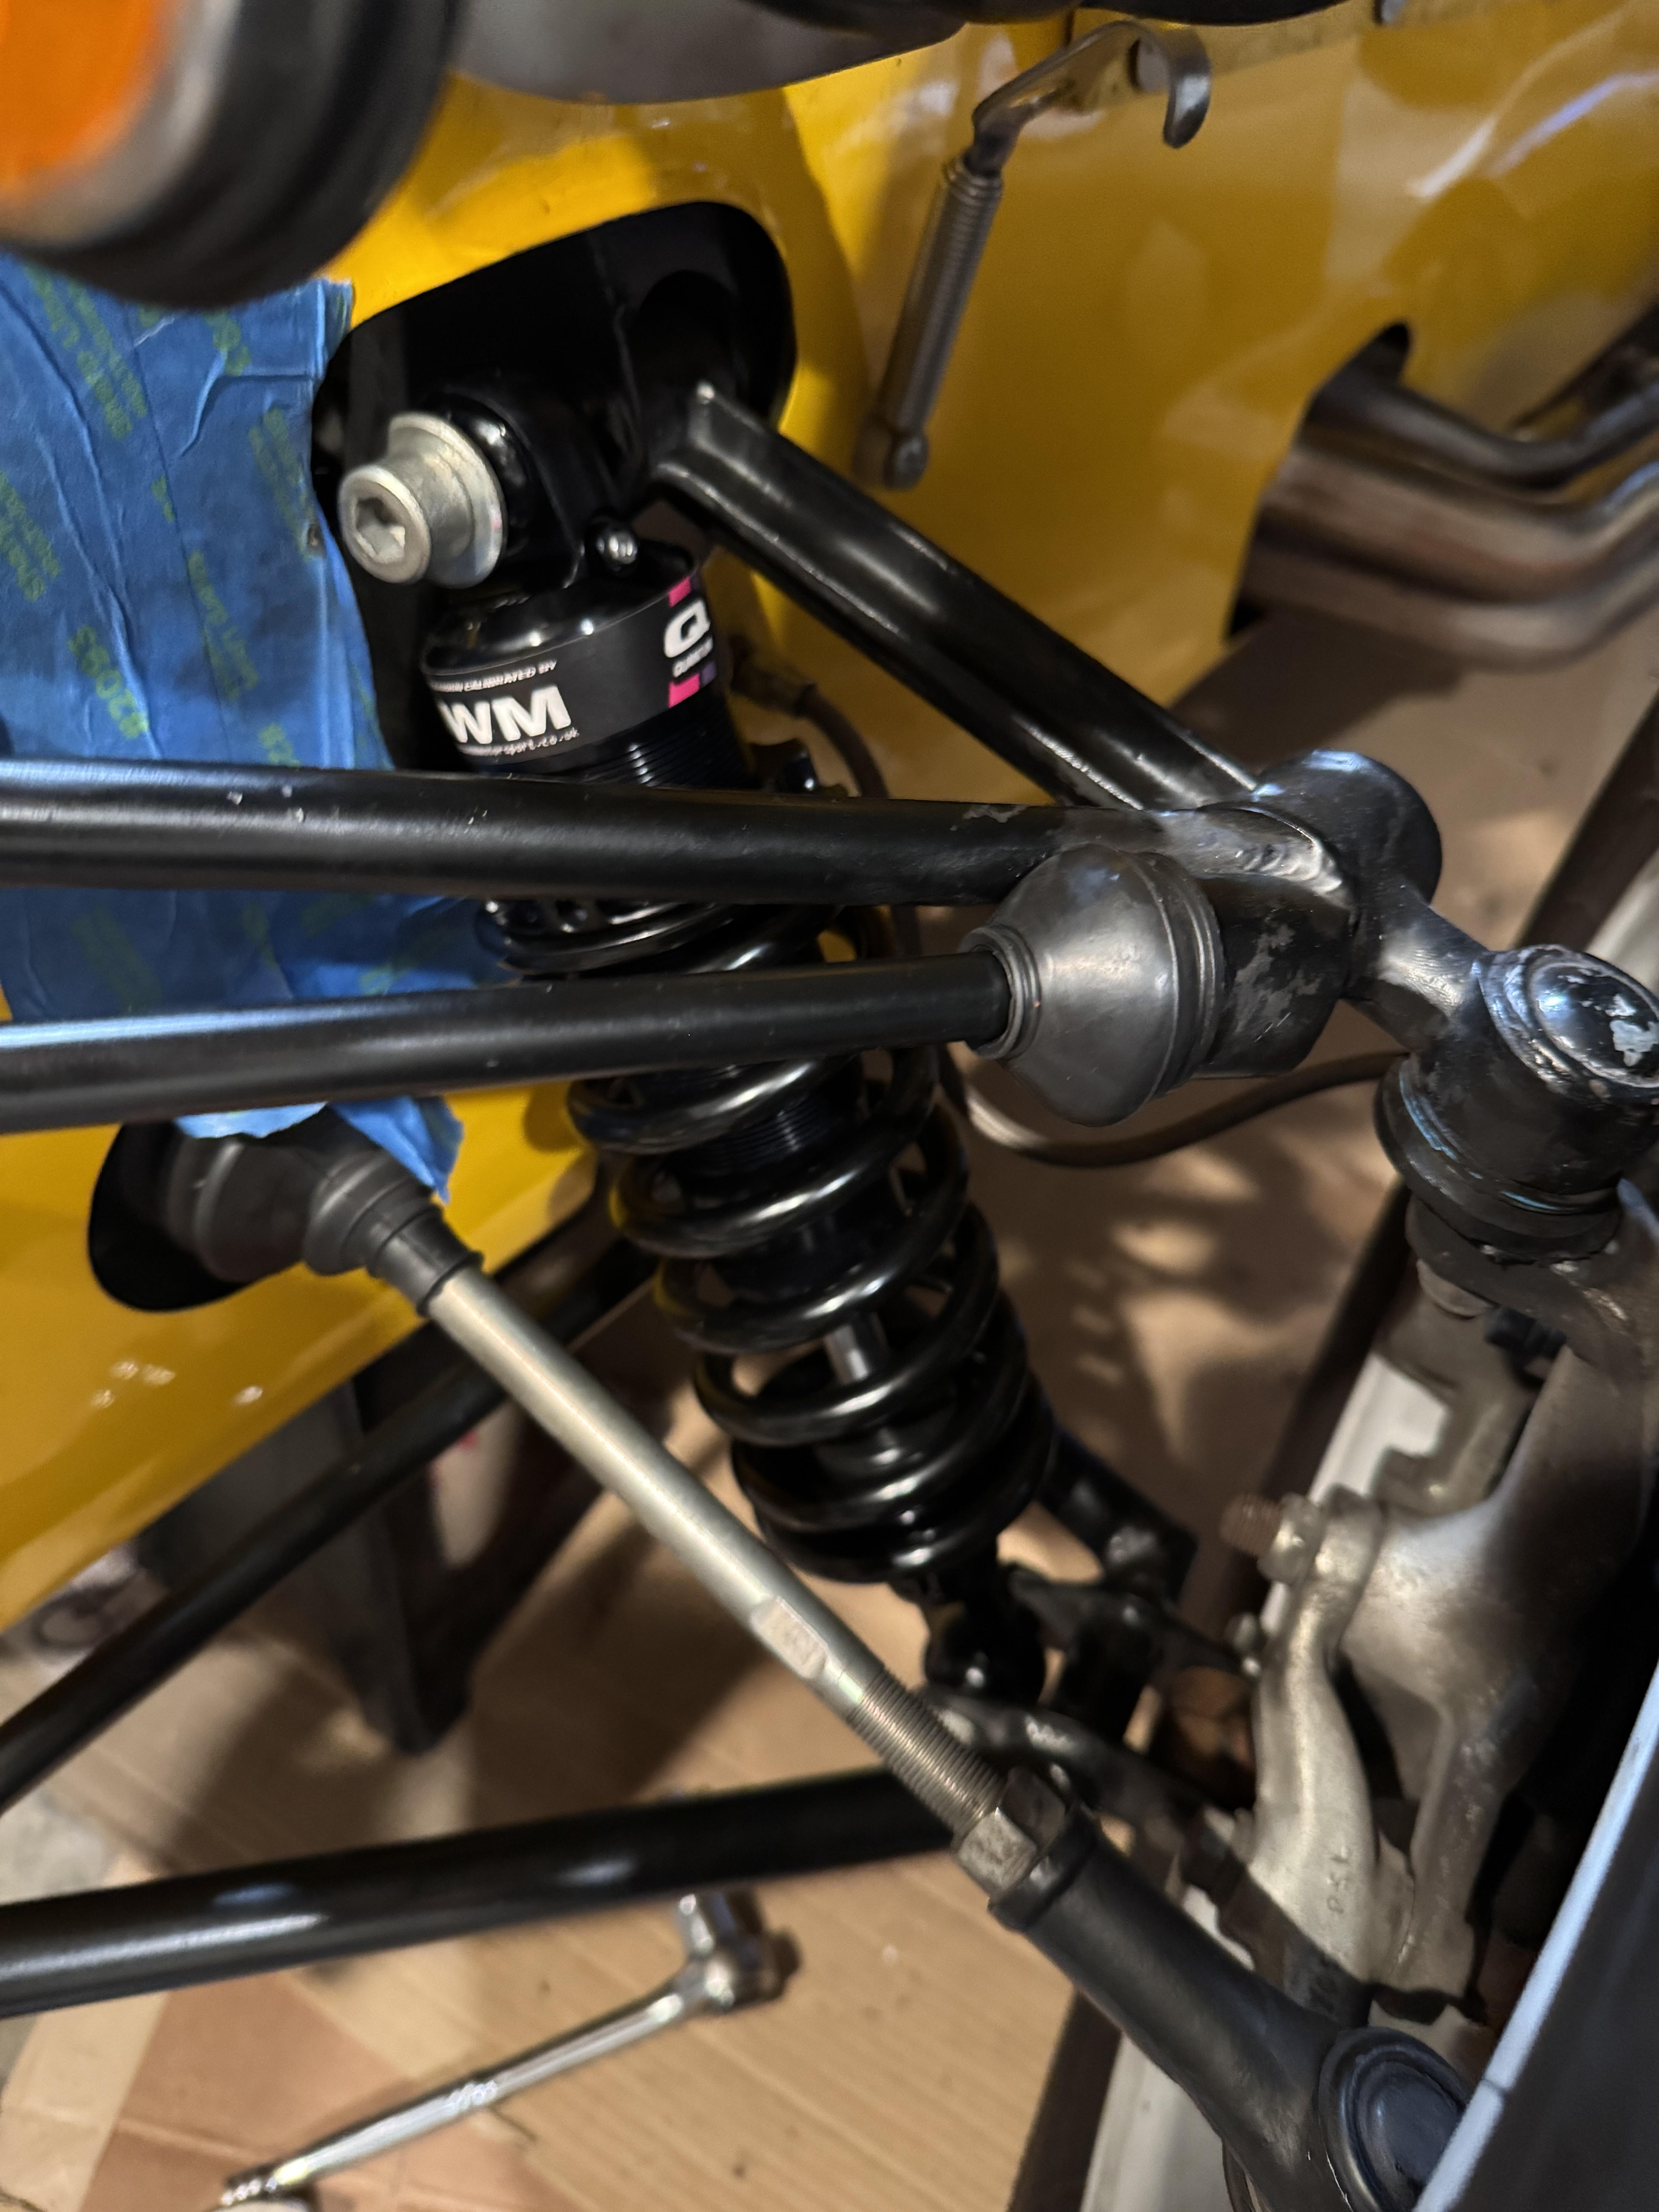
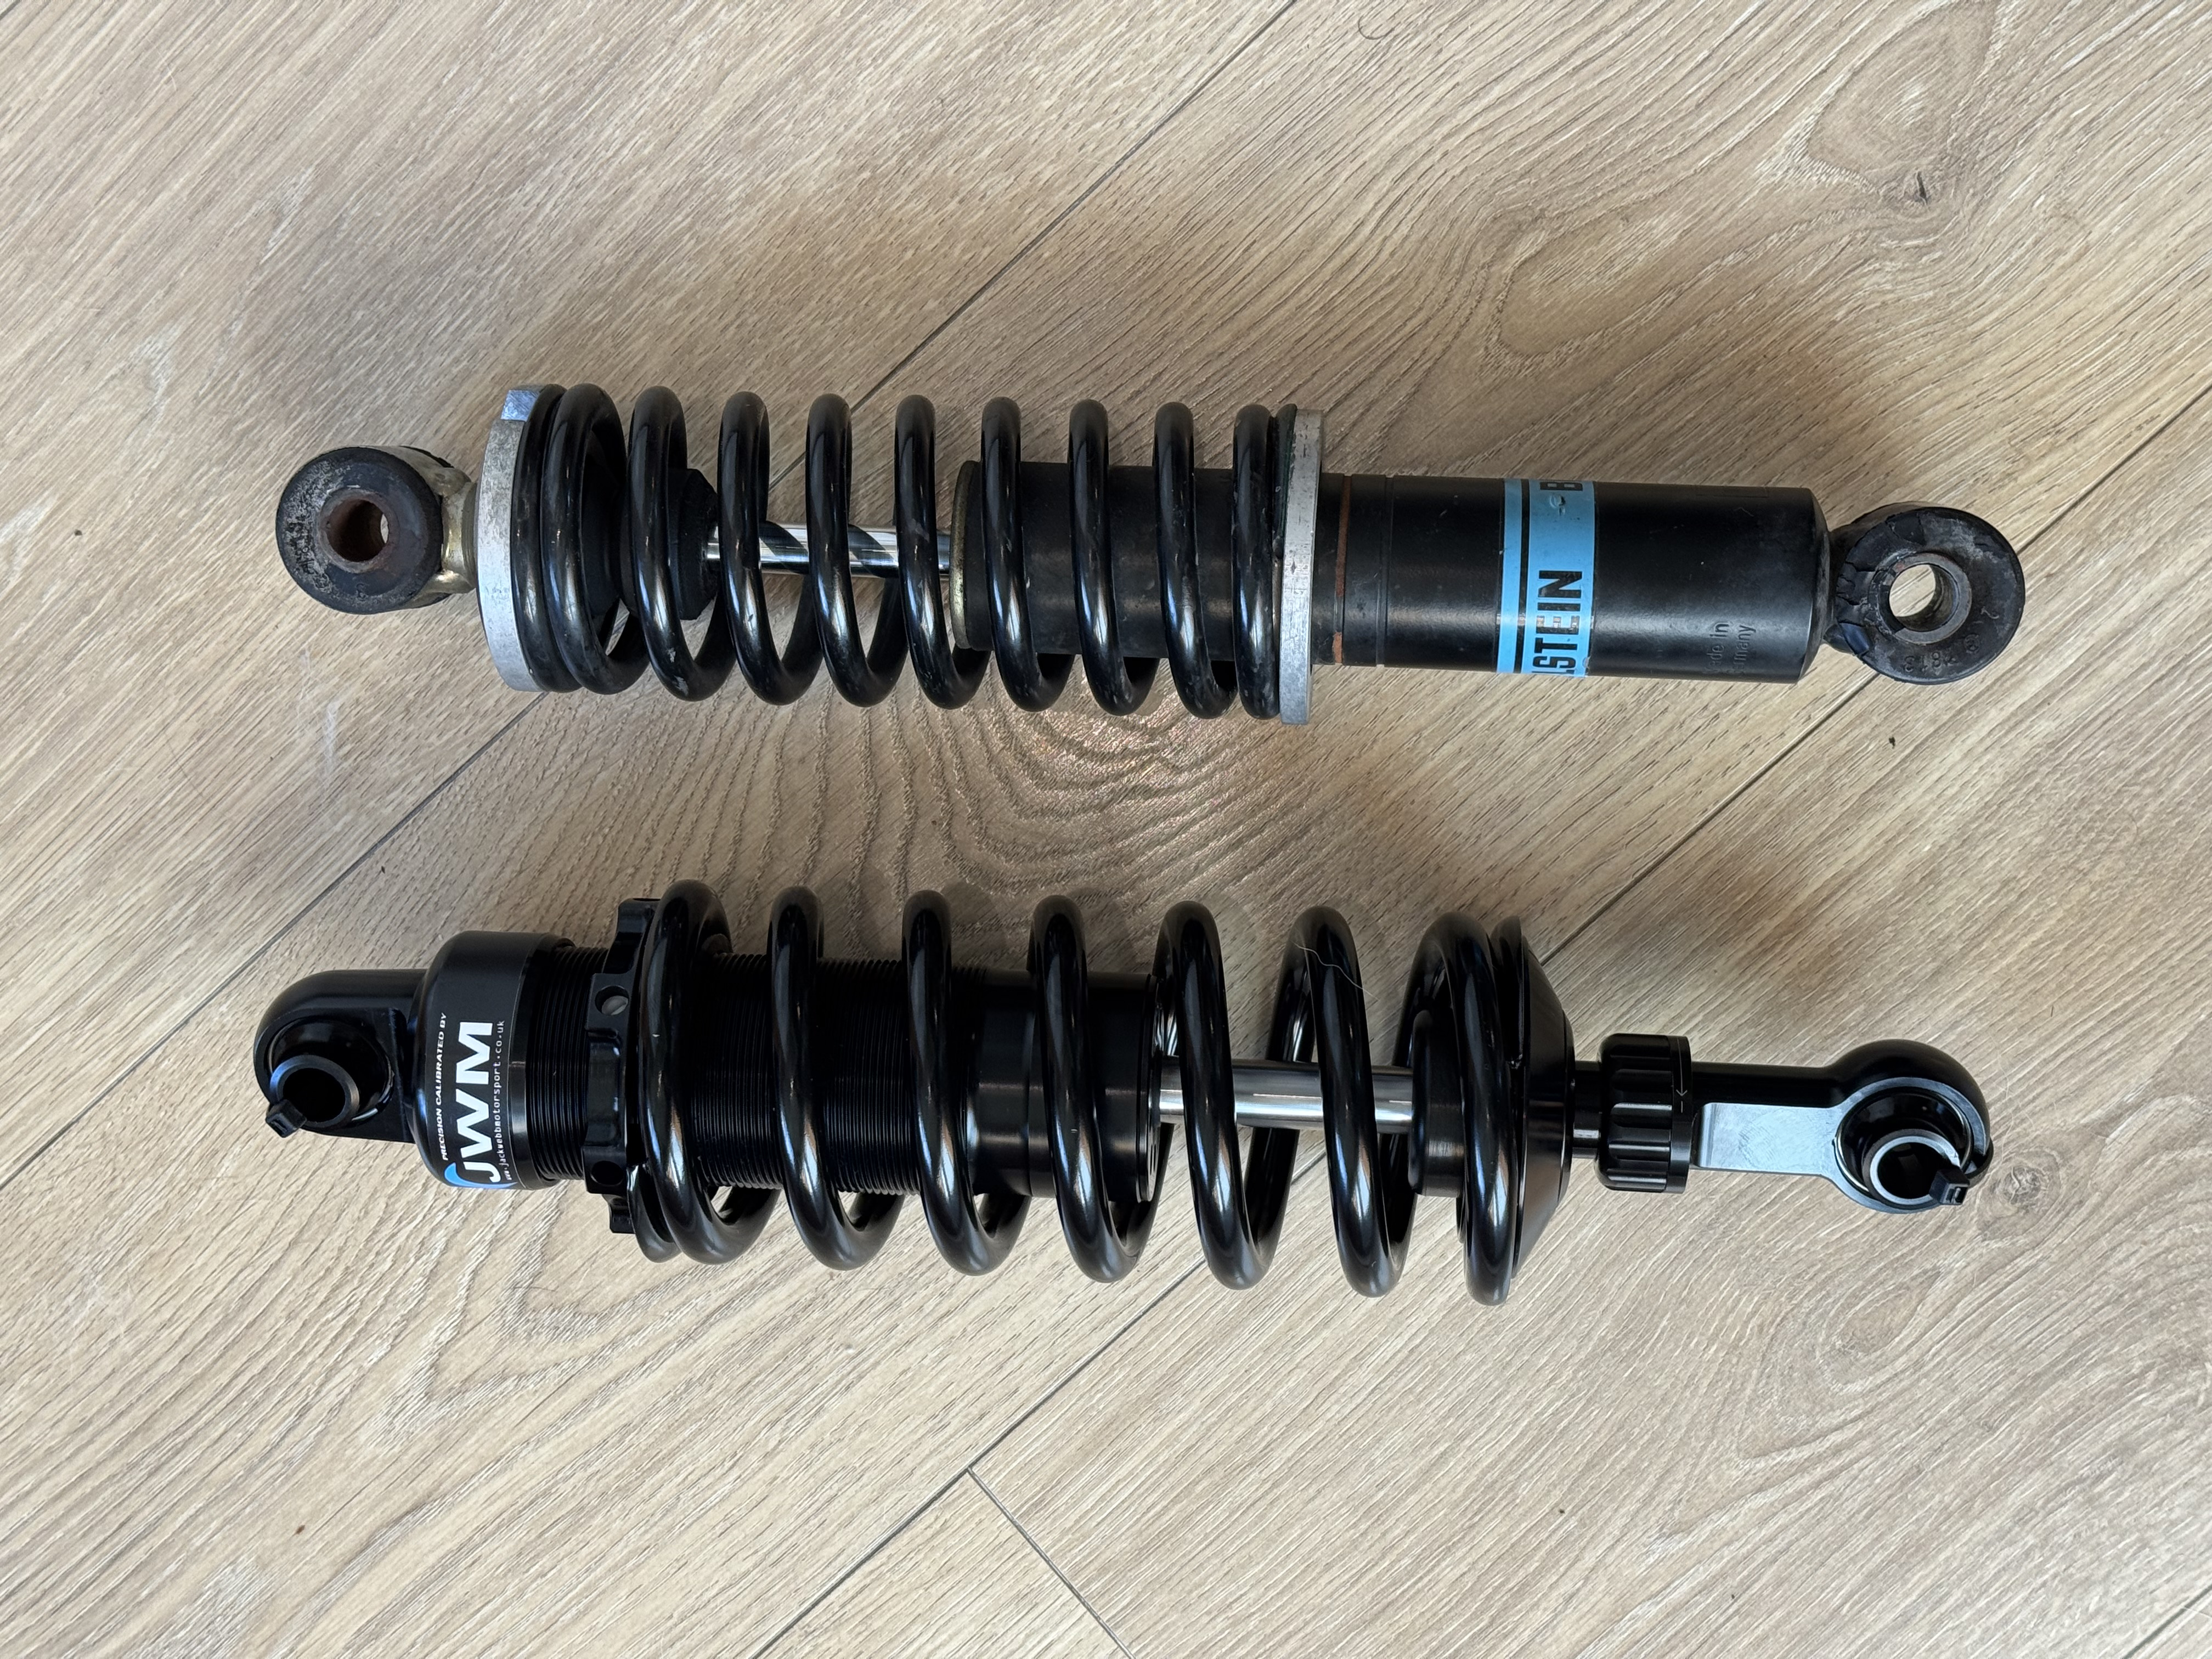
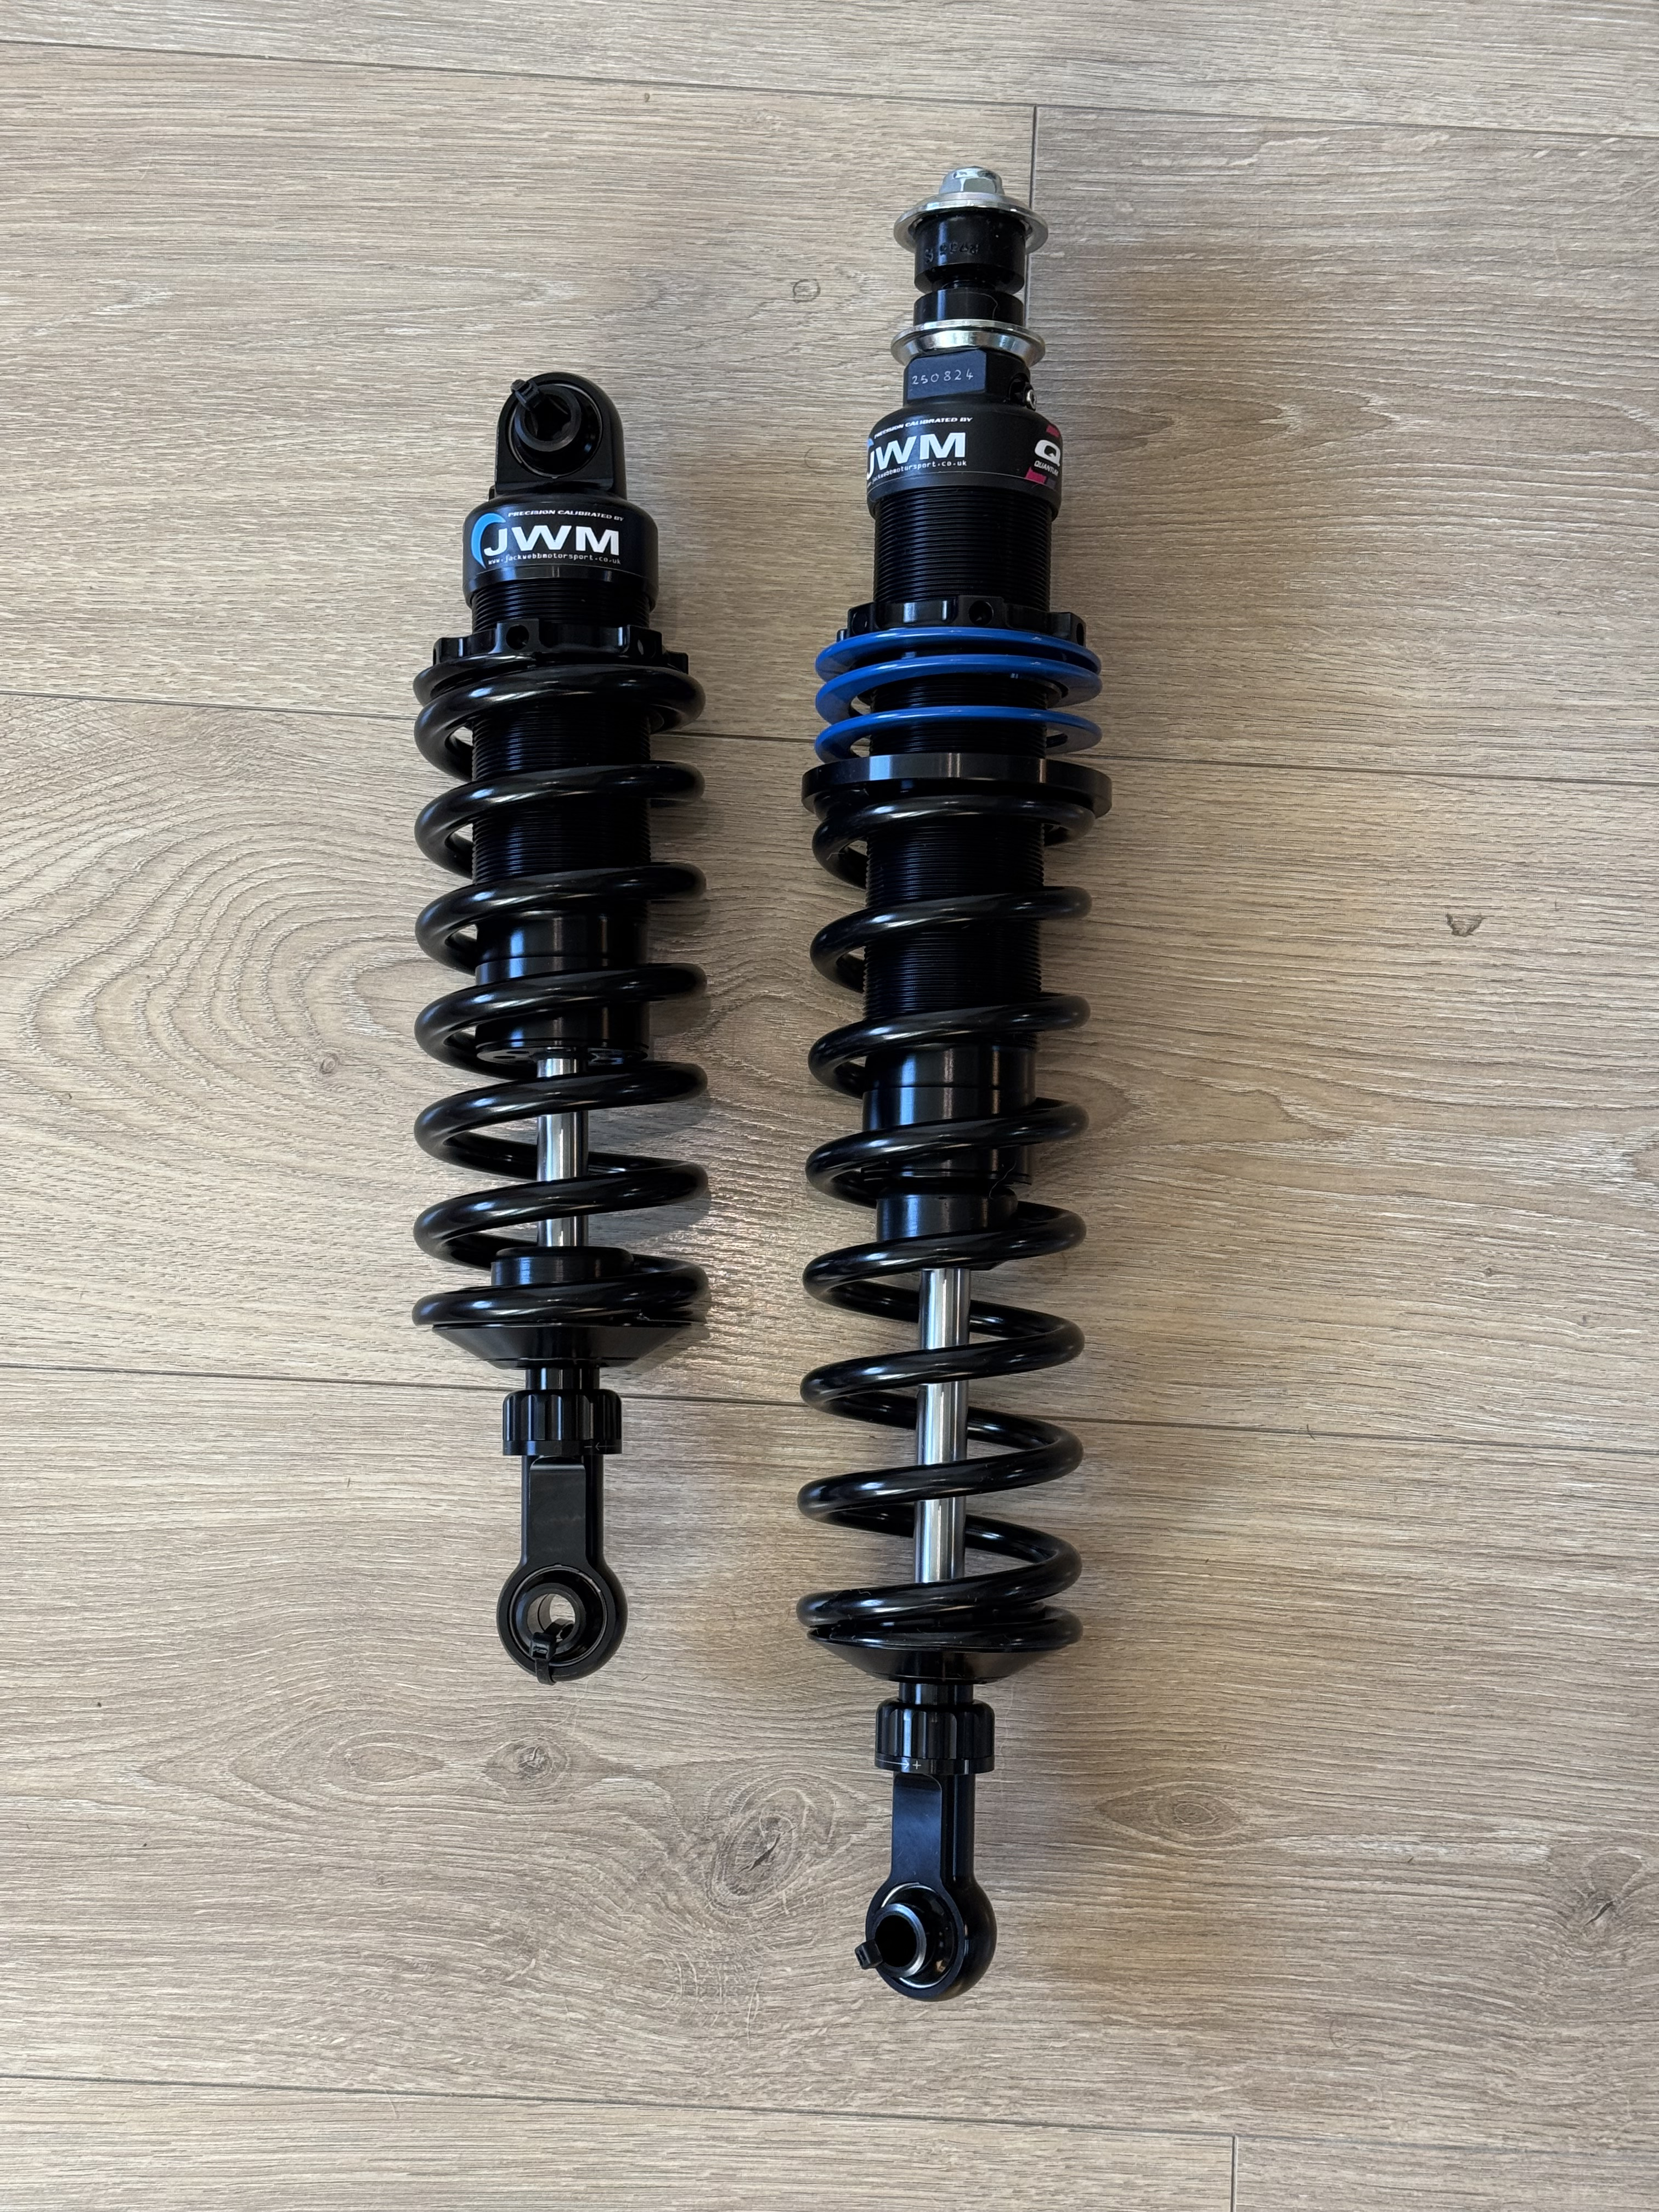
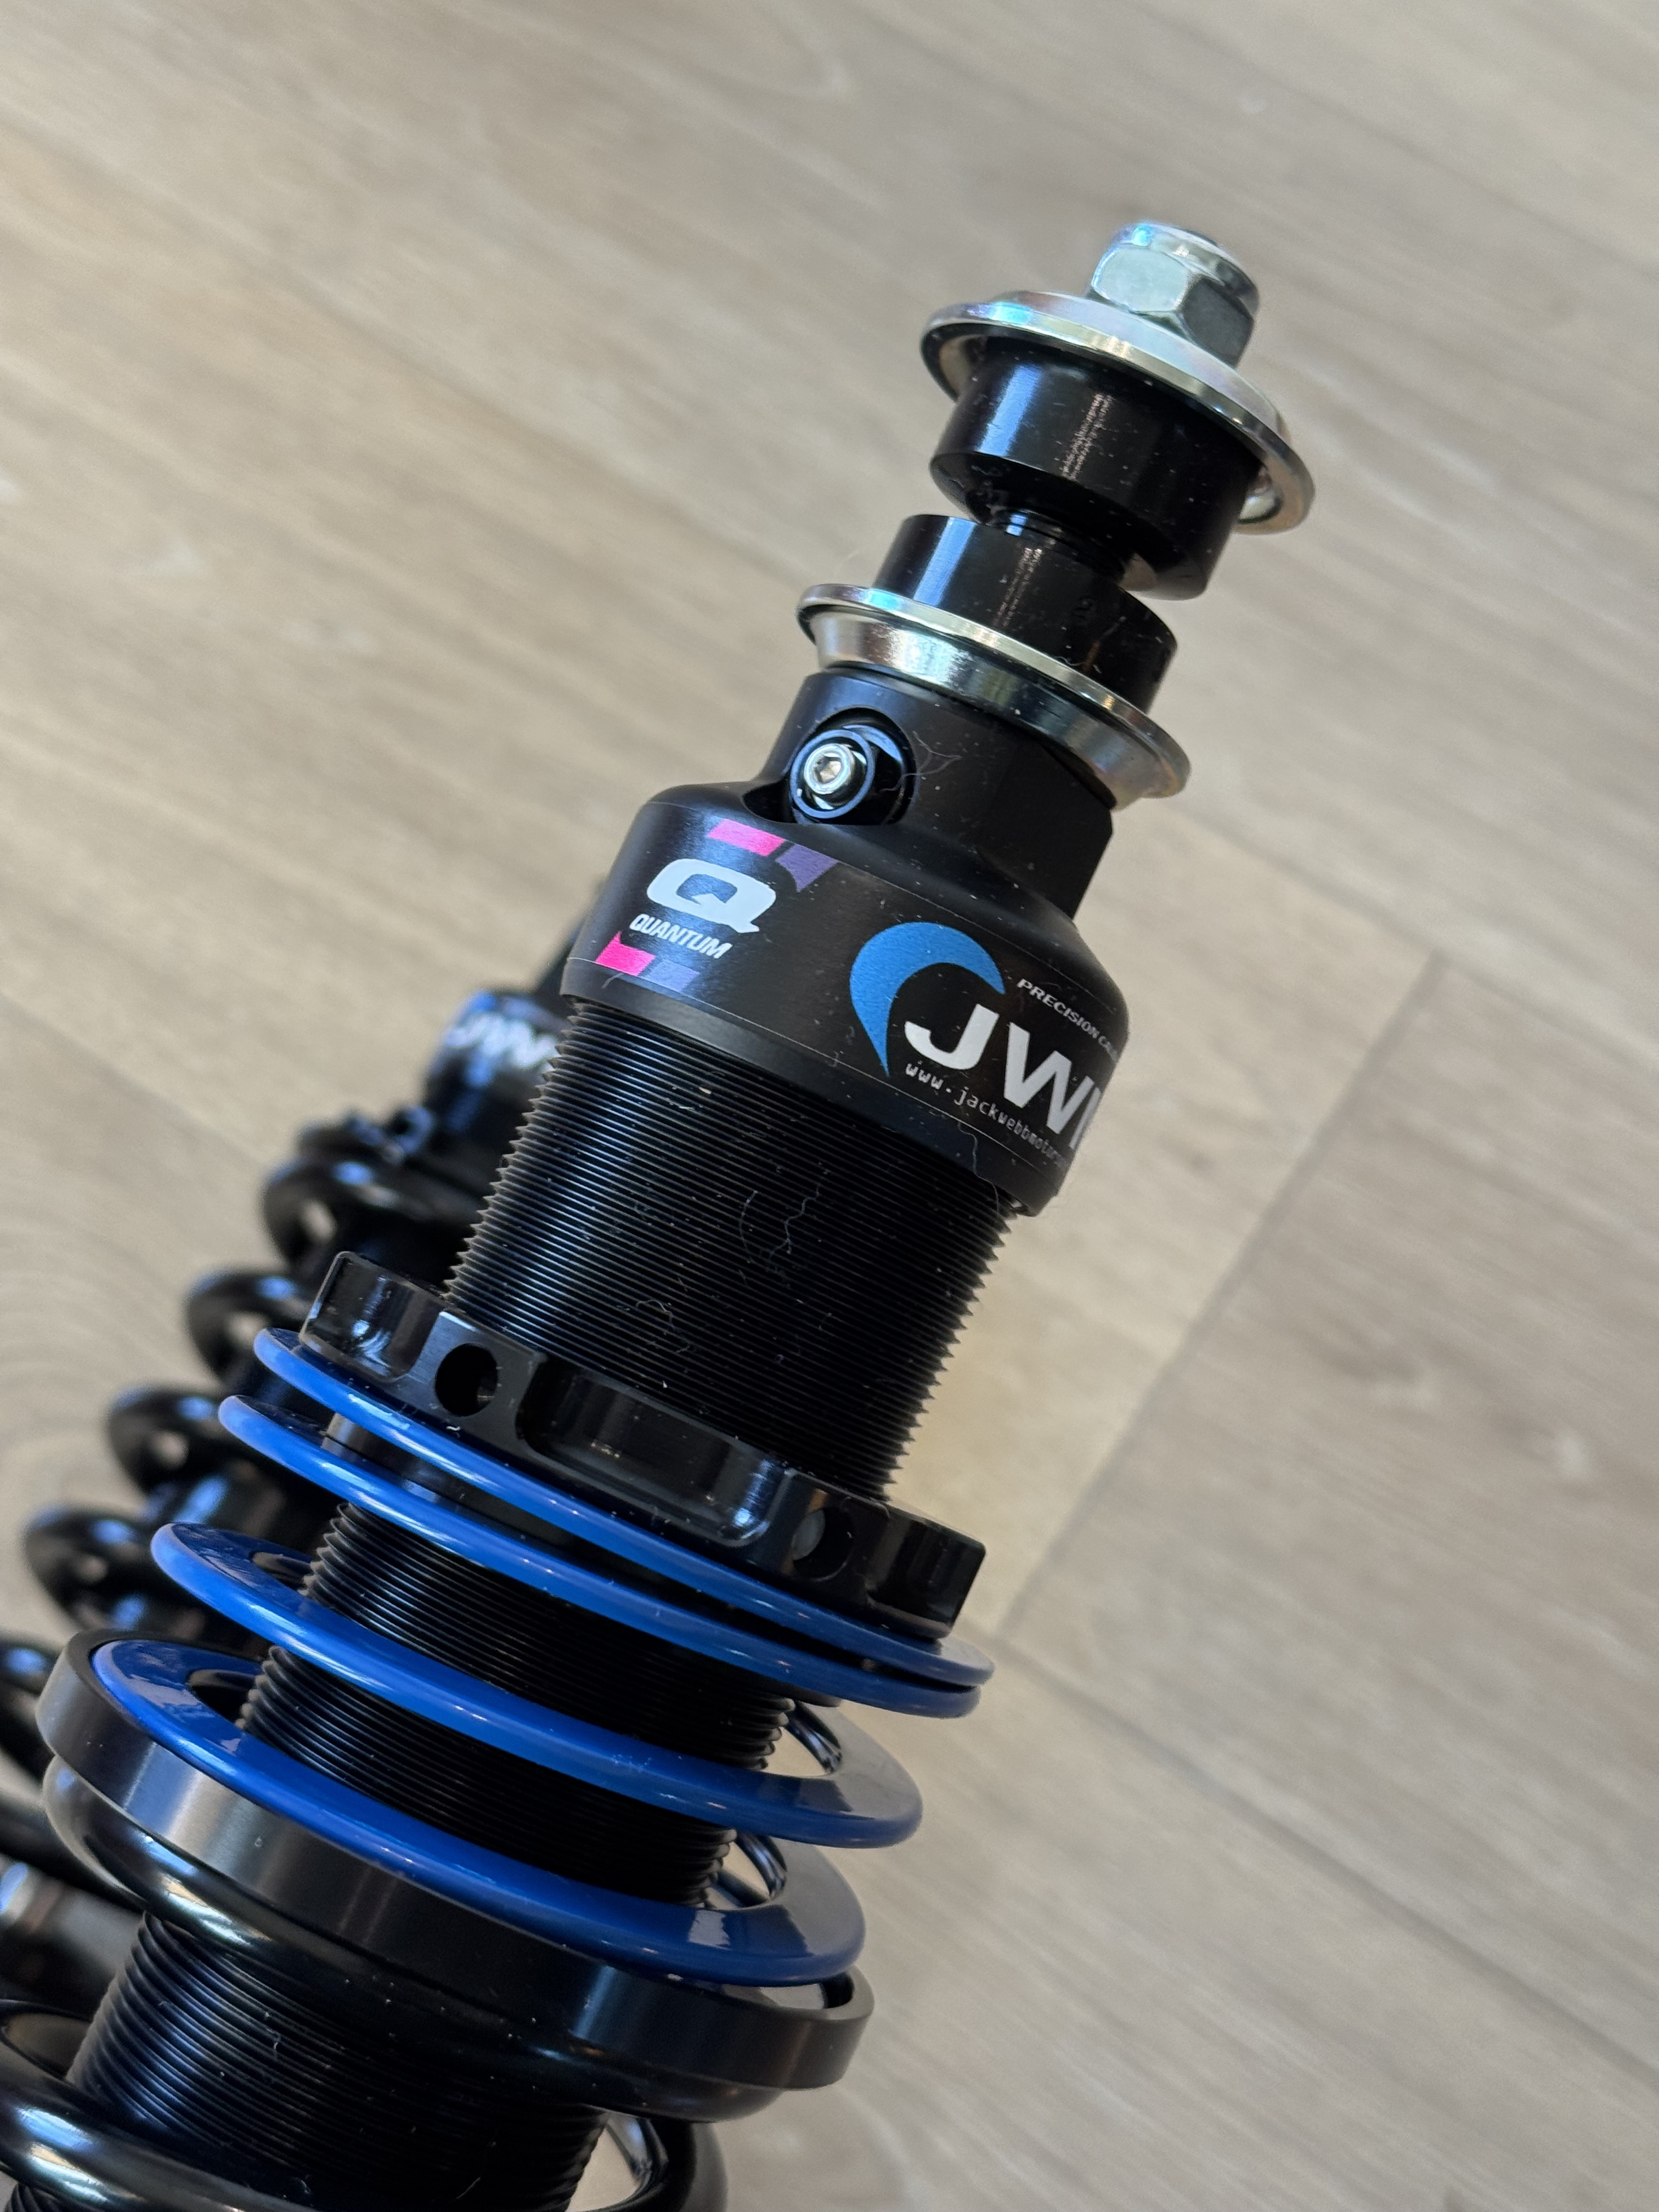
Ok so super late completion to this thread but I thought I should share what I ended up with. I eventually went with the Jack Webb Quantum’s on the live axel car although I think the Nitrons would have worked out fine too. Jack knows his LA cars and was really helpful via email. The Quantum’s I got from him are divine. I was able to raise the car up to the proper height and the ride is amazing. No rubbing on fenders ever, very comfortable and my god it feels so balanced now. He also recommended swapping the ARB to the smaller orange 1/2” think size for LA cars to reduce understeer and I think that helped the balance a lot but before the new coilovers I was hesitant to really throw the car around. Now it’s track day everyday Install was straightforward but I had to sand down the aluminum spacers on the rears where they attach to the axle because the wrong size was sent, it was only a mm or 2. These are direct replacements so they have the correct and all new rubber bushes etc. for the top perches on the rear. Something I don’t think the Nitrons have. Those use some funky bracket to adapt them to the LA perch holes. Overall very happy with the setup, the car no longer scrapes or bottoms out and is now a dream to drive. Also just look at the size difference between the stock Billy and the Quantum, yes plz!

-
They didn’t seem to be seated fully. I still don’t love the connection - I may change it in the future.
-
Was it the pins that weren't fully seated in the connector body, or was it a problem with the connectors themselves?
-
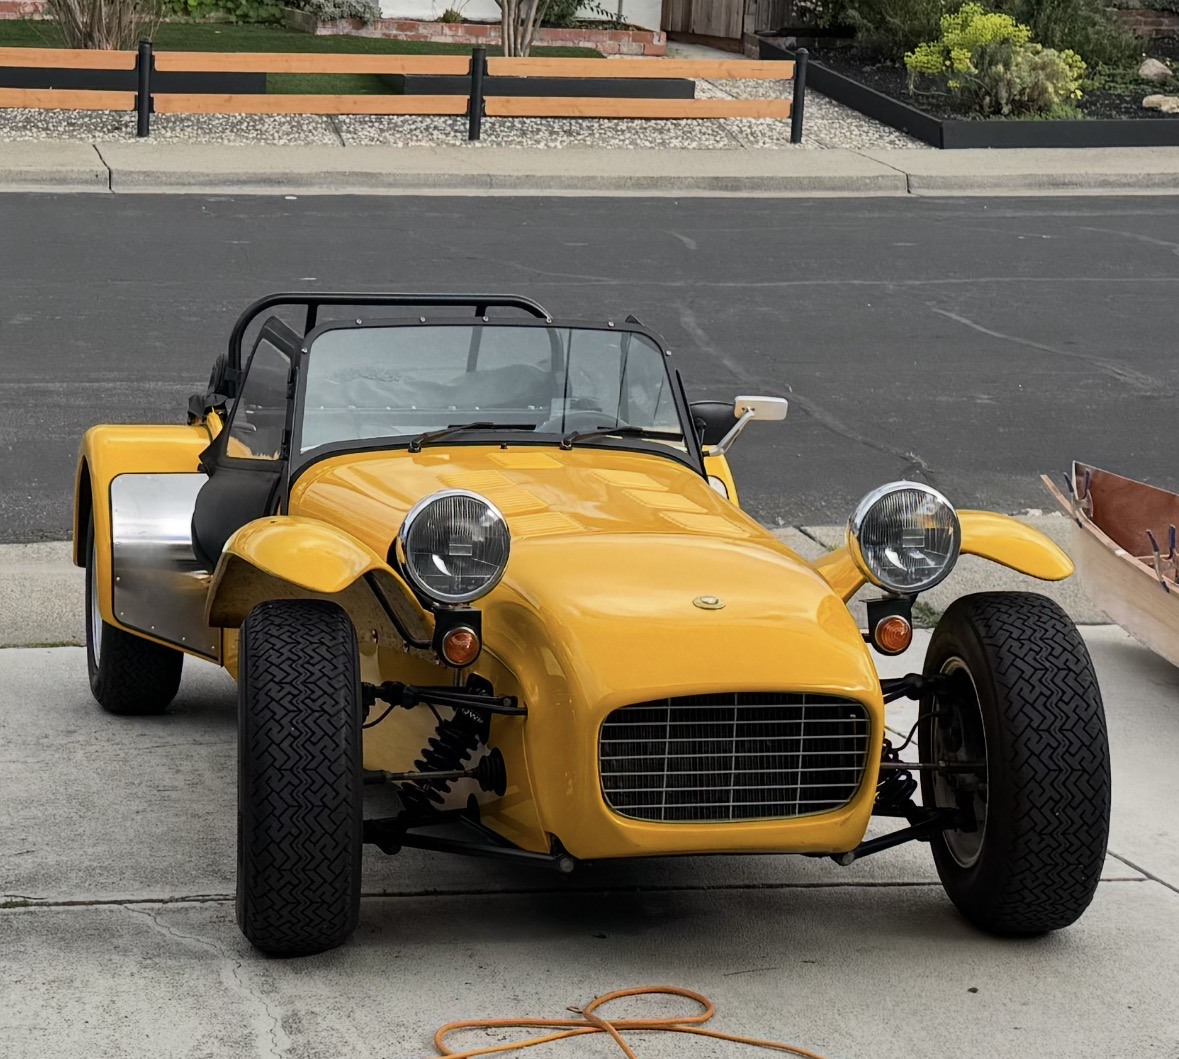
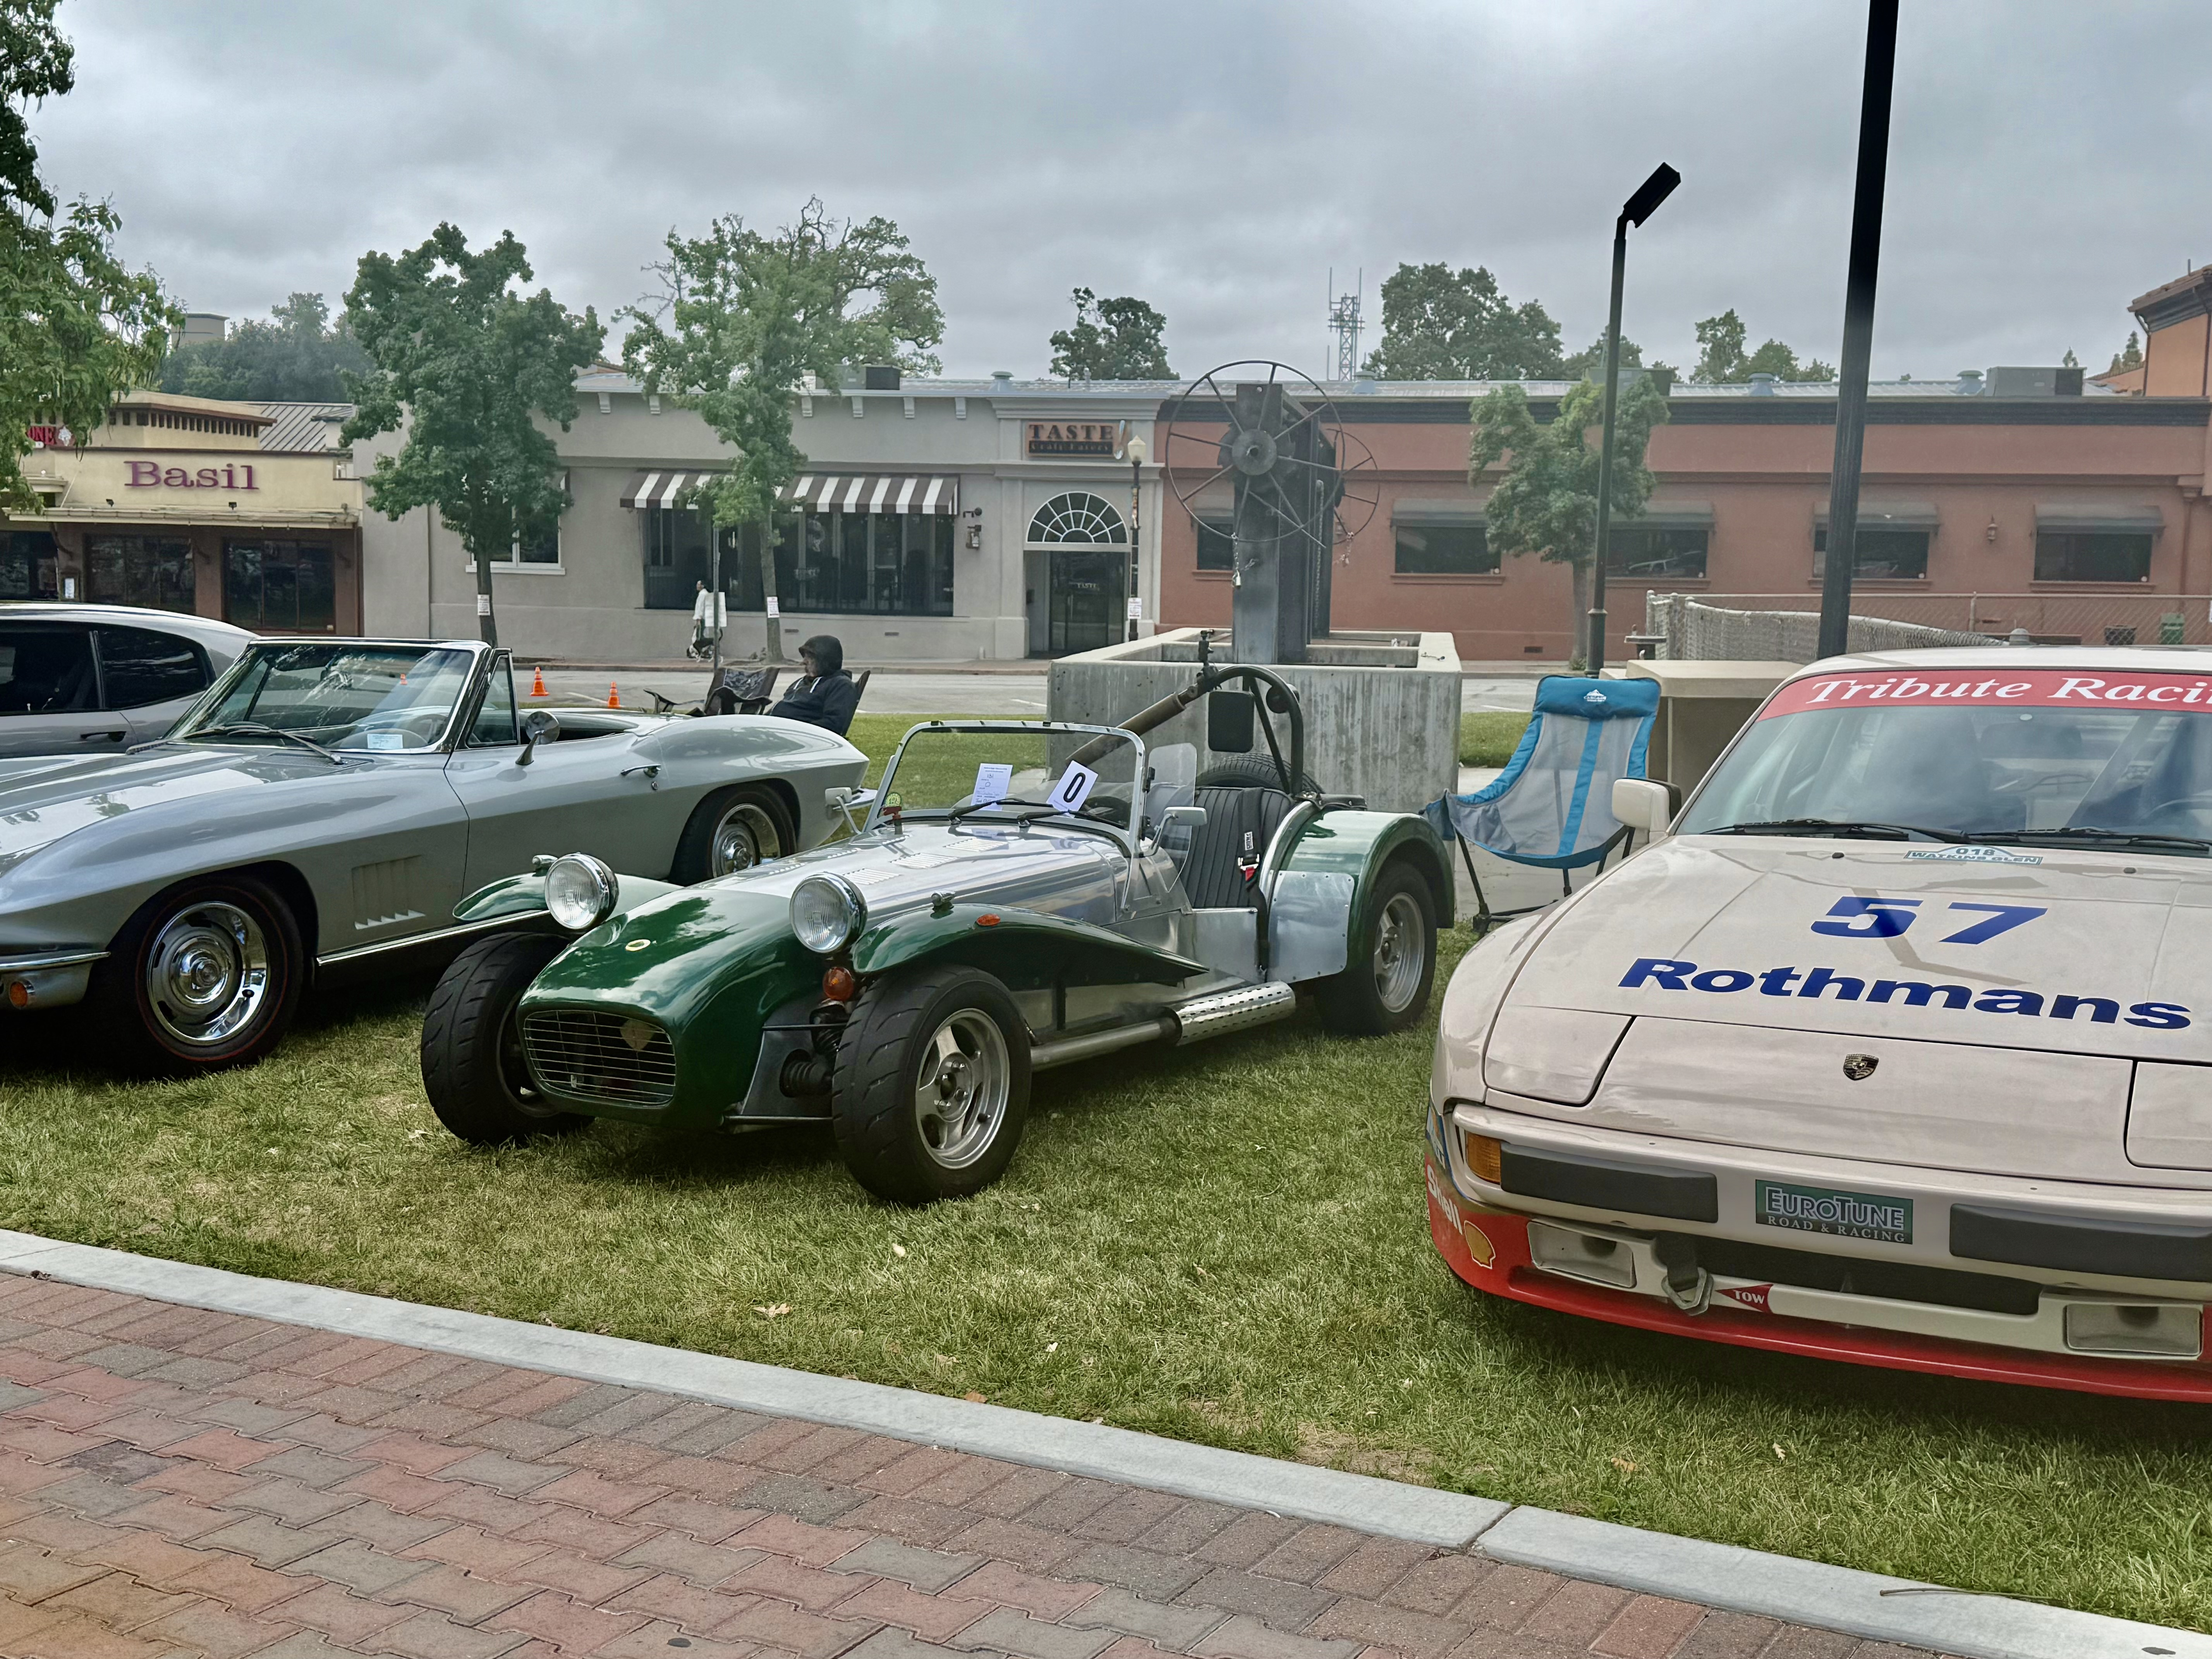
Golden State Classic car show in Paso Robles today.
- Yesterday
-

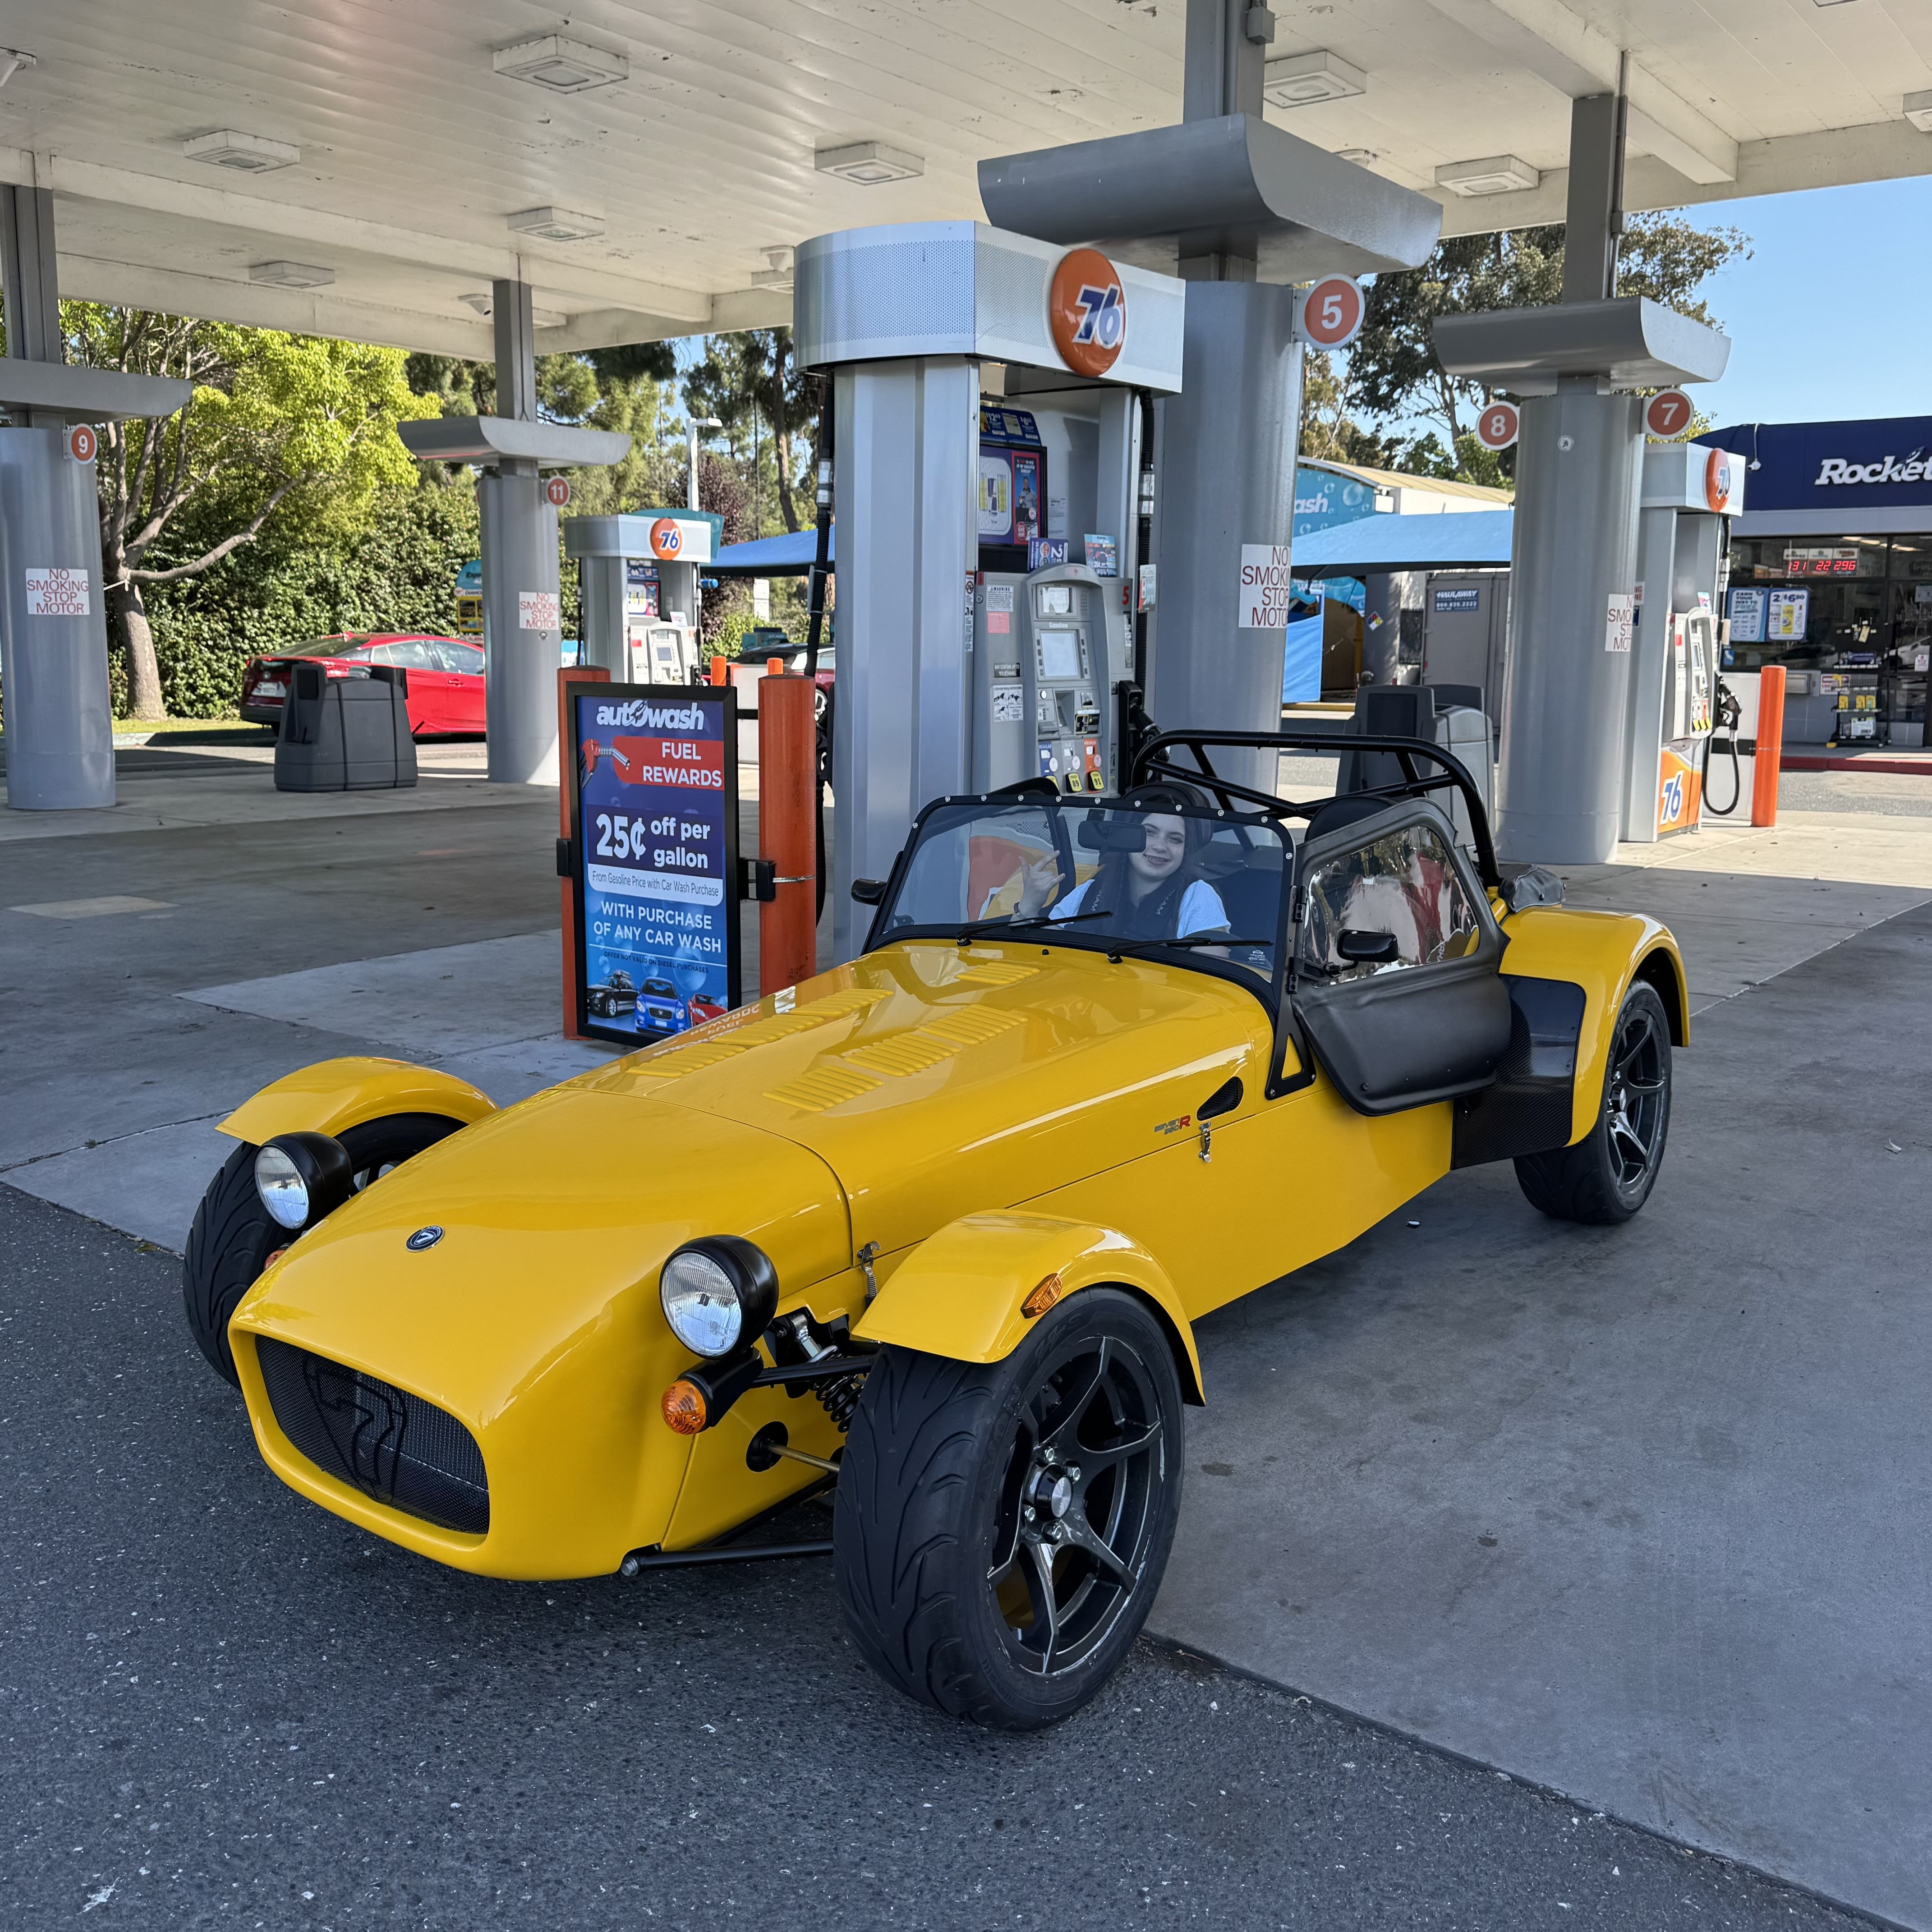
Photo of your car you took today
richardjbondy replied to Xhilr8n's topic in General Sevens Discussion
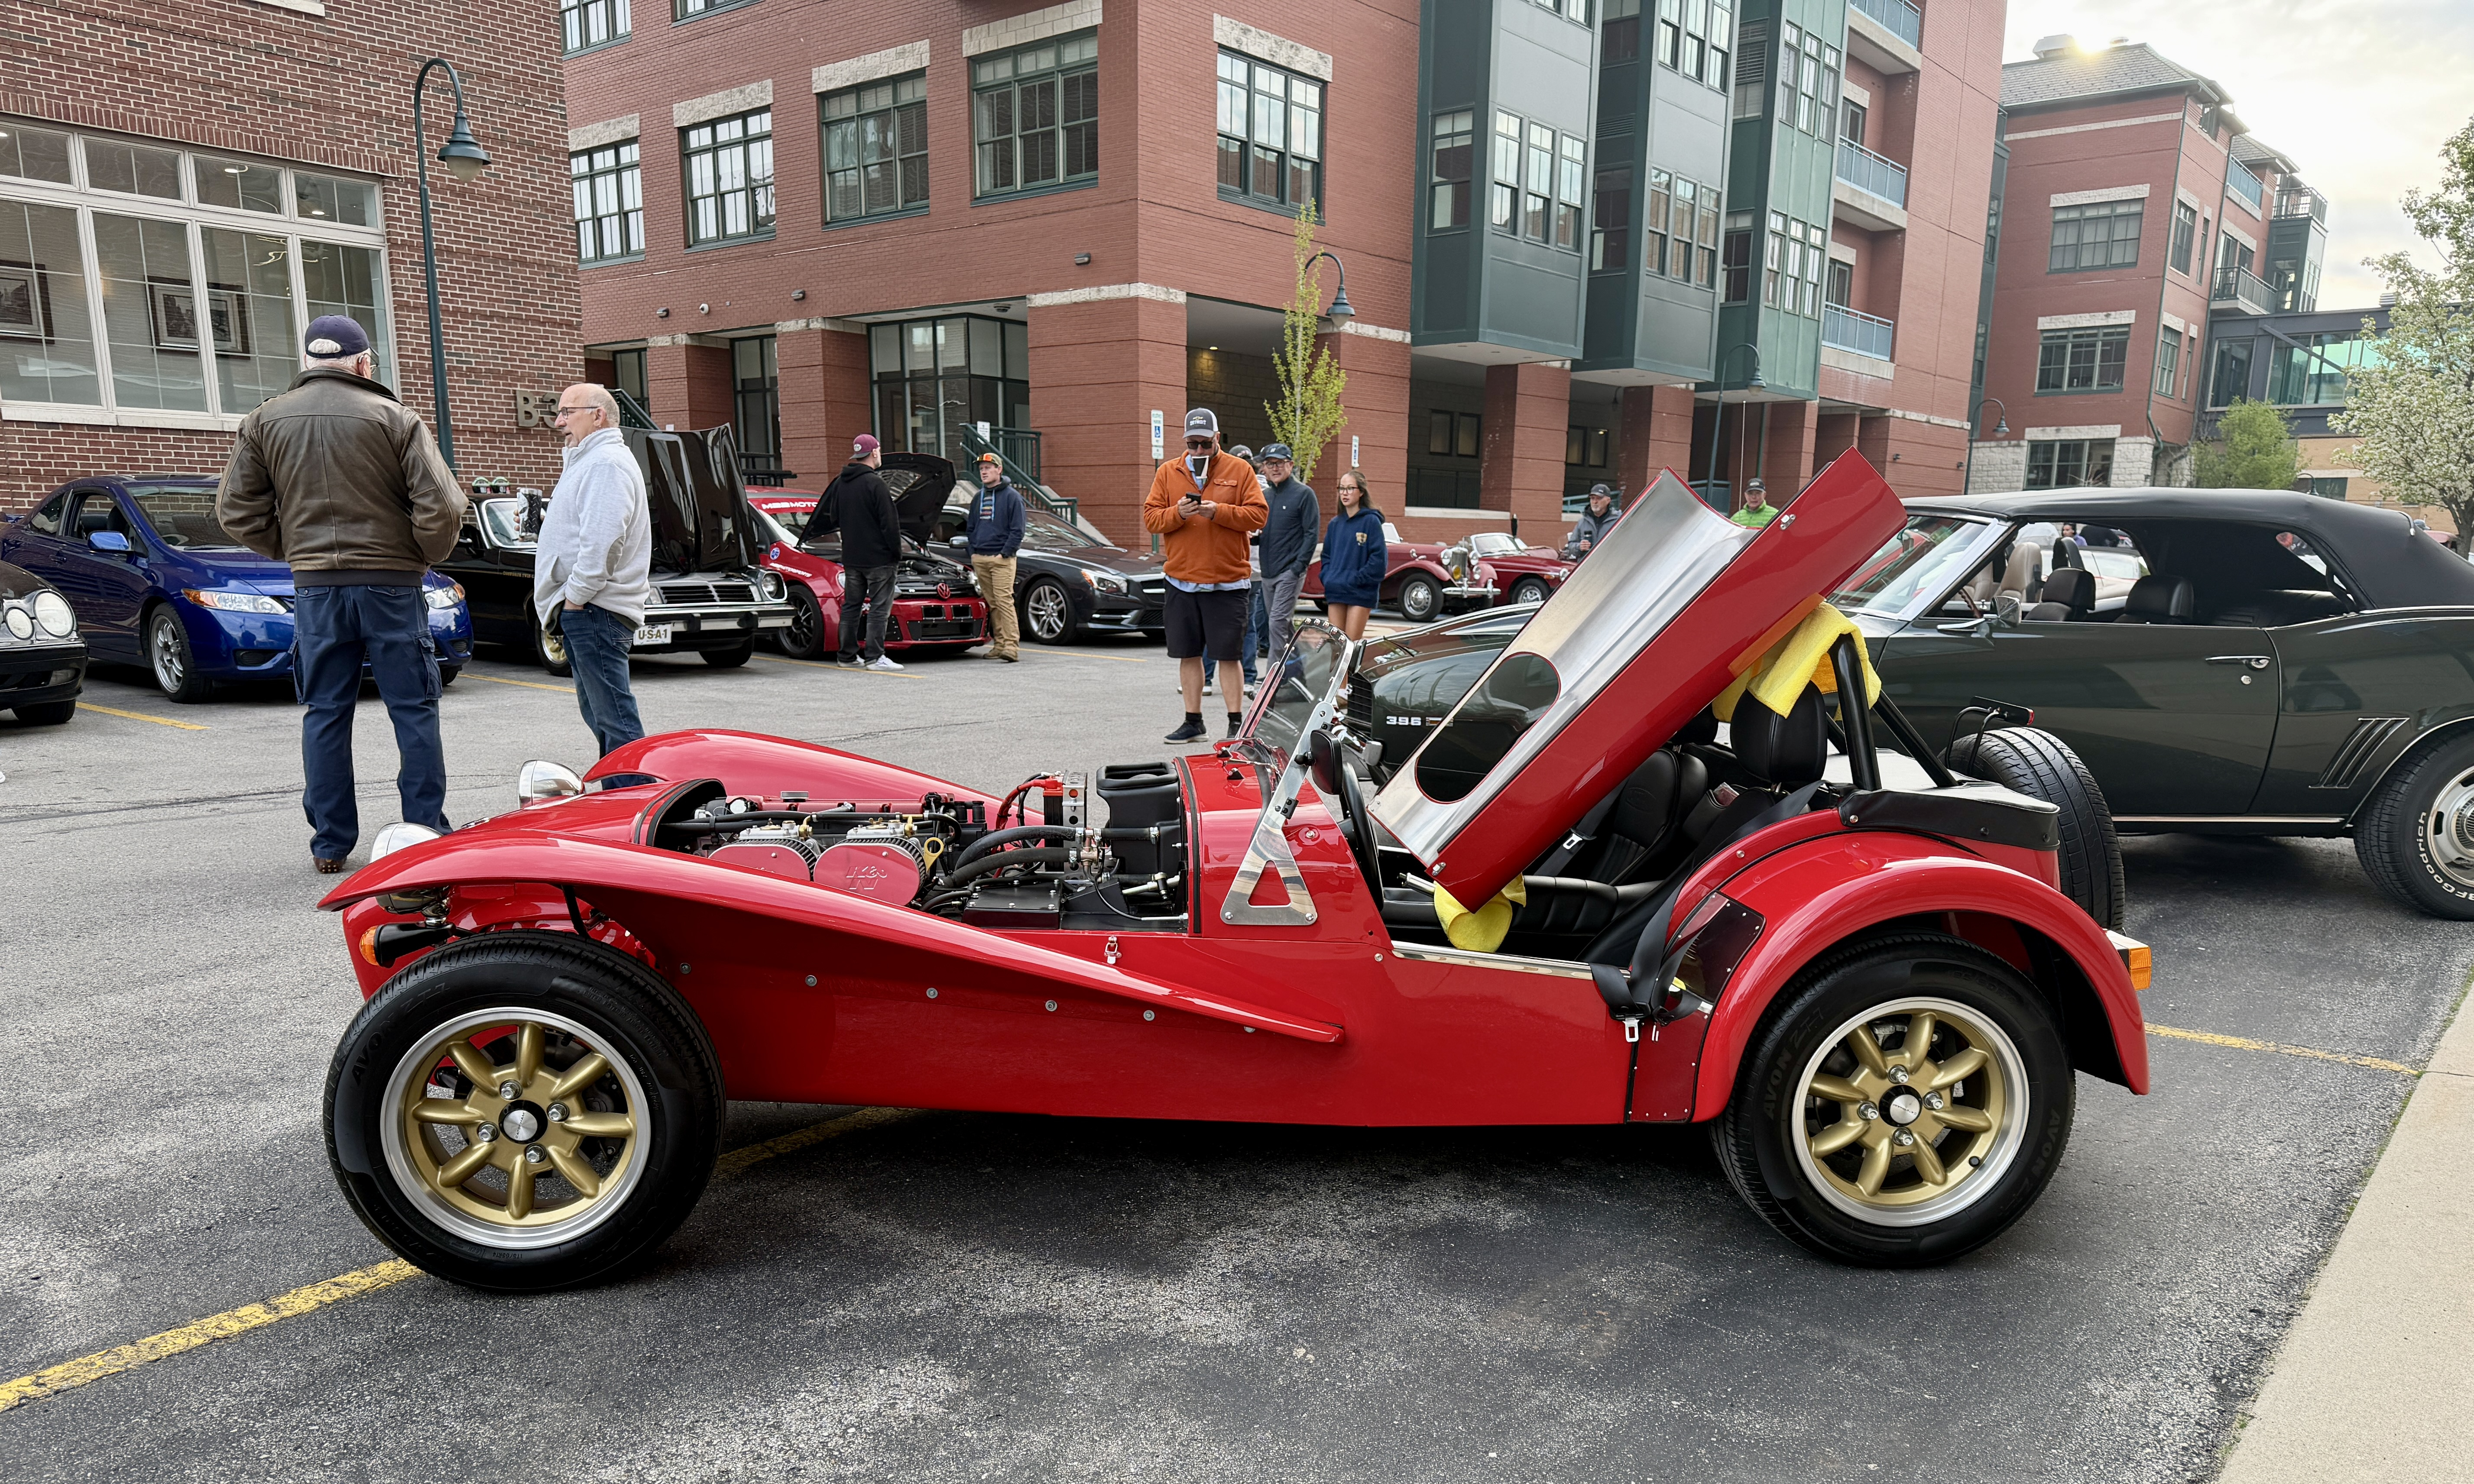
Hagerty Cars & Caffeine, Traverse City, Michigan , May 22, 2026. Super Seven 1600.
-
SB100 process started! Got a temporary operating permit - now need CHP, BAR, and brake and light checks. Went to the Los Gatos DMV and they were helpful. Hopefully the paperwork is correct… First full tank of gas!
-
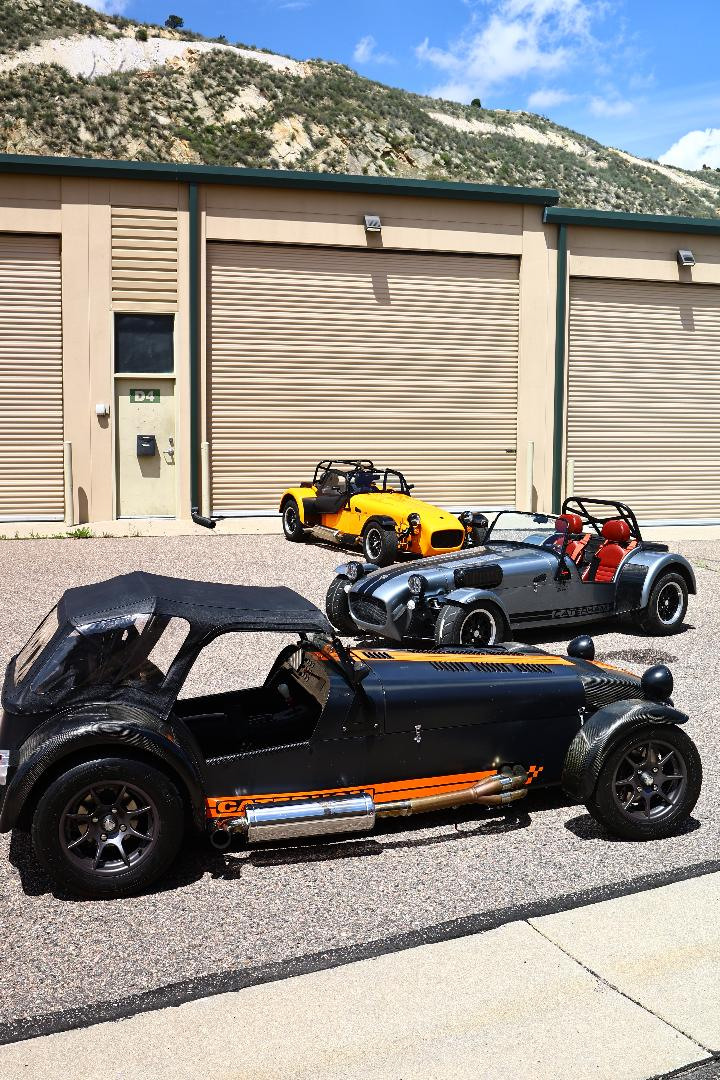
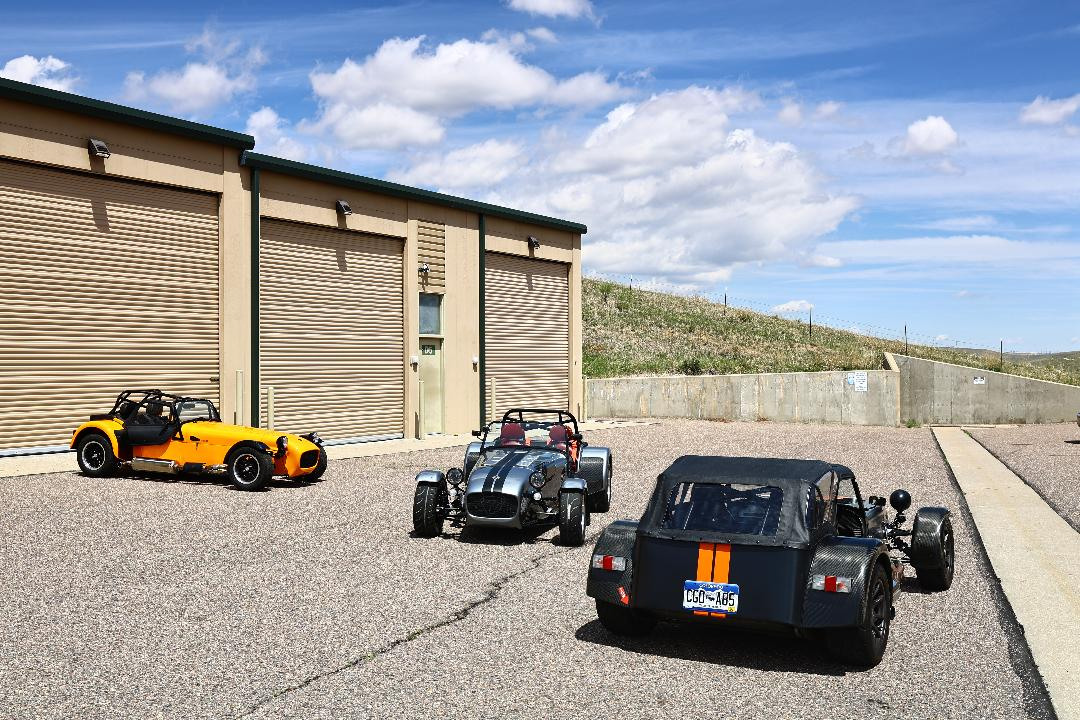
https://route7.austindavid.com/ is open and free to use. Cost-modeling says "always free" but usage will help tell if we approach any API usage above the free tier.
-
Our little group will be heading up to Canaan on Friday afternoon for Saturday's HPDE on 5/30. Our friend Tom will have his VanDieman sports racer there and should be very quick as he continues to get it sorted. Canaan is a great little track to learn on and is always fun in a Seven. Ride-alongs will be available, hope to see some other Sevens there!
-
 Strouds joined the community
 -
 bioveramaleusa joined the community
 -
In some good company at Rocky Mountain Caterham, Josh took the pics and I'll have it back next Tuesday. New tracsport dif, removed the overly firm Nitrons for the original adjustable Bilstein's and had the height set to 'fast road'.... front track adjusted etc. A few other things done.... strangely we found (he found) that I had 8 in wheels all around (no wonder the fronts were hard to fettle under the fenders)...so I sourced new wheels all around of the proper size.
- 199 replies
-
- 10
-

-

-
@Vovchandr you drove there? Hey hey!!! Get the miles on that thing.
-
Night meet
-
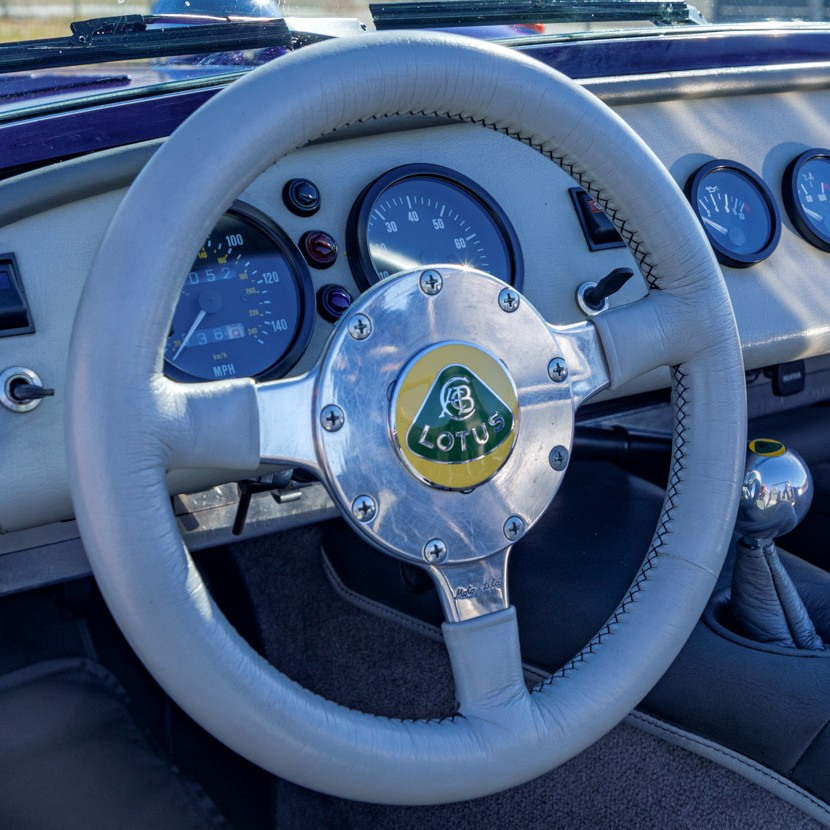
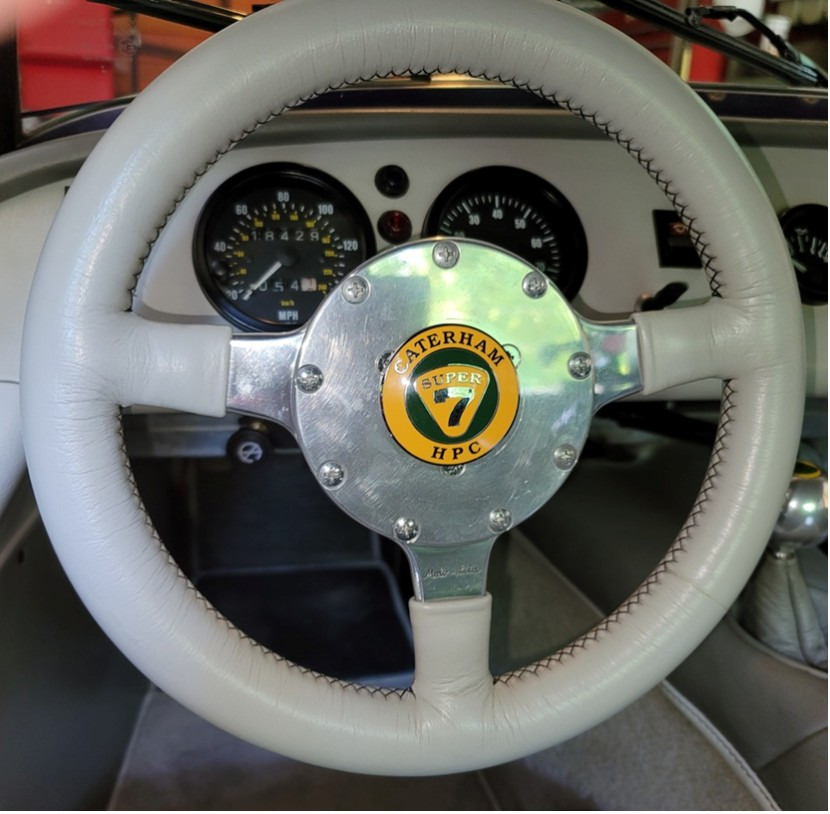
Nose badges on steering wheels is not new. The Original owner of my car wanted anything that said Caterham replaced with Lotus. He said as much in a detailed letter to the shop in Delaware that was building the car instructing them to use the Lotus nose badge he mailed them. I believe this was because the car was licensed as a Lotus back in 1993. I returned the car’s badging to being 99% Caterham. I ordered an HPC nose badge to replace the Lotus badge on the steering wheel. The only thing left that says Lotus is the small shifter knob emblem. I like that big chrome ball. Plus, I like to tell the story of how the Caterham 7 logo came to be and point to the shifter emblem so people can see the connection.
-
Really interesting video on Keith Tanner's Locost build.
-
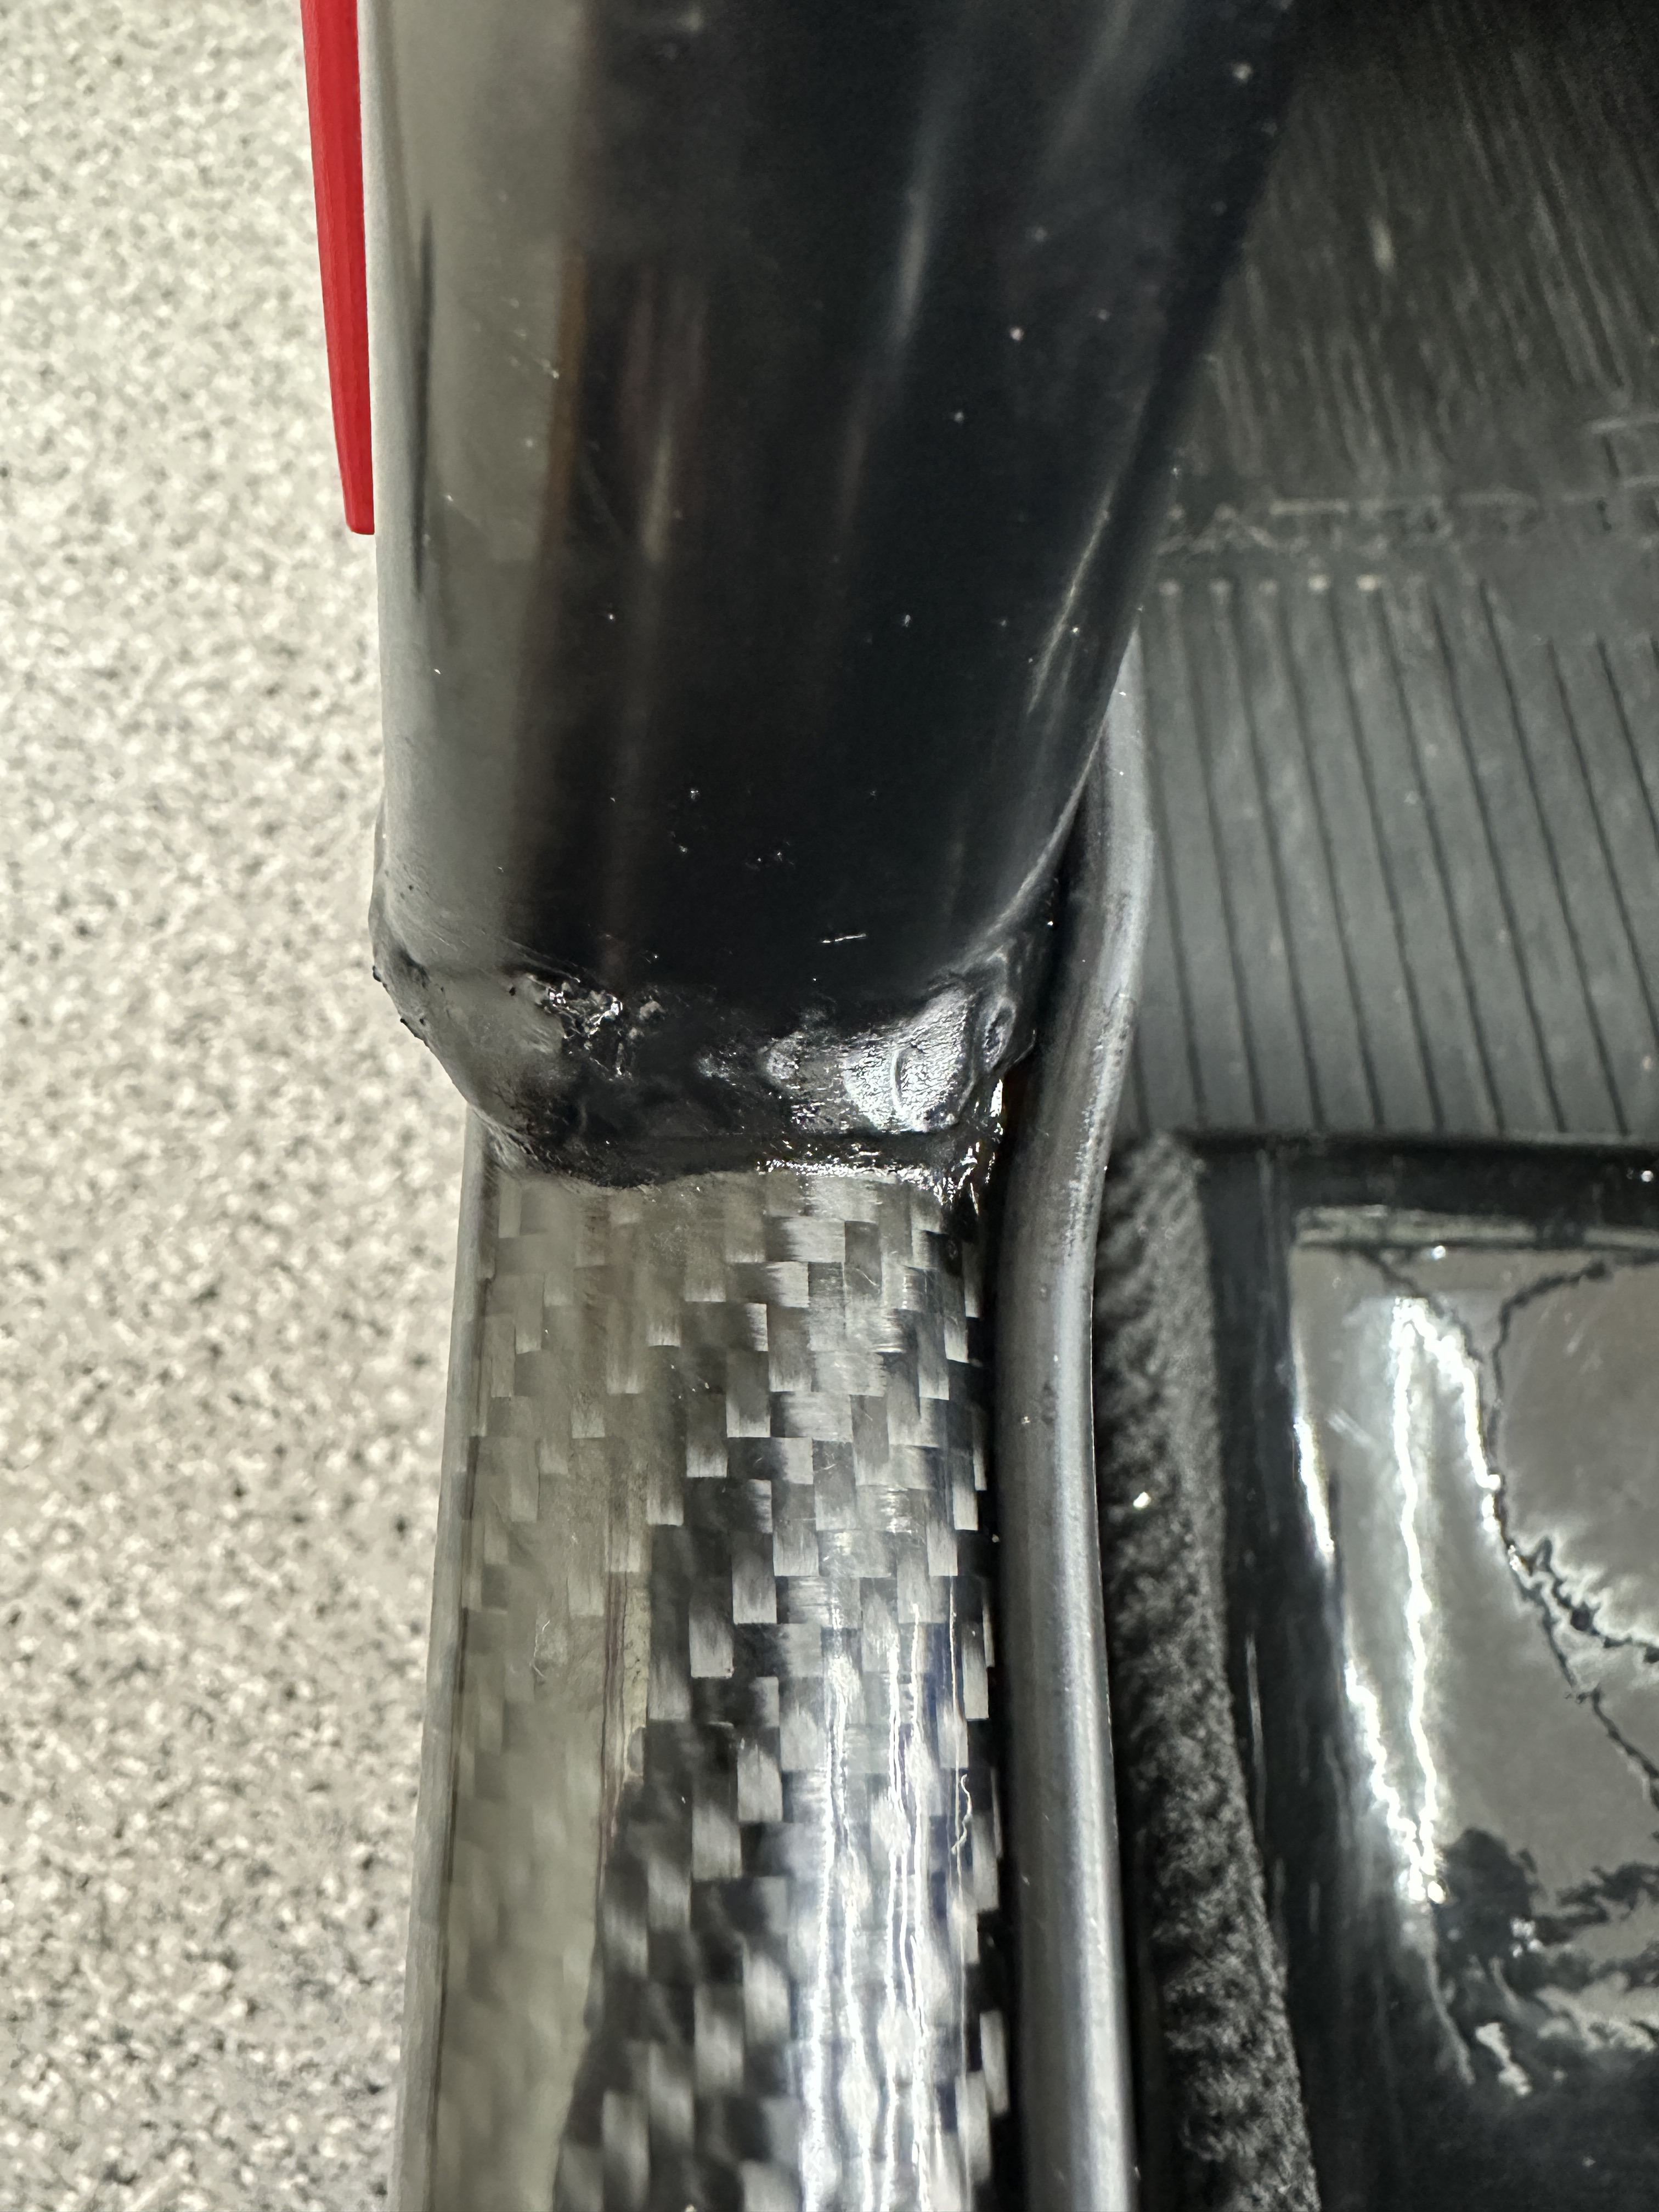
Sounds good. A fabricator who will work with 3D objects like this is a rare find.
- Last week
-
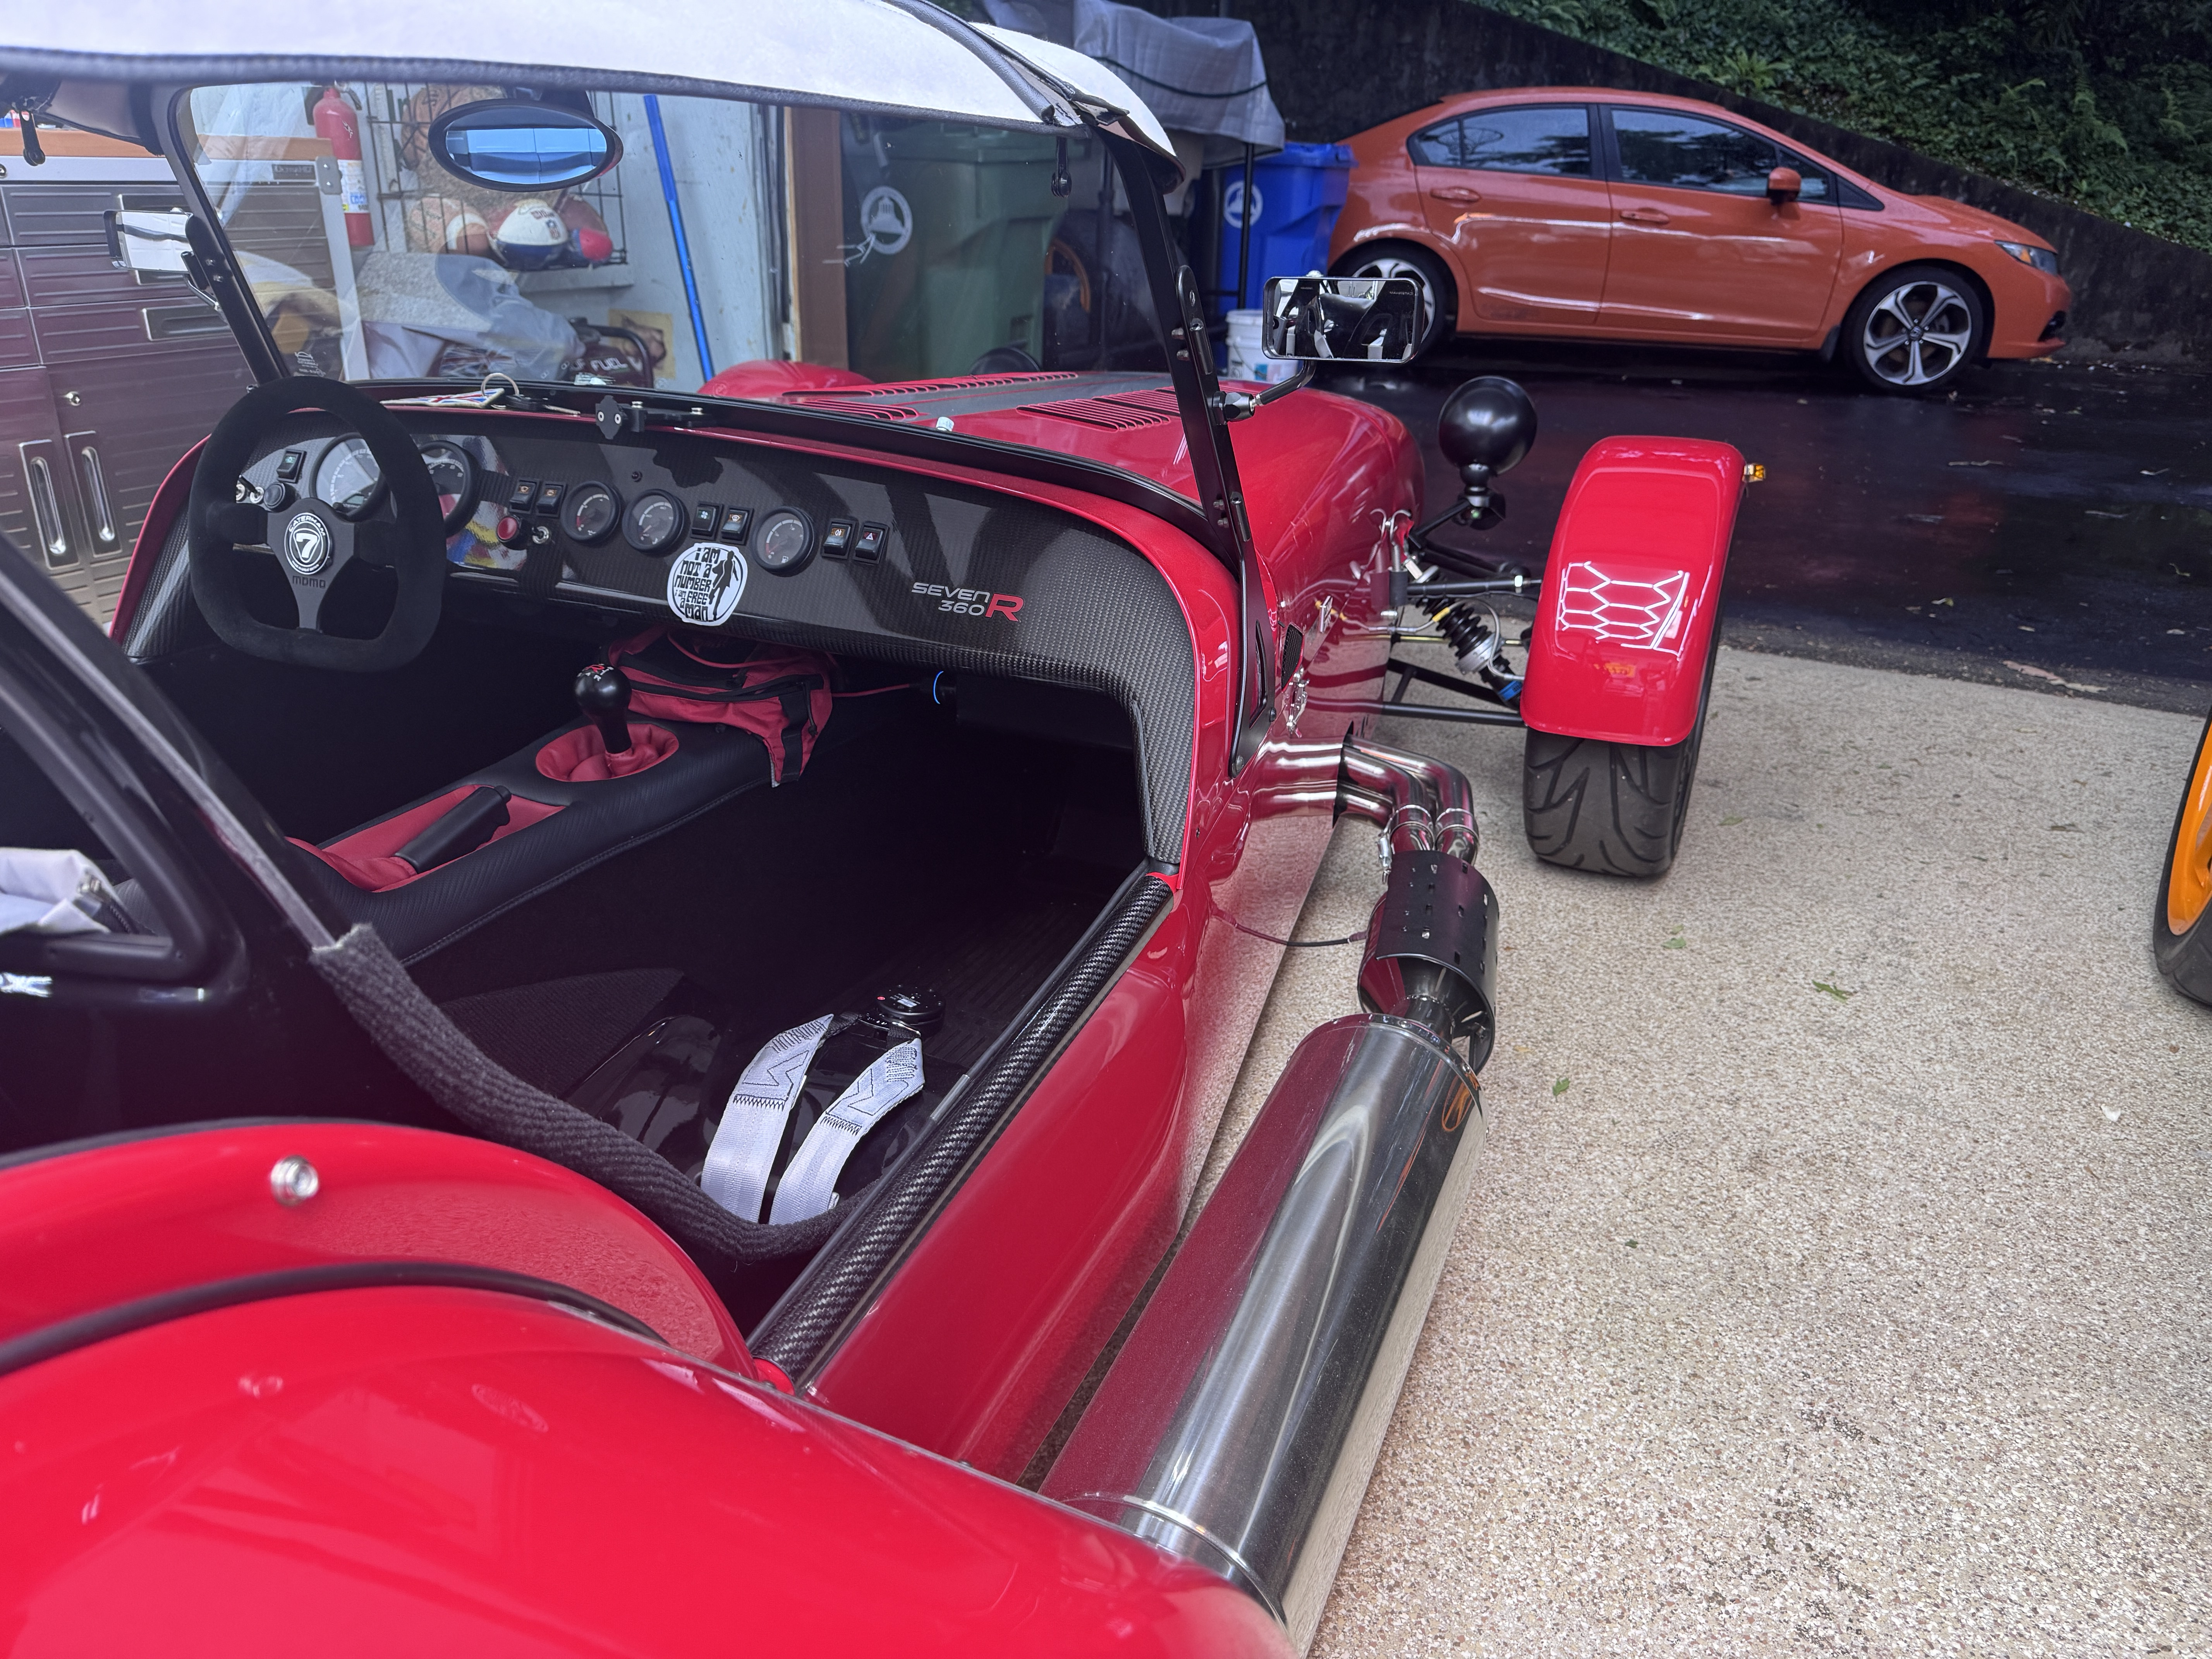
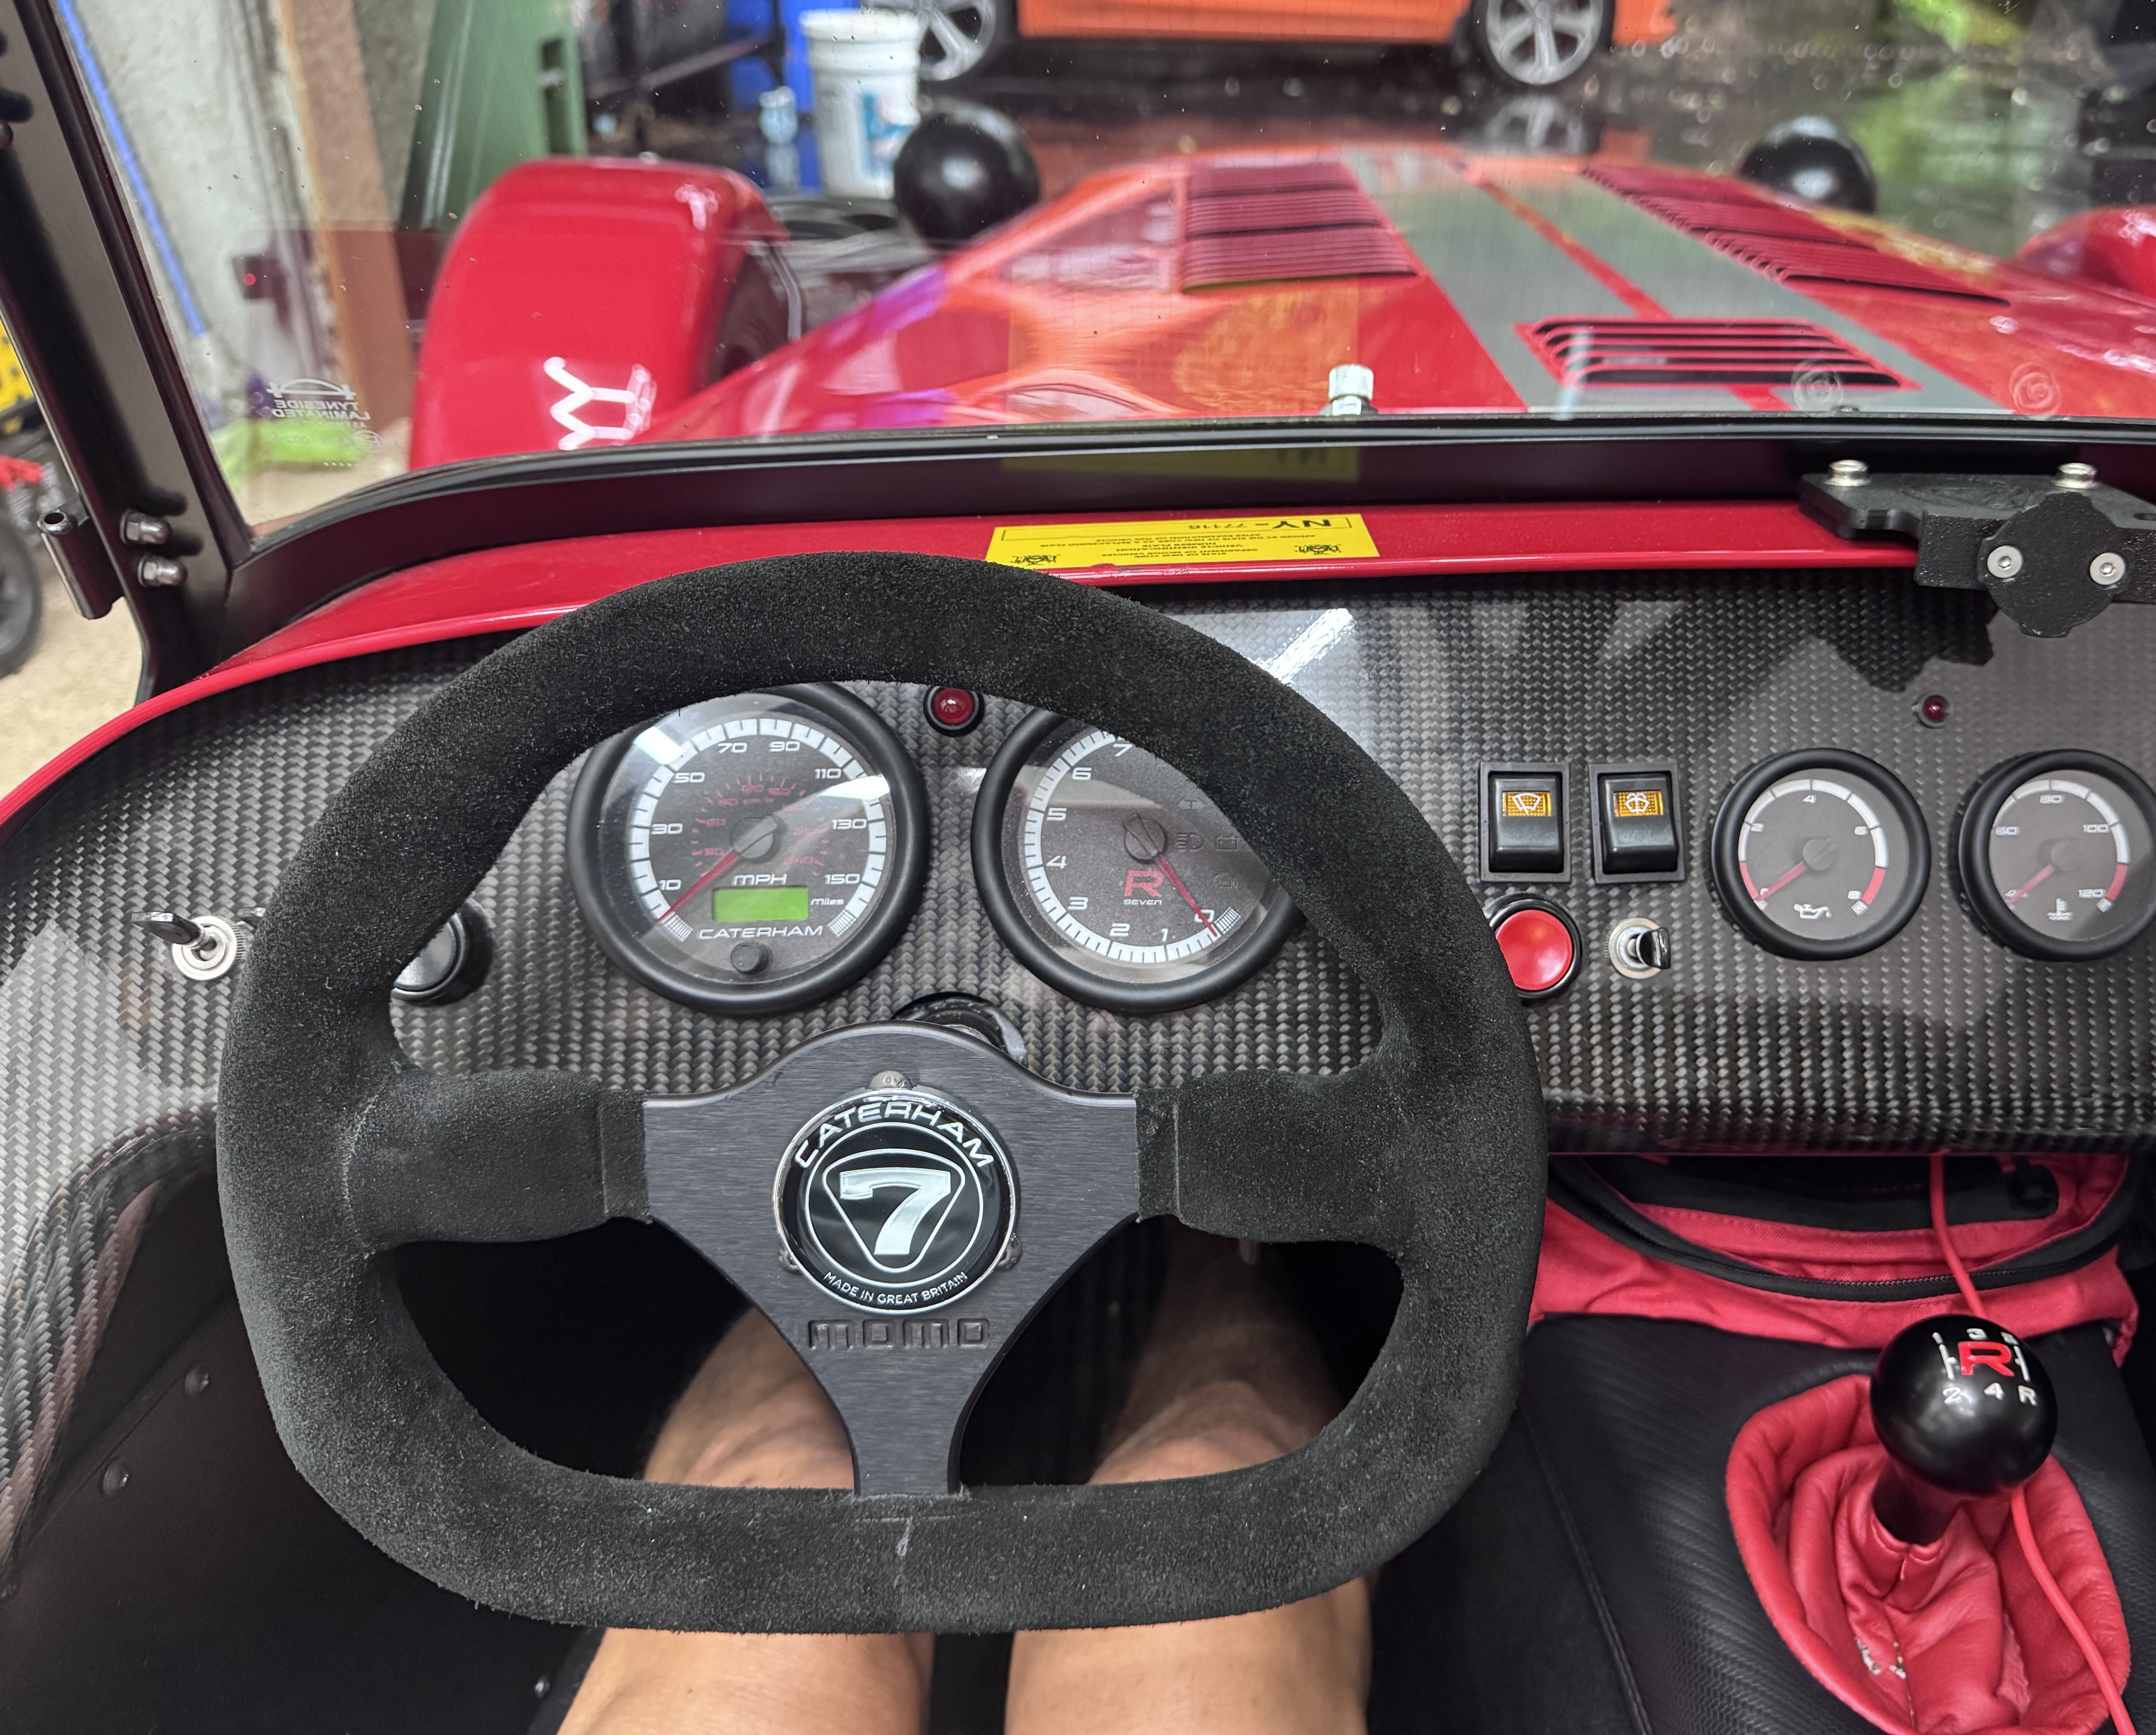
The little changes add up. Been most of a year now since this little beast came to our garage. In this picture changed the steering wheel, harness, all mirrors, 12V adapter, fuel gauge mod, striping, phone holder, half hood. But today added this emblem to the steering wheel. An Ebay nosecone emblem, probably a knock off. The 7 is flat while the one on the nose is 3D. Still looks good, ain’t no Bentley. Flat black paint on the MOMO and it’s an improvement. Now to figure how to sew a red stitch like in the Honda Si in the background 🤔
-
Yesterday a friend said that a friend of his is a metal fabricator, has a CNC machine etc, and can probably come over and make mounts when my engine arrives. I have a new set of Birkin mounts to fit a Zetec engine so I have a start at the frame side. I'll level the car up on jack stands, mount the exhaust manifold and level the engine, that should give us a start.
-
Yeah it’s weird. She said something about some policies being grandfathered in. Could be because the car is a “kit car” spncs not a “Caterham” idk maybe they think I’m a factory five guy so they up charge an old xflow. I just had a call with JB Taylor broker (ACC) who quoted $260 for a year in CA. So I have no idea what’s going on. Agreed value 35k, good+ condition car they don’t care if it was a kit car and the rep knew what a Caterham was. We’ll see how it pans out I guess. They will need to write a new policy in CO though after I slog through the DMV…. Again. I’m up in eastbay so don’t make it down to peninsula a lot. Cars and coffee for me is my toddler and the local coffee shop down the street. She loves the “race car” ride.
-
 The lowered floors are a big plus for some folks. Definite minus (pun intended) for a man of my Chapmanesque stature
 -

Weights for the Track Day Roll Bar and the Track Day Rollcage
Pokey replied to Pokey's topic in General Tech
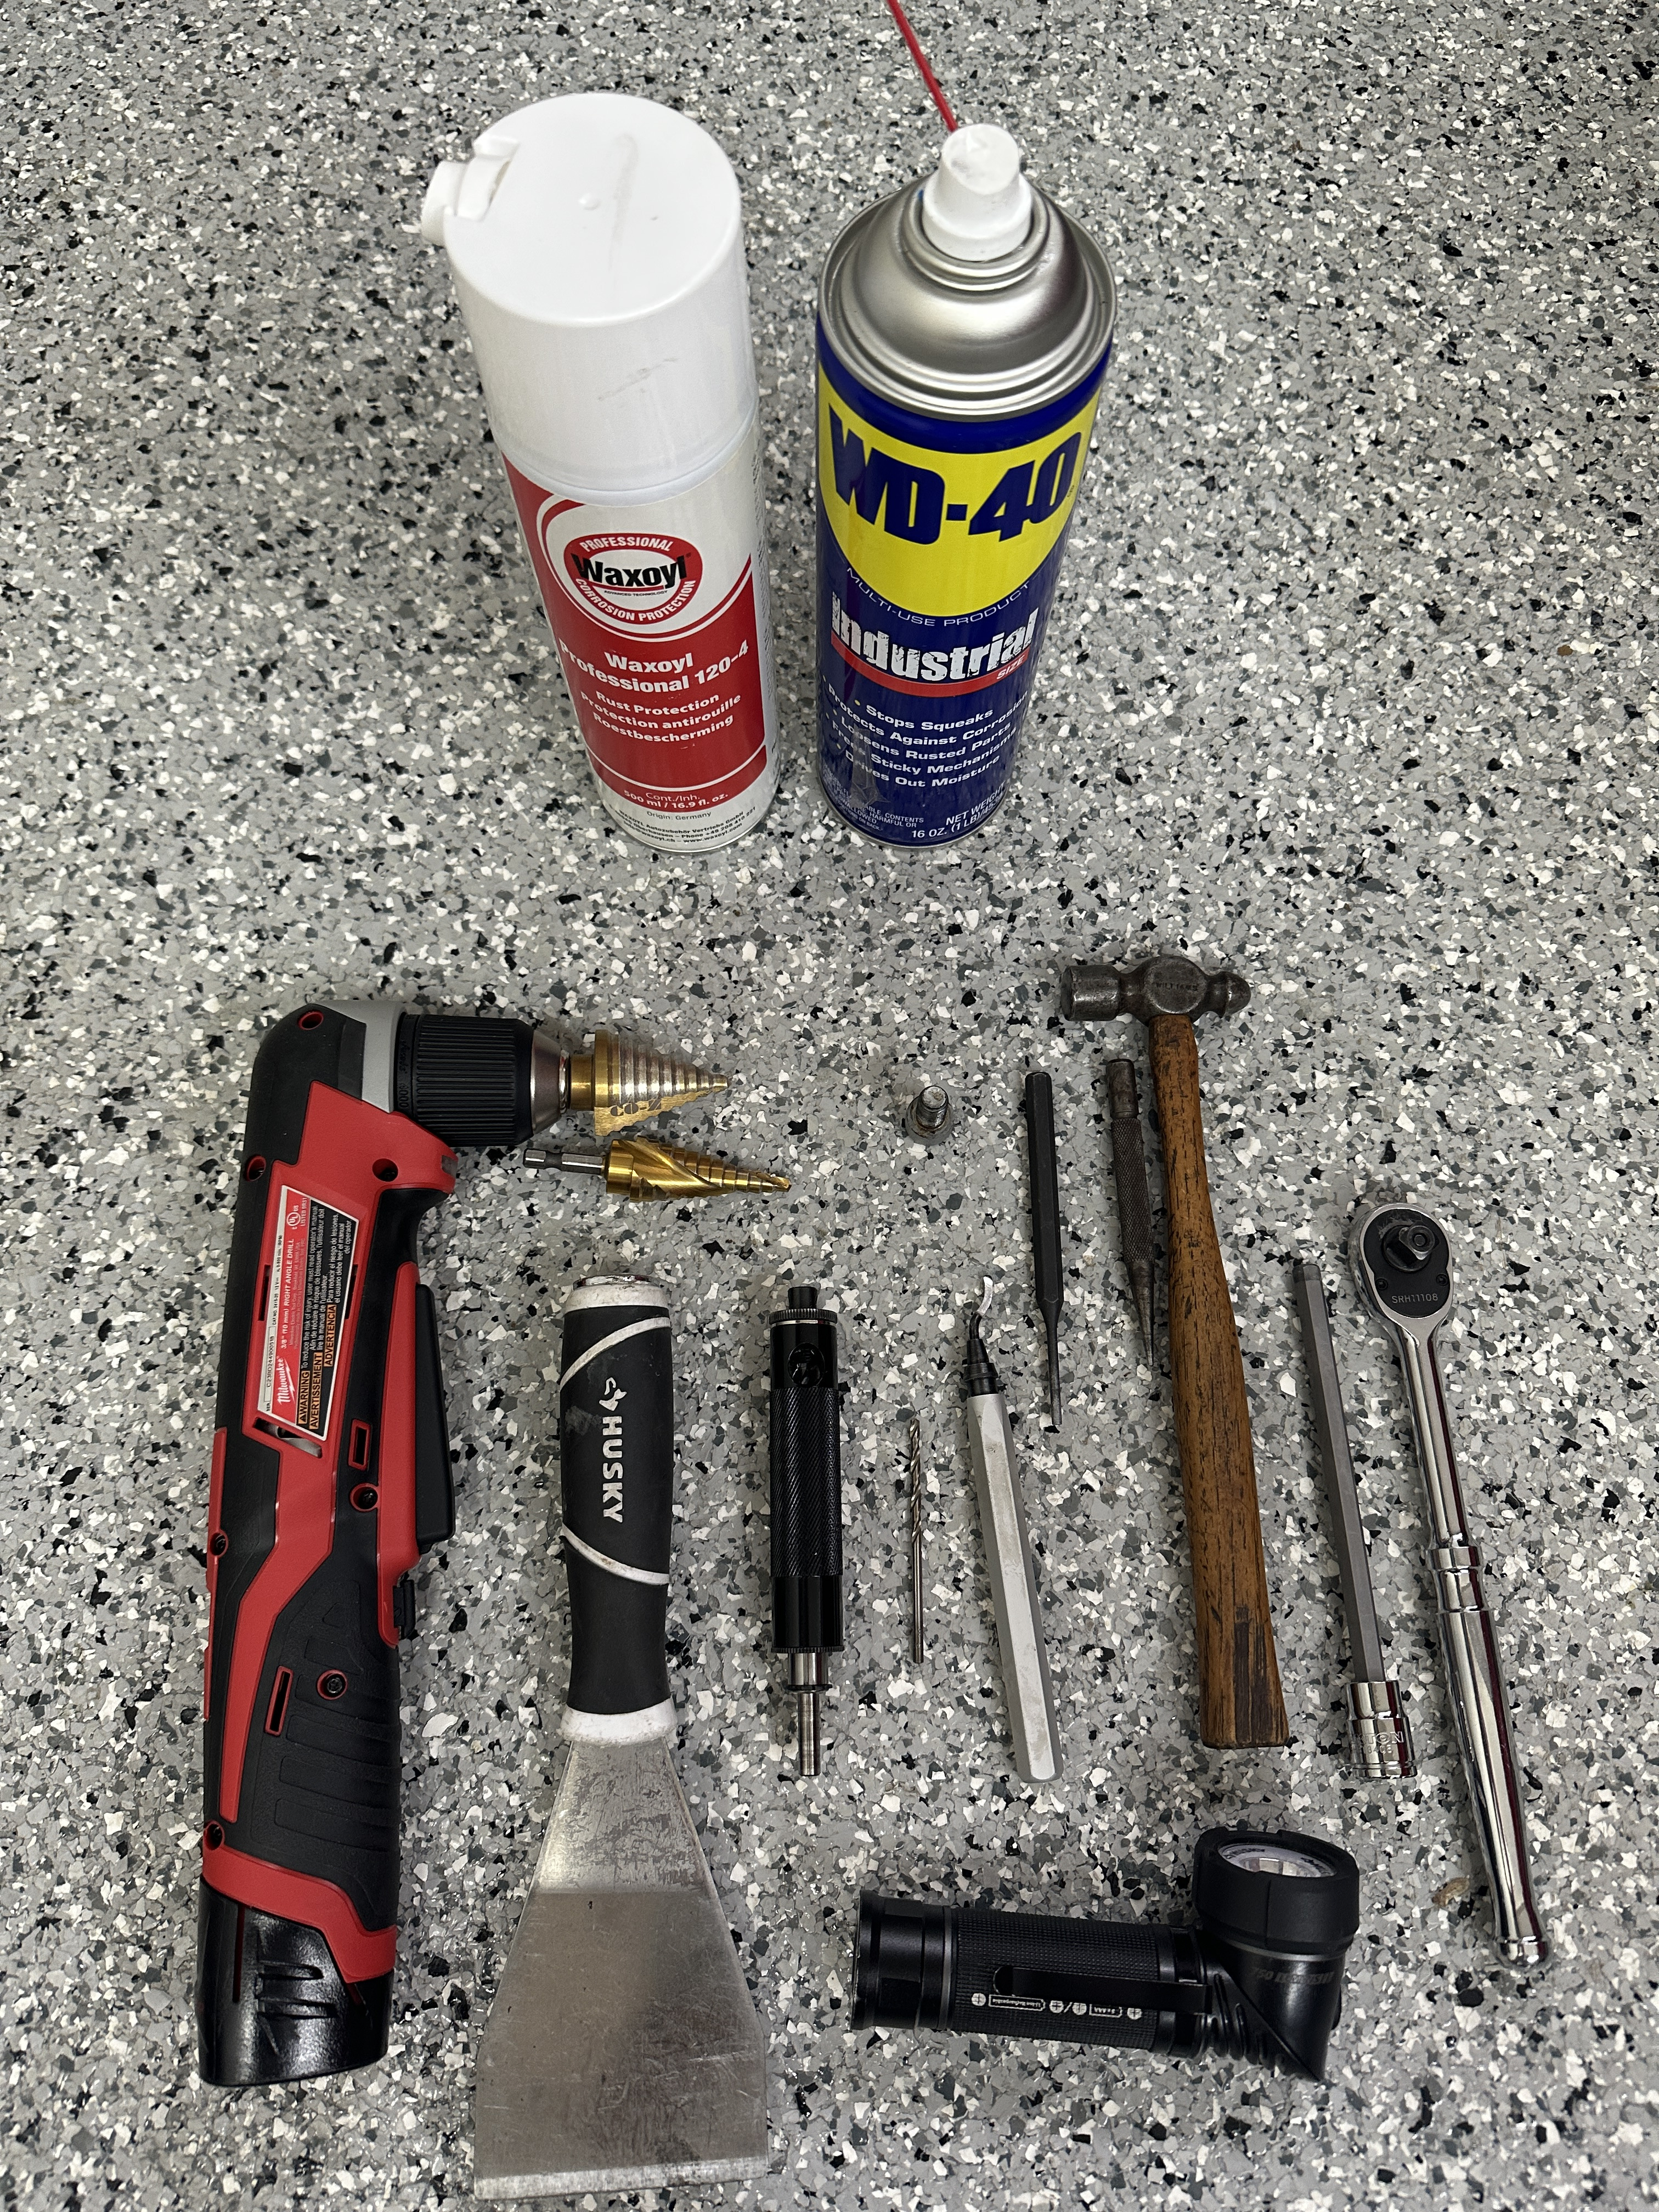
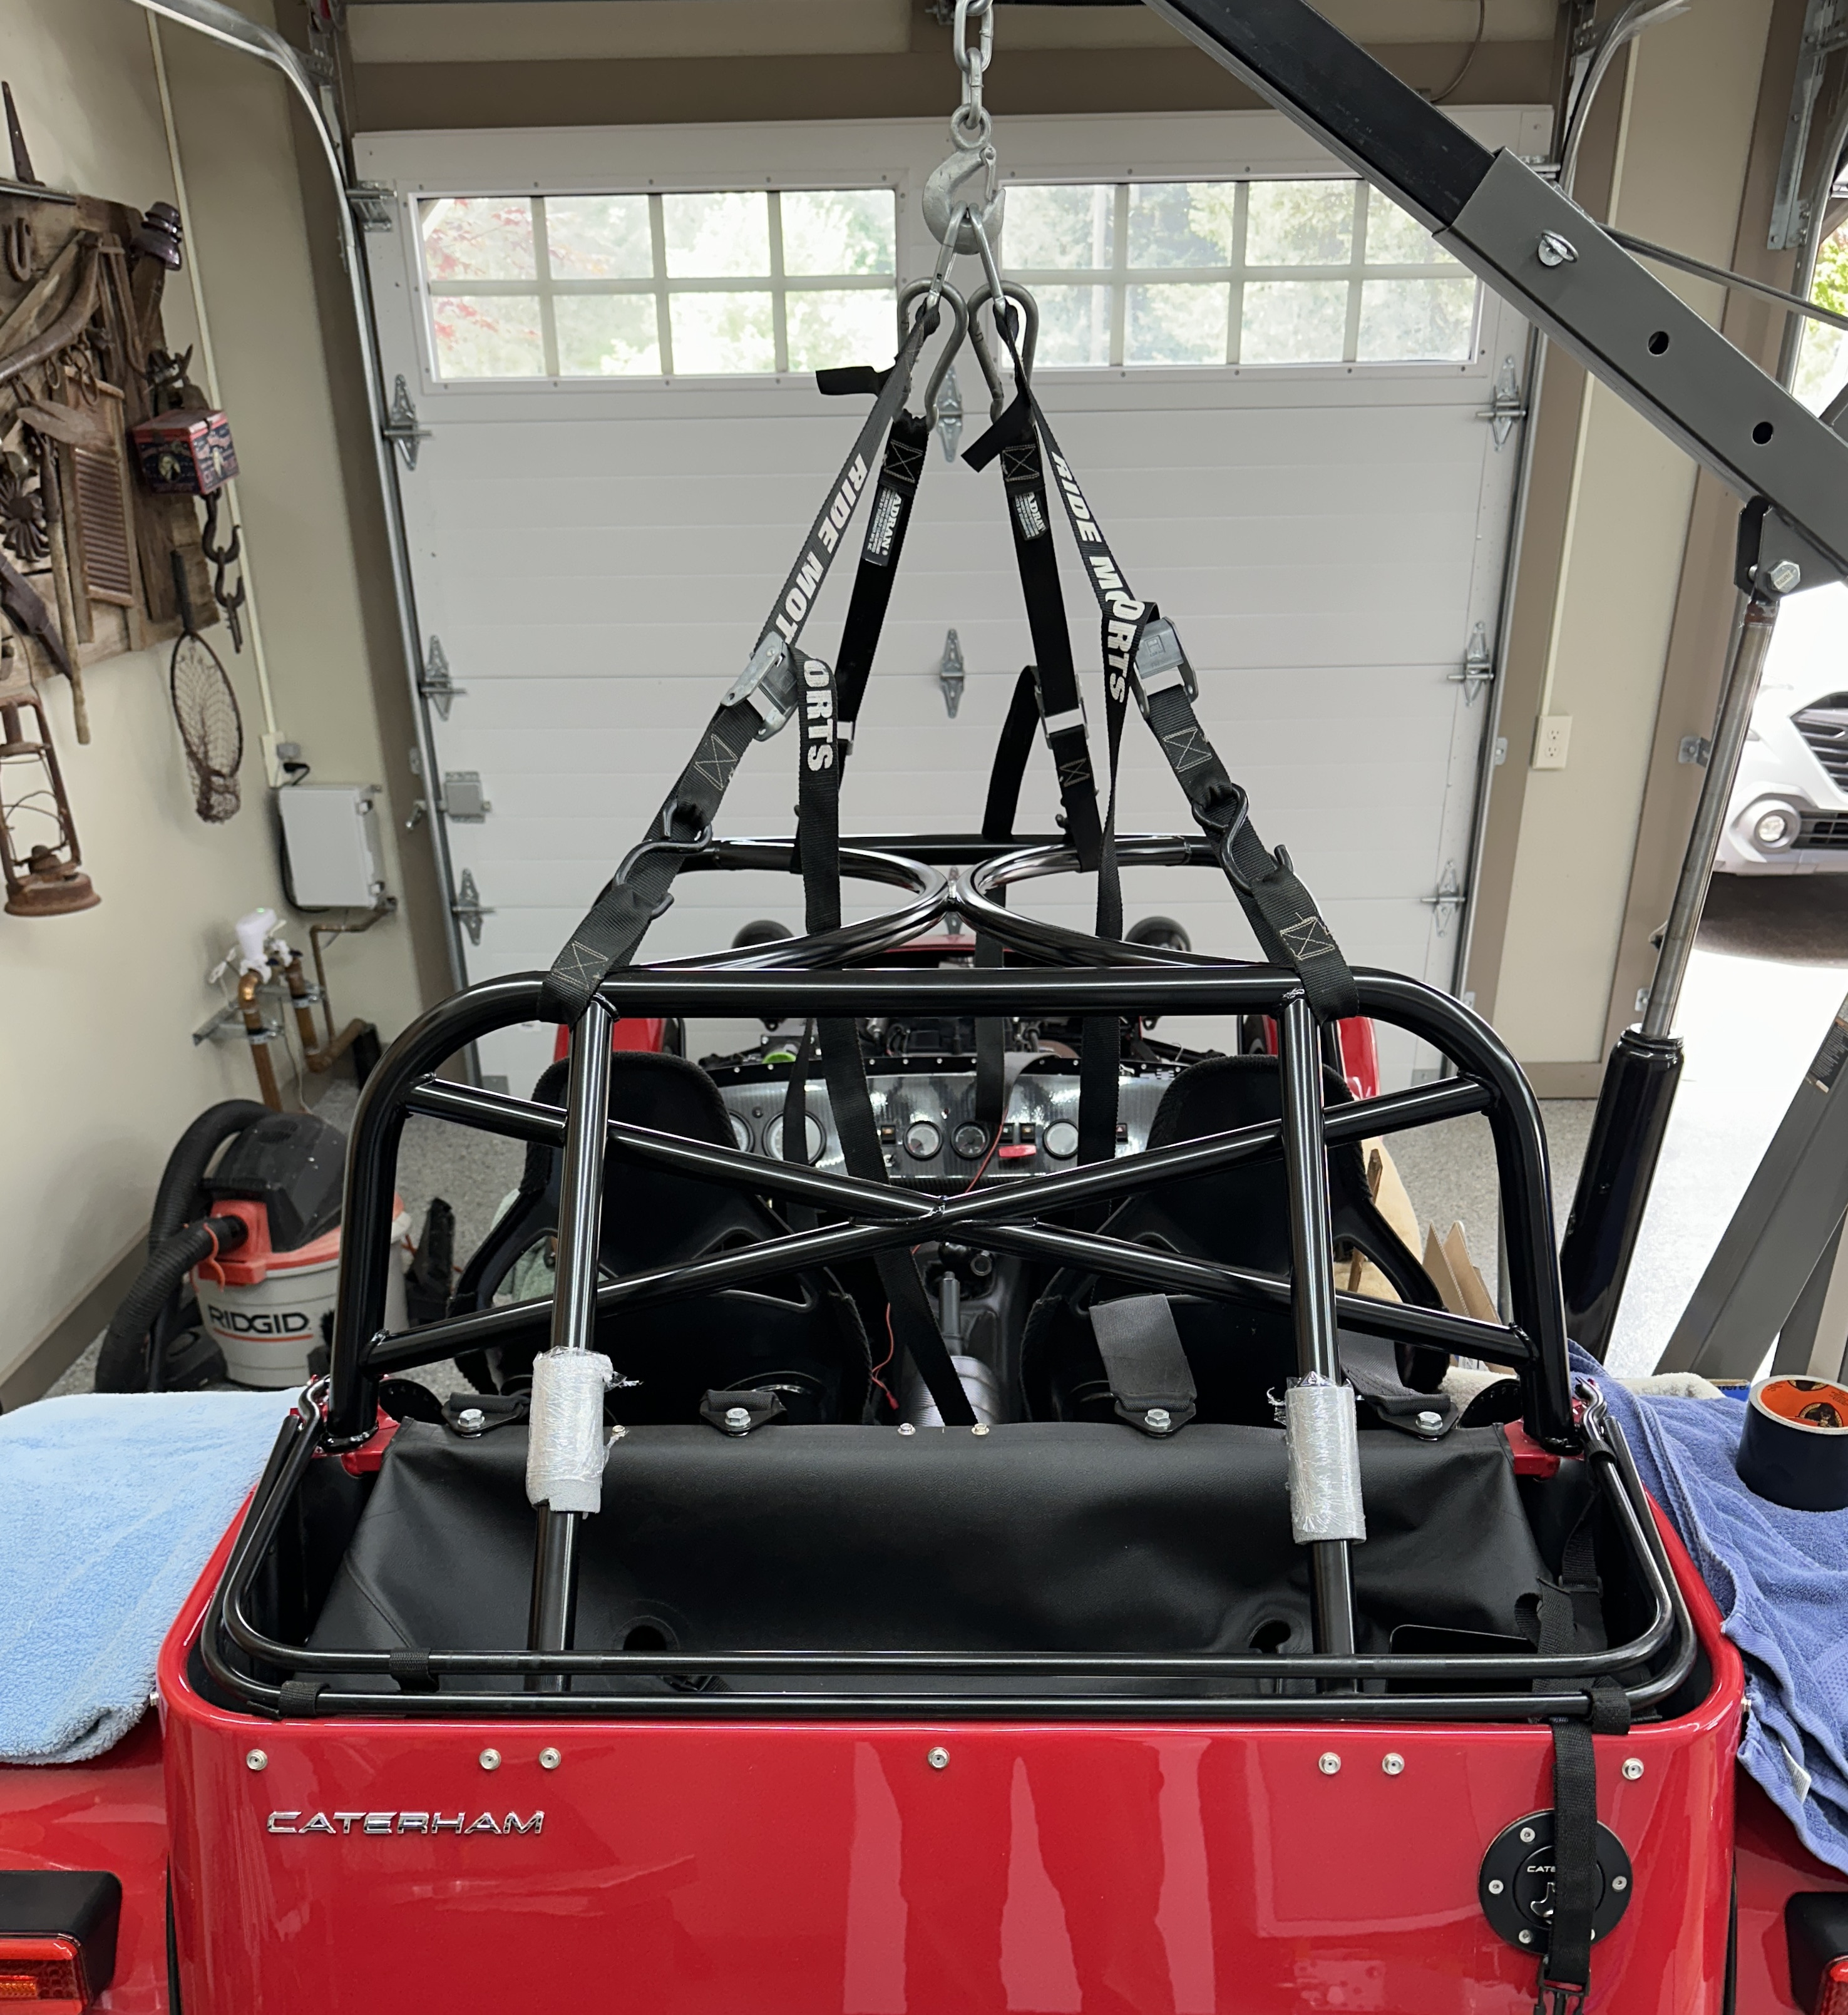
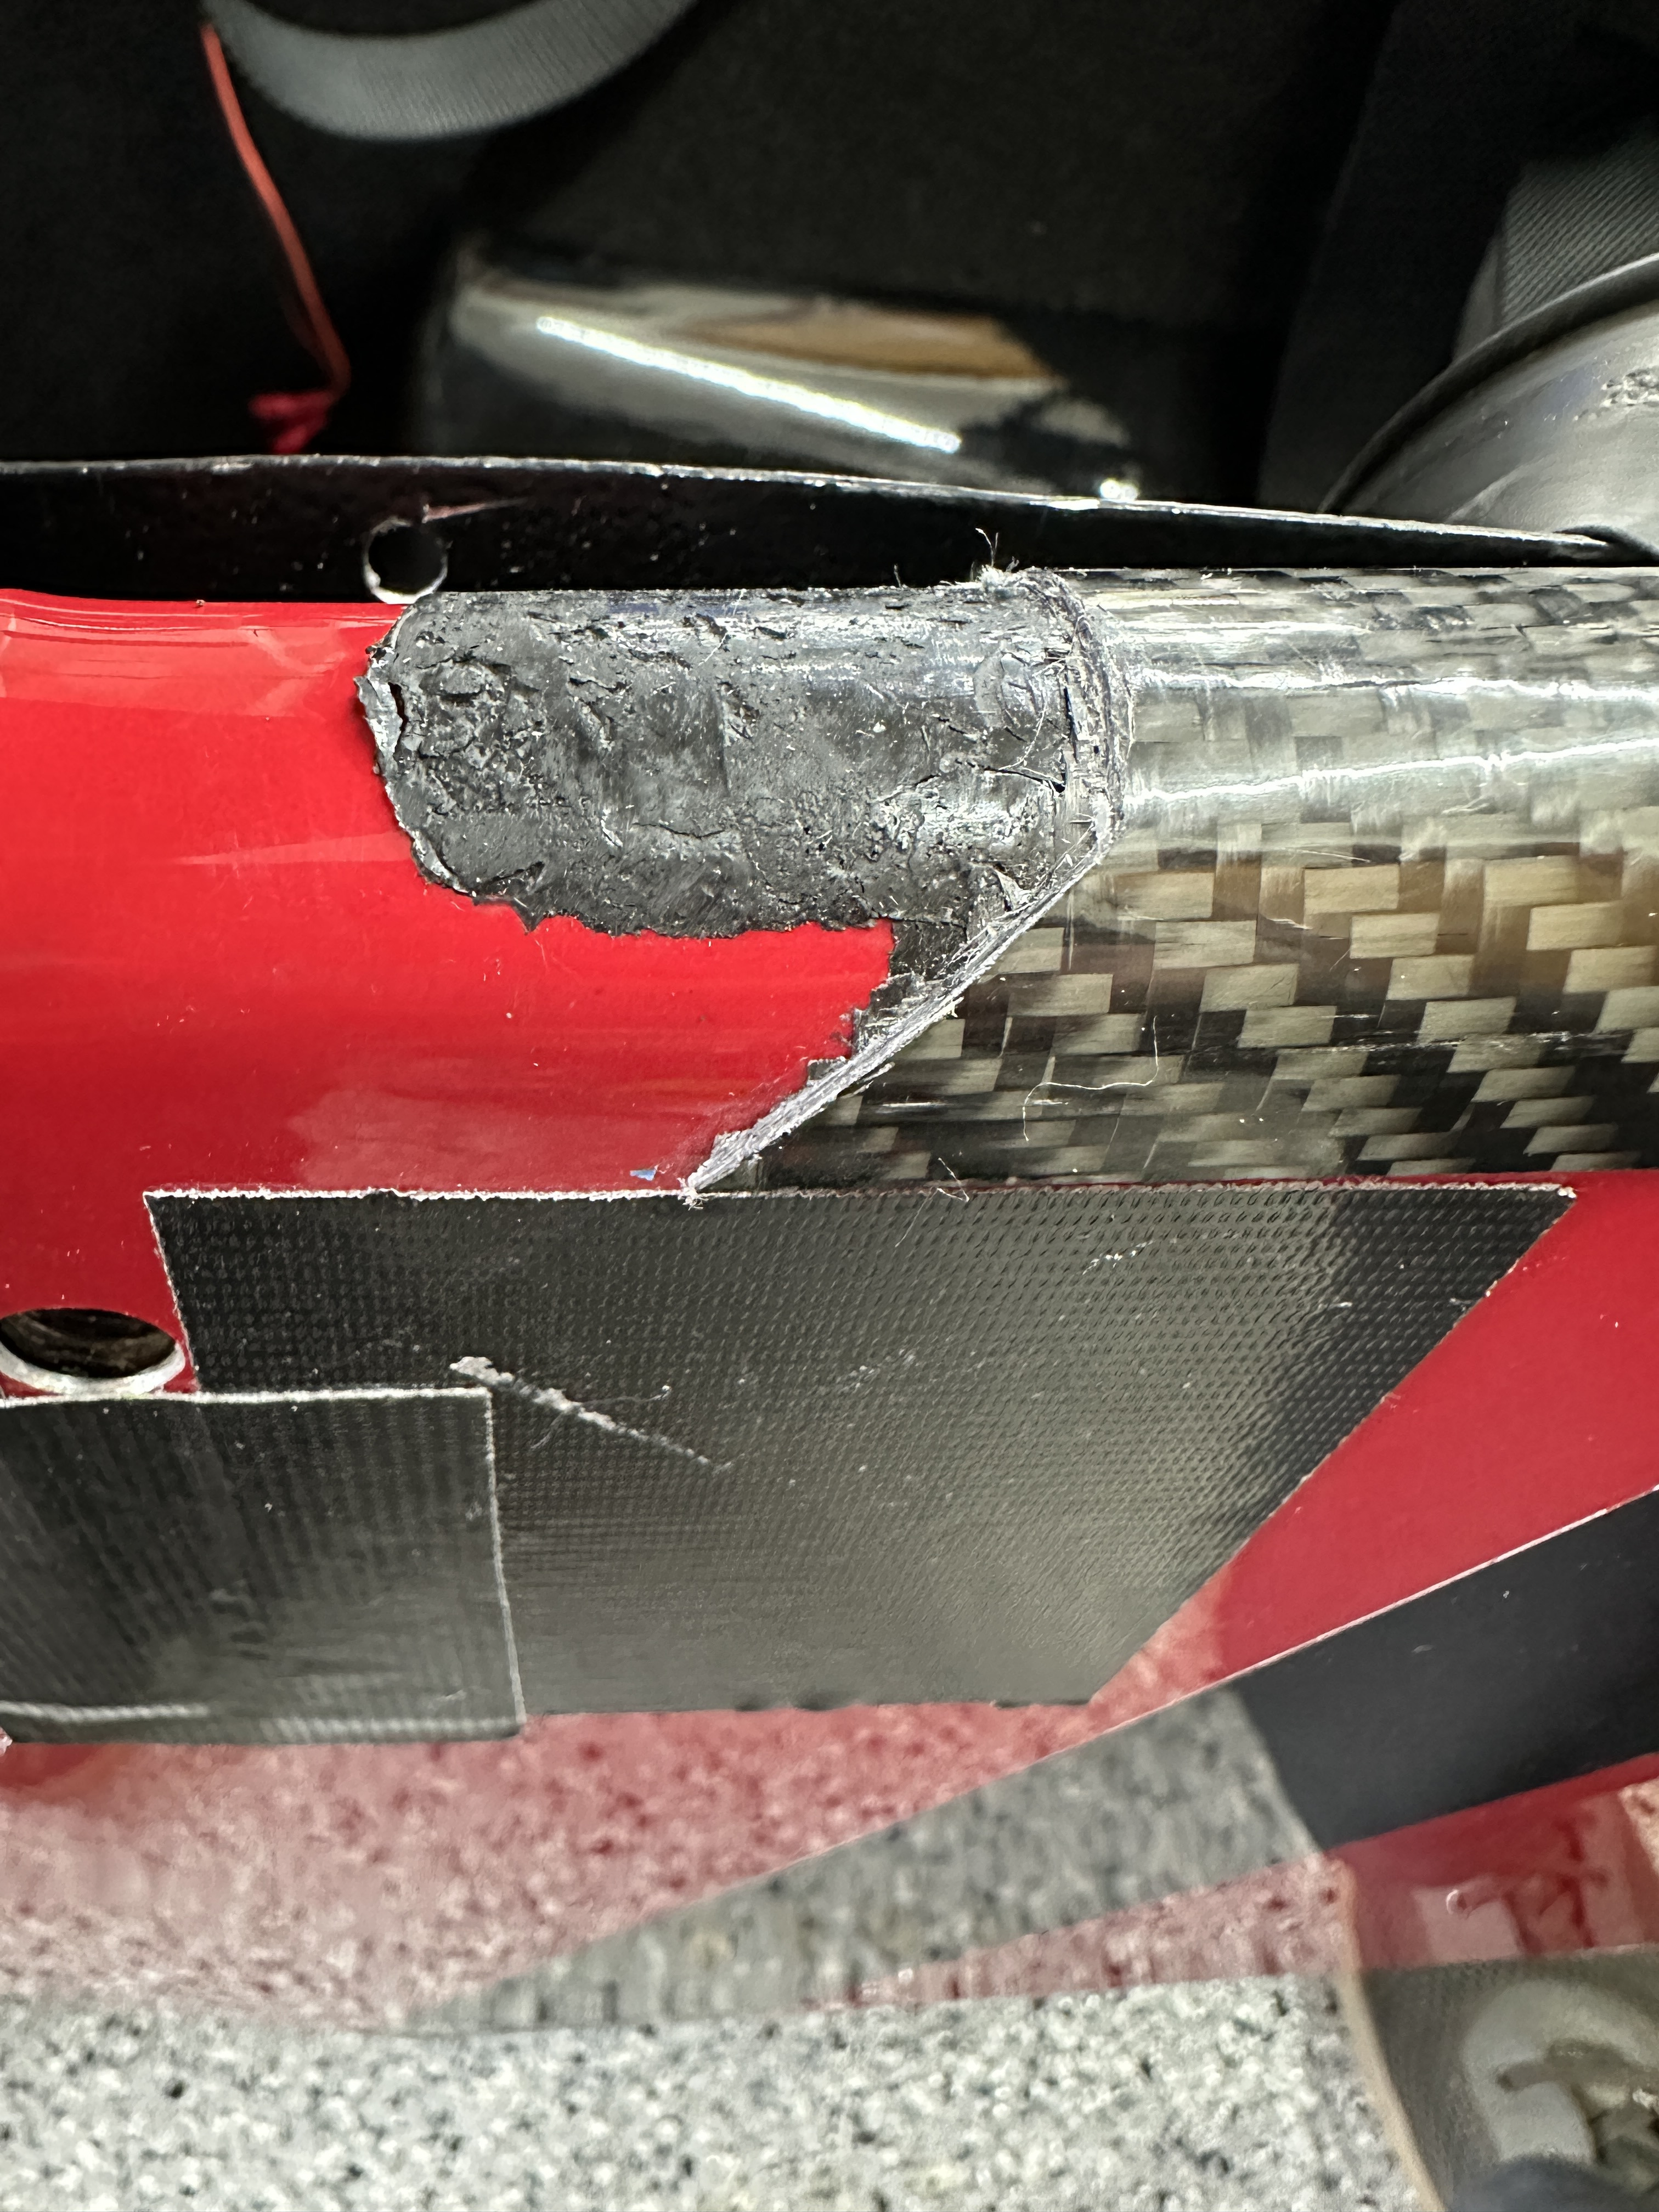
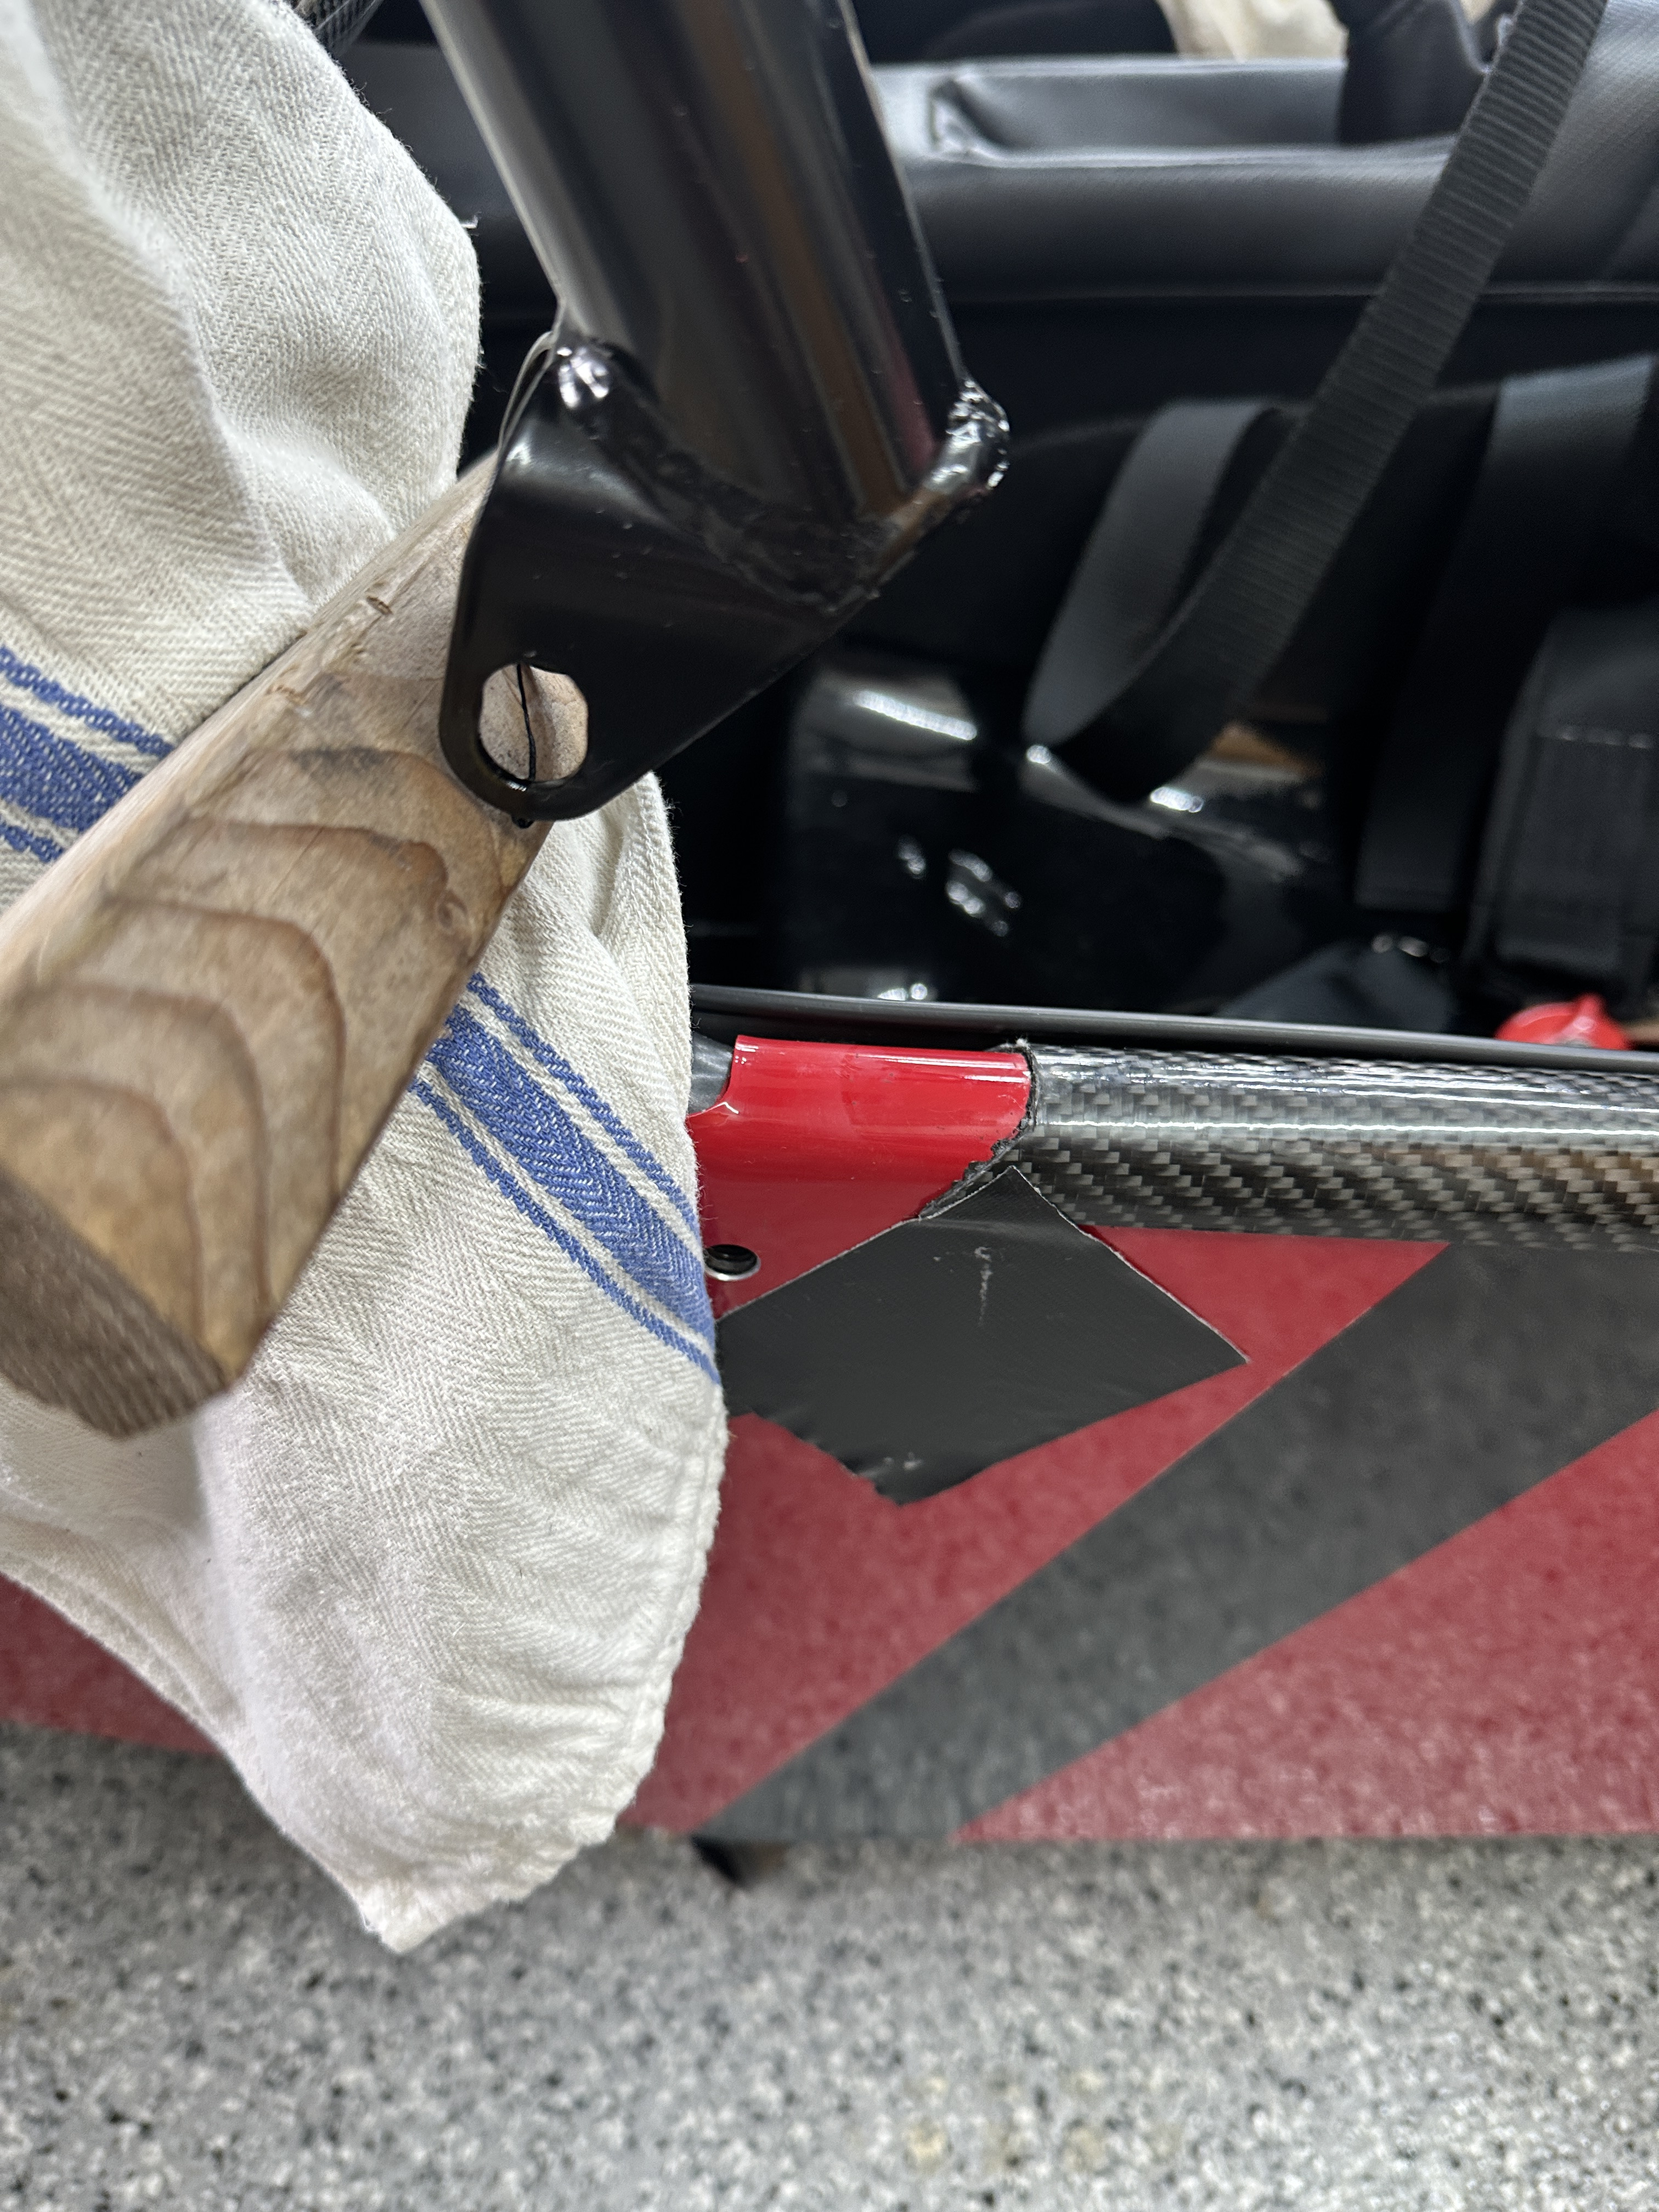
I'll start small and if you want more just ask. Supplies: The (2) M10 x 60mm w/ washer and nuts from your rollover bar The (2) M10 x 20mm caphead bolts from your rollover bar Two (4) M10 x 16mm bolts. I sourced mine from McMaster https://www.mcmaster.com/nav/enter.asp?partnum=98093A610 5/32 x 47 rivets to replace however many you choose to remove from the interior door panel Waxoyl if you are that kind of guy Tape and towels to protect bodywork Black silicone sealant if conturing the sill protectors rather than replacing -or- Catherham's shortened sill protectors for cars outfitted with a cage Tools: See the picture of most of what was involved Rivet gun Assorted socket and box wrenches You might need a ratchet strap to aid in the fit into the rear mounting brackets Something like an engine crane to hold the cage while working (picture) Steps: Put the rear of the car on stands and remove the rear wheels and shocks Remove the rollover bar Remove the sill protectors if replacing with the shortened versions, or loose-fit the cage to mark where to cut the sill protectors I'm assuming you have carbon fiber sill protectors If removing be aware that in addition to the rivets there is a very tough rubber adhesive to overcome There is a very real possibility of breaking the sill protector during the process I had my best success using a box cutter and patiently scoring rather than sawing or grinding (pictures) Gently pry back the door panel to locate the interior chassis boss and locate its position on the panel I estimated the position and used a punch to check alignment, adjusting as needed before making my final punch to drill Drill the door panel, enlarging the hole using step bits, and then debur Run a punch through the hole in the door panel and the interior and exterior chassis bosses to mark where to drill the skin Drill the skin as you did the door panel Install the cage Leave all bolts loose until all are installed, then torque to spec Fit is determined by your chassis and cage so I can't tell you in advance what you might need to do I would fit the two bolts that go up and into the verticals of the cage first, but leave loose The left (driver side) rear chassis bracket needed to have both holes elongated, and even then it took creative work with a ratchet strap to make fit Only one of the four front bolts aligned without modification - the other three bracket holes needed further elongation Be aware that the above steps make it sound like it was a measure twice and cut once operation, whereas in reality placed and lifted the cage dozens of times while aligning If you cut the sill protector in situ then a little black silicone sealant provides a nice optional finish (picture) Note that clearance between the windscreen is minimal, likely contacting in some places I've run foam tape across the top of the windscreen but only time will tell if this is a good solution My plan (hope) is to attach the rearview mirror to the cage to minimize vibration and to allow for easier swaps between the windscreen and aeroscreen, but that clearance is an issue Reinstall the shocks and wheels
-
I finally got around to reading @chrisp993's blog. It's well worth checking out if you haven't already done so. It's brought back a little trauma from my build, but other than that, I've really enjoyed it.