-
Posts
279 -
Joined
Personal Information
-
Biography
I was born shortly after the introduction of the first wheels which were near round, and they immediately caught my fancy.
-
Location
Upstate SC
-
Se7en
2022 Caterham S3 360S (home built)
Recent Profile Visitors
The recent visitors block is disabled and is not being shown to other users.
-
Yoram started following 2025 Western NC/Upstate SC/TN, let’s go for a drive. , Rollbar Lights -- custom animated run/brake/turn , What do you call your Seven? and 2 others
-

Rollbar Lights -- custom animated run/brake/turn
Yoram replied to Austin David's topic in General Fabrication
Very slick. I may bug you for more details once my Amazon center light (running and brake) on the roll bar craps out. -
I tell them it's a Caterham 7, pronouncing it Kate-Rum as best as I can in my immigrant accent. I then follow up with something like "it is an evolution of the original Lotus 7 which was launched in 1957". And we go from there. It then usually leads to one of those Chaos and Bifurcation moments, when things go very unpredictably in one of extreme opposite directions. Either automotive ecstasy feeding a long friendly chat, or total glaze-over and "oh, cool, thanks". The most irritating (and frequent) next question I get, usually in the second scenario, is "how fast will it go". HTF do you answer that??? I think I will follow the OP's example and start a new thread with that question.
-
Would have loved to join you guys... but on second thought, J, how was it driving back to the Upstate today??... We drove to Easley and back in Wombat today and were very grateful it has a roof and the windows roll up...
-
Thank you, J, but we should be more inclusive and consider also how most women would react to said increase.
-
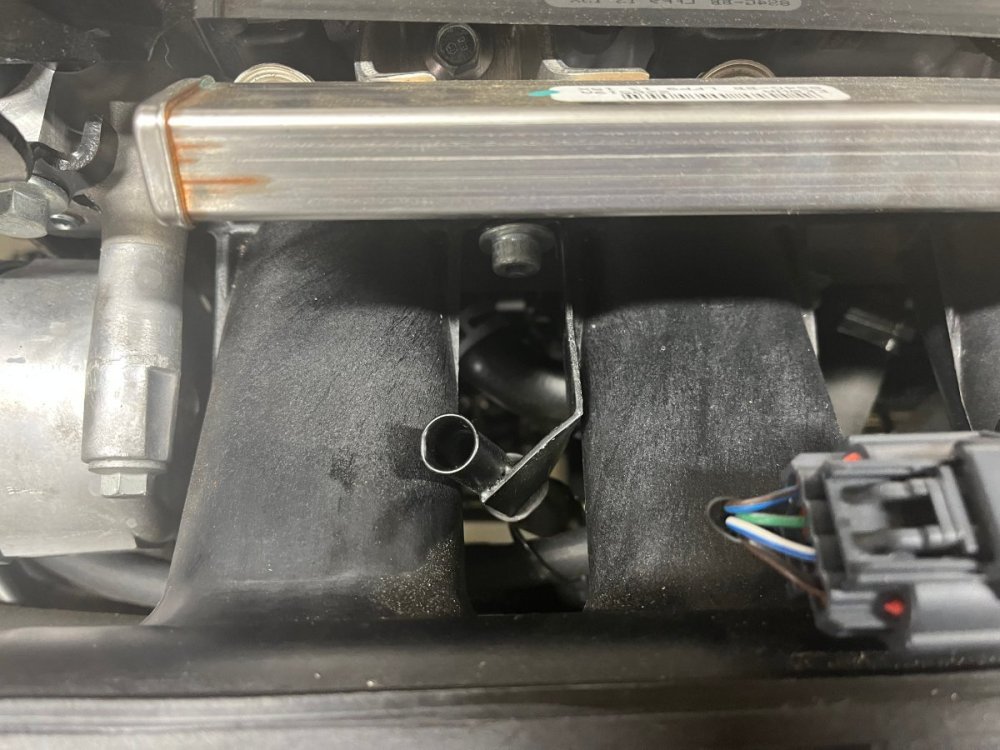
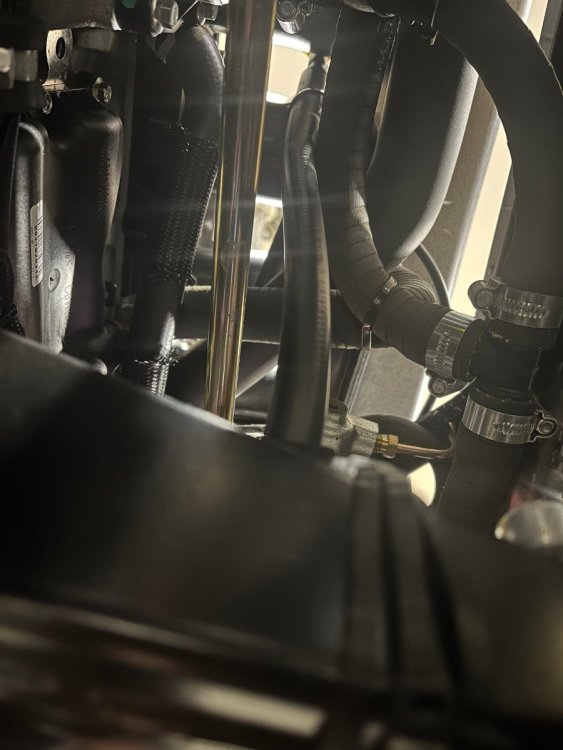
Long time no post... I realize this is a build thread, and (alas!) the core build is over for more than two years now (hard to believe, really). However I decided to resume posting aperiodic tidbits of technical findings and "continuous improvement" tweaks. One detail that kept nagging me ever since the build was the clearance between the steering shaft and the dipstick hose. It had been from the start about 1/4" which I thought was too small. As part of my 1,000 mile "self service" I decided to look for ways to increase it. I ended up bending and twisting the end of the bracket holding the top of the dipstick hose (it is held by one of the plenum bolts), so that it bends the hose away from the shaft. I used padded vise-grips. The gap is now about 1" and I can finally sleep again. Oh, and Happy New Year and Blissful Se7en Motoring, y'all!
-
So not true. Just scrambling to keep up.
-
I'm hoping USA7s is a bit more discrete than YouTube... I took the chance, but took extra care to protect your identity -- no face, no license plate, no name. Mine is all over the dark web anyway.
-
It happened!! Yesterday J and I stuck our necks out and took our 7's up Caesar Mountain to Brevard and back, stopping at Caesar's Head and grabbing lunch at Pisgah Bakehouse in Brevard. The rain held off for us and we had only a few slow moving obstructions on the way up, almost none on the way down. The weather was actually just about perfect! If it weren't for the company it could have been an OK outing... Here we are at Caesar's Head: The normally magnificent view itself was completely clouded/fogged over when we arrived (first time for either one of us): But the parking lot view was excellent: And here is some unedited footage from the runs (I hope the links work...) On the way up: https://www.dropbox.com/scl/fi/ptaj10tl8jek7eb1kb0xc/GX010009.MP4?rlkey=ox10n2uo6msuzcaikkbrywpk1&st=hi3umh39&dl=0 And on the way down: https://www.dropbox.com/scl/fi/0inuj65d4gu1wle2zkc71/GX010010.MP4?rlkey=sc6olu5oy0nrjyfh4naja5lle&st=r0qe3je5&dl=0 This was lots of fun. Thanks, J! BTW, if you look at the videos you may recognize a few issues... - my coolant temp gauge is still going haywire once in a while - I need to somehow mount the GoPro lower so the road is not obstructed by the rear-view mirror - I needed to lock the orientation so it stays with the car and not with Father Earth - should have worn my clear goggles on the way down (nothing bad happened but...) - we need to do this again, soon and often Cheers!
-
Looking likely to rain. I'm likely to bring an enclosed car. This is like F1, not like Indy or NASCAR - we run rain or shine. Fewer cars in the way if it rains.
-
So... J ( @UglyFast ) and I are scheming an invigorating drive this Saturday from Travelers Rest SC to Brevard NC with a stop at Caesar's Head. Rte 276 up to Caesar's Head and even past it is spectacular. Start point: Spinx station in TR at 11:00 am. https://www.google.com/maps/place/Spinx/@34.979925,-82.4255463,17z/data=!3m1!4b1!4m6!3m5!1s0x8859cd2b59270aad:0x4acf1d08abccde51!8m2!3d34.979925!4d-82.4255463!16s%2Fg%2F1tcvvl0z?entry=ttu&g_ep=EgoyMDI1MDYxMC4xIKXMDSoASAFQAw%3D%3D Destination: Pisgah Bakehouse in Brevard https://www.google.com/maps/place/Pisgah+Bakehouse/@35.2682211,-82.7107133,17z/data=!3m1!4b1!4m6!3m5!1s0x8859bdcf71dec863:0xc140d4ade942a4f2!8m2!3d35.2682211!4d-82.7107133!16s%2Fg%2F11ksq2kqyf?entry=ttu&g_ep=EgoyMDI1MDYxMC4xIKXMDSoASAFQAw%3D%3D Return same route (or as the quorum chooses...) Considering the iffy forecast it will be "Run What You Brung" -- your Se7en, or other (hopefully interesting) machinery. Sorry for the late notice but let us know if you can come out and join!
-
Got it. Mine is a driver too, but I find 7 cruising down the highway at 75mph for hours tiring and not rewarding. If we are talking about the Tail of the Dragon, I was thinking of driving from here (Greenville area) to say somewhere around Robbinsville NC (staying 2 nights there). That's about as long a drive (with stops) as I'm inclined to do in a day.
-
Great! Do you have a trailer to skip the interstate miles or would you plan to drive up in the 7 to group somewhere in the upstate area?
-
I applaud the initiative. I am however with Bill re long drives in the summer heat. I also am not a fan of long "straight" and level roads, which rack up the miles and cramps without bringing to life the unique 7 dynamics. Additionally I am limited in not having a trailer. Therefore I focus my current range on the foothills - Rte 276/Brevard, Rte 176/Saluda, Rte 178/Rosman, etc -- up to ~2 hrs radius from us (in <1 hr stints). I would entertain a 2-night excursion to the Tail of the Dragon from the Greenville area: An afternoon to get there by back roads (need to confirm which ones), a day up and down the Dragon and area, and ~1/2 day to get back. The Fall would be ideal, especially for the latter, but I'm up for a day for one of the shorter routes yet this month. P.S., I too am retired, so weekdays actually preferred due to lighter "tourist" traffic.
-
I'm game for Sunday! In general, we are based in the Five Forks SC area -- if anyone is passing through (I-85/I-385) and wish to stop by and stretch your legs let me know! Always love to meet, hang and motor with other 7 knuckleheads whenever possible.
-
Should have intercepted this thread on my own, without a personal prod from @UglyFast. Thanks and sorry! I too am near Greenville SC. Unfortunately Sat June 7 we have a prior commitment. The climb from Travelers Rest to Brevard via Caeser's Head is also a fun little run, closer to us. Slow traffic can be a buzz kill. My problem is that I still don't have a trailer and have a bit of a challenge with more than a ~2 hr range -- left foot goes numb or cramps from hovering over (not touching) the clutch pedal on longer runs. Dang old age...


