ianashdown
-
Posts
217 -
Joined
Content Type
Profiles
Forums
Store
Articles
Gallery
Events
Library
Everything posted by ianashdown
-
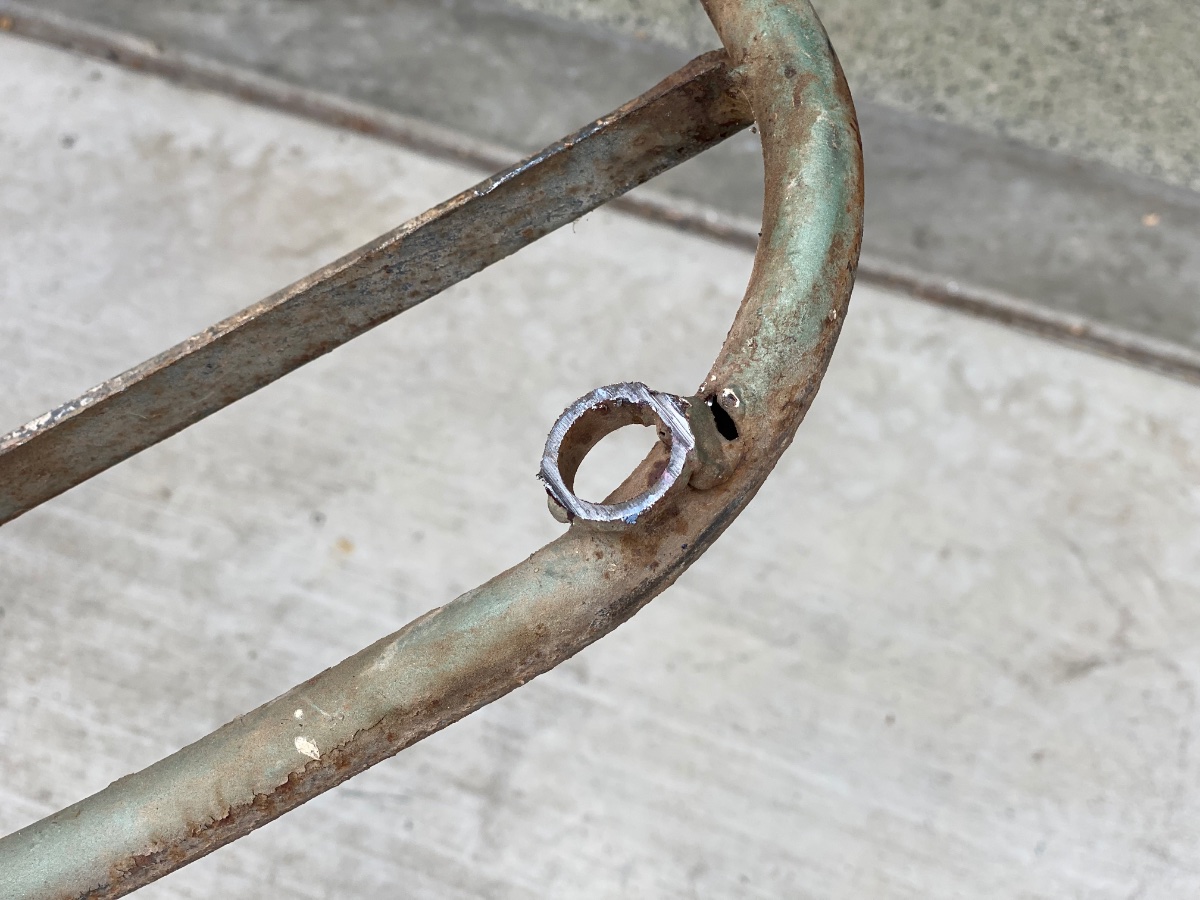
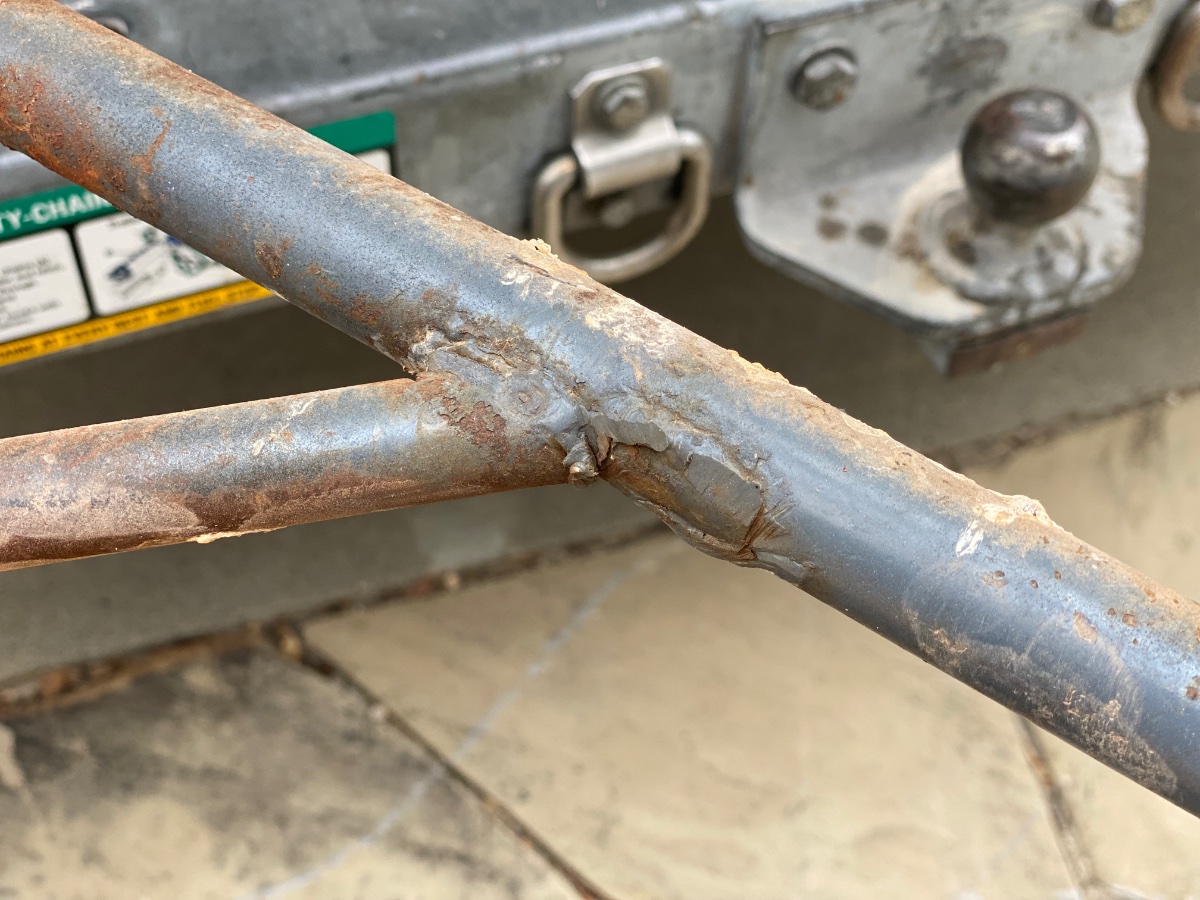
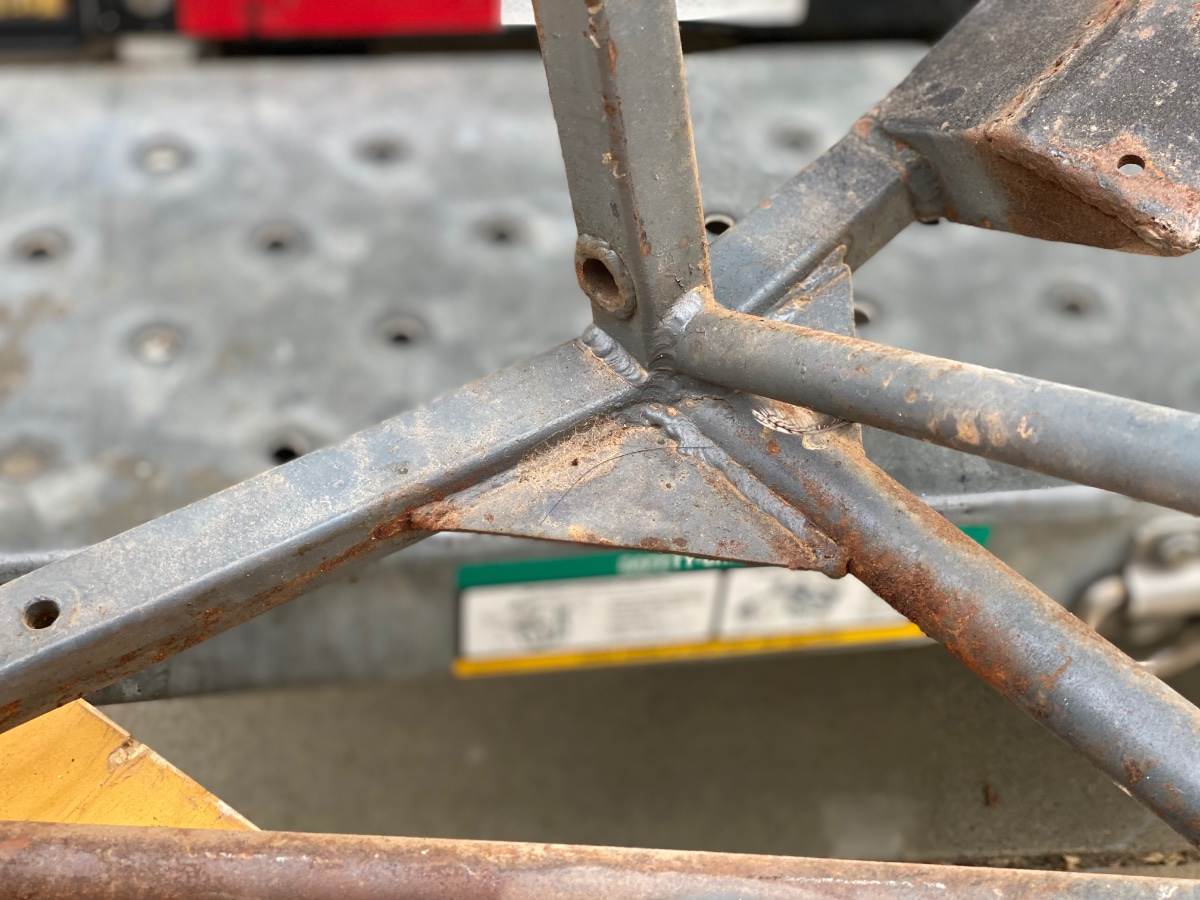
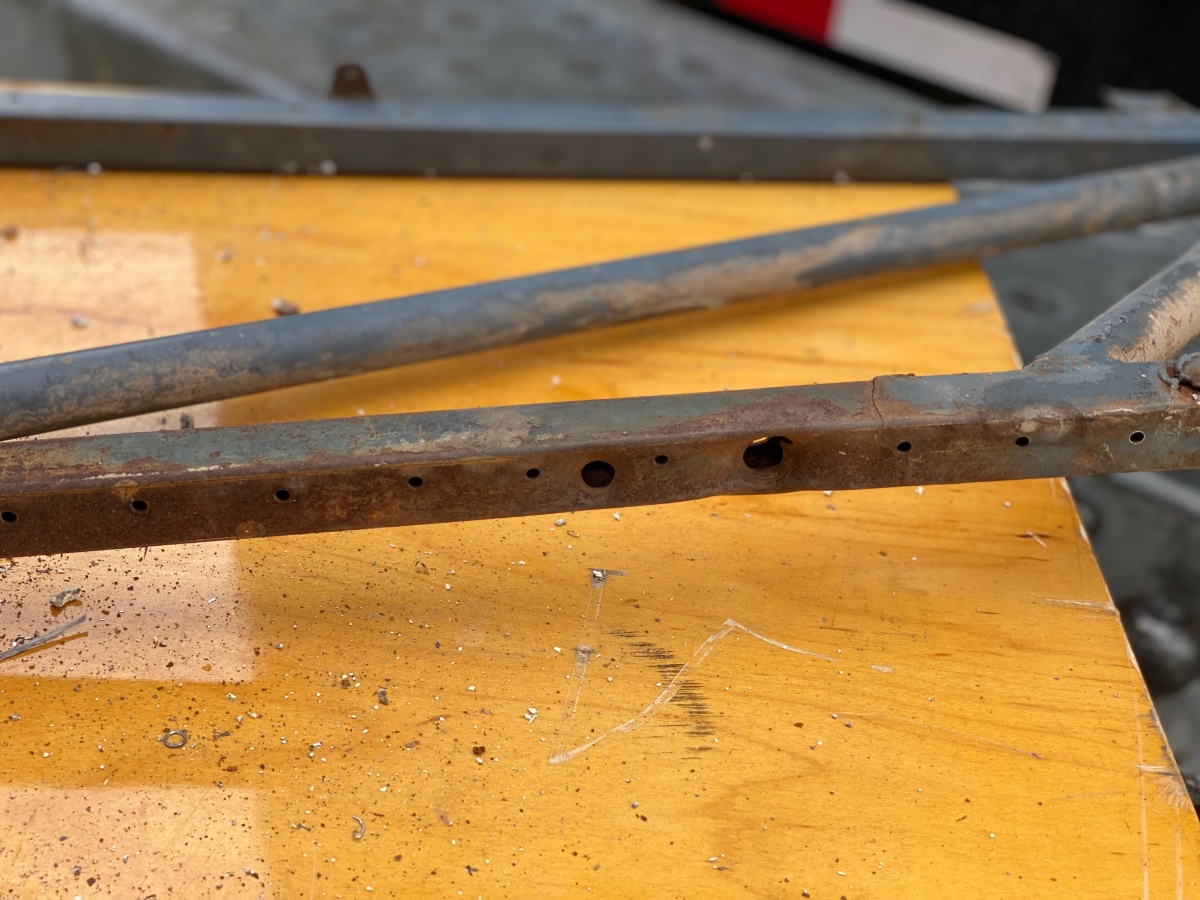
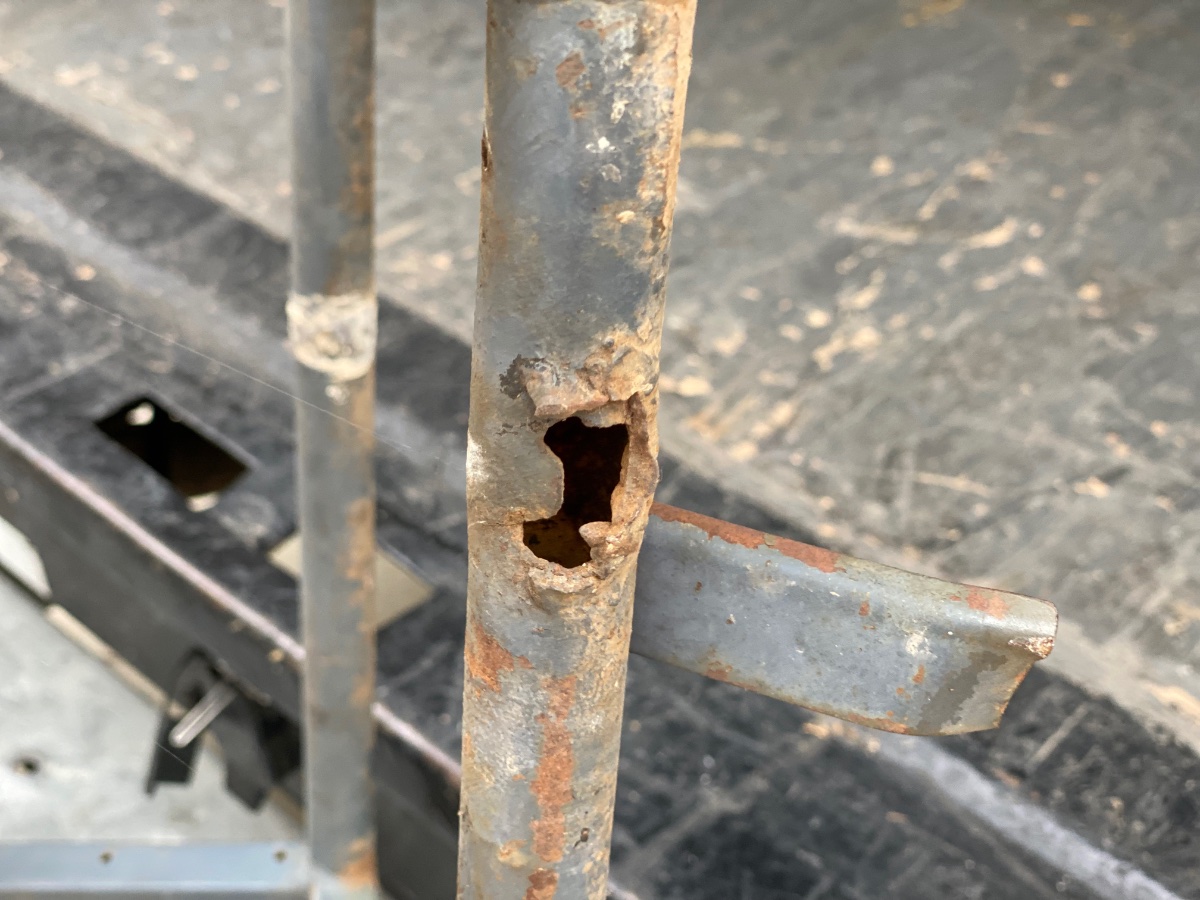
I got all the Aluminium panels removed so the frame could go off to my local powder-coater for a sandblast clean up. I’m just wanting to reveal all the ‘issues’ with the frame. With the panels removed the condition of the frame was much more easily seen, and several things I’d not seen before were revealed, as was the horrendous standard of work done by/for the DPO. Already the scope of frame repairs has significantly increased, then add my ‘improvements’ and there is a lot of work to be done. I have a gas fluxer and am fairly handy with it, have the correct rod etc so I could use this low temp method for all the repairs, but this frame, being a Unirads built frame, was gas welded not nickel-bronze brazed. I was going to buy a TIG welder but I think my available power at home may not be sufficient, and the cost to upgrade the power plus buy the TIG set-up it getting a little higher than I’d like, so I think nickel-bronze brazing will probably be my choice. I do need to figure out some kind of jig for the chassis to make sure I have a chance of the end result being close to straight. A few shots of some of the things that will need to be addressed. I’m going to try a find somewhere to post all the photos so they can be viewed by anyone. I also had a new windscreen cut from flat laminated glass. It wasn’t ‘cheap’ at $190, but not too bad either. The thickness of laminated glass that was used (0.220”) is no longer available, we have to use 0.25” thick (which turns out to be 0.258”) and the rubber channel extrusion that I got from Caterham seems to be made for thinner glass, maybe it is available in the UK. The combination of the new glass with the rubber extrusion seem to be impossible to fit in to the frame extrusion, so I think I’ll have to investigate the bicycle inner tube idea or I’m back to the plan of using a sealant of some kind. I might look into getting a mask made so I can etch some period markings in to the glass. More fun to come! Ian SoCal

-
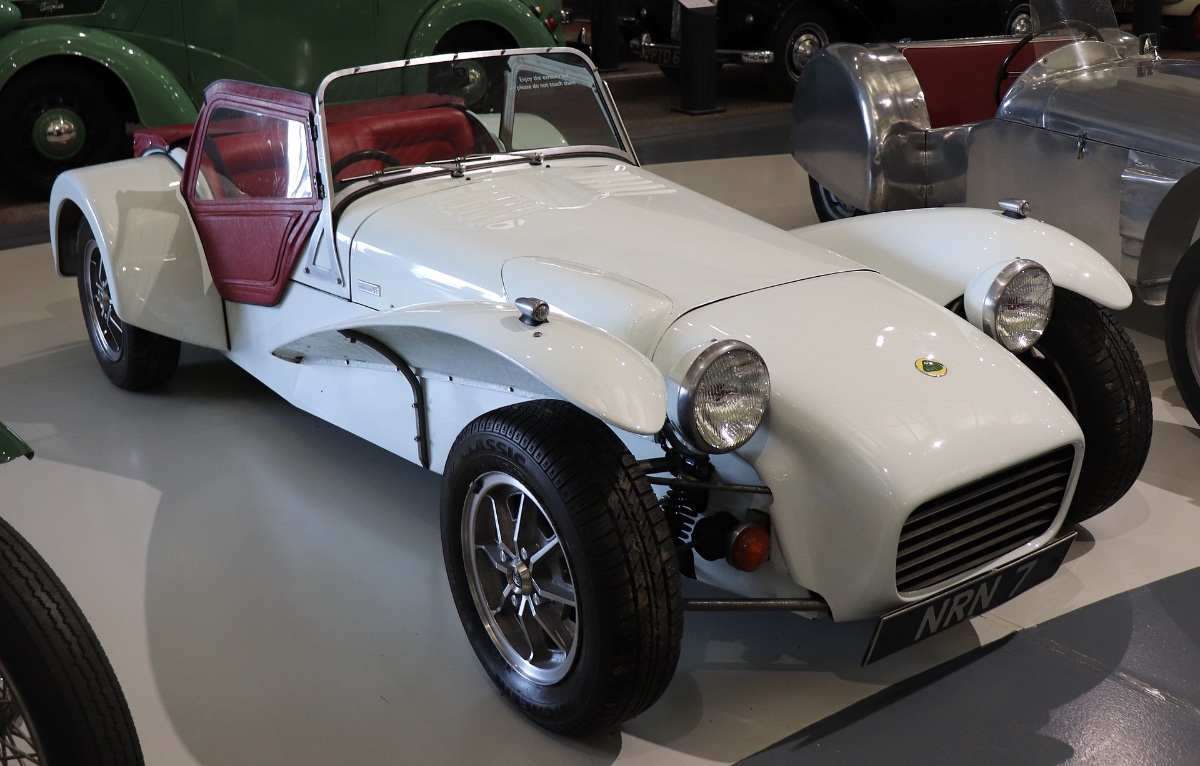
I only picked it because it is a white car, bright white in this instance, with red doors. I’m not sure if I like it or not . . ian
-
-
Don’t you think a red Trunk cover and Tonneau would look cool with a white body? I visit Lotusandcaterham forum often. I find very little ‘Lotus 7’ content on there, but for the cost of entry it probably is worthwhile. OMG! I’m horrified that you even think for a minute that I might commit such a heinous sin! Most of my chassis is still in the original medium grey. It will be going back to that color. Ian
-
Even though I’m very much at the beginning of my restoration I have been thinking of some finish items that come way at the end, but also have decisions that need to be made quite early. It appears my car was originally white, with red dash, seats etc, from the factory, presumably that would have been some variant of Old English White. Certainly what I am finding on the car supports that conclusion. I was always planning the appearance would be ‘of the period’, and what could be more ‘of the period’ than the original color? It seems there aren’t, or weren’t, many 7’s in white, and I think it could look pretty cool! I’ll go with red interior with white piping. What color piping should there be on the fenders (wings for my fellow Brits!), red, white, black or none? To pull this off completely I think I should get the trunk cover and tonneau in matching red with white. Should the hood and doors be red too? Then the question is, who makes these items in red? I’m guessing they might be custom, but I think it would look very cool! One trick will be to get everything to be the in same color! I’ve not decided on wheels yet, but it’s between lotus steel with hub caps, or Minilite style. Then there’s the color . . . White Minilites might look good! Progress reports coming soon! Ian
-
Hi, Thanks for posting this. Looks like someone was getting serious about weight removal! I have time, at least a year, while the rest of the car is restored, to as close to original, to find an original part that I can either use or borrow and replicate. An hour or two and I could have it reverse engineered . . . Ian
-
I was cleaning the windscreen today, scrapping off the RTV stuck to the glass etc, and on closer inspection I find the glass has a couple of pretty decent chips, an small area that has been worn, and quite a bit of delaminating around the edge. One area the red RTV has penetrated between the panes. All in all I think it’s worth, as part of the restoration, getting a new screen. Is there anyone else who’d like a screen, either a replacement or a spare? I’m just thinking we might get a better price for a number of screens. I’m probably going to 2 screens (1 spare) for my Series 2, if any one is interested, let me know and I’ll get a quote for a quantity. Happy 4th to you all! Ian Ex-Brit! 🇬🇧🇺🇸
-
Hmmm . . . Any chance of a picture or two? Thanks Ian
-
The one in the last diagram is probably the closest and easiest to make work. I’ll probably get one to visualize in place etc. Ian
-
Temporary is a relative term! When I might come across an original part is impossible to predict. I like the E-Stopp or similar systems because they utilize the existing cables etc. I believe I can hide it away so it’s not challenging the appearance of originality, and other than 4 holes I think it can be removed with no permanent alterations. The company is local to me so perhaps I can get a look at one before making a purchase. Ian
-
How about this until I can find/make the correct parts? It could be hidden under the scuttle, in front of the dash with the button out of sight. Might be a reasonable, but not inexpensive, compromise at $600, but I think it would get me through an inspection. Ian
-
I think you’re probably correct! I don’t think it was the original source however, at this point I believe it probably was a Lotus original part. Maybe the ratchet was from another car, but I don’t think it was a direct fit. Ian
-
I think this might be MG Midget. My plan is to keep my car as close to original as possible so I’ll be keeping the original position even though I think the conventional tunnel mount is probably more effective. Ian
-
Hi, I appreciate the offer, but I have lots of photos. I believe that to be effective the mechanical dimensions/geometry need to be correct, so my goal would be to carefully measure the original part in order to replicate it as closely as possible. I’ve looked at all the Triumph levers going back to the Standard 10 which is the source for the axle, and none look similar. The Lotus ‘motion’ is also reversed, pushing on the cable outer rather than pulling on the inner. Ian
-
I have been looking for a handbrake lever for my ‘61 Lotus 7 restoration without any positive leads. Like many others, I’ve tried to find a likely source from the ‘60’s UK Car industry parts bin; also without any success. I’m also aware that I’m not the only person looking. So, what to do? I, we, have to have a functioning handbrake to get these cars tested, titled etc., so a solution must be found. There are a few non-original solution, but for me that is not an option. A reproduction will have to be made. Looking at pictures of the assembly it doesn’t look too difficult. With the idea of reverse engineering the lever assembly, I need to find an original example that I can measure, scan etc and then re-engineer in CAD so that parts can be made. Does anyone have a Lever Assembly that I could borrow for a few weeks to do the reverse engineering? I don’t believe the demand is large, 10-12 perhaps, maybe another 5-10 for future restorers needs, so the cost is likely to be high, but I don’t believe there is another option. I, for one, am reluctantly prepared to pay the likely price. Do others feel this way? Thank you, Ian
-
Hi, I’d be happy to purchase you extra material. Look for a PM Thank you! Ian
-
I’m going to order up some rubber extrusions from a couple of places to see what works best. If all else fails it think black silicone or some specific sealant will work too. I’m just just getting my blast cabinet back up and running so I can blast the steel strips, then some zinc primer and a coat of black. Not that anyone will see them . . but I’ll know Ian
-
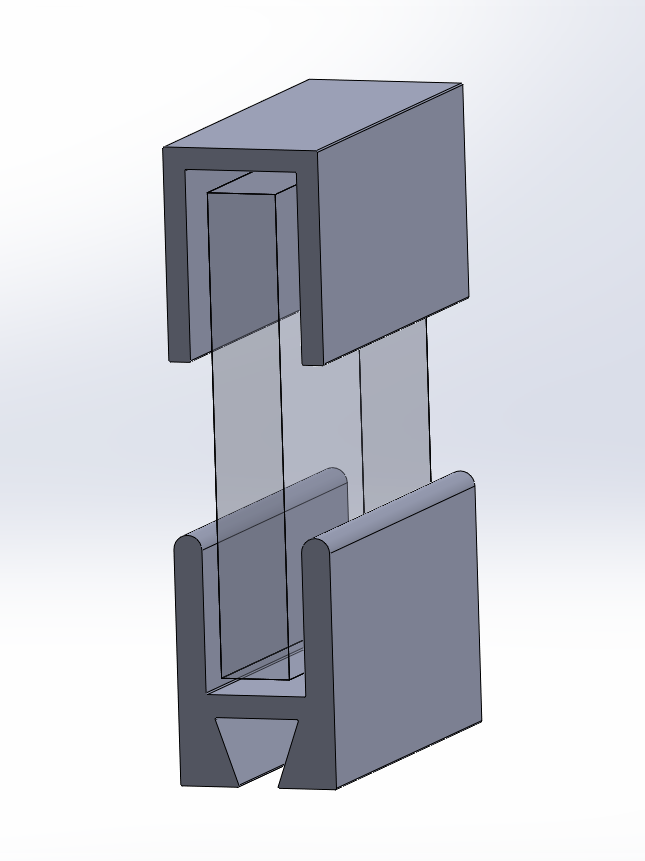
I’m still trying to settle in my mind how to go about re-sealing the windscreen in to the Aluminium channel. I thought about the MG TC, TD even MGA etc as they use a very similar arrangement. If you search on YouTube there are a few helpful videos. Then, I thought I’d take a look on Moss Motors to see how they show the arrangement and what they sell for it. And there it is! Quite well illustrated and they sell a roll of flat, overly wide rubber. I assume to trim back after the installation is complete. I’m not sure rubber is compressive enough, but I’m going to get some anyway. I’m also going to order some similar rolls but in a few different durometer in foam rubber, or neoprene. I’ll test out a few options. Water will not be a major concern for me, I just want the glass in there securely, not rattling etc, and if it’s 90% waterproof that be a victory! More will follow! Ian PS. I should say that this method is what a couple of people had posted on here using a bicycle inner tube. I did not really fully understand the process, but did feel that an inner tube might be a bit thin. I have a gap of about 0.060” on each side of the glass, I think from memory, so I’m thinking a natural thickness of 0.080” or 0.090” would be a good place to start.
-
What isn’t in this section is the steel strip that does occupy some space. I’ll measure it and include it ASAP. Im up early today. Starting a new job after the implosion of Virgin Orbit. Ian
-
Just for those that are not aware of these two places that might be helpful. www.carbuilder.com www.woolies-trim.co.uk Ian
- 1 reply
-
- 2
-

-
Here are the dimensions of the earlier section. Ian
-
What are you saying? I'm going to get wet?!! Good job I live in Southern California!! Ian
-
So I just fit the top steel strip and I see how the snap posts screw in to it and it does position the screen vertically, the side strips position it laterally. But how is the glass sealed to prevent water etc? Is the channel just filled with some kind of sealant? What sealant might anyone have used previously? Thanks, Ian
-
No, I understand there is a seal underneath the windscreen assembly. My screen came removed from the body and there was no seal. I’m just trying to reassemble the screen frame on to the glass at this point. If the steel strips are all that positions the glass then what fills the .06”-.07” gap between the glass and the aluminum channel. Maybe in the ‘60’s when this car was built they used the steel strip and fill the gap with a sealant. These days Caterham use a rubber extrusion. A much better solution in my opinion providing the size of the channel and the glass remains the same. This video shows the extrusion I’m trying to replace. Ian
-
This is the basic section through the windscreen FYI. So I think you can see how the steel strip would fit on top of the glass and then the sealing would be with Butyl or Mastic, but if you want to use a rubber seal it's one OR the other, but not both. Ian