SK400
-
Posts
210 -
Joined
-
 Croc : do you know which date related equipment requirements they will look for in Oct 2026? (Seatbelts, helmets etc others). Txs.
 -
Hate to admit it but I unfortunately agree. The truth is that I was getting tired of beating Simon and bruising his ego all these years… so thought he deserved a bit of fastest lap time glory and a break. I think he had enough of fame and time to bruise his ego again.
-
Penciled in as well. hope to have the car sorted and one or two shake down track days in by then. thanks @Croc and @yellowss7 as usual for organizing this event. It has been way too long for me!
-
I think it should be good and will work. I recently bought and installed a race De Dion tube (only has an extra reinforcement bracket) and no issues. I have a minus 2.5 degree rear camber which may help a bit in full disclosure. I have Apollo 13” rims and other 13” rims. I would not put any rim balance weights on the first 2 inches from the inner face of the rim thought. Worse comes to worse, you can lightly file one of the corners and it should work.
-
Rear uprated ("race") brake upgrade finally done
SK400 replied to KnifeySpoony's topic in General Tech
KnifeySpoony I’m installing the updated rear brake calipers as we speak. I had read and heard from Roger at Meteor not to install a bias valve because it destroyed the brake feel and rather adjust the bias and rear locking risk using different rear pads with lower friction than the RS pagid pads that come with the kit. What are your thoughts? also would you mind showing how you connected the biais valve to your master cylinder? thank you -
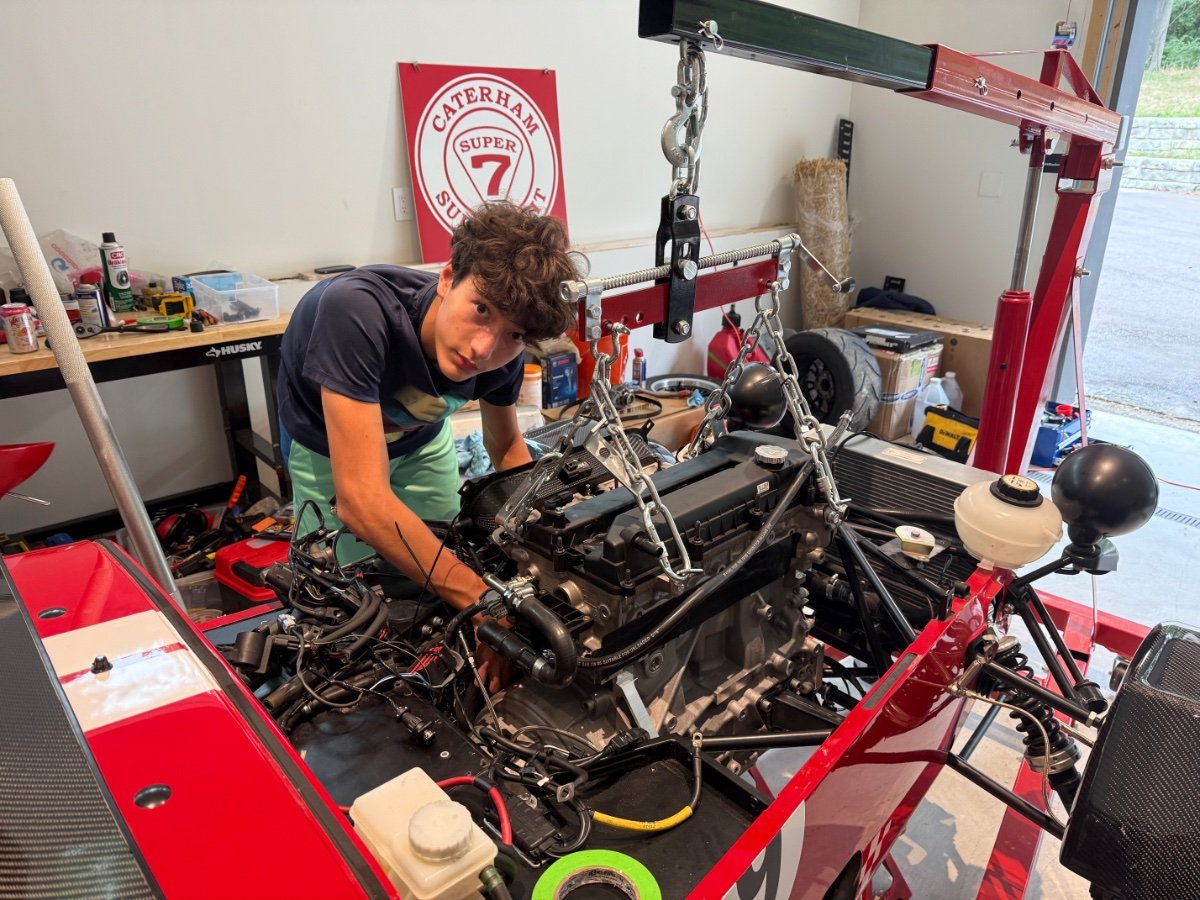
Replying to myself since I think I solved it. I had to split the gearbox and engine at the bell housing, insert the gearbox straight into the tunnel, and lower the engine vertically after having removed the serpentine belt and all the various belt pulleys to create clearance. I then managed to align the engine and gearbox, clutch disk splines etc and brought it all together in the car. Torquing the bell housing bolts in place was not too bad. Let’s see how the rest of the build goes ….

-
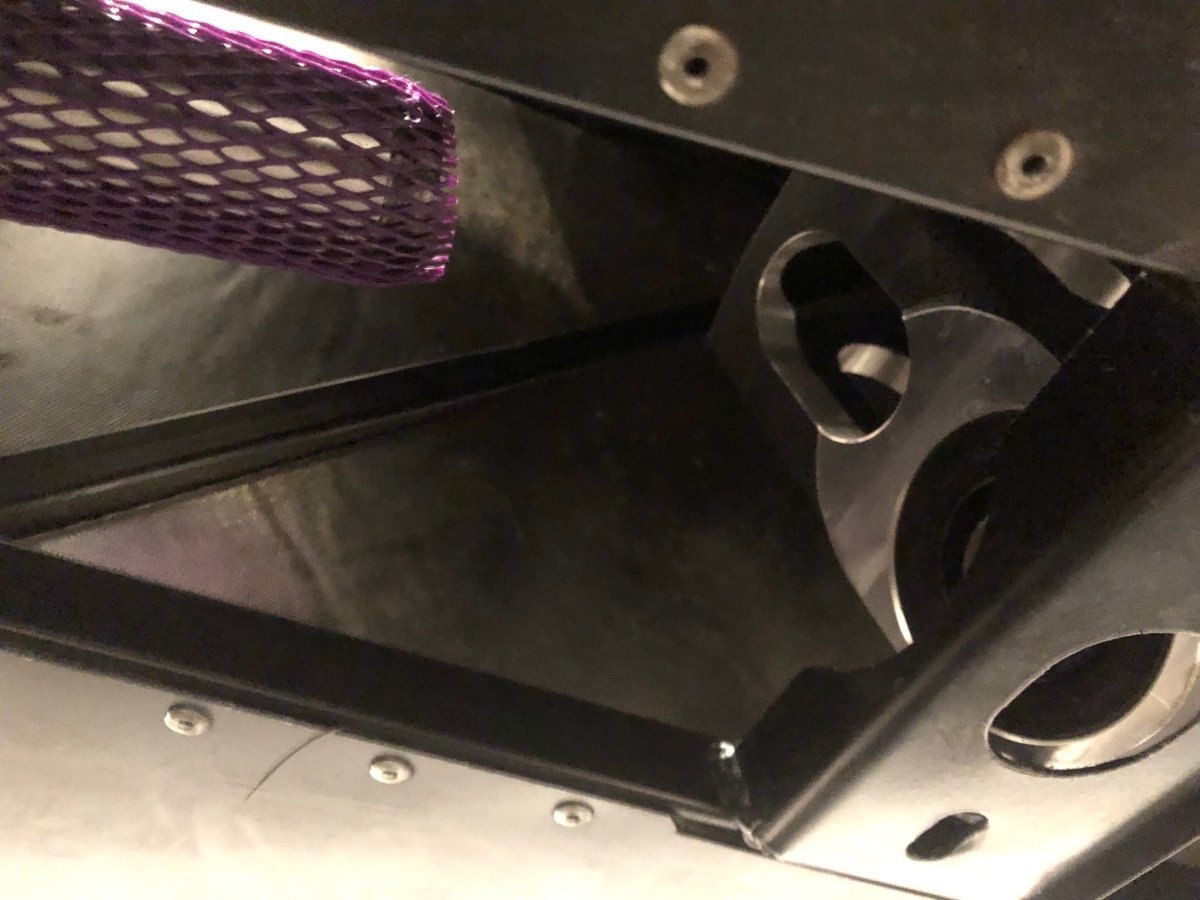
Hello all Has anyone installed a Sadev in an S3, 2013 r400 frame? I used to have a 6 speed caterham gearbox and could pull out and reinstall the engine and gearbox assembly in matter of minutes with no sweat by inclining the engine and the car chassis. I finally received my freshly built Esslinger 2.3l engine, now bolted to a brand new Sadev sequential. I’ve been trying to install the assembly into the car, but to no avail. I’m missing 0.5” of clearance it seems, distance between the rear sensor boss and the end of the gearbox resting on the gearbox mounting plate. I can’t seem to find a way (see pictures). Whats the trick if I may ask? Any help would be much appreciated. I hope I don’t have to modify the frame or gearbox mounting plate. Thanks much Seb
-
I’m in the process of installing. In fact, I’ve been struggling to get the right fittings to connect properly to the bias valve. I assume caterham fittings are ISO bubble connectors. How did you install your bias valve? Next to the driver and cut through the rear copper line or closer to the master cylinder? if the pedal feel firm when the valve is closed, that’s at least a good sign. But I think what you are describing is what Roger at Meteor Motorsport warned me about. I’m trying to install in a way that I can remove valve or change if I don’t like the feel.
-
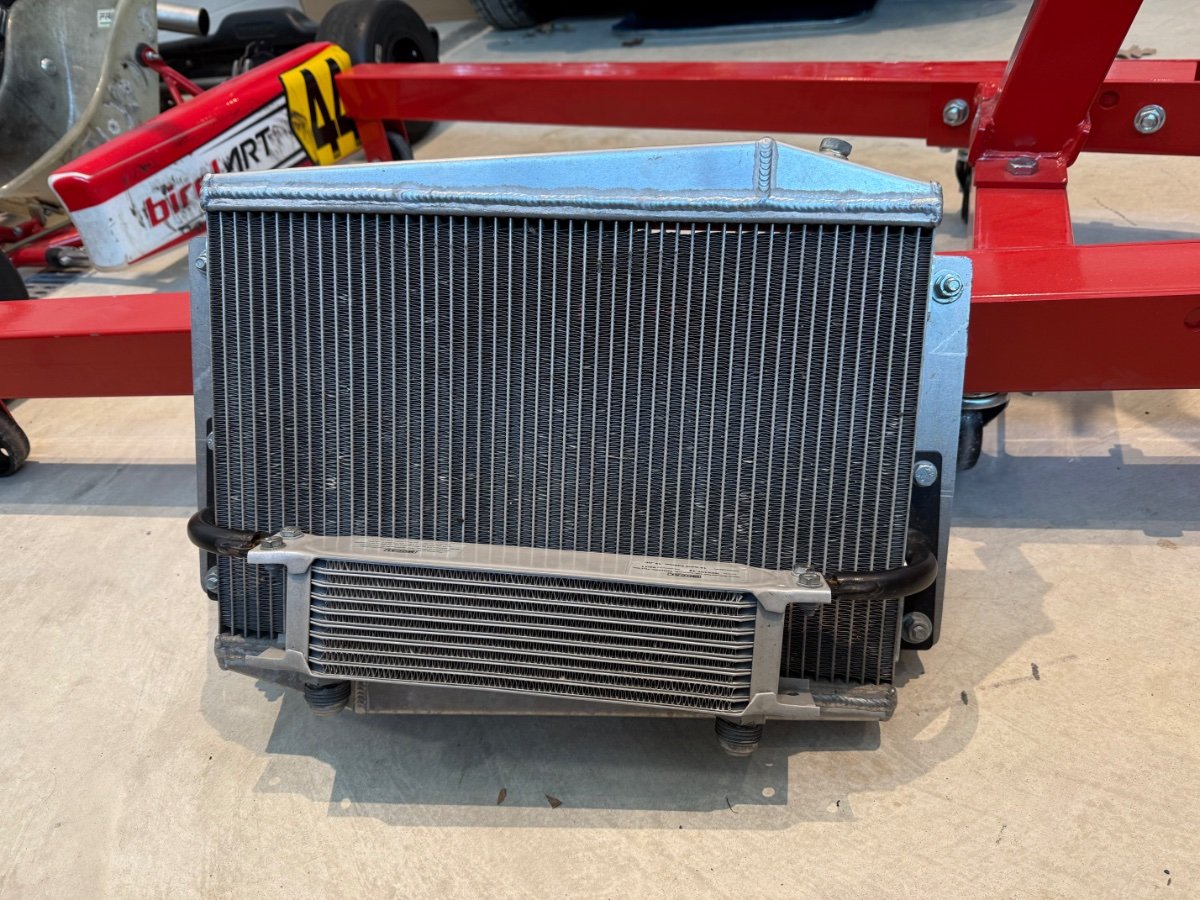
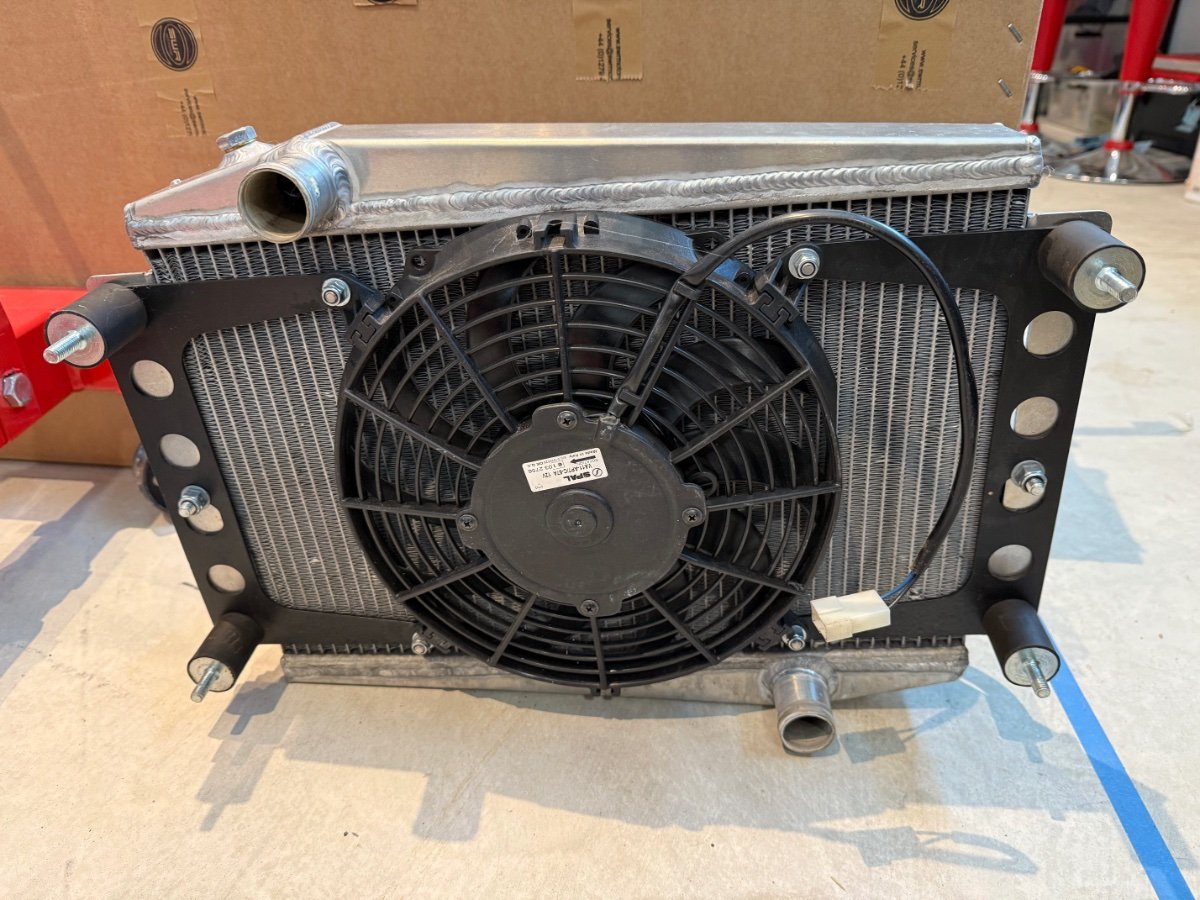
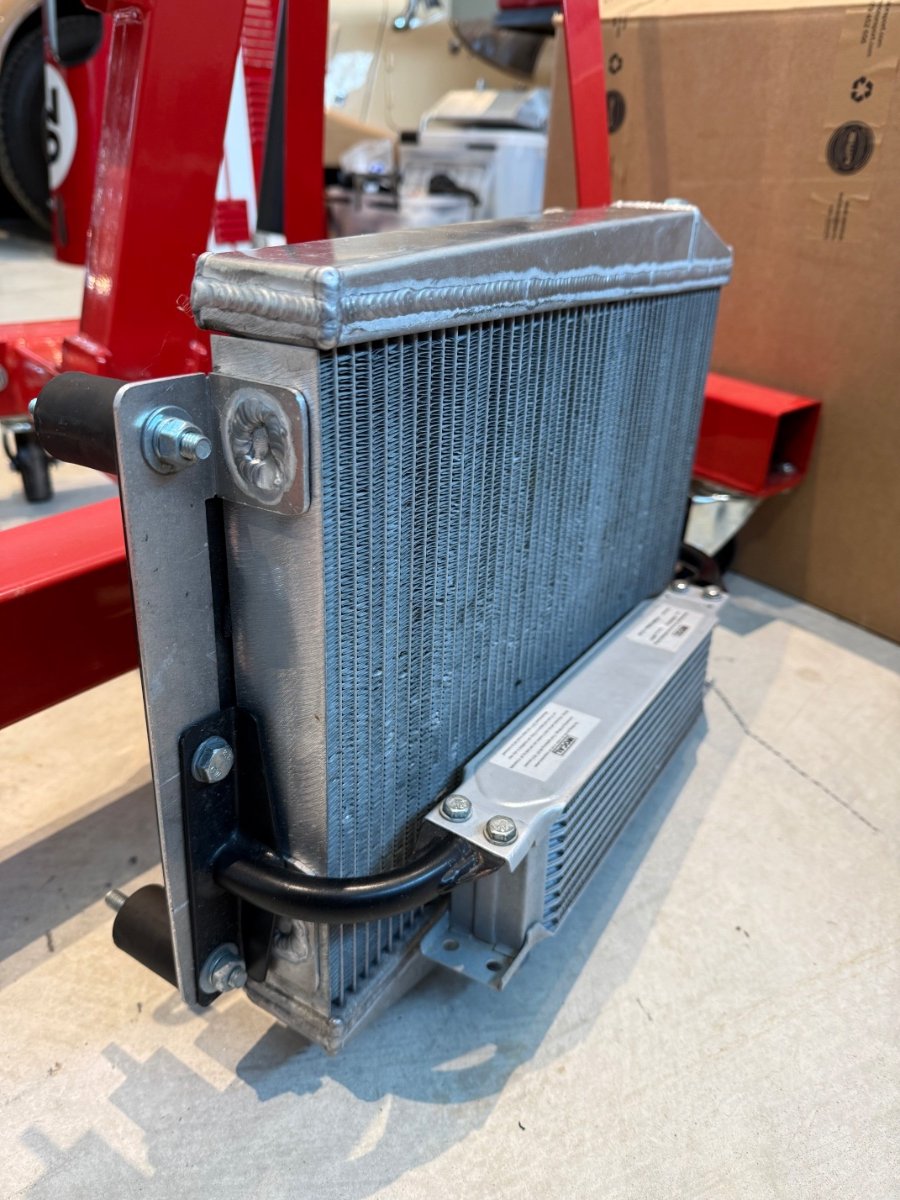
I have a 2013 r400 before they were called 420R but it’s essentially the same thing. The radiator, oil cooler and electric fan combo is in pristine condition, arguably like new. I’m selling it because I replaced it with the slightly larger new radiator model and integrated oil cooler that come with the newer caterhams or the 620r as I was upgrading to the R500 powerplant. Just because. I also have the newer race nose cone to fit the new radiator. attached are the pictures. @vovchandr, let me know if this would work for you.
-
In an effort to clean up my garage, I have a few R400 S3 parts for sale: 1. One R400 Aluminum radiator and one R400 Oil cooler and oil cooler mounting bracket combo, used and very good condition 2. One DeDion Tube in very, used, in very good condition 3. Two DeDion A frames, used, in very good condition 4. A set of rear brake calipers, Ferodo pads and disks, used and good condition 5. a set of Rear De Dion tube aluminum "ears" with negative 1.5 deg camber, used, look like new 6. a set of rear hubs and bearings, used, in very good condition 7. a set of front vented disks for uprated front brakes, used, 0.68" thick vs 0.70" new Let me know if interested. Questions welcome. Please feel free to send me a PM. Thank you.
-
That’s right. We moved a few years ago to Ann Arbor, MI. A great little town and some good local tracks. That’s said, miss the East Coast gang and our more regular days at NJMP or Lime Rock.
-
I’m upgrading my current 2.0l duratec R500 block to a 2.3l and have, as a result, have a few engine parts for sale. I have less than 1500 miles on the parts below and are in perfect conditions, essentially new. Parts for sale - set of R500 Ford Duratec 2.0L model Kent Cams DTEC35 - set of 4 K1 conrods for 2.0L ford duratec and matching King bearings assembled by Danbury Competion engine. - forged crankshaft for 2.0l Duratec, keyed for balancer - caterham factory ÉCU with R500 fuel map loaded - CR500 flywheel, clutch and pressure plate - optional 2.0l block and supertech pistons Questions welcome. PM me if interested. Thank you
-
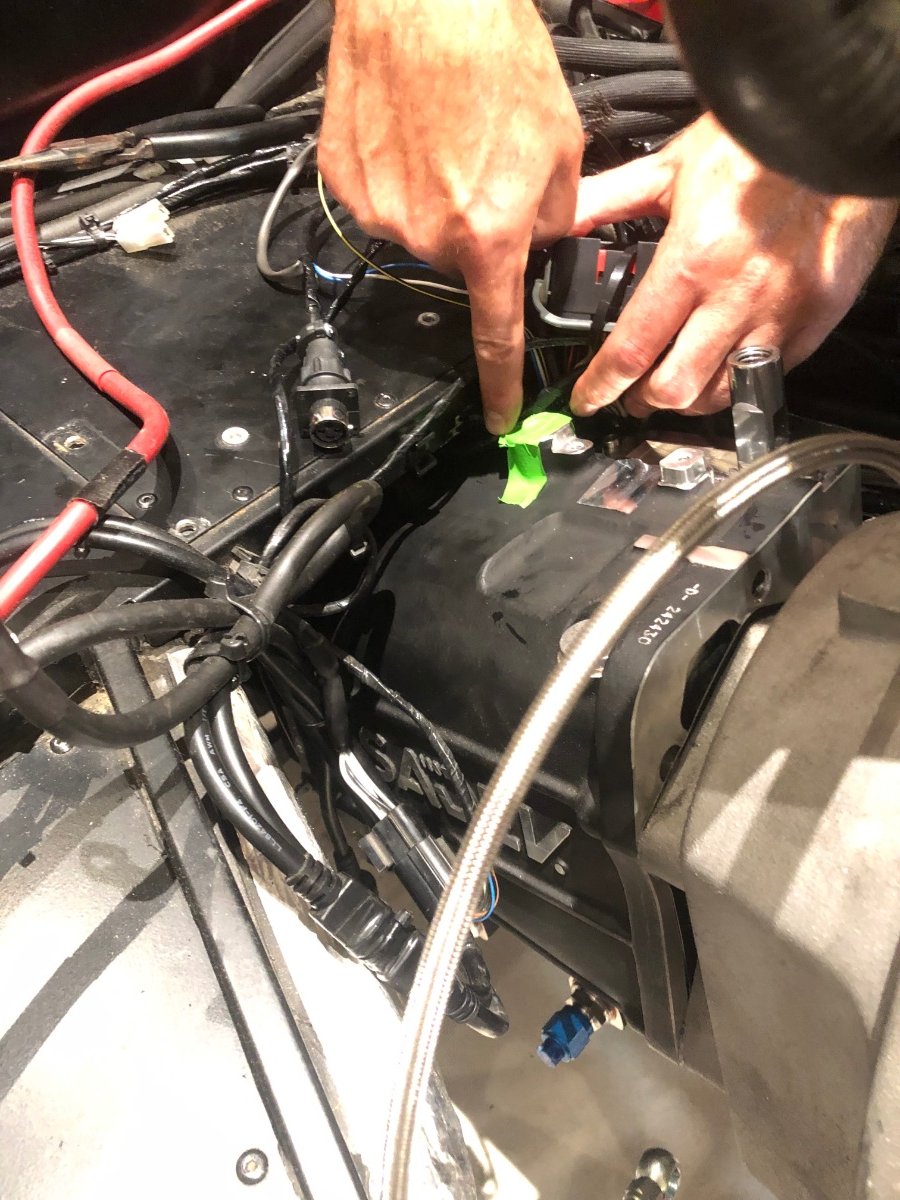
Alright. So on this topic,, BY10 and G9 should connect to “free” flat connectors under the dash. I haven’t looked at it yet but I remember seeing a few available zipped tied connectors in the past when attempting to mess around under with wires under the dash. These should be power. Special thanks toJosh from Rocky Mountain for this guidance. the BY3 and BY4 connector is for flat shift. Will need to connect the various pins to the ECU and may have to pull existing pins out and replace with those. Left is the rear switch. Need to connect the chassis rear green wires to that switch through a Deutsch plug. BUT … it will take a bit of time to see if all of this is working. After some regular engine TLC, I decided to upgrade my engine to a 2.3l with a short block from Esslinger, (just because I can’t let Simon win too easily .. although some of this forum would be quick to add that he would still win if he rode an e-bicycle around the track against most of us). Will keep current 2.3l ported head and valves (well enough for what I want to do) and probably change cams to match displacement aiming at 285 hp and 200 to 210 ft-lb of torque. With the Sadev, on a. s3 chassis, this will be mental enough and suspect that anything more than this will be fighting for traction …. More to come on this on a different thread
-
Thanks a ton Croc. Some useful info in the document. I reached out to SBD to see if they had any insights on the loom and pin connectors. I intent to have "flat shift" functionality programmed so had planned to reach out to Steve at SBD anyway to update the map I made with him. I will circle back when I hear from them.
-
I did not purchase from Caterham directly and perhaps to a fault and paying the “price of figuring things out now”, I decided to buy directly from the UK Sadev distributor (from which I had outstanding service and decent delivery lead times of 3 to 4 months). question for Yellow7 or Croc: do you know how your respective Sadevs are connected to your cars and ECUs? (Orange monster and CatKong) Thank you