vstryker
-
Posts
84 -
Joined
Content Type
Profiles
Forums
Store
Articles
Gallery
Events
Library
Everything posted by vstryker
-
I have a double stripes set from Caterham for my S3 with cutouts from the nose cone to the back of the boot. The stripes are 3" in width with 0.5" of space in between. It also comes with the "Caterham" on the sides of the car but I didn't put them on. http://i25.photobucket.com/albums/c87/vstryker/20150707_184245_zpsqmbxhvq5.jpg
-
If you are referring to the 4 intake ports that mate to the head, then they are 53mm ID x 2.0mm thickness as I just replaced mine as well. Cosworth Part # PR0142 but any O ring with same dimensions will do. Good luck!
-
Thanks for the feedback, Tom. Is the outlet (to water pump suction) of your radiator on the bottom driver side & inlet on passenger top? It looks like the extreme has the ports the opposite of what I want since my water rail outlet is on the passenger side like the CSR. I wonder if their 50 mm duratec model would be good enough & also if the extreme would even fit my smaller S3 cone. I'll shoot them an email & see.
-
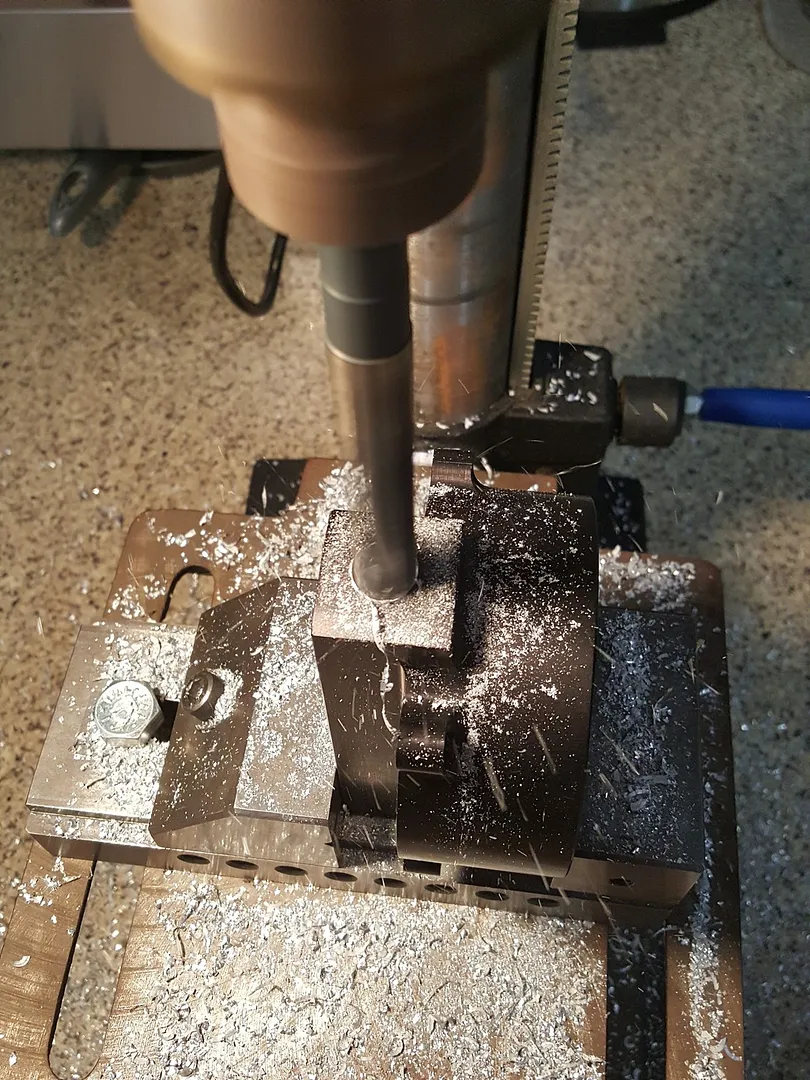
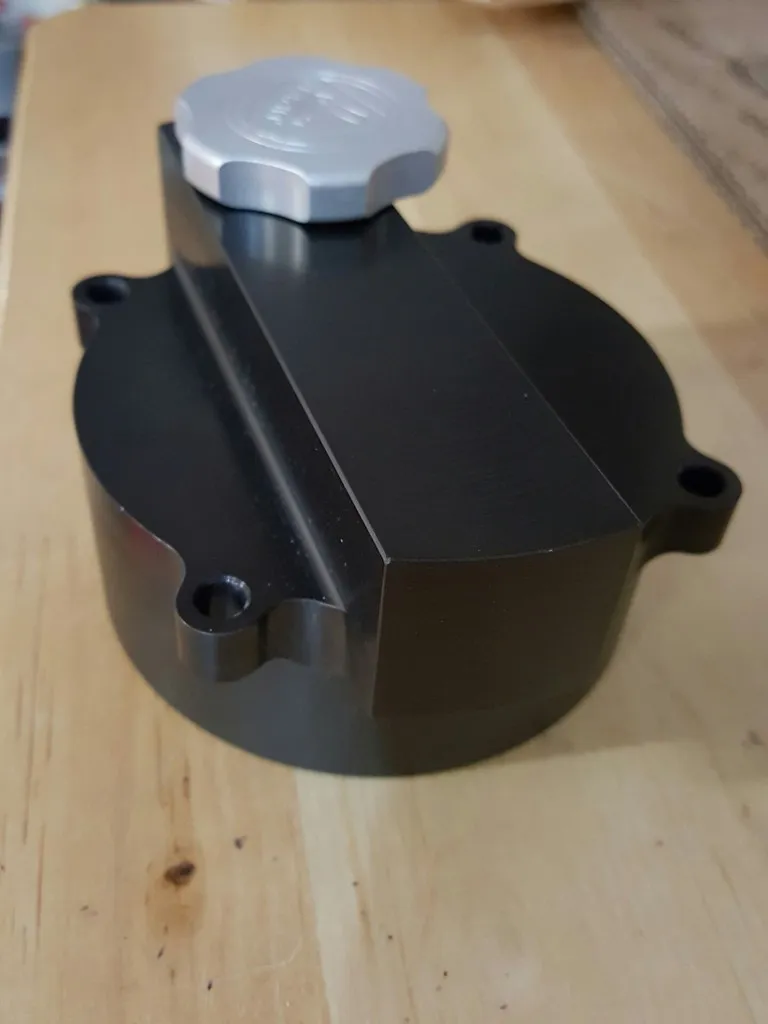
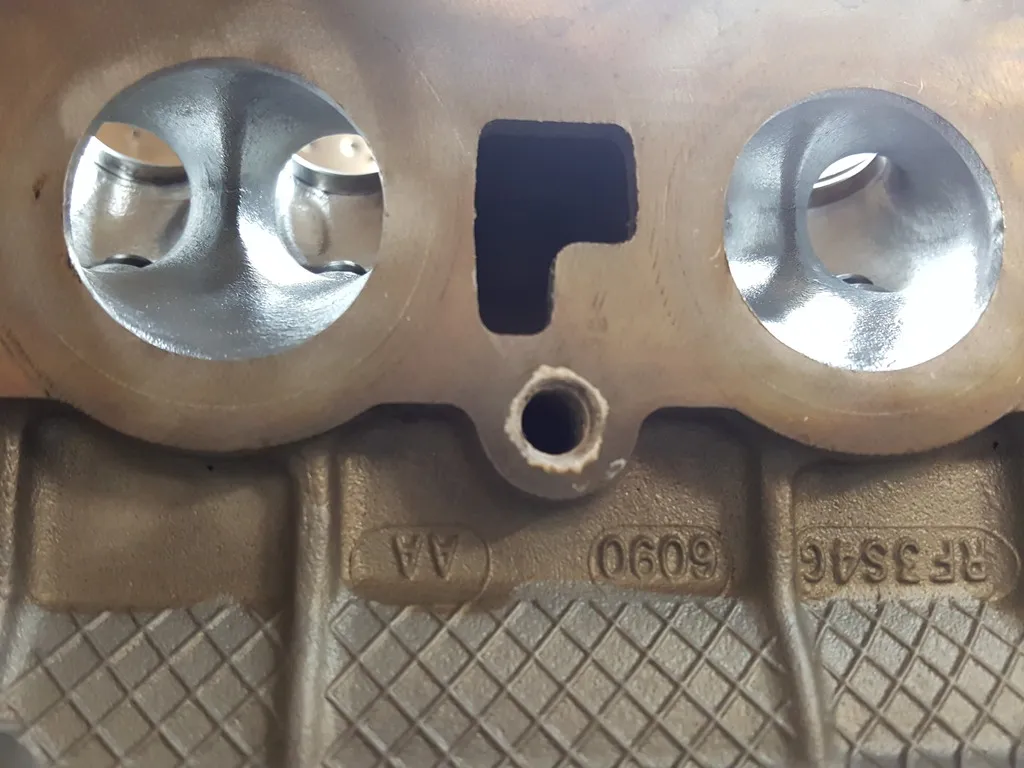
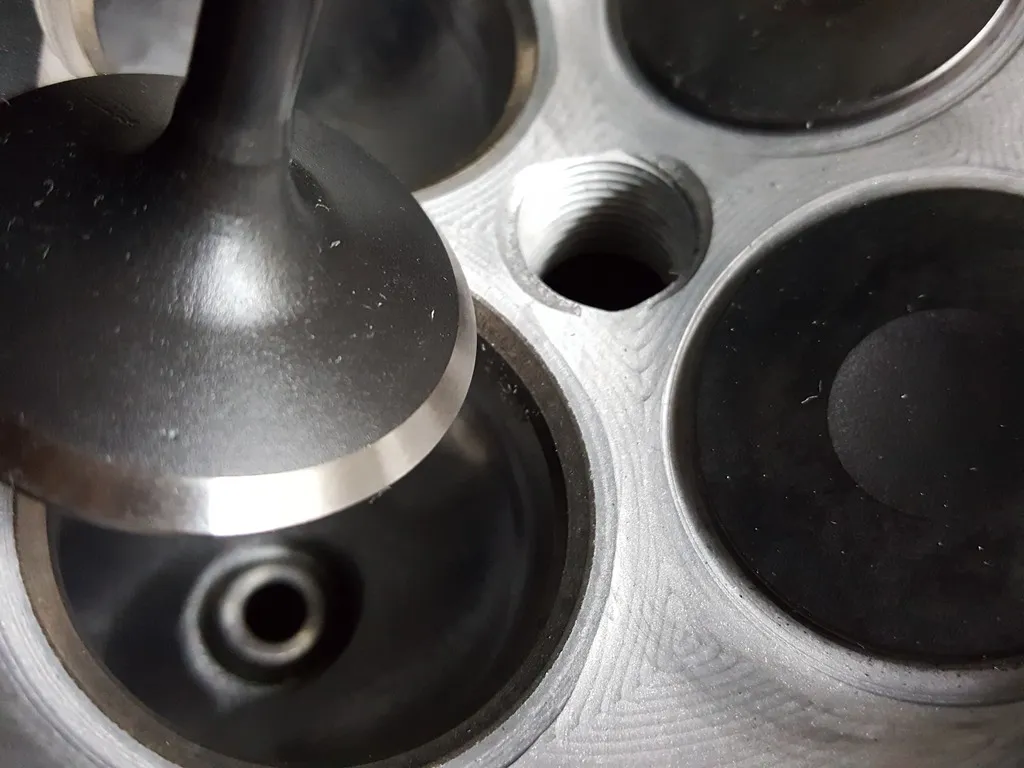
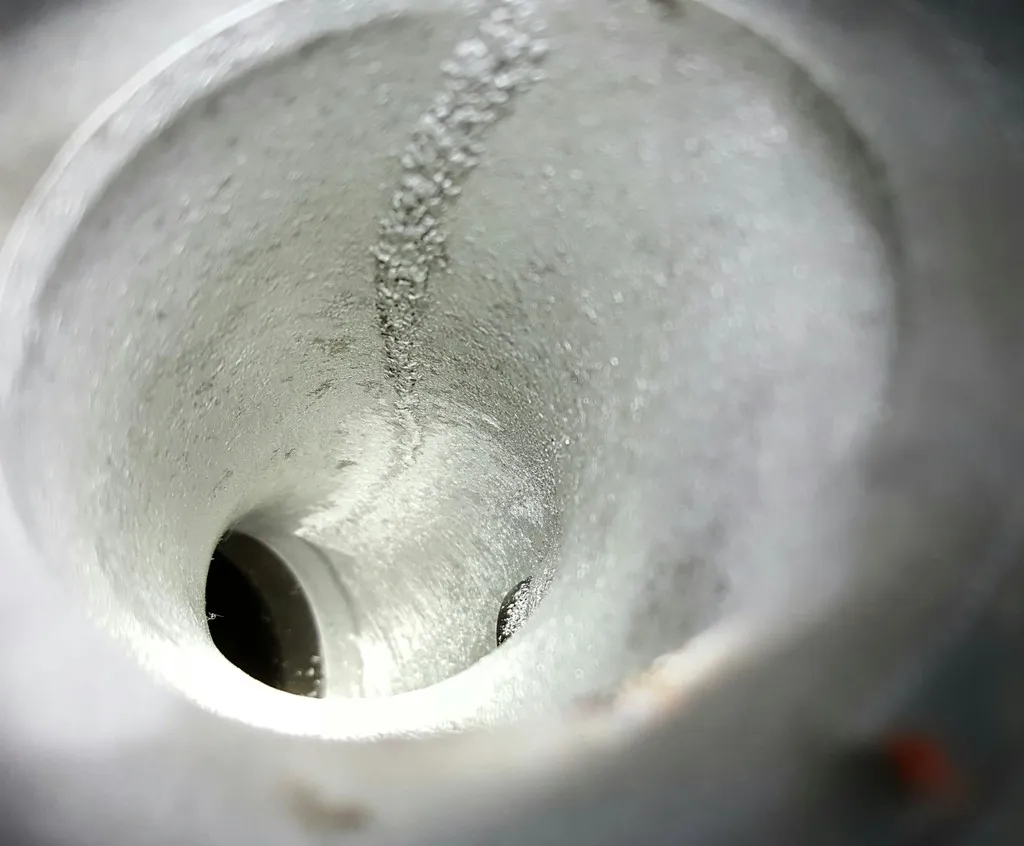
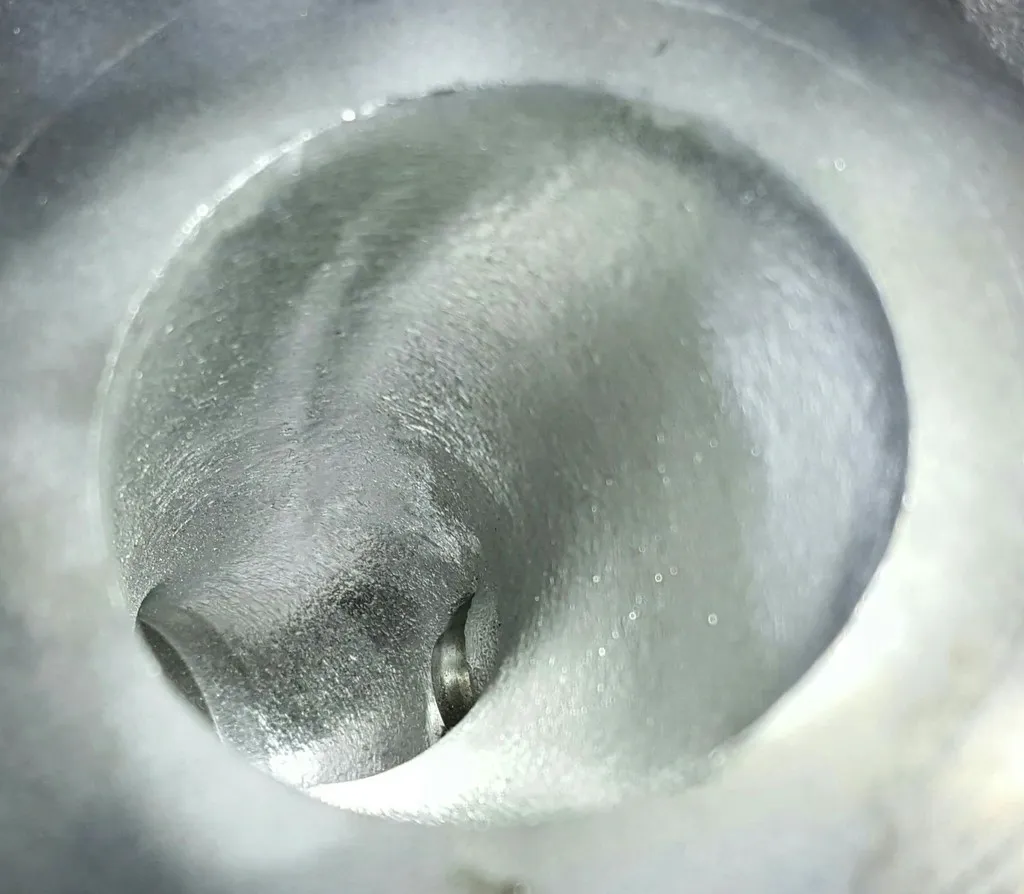
I tried to see if Caterham could help out & possibly send me a new cap with the ports drilled and tapped but since the part is currently out of production, it could take several months. Luckily, Bruce was able to send me a few good pictures of the cap & from looking at it over & over, I was able to figure out the different flow paths as there are several other ports that are connected & how deep & big to drill. After measuring the correct drill size, obtaining the M16 x 2.00 tap, & a few shots of Lagavulin later I built up enough liquid courage to mount it on my drill press. Drilled and tapped: From the above picture, the top port had to be drilled that it opens up to both of the top 2 larger holes. The bottom port has to go through the 2 smaller holes on the bottom and all the way to the middle port... but without drilling through to the top port if that makes sense. Waiting for some parts to move forward but does anyone have good experiences with Radtec radiators from the uk? I'm looking at this one: CATERHAM 7 DURATEC 60MM (radtec.co.uk) Seems like they make some nice rads, or if anyone knows a good multi-pass radiator that can be had here in the states?

-
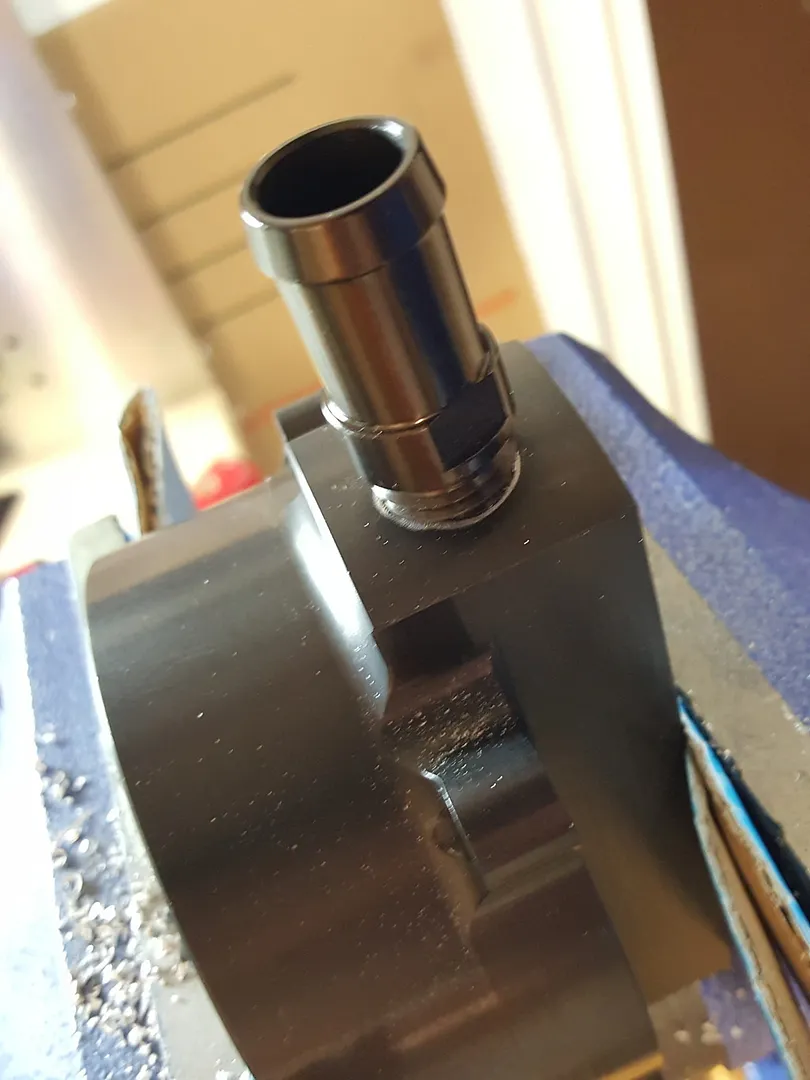
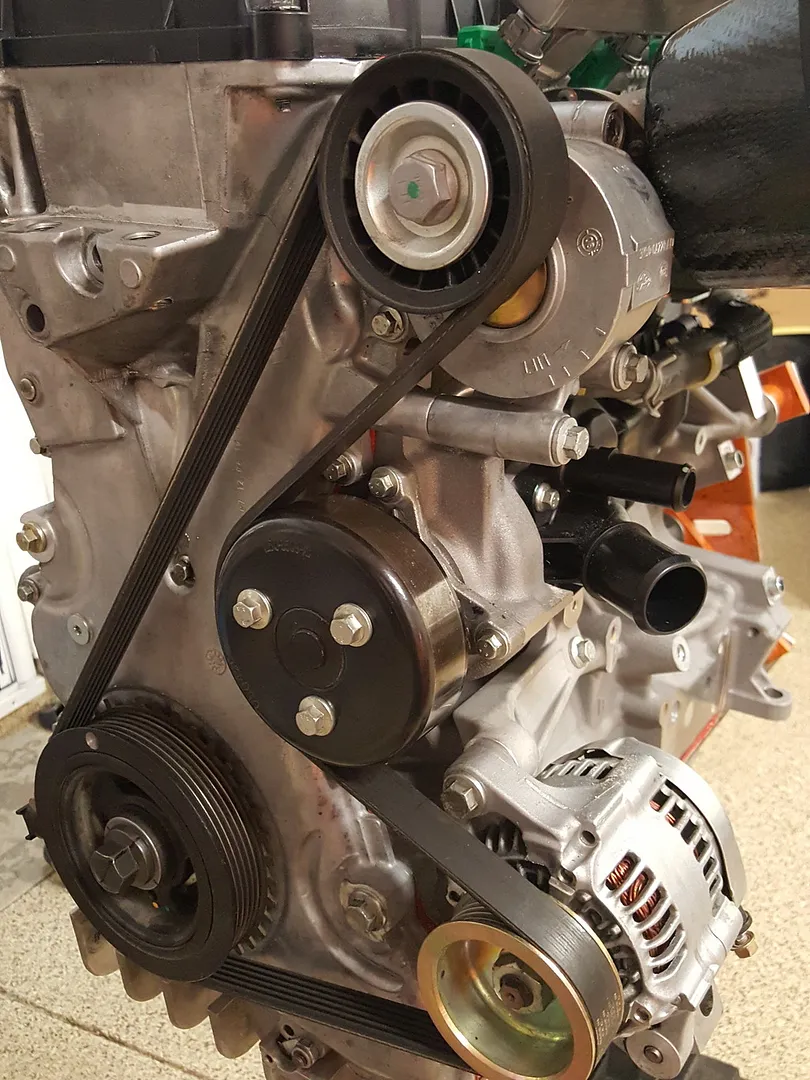
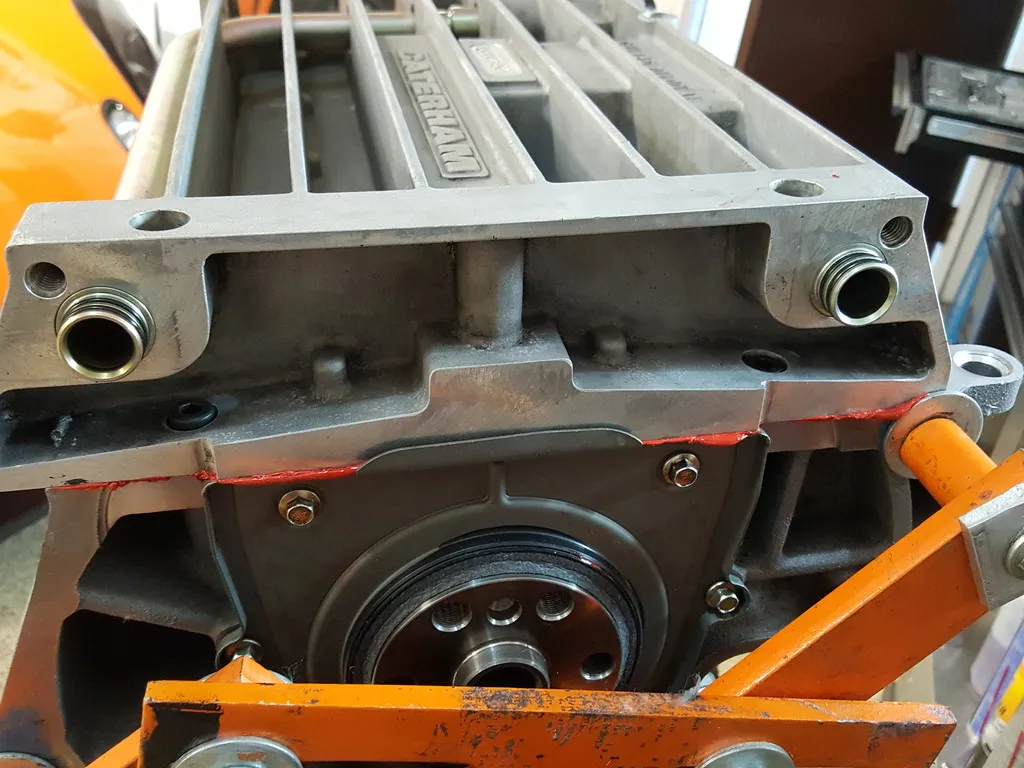
The idler pulley, alternator, water pump pulley & belt all went on without a hitch. As far as the engine block is concerned, it is pretty much complete. The engine block is pretty much complete so I turned my attention to the bell housing & swirl tank. Upon closer inspection & dry fitting of the parts, I found that the swirl tower top cap was missing 2 ports. Titan/Caterham must have forgotten to drill & tap the 2 ports on the ends of the cap as shown here. The 2 ports are from the valve cover inlet & outlet to the oil catch can.
-
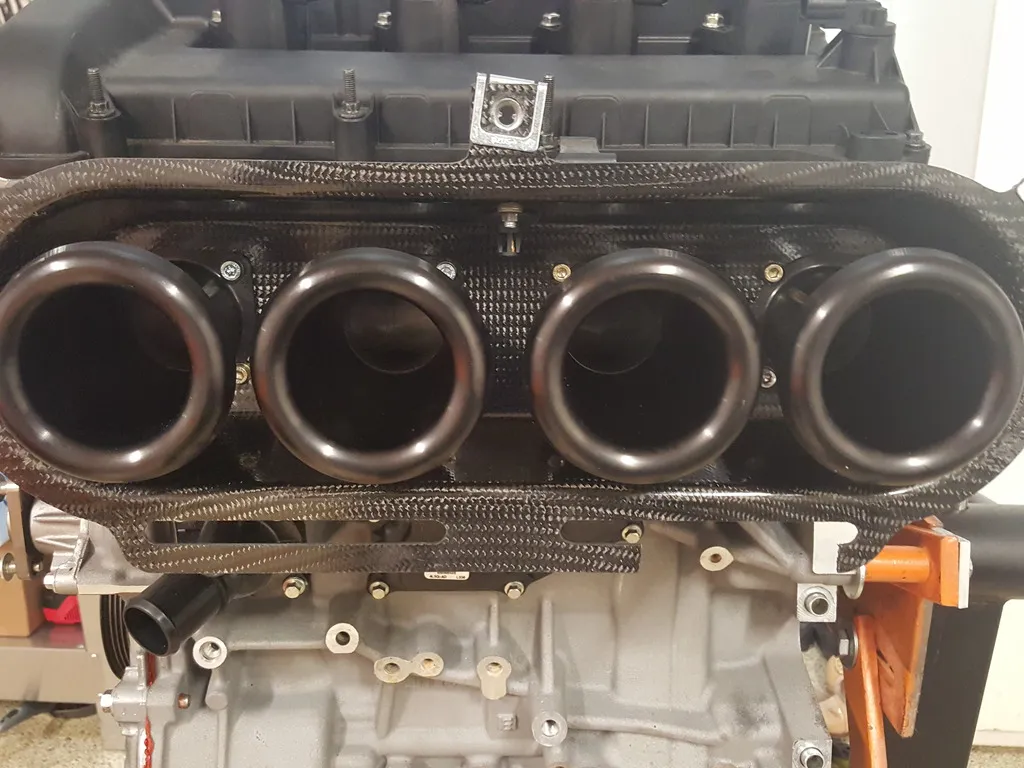
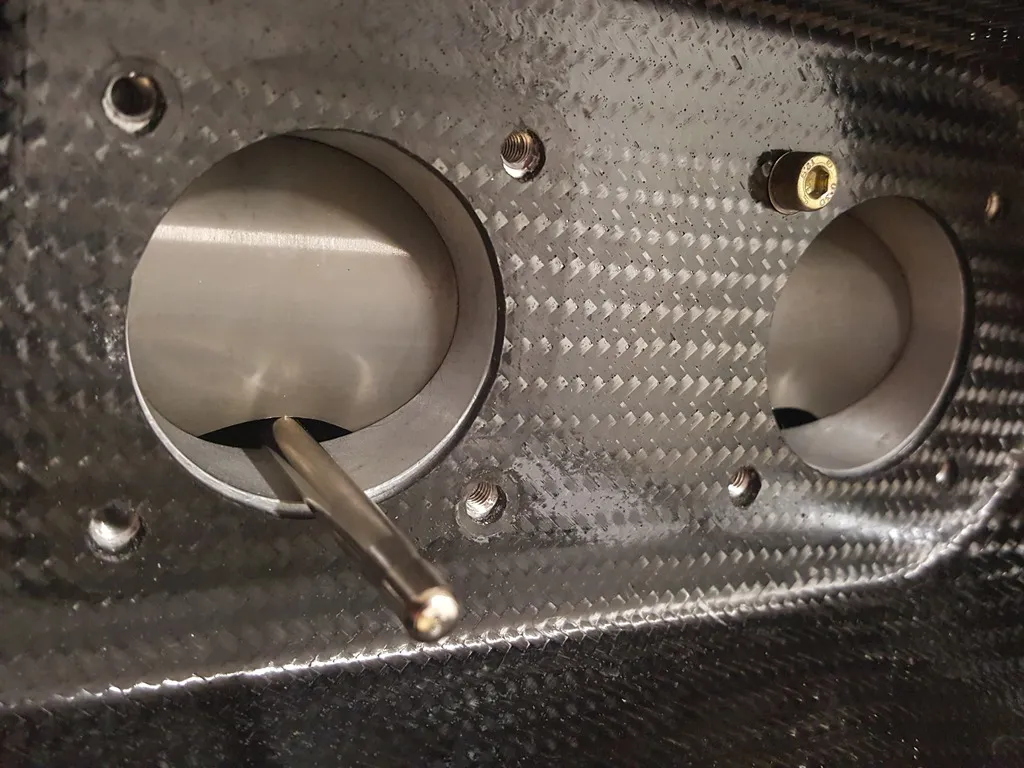
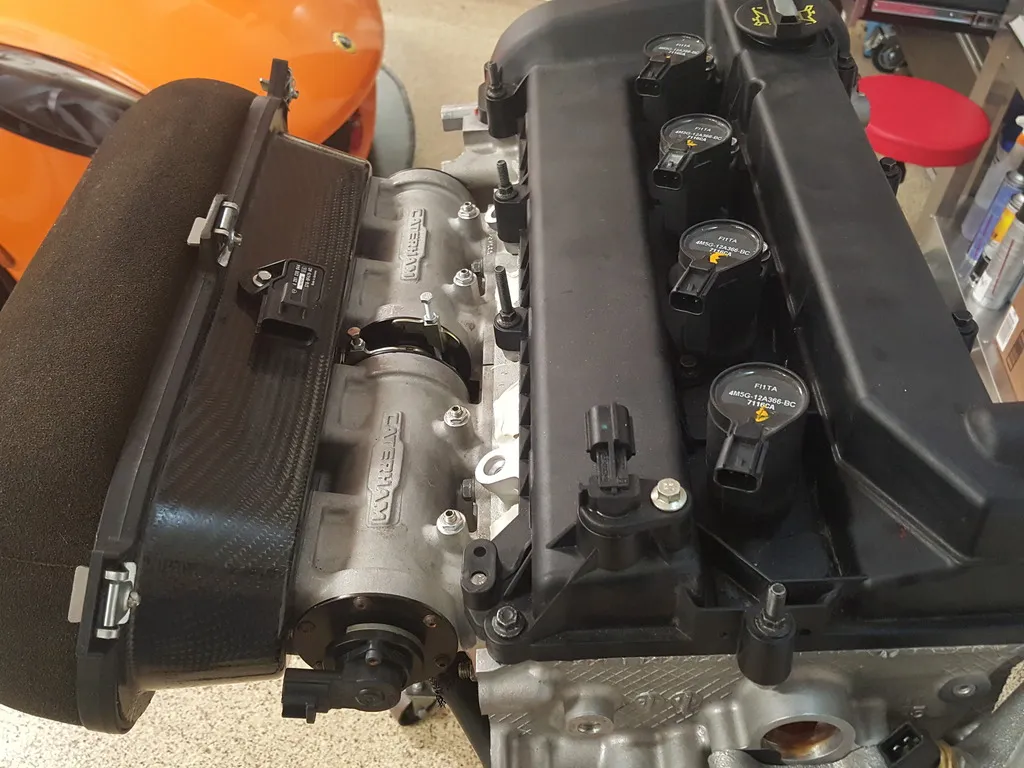
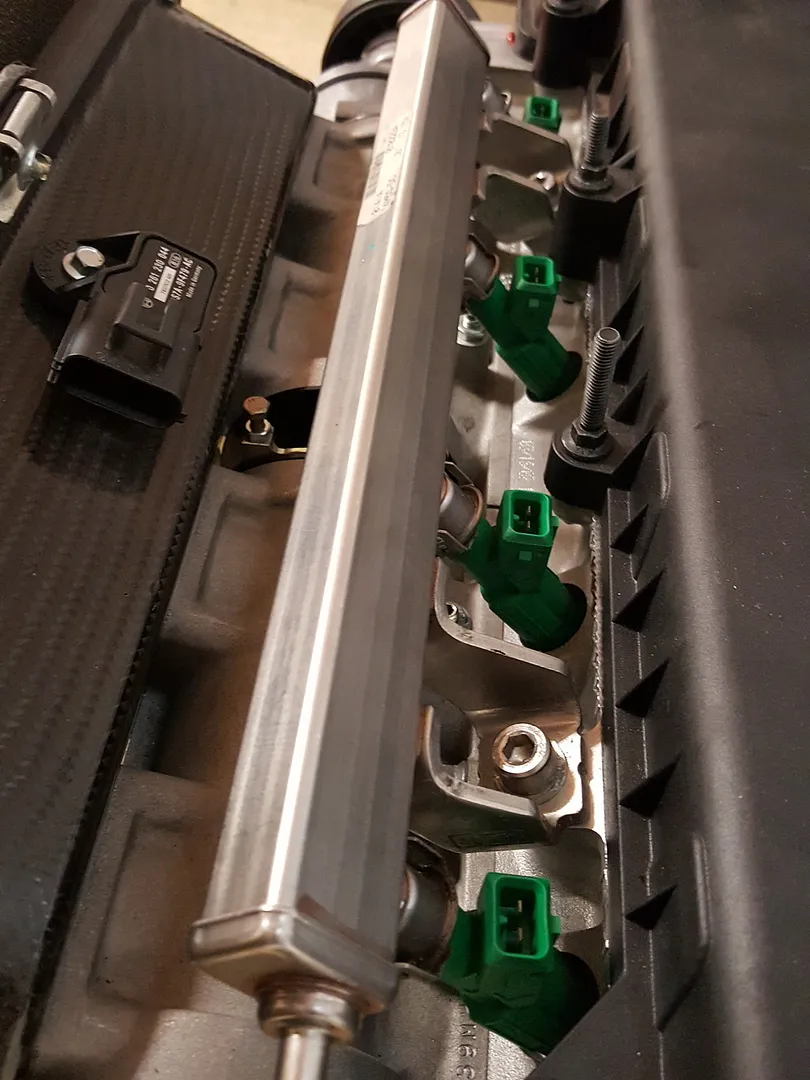
Had some time to finally install the Titan/Caterham 2 piece roller barrels along with the CF shroud and trumpets. The pair of cylinder 3,4 intakes have to be balanced with those of cylinders 1,2 using a 6mm blank rod when fully closed. The opening is actually on the backside of the roller barrels. I love how there is absolutely no restriction when the throttle is wide open but many have said these can be a little trickier to tune. Make sure to locktite the small bolts inside the shroud to prevent them from coming loose and being sucked into the intake. High flow Cosworth injectors & coils were next.
-
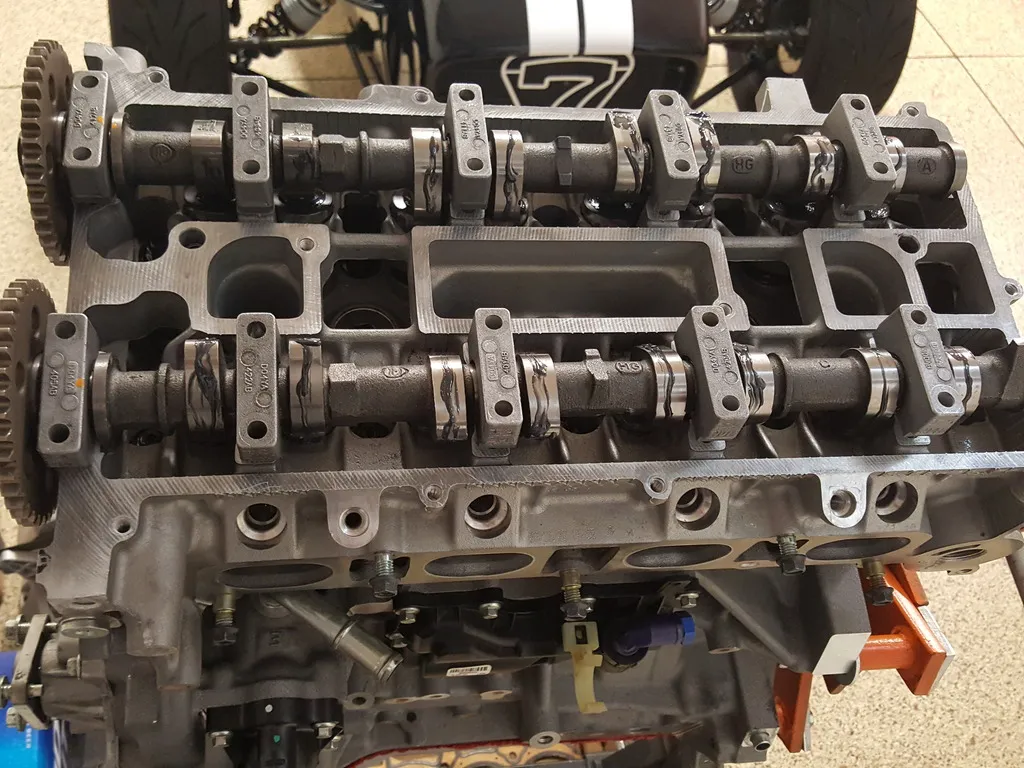
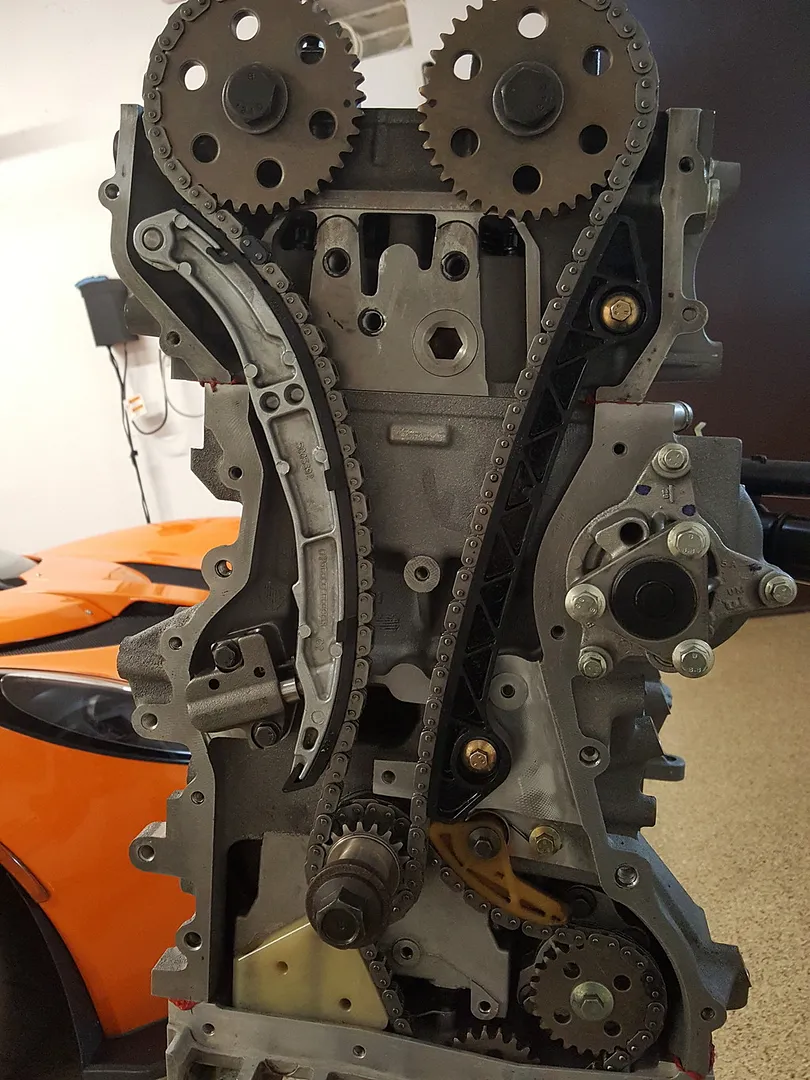
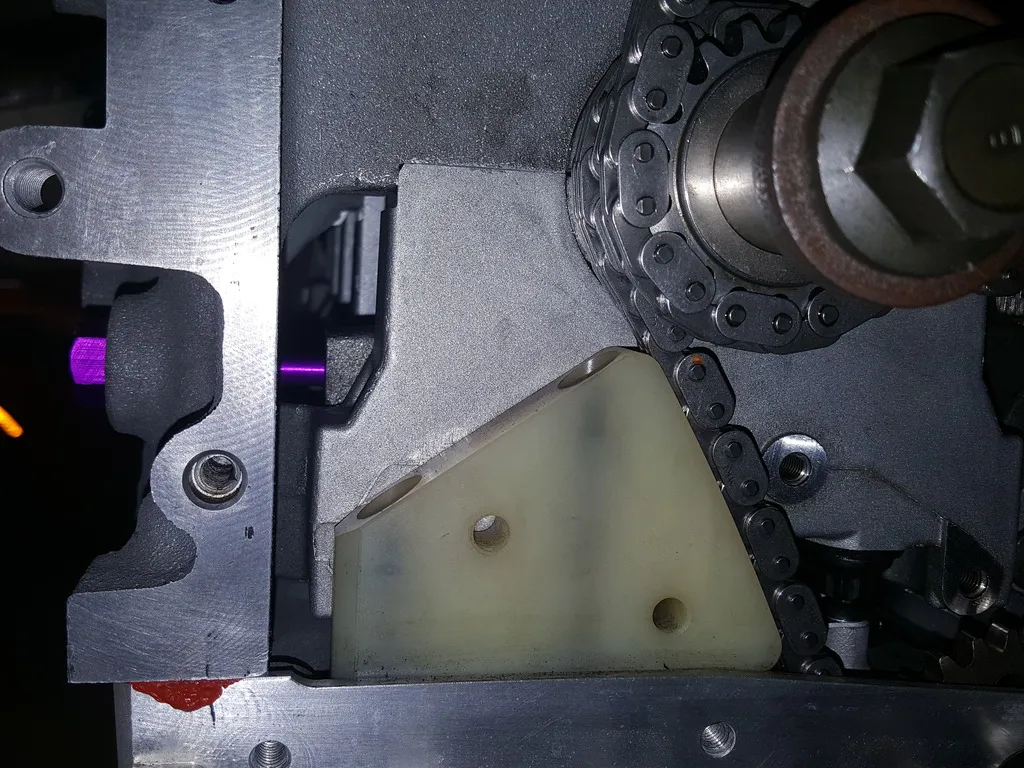
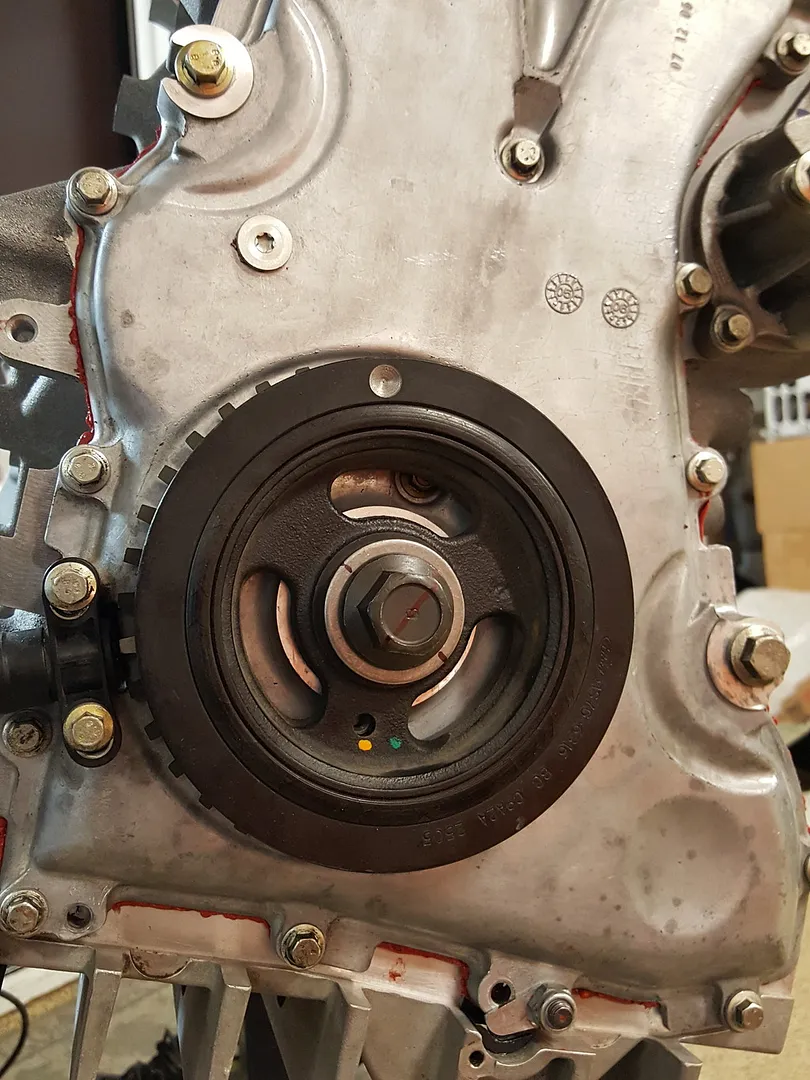
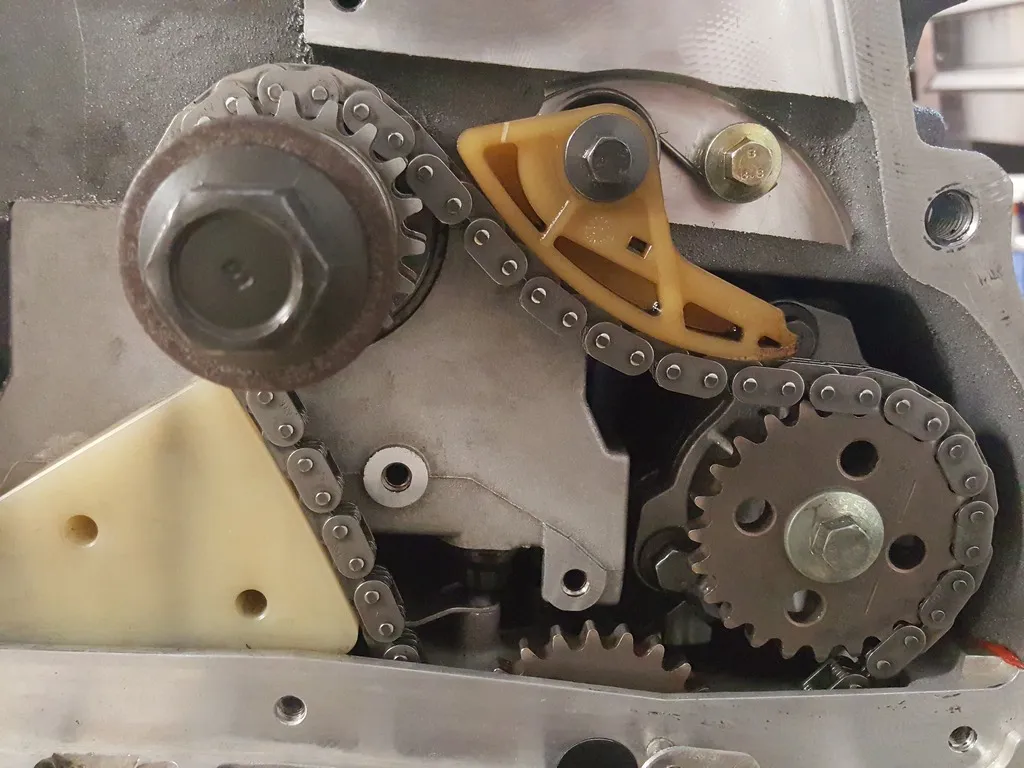
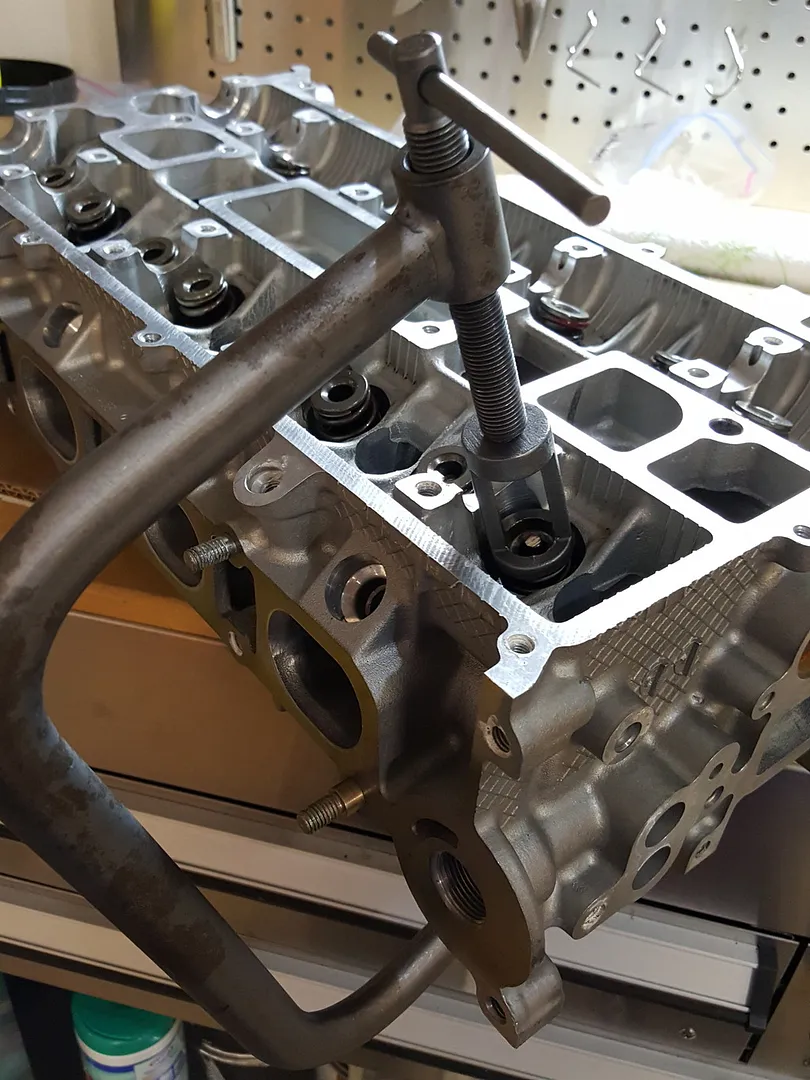
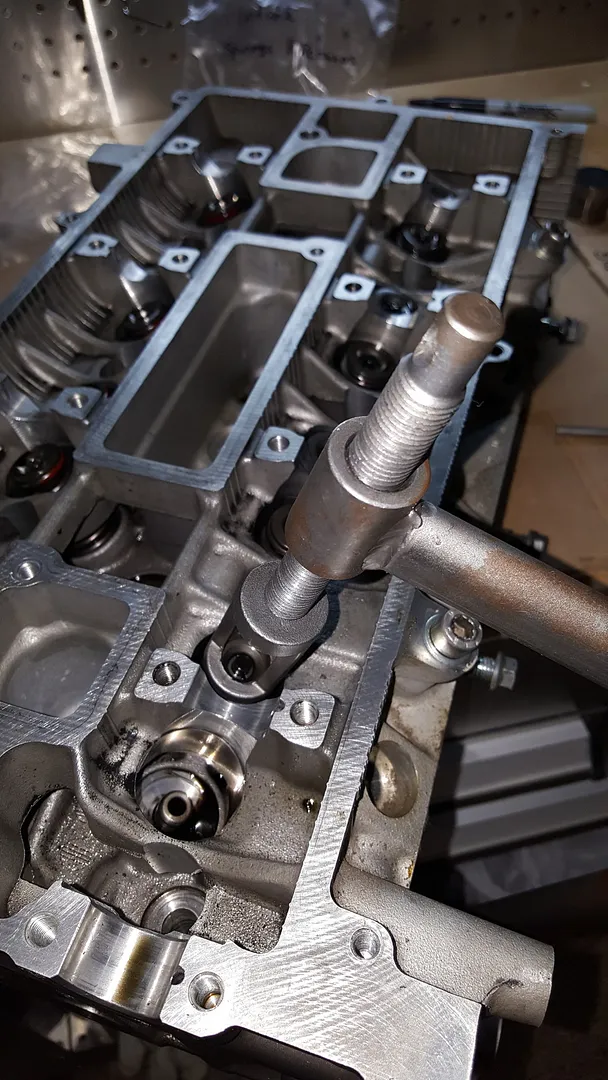
Cams, and cams gears are in. Then it was the timing chain, crank gear, chain guides, and tensioner. To set the timing, you have to set pistons 1, 4 at TDC using a timing pin that user Papak was kind enough to lend me. Basically a bolt with the correct length that when screwed in near the bottom of the block will set the Pistons 1,4 at TDC as you rotate the crank clockwise until it hits a flat section on the crankshaft balancer. You can see the bolt in purple touching the perfectly flat part of the crank. Next was bolting up the front cover and tightening of the crank bolt. I didn't have a second set of hands and it took me about 10 mins of sweat, tears & lots of cussing to finally get the last 90 degrees on the crank bolt. I had the flywheel locked on the back end, with the cams locked, the timing pin in & a 3 foot cheater bar. I was warned and indeed it was a tough mother... but nothing a few ice cold beers couldn't cure.
-
Unfortunately, they do not on the 260, I think maybe in the 280 as an option but they recommend doing it on 300hp motors. You can buy a keyed billet crankshaft & gear though. I thought about it and kind of regret not doing it for the extra insurance. In the future, when and if i want more power, id definitely get the crank keyed or go for the $$$ billet.
-
Special shout out to Bruce at Beachman Racing for helping me with the build so far. A wealth of knowledge in all things Caterham, especially CSR related. First class outstanding service! Bruce not only quickly replies to my countless emails, calls & questions, but the prices on the parts he has are very reasonable as well. He's also currently helping me with the crossover loom.
-
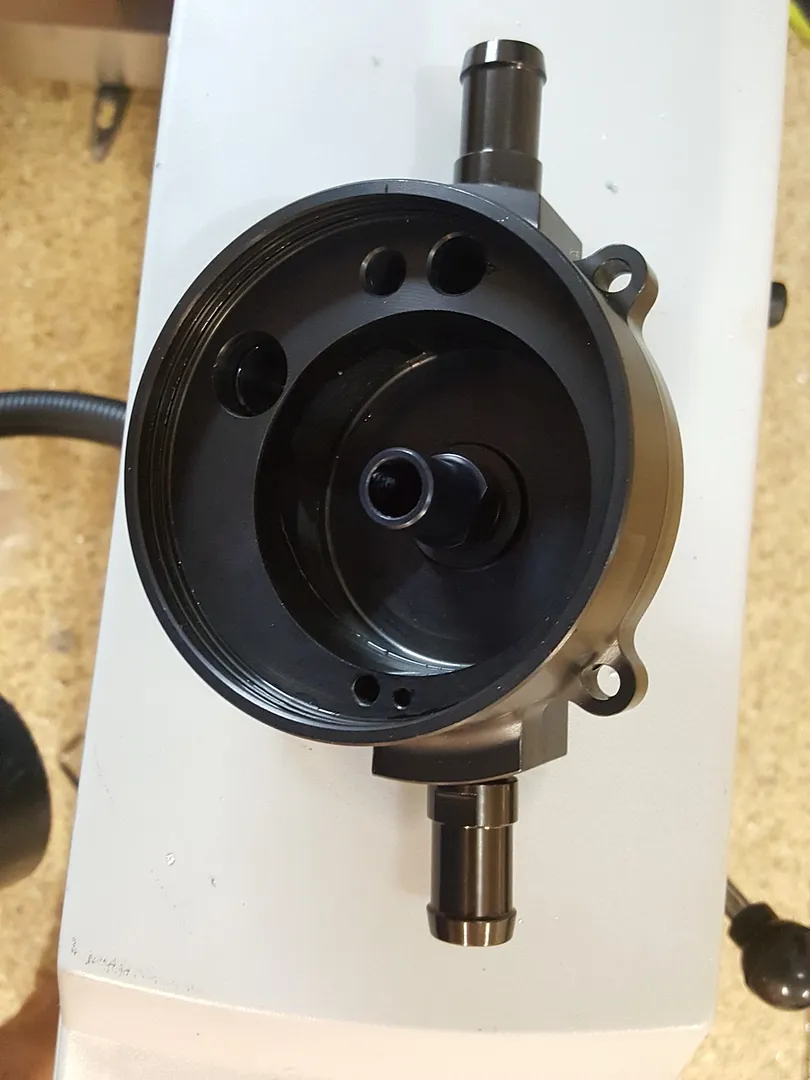
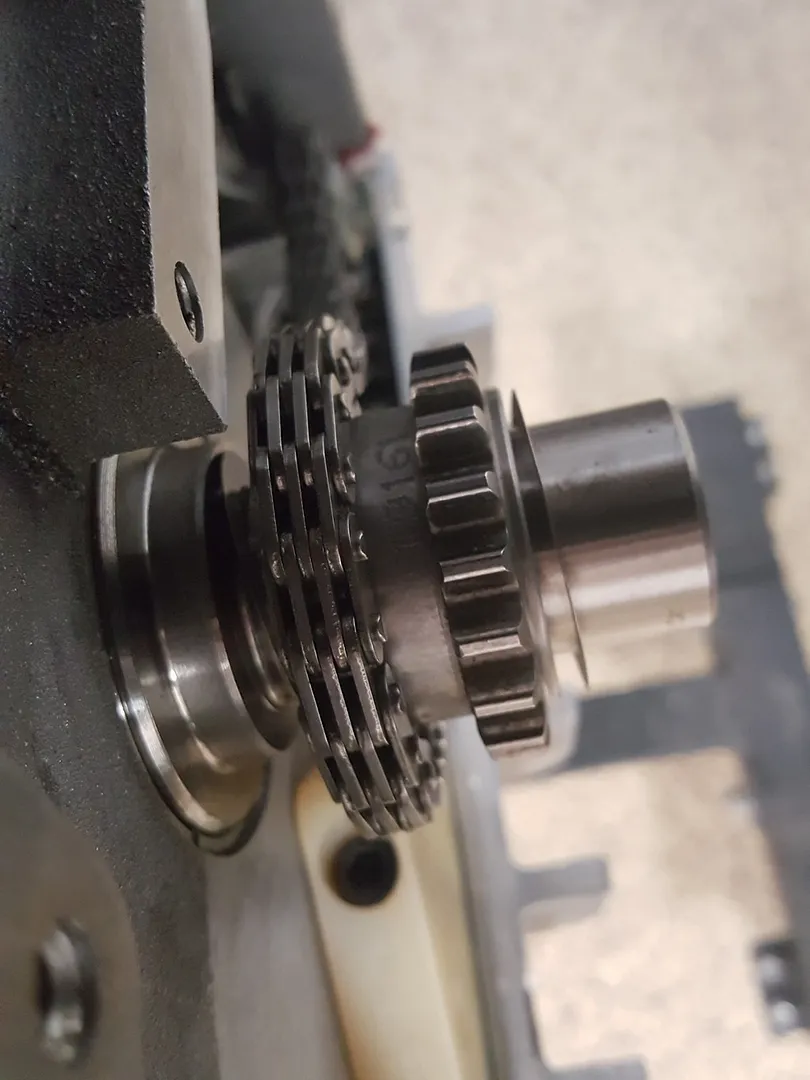
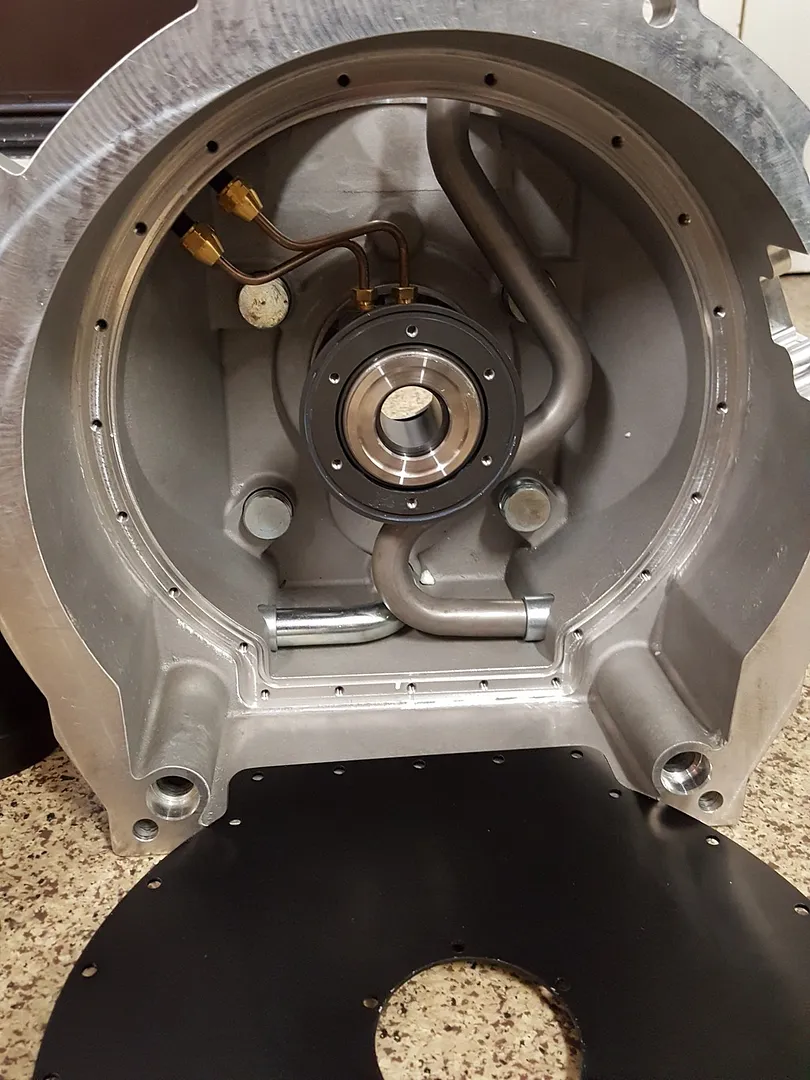
I was finally able to get the missing pieces of my cosworth/Titan CSR dry sump. It is a 2 stage system with an integrated bell housing tank & swirl tower. Originally, i had planned to use an R400 bell housing & an external dry sump system because I could not source the swirl tower. Luckily a member who built a CSR chassis but is going with a different engine had one for sale. It is quite a bit more expensive but the whole unit is nicely integrated. It uses the uprated oil pump and a scavenging pump, which is driven from the same oil pump gear. The main pressure pump is on the right while the gears to drive the scavenge pump is on the bottom. There are 2 scavenge suctions on the pan, one in the front & one in the the back. The scavenge pump sucks oil from the pan & discharges it to the top of the swirl tower. The tower sits on top of the bell tank assembly and aerates & swirls the oil downwards to the tank. From the bottom of the bell tank, there is a suction line that goes to pressure pump which gets oil to the engine. Here is the pan all bolted up, the hard oil line connections all have double o rings. From this pic, the left is the suction to the main oil pressure pump & the left is the discharge of the scavenge pump going to the swirl tower. A pic of the 2 one-time use friction washers. One on the inside and other on the outside. The CSR bell housing tank side. Again suction to main pump is on the left while right is the discharge of the scavenge pump. Another reason why I went with the CSR setup is that the slave & release bearing is also integrated and makes for a very clean install.
-
I thought about higher compression with the rebuild but since mine is not a track only car, it was difficult to justify race gas all the time. I was so tempted with your car when the previous owner had it for sale...that motor mated to the sequential...:drool:
-
It's a 2.3L with 12.0 compression
-
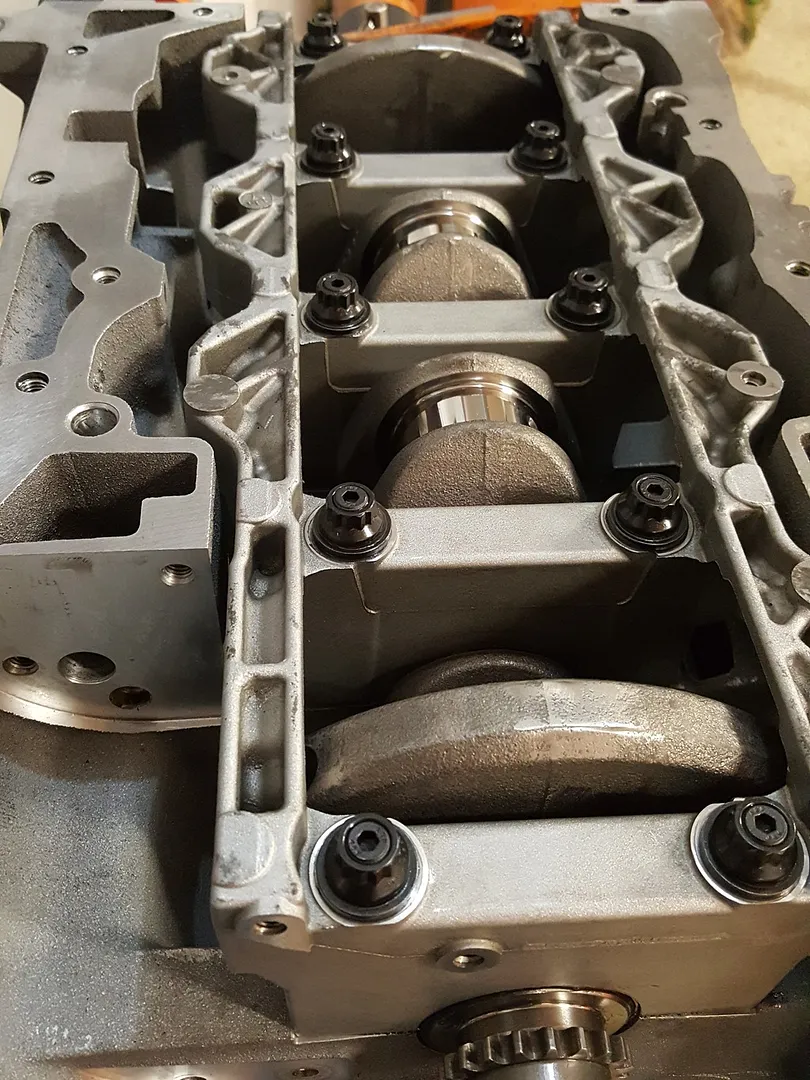
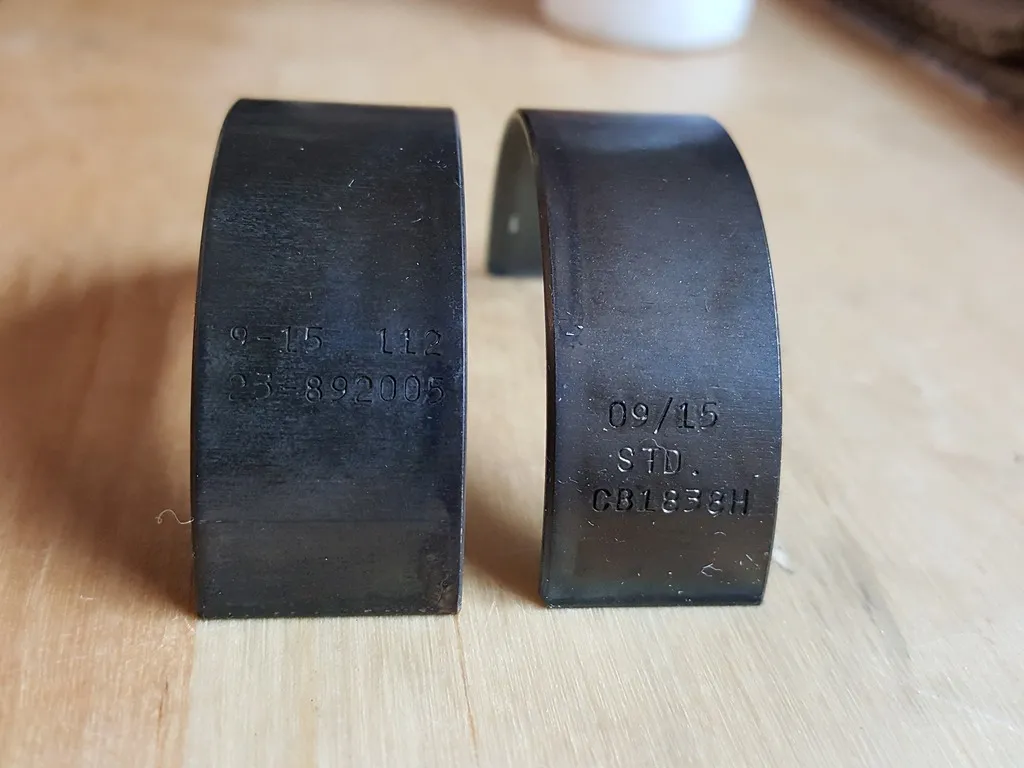
Ok, time for a little update: After completing the head, I started working on the bottom end. Installed pistons with new rings: New mains and thrust bearings installed into block, along with crankshaft. I did not use the plastigauge to measure the tolerances between the mains and and journals, I just used a micrometer instead since they were both new and each was well within the middle of the specs. Torqued in sequence of 20, 40, then 60 ftlbs with arp studs. Reading up on other builds, I know that a lot of people have trouble with the studs getting in the way of the dry sump windage tray. To solve this, you have to make sure the studs and nuts are flush as in the picture. I did a dry mounting of the dry sump pan and all is good. When it came to installing the pistons and rods to the crank, all was smooth until I came across this: I had ordered 4 sets of Clevite CB1838H and 3 of them were the correct ones, the other was something totally different, even though the box says CB1838H on all of them. It was wider by a few millimetres and had a notch in it, needless to say, I sent them right back and Amazon had the correct ones sent out in 3 days. With the correct big end shells, again arp bolts on the connecting rods, the piston assembly was complete.
-
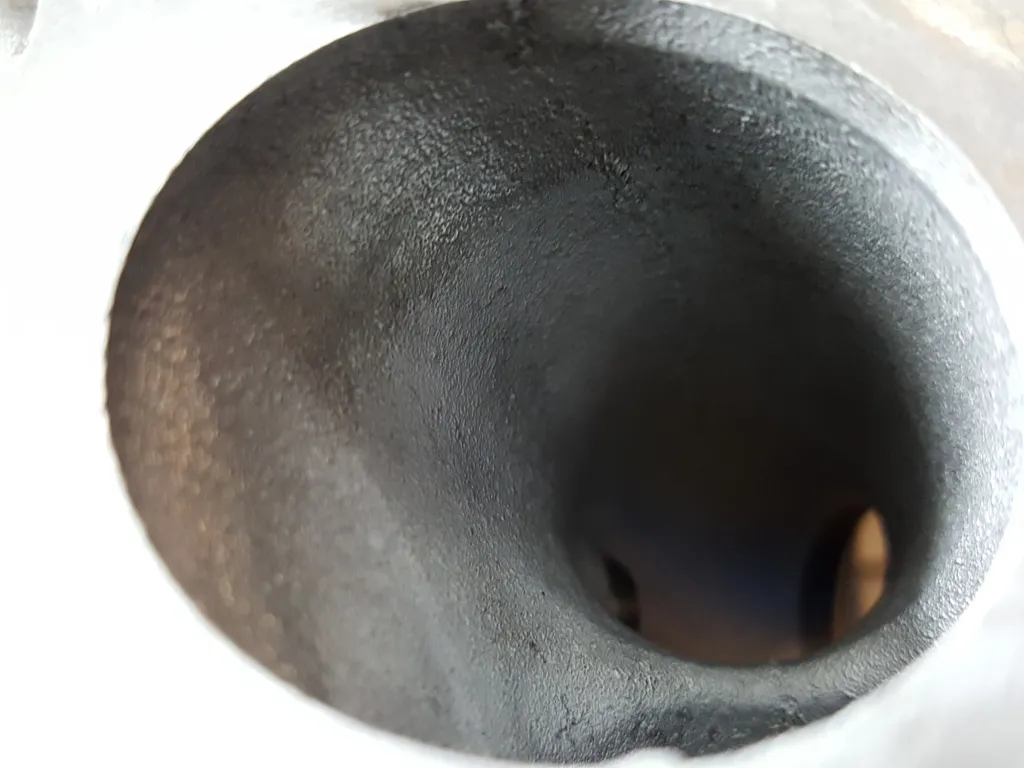
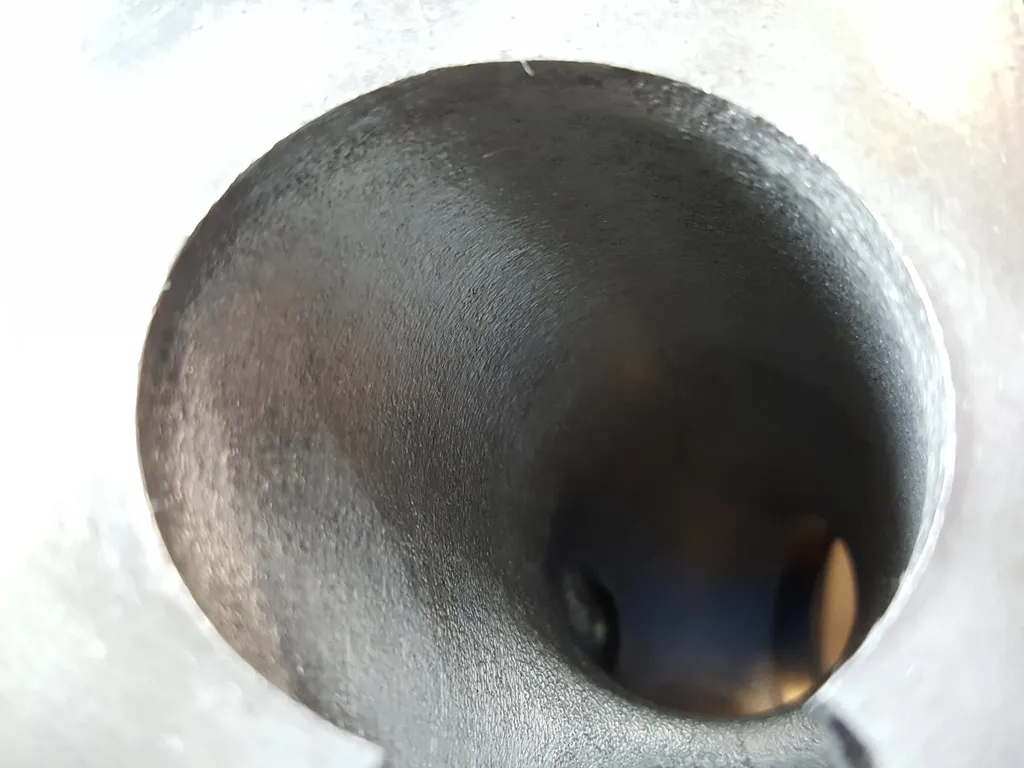
Next up was assembling the head. Installed new valve stem oil seals on both intake and exhaust. Reinstalled oversized 31mm exhaust and 36mm intake valves. I heard Cosworth says you don't really need to lap new valves onto their seat. But since this is a rebuild, it was an easy decision to grind and lap the valves onto the seat to ensure a good tight seal. Perhaps that is why there were so much carbon deposits on top of the valves when I first took the head apart, maybe it wasn't sealing as tightly as it should be from the factory. A bit of grinding and rolling the lapping tool. Didn't take me long, maybe 5 minutes per valve. Continued with head assembly, this tool makes it so easy. After the valve stem oil seals went in, then it was the valves, valve springs, retainers and their locks. Oh yea, I used graphite moly assembly lube for the head. After a few hours, the head was complete minus the cams. When I took the head apart, I made sure I put the same tappets in the same exact place as I did not change the cams or ground new seats so the lash should be the same. A quick lash check on a few and I called it a day.
-
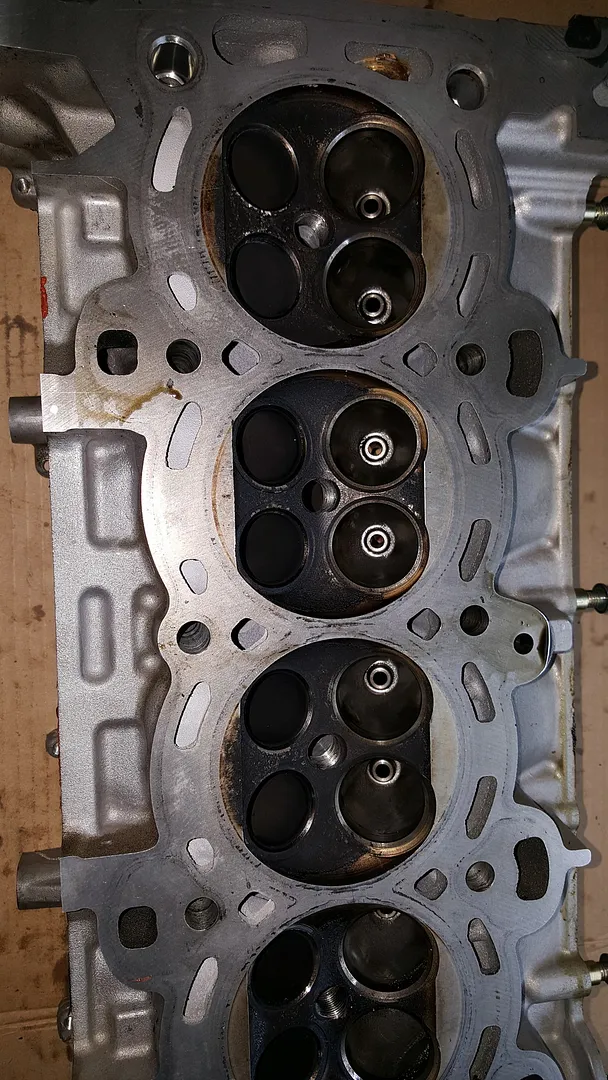
Finished exhaust ports Close up of CNC combustion camber
-
Taking a close look at the intake and exhaust ports on the head, I noticed that the casting isn't as clean as it should be. I know the only machine work Cosworth did was CNC the combustion cambers and maybe a slight port. After all, this is not the full on CNC extruded race head that they offer, where everything is CNC ported. So I took the dremel out and started to work. I was extremely careful not to enlarge or change the shape on any of the ports as this will affect the flow. I basically ground down and smoothed out the casting by polishing it slightly, I would say maybe equivalent of a mild stage 1 port and polish. I tried my best to make sure whatever I did on one port, that it was even all the way across. Even if it didn't make a difference in the flow, it sure as hell looked much nicer after a few hours of elbow grease. Before and after:
-
Ever since Cosworth closed its California branch, there has been no support at all from my experience. I bought my valve stem oil seals from burton too and it arrived in a Ford package. They look & fit the same as stock ones.
-
I bought all the Cosworth stuff such as the rod, rings, seals, and a few gaskets at burton power. The other smaller items I got either from ebay, Amazon or members on the forum.
-
I don't even want to think about it hah! Although was it about $18k new?
-
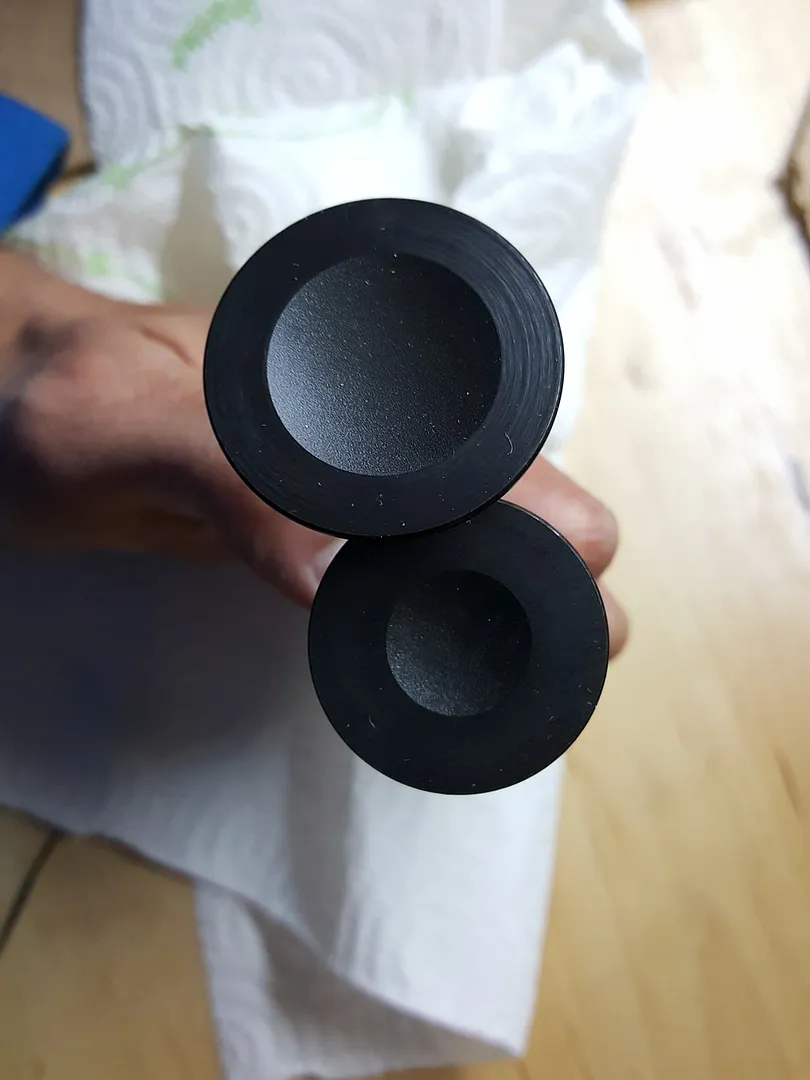
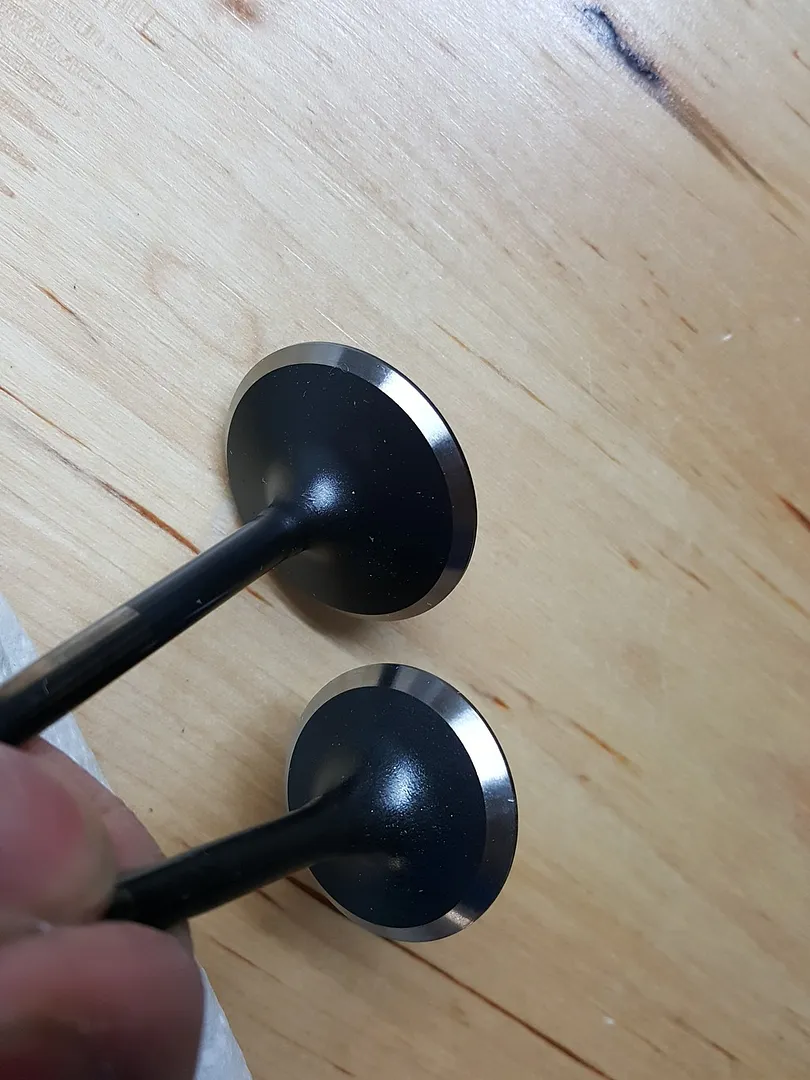
They did an amazing job of cleaning the old valves. I was surprised they got it this clean as it looked brand new Here is how they looked before, more on why I think it was so full of carbon deposits later.
-
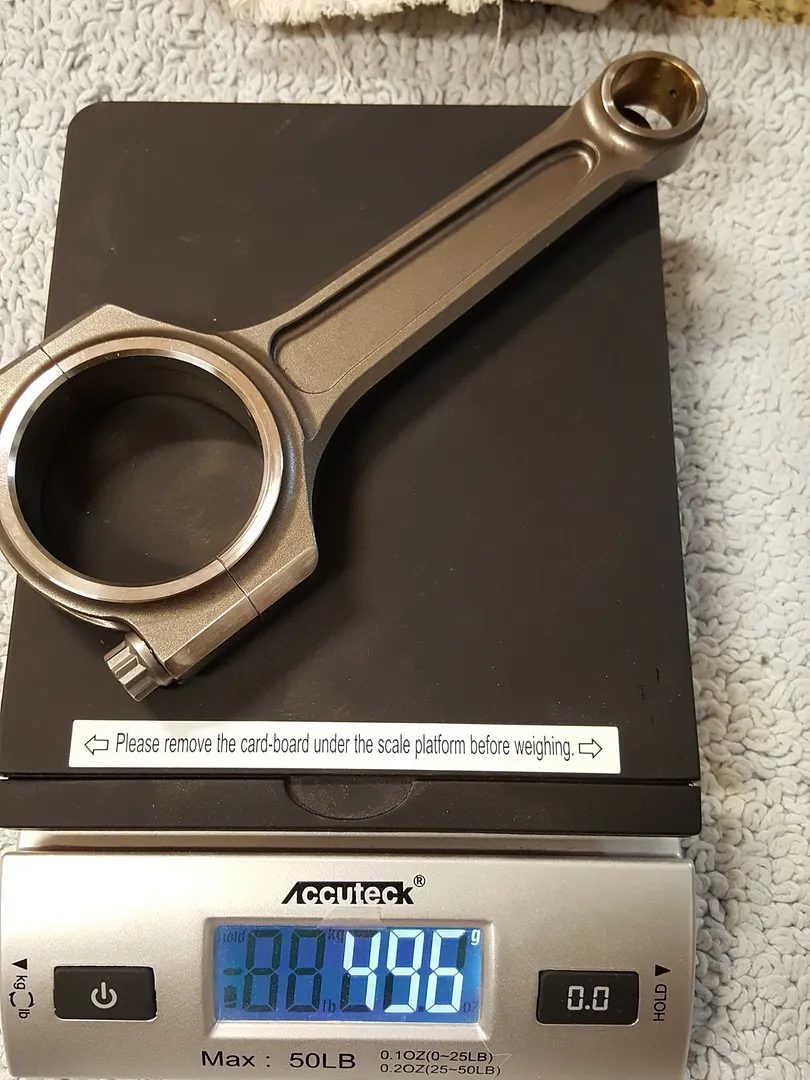
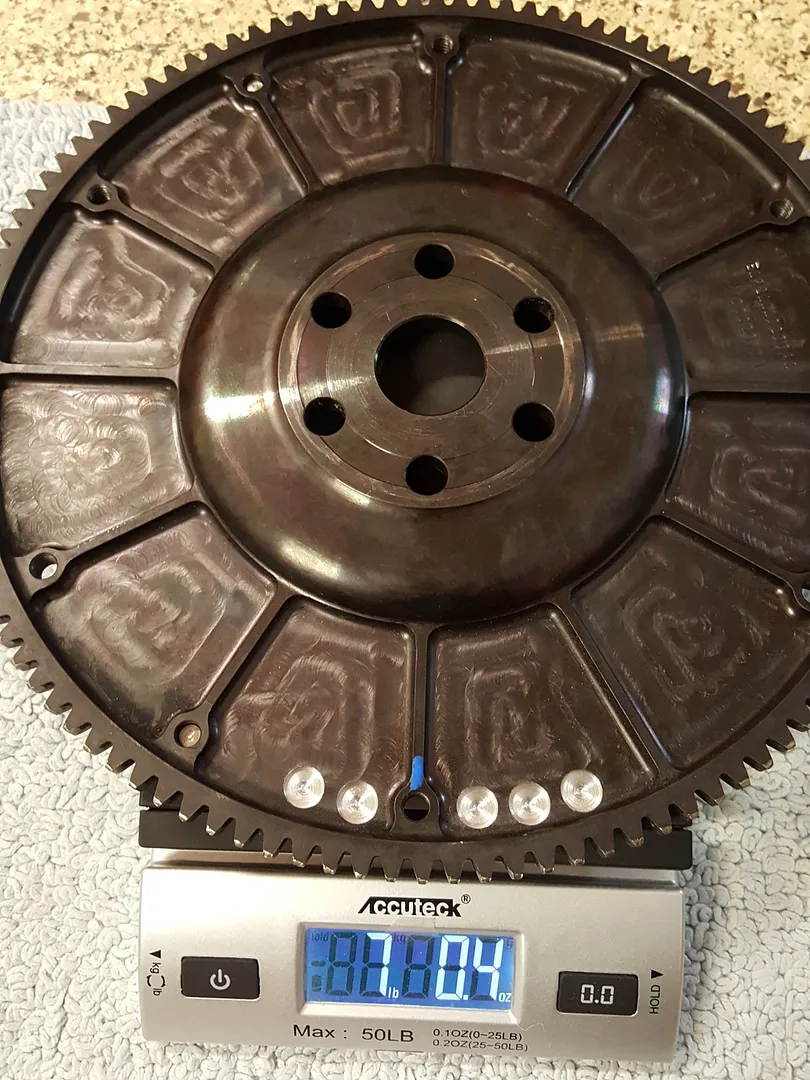
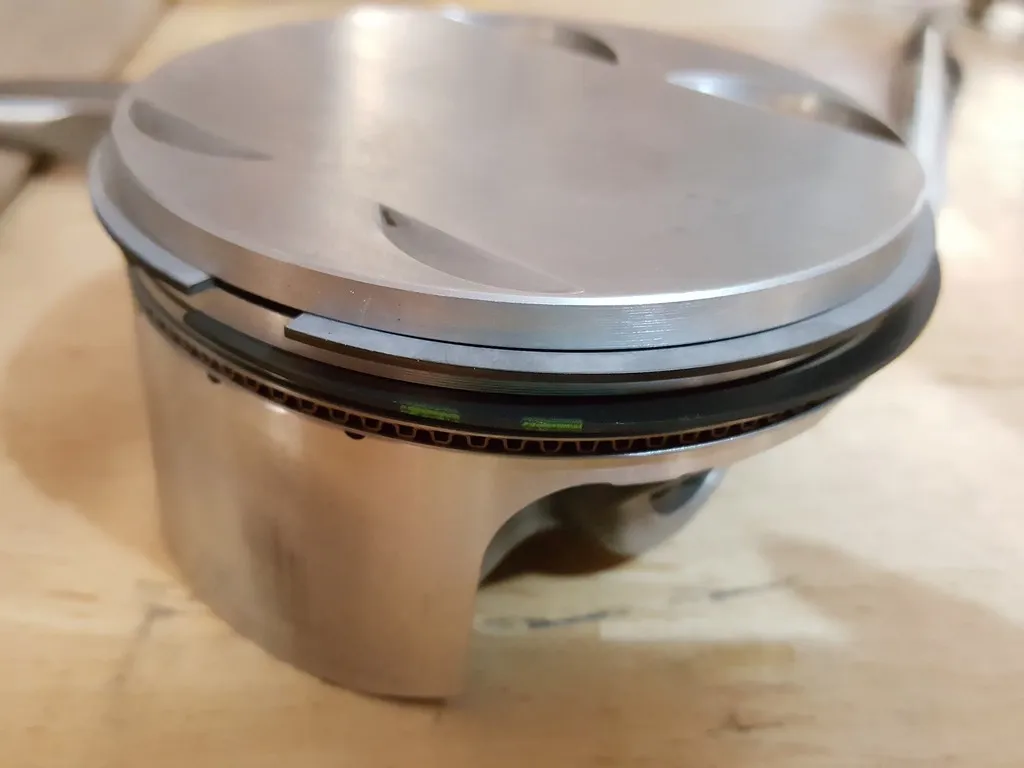
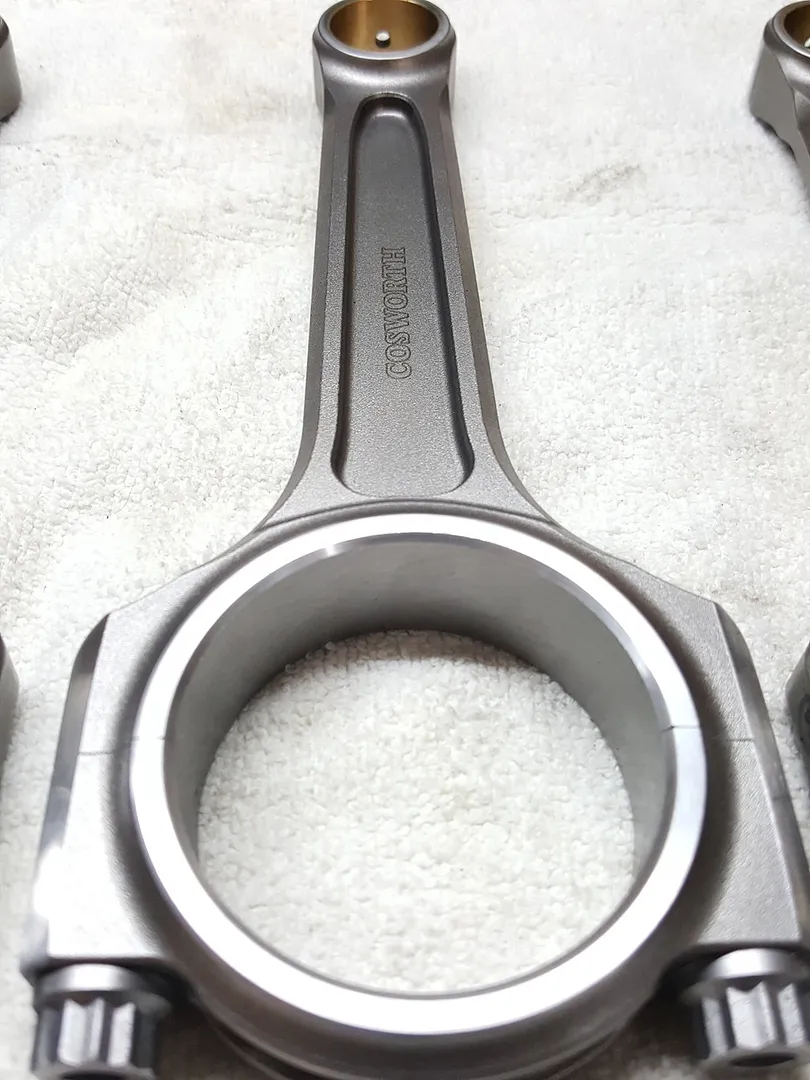
The pistons, rings, wrist pins were all balanced to within +-0.25 grams!!! That's right, a 1/4 of a gram. I weighed them all and according to my scale they were exactly the same Same story with the rods, both the big end and wrist pin end were balanced separately to keep it perfectly balanced, and all weigh exactly the same: Check out the flywheel after being balanced, I thought it was around 9 pounds but the scale says otherwise I fitted the new rings onto the recently cleaned pistons with reference to the orientation of each ring as set by the Cosworth manual
-
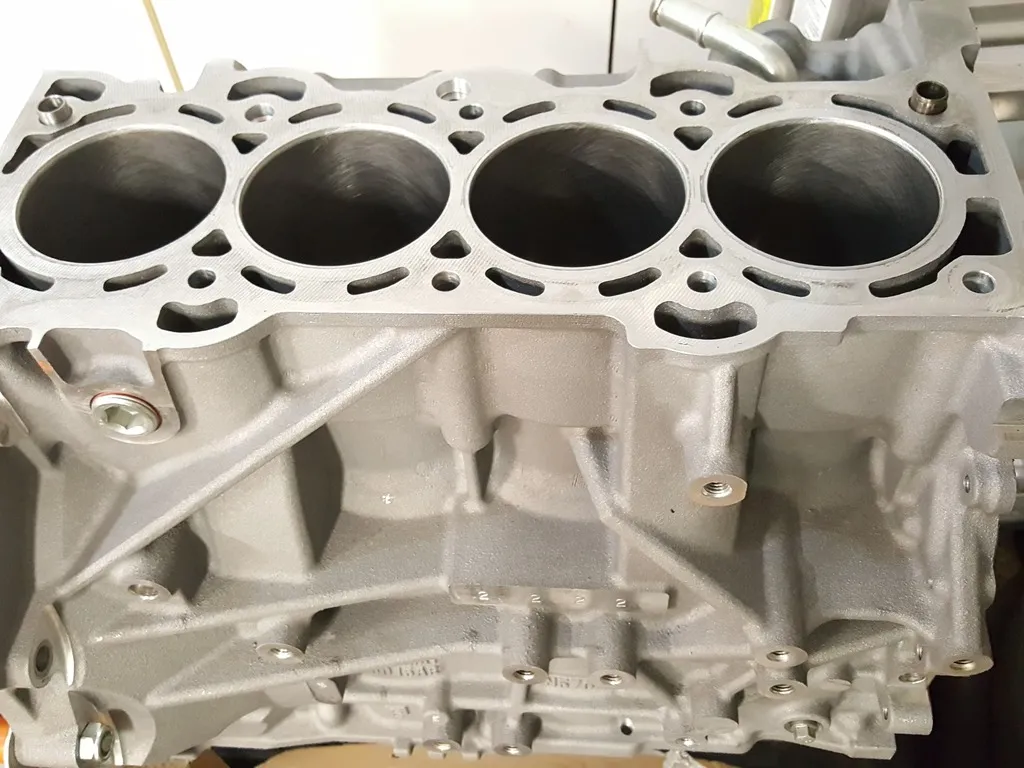
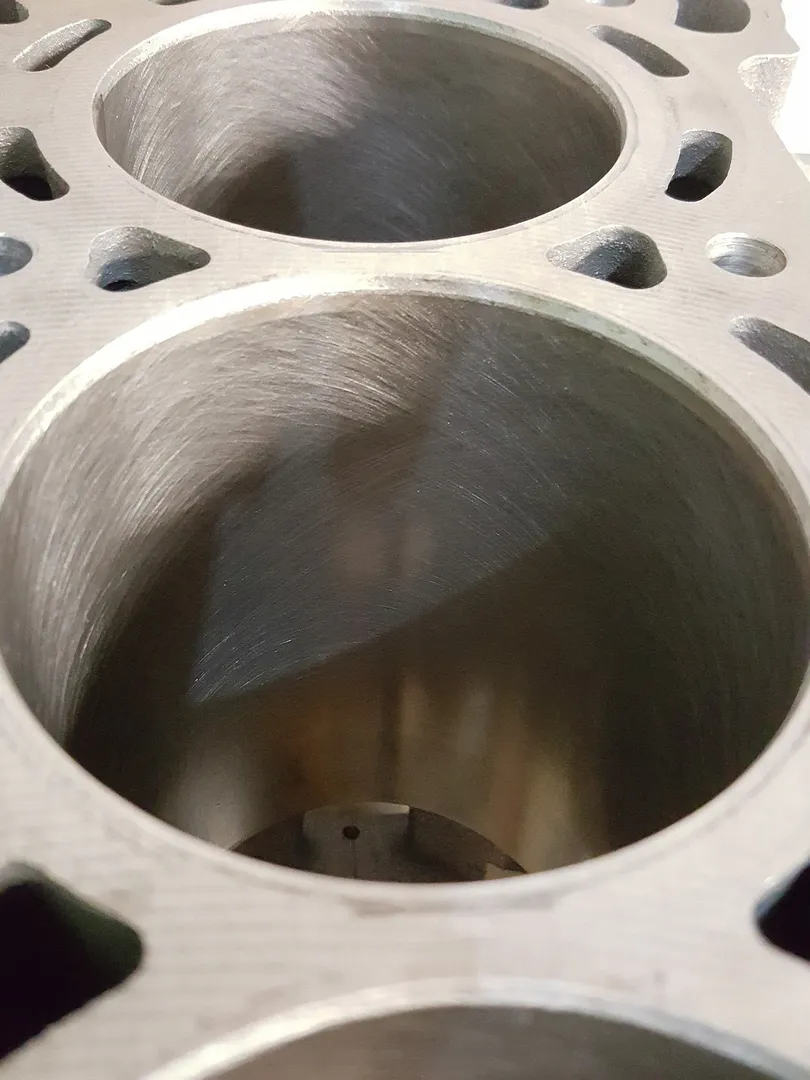
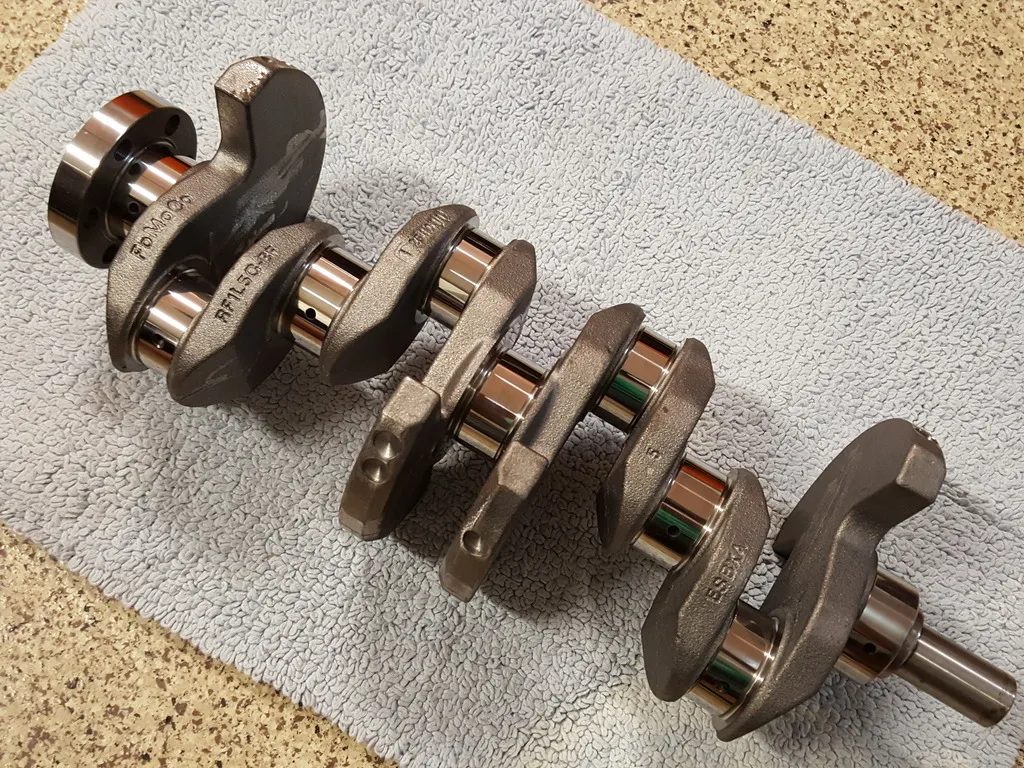
Got the block, head and rotating assembly back today. Everything was cleaned and cylinders freshly honed New crank balanced and journals micro polished:
-
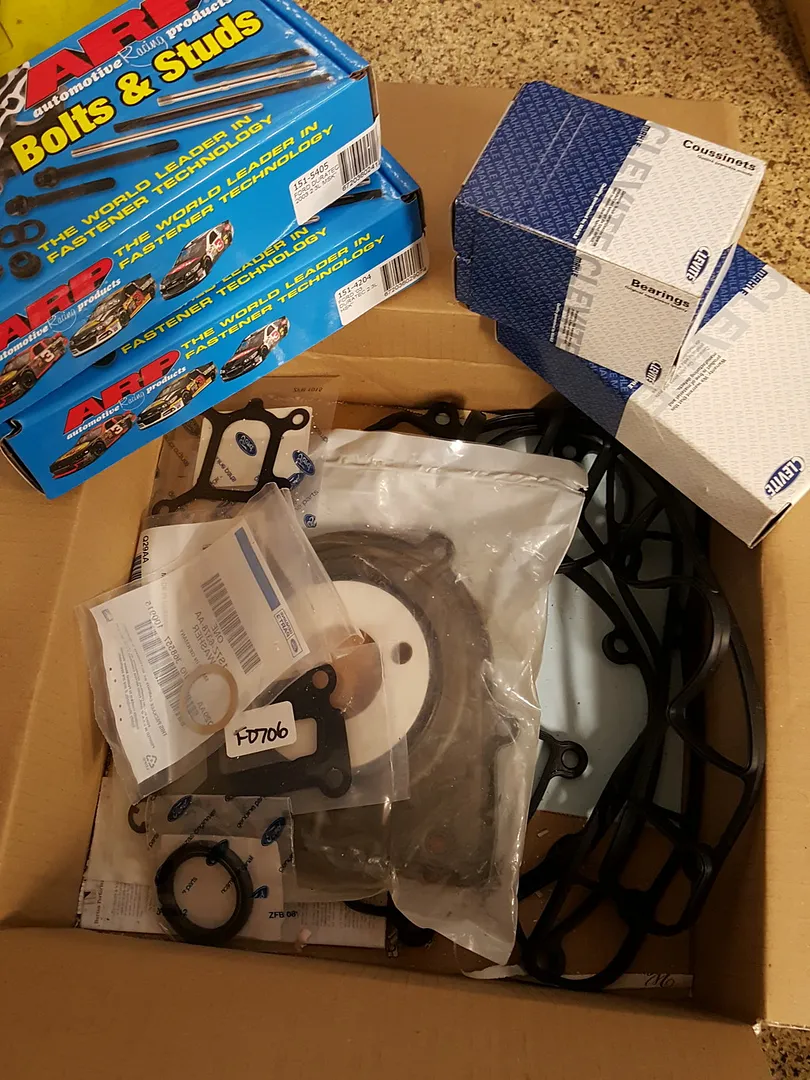
Some parts have arrived: Cosworth rod & piston rings Clevite H rod & main bearings ARP fasteners all around New 2.3 Ranger crankshaft Intake, exhaust seals along with other gaskets, seals Cam bolts, crank pulley bolt & friction washers I sent off the new crank, flywheel, clutch cover, and pulley to have it balanced. Also, the rods, pistons, rings, wrist pins will be balanced as well. The pistons and rods set were about 1-2 grams off from another which is within Cosworth tolerances but Im expecting them to be within less than a gram once done. I'll pick up the cleaned block & head this weekend. Then the bell housing & dry sump tank should be arriving next week. Still trying to see if there's an easy button for the engine loom, I don't think I have the time and patience to rewire & re-pin. I thought about having my 6speed rebuilt since it will be out with the engine. 2nd & 3rd can be stiff and I sometimes grind 3rd when shifting too fast. Anyone local can do it? if not, I'll do it myself but where to get the syncros & stuff for the Caterham 6speed?
-
After close inspection, I'm replacing: Cosworth rod Cosworth rings New 2.3 ranger crankshaft All new main and rod bearings ARP main, rod, head studs New friction washers and bolts All gaskets and seals I'm also sending off everything to be cleaned including head, block, dry sump pan. The other 3 rods and pistons will be fluxed and checked for cracks. The same machine shop is also honing the cylinder walls. Once I receive the crankshaft, I'll have the whole rotating assembly balanced. As far as swap parts go I need: Engine mounts/brackets Duratec headers (will reuse my existing Titanium ammo can) Dry sump tank Modify the hard oil lines on existing dry sump pan Duratec bell housing with slave/release bearing New clutch/pressure plate New water rail Caterham engine harness MBE 9A4 ECU Uprated fuel pump Oil catch can Throttle cable... and probably lots of other little things I can't think of right now
-
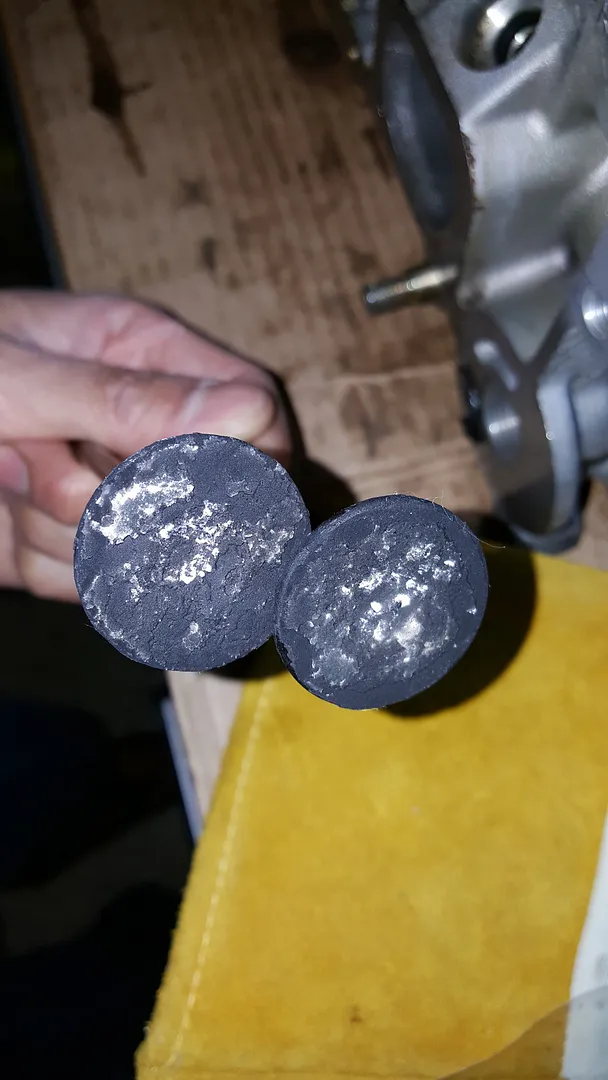
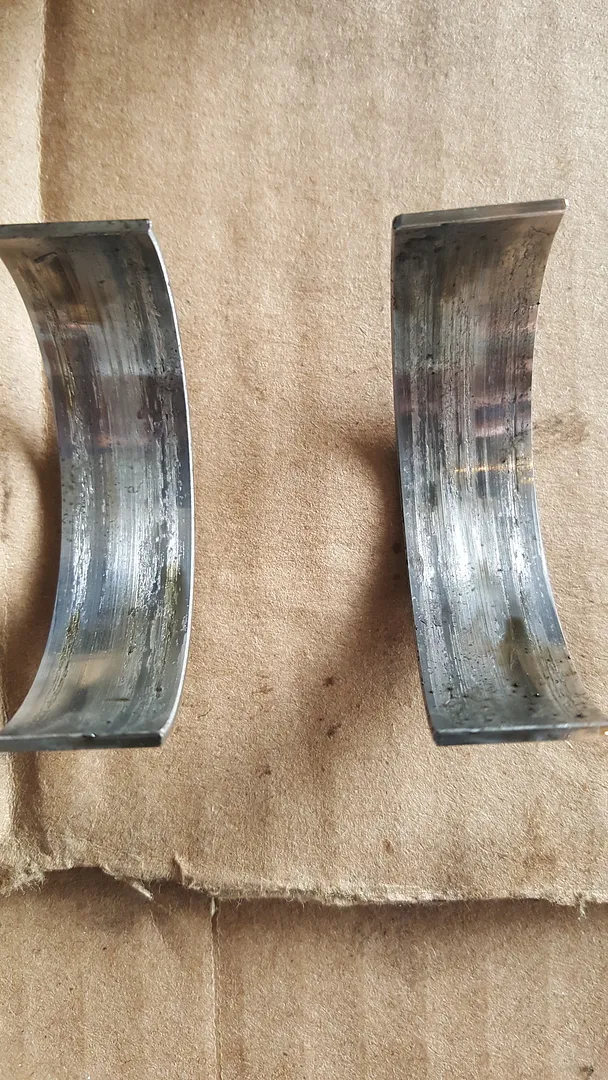
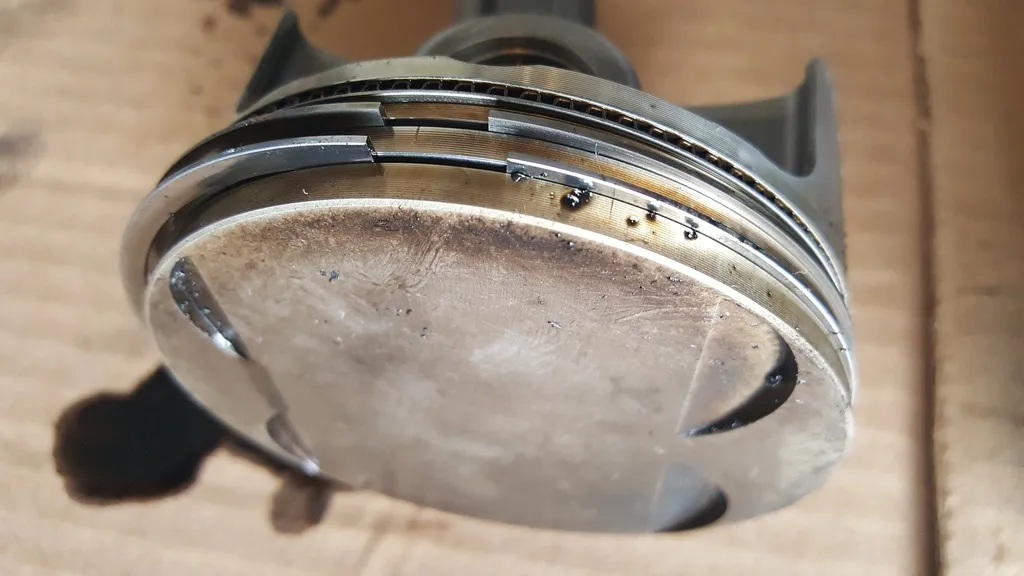
The other rod bearings were about to fail as well Took the head apart: Quite a bit of carbon deposit for 9000 miles, although probably 50% of it were hard track miles: Pistons were a bit dirty with some debris on it, but not bad overall: