MK Sportscars USA
-
Posts
26 -
Joined
-
Last visited
2 Followers
-
Thanks John. Kit price is in the range of $28K, plus engine, ecu, and miata bits needed. Engines are dirt cheap, and you don't really need a terrible amount from a miata - ie, no donor needed, just buy the components you need.
-
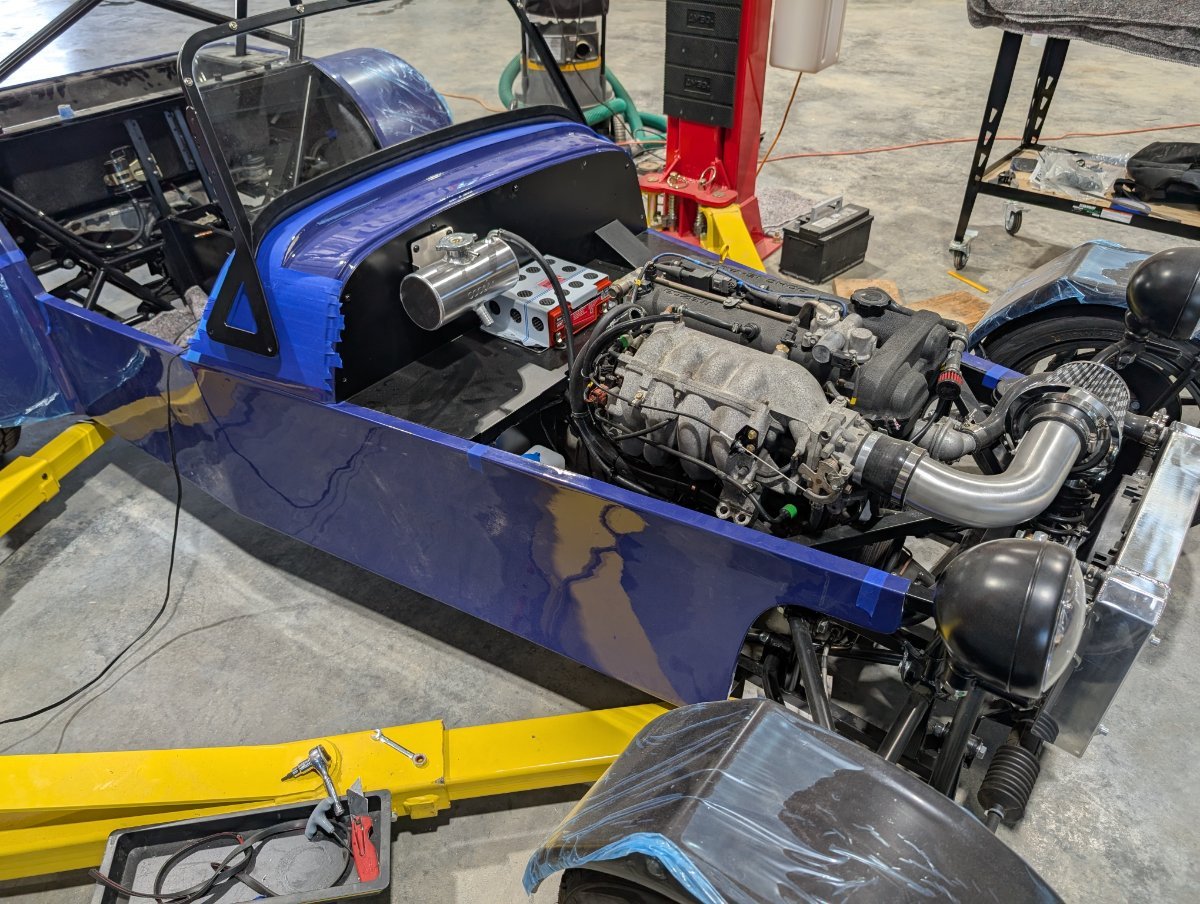
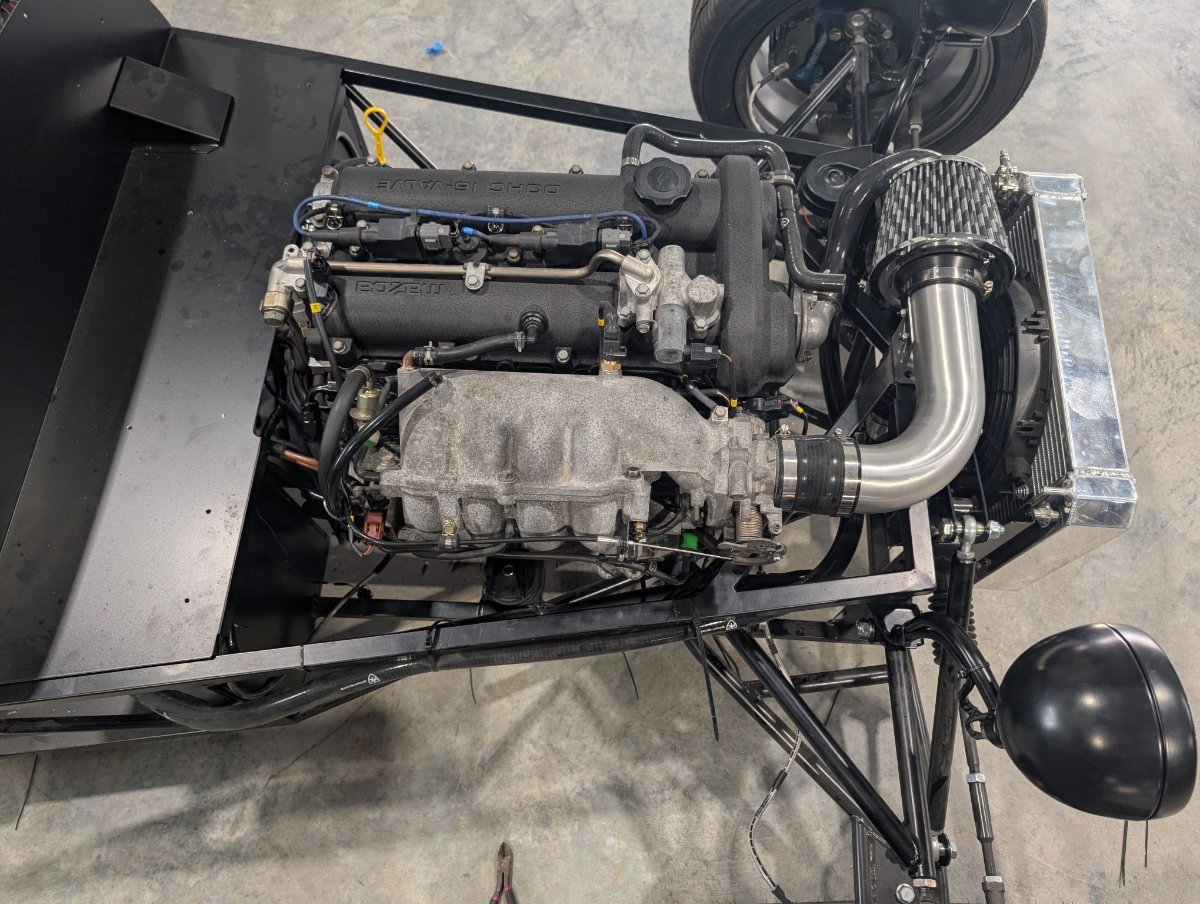
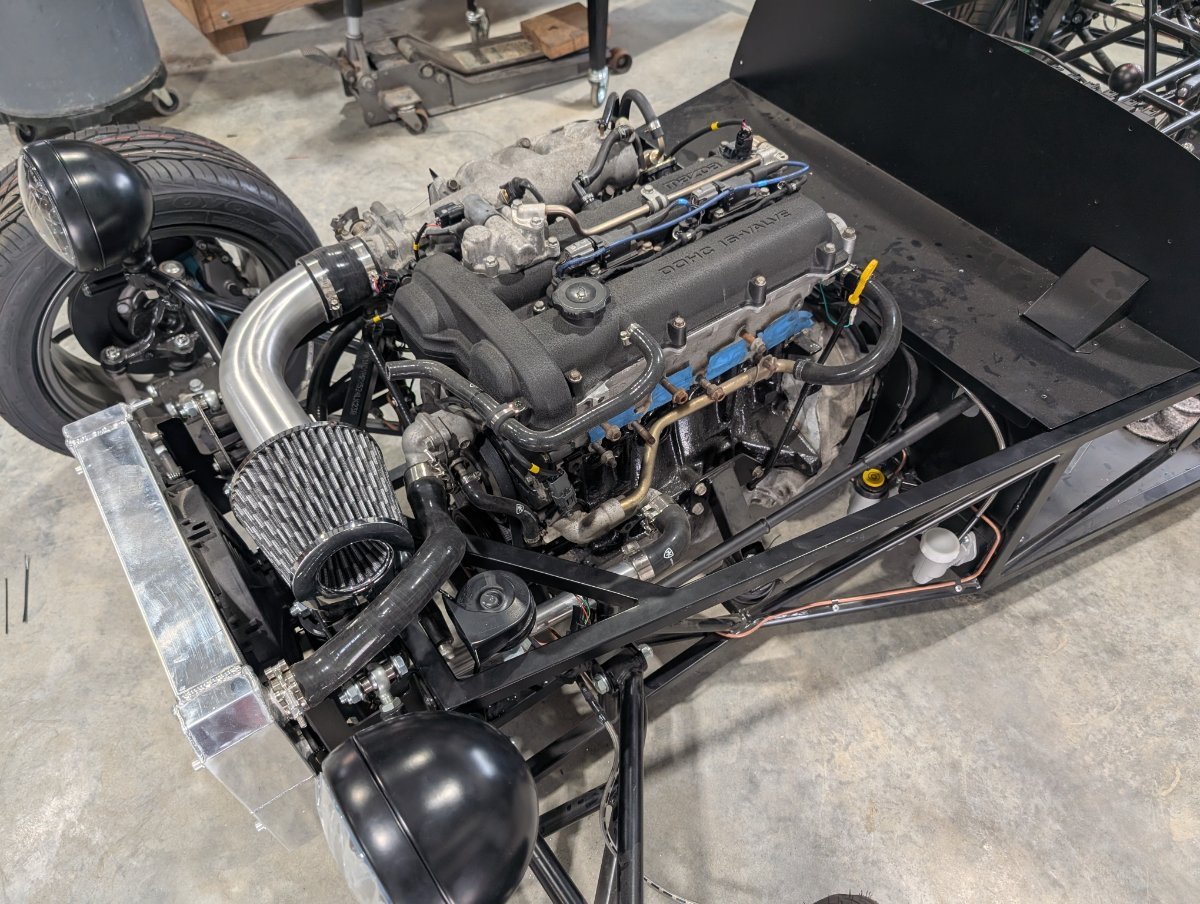
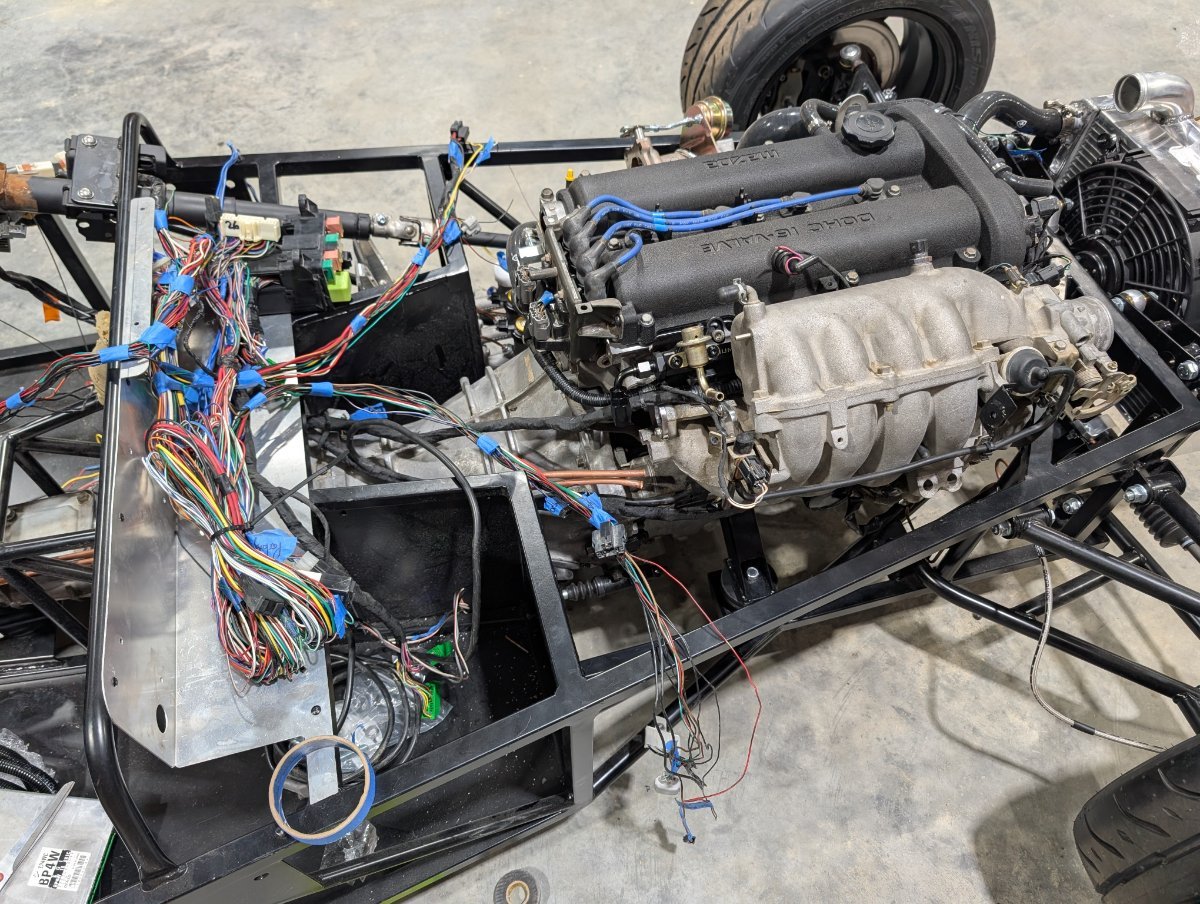
Wanted to share a car I just finished up and shipped to OR. Was sad to see her go, she looked nice in the shop here! She came out great, and is a wonderful ride. MK Sportscars RX5 Vtec Kit Honda K24 engine, stock other than oil pump upgrade, and 40 degree cam gear. 6 Speed Miata drivetrain, LSD, 22K miles on these donor parts. Hondata ecu (still offers an OBDII port) MK has not offered a K24 powered package before. I installed one in my personal car, but required custom headers and a fabricated engine mount. (I do love these engines!) After 2 years of harassing MK, and a bit of design work, we now offer a truly bolt in kit - making what I consider the ideal package for the US market. Moderately priced build, phenomenal performance, bullet proof drivetrain. I only did (2) 0-60 pulls, no roll out, 3.8 seconds. 1240 lbs without fuel. (The cobra leather seats are pretty heavy as well) 240 - 250 flywheel hp estimate. I'm about to put an order in for another shipment of cars, if anyone is looking, I have room for 2 more kits in there! Thanks for taking a look, any questions, let me know. James james@mksportscarsusa.com

-
It's a 10% tariff with the UK on auto parts. No additional compounding tariffs for aluminum, steel, etc which is quite nice compared to some of the issues I've had with other countries I import from. I had a container of MK kits arrive a few weeks ago, and had to cut a nice check. "The retailers will have already put on a considerable mark up on the price cost price + shipping" This is not true in my case... I just pass the tariff and shipping costs along to the customer. Listed as line items are on the quotes. Not a prayer I can cover the overages with my margins!
-
New owner came down for a shakedown run and test drive. A touch warm here in August, but we had a blast!
-
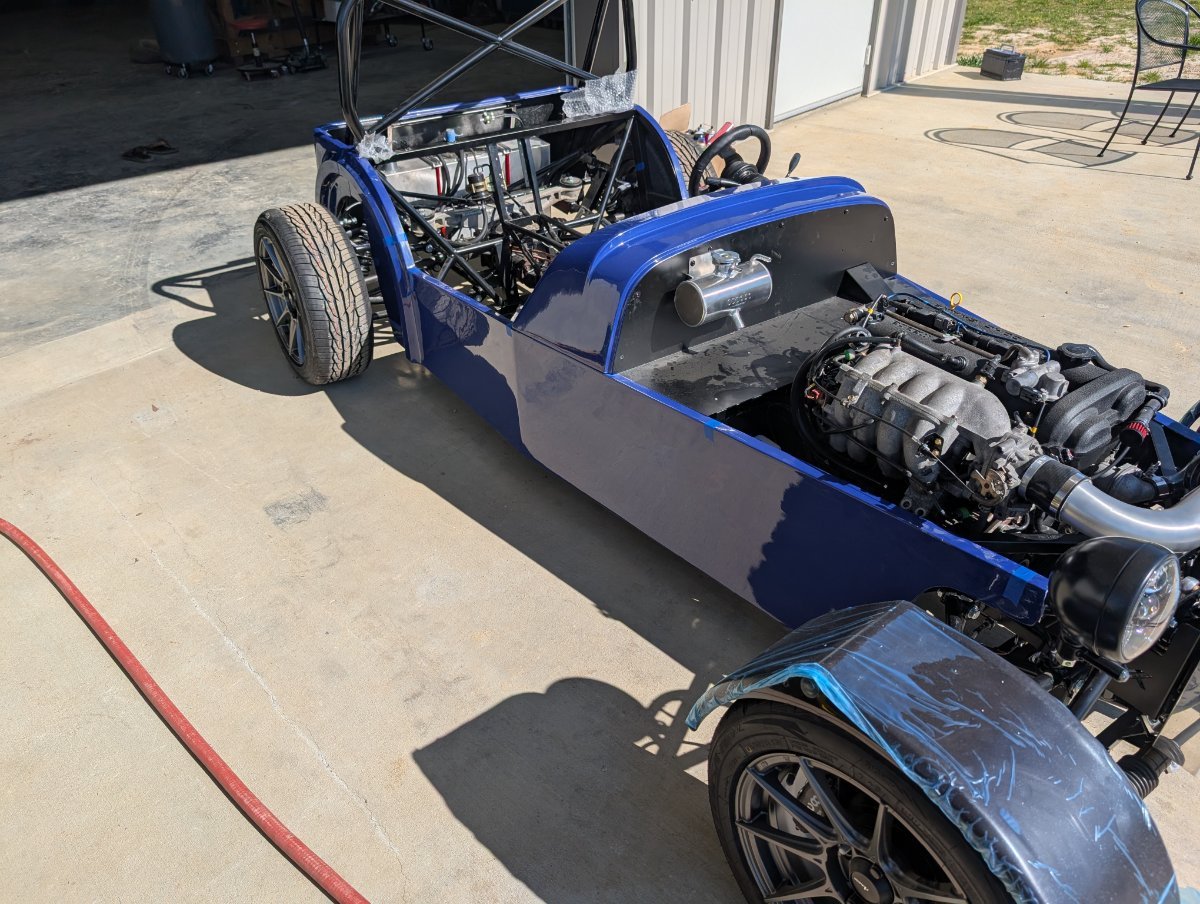
Been busy around the shop here! Sorry for not posting, I prefer the car work vs. the computer work - I'm sure many of you understand. Here's a few more pics of the build, once the container finally arrived. She's been shipped up to NY, and was quickly registered there. Having a 17 digit VIN make the process pretty darn smooth. Have a few more builds in the pipeline, and enjoying every minute of it - they are all unique and challenging in their own way.
-
Been busy in the shop! A few more pics of the progress. She's officially "done" until my container arrives from MK. About a day of work once the parts arrive. She cleans up quite nicely, and the stripes always make a huge visual impact. Any questions, let me know.
-
Plenty of progress has been made over the past few weeks. Headers arrived and installed. This car will have a carbon muffler, the stainless is just for testing. Of course carbon looks nice, but the biggest advantage is the fact that it won't burn you like the stainless will - I made that mistake after the first test drive... And still have the mark to prove it! The car has now been successfully tuned, and has about 50 miles on her. I used Alex Hickson over at Digitune in the UK (Obviously a remote tune) First time using him and it was a very pleasant experience. Look forward to working with him more down the road. I'm pleasantly surprised how peppy she it, it's a nice balance of power for such a light chassis. My personal car is pushing a lot more power, this was the car I was most anxious to "feel" for comparison. She's no slouch! Seems like it took forever to get the protective coating off the rotors, just so hard to build heat in the brakes. But they are working great now. The only puzzler was that the car would continue to run for 2-3 seconds after shutting her down - but only intermittently, and only after a longer drive. Turns out that if you cut off the ignition while the cooling fan was on, it would turn into a generator as it spun down - keeping the ECU and coils alive. Slapped a 50A diode in there and the mystery is solved. Still have a few odds and ends to finish up here, and a few parts coming in on the next container from MK (Seats, muffler, rear bulkhead, etc) she's quite close to being complete.
-
Lots of progress made on the car. Been going fairly smoothly - still waiting on an exhaust header from MK which has prevented finishing the bodywork - but it's finally in route! All electrical is finished, all gauges and sensors work. I briefly started the engine over the weekend, using a basemap for the ME360 ECU. No issues there fortunately. Body has been trimmed and dry fit - not too bad though, a small cutoff wheel and a bandfile make the job pretty simple. Interior panels are drilled for final assembly. Rear fenders and boot bin fitted. Fuel fill assembly completed. She's getting pretty close! Windshield and wipers / squirter will be the next step of the build. Any questions, let me know!
-
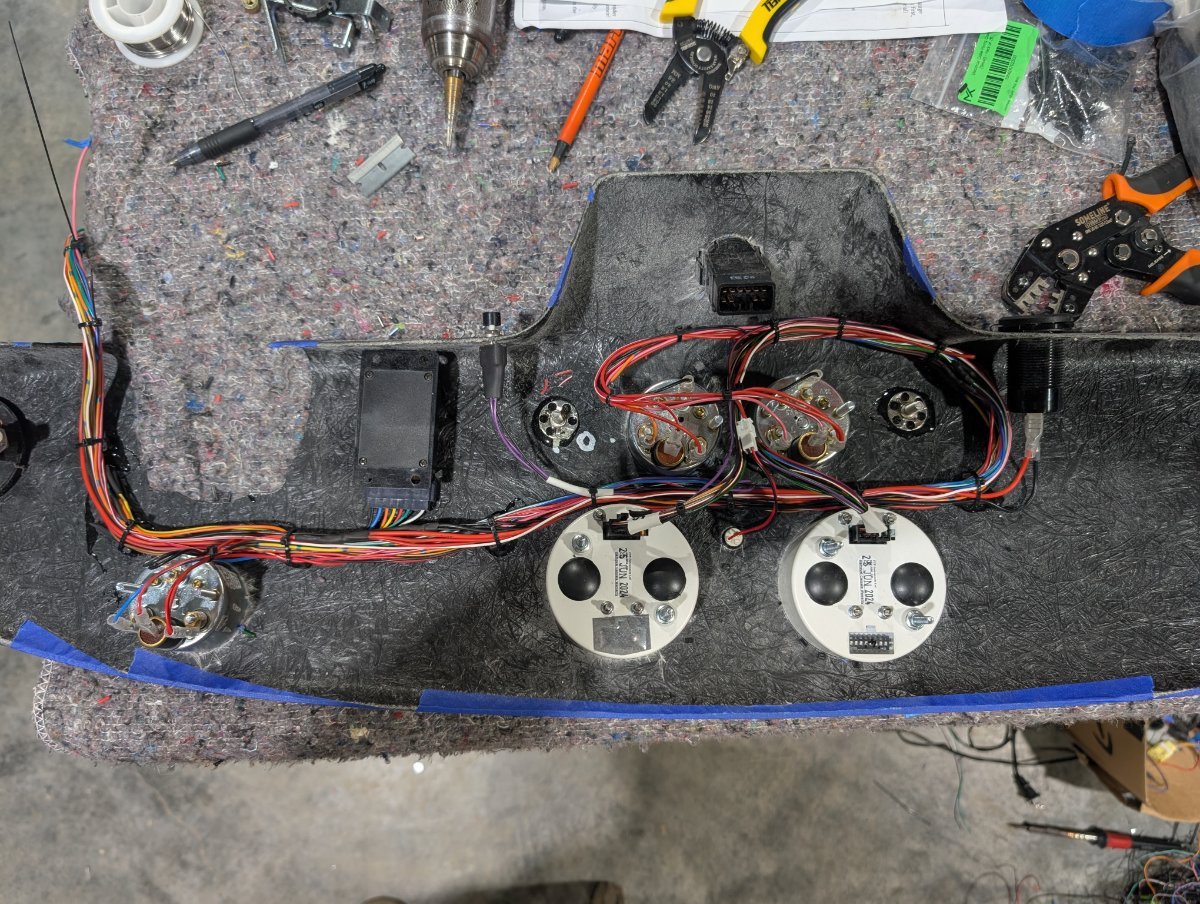
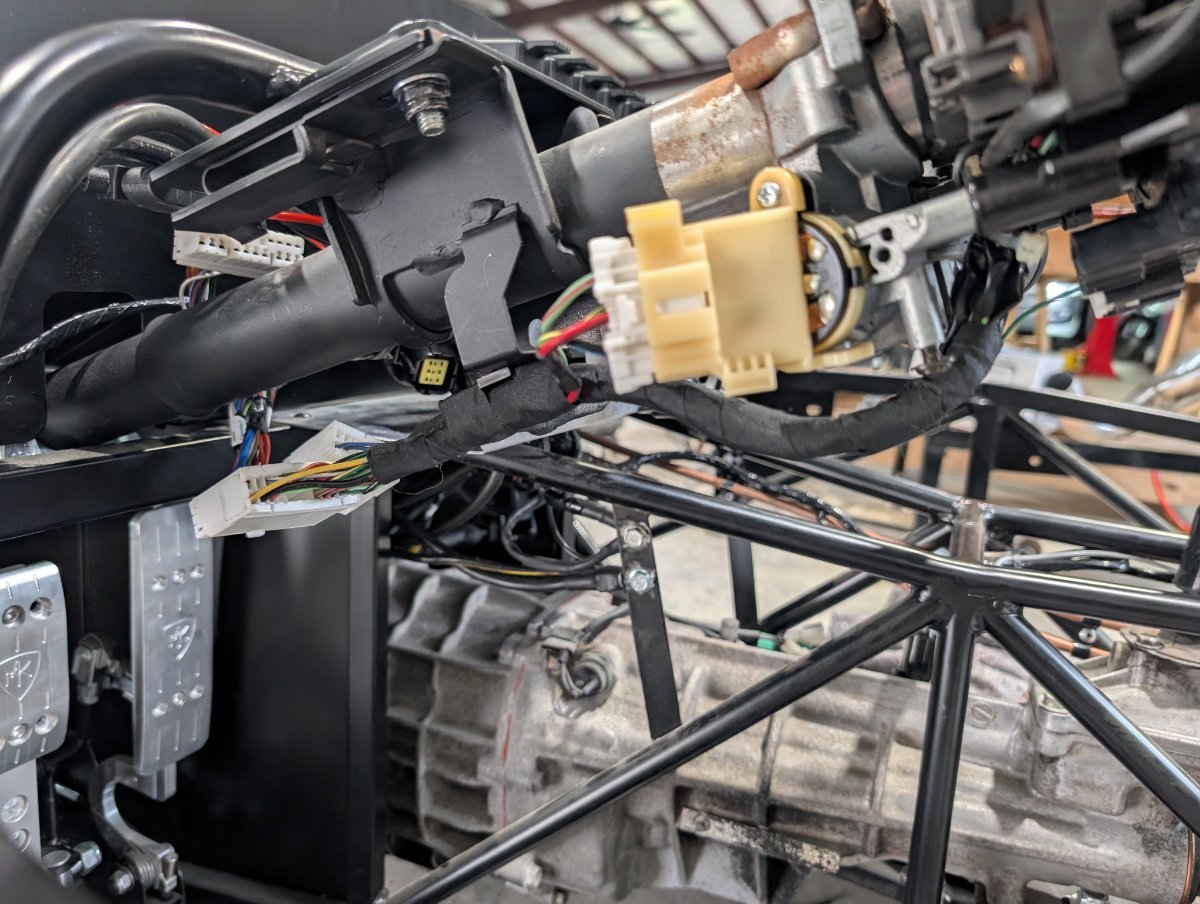
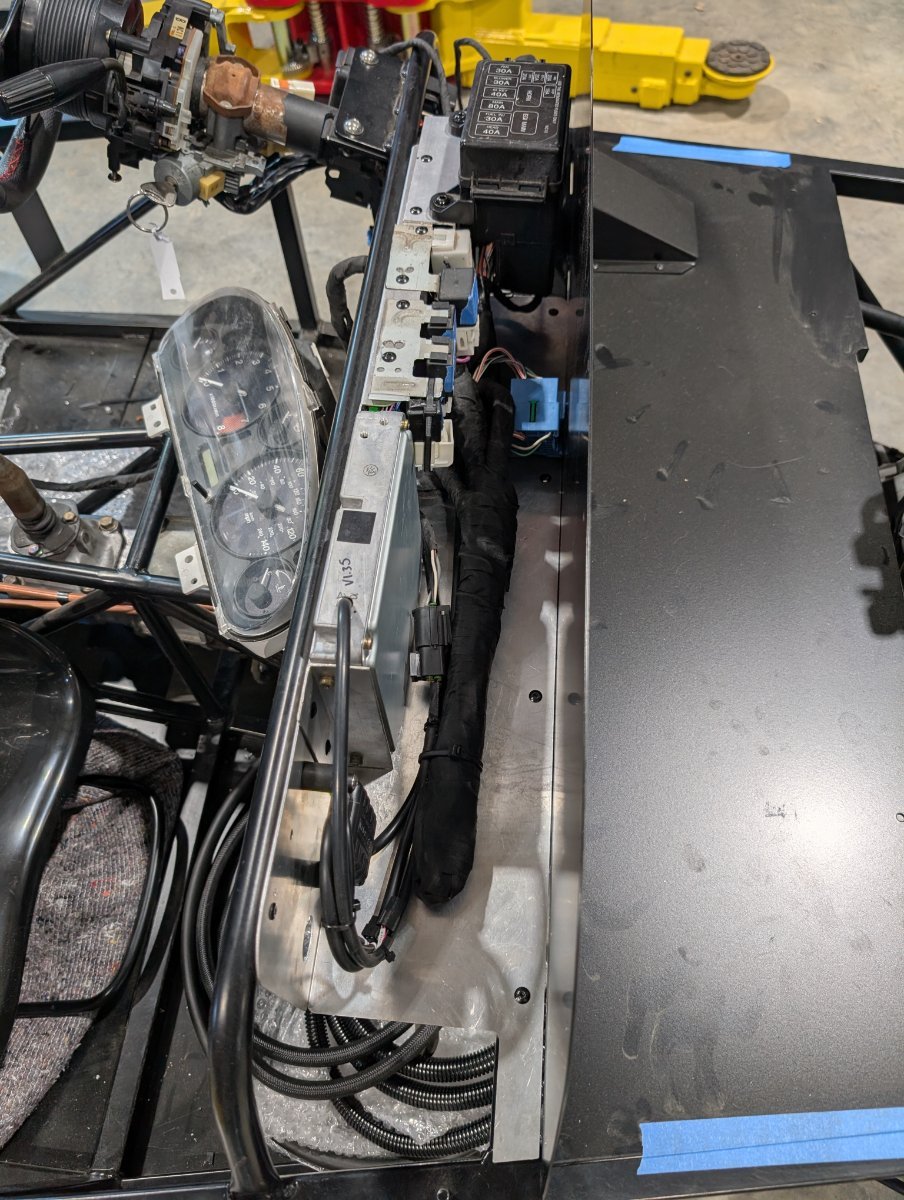
Been plugging away here! Received the chassis harness and ECU from across the pond and started getting everything wired. (MK harness, ME360 ECU and engine harness) This car will use the OEM steering controls from the miata - wipers, horn, lights etc. We are also using the MK gauge set for this car, which conveniently integrates indicators for high beams, blinkers, alternator failure, and oil pressure. We will have one stand alone indicator for the CEL. This also necessitated the implementation of a speed sensor on the rear axle. I tacked some small sections of flat bar on the inner axle stub shaft to provide the signal needed. They say you should glue them on, but that doesn't seem like a reasonable attachment method IMO. Added a real oil pressure sensor, additional water temp sensor, and a new bosch knock sensor. The OEM mazda clocks can be used if preferred, even with the aftermarket harnesses. We decided to reuse the hazard switch from the miata - as the double pole switch makes the job clean and simple with no parasitic draw. A single pole switch will leave the battery powered to the flasher, which doesn't draw much current - but 0 seems a lot better. The only wiring left at this point is the dashboard - which will have it's own harness so that it can easily be removed from the car should the need arise for future modifications. A few pics attached for your pleasure....
-
(11) 6mm allen head bolts to remove the bulkhead panel. All easily accessible. I am an optimist, but I've also never had one of these components fail in all my years of car ownership. Probably shouldn't say that out loud....
-
Just checked.... 13 lbs of left over wire, plus probably another pound or two of stuff I've tossed. Nice work on the wiring harness build attached!
-
Standard fuses are in the passenger compartment. Bulkhead panel or scuttle removal are quite simple - even with a full windshield - but I wouldn't expect these items to be accessed too often - relays and main fuses shouldn't fail frequently. Wouldn't be too difficult to add a removable panel on the vertical wall of the bulkhead panel, certainly a good idea if that is a concern. Thanks for the nice and tidy comment!
-
More progress.... Lots of zip ties and masking tape wasted. But starting to get manageable. Last 2 pictures are the final layout. This does turn into a fairly elegant solution at the end, and makes the miata harness a viable candidate for the job. Only 6 relays remain (headlights, parking lights, fuel pump, main relay, horn, and fan) plus the flasher. Fuse box is under the dash in an OEM like position. All other components will be nicely hidden by the scuttle and engine bulkhead. Factory color codes are used throughout, so future modifications should be easy and can be referenced with the miata wiring diagrams. Overall, I am pleased with the finished harness - but it took me far more hours than I anticipated. And it all works! That's the best part. I did swap a turn signal / headlight pin on the drivers side... And getting the high beam dash indicator to work requires the bulbs to be installed first (Doh!) But otherwise went off without a hitch. When I jump back on the RX5140 wiring in the next few days, I'll take some pics to document this option using the MK chassis harness and ME360 ECU / Harness. Should be far faster, cleaner, even simpler, and add some nice flexibility to the build.
-
Next step is to lay this mess into the car and start the fitting. Again, this takes a good bit of patience, planning and trial and error for the "best" fitment. Second pic compares the OEM engine harness and the "new" engine harness. Third is the beginning of the harness routing, trying to group circuits together in the manner that best fits the car. I ran all engine wiring on the "cold" side of the engine to avoid the exhaust heat.
-
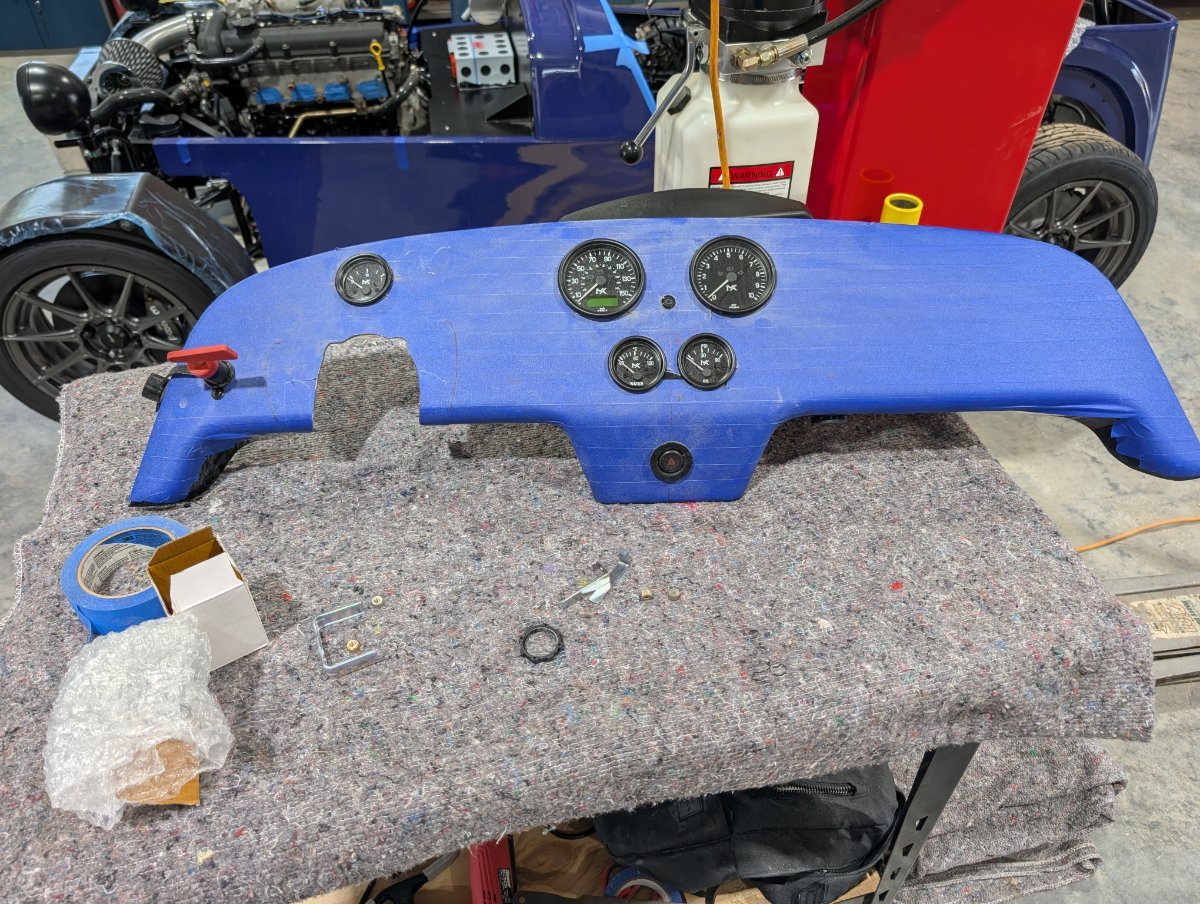
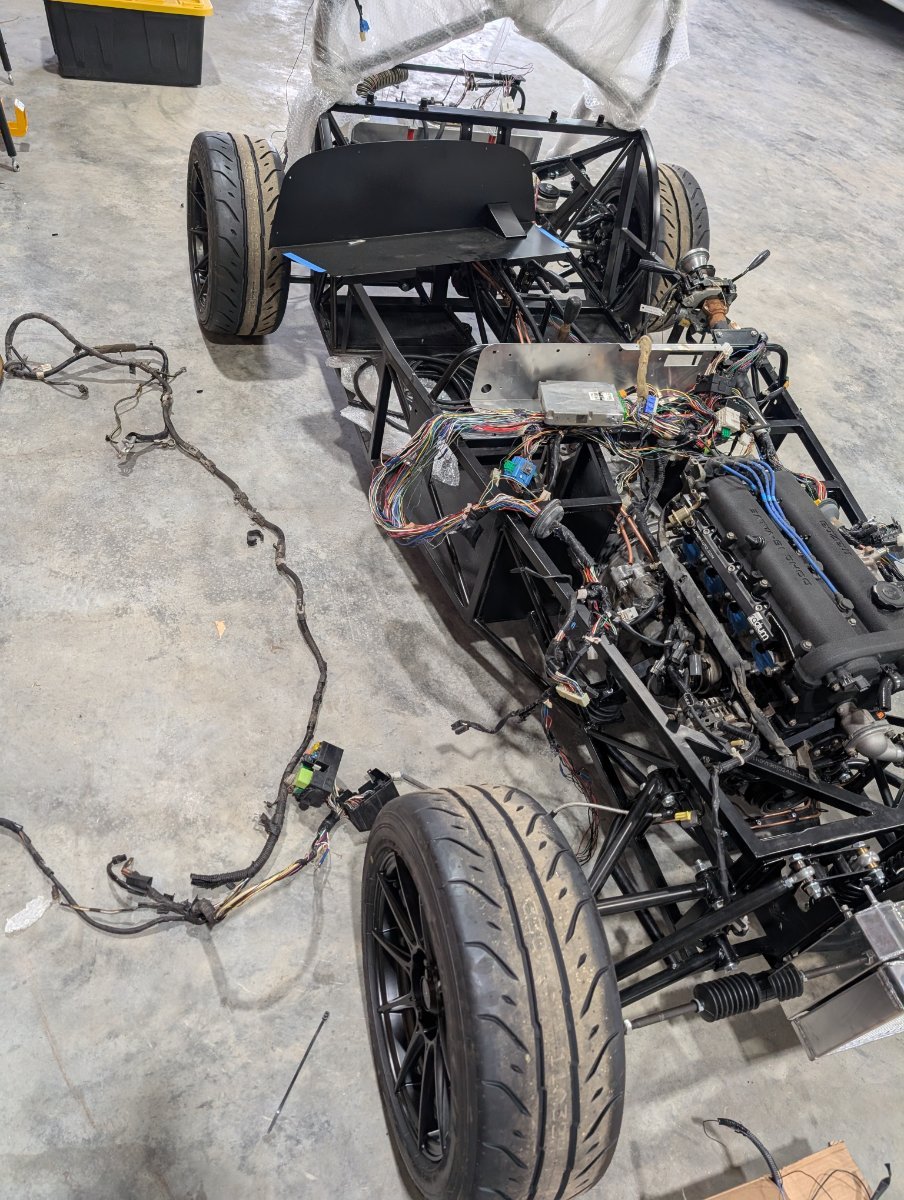
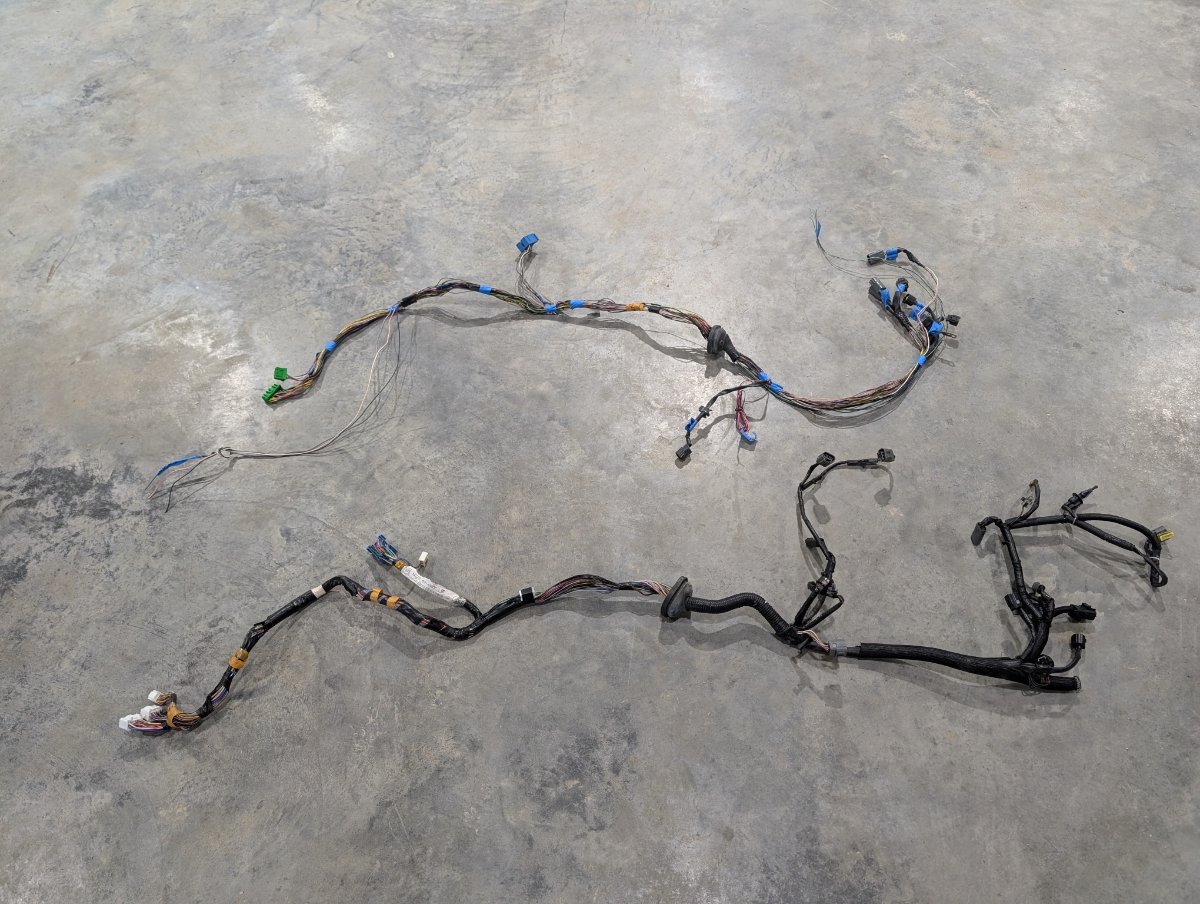
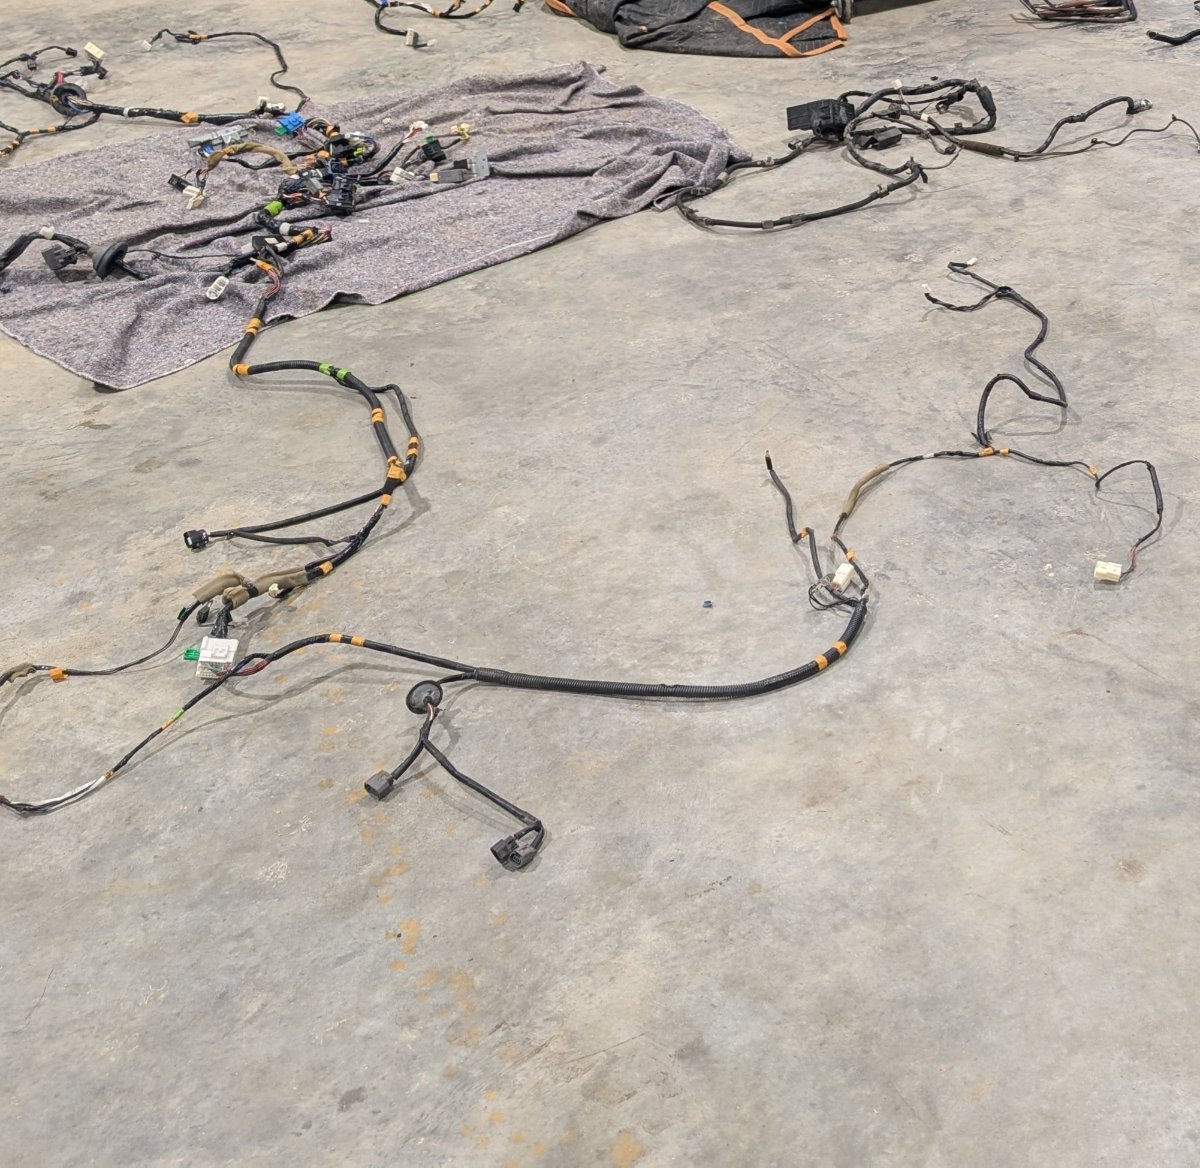
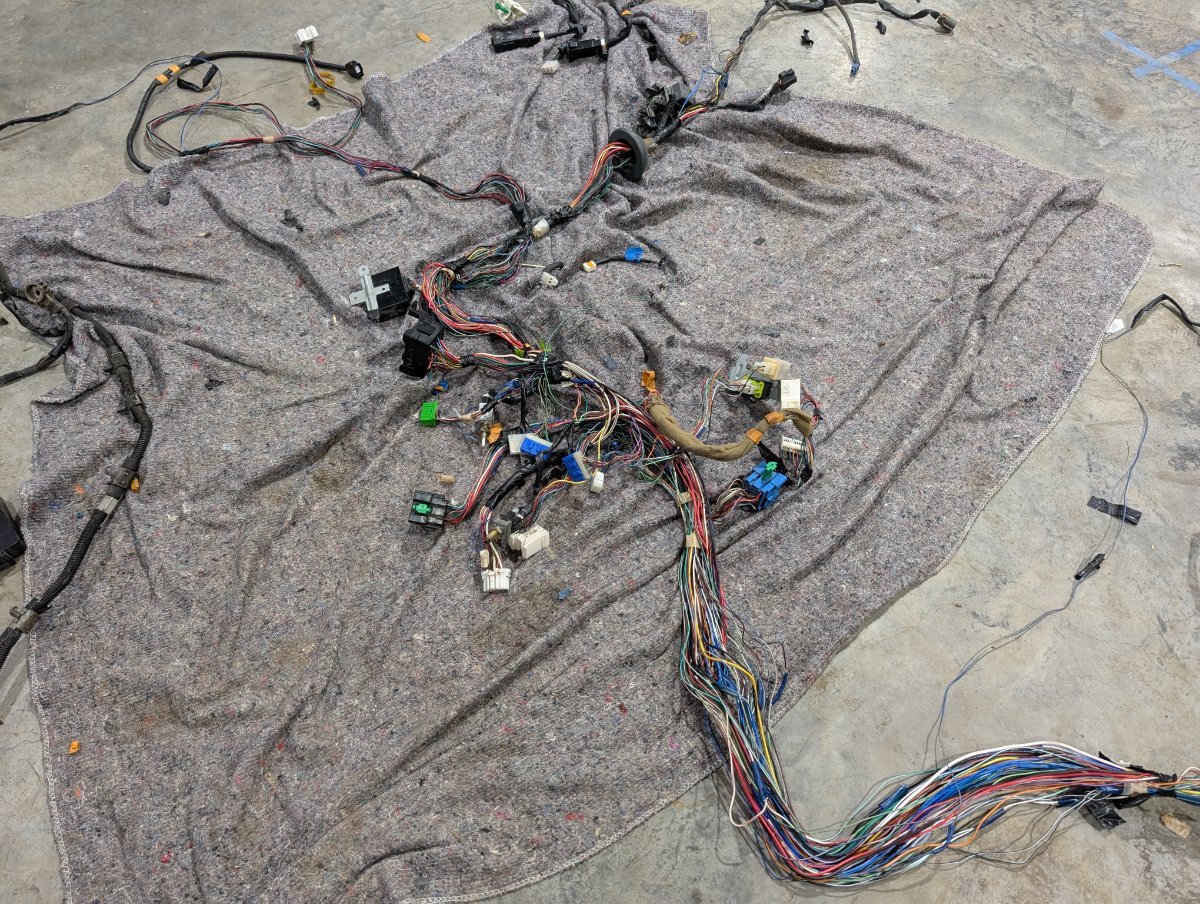
Been a minute since I've updated this thread. I am patiently awaiting some parts for the the wiring of this car, but should be here any day and we'll be off to the races again with this build. We'll be using a standalone ECU and MK chassis harness to wire this car. Will also be using standard MK gauges instead of the Miata dashboard. As I stated earlier, I'm working on another car - an RX5 250 Turbo build. This car is using the OEM miata harness to power the car and the engine needs - and the miata dashboard for info. This is the standard arrangement using the RX5 kits from MK - re using the donor car harness to complete the build. I hadn't gone through this process before with the Miata harness - and wanted to share with you guys. First - it's time consuming. And quite tedious. Second - you better be pretty sharp on auto electrical circuits and wiring diagrams. Third - Patience is key, the only way to eat an elephant is one bite at a time. That said, it is certainly a good solution and a significant cost saving path (if you don't count your time...) Here's a few pics of the progression, first pic is the untouched harnesses from the car. Second is the beginning of the teardown - this part is covered in the build manual, and removes quite a bit from the main chassis harness - but I wasn't happy here, and continued to remove quite a bit more from this harness and the other harnesses from the car. I managed to avoid splicing too much, with only 3 solder connections made in total. Everything else was re pinned, rerouted, and economized as much as possible. Third pic gives you an idea of how much is removed from the harness vs. the OEM configuration. And lastly a beautiful shot of the discarded tangle....