Timberline
-
Posts
63 -
Joined
-
Last visited
Content Type
Profiles
Forums
Store
Articles
Gallery
Events
Library
Everything posted by Timberline
-

420S Rainy Season Build in Western Washington
Timberline replied to Timberline's topic in Build Threads
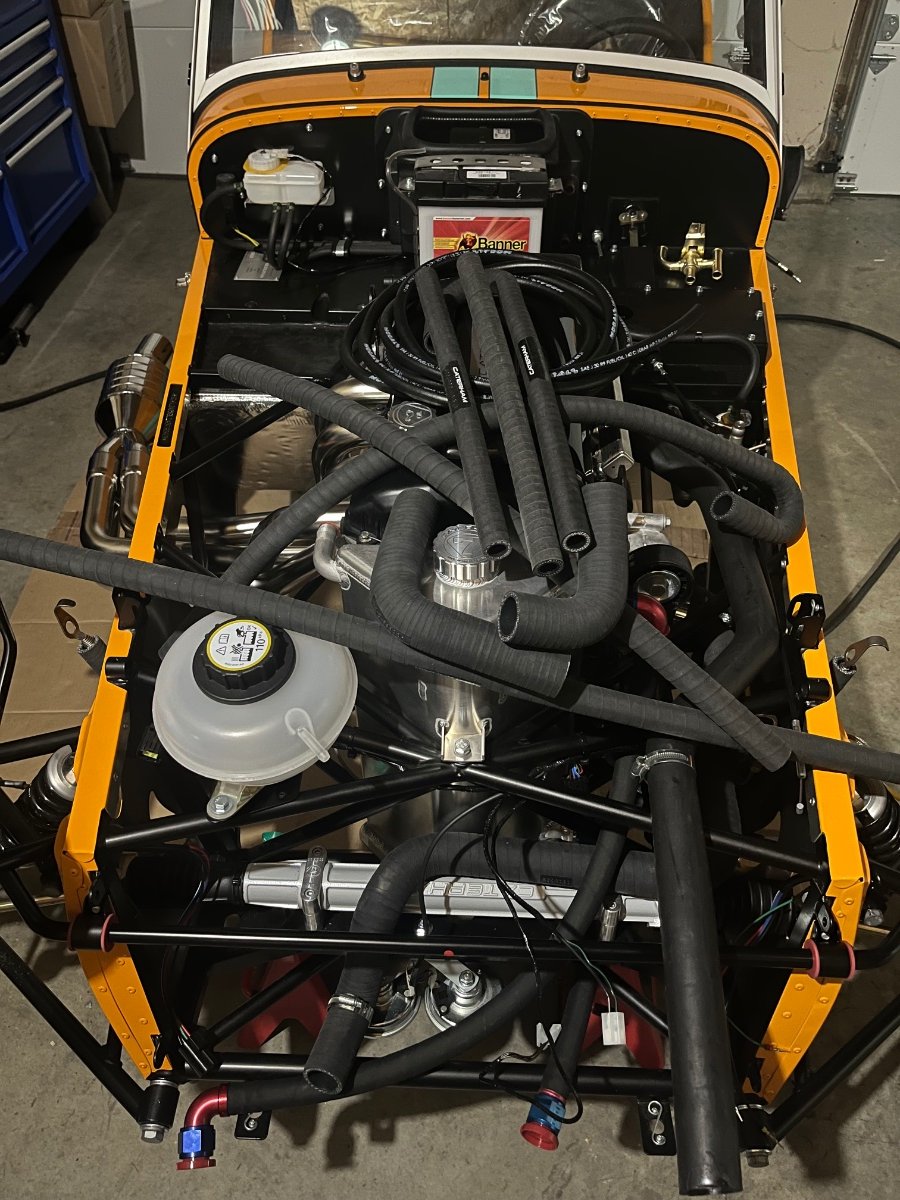
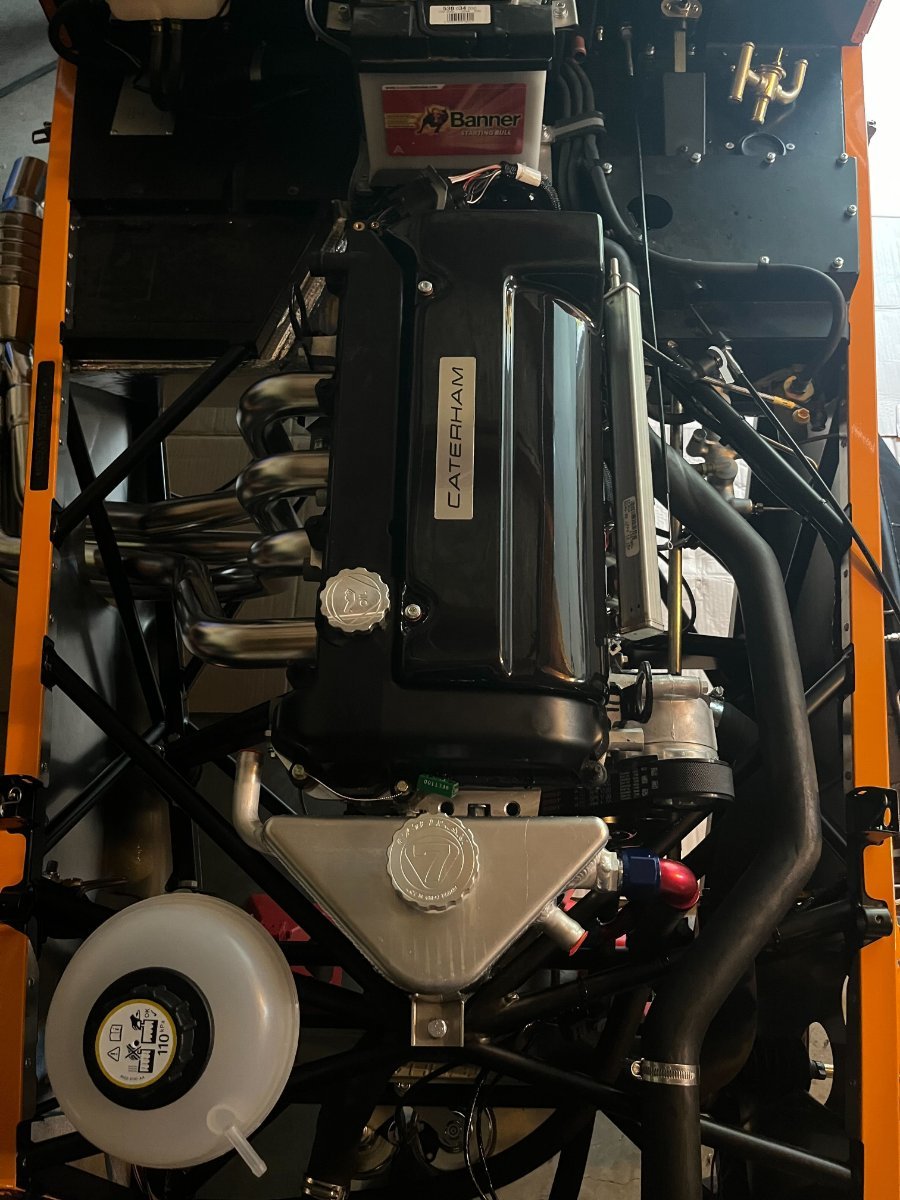
I need fenders and better wire routing before driving any further, so here is the question for the forum: what things can touch each other and what things should really have separation? I have work to do in the engine bay on the wires and pipes. List of concerns: Positive and ground battery cables routed together Main loom plug hanging in space over the bellhousing Fan wire is all over the radiator upper surface Wires are touching hoses Hoses are touching hoses Dogs and cats are living together -
420S Rainy Season Build in Western Washington
Timberline replied to Timberline's topic in Build Threads
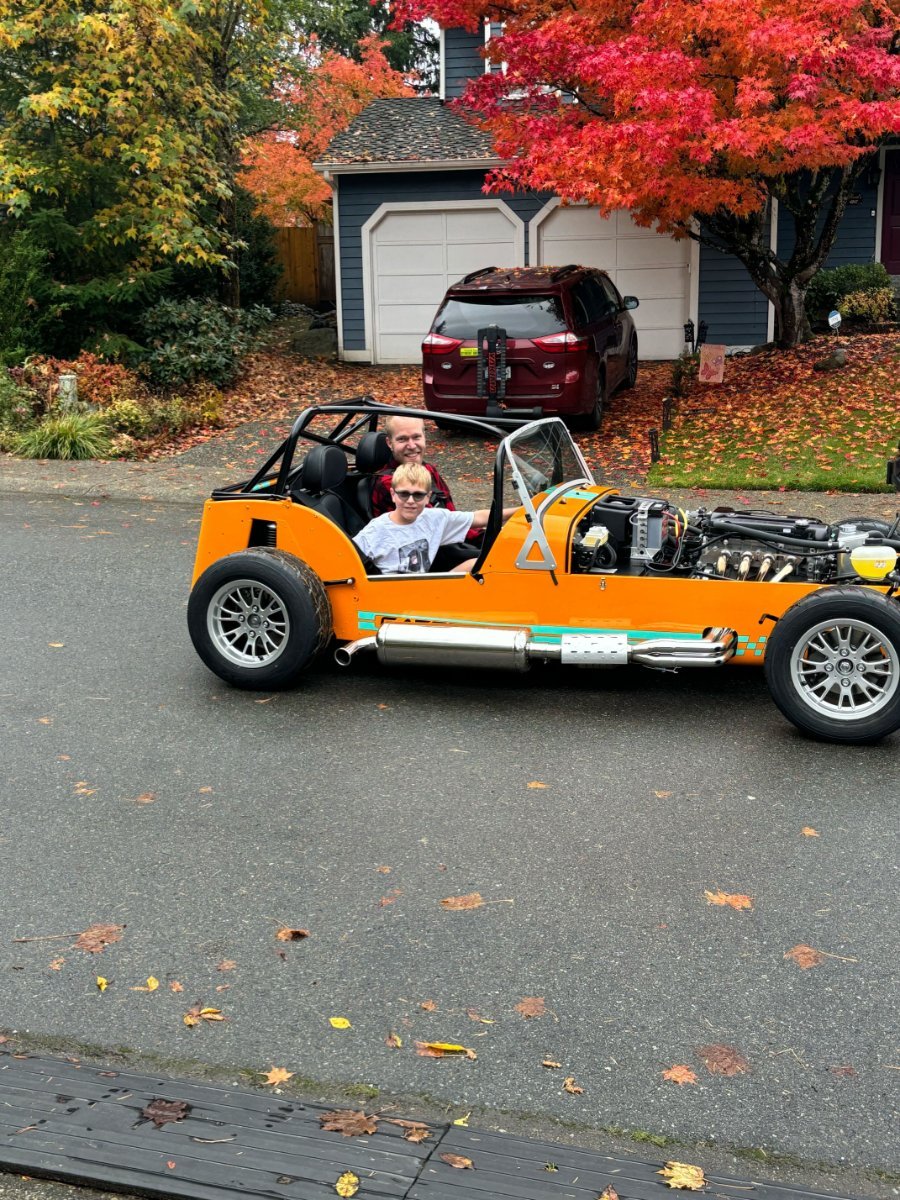
Weight on wheels and first drive around the block!!! IMG_2073.MOV
-
420S Rainy Season Build in Western Washington
Timberline replied to Timberline's topic in Build Threads
Successful engine start today! Really cold and wet out. I was worried how long it was blowing white condensation. However, once it reached temperature, the exhaust totally cleared up. Only leak to report so far is me not completely replacing the bleed plug in the radiator. -
420S Rainy Season Build in Western Washington
Timberline replied to Timberline's topic in Build Threads
You can't hear the harassing and complaining through the picture Good times! -
420S Rainy Season Build in Western Washington
Timberline replied to Timberline's topic in Build Threads
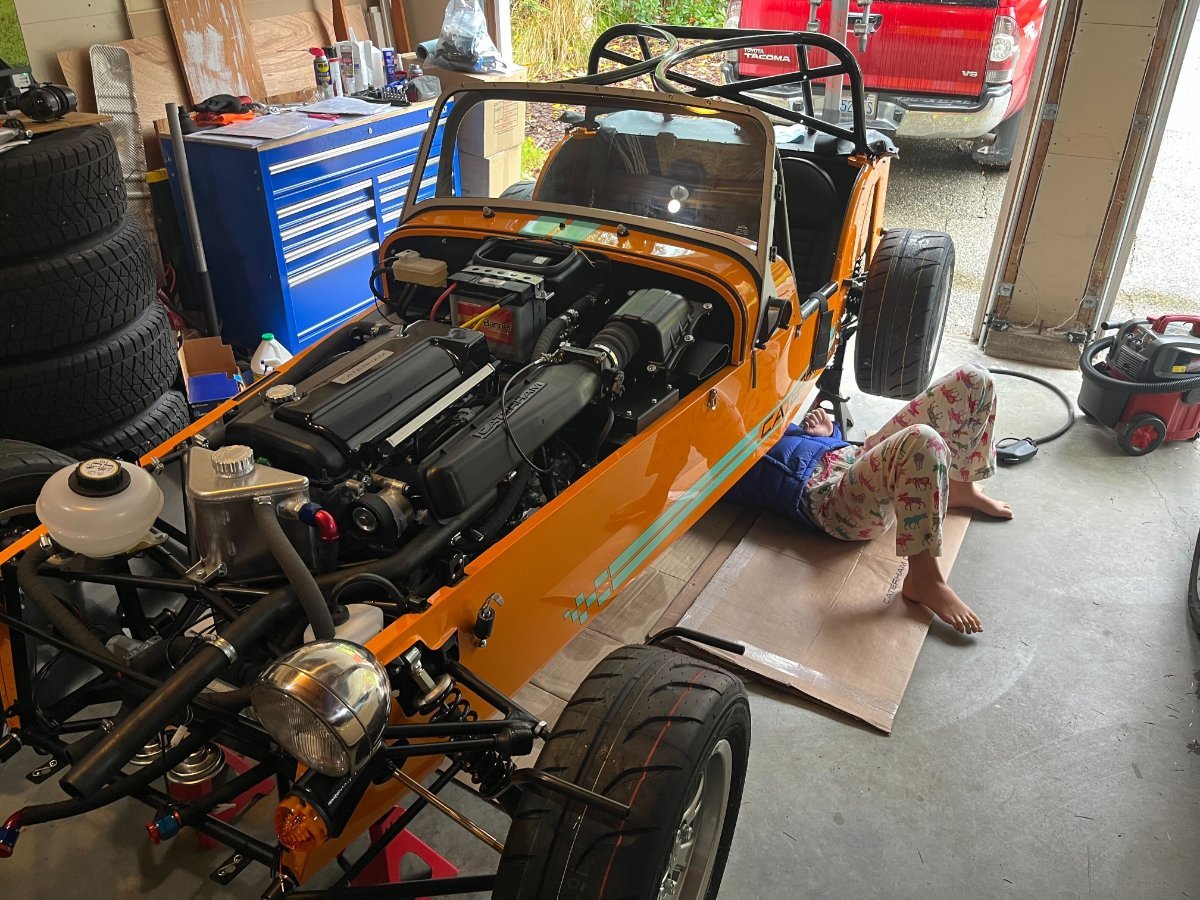
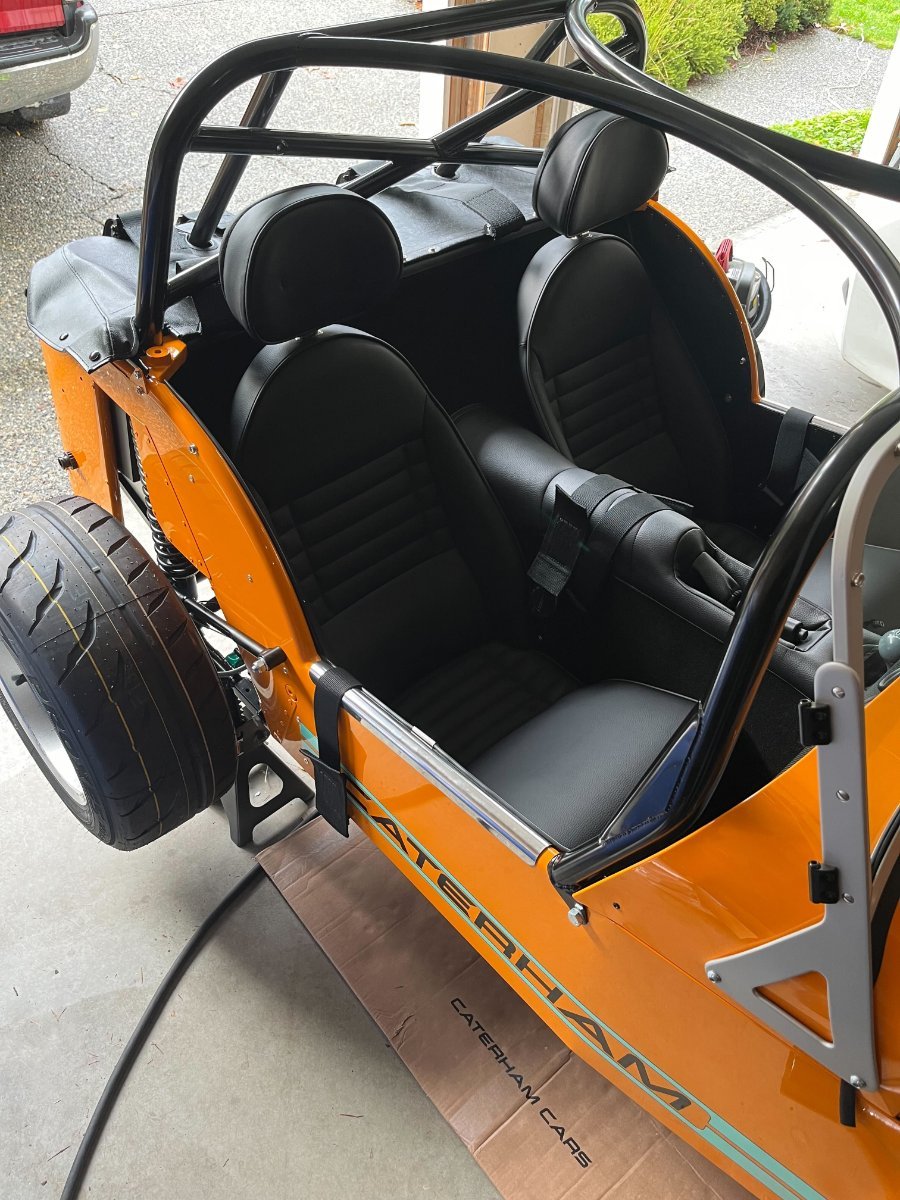
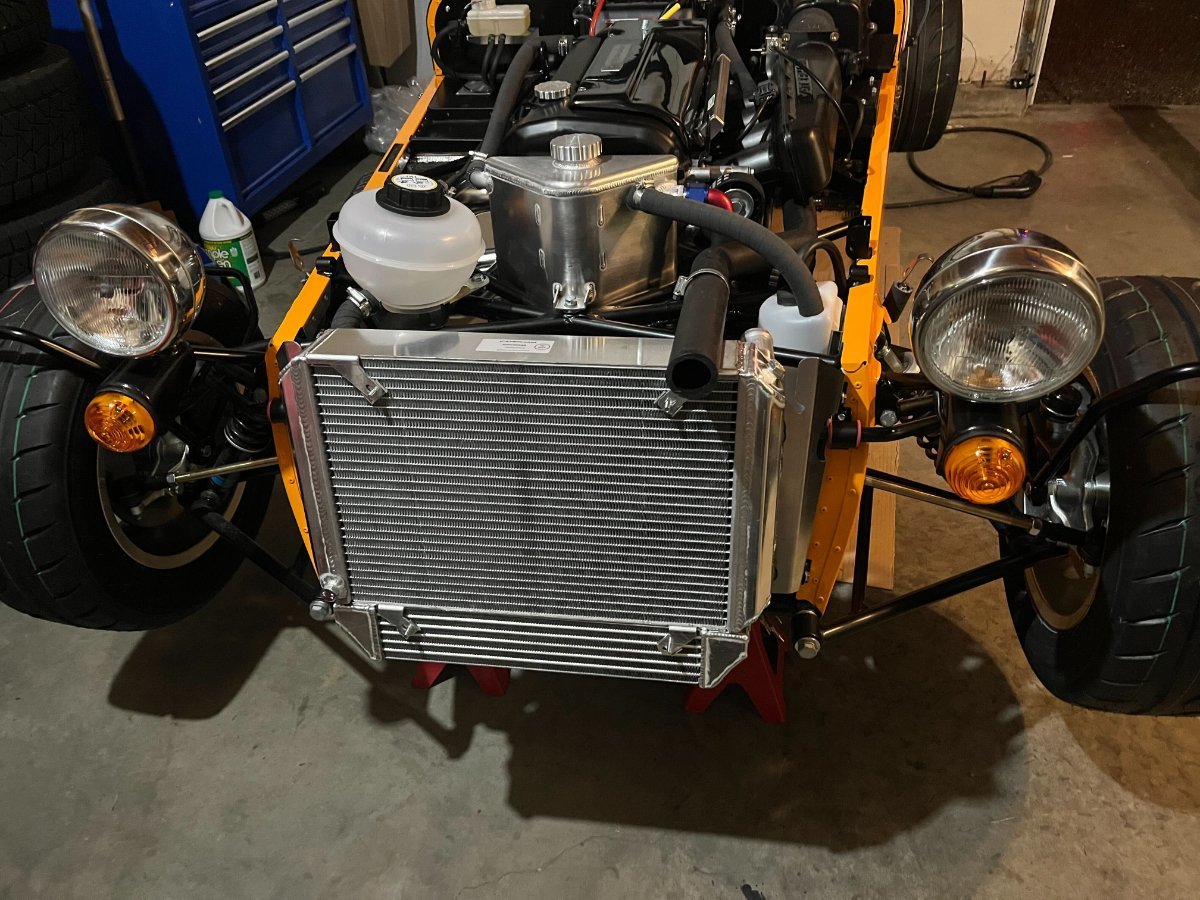
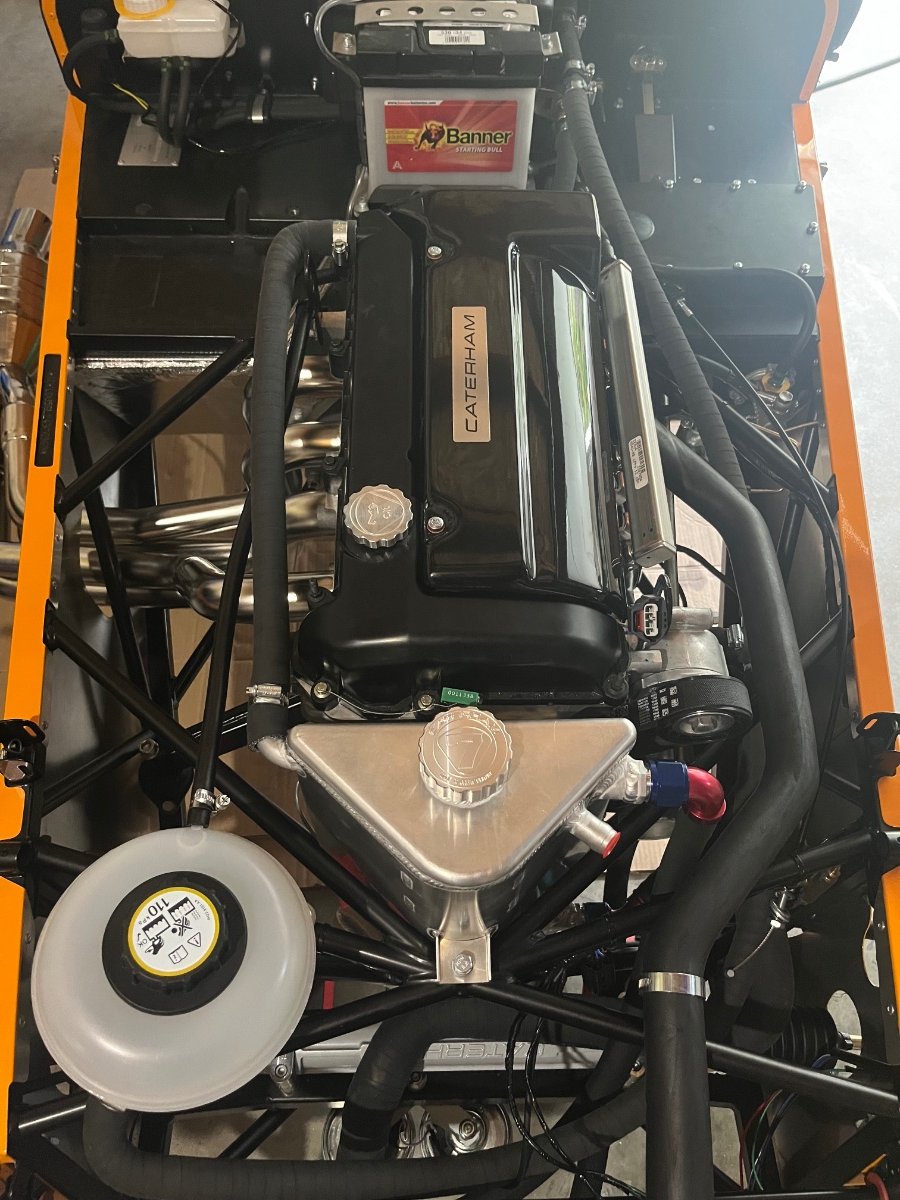
This weekend lived up to this build thread's name, so lots of jobs got completed on the car. Complete check of all brake fittings and bleeding of the brake and clutch lines. What should have been a 2 hour job became a 4 hour job when my neighbors ancient brake pressurizing kit lines disintegrated and threw brake fluid all over the engine bay. Quickly got any painted surfaces cleaned up, then took a long time throwing simple green everywhere. Afterwards, we were able to get the lines bled alright. Laundry list of things installed: carpets, tunnel closeout, parking brake adjusted, harnesses, and seats. Got everyone in the family helping at one point or another. Even got my daughter enthusiastic enough to help with seats. Then, monday night, I finally got the radiator brackets in the mail. Here they are temp installed.
-
420S Rainy Season Build in Western Washington
Timberline replied to Timberline's topic in Build Threads
Thanks! I’ll do something with it. It’s just weird I can’t find any ideas on the many build blogs online. Some of these folks are very fastidious about things. -
420S Rainy Season Build in Western Washington
Timberline replied to Timberline's topic in Build Threads
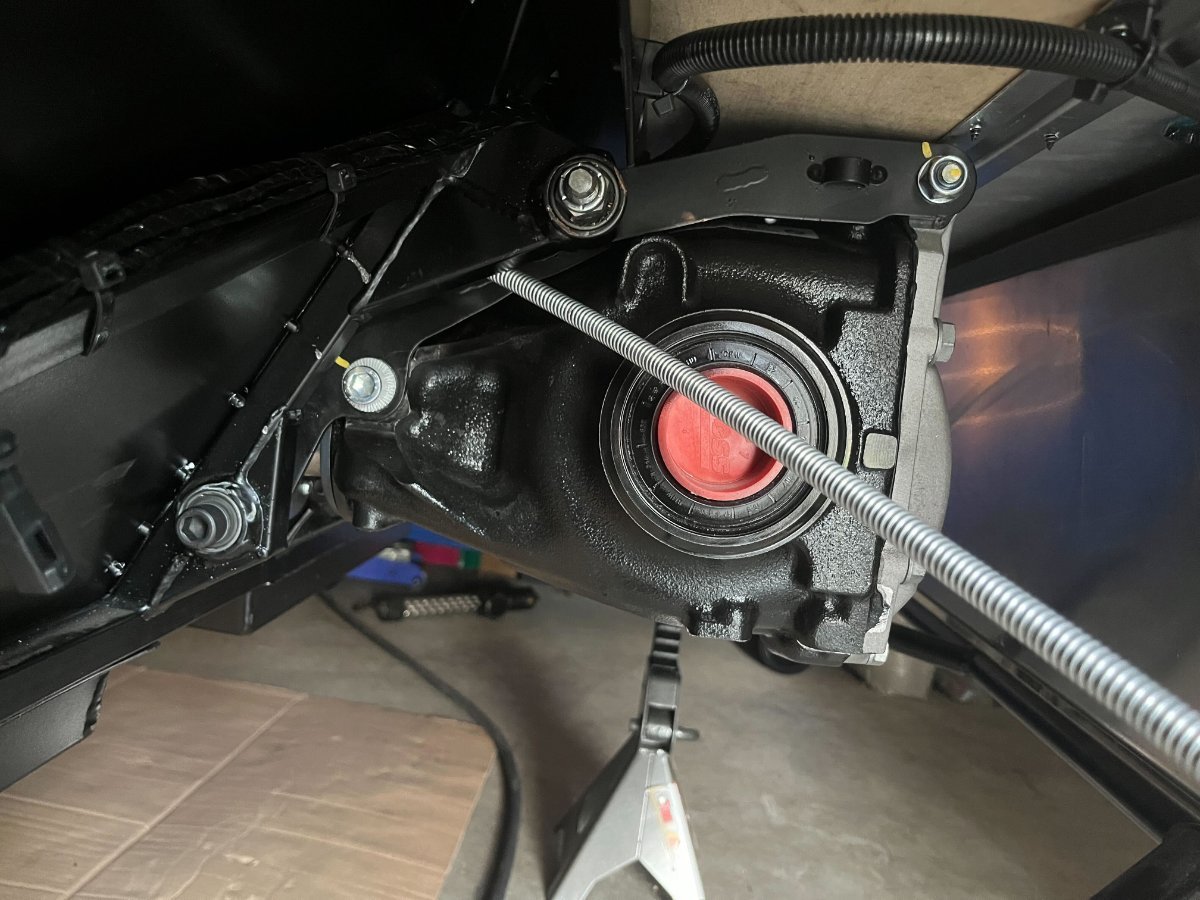
I just reinstalled it. Had it out to fill the diff oil and weather proofed the wood -
420S Rainy Season Build in Western Washington
Timberline replied to Timberline's topic in Build Threads
-
420S Rainy Season Build in Western Washington
Timberline replied to Timberline's topic in Build Threads
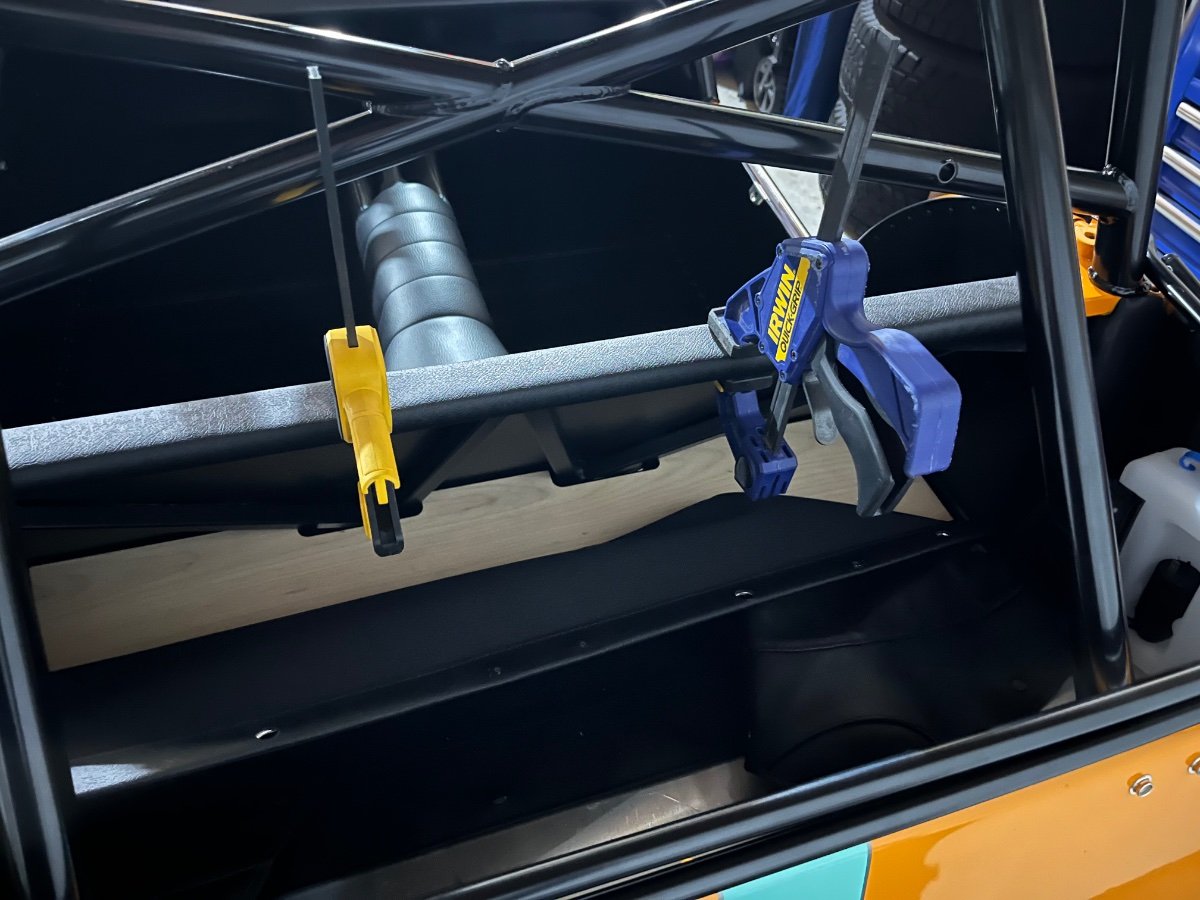
Glued carpets in place today and I have a light question about the wall carpet. What do I do with the leather piece at the top? I figured it goes under the boot cover so that got removed. Do I just loop it around the chassis? Glue it in place? The top will be partially held by the boot cover screws. -
Of the whole build so far, the front suspension is the step I am least satisfied with. I can't believe it's the first step in the build manual. The wishbone installation in particular was so difficult and took many sessions to complete. Every bolt was a challenge to install. So keep persevering. The future challenges are much more rewarding to work through. Something I discovered after the fact that made my chassis even more challenging. For the top bolt of the dampener, you need to push the skin out of the way. My skin rides the chassis there (manufacturing flaw) and has no travel inside. I had to push the skin outwards. Literal blood, sweat, and tears later, I got that bolt in. Now that I know this is a flaw, I should have trimmed the skin or frame a little to eliminate the riding clash and popped the skin inwards as designed.
-
420S Rainy Season Build in Western Washington
Timberline replied to Timberline's topic in Build Threads
Thanks for the heads up! I had noticed that issue with failed starts. Once you know what to listen for, the fuel pump is noisy enough when nothing else is on. When it comes to starting the engine, I was going to not put fuel in the car till after the oil pressure check. Do I still need to disable the fuel pump? The line should have no fuel in it either way. -
420S Rainy Season Build in Western Washington
Timberline replied to Timberline's topic in Build Threads
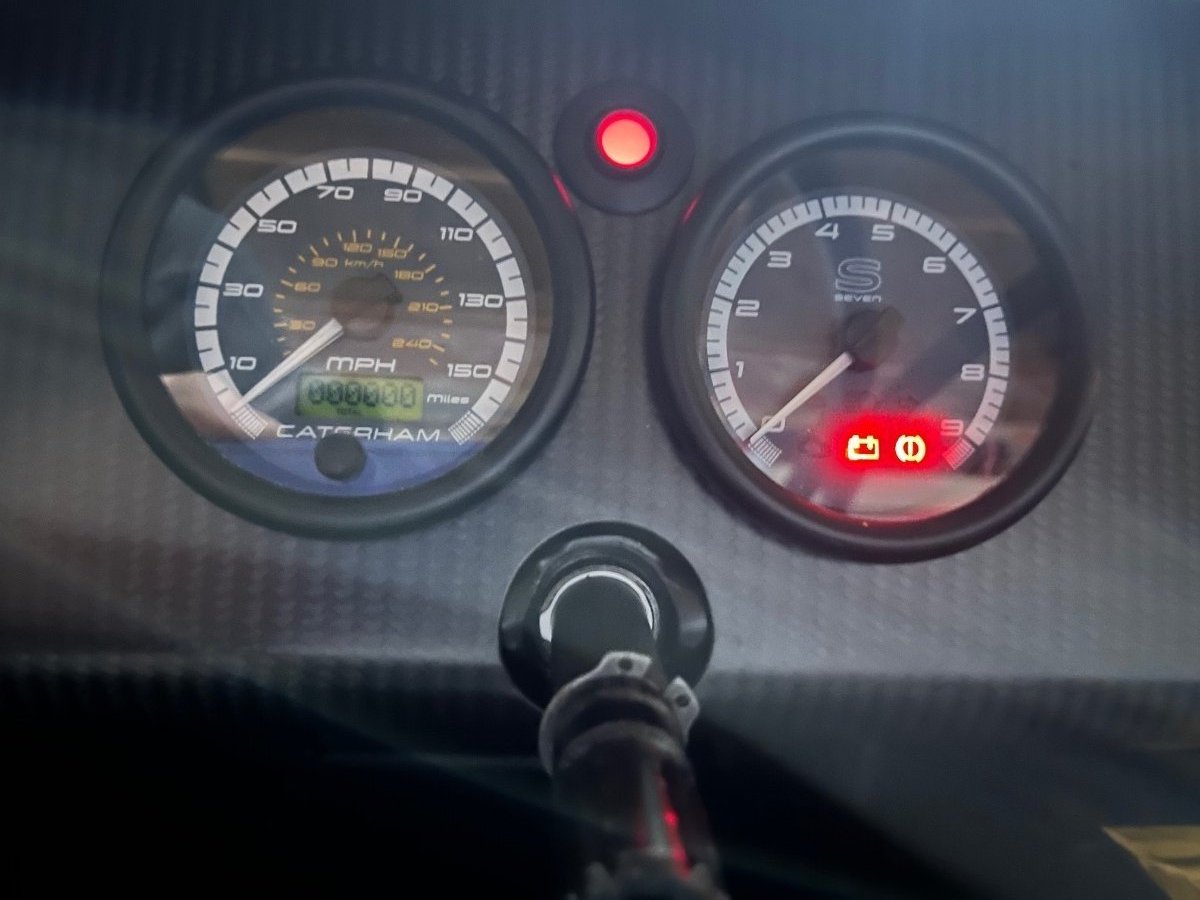
Battery activated and charged. Started the electronics for the first time! First system check! The speed sensor picks up every tooth!
-
420S Rainy Season Build in Western Washington
Timberline replied to Timberline's topic in Build Threads
I really wanted to just splice the two ground wires together and figured it would have been just as good. Doubt got the best of me and I didn't. I am a structures guy, not an electron guy Hopefully none of my wiring problems get any harder than this. -
420S Rainy Season Build in Western Washington
Timberline replied to Timberline's topic in Build Threads
I used 18ga like you did. Upon stripping the harness wires, guessing they are 20ga. Happy with the results so far. I had to heat the shrink splices in place, only piece of metal I have left is the fuse box cover. It’s an excellent heat shield!
-
420S Rainy Season Build in Western Washington
Timberline replied to Timberline's topic in Build Threads
Do you know the gage of these signal wires? @Austin David -
420S Rainy Season Build in Western Washington
Timberline replied to Timberline's topic in Build Threads
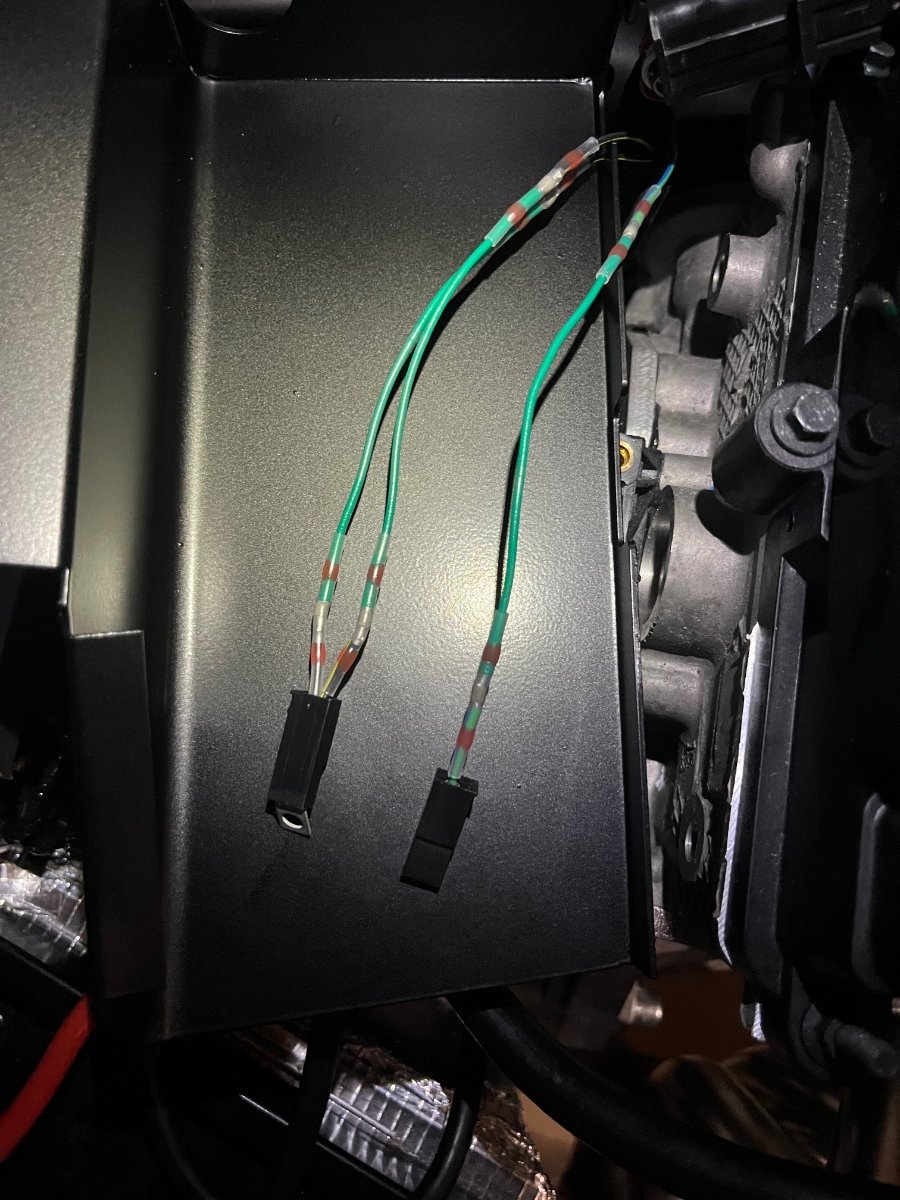
Okay. After subassembly and connecting the coolant heat sensor (submarine), the lead and ground cables are too short by a couple inches. Any clever ideas to fix this? I am thinking of creating short splices. -
420S Rainy Season Build in Western Washington
Timberline replied to Timberline's topic in Build Threads
@CBuff But seriously. Thanks for the pictures!
-
420S Rainy Season Build in Western Washington
Timberline replied to Timberline's topic in Build Threads
Thanks for all the great pictures! Got me over the hump on installing all the hoses. I think I nailed it!
-
420S Rainy Season Build in Western Washington
Timberline replied to Timberline's topic in Build Threads
Thanks for the reply. Gave me the confidence to remove material from that plastic plug. All fitting now! -
420S Rainy Season Build in Western Washington
Timberline replied to Timberline's topic in Build Threads
One more question for the community: I have finished the roll cage install, can I rivet the footwell panels, seal, and trim now? I don't see any other operations that need to be done first. Just checking as I don't want to drill out a ton of rivet heads later -
420S Rainy Season Build in Western Washington
Timberline replied to Timberline's topic in Build Threads
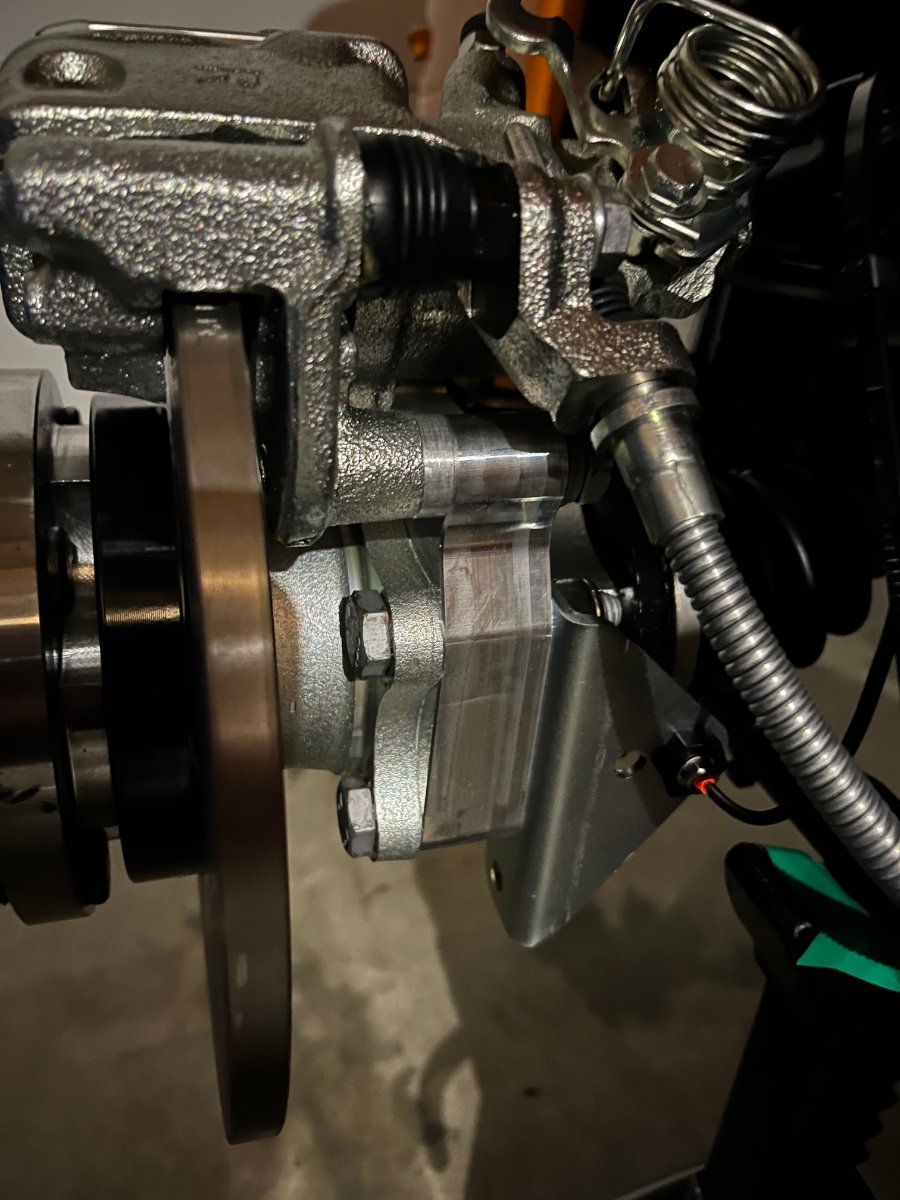
Just a couple build updates today. I am moving forward with little jobs in the engine bay without the radiator mounted, but i do have the brackets being sent to me in the mail! I am stuck on the throttle cable installation. It all makes sense, but I am having a ton of difficulty inserting the plastic retainer into the footwell bulkhead. You can see it's still loose on the throttle cable in the picture. Any tips on inserting/smashing that in there? It feels like another case of internal powder coating like the anti roll bar cups. Finally completed the differential install. Ended up installing the differential frame to the chassis first, then the differential to the differential frame. I would suggest this method for any future builders because the differential frame to chassis holes were spaced really poorly on my build. Also, the differential frame by itself is easier to lift and manipulate into place. Messing with the internal spacer washers with less weight makes it easy. After measuring the total space needed to shim and halving it for each side, install the washer shims on the tighter side first. The natural tension on that side retains the washers without having to juggle anything. Then the whole assembly will be pushing against the other side and retain those washers easily as well. One thing to watch out for is calculating the spacer washers with just the differential frame and no differential. That could push the differential frame too tight. I just used the spacers from my first failed install and it worked great, but that was measured with the whole assembly in place. Additionally, do the forward shorter bolts first (in both cases) because they have internal threads and don't take to the beating as well as the aft long bolt. From an earlier post, I ruined a bolt and almost damaged the differential frame due to cross threading and being thick headed. The aft bolt can take the beating, can better take a chamfer (needed for my alignment), and there is no risk to damaging internal threads.
-
420S Rainy Season Build in Western Washington
Timberline replied to Timberline's topic in Build Threads
Update: I was able to re-tap the threads in the differential housing after breaking off bolt threads in it. Too much brute force. Got it installed and moving forward with the rear end part of the build. -
420S Rainy Season Build in Western Washington
Timberline replied to Timberline's topic in Build Threads
What's the best way to ping Caterham for parts? I haven't heard back from dealer or the build support email about the radiator brackets. -
420S Rainy Season Build in Western Washington
Timberline replied to Timberline's topic in Build Threads
Can we petition to get half a dozen radiator mounts shipped state side? Cover the next couple builders till they get incorporated in the kits. -
420S Rainy Season Build in Western Washington
Timberline replied to Timberline's topic in Build Threads
Starting with the big pipes and have the 30-40 or 27-40 clips on them. I guess it's order of operations. Do you insert the hose with the clip on the hose? Or insert the hose then come back with the captured clip from the fitting?