sainthoo
-
Posts
90 -
Joined
-
Last visited
Content Type
Profiles
Forums
Store
Articles
Gallery
Events
Library
Everything posted by sainthoo
-
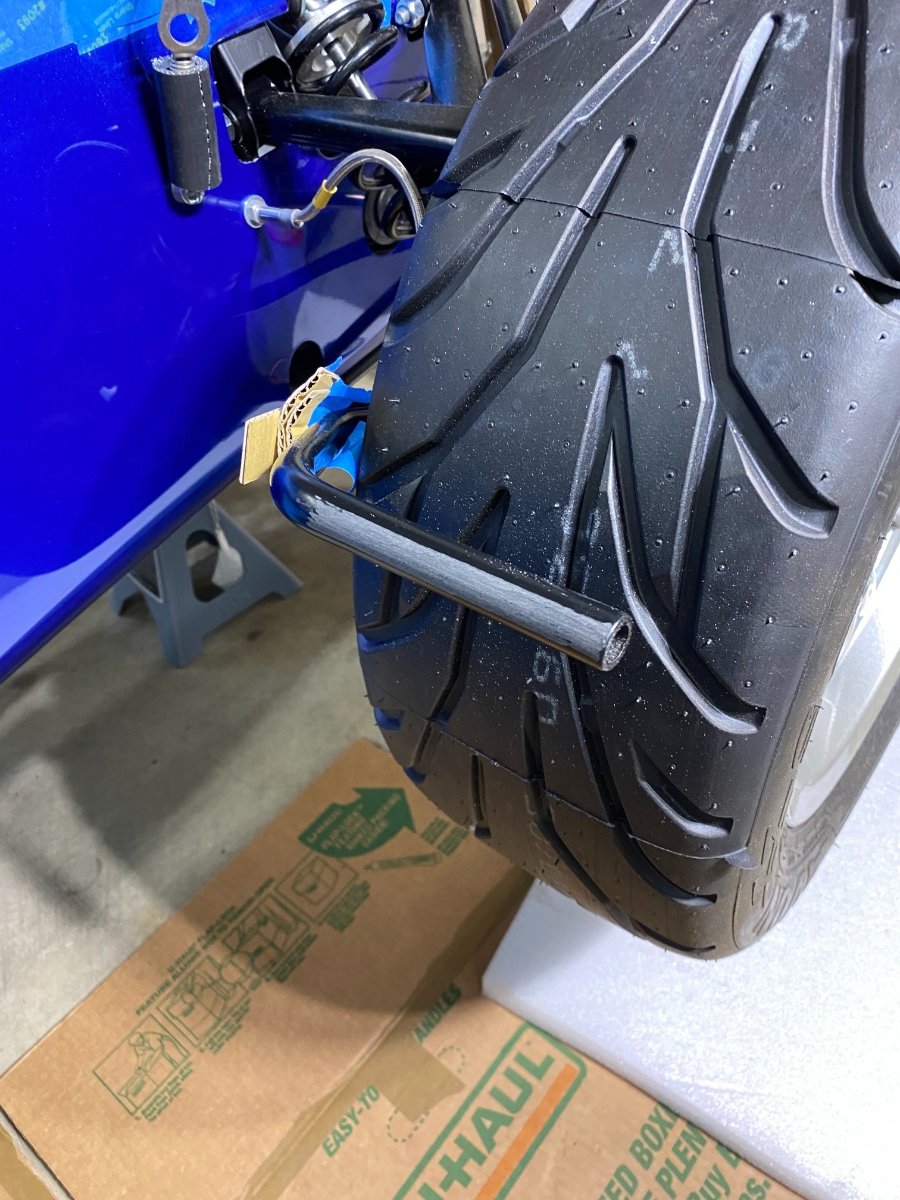
All I know is it came on the giant pallet of stuff with the kit- not drilled (me not thrilled about that). i definitely would not want it any smaller. edit: I do have some random extra brake line, don’t have a fuse box cover, etc. So, who knows what wheel I have?
-
That seems strange to me- I’ll keep it with the key, so it can’t be stolen.
-
Couldn’t figure out why it wouldn’t turn over … resorted to manual. Hey, look at that…. It’s an immobilzer, gonna go ahead and put that on the key ring.

-
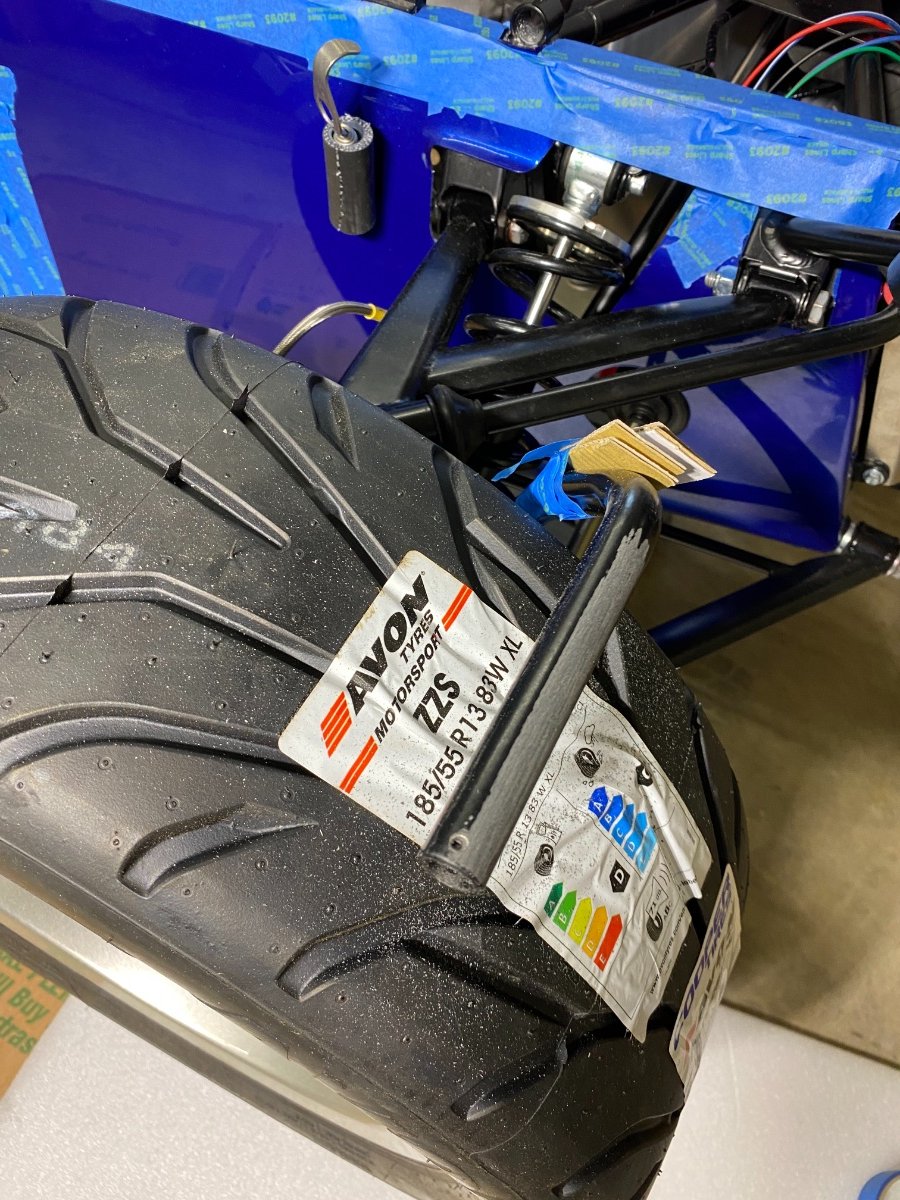
Yes, not very large at all in person (about 11” diameter), probably camera distortion.
-
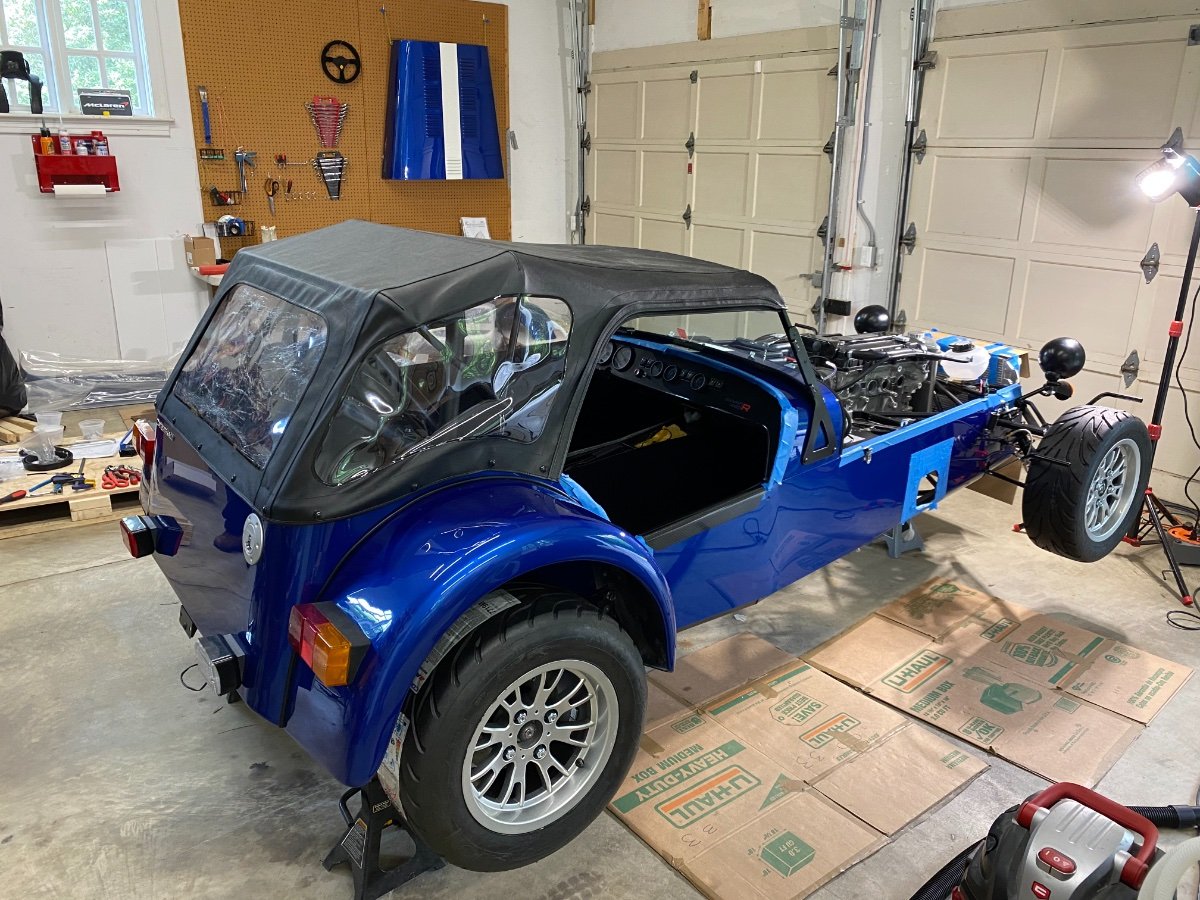
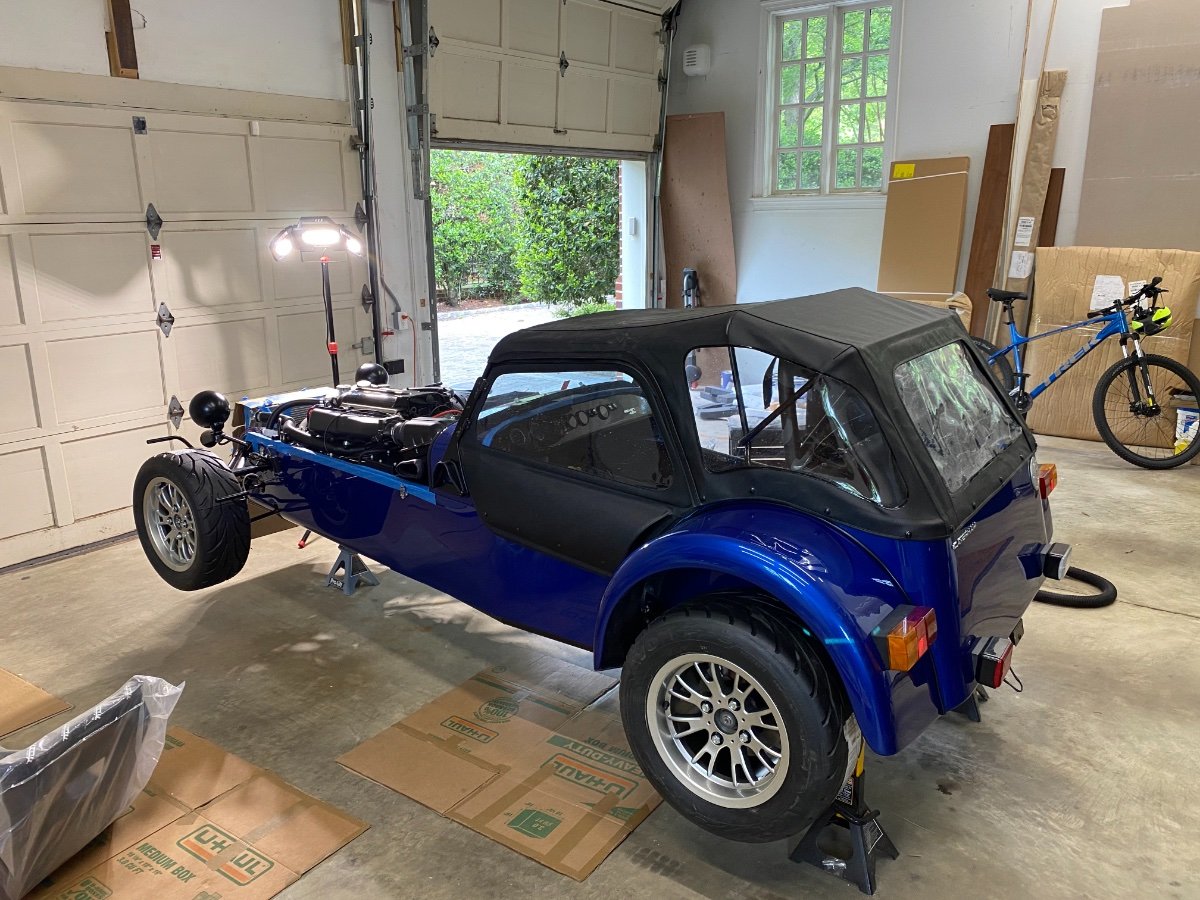
Hole cut: Hole cleaned up, headers installed- Finally! Exhaust finally on the car:
-
Lord help me, I did it. First, I tried shears- straight cut, but way too fast, more difficult to turn than I was comfortable. I then tried this metal cutter that fibrates really fast (same as a bone saw). Not as pretty, but more controllable. Figured I would just clean up the edge afterward.
-
Made my template of the factory opening for headers. Then, I measured 2” forward, applied tape, applied template, marked area to be removed. (chose 2”, as I’m going to try to make the fore and aft gap more symmetric- will further minimize gap discrepancy with trim ring as ring does not have to fit to edge of the body- cheat in a bit on aft edge). Now, wait for metal cutting implements to arrive.
-
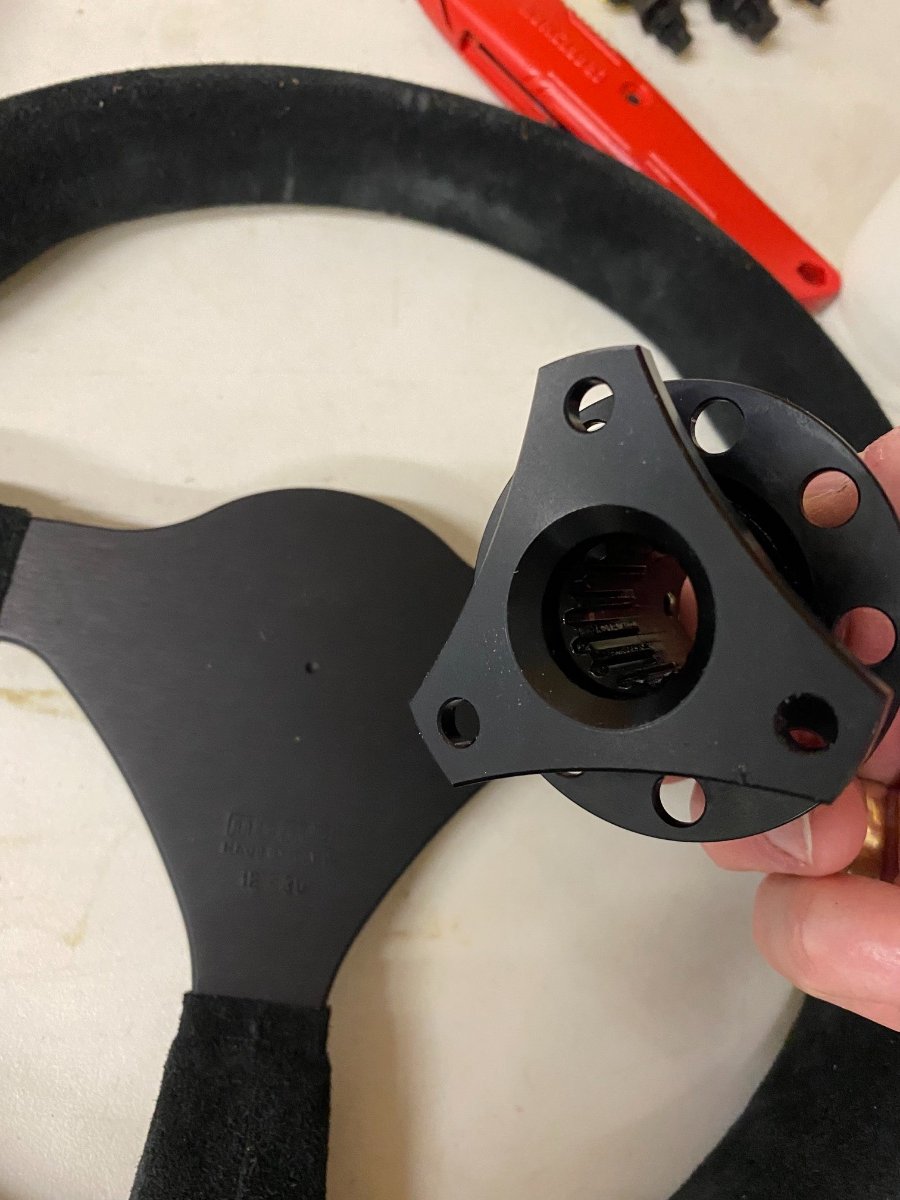
Steering wheel for those that want a pictorial (I am a rank amateur- so take that into account) template- traced release hub, measured center points, drew lines to find center: Nail through paper into divot to line up. Drew a center line on wheel, lined up with my template. Then, I drilled and fitted the center spoke. Fitted hub with bolt/nut, then centered the next 2 holes with punch, removed hub, drilled next 2 holes. (I started small, worked my way up in 3 successively larger holes) Counter sunk side facing driver to make bolts flush. Nylok nut, making sure there is clearance for releasing hub (don’t use a bolt that is too long).
-
Yeah- options 1) custom headers, sounds simple, actual execution not straightforward to match up to collector/ muffler or 2) Caterham offered to send a new body opening panel- have to remove current, blend paint or 3) enlarge opening Caterham is apologetic, offering to cover “solution.” I am inclined to cut opening bigger, then have a stainless steel trim ring fabricated - make it look intentional.
-
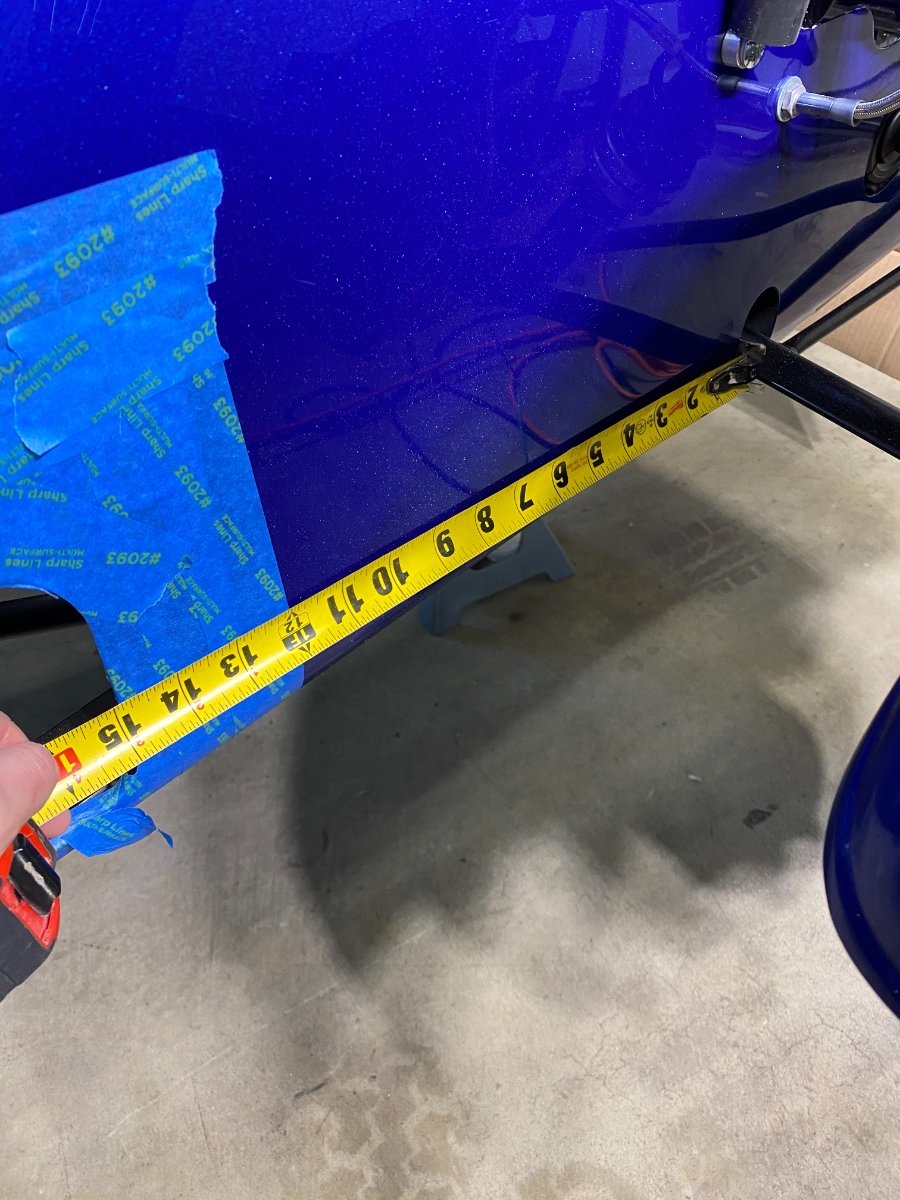
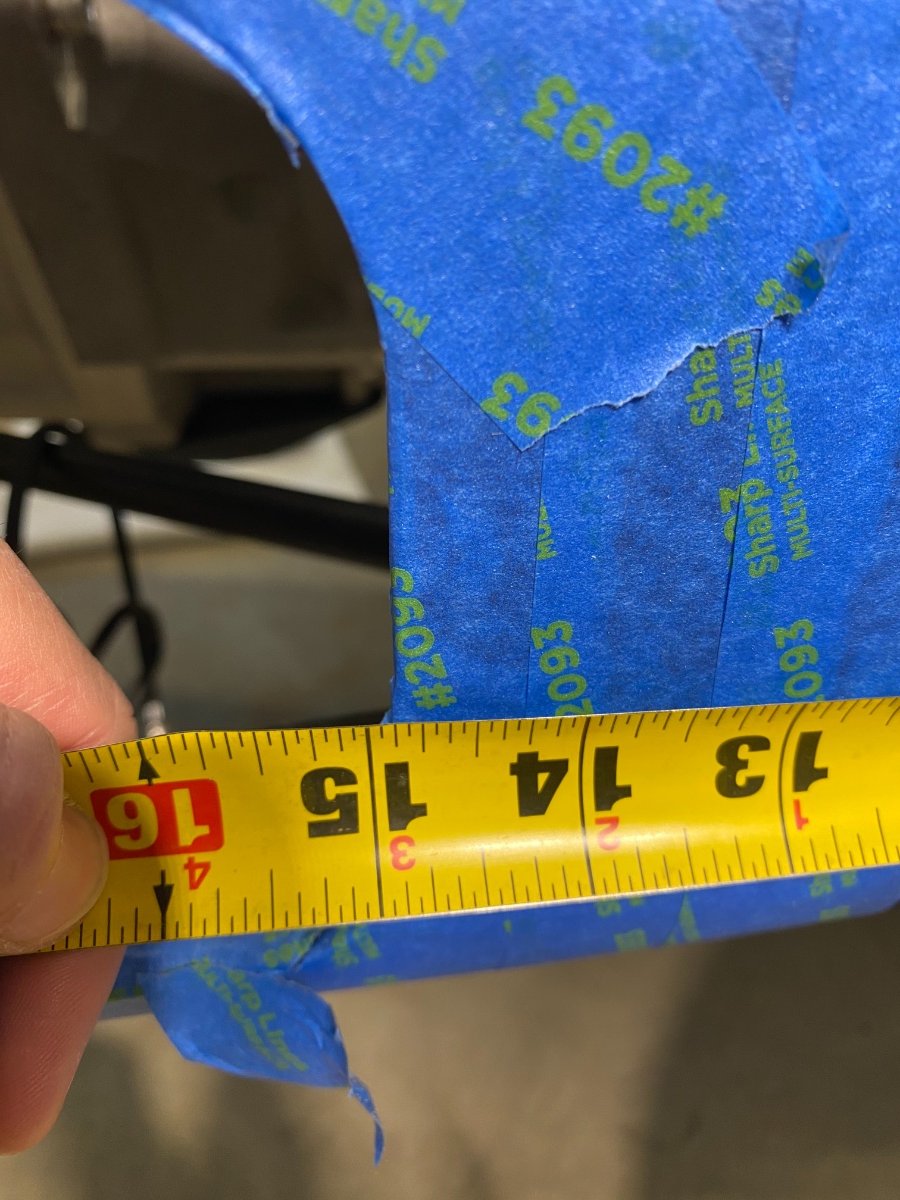
Anyone care to chime in on this measurement (how does it compare to your car)? Edit: SV with aero wishbones Edit #2: Caterham cut the opening in the wrong spot for the SV…. This should be located 13.625” from front wishbone. …. At least I’m not crazy…. Now to get to a solution.
-
Anyone know of a simple (idiot proof) way to drill the steering wheel to match quick disconnect?
-
Definitely windscreen- Josh @RMC says he has some nice brackets, probably go that direction.
-
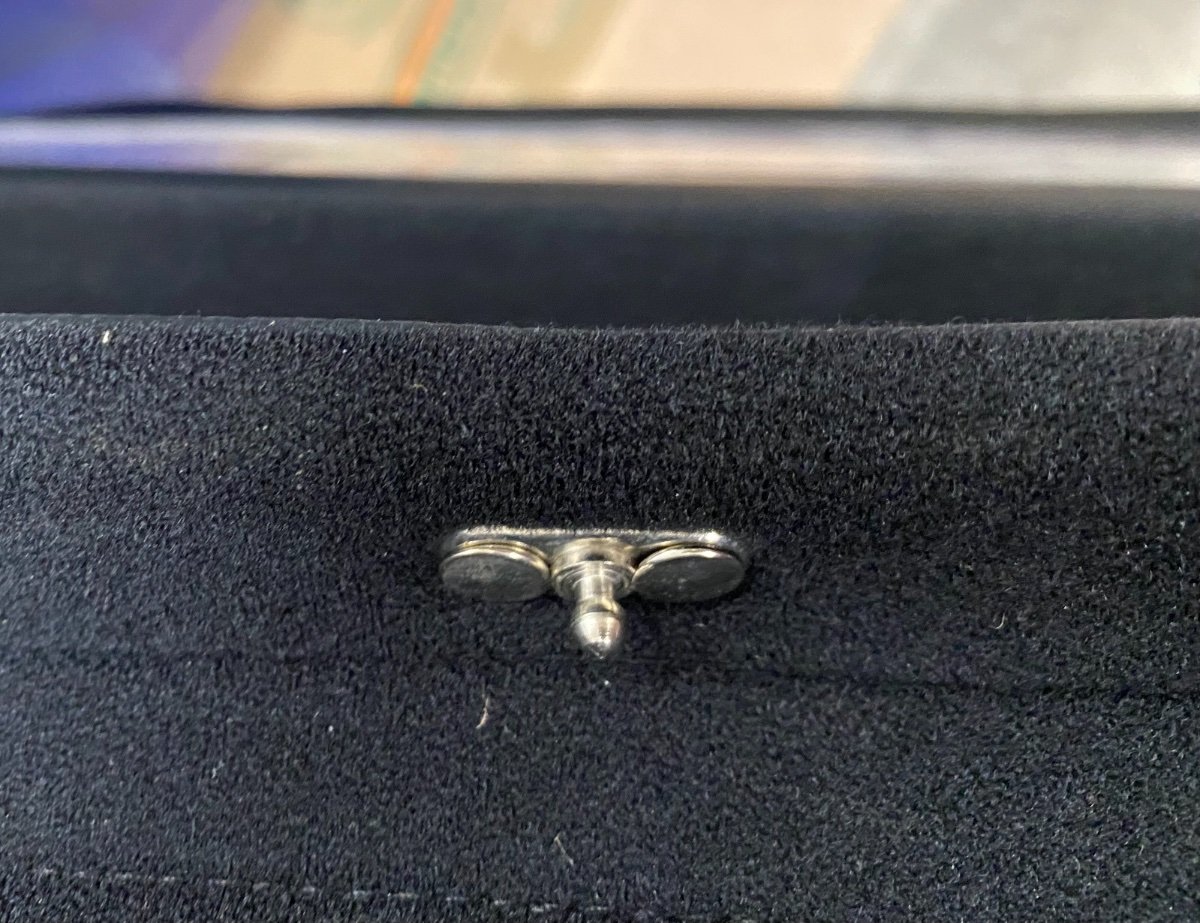
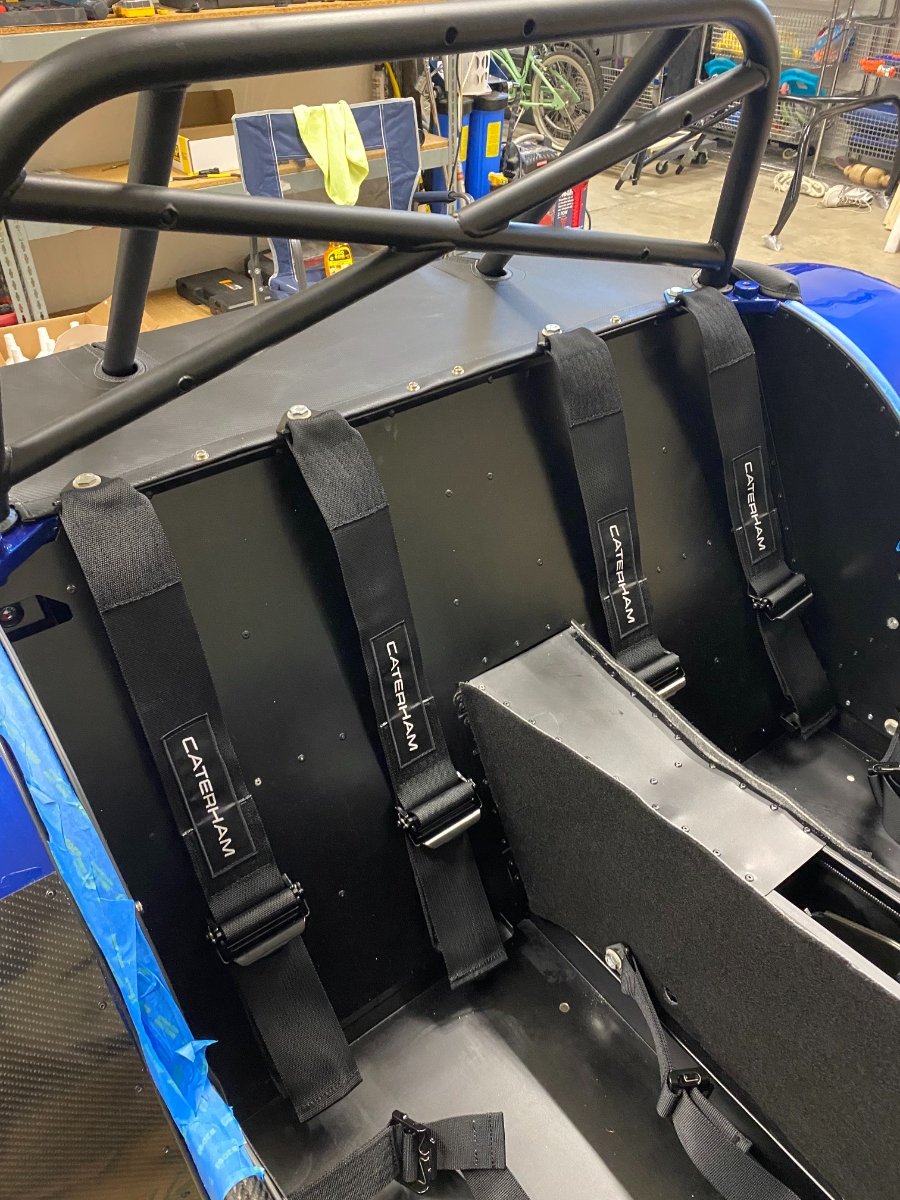
How does one properly attach these? I can see using the forward bolt hole, then punching a snap through the back where there is already a snap in the chassis (not sure 1 snap is good enough to prevent flapping like crazy)
-
Huh, I don’t have the female end, I don’t think. Easy fix, just need the part. Anyone have a picture, so I can search with a clue?
-
Anyone care to share how they attached wing mirrors?
-
This is the fastener on the underside of the arm rest for the door. Anyone know what/name fastener this goes into? Also, anyone have a picture of where/how this fastener is attached to inside of car near arm rest?
-
Need to figure out side mirror mounting/placement, install license plate light. I’m sure I’ll have some electrical sorting, TBD. Just need the “top hat” for the speed sensor, fuse box cover….. and possibly some new headers.
-
Fitted the foul weather gear just for the heck of it.
-
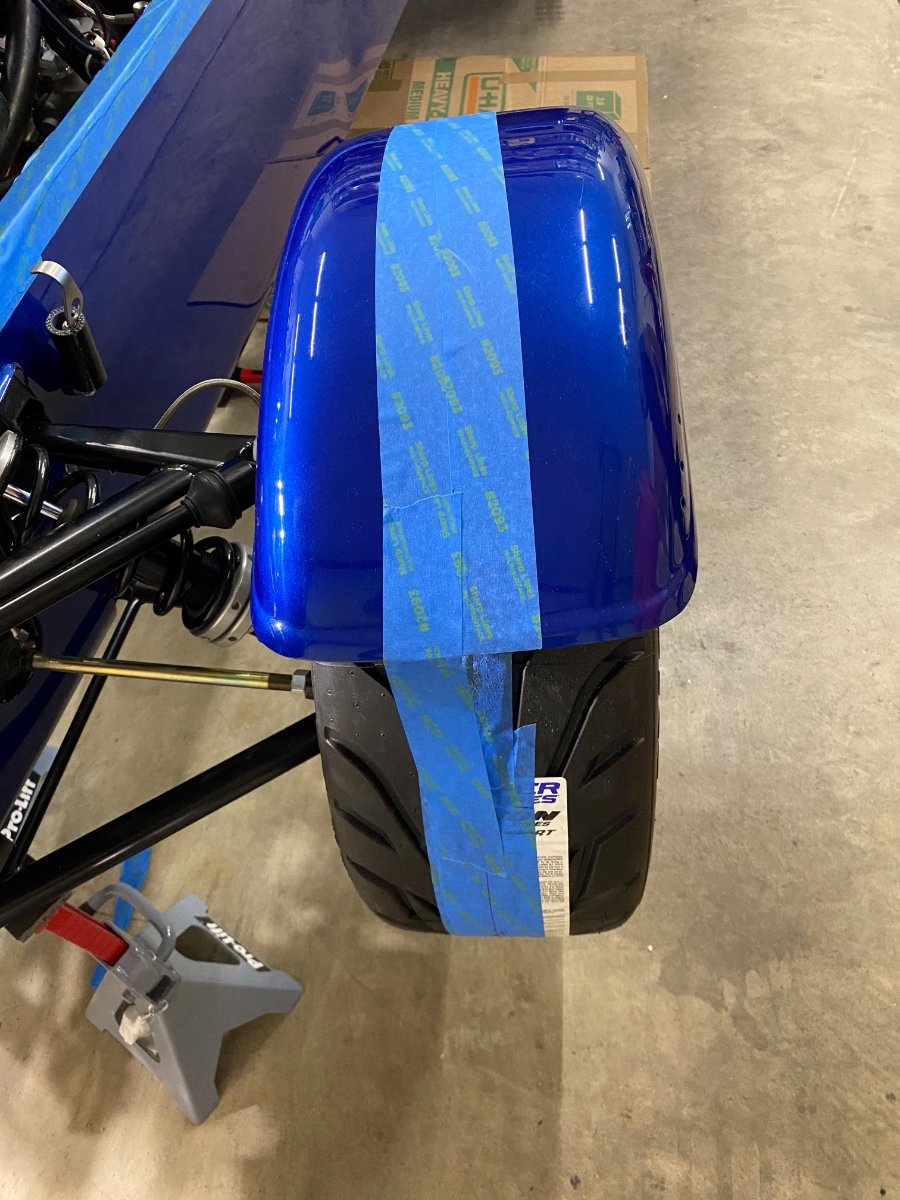
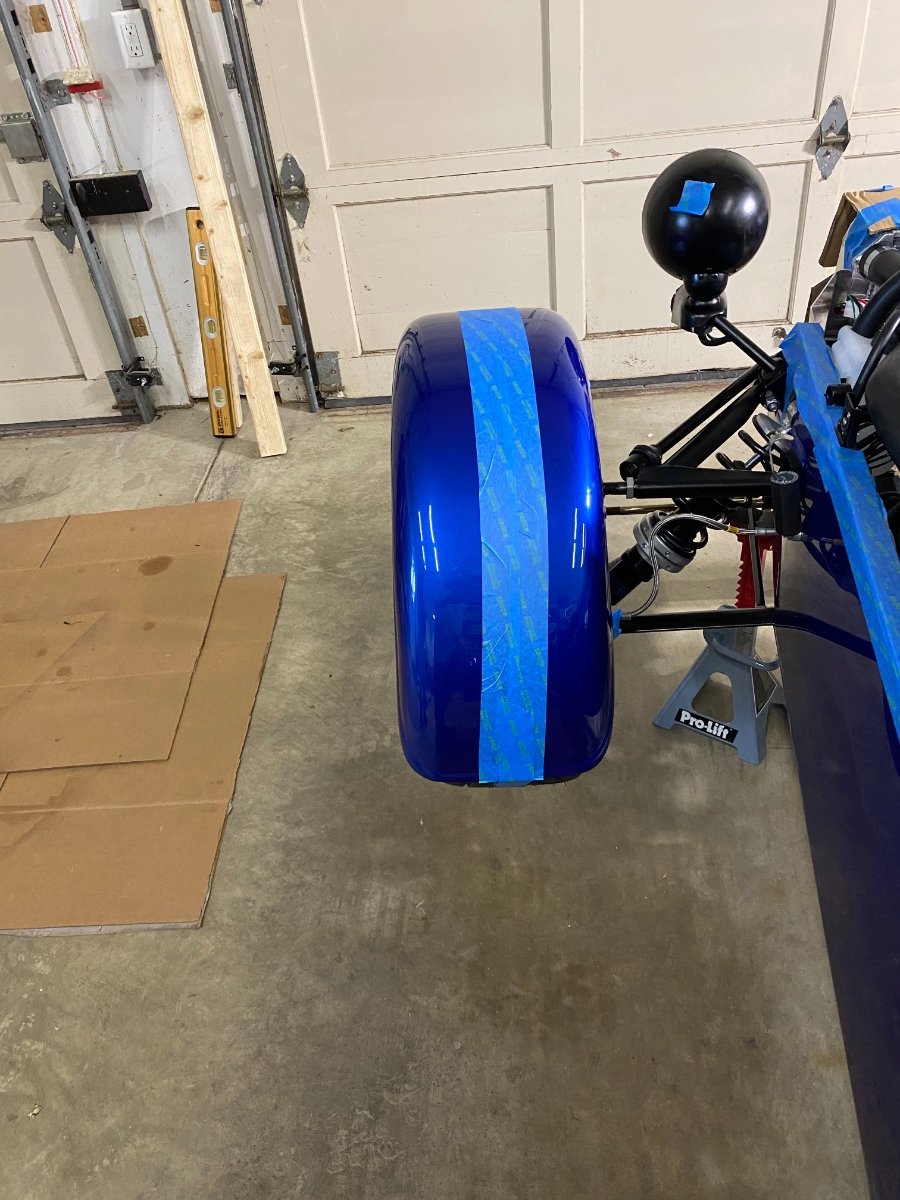
Did not like fitting front fenders- they did not seem to be perfectly symmetric, so basically eyeballed it, glued it, currently have fingers crossed as the drying happens overnight.
-
Rubber mats were a bit more of a chore than I anticipated. Snaps riveted to floor after mats trimmed. Getting the snaps in the mat itself was a pain- ultimately a tap or two with a hole punch worked to get the snaps assembled.
-
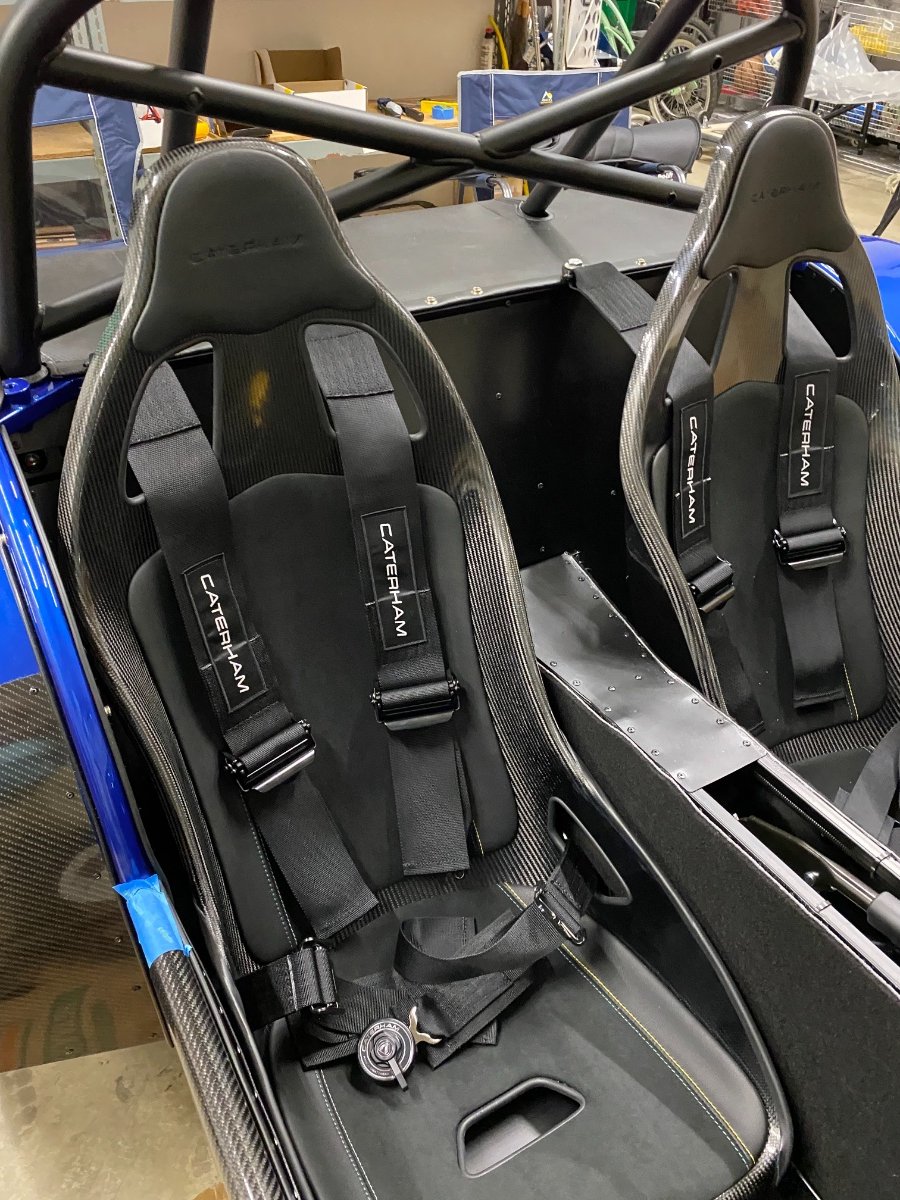
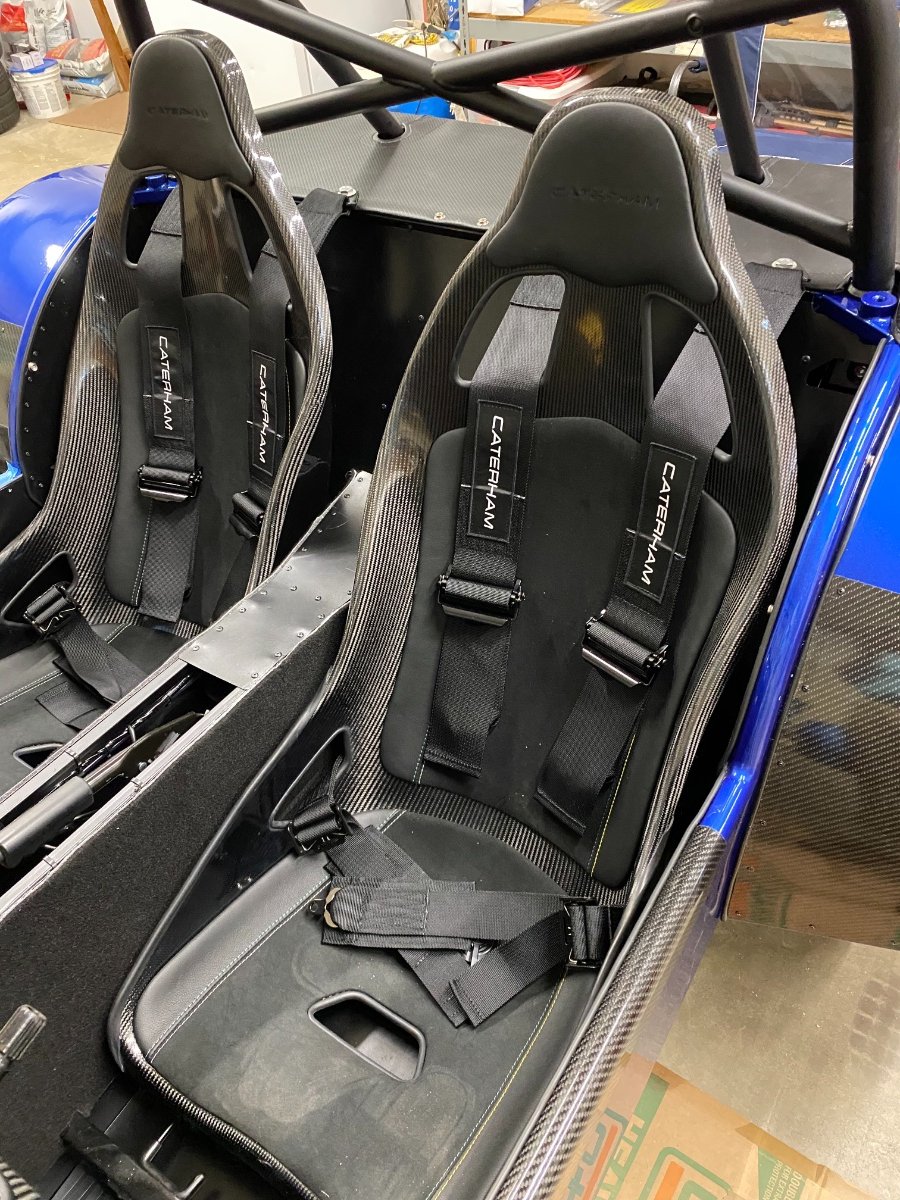
Composite seats are awesome- the contrast stitching is really a nice touch.
-
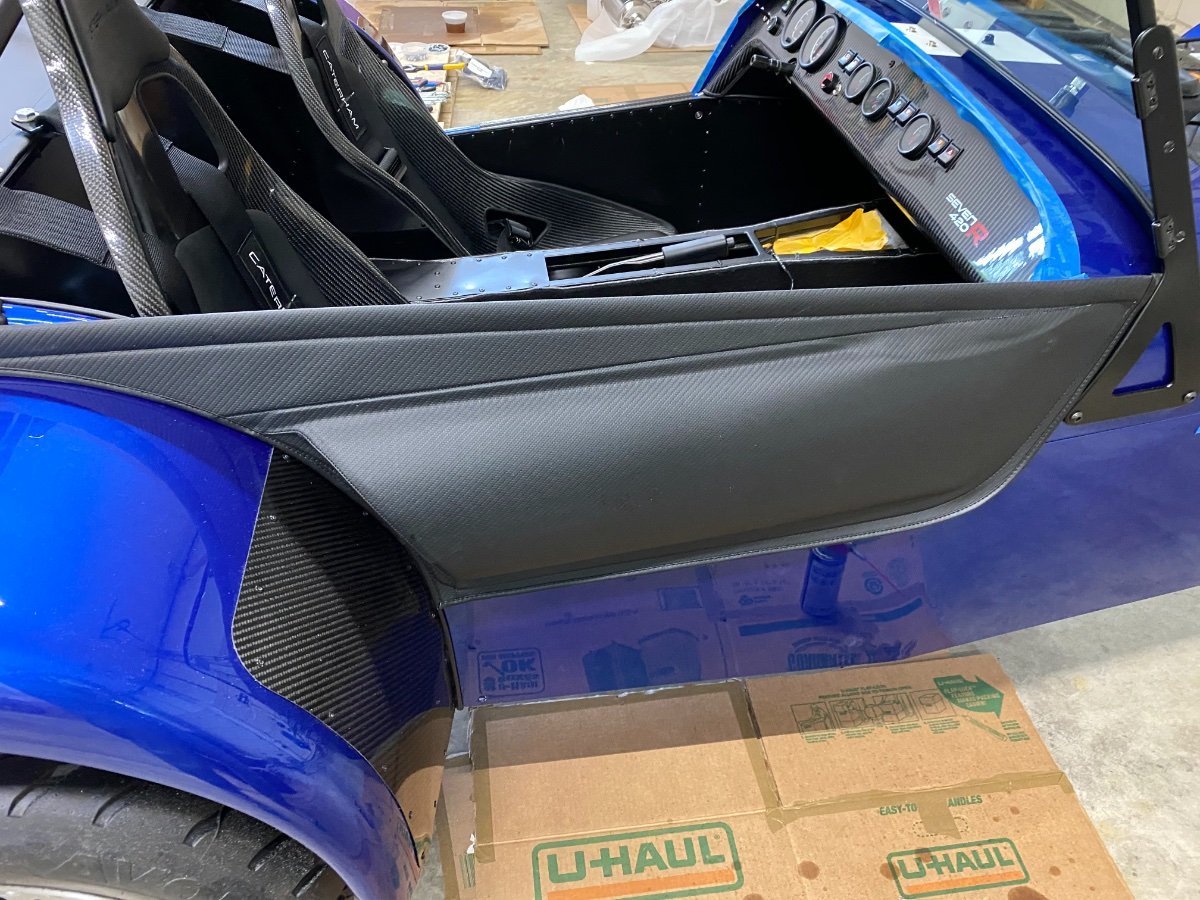
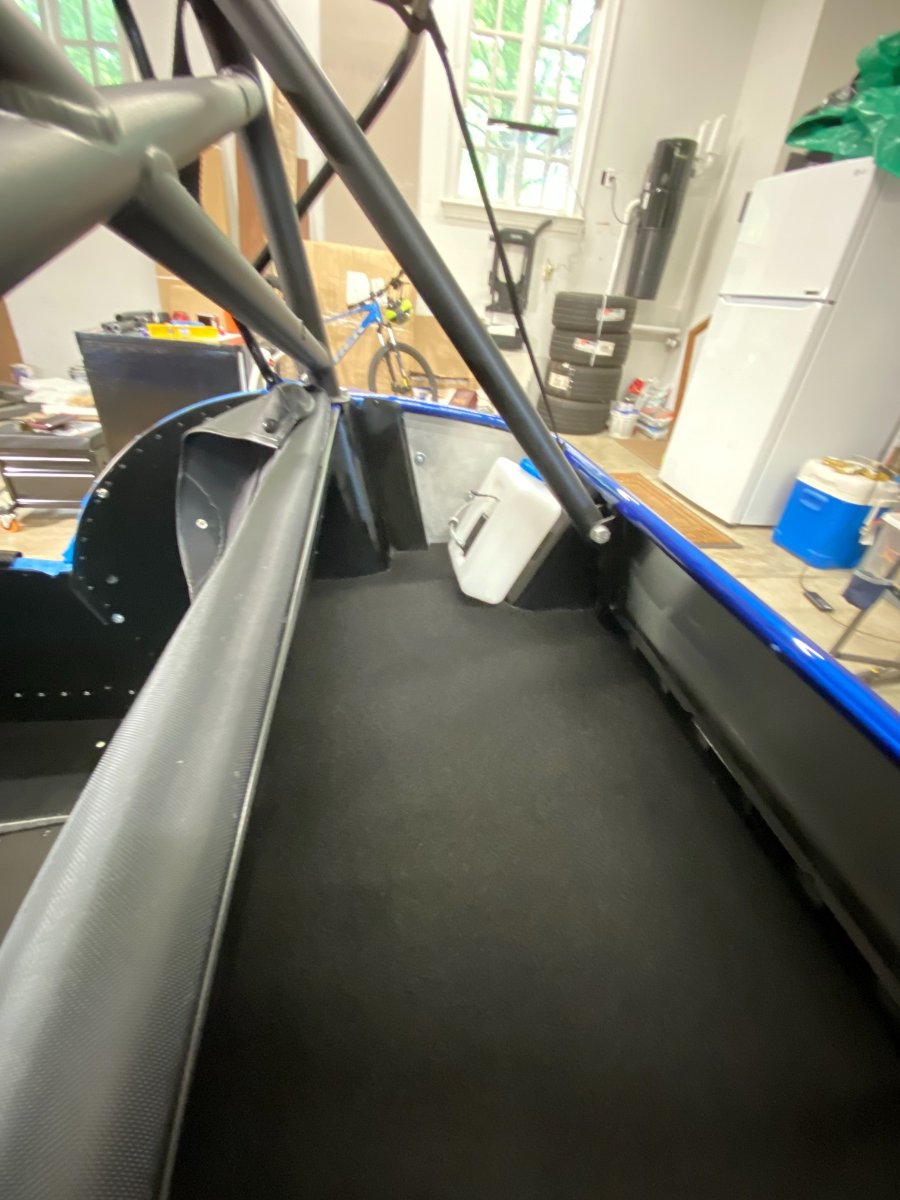
Another day off and it’s basically done. placed mats, put in seats, last big job was those front fenders which I had put off- but, nothing left to do, waiting for headers guidance from Caterham, need a fuse box cover.
-
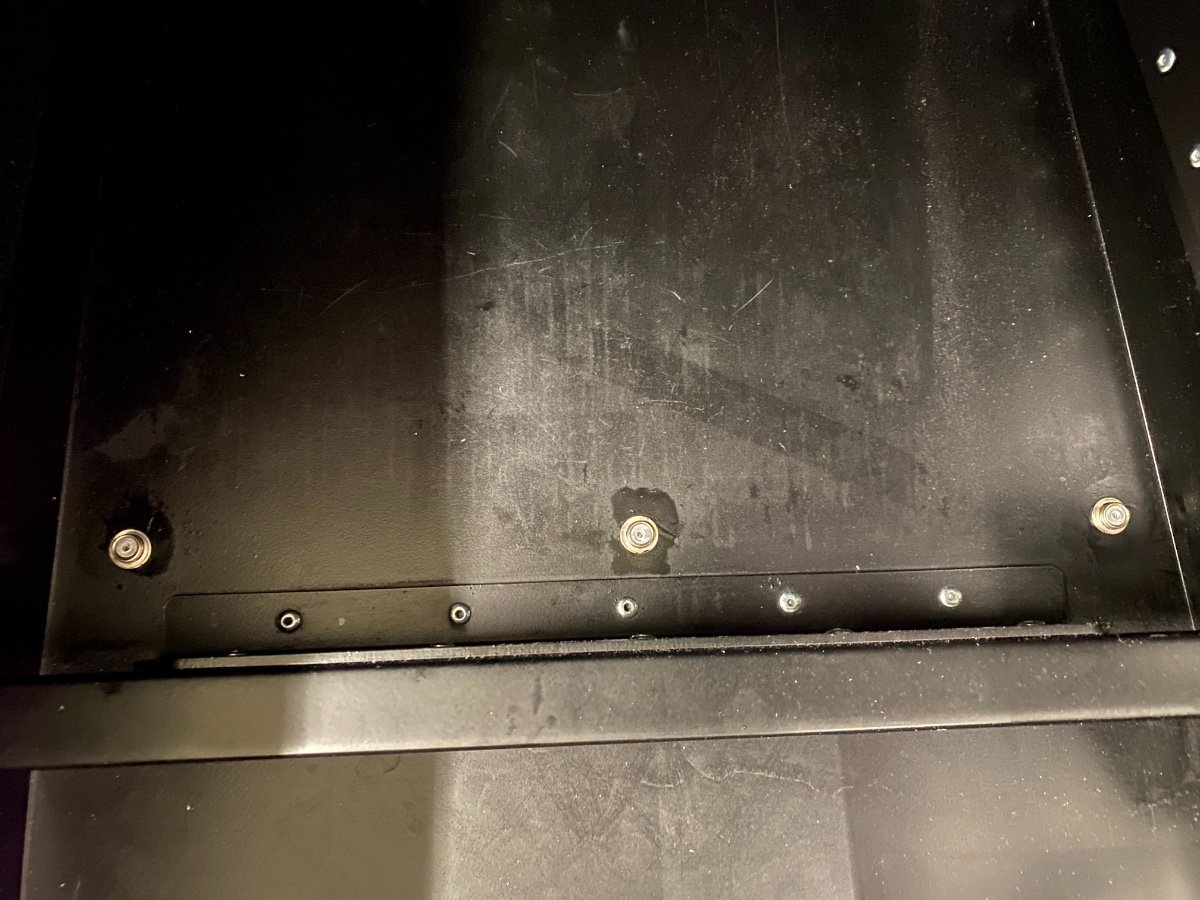
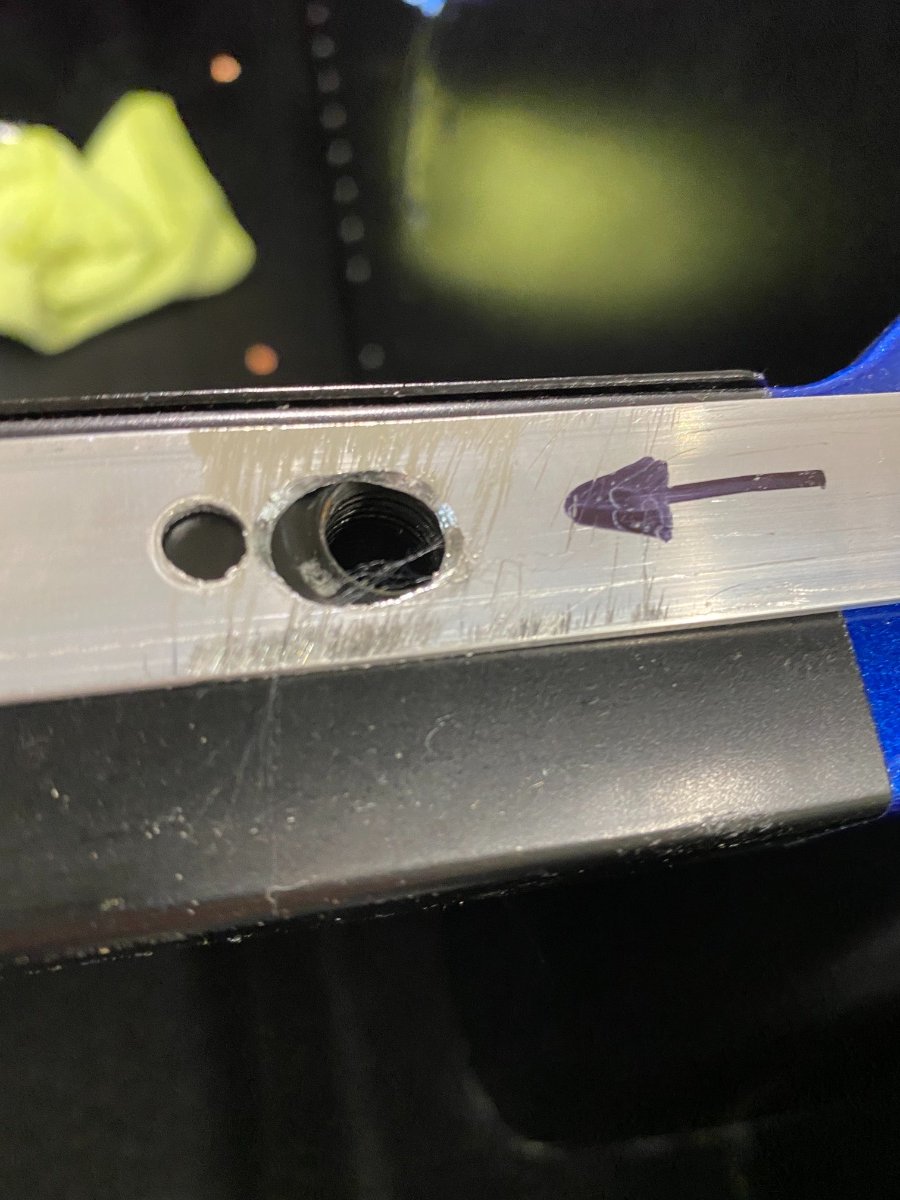
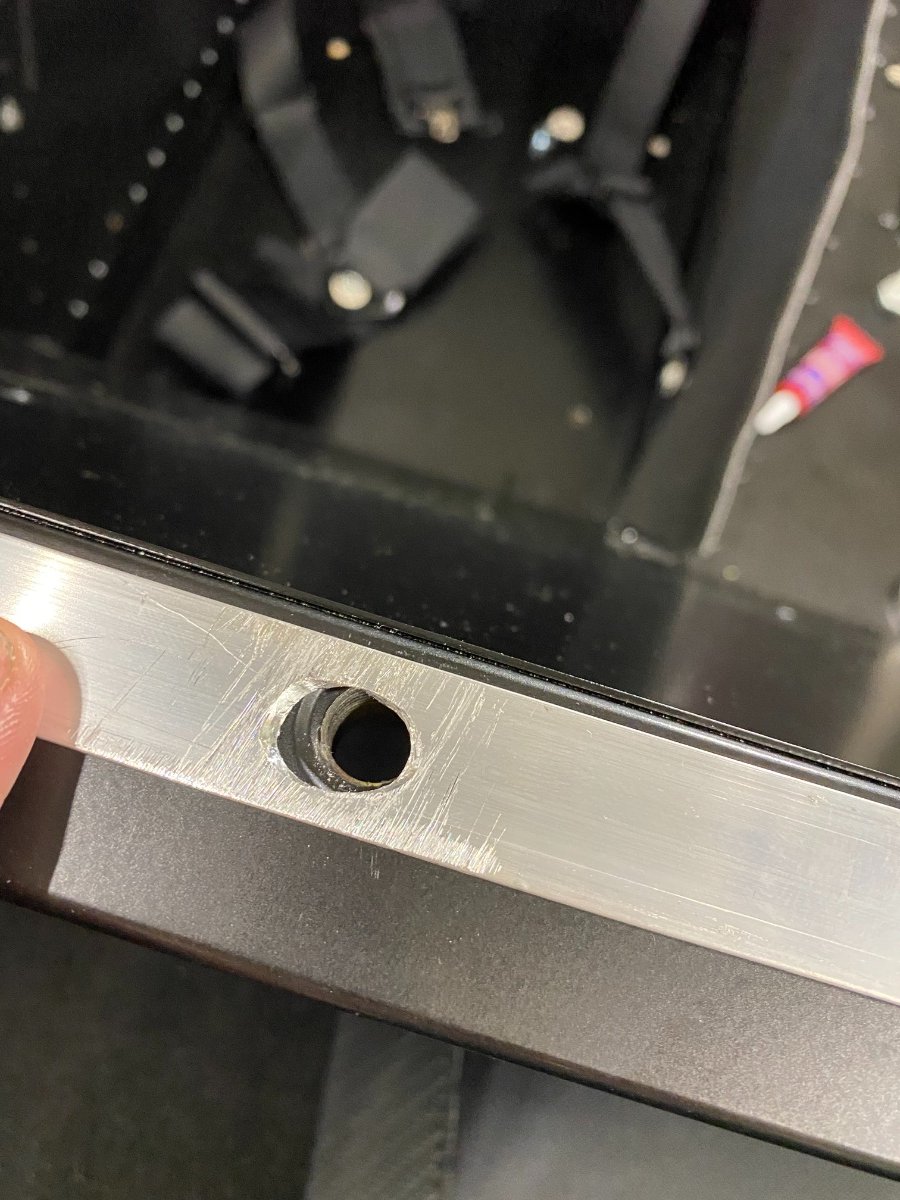
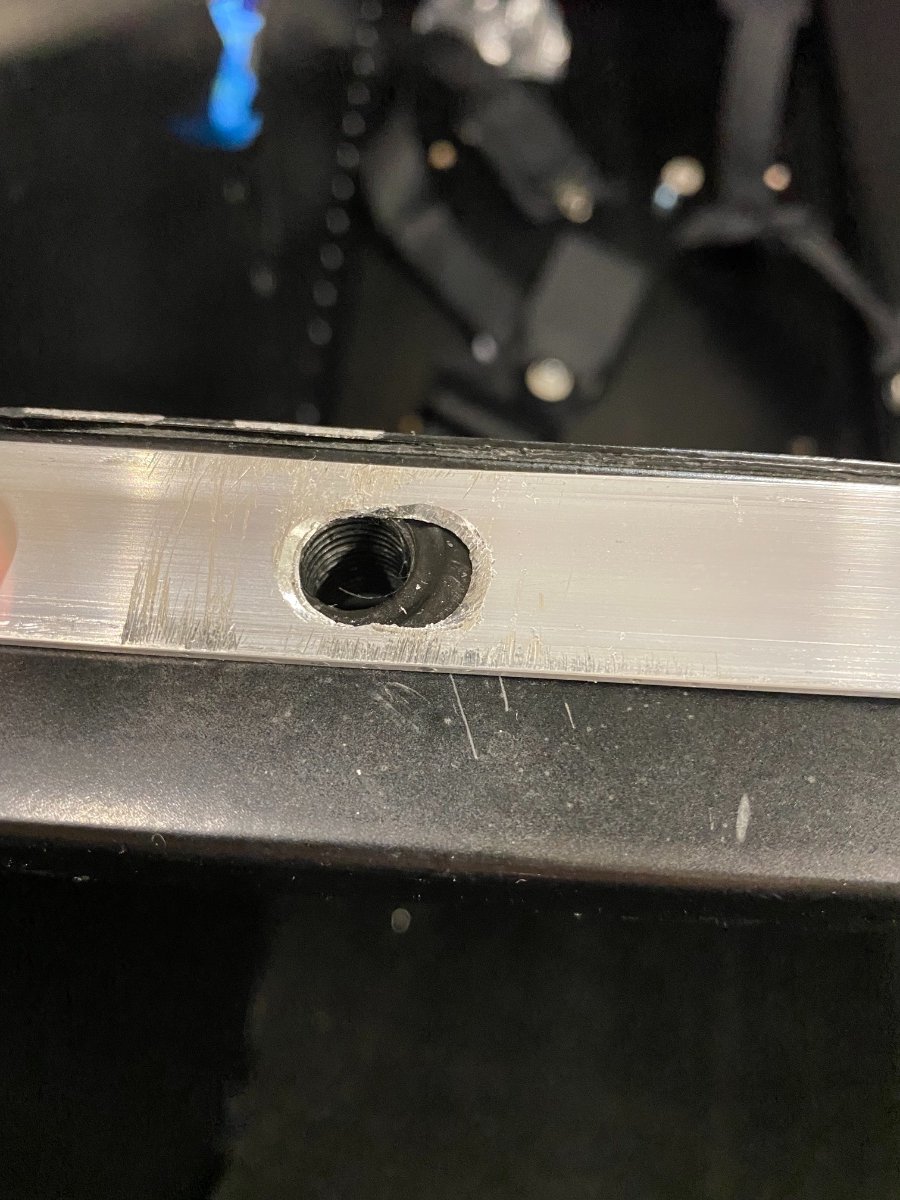
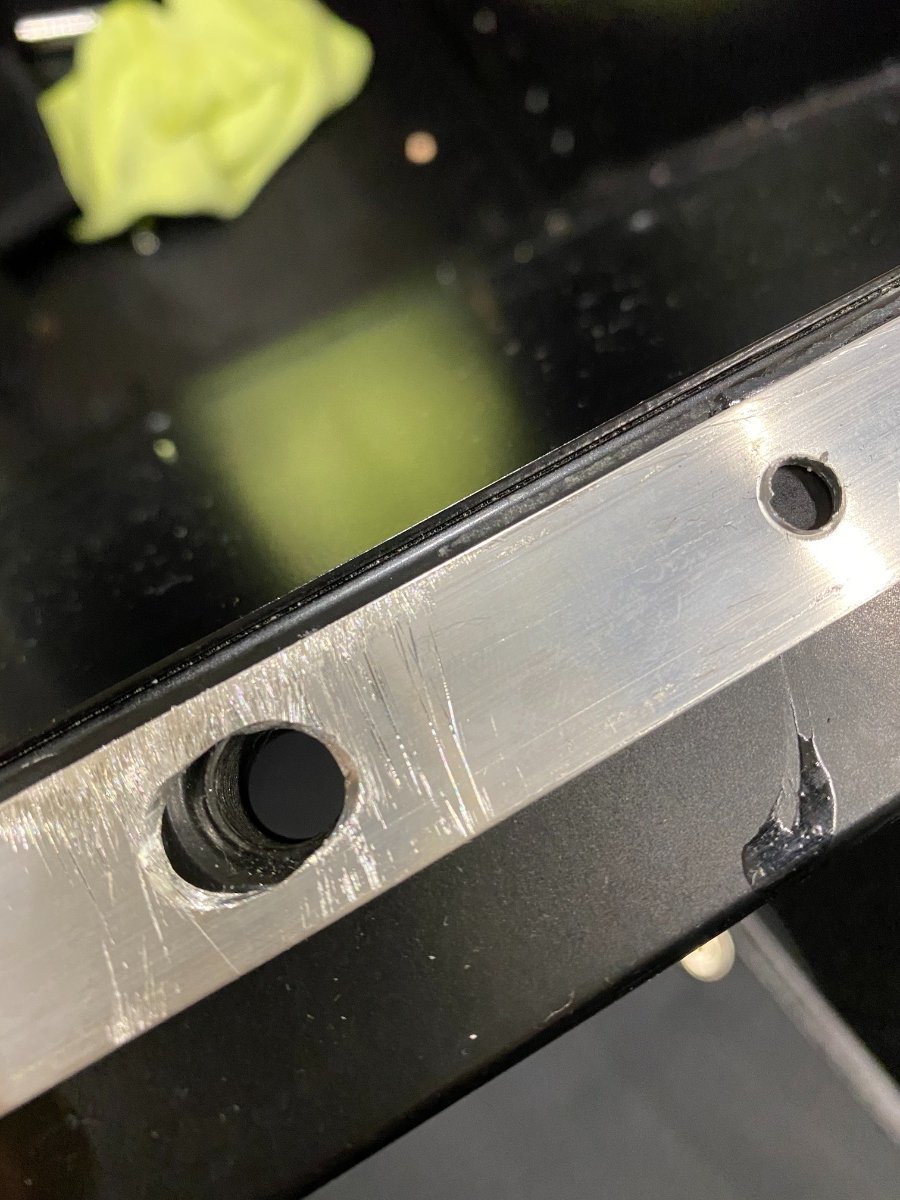
Comic attempt by factory to drill holes. This aluminum piece (which had to be removed) is the stiffener at the front of the boot lid cover. Yes, this is the factory attempt to drill holes- all 4, just terrible, and it still doesn’t allow attaching a harness as the holes are ALL still blocked. Makes me wonder what other care is taken elsewhere?
-
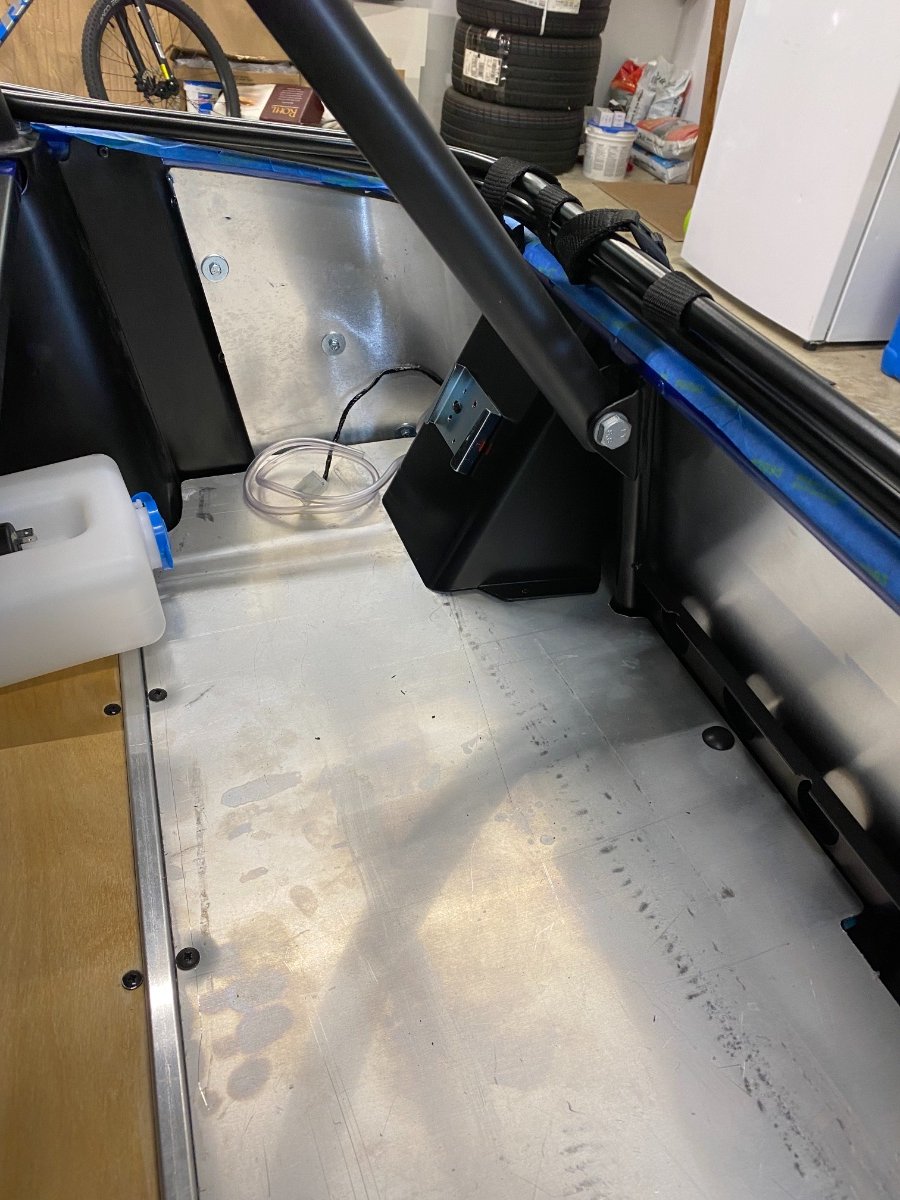
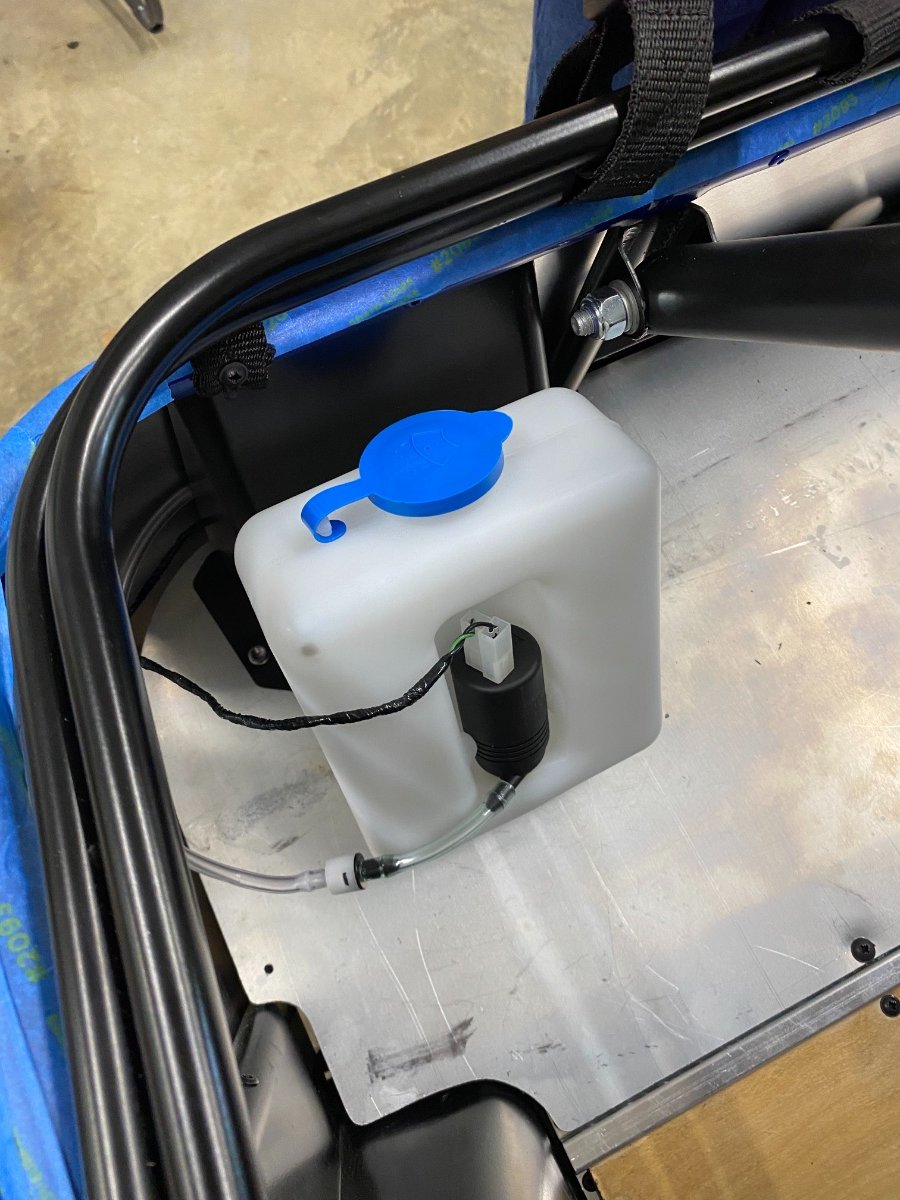
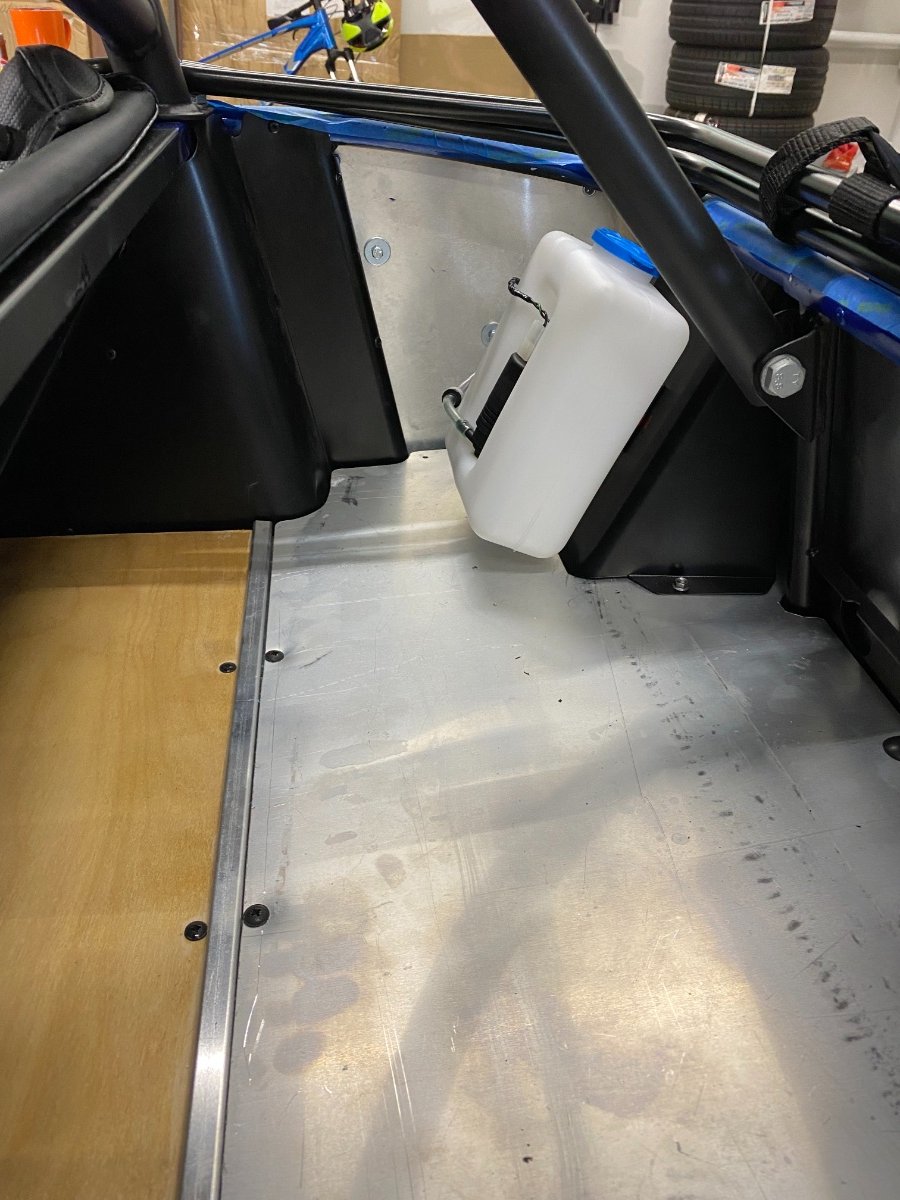
Boot fuel filler cover, washer bottle, carpet: