-
Posts
70 -
Joined
Content Type
Profiles
Forums
Store
Articles
Gallery
Events
Library
Everything posted by Tony
-
Good Morning, My Seven arrived in boxes as a kit for the first owner. There is nothing in the manual about attaching the arm rest. It is worn out and needs to be refurbished. Anyone recall how it comes off? Thanks, Tony
-
Good Morning, My Seven has developed a curious momentary power loss mostly during warm up, more noticeable at lower rpms. Accelerating slowly, there is a momentary blip of a power loss. No sound, no backfire, pop, just loses power for a briefest instant. Seems more prevalent at lower rpms and smooths out as RPMs increase, but occasionally noticeable. Not problem on the road, seems to go away when hot, but initially will happen four or five times. Makes me nervous about longer trips should whatever it is fail. What would you check or suggest replacing? Planning on a tune up soon, but would like to figure this out. Thanks much for your thoughts, Tony
-

Melted Voltage Regulator on '93 Supersprint - Anyone know wiring well?
Tony replied to Tony's topic in General Tech
Carbs back on, alternator replaced, ready to go. Except for concerns about wiring I'm ready to connect the battery and hope for the best. One more question though. With all lights off, key off, no other things on that I'm aware of, Should there be any voltage measured between ground cable and negative post? Even with all alternator leads disconnected I'm getting 12.68v. Would there be anything on all of the time? -
Good morning, Noticed a trail of sticky material under my alternator which migrated inside the alternator. Required professional help to clean out the alt and replace the voltage regulator. The tech said that if the small lead (Brown/Yellow) next to the two large leads was grounded, it would cause the reg. to overheat. Sure enough, it shows about 54 Ohms. That lead goes directly to Ignition warning light, Tach, Oil Pressure light, Water temp guage, heater switch, rear fog switch, on and on and on...... Seems to me that any number of those connections might be grounded on purpose. Anyone have any experience with such situations? I am not interested in going through the harness looking for grounded spots! Really hope someone can help. Been driving it like that for years until I noticed the mess. Tony
-
I picked up my first Lotus 7 on the docks of New York on an early Spring day. I'd never driven a Seven until that morning. Drove it straight through back to Illinois. Took the Penn Turnpike through the mountains at night, rainy in the low 30s being passed by semis and hitting potholes that should have swallowed the car. That was the greatest trip of my lifetime. Sorta itching to take my '93 Supersprint on a adventure this summer........
-
Gentlemen, Noticed antifreeze around the outer top lip of my '93 SuperSprint radiator. Found that it was weeping at the front. Most posts seem to be about aluminum radiators, but mine is bronze colored. Leak starts at the front and spreads around the lip slowly. Also noticed a bright green rough patch on the top, side of the radiator, underneath the metal mounting plates that fold over the top. Hoping that is external corrosion; not leaking at this point. Seems like the seam could be repaired, pretty straight forward. Anyone have this problem before or deal with such a repair? Any pitfalls or general thoughts about such a repair? Appreciate any insights, hoping for an easy fix............ Thanks, Tony
-
I did a basic rebuild on my two carbs, mounted them with new O-rings, tuned them and they ran fine. Plugs looked good. Now I am noticing occasional snapping at low rpm/idle. Went to retune and noticed that pressing down or pulling up on the carbs changes the rpm. (One acts one way, the other is the opposite) Before I tune, I want to tighten them correctly. I assume that having them correctly sealed/mounted would be a prerequisite to being able to correctly adjust the idle mixtures. Question. When the rpm increases, does that indicate an air leak or a proper seal? I am not sure if I need to tighten the top nuts or bottom nuts. I used a flow meter to balance the carbs and they are very close, but it is difficult to adjust the idle mixture, one barrel at a time, by listening to rpm changes. Hope the correct tightening of the carb mounts will make the adjustment easier. Any suggestions or insights would be appreciated. Thanks, Tony 1993 Supersprint
-
So, last Spring I rebuilt the dizzy with a Pertronix, eliminating the old skirt-style rotor, and did a basic refurb of the Weber 45DCOE's on my 1993 Supersprint engine. Ran perfectly, not a cough, pop or hesitation from 0-6000 rpm. As the Summer progressed the cough, pop and hesitation slowly returned. I just replaced the rotor and inspected the old one. A bit of rough surface, but no evidence of any real problems. I really expected to see some problems in the dizzy, but nothing seemed severe. The fuel filters were clean, spark plugs 2,3 showed a bit of richness, but other than that, nothing really stood out. Haven't fired it up yet, carbs are on the bench and will be cleaned. Any general thoughts about the gradual decrease in performance over 2000 miles last summer? Want my Seven ready to roll when it's sunny and 30. Got to be ready..... Tony
-
So the car is so light and takes so little braking to stop that the pressure on the switch never makes it to the point of turning on the brake lights....... Got to love it. Will be checking the recommendations for a lower PSI switch. Also may go the mechanical route, but would like to stay more original. That switch from summit racing looks very close. Wondering if it is a direct swap thread-wise? Thanks all for the many insights. For now I'll show braking with my hand.... Wonder if that will satisfy an officer of the law......
-
It was simple. Pumped the brakes a few times and then really pressed hard and the brake lights came on. Expect that the pressure switch is getting stiff and needs to be replaced. Next question. Anyone know a part number for the switch? Nothing in the build manual about it. This is on a 1993 Caterham Seven. The pressure switch is mounted on a small cast aluminum block on the rear brake line, about one foot from the brake cylinder. Thanks again. Tony
-
Just found out my brake lights weren't working. So I went through the steps. Fuse OK. Power to brake pressure switch OK. Removed bulbs, checked power back to bulbs; OK when brake pedal pushed. Bulbs checked OK with ohm meter. Insert bulbs, press brake pedal.......... no brake lights. Very strange and baffling. Running light filament of same bulbs work fine, just not brakes. Both have the same ground. Anything obvious I am missing? Any thoughts? Got to be something simple..... Thanks much. Tony
-
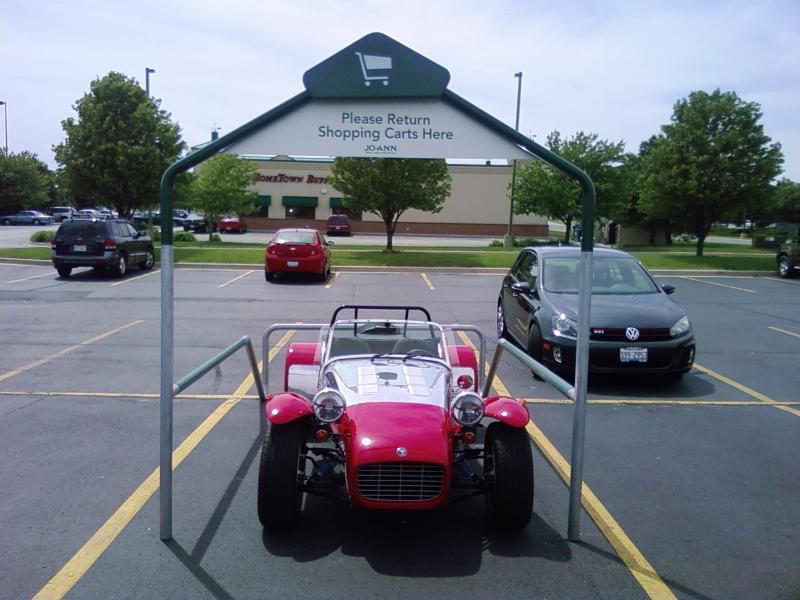
How is it when you park your Seven in an empty parking lot, you come out and find people parked on both sides and in front of it? Think I've found the solution........
-
I am hearing an annoying squeak when I turn the steering wheel. I've assumed that it is the bushing. Is there any way to lubricate it? I have to take the wheel off anyway to repaint the hub. Perhaps that would provide better access to the bushing. There is a contact ring between the dash and the hub for the horn button contact, but I don't see any way it comes off. Appreciate your insights. Tony
-
Just measured the resistance in my plug wires, original '93 Lucas Silicone, three were around 7400 ohms, one was 11,400. Would that be enough variation to effect performance? Would be easy now to replace them all with carbs off and dizzy in plain sight......
-
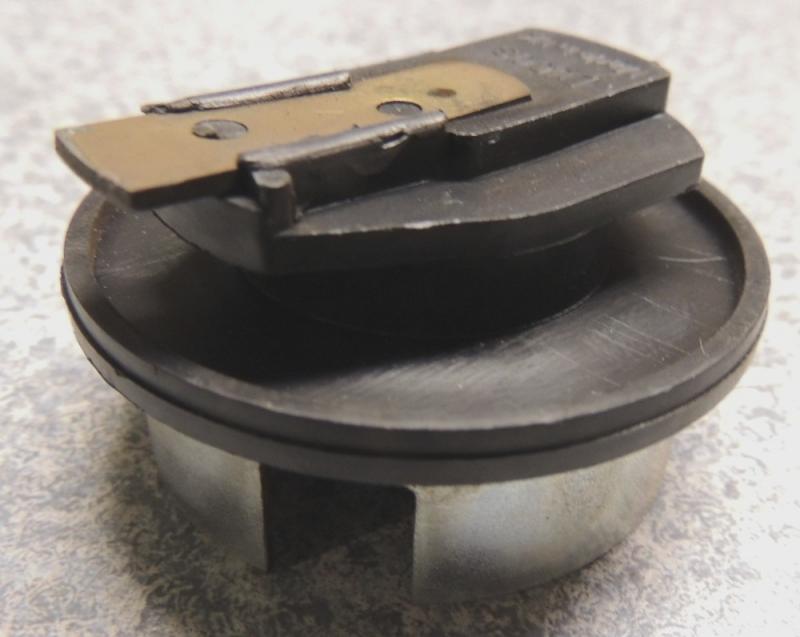
Just pulled the carbs off for rebuild, opened up the distributor and...... no points. Just the original Caterham electronic ignition set up with rotor that has slotted skirts. Unfortunately, the metal slotted skirts part is loose and needs to be fastened securely back to the rotor disk. Went back through 10 years of blatchat and found that it could be ? epoxied in place. Now trying to determine what approach to use. How to epoxy it in an exactly concentric location so that it won't come loose. They mentioned using Alardite/Aldarite epoxy, but not sure what an alternate might be. Really don't want to replace the distributor at this point....... Anyone else been this route of repair? Thanks all for the many great insights, learning the ropes slowly.... Tony
-
Aaaaaargh. Last two hours reading the Tech Blatchat's back to 2000 told me the bad news. Said rotor no longer available. Unreliable as well. Although I could probably epoxy the "skirt" to the rotor (which happens to be loose now), might be time to consider other options such as alternate electronic ignition systems. Anyone done this transformation? Curious about wiring, i.e., need to get into the wiring harness? Remove Caterham electronic ignition? Most straight forward swap you might recommend? Might be time to just deal with instead of waiting for it to crash........... Thanks all. Tony
-
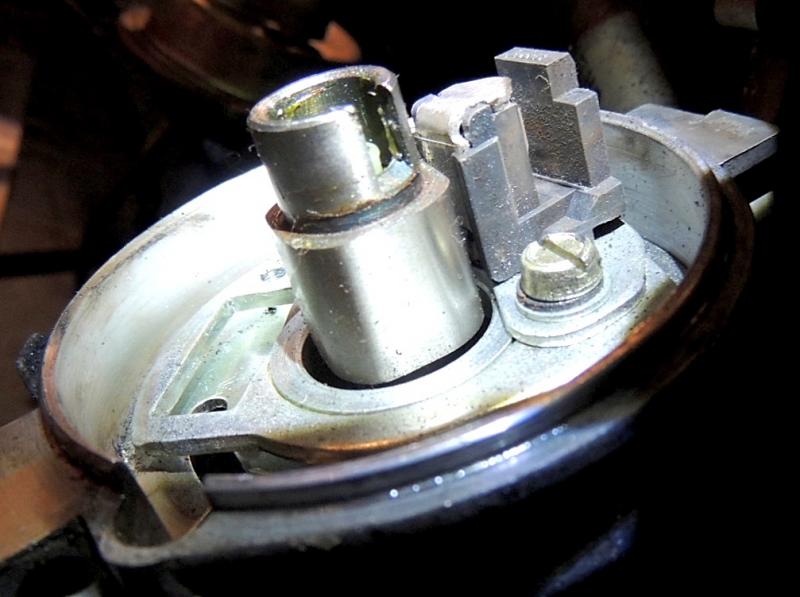
Here are two photos. The slotted cup under the rotor is loose, can't be good for the timing............ The manual says it is a "Caterham distributor with optional Lucas electronic ignition".
-
I am trying to find a replacement rotor for my '93 Super Sprint. The Lucas distributor is engraved 103 FXYULS 11/90. It is not vacuum advanced. The Lucas cap is marked 54400270. The Lucas rotor is marked 517 2191. The rotor is a flat disk with a slotted cup underneath that fits down into a Hall sensor (I think). The slotted cup is loose..... I have searched relentlessly for the rotor and have found no reference anywhere about it. Everything I've seen seems to have points and a simple small rotor. Not sure if the distributor I have has been modified away from points, but the rotor is marked Lucas. Really would prefer to find replacement parts; don't really want to replace the entire distributor. I have a bunch of inquiries out to various suppliers, but if any of the above rings a bell, I'd love to hear from you. Thanks again. Tony
-
Dave, Thanks for those links. b) seems as you say to be what I have which are approx. .200" thick. a) differs in that they are connected and come with captive washer and hour glass rubber washer for each stud. Both seem applicable, either one preferred? Curious about my current install, but each stud has two of those cuplike captive washers, face to face (cupped areas facing each other) with no visible hourglass rubber washer, all held down on the stud by the self locking nut. Seems like that would cancel any flex offered by the hourglass washer. I'm going to dig through my books again to see if I can find a correct picture of how it goes together. I will be ordering once the carbs are off...... As for the sharp bend in the throttle cable, I'll leave it be (well greased though) and keep a sharp eye out for the barrel working free. Tony
-
Two questions. My '93 Supersprint engine with two 40 DCOE 151s, each with a metal spacer between carb & manifold. They look to be 1/4" thick with very small spacing on both sides of the spacer. Can't seem to find any reference to exactly what type of gaskets go there. Are these anti-vibration spacers? Regular gaskets? Q#2: Again, can't find photos or detailed info on the throttle cable to carb linkage. Throttle cable comes over the top of the valve cover to the top of the throttle plate. The outside of the cable ends there in a barrel, the inside cable continues straight down to a round slot in a V-shaped bracket under the carbs. The inner cable, when exiting the barrel goes straight down, at a sharp angle which is on the verge of binding. The bracket is mounted to one screw on each of the carb's bottom bowl covers, screws closest to the block. I might be able to move the bracket to the two bowl cover screws farthest from the block, but I believe that will cause the bracket to interfere with one to the frame tubes. I greased the inner cable and it works OK, but the geometry just doesn't seem correct. Anyone dealt with this? Thanks much. Tony
-
Thanks Steve for the clarification on the BCD cam. I went to adjust my valves, found several out of adjustment anywhere from .002 under to .003 over. I have the "self locking" adjusting screws and found that they were really really tight. A bit concerned about applying muscle, any trick to adjusting them? Expect them to be tight, but not that tight. A related question on valve cover gaskets. Rubber with or without sealer? Cork with or without sealer? Research is saying rubber without. Rubber gasket I bought is about twice as thick as the old cork, but still curious.... Thanks, Tony
-
The assembly guide that came with my 1993 Super Sprint states that the cam is a "Caterham BCD" with high lift, short duration profile. Valve clearance cold is Inlet .022" and Exhaust .024" . In all the references I've seen to cams, I've never seen "BCD" mentioned. Can anyone confirm the cold clearances that were mentioned? Is "BCD" another name for one of the common supersprint cams? Any suggestions on where to find the proper procedure for setting clearances? I'll start searching and googling for details. This is my first step on my Spring tune. Just want to be sure........ Thanks, Tony
-
Received the Haynes Weber Tech book which has very detailed instructions on rebuilding the 40 DCOE's requiring lots of special tools and a fair understanding of Webers. Not really interested in going that deeply into this rebuild though. Know it needs some gaskets and probably cleaning. So, how far do you need to go before putting the body into an ultrasonic cleaner? With less than 5K on the carbs (but 20 years of use), I don't think it will need a complete rebuild. Jets and passages could be cleaned with carb cleaner and air; not ready to pull out every part........ Thoughts? Thanks!
-
Looking closely at the carbs on my 1993 Supersprint, notice some seepage around many seams, rubber O rings crumbly and every spark plug reading different, think it may be time for a rebuild. With the carbs out I can access the distributor much more easily. Question is, how difficult is it to rebuild Weber DCOE 40's? Worth having it professionally done for lots of money? How thoroughly do you drill down? Just gaskets? Replacing needle valves & jets? I'd like to do the work myself to save the money, but I've heard they're complex and best left to the experts. Anyone been through this? Practical advice, pitfalls to avoid, etc? I've found several suppliers of rebuild kits, but do any offer the best/most complete kits? Planning on starting this soon to allow plenty of time to work, but am a bit leery about jumping in with both feet before hearing other people's experiences. So far, answers to my other questions have been great; really a gold mine, very helpful and much appreciated! Thanks, Tony
-
Thanks all for the suggestions. Worked through many to no avail, so I emptied what Turbo blue I could from the tank and refilled with new pump gas. That seemed to make a big difference..... Still can't believe I got a batch of bad Turbo blue.... at $10. gallon. Did learn how to read spark plugs, still learning, but found cyl. #1 was a medium tan, cy. #2 was black & sooty, cyl. # 3 was a light tan and cyl. #4 was grey. Think my Webers need some attention. Going to start collecting parts for a Spring tune up. When I filled up on pump gas, noticed the filler tube? was leaking onto the ground. Aaargh. One more thing to fix before Spring. Trip to the gas station today was sunny and 24 degrees. When the fingers started to work again, I checked the plugs. All part of the fun of owning a Seven and well worth it.....


