Introduction
Getting comfortable in your Se7en is essential to stay firmly located when driving vigorously - backroad blat, autocross or track day. This means you have to have a good seat. The standard offerings from Caterham, Birkin and Westfield fit the majority of the population well. However, they may not fit some drivers or be suitable to track days or autocross. Taller drivers may want to gain some leg/steering wheel clearance or get lower in the car by 1-1.5 inches to allow better roll bar clearance for their head.
A resin bead seat may a solution for the needs for those drivers who need additional room or locational anchoring. This article is to take you through the basics of of making a resin bead seat for your car.
Types of Seat Kits
There are a couple of seat making options that you will come across:
1) Seat kits
2) Seat insert kits
A seat kit is going to replace a seat. A seat insert is intended to fit within an existing seat like the photo below:
If you need to replace the whole seat - base and backrest then a full seat kit is going to be what you need. If you wish to keep the existing backrest but replace the seat squab/base with a foam or resin seat then a seat insert kit is going to to be sized better for your purposes. The process described below is essentially the same for both seat and seat insert options.
Then you will want to consider the different options of seat material available in kit form:
1) Bead resin seat
2) Two Part Foam
3) Expanding Foam
Both have merits depending who you listen to:
- The bead resin seat is using similar shock absorption material to what you would find inside a motorcycle helmet. Proponents claim that it has superior safety in an accident than the foam, having been tested by IndyCar and F1.
- The foam seat proponents claim it is a better system as some kits achieve SFI 45.2 qualification
- The expanding foam proponents talk about how much easier and quicker is to produce a result than the other two
I am not going to provide an answer to what is better. Various racing forums have debated this at length and never achieved a conclusive outcome. One thing I will note is that any seat subject to an impact should not be used again - its similar to helmet safety in this respect.
Seat Kits Available for Purchase
Some of the better known kit options available for purchase are below:
Bead Seat
Creafoam Bead Seat Kit - Pegasus Auto Racing Supplies
Bald SPot SPorts Creafoam Bead Seat Kit - DIY Creaform Race Seats (discoveryparts.com)
Bald Spot Sports | Providers of Performance Enhancing Foam Solutions
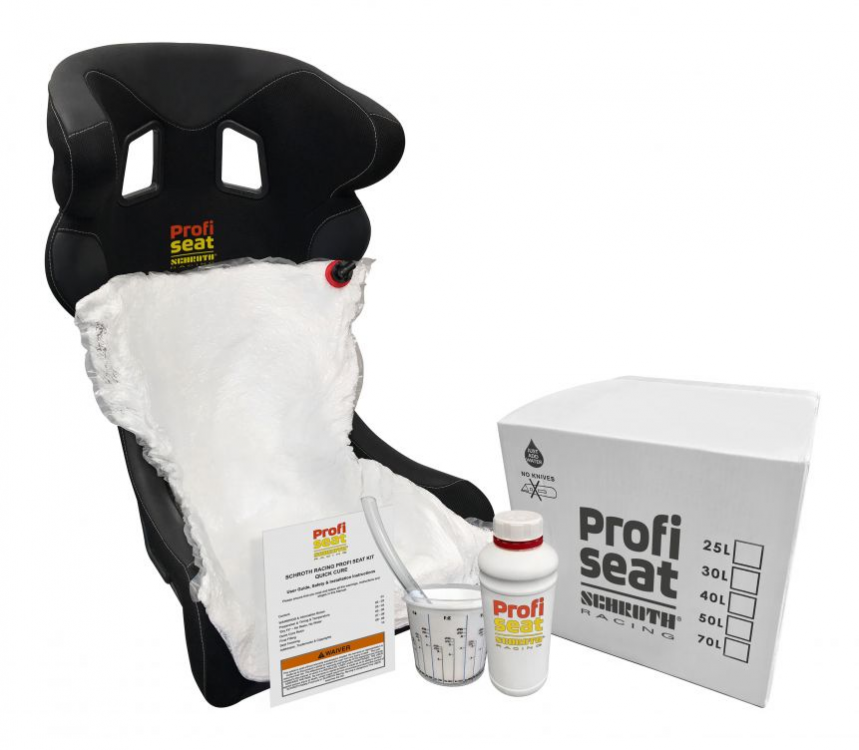
Profi Seat - schroth.com | SCHROTH Safety Products
Foam Seat
Expanding Foam
Custom Seat Kits - Motorsports Southwest Motorsports Southwest (motorsports-sw.com)
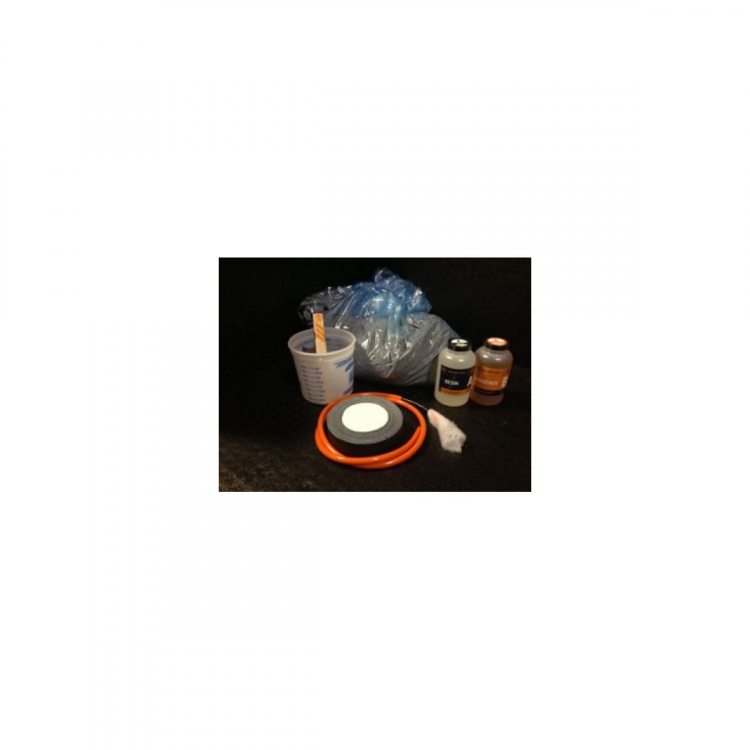
You do not even need to buy a kit. @yellowss7 made a seat base for his Caterham by buying foam bean bag beads, a space saver vacuum bag and a two part epoxy mix following a similar process to what I did below, before covering it in Nomex fabric. Amazon is your friend for these pieces.
Making a Resin Bead Seat
For the purposes of the remainder of this article, I will be using the Creaform Bead Seat Kit from Bald Spot Racing (also available for purchase from Discovery Parts and Pegasus). I purchased my kit from Pegasus Racing.
Creafoam Bead Seat Kit - Pegasus Auto Racing Supplies
Before starting I recommend watching the instruction video.
I recommend you have a friend to assist you in this, especially since you may be stuck in your Se7en while the seat cures.
My first lesson - the XL size of the Creaform seat kit is too big for the bathtub area of a Caterham SV even after removing everything in the seating cavity. Hindsight says it should have been a Large or possibly a Medium sized kit. My second hint for you is wear the clothes you expect to be wearing when you are driving. If this is a track car or autocross then maybe you wear race overalls? Your clothing for this fitting will memorialize your shape in the seat so you want a close approximation of what you intend to be wearing when you are driving.
Step 1 is vacuum out all the gravel and debris from various drives.
Step 2 is tape or cardboard over all the sharp protrusions in the space that would otherwise threaten to rip the plastic bag of beads and cause them to flow everywhere in the cockpit. So bolts, chassis tube ends/braces, belt buckles, etc
Step 3 is trial fit of bead bag (no resin yet). You GENTLY sit in the car on top of the dry bead bag. This test showed pretty quickly that we had too many beads in the bag. So about 25% to 35% came out and we test fit again. That was a much better fit.
Step 4 is prepare for the vacuum - there is a hose into the bag. You connect it to a vacuum and it keeps the bag under suction through the initial cure fitting. Some people talk about buying a cheap water valve to go between vacuum and hose so you can turn vacuum cleaner off but I doubt you can keep enough vacuum on it this way.
Step 5 - at this point, take a bathroom break, cigarette break or whatever you need as you wont be going for a while. Secondly, wear long pants as the resin curing is quite hot on bare skin.
Step 6 - mix the resin into the bag. We ended up using all the resin as the mixture felt too dry. You put the bag on the floor and gently knead the resin around the beads so there are no clumps, taking care not to break the bag.
Step 7 - Bag with beads and resin into the car. Then lower yourself GENTLY into the bag. Squish yourself, butt, legs, shoulders, hips, etc. to get comfortable for a good driving position. Move the beads around to where they need to be. Once you are comfortable then stop moving and sit still. Vacuum is on. Your assistant can bring you a beer and you both take a break from while the seat cures. Maybe gaze around the garage, or in my case the TK Autosports hangar.

At this point you contemplate the messiness of our existence. Jeff's @JBH blue Caterham awaiting yet another rebuilt engine (hint - don't use 10,000rpm on a Zetec). A certain blue Holden awaiting its rebuilt engine to go back in. A Corvette with a blown clutch. The already trashed rental blue Datsun 200SX for hackers to destroy further. The number 51 Mazda RX7 in for yet another new engine.
Step 8 - Escaping from your "mould." After an hour I was allowed out. Less resin would have seen me escape at the 30 minute mark but the seat felt too "squishy" at the 30 minute mark so for caution I stayed there for the full hour for the seat to firm up more. At the time of my exit from the seat, the seat had firmed up enough that my butt impression was not going to move. Getting out was entertaining. I could not use my traditional hand holds to lever myself up plus I could not move my legs much given the beads. And my non-removable steering wheel was where I needed to be. Having your buddy assisting, collapse in giggles at your difficulties was never going to help me but eventually...

Yes folks, that impact crater, is my butt impression. Its amazing where your body leaves divots - a love handle on one side, my leather belt line, a wrinkle in my shirt, a hole where I had my SUV keys in my pocket, etc., you get the idea. At this point we turned the vac off and left it to cure over the holidays. It only really needed 24 hours but we were heading out on holidays so not a problem.
Step 9 - Removing the seat from the car to shape it. The seat has now hardened up fully. Using a hot knife you trim away the excess pieces of bead/foam so that it will come out of the car easily for further shaping and covering. It was at this point I discovered something critical:
- If the bag is too big then it bunches up and creates chasms of plastic in between the beads. The XL kit was too big a size for a Caterham SV - learn from my lesson
- If you mold a bead seat under the lip of the center tunnel then it will not like coming out.


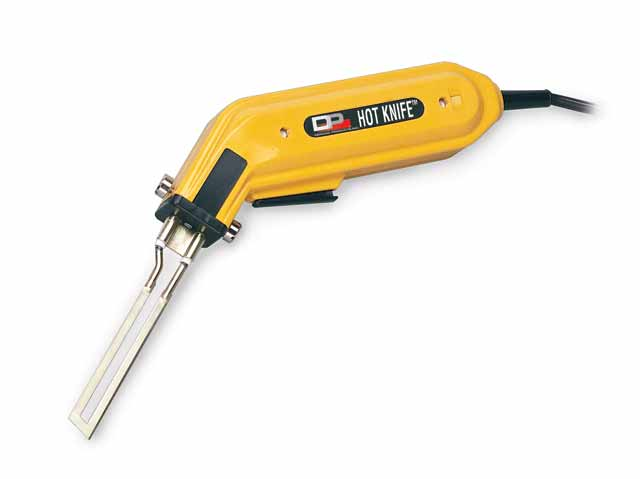
The hot knife is key. It makes life so much easier carving and shaping the seat for the space. You need to car space channels for the belts on the sides and underneath for the submarine belts. Need to carve a hole for the submarine belt to surface through the seat to meet crotch. A hot knife looks like this:

Because of my errors, I cut my seat out of the car in two pieces which made it far easier to manage than one who seat. It was then trimmed neatly.
Step 10 - Covering Your Seat
While you can leave your seat in its exposed bead foam state, you will be abrading beads everywhere and it will be messy. A seat covering is recommended. You have a range of options to cover your seat - duct tape, nomex fabric, etc. I chose Nomex fabric and had the upholsterer do it in loose style so I can remove it for cleaning in case of any accidents.

Step 11 - You need a head rest. By removing the original seat with integrated head rest, your head is now exposed to impacts against the roll bar. You have a couple of options:
1) Use roll bar padding like that in the photo:

2) Fabricate a head rest
3) If you have a Caterham then you can buy the kit that just bolts onto the roll bar. I upgraded the foam that came with the kit for some thicker "NASA" foam.


End Result
I am very happy with the end result and are now able to sustain higher G forces on track without fatiguing and find it much more comfortable on my back and neck. I am lower in the car which has reduced the level of wind buffeting I get. Hope your results turn out as well as mine.


Recommended Comments
There are no comments to display.