.jpg.dba9367c1aedb8fb9186f2a110402d4e.jpg)
Lucky-7
-
Posts
106 -
Joined
Content Type
Profiles
Forums
Store
Articles
Gallery
Events
Library
Everything posted by Lucky-7
-
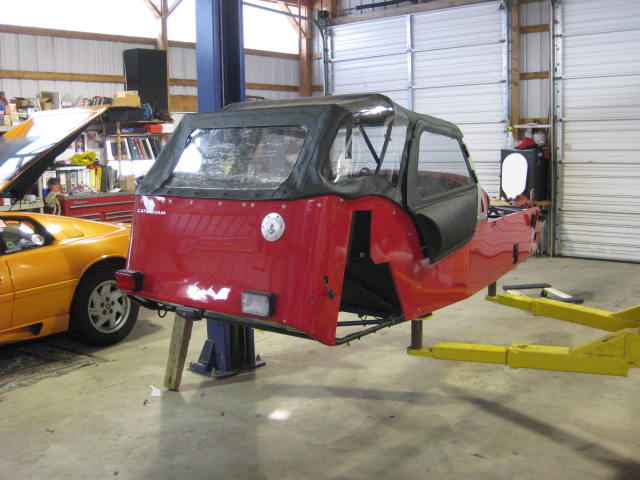
Looks like 71. Lots of fiddly stuff from here on. I think your build time is safe! I admire you for that. It's really a lot of fun but a lot of work too. Sometimes one step forward, two back. There's only a fifty-fifty shot at putting the e-brake wire on the correct terminal on the micro switch. Of course the guide doesn't tell you. Found out after I had the tunnel top on... of course I chose poorly! So it was either pull the seats back out, loosen the cables again, remove the shift knob, pull tunnel cove off, or spend an hour working your hand thru a two inch slot and scraping the back of your hand raw to make the wire switch.. my hand is still sore. :smilielol5 Today putting on the tail lights, got the wires thru the fender grommets, all connectors plugged in. Turn on the lights.... left side super bright, right side normal. Hit brakes, right side super bright, left side dim. Get out power probe, test wires to the tail lights. Everything good there, somewhere in the left side harness two wires are crossed. Take apart connectors, move wires around and presto. Lose another hour. Oh well all in a day's work... still loving it though! Kenny
-
I haven't gotten to much done on the car lately, came down with the flu and screwed up my plans for this weekend. I managed to get a hold of Hagerty for insurance, I have 6 other cars with them, so I figure they will do pretty good for me. They said they can't insure it until its completed and they will need pictures of the car and the VIN in the engine compartment. No big deal I can wait. I mounted the left rear fender, what a pain.... only half of the predrilled holes lined up! I had to dremel the ones that didn't a tad, so as not to take a chance on cracking the fender by forcing them to line up. I'm going to mount the right one loosely also, then put the rubber body filler seams after. I have the cycle wings all ready for gluing, I mounted the repeaters, ran the wires up through the struts attached the ground wires and tested good! http://www.usa7s.net/vb/attachment.php?attachmentid=15164&stc=1 http://www.usa7s.net/vb/attachment.php?attachmentid=15165&stc=1 http://www.usa7s.net/vb/attachment.php?attachmentid=15166&stc=1 http://www.usa7s.net/vb/attachment.php?attachmentid=15167&stc=1

-
Thanks! I'll hit it again tomorrow. The weather is starting to break again and iI needed a little break to gather my thoughts anyway. Where did you guys source the big heads from? I've read about them on some build blogs maybe I'll give them some thought. Any links? I have some professional grade epoxy they use for panel bonding in body shops. I'm sure any of you guys could "con" some off of a body guy in trade for a ride! I'm not so sure about that! But I'm not planning on doing any track time... for now anyway.... rocks... probably lol OUCH! Glad you're ok!
-
Up and running! Apparently or my guess would be, the diode in the relay fizzed when Caterham put it where the flasher was supposed to be. Just by dumb luck and a case of well maybe the damn relay is bad, I put a different relay in, that I had laying around and she started! Life is good! I managed to salvage some of the weekend and wired up and mounted the repeaters on the cycle wings. Pain in the butt getting the wire thru the wing support. Hint... Feed a very thin wire (I used phone wire) up from the bottom, tie off the repeater wire then pull the works back down thru. Works great! Next up, gluing the cycle wings on. I purchased some professional grade 2 part metal bonding epoxy from a body shop on my Snapon route. I don't want to take any chances of the wings flying off! They use it instead of welding body panels together. They say it's stronger than welding. They said to sand the wing uprights down to bare metal so the epoxy bonds to the metal better. I filed the paint completely off where the fender and support will meet. Also left the metal a bit rough for better bonding.
-
Not much help I'm afraid... but thanks. This is very similar to the one Derek sent me. At least this one has a starter button on it, the one I have doesn't... lol. The relay block is totally different than mine. I think these diagrams are actually drawings for the manufacture of the wiring harness. Those light printed numbers in between junctions, terminals and connectors etc. are distances in MM's. Close to a diagram but not quite. I've been staring at the one I have for two days and I still can't find where N52 terminates, I see it at the starter, relay but I'll be darned if I can find where it goes. Thanks again, Bruce! I'll keep you posted, Kenny
-
Thanks Bruce I'll give them a look!
-
On the starting problem.... Does anyone checking in here have a newish 7 they could check on some wiring for me? When I checked the relays, 1st... I found that Caterham put the turn signal flasher where the starter solenoid belongs :facepalm at least the blinkers work now! Secondly, when I checked the voltages on the back side of the starter relay, I discovered that 3 of the 4 wires have 12v being applied to the wires. The odd man out is a double black pair of wires that lead to the starter solenoid. When I apply 12v to that pair of wires the starter engages and spins the motor over. I find this troubling in that I know that one of those wires should be a ground and not have voltage on it. The wires are brown, purple/blue(it goes to the ignition relay) and the other is a small black/red wire. Like I said they all have power to them. Not being an electrical engineer even I know that there has to be a ground in order for the relay to engage. Is this the same B/R wire that runs thru the starter button? Does the starter button have 12v applied to it or does it supply the ground when pushed? Any Thoughts? Kenny
-
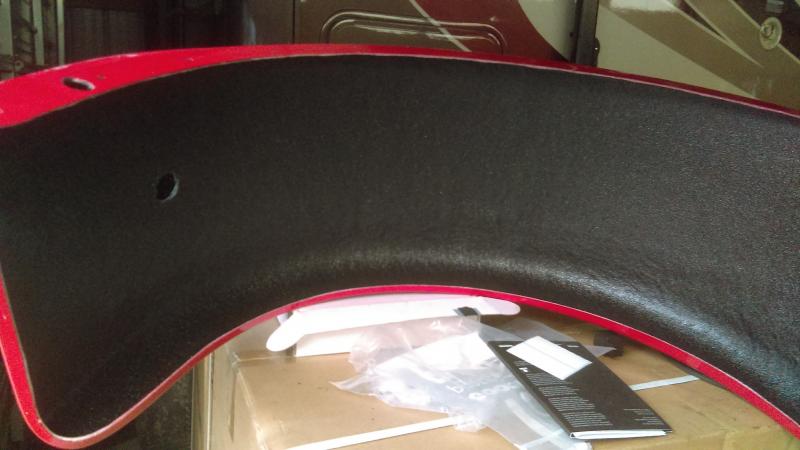
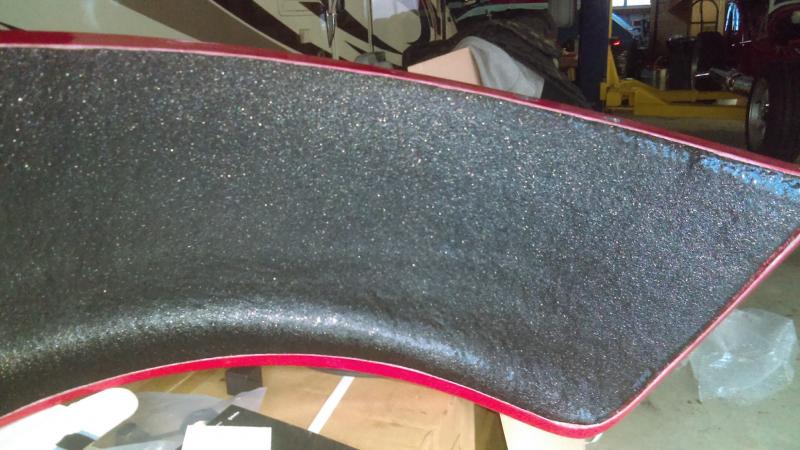
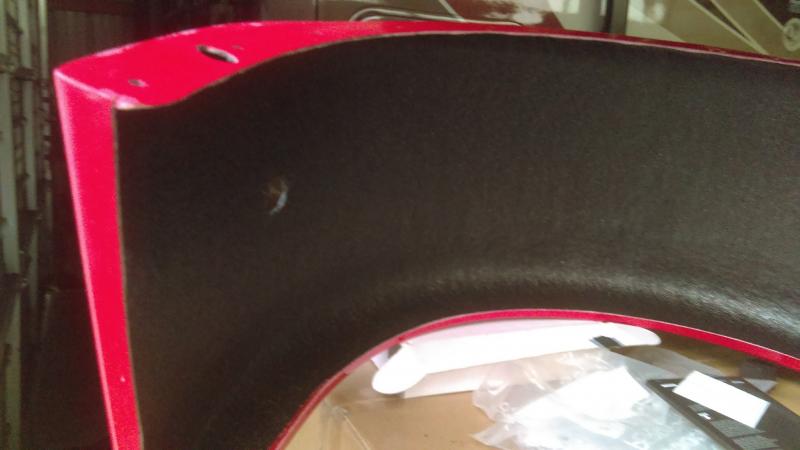
I picked up the wings and fenders yesterday. He sprayed four layers of bed liner material on the under sides. They came out great and I think they will very well protected from stones! http://www.usa7s.net/vb/attachment.php?attachmentid=15136&stc=1http://www.usa7s.net/vb/attachment.php?attachmentid=15139&stc=1http://www.usa7s.net/vb/attachment.php?attachmentid=15137&stc=1http://www.usa7s.net/vb/attachment.php?attachmentid=15138&stc=1
-
http://www.usa7s.net/vb/attachment.php?attachmentid=15079&stc=1 http://www.usa7s.net/vb/attachment.php?attachmentid=15078&d=1551301368 I hope you meant the headers...our did you mean the fenders and wings?
-
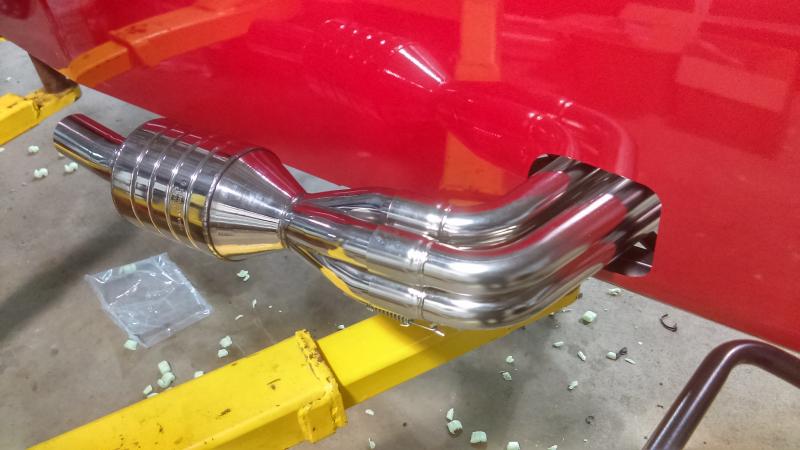
The headers are chromed if that's what you mean. I took the wings and fenders to a customer of mine to have bedliner material applied to the underside of them to prevent gravel and some damage. I'll get them back on Thursday. I live in a very rural area with a lot of macadam and dirt roads. Better to be safe than sorry. Unfortunately the car won't start... Seems to be a wiring issue. It won't even crank unless i jump the solenoid on the starter. Derek with Caterham sent me a writing diagram but just the engine compartment, hopefully I'll get the chassis one tomorrow. Hopefully I'll get it sorted soon! Dying to hear it!
-
So far I have about 66 hours in it. Been a lot of fun!
-
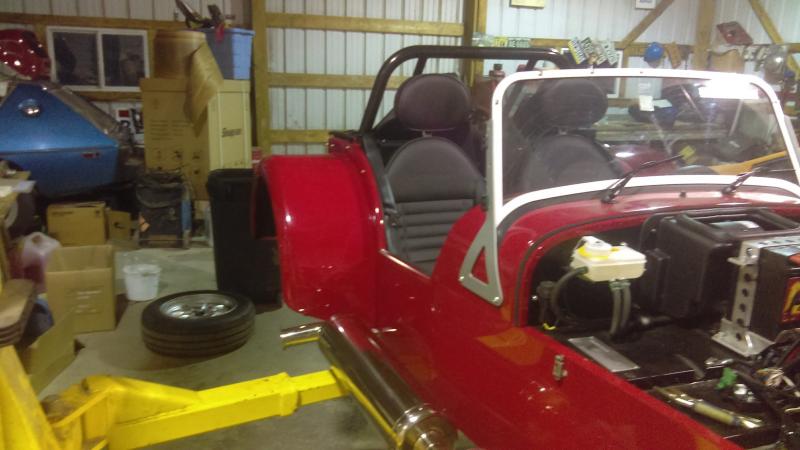
I got some more done on the Seven over the past week. Sorry for the pic quality. My phone camera lens is screwed up! http://www.usa7s.net/vb/attachment.php?attachmentid=15122&stc=1http://www.usa7s.net/vb/attachment.php?attachmentid=15123&stc=1http://www.usa7s.net/vb/attachment.php?attachmentid=15124&stc=1http://www.usa7s.net/vb/attachment.php?attachmentid=15125&stc=1
-
Thanks Tom! Been a nice challenge. I've mostly been working on it on weekends. The diff, was a lot easier than I thought. I read some horror stories of the fight some have had, but mine went real well. Next up I'll build the dedion and rear brakes. Derek from Caterham has been very helpful with the electrical connections that I had questions about. I sent him some pics and he sent some back with comments. The hand brake cable, routing points were another issue that he resolved for me. I'll get them taken care of when I go to the deDion. Unfortunately, I'm going to have little time over the next couple weekends to work on it due to some family matters that need done. But I'll try to do more during the week days to keep the pace up. Kenny
-
I've got about 40 hours in so far. Having a great time doing it. Only wish it was warmer. I've got a torpedo heater but the constant din of that thing running makes you crazy after a while! LOL
-
Here are a few pics of my progress on the Seven. Hope you like them! http://www.usa7s.net/vb/attachment.php?attachmentid=15078&stc=1http://www.usa7s.net/vb/attachment.php?attachmentid=15079&stc=1http://www.usa7s.net/vb/attachment.php?attachmentid=15080&stc=1http://www.usa7s.net/vb/attachment.php?attachmentid=15081&stc=1
-
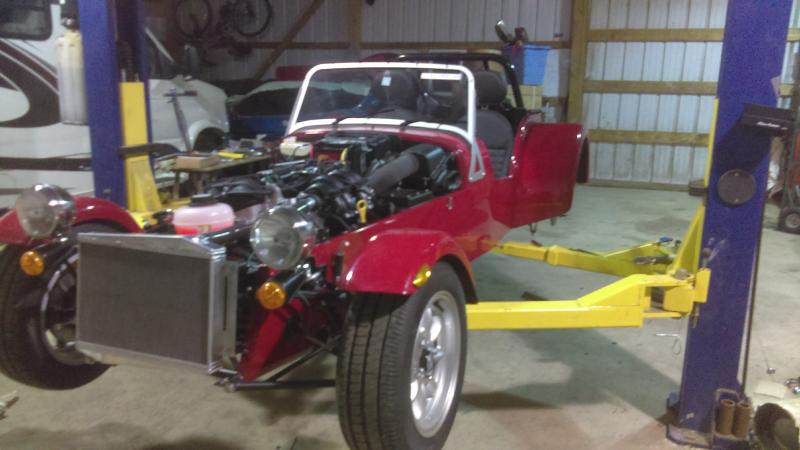
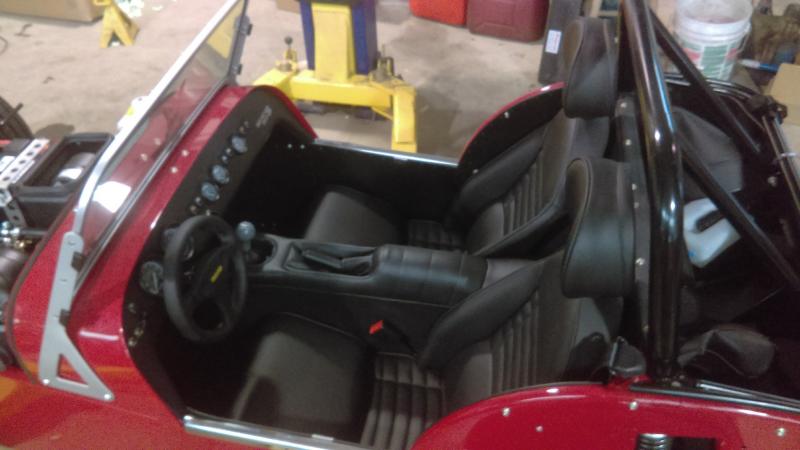
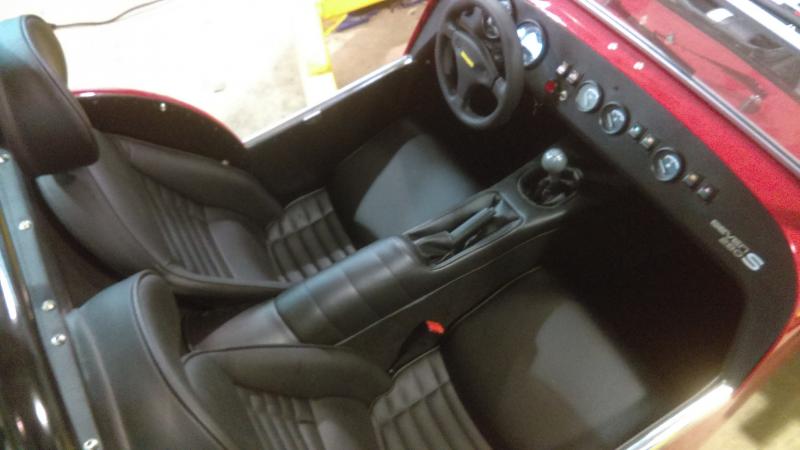
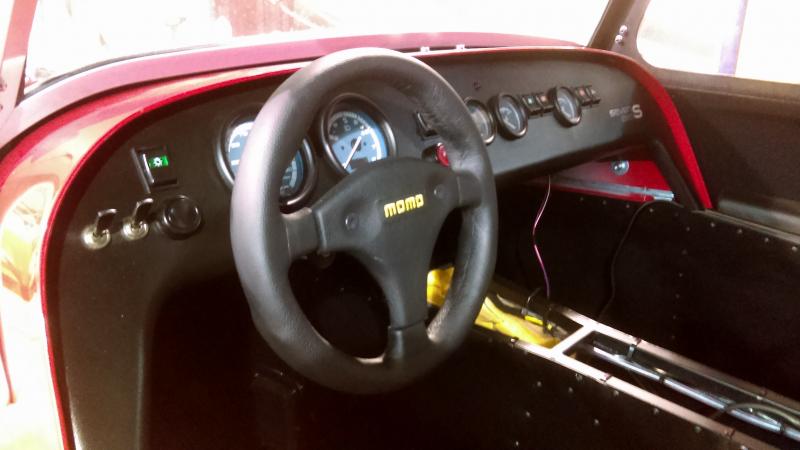
Well I got some more done today on the Caterham... oil is in, coolant is in, throttle cable and I fought my ass off with the steering column... those bushings are a nightmare, not to mention the one one the dash board that wasn't even mentioned in the guide. I kept knocking out the nylon inner sleeve. What a pain in the arse. They should note that the steering rack should be left loose so you can rotate it as necessary for a better angle to the steering column. I found out where those wires go. White and red to the starter and brown to the engine block... I hope. Lol Tomorrow the exhaust pipes, then the e-brake and diff... even with the problems I'm still loving the build!
-
Apparently something went wrong.... my pics weren't posted. I sort it out and re post
-
Here is what I had to move to this post.... Anyone know what these wires go to. I deduced that the brown ones are a ground. I checked them for continuity... The white and red ones? and the twisted ones with the plastic blades are up in front by the lower rad hose? The FSM has no wiring diagrams what so ever. http://www.usa7s.net/vb/attachment.php?attachmentid=15039&stc=1http://www.usa7s.net/vb/attachment.php?attachmentid=15040&stc=1http://www.usa7s.net/vb/attachment.php?attachmentid=15041&stc=1 HELPPPPPP!!! LOL
-
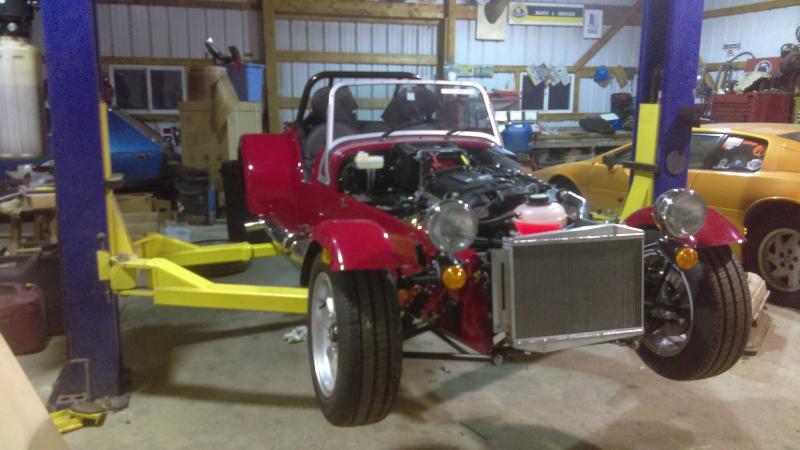
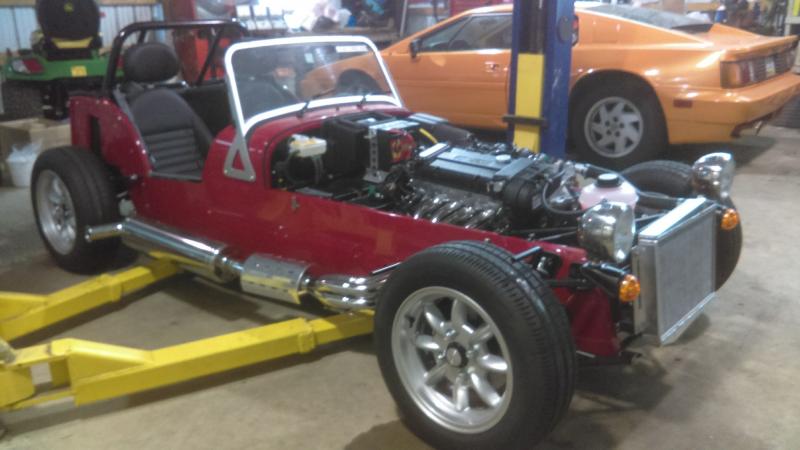
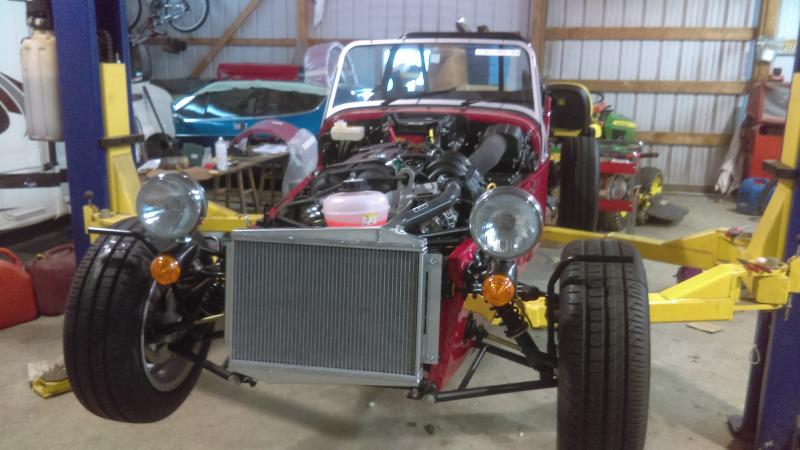
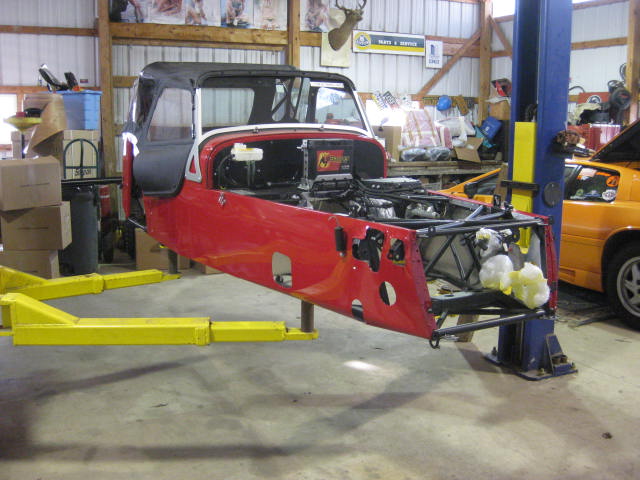
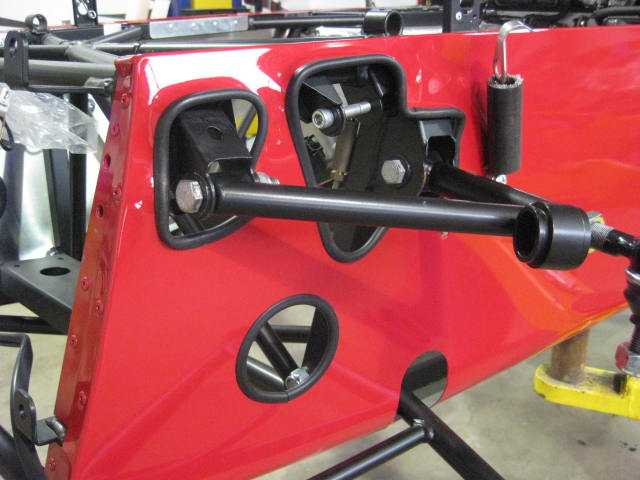
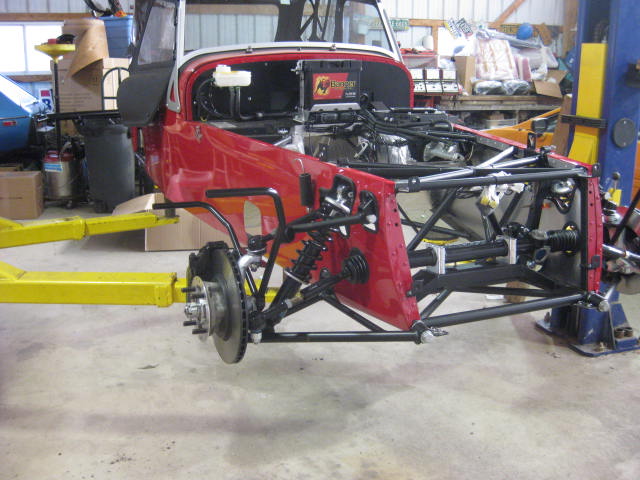
Well, I finally got some time to post some pics. A good friend of mine came over to give me a hand with putting the engine in. Unfortunately we lost about 4 hours trying to bleed the air out of a borrowed cherry picker only to run down to the rent a center and renting a known good one. We got about 12 hours in it over the two days. Fitting the trans to engine, plumbing up all the hoses, and installing the rad after the engine was in. http://www.usa7s.net/vb/attachment.php?attachmentid=15037&stc=1 http://www.usa7s.net/vb/attachment.php?attachmentid=15038&stc=1 One huge problem we ran into was the engine brackets to motor mounts. I bolted the rubber mounts to the frame and got the engine in close. But the brackets that bolt to the engine were "miles" off! This was the drivers (Left) side: http://www.usa7s.net/vb/attachment.php?attachmentid=15042&stc=1 This was the passenger right side: http://www.usa7s.net/vb/attachment.php?attachmentid=15043&stc=1 As you can see they weren't even close... very frustrating. The engine needed to be about 3 inches toward the left side and back about three inches. This was impossible as the dipstick was already against the side of the car, the throttle was against the brake/clutch peddle box cover and the intake was against the master brake cylinder! I almost gave up and was going to call the dealer figuring that the brackets were the wrong ones. I stumbled on the remedy by loosely bolting the driver side bracket to the rubber mount on the frame and swinging toward the engine. What I discovered was, the engine needed to be tilted, with a list of about 5-10 degrees! I had no idea. When you pick up the engine with the cherry picker and engine tilt it picks it up level. Sure you can tilt the engine with the positioner nose to tail, but the yaw you could do nothing about. Being new to the Caterham, I didn't know that the engine was listing toward the passenger (right) side. So I pushed the tilter towards the passenger side to match the engine bracket and BINGO! I then moved the engine back and everything cleared! My buddy held it there as I bolted the bracket to the engine and then, the right side was spot on! Problem solved and time for a BEER! We finished plumbing up all the cooling system and called it a weekend! A LOT of work but I'm very happy with the result. Its really coming together. Next a cleanup of the shop, tool organization, get rid of a bunch of empty boxes and hit 'er again next weekend. Stay tuned! Apparently I exceeded the number of pics I can post... to be continued
-
Great garages guys! My wife has a newer mini but we love them all! @pk .... what is the one on the left? Looks like a BMW? Nice collection! Tomorrow I'm putting in the engine and trans. I bypassed the headlights and radiator because i know how clumsy I am. I can just see me swatting them with the tail as i set the engine in. LOL! I did manage to get the heater/heater core in, the airbox, horns and the headlight supports installed. So far about 13 hours in. I'll post some pics of the engine install tomorrow.. cross your fingers!
-
Thanks! I've had it for 16 years... How time flies!
-
I'll be sure to watch for it...I have a pretty big hammer if necessary LOL!
-
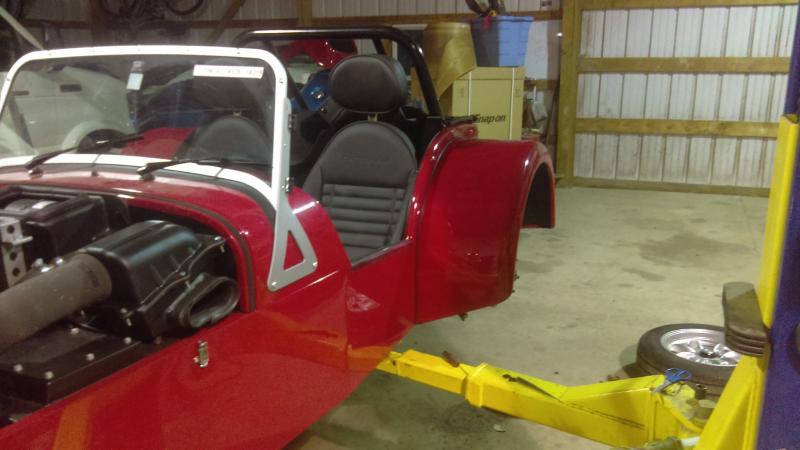
He is a great guy. Any questions I had he got back to me like right now! He delivered it Saturday. I got it on my lift Sunday and started the build! I've got about 6 hours into it. Some things were a bit fiddly, the trim around the holes in the body for one and the upper coil over bolt were a real treat! Lost quite a bit of time there. http://www.usa7s.net/vb/attachment.php?attachmentid=15026&stc=1 http://www.usa7s.net/vb/attachment.php?attachmentid=15027&stc=1 http://www.usa7s.net/vb/attachment.php?attachmentid=15028&stc=1 http://www.usa7s.net/vb/attachment.php?attachmentid=15029&stc=1 I'll keep you guys up to date! Kenny
-
The only salt that this car will near, will be from the "chips" while on a Fish and Chips run!:driving::rofl: Thanks everyone, I'll post some pics tomorrow! I'm going through the newly designed build manual right now and all night I'm sure... LOL
-
I'm in Wellsboro, PA. Just shy of an hour south of Watkins Glen. Forgot to mention the color, Exocet Red. It should be here by noon, I'll be driving it tomorrow:rofl: Thanks for the support!
.thumb.jpg.014dbf29b8ffcc32438aff111598bf1f.jpg)