.jpg.dba9367c1aedb8fb9186f2a110402d4e.jpg)
Lucky-7
-
Posts
106 -
Joined
Content Type
Profiles
Forums
Store
Articles
Gallery
Events
Library
Everything posted by Lucky-7
-
I used them for the same reason, but I used the rivets. I'll have to look and see about the dimpling. Never gave it much thought. Thanks.... now I'll be self conscious..:smilielol5:
-
Hey Greg, it's a bloody mess. I did almost all of mine in one shot. Then added some more on the next day. I also sanded the top of the uprights to bare metal so the epoxy bonded really good to the steel. I also hit the fenders a little for the same reason. Did you do have the wires through the supports for the repeaters? I drilled the holes for the ground and attached the ground wires before gluing. And I installed the repeaters. I feel pretty confident they won't pop off somewhere.
-
I don't know if you saw my build thread, but I had my wings sprayed with bed liner material at a local shop. I marked the front ones where the supports would go so he masked them off there, and the rears he sprayed full length. I figured it would help with stones flying up and star cracking the wings. For the front wing mounting, (very messy) I used a professional grade 2 part epoxy that body shops use to bond body panels together. I got mine from a body shop customer of mine, expensive but worth it. $85.00 Came with a mini dual caulking type gun, and nozzles, so the mix is exact. Norton makes it but there are other brands. Swing by a body shop and ask.
-
Hi Greg, nice progress, I see you put in the A Frame. I hope you didn't make the same mistake I did and put it in upside down. LOL. I only noticed the difference in the guide after I put it in. Oh well, it wasn't the only time I had to pull something off and put it on again. Keep up the good work!
-
Both are awesome looking cars. CONGRATULATIONS!!! Keep us posted on your progress!
-
As you can see in the picture the mount is offset (more flange on one side than the other), I wonder if you spun it 180 degrees, there by moving the trans more towards the passenger side. Just a thought, I don't know what the ramifications would be on the console and shifter from up above.
-
Just for S&G, try it with the all the mounts loose and disconnect the engine host completely. Maybe you can move the tail of the trans with a pry bar that way. Mine sits just above the that tape probably 1/8"-3/16" above the foil covered rail. It's definitely a super tight fit while the other side has plenty of room.
-
I looked at mine yesterday and there is no issue. Geez you would think by loosening the 4 bolts on the trans mount plus the two on the trans itself it would have enough movement. Did you loosen the motor mounts also, when you tried this? I would take the trans mount completely off and see if you can get the clearance you need. Then you may have to die grind the holes in the mount just enough to get it away from the frame. The two big ones that go into the trans not the for little ones hold the mount to the frame.
-
Thanks for the support my friends!!!
-
I'll have to look at mine. But mine has the Sigma engine. Yours is the 2.0 Duratec correct? There may be a difference in the mounting.
-
LOL... shoulda picked that up its the backing paper from the vinyl stripes....
-
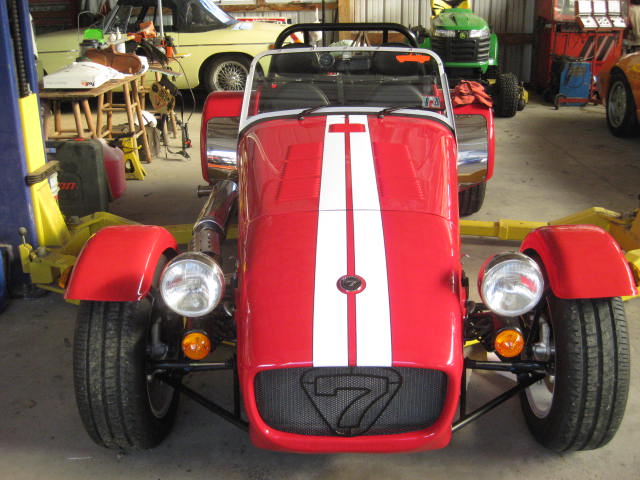
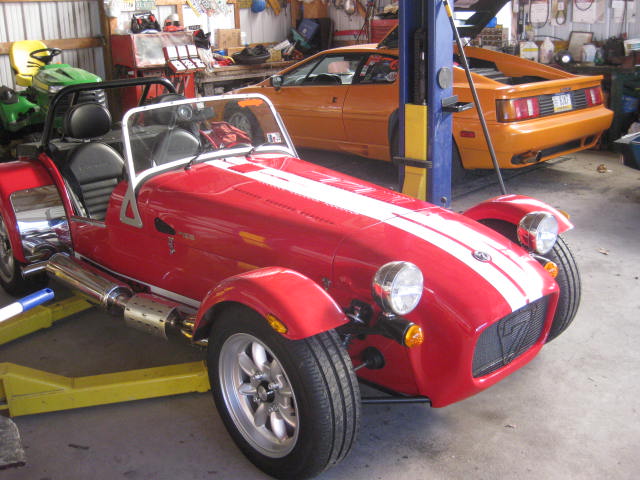
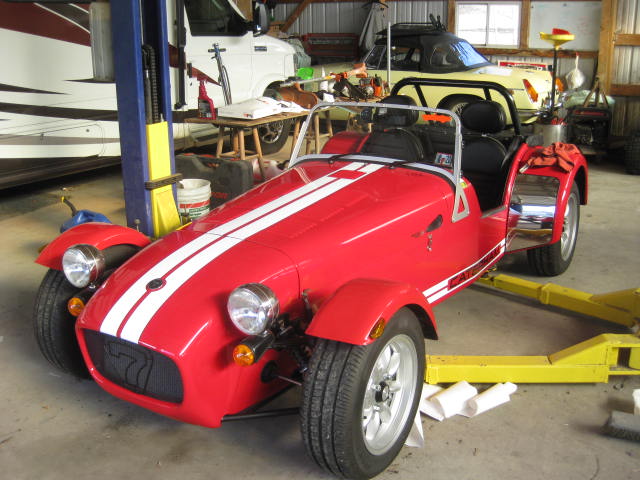
Whilemy dealer was in England visiting the factory he brought me back some stripes! Let mestart from the beginning. When I ordered the car, I figured I would be able toget a stripe kit here in the states and save myself a few bucks. Well after Iordered it, I searched for some stripe kits that I would like or some type ofvinyl wrap. That search was a waste of time and the more I saw the factory onesthe more I liked them. Iwrote to the dealer and told him to add on the stripe kit. He tried to get iton the order but when the car got here there were no stripes on it. Whenhe delivered it he realized it and said he would get a kit coming. When thestripe kit it was only for the sides of the car and no hood stripes. Asdisappointed as I was, I soldiered on and kept going on with the build. I askedhim to get me the hood stripes once again and he said they would be in ashipment that he was receiving back in Dec. of '19. I contacted him once againand he told me in January that they weren't in the container. Hereplied that he was going to England in early March and he would personallypick them and get them to me. I'm thinking SURE HE WILL!!!! Well,much to my surprise when he sent me the pics that I posted here of the factoryand showroom he said my stripes were in the mail!!! Just like the check is inthe mail??? Thatwas on a Saturday and Monday I got them! FINALLY!!!!! Hereis the best part..... I wrote to him to tell him that I received them and tothank him, I asked "What do I owe you for the stripes?". He replied,"I screwed up on them from the beginning so they're on me." I wasfloored, never expected that! Its almost a $300 option! To thank him, I'm goingto send him some stuff I bought from Snap On for my customers and give it tohim for his showroom. ThanksRick!!!! TodayI had a chance to install the ones on the hood. I still have to do the ones onthe back, but take a look and let me know what you think...

-
Looking good Greg! Keep it up and you'll be grinning from ear to ear in no time!
-
No problem Greg, it was nice to get her back on all fours! I even sat in it and made vroom vroom noises:smilielol5: The roads still have to much crap on them to take it for a ride so I passed on firing her up. This weekend I hope:driving:
-
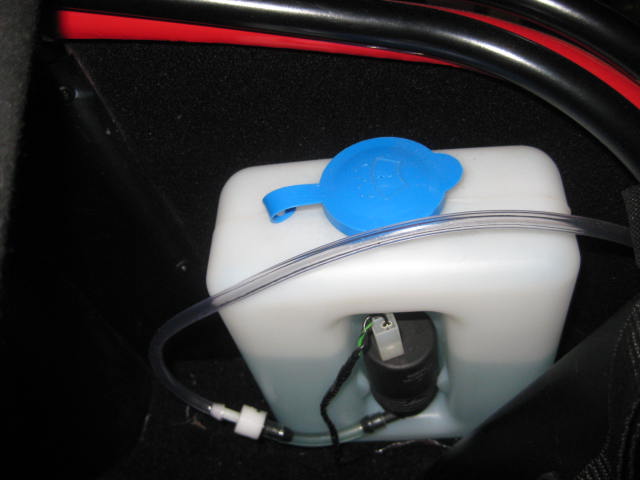
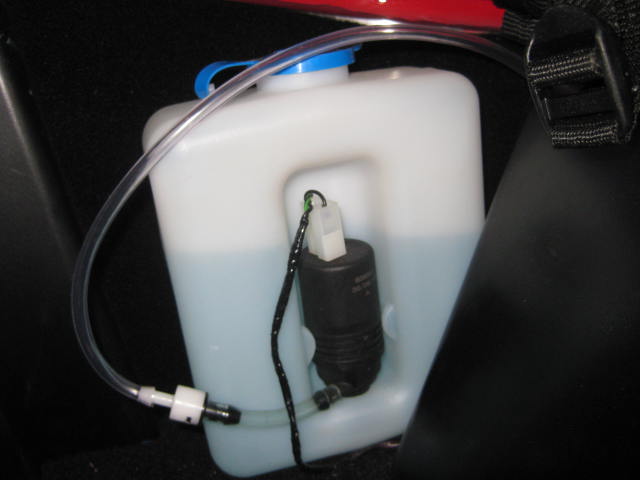
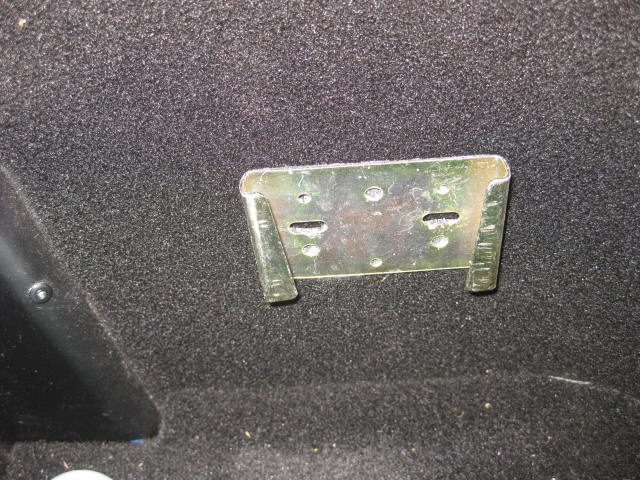
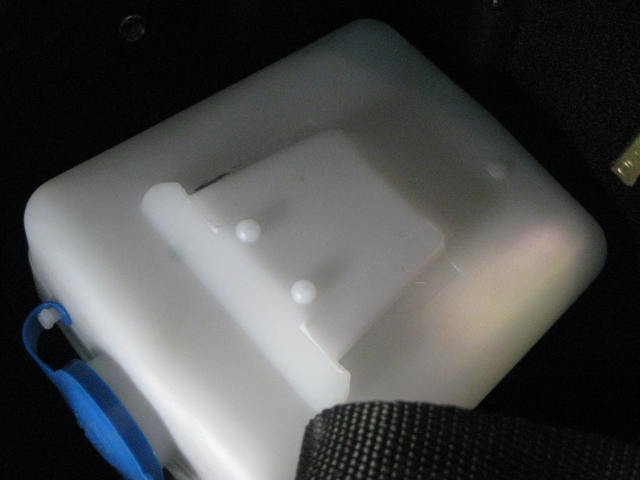
Just got some pics of mine I hope it helps. Here is the bracket. I velcro'd it to the carpeting in the boot. Keeps the bottle out of the way for more storage. I'm going to turn the pump towards the rear more and get the hose hidden in between the bottle and the rear of the car. I took it out so you could see the bracket. Once I put in the carpet and it set (3M upholstery spray) I put the hook Velcro onto the bracket that was mounted to the bottle and stuck it to the carpet. I made sure the bottle was resting on the floor of the boot so the Velcro wasn't carrying all the weight. No problem thus far! Once the Velcro is stuck there you can lift the bottle out with ease if needed. I have as close to the rear of the car as possible. It's actually tucked away behind the metal wedge that hides the filler neck to the tank. Waaaay out of the way. You will need as much room back there as possible. Kenny
-
It goes in the boot. Don't worry about it for now. I was confused about it also but then I saw the tubing running to the boot. Those drawing's are a hoot! Wait til you have to figure out the carpet set for the boot. LOL There should be a brass colored metal bracket that the bottle slides and locks into. Then you're supposed to figure out where you want to screw it into. Picking's are mighty slim unless you want screws poking through the side of the car... LOL I'll get a pic on how I mounted mine... it's up on the lift with another car under it, but the weather is breaking and it's time to get them rolling. Carry on, I'll get a pic later today.
-
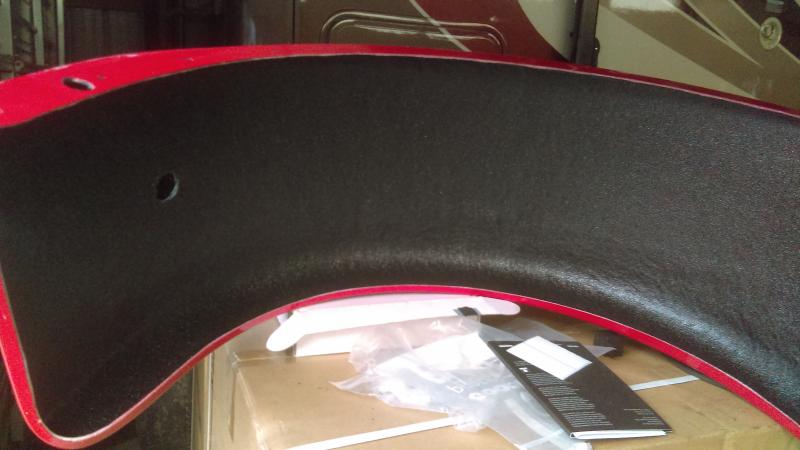
Hi Greg, Thought I'd chime in with a suggestion. I had the underside of my rear fenders and cycle wings sprayed with bedliner material before I installed them. I figured it would help with any stone or rock chips flying up from the tires and chipping or cracking the fenders. My local bedliner guy did them no problem. I had him leave spots on the fronts bare where you glue them to the braces. Just a thought.:cheers:
-
LOL And never get in or out of your Caterham naked!:smilielol5:
-
Great Job Bruce!!! THANKS!
-
It is the trim for the air box. I scratched my head for a couple days on that also. Looks nothing like the picture in the guide... LOL. Also don't torque down the rack until later. You WILL need to loosen it to line up the steering column with the U-joint. I tried my best to "eyeball it" but needed to twist the rack later anyways... I waited to torque a lot of the suspension bushings until it was on the ground with the engine in. With the suspension hanging,(upper and lower a-frames, radius arms etc.) I didn't want to tighten everything to spec at their lowest point of travel, then have them damaged after it was on the ground. The steering column bushings were a real pain! I wish i had a nickel for every time I pushed the one just behind the dash thru. Use plenty of lube! Also. I installed probably 95% of the heater and radiator house before putting the engine in. I have no idea how they expect you to get some of them in after the engine is in the car!. Like the "U" hose that's practically under the battery. Sheesh. Keep us posted. Good luck! I've got a lot more advice of you need it. Kenny
-
My advice is to follow the build guide. Mine came out just right. I took it to my alignment guy and the only thing we adjusted was a bit of toe. Ruby handles great so far.
-
Congratulations! That's a lot of work with a great result. Enjoy!
-
:rofl: The factory called it the Cyclops package when i wrote to them...LOL they sent me one in a couple days, all was good.
-
LOL when I unpacked mine it was short one headlight! It wasn't in the "shortages" box....:rofl:
-
Congratulations And Good Luck with your build! I thoroughly enjoyed building mine. I got mine last February, took about 95 hours to complete. Mostly weekends some weeknights. On the road by June 21st, mostly held up by bureaucratic BS and crappy weather to get a special inspection done. Love the color, but then again I'm biased as mine is the same... lol. Any questions feel free to ask! Kenny
.thumb.jpg.014dbf29b8ffcc32438aff111598bf1f.jpg)