Marine7
Registered User-
Posts
78 -
Joined
Content Type
Profiles
Forums
Store
Articles
Gallery
Events
Library
Everything posted by Marine7
-
Jack, It's true the Birkin and Caterham are very similiar in major dimensions, but they are slightly different in many many ways. For example, I'd looked at some caterham doors to fit my car (or more specifically cut down to half doors) but the body lines are very different. I'd also looked at using the alternator mouting system from Raceline for the zetec motors that is designed for the Caterham on my Birkin. The Birkin has a frame brace where the Caterham does not, and thus the alternator mount will not swap between the two. The clamshell brackets are different in that the tube that serves to hold the headlight (via the pinch bolts on the frame) is 2" too short. The arms also foul the upright A-arm under compresssion. so in the end, its nice to use the Caterham bracket as a general guide, but fabricating a new one is probably easier. I love the way your stalker looks btw. Brooklands, clams and beautiful paint scheme! Well done. Jason
-
I have a Birkin and am in the process of fitting clamshells. The Caterham brackets althought close, do not fit the Birkin. The clams are bolted along the side panel with rivnuts and you will have to fabricate a brace for the front of the clam. The Caterham bracket is a pretty good design as it integrates the headlight mount into the clamshell bracket and connects to the upright wishbone for support. With a bit of welding, the Caterham bracket shouldn't be too difficult to modify. (that's the point I'm at present) good luck. One final note: When initially locating the fenders, dont forget to leave a bit of room for the bonnet latches. (dont bother asking me how I know :banghead:) Jason
-
Kitcat, I'm just completing the build of my Birkin. I chose the anular release over the external slave cylinder and lever arm. On the Birkin, the stock roll pins on the clutch arm are a weak point and fail in short order. All new cars are fitted with anular release bearings and the theory is sound. Now, I too have found that the actual modulation of the clutch takes a fine touch. The "engagement" area or sweep of the pedal is quite short. I'd say it feels like 1" in or so at the pedal. Please keep in mind that my car is essentially in its break in period. It has less than 50 miles on it. The choice in friction material is also going to play a part. I'm running a Spec stage 3 clutch for street applications. The puck style racing clutches are not a very good option for the street. The guys at Taylor Race in N. Texas can provide you with a wealth of information on the Tilton release bearing. They also make the custom pedestal for the Birkin/T-9 tranny to bellhousing. The bad news is that any future service for your release bearing will require removal of the engine and tranny from the car. The good news is that once properly setup, it should be trouble free. Good luck Jason
-
As Mike said, the car is basically brand new. I shoud know, I sold Mike the car about 2 yrs ago. At that time the car had about 12.5k miles on it. Mike jumped in it and drove straight from Houston to Denver in January without incident. (well he nearly froze his butt off in a snowstorm and had a headlight go out) Since then, he's clearly don an amazing job rebuilding and improving the car in every way. Just look at the craftsmanship on the center tunnel and console. His attention to detail simply doesn't show in the pictures. The engine is a Zetec 1. I fitted a UK spec water heater to simplify the belt routing (now its a simple triangular setup from crank, water pump, alternator). Whoever buys this car is getting a great car at a fraction of the price of a new one. The car has always been very well taken car of and has not seen track time. I'm happy to answer any questions about the cars history. Regards Jason
-
Mike, Is that really my old car? Wow... I've said it before and I'll say it again: Nice Job! Cant wait to see the whole thin finished. Of course you'll have to post a lot of pictures of both interior and exterior. Maybe some before and after shots so everyone can truly appreciate the transformation. Tell me about your heel pad. Looks like a small alloy strip. Great idea. Did you purchase off the shelf, or have your metal magician whip it up for you? Keep the updated coming. Jason
-
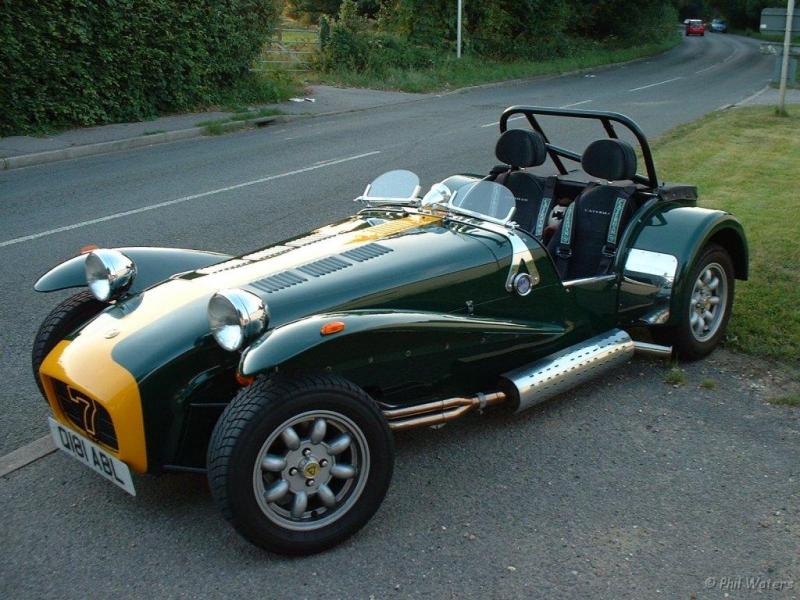
Steve, Funny enough picture 31 and 29 are of the same car... sort of a before and after. Picture 31 was when I sold the car to Mike who since repainted, polished and generally upgraded the car to the beautiful state shown in picture 29. Love the idea of a collection of pictures. Cheers Jason
-
I"ll measure up a friends Caterham to see if the scuttle profile is the same on the Birkin. Still 130 GBP + shipping seems a bit expensive for a simple piece of alloy (but it does look like a quality piece). I'd like to know what the cost for laser cutting a piece of ally on this side of the pond would be for comparison. I'll post the results of my search for an alternative to the factory part for those who care. Cheers Jason
-
I had no idea it was a stock Caterham part. Thanks very much for the info. Now I've got to see if the scuttle profile is the same on my Birkin. Cheers Jason
-
Howdy, My build progresses every so slowly. I've searched but have been unable to find any sources for a bracker similar to the one pictured below with which to mount my brookland screens to my scuttle. Aside from fabricating my own, is there a supplier of such an animal? Thanks Jason
-
TG USA... I couldnt get past the first 20 min. I DVR'd it, so I skipped forward to see if I could find something interesting. Nope, nada, nix. What a snoozefest. I even noticed they tried to make some politically incorrect comments like JC, but failed miserably. Jason
-
1962 Lotus Super 7 Replica (5speed + Supercharged v6)
Marine7 replied to MightyMike's topic in Cars For Sale
Thumbs up on the paint. These cars are meant to reflect the owners own likes and dislikes. I like the creativity and innovation of many builds even though I wouldn't necessarily apply it to my car. I'm sure the next owner will appreciate at it as well. -
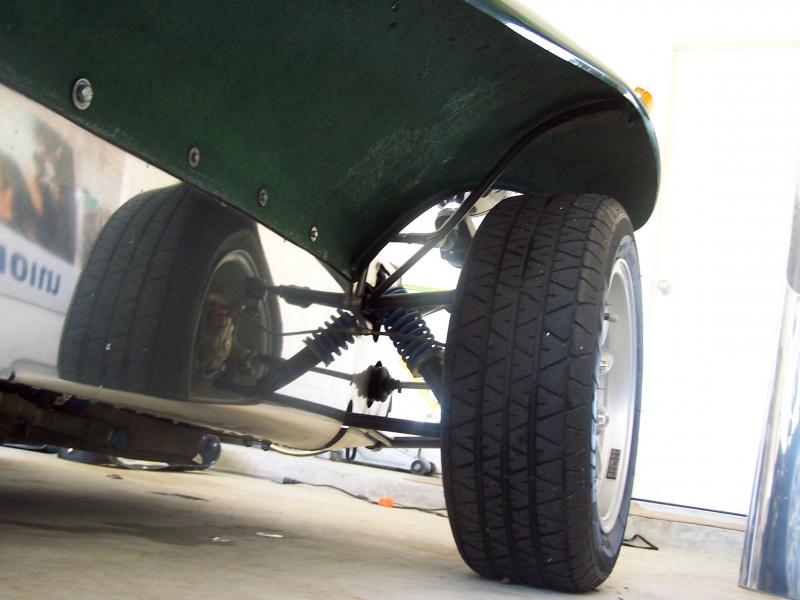
An update on Caterham Clamshell supports. Luckily a local Caterham owner (well he owns 3 actually) provided me with his old set of clam supports. To my surprise, the fit the Birkin like a glove. The uprights and headlight pinch bolts are in the exact same position on the Birkin and Caterham Series 3. Looks like fitting the Caterham clams to the Birkin will be easier than I thought! Thanks for all the help. I'll post some pics when I've got em fitted... (might be a while, I'm knee deep in Emerald ECU/Throttle body/wideband install) Cheers Jason
-
Mike, Can I have my car back? All kidding aside, you've done a fantastic job. I really like the mirrors and the center tunnel. The paint really sets it off and makes it look much more modern. Now get better and enjoy that car before the snow falls! Jason
-
Jack, Thanks very much for the contact info. I've spoken to some local Caterham guys who I'll meet this weekend at a local Coffee and Cars event. They're going to bring along some old brackets they've cut up and combined with some careful measurements from their cars, I should know if the new re-pro's will work. If all goes well, I'll order a pair from Burt and Fay Curtis next week. I throughly enjoyed your website. Thanks for taking the time to document your build and evolution of the stalker. Its a beautiful car. Love the Brookies... Mine just came in the mail. Now if I could just get my car to the point that it makes engine noises on its own instead of my vroom vroom from the drivers seat! Cheers Jason
-
Jack, I remember that post. Its great that you can spend so much memorable time with your son. I truly look forward to the days when I can do the same with my boy. For now, he just hands me tools and generally runs off with my stuff when he's in the garage. He's only 6 years old, so I'm just happy to have him interested enough to play around the cars. Did you locate and use an actual Caterham bracket? It appears to me that the bracket is an extension of the headlight bracket with a lower brace extending down to near the upper A-arm. Is that pretty close? Kudos on your wire covers. Looks like a fantastic way to run wires. is that -3 AN braided brake hose? I may do something similar but oh the weight penalty! Must be 3 oz on both sides... eeegads! Just keeping it light Jason
-
second photo wouldnt upload. I'll have to work on it...
-
Jack, Thanks. I havent spent a great deal of time around Caterhams, so I've got very little to go on in terms of how the Clams were originally fitted. However, the guy who had the Clams mounted previously on his car provided me with a couple photos of the bracket. One is of the bracket supporting the fender and the other is post modification. He modified the bracket so that he could retain the headlight portion of the bracket and run cycle fenders. I'm hoping to find a pair of brackets that are still in their original condition and havent been modified. Thanks Jason
-
Howdy, I'm wondering if anyone out there has an old pair of clamshell wing supports collecting dust. I'm specifically looking for the supports on the forward end of the clamshell that I believe may be part of the headlight support. A good digital photo of the mounts off the car would also be helpful. I'm trying to install a pair of Cat wings to my Birkin. If I cant locate a pair, I'll try my hand at fabricating something. I'd be quite interested to hear from anyone who has made the switch from cycle fenders to Clamshells Thanks very much Jason
-
I've spoken to the guys at Raceline and decided to purchase their Valeo 45 amp unit. They told me it's a new unit made for an old Lucas application (hence the odd spacing of the lugs). The location of the lugs at 1 and 4 O'clock should allow a very tight fit against the block, so it "should" fit. Certainly not the cheapest of options, but this is all for fun anyway. I'll post the results when it arrives. If it doesnt fit, maybe I'll have the first plug in hybrid Seven? Charge, drive, charge, drive... Cheers Jason
-
Bruce, I picked up the clams from Graeme Gee, a fellow board member who was parting out some of his extra Cat parts last winter. Cheers Jason
-
Interesting idea from the S1Steve. (I've been using the S1 build manual to help me along in my build.. very good piece of gear). However, I cant identify the lower bracket. It looks like a stock casting. I doubt I've got that much room between the side of my block and the frame brace. I might be able to use it as a starting point for mounting of a mini racing alternator in the future. So, I bit the bullet and called the guys at Raceline. I've purchased the Valeo unit pictured in the first photo. With any luck, it'll sit close enough to the block to clear the frame brace. The Valeo unit is a new version of a Lucas alternator from UK spec Mark II escorts. I'll post pics of the fitted unit. Cheers Jason
-
Kitcat, Thanks for the compliments. The bike is a 1953 BSA C10L. I bought it as a basket case about 10 yrs ago and did a total frame off on it. It's not much to ride as a 250cc side valve motor only makes about 5hp. Wouldnt want much more than that since it's got 4inch drum brakes and stopping takes a LONG time... I love the look of your car. So much so that I've obtained a set of clamshells and just ordered my brookland screens last week. I'd love to get a larger picture of your car if you have one avail. I might bother you in the future to get some rough measurements to help me locate my clams to the body. (I'm leaving them off till the end of the build) Cheers Jason
-
Mike, The progress is slow but I really enjoy the head scratching. I do miss being able to enjoy a blat when things at work get the best of me. You've really made giant leaps with Cheryl. I cant wait to see the finished product. Take care of that back. Jason
-
Mike, Yep, can have it machined once I find a small enough alternator. Was hoping that somebody had invented the wheel first... I have the feeling that my options are fairly limited... Figure out what the heck is out there with the correct orientation of mounting lugs or ditch this setup for a ground up build which will take more time and more money. How is the back? Any chance you'll be able to fit up all those carbon bits soon? Jason
-
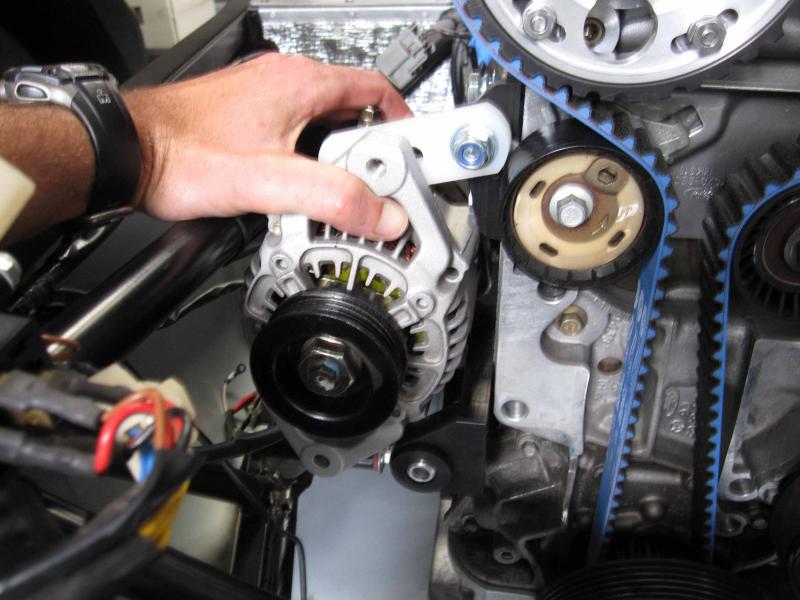
Hopefully this picture will be a bit better. The main culprit is finding an alternator that is both small enough and has mounting lugs that are located at 1 and 4 O'clock. As you might be able to see, I'm trying to fit between that frame brace and the block and still be above the oil filter housting. Thanks Jason


