TwedleJoe
-
Posts
27 -
Joined
Content Type
Profiles
Forums
Store
Articles
Gallery
Events
Library
Everything posted by TwedleJoe
-
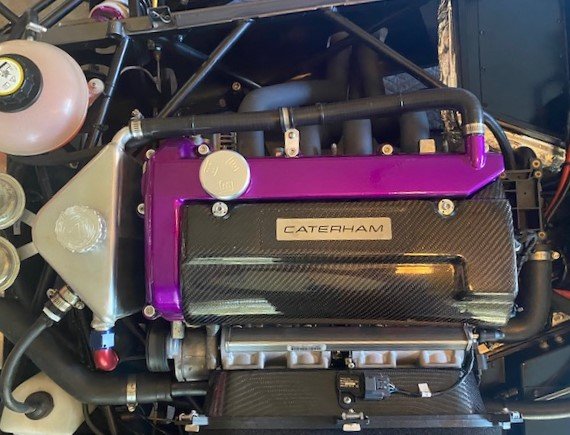
New Carbon Fiber Airbox - Duratec - For Sale
TwedleJoe replied to TwedleJoe's topic in Parts For Sale / Wanted
P/N = drop the "O" at the end. -
I have a brand new CF airbox (part # 35E058A0) for sale. Part is $850 plus shipping from Caterham. Fits Duratec with roller barrels. $500 OBO - Buyer pays shipping.

-
For Sale - 2012 R400 - Recently Rebuilt and Upgraded
TwedleJoe replied to TwedleJoe's topic in Cars For Sale
Car is now sold. Thanks to all who enquired and/or commented on the car. -
For Sale - 2012 R400 - Recently Rebuilt and Upgraded
TwedleJoe replied to TwedleJoe's topic in Cars For Sale
In TX we have at least 2 ways we can title a Caterham. This one is titled a 2012 Caterham as a Custom Vehicle. This eliminates the need for an annual inspections amongst other things. I am unfamiliar with CA registration requirements. -
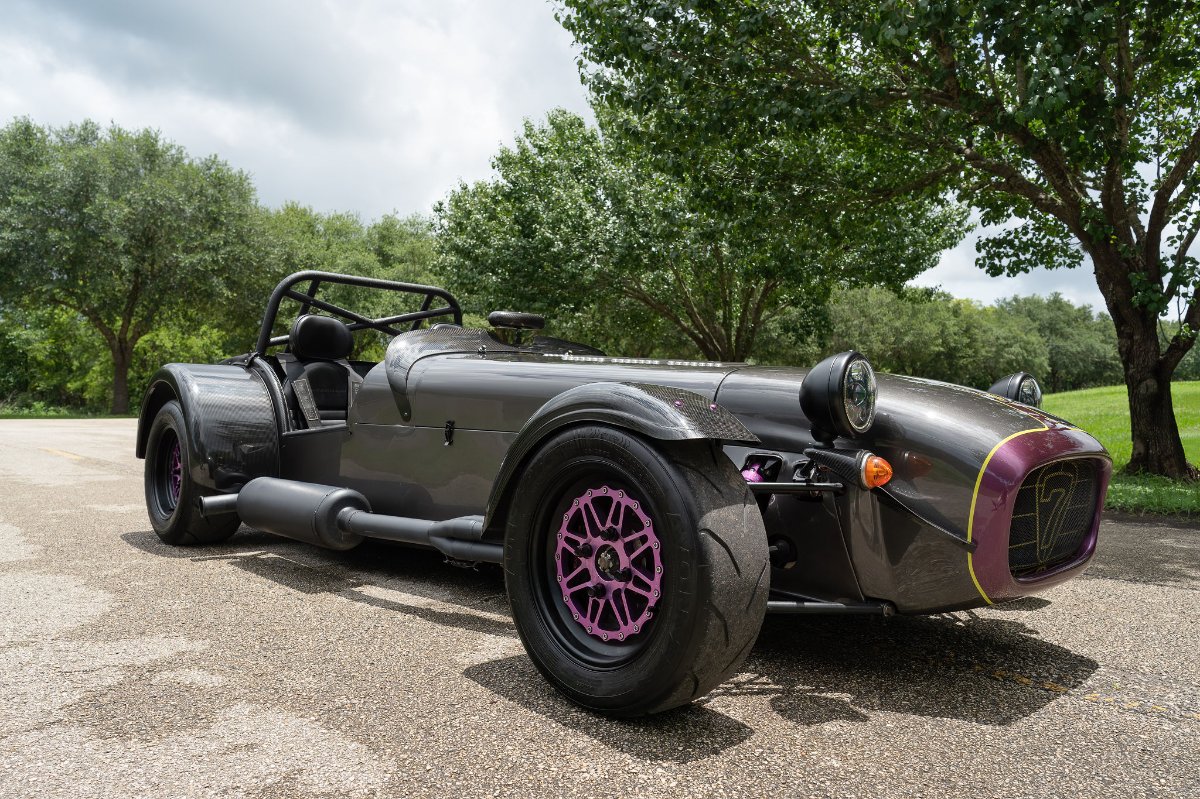
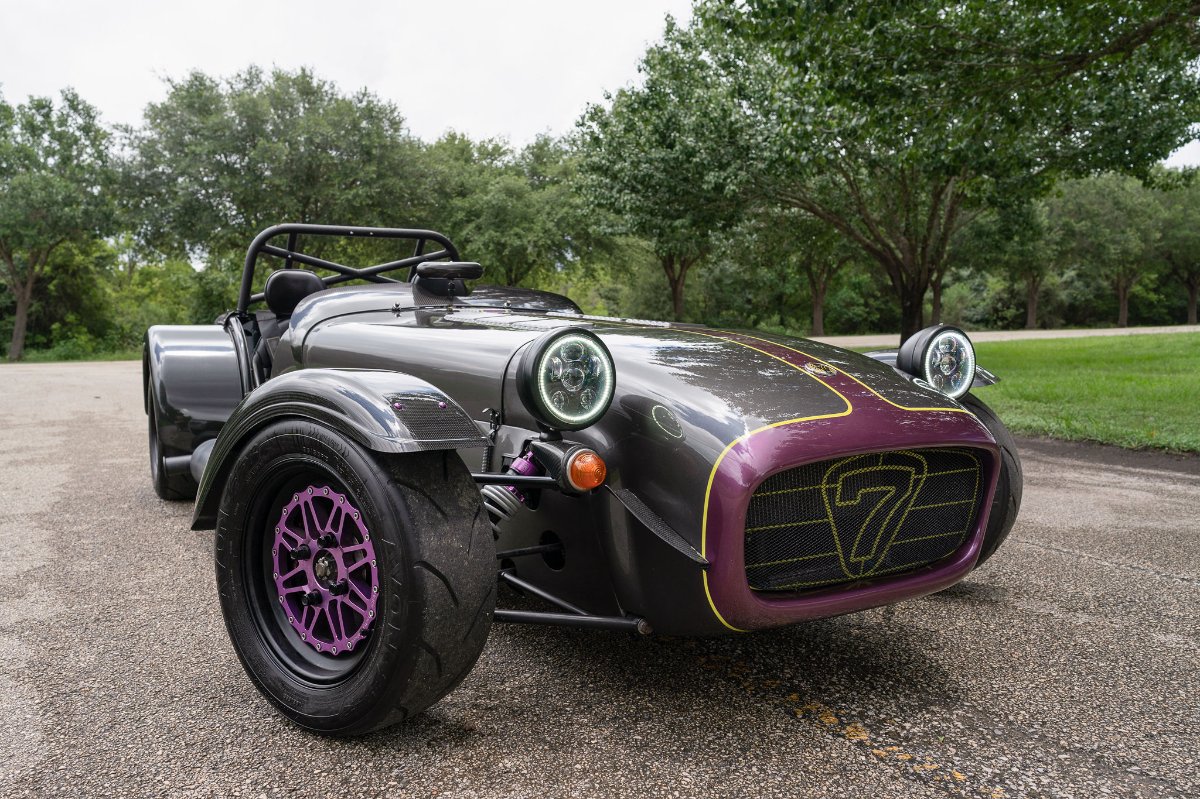
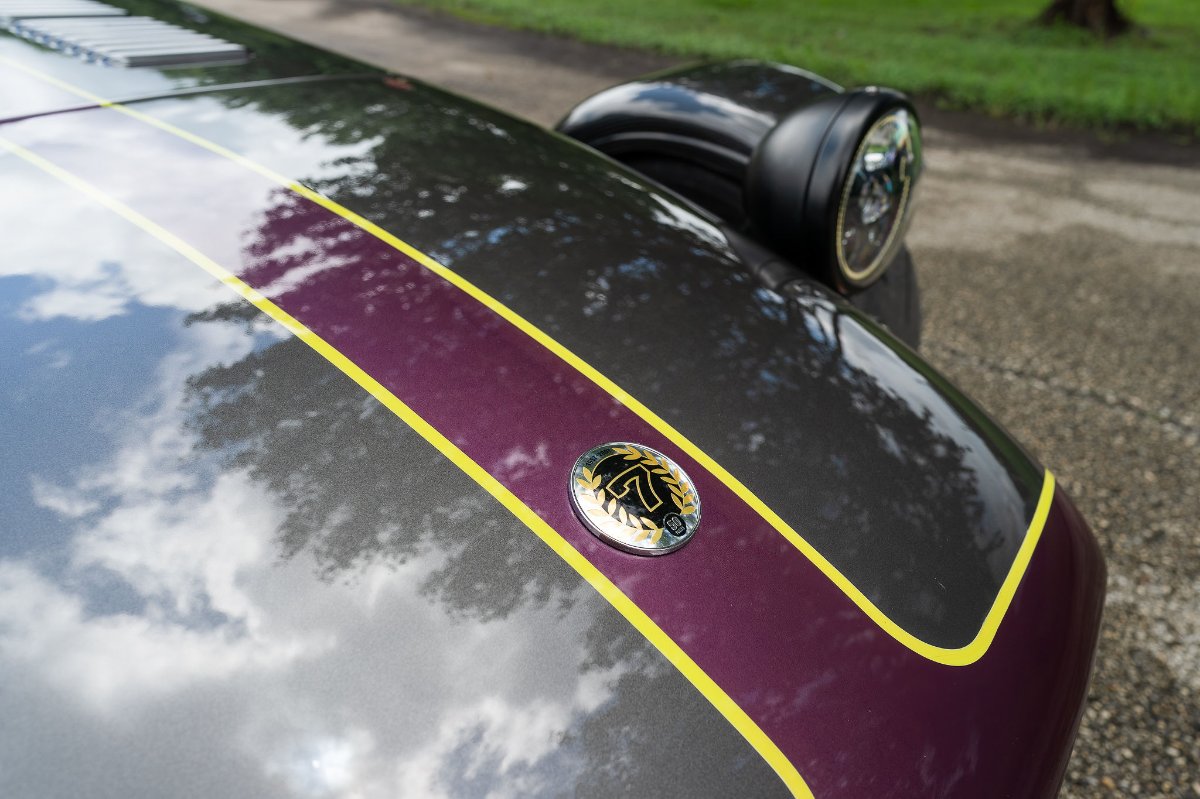
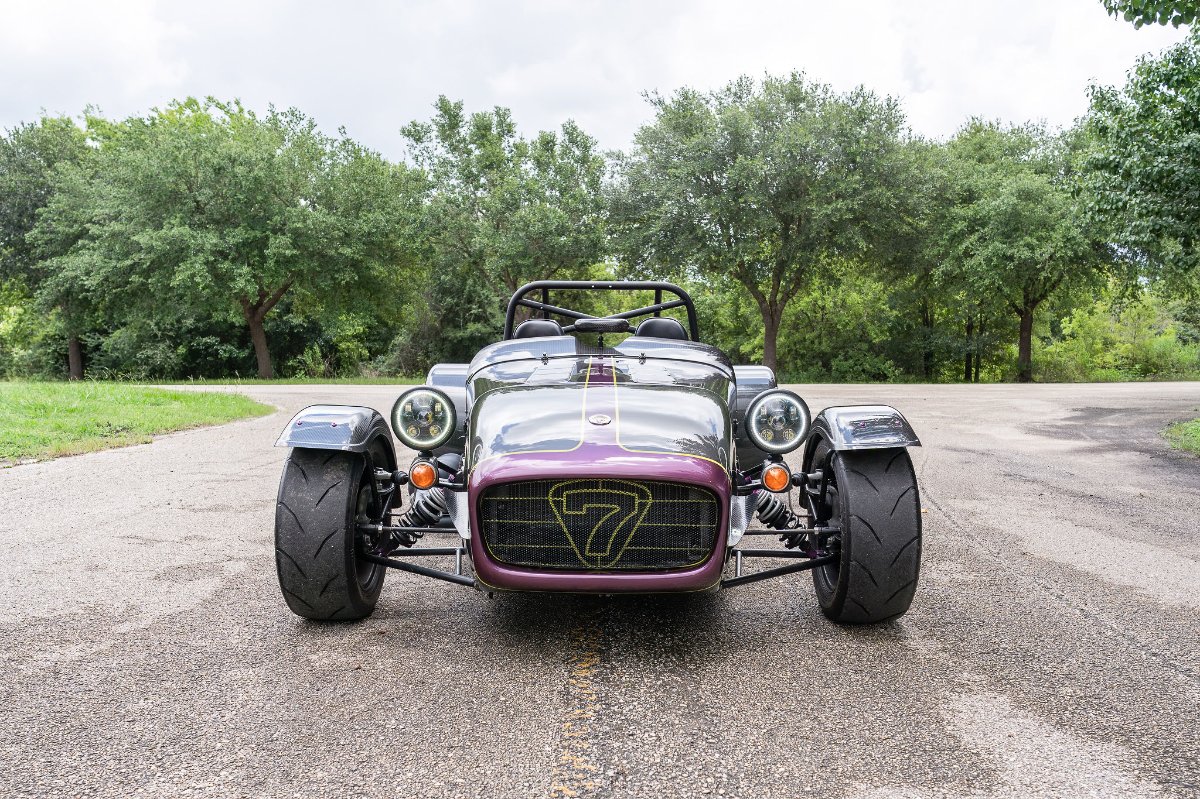
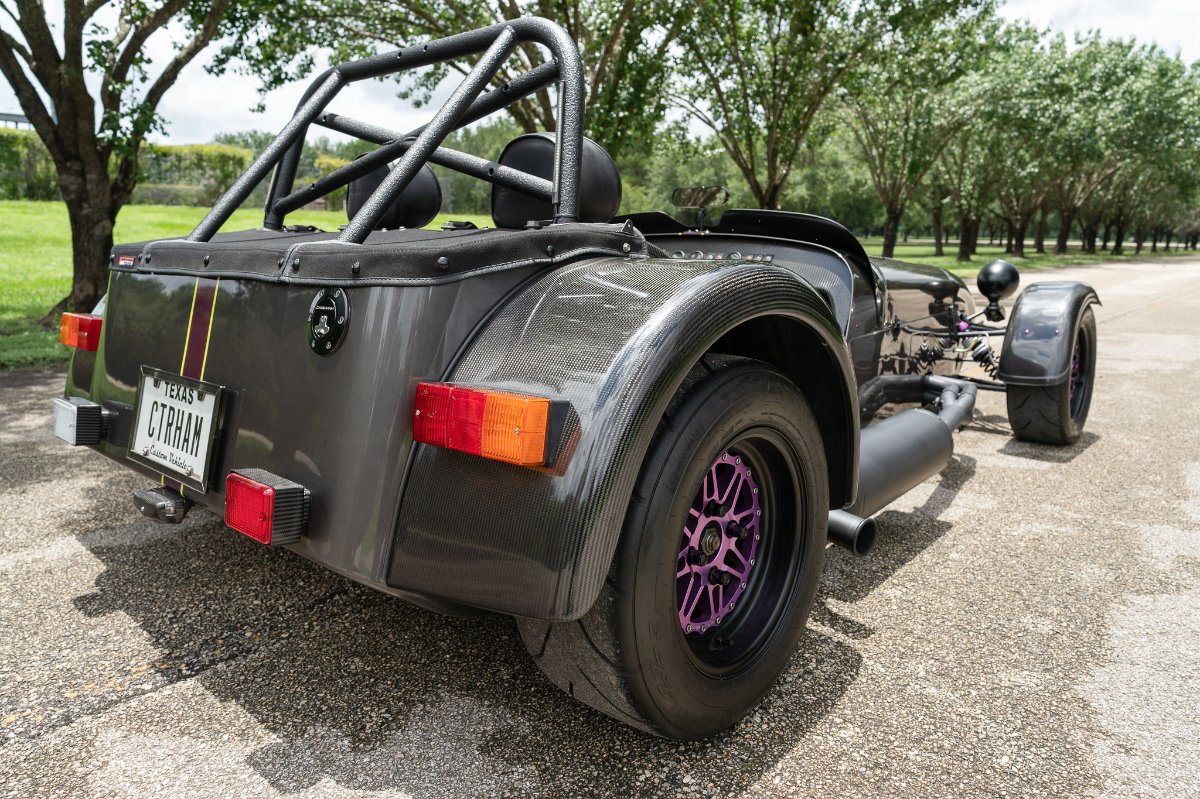
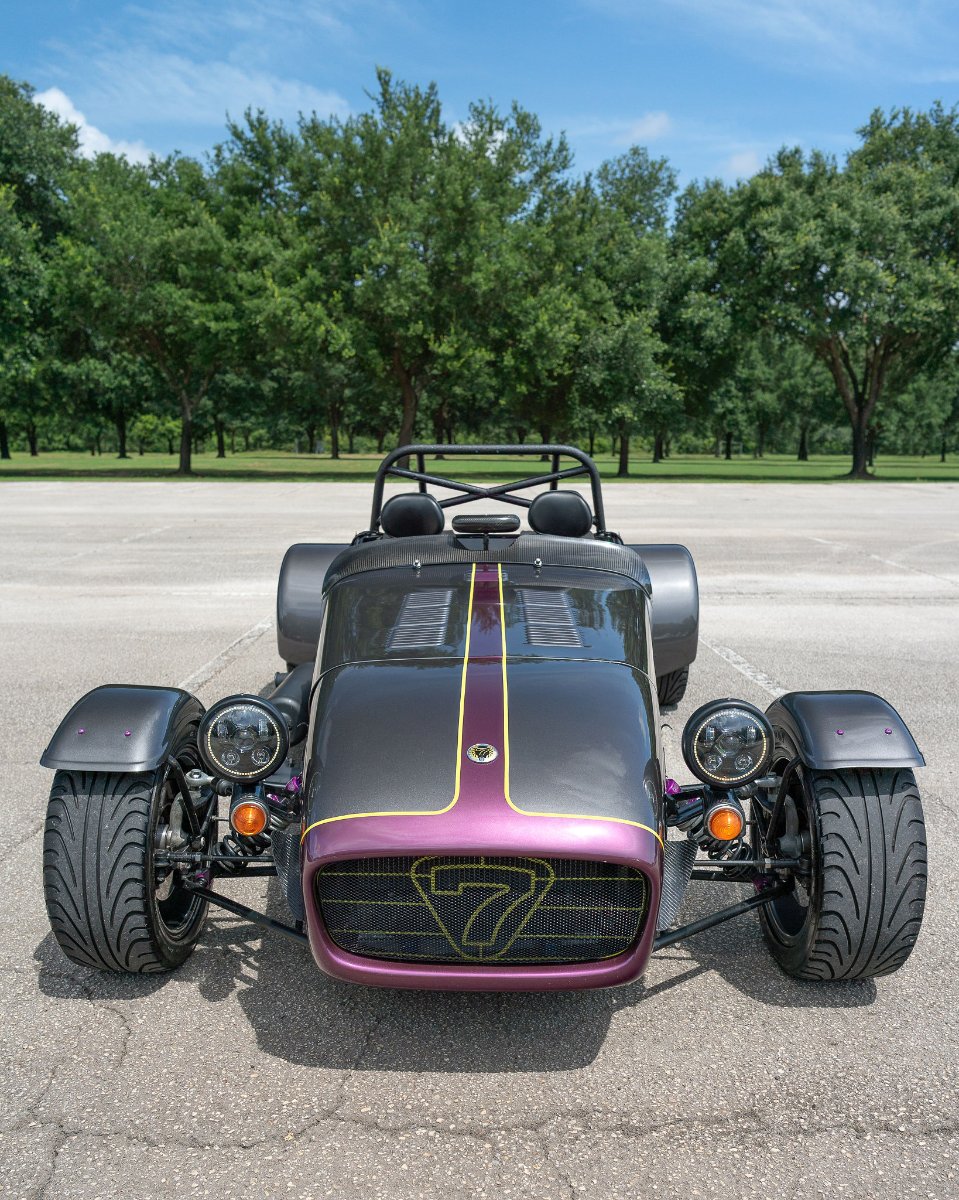
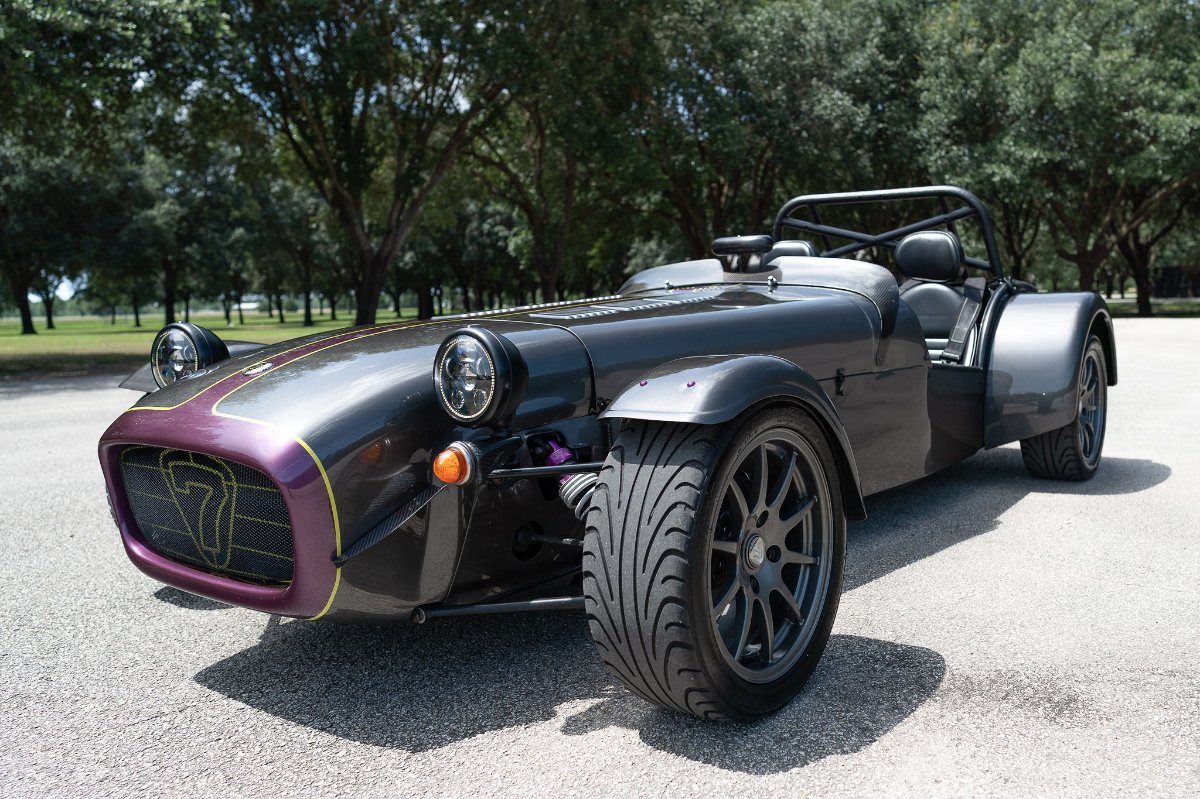
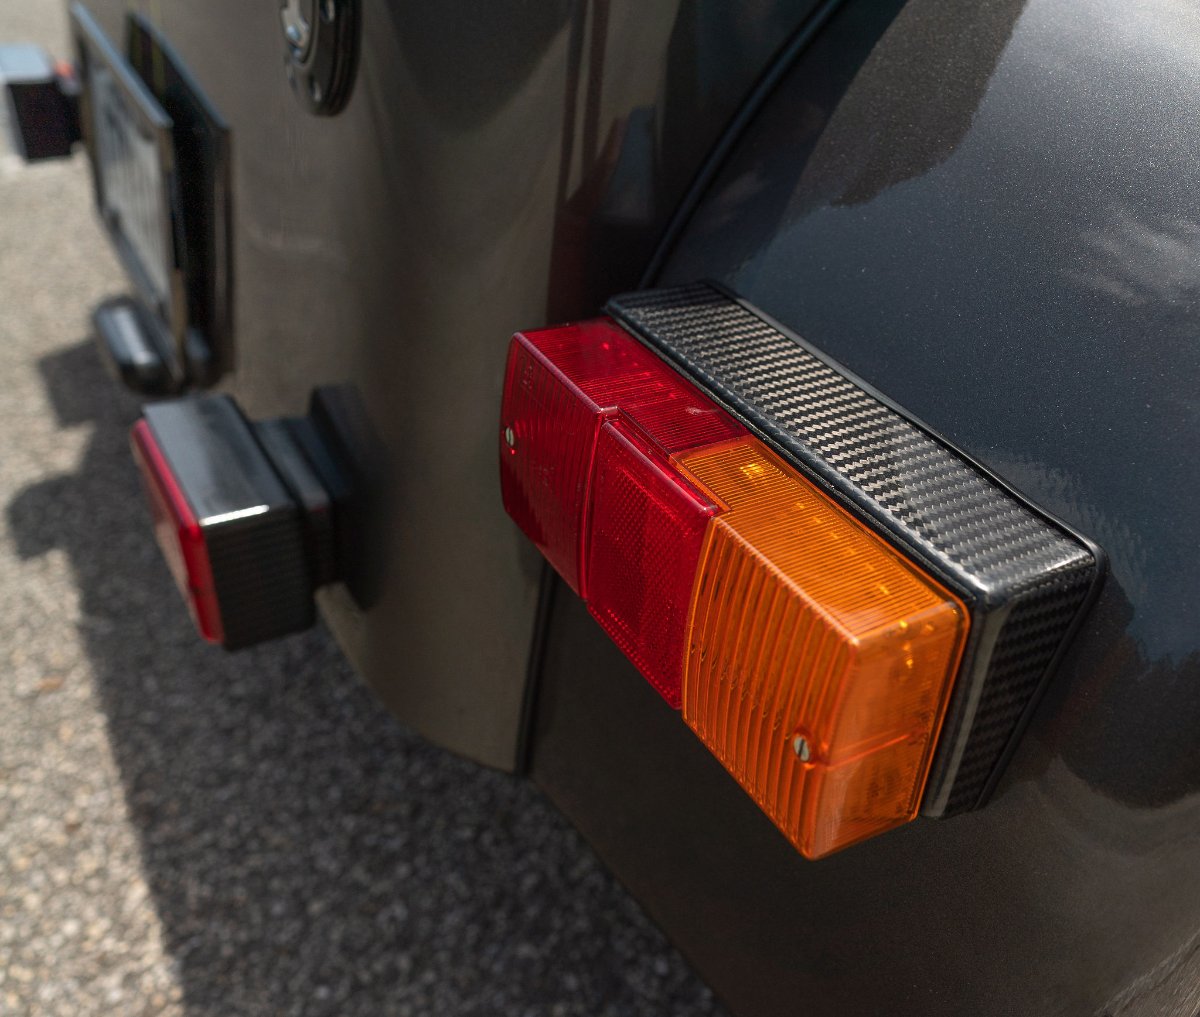
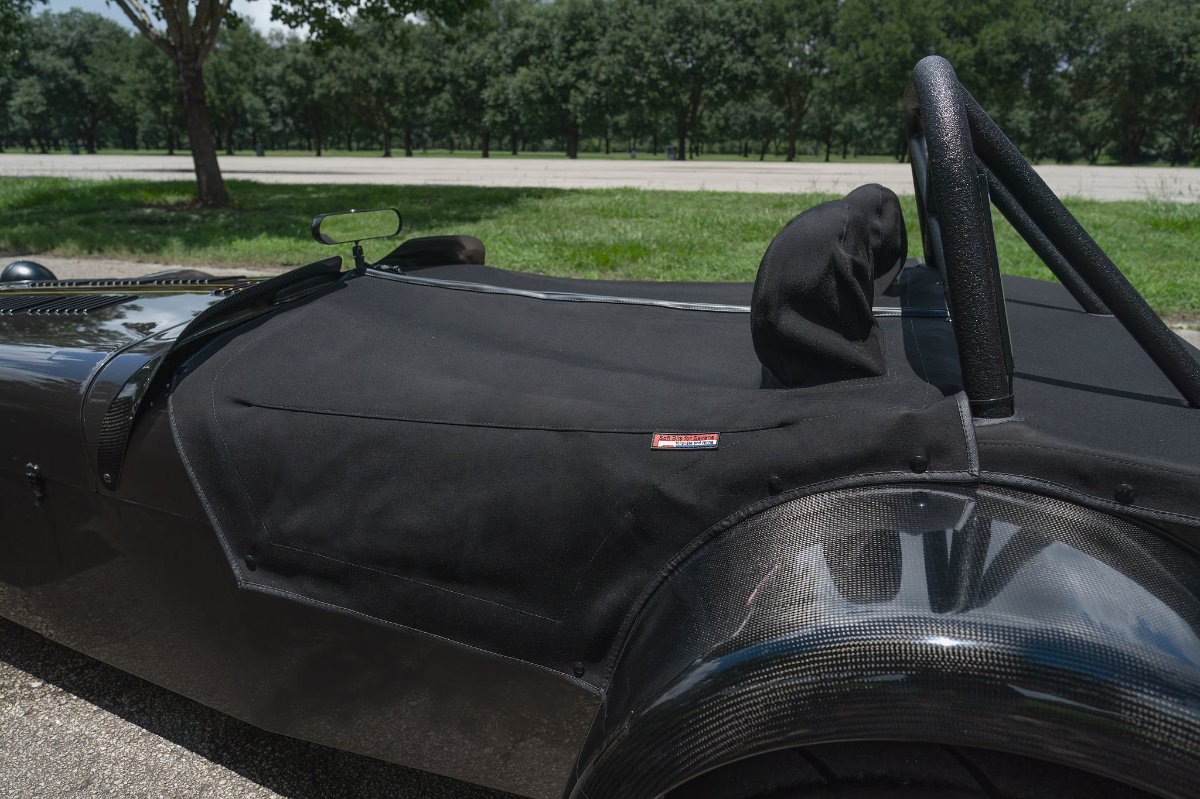
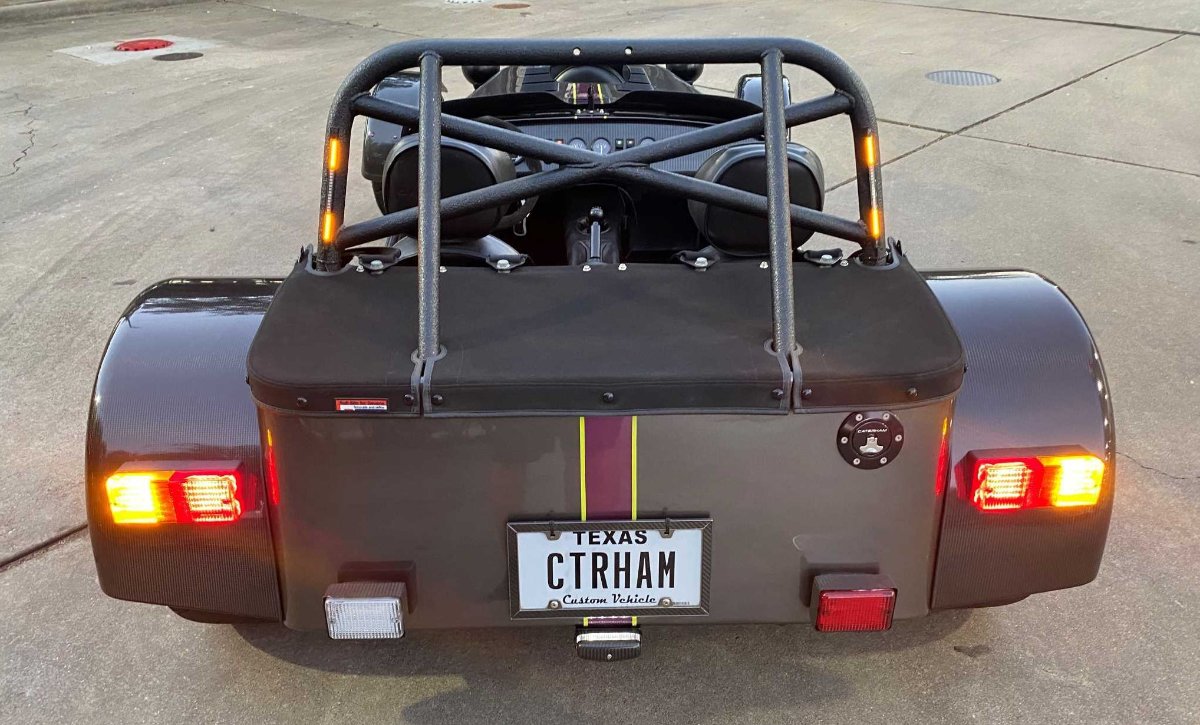
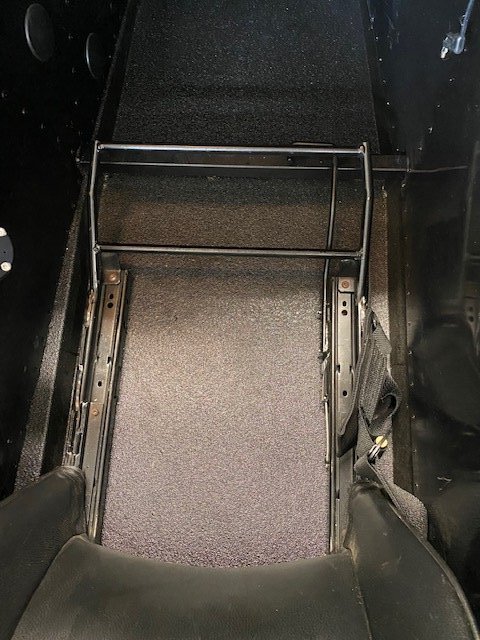
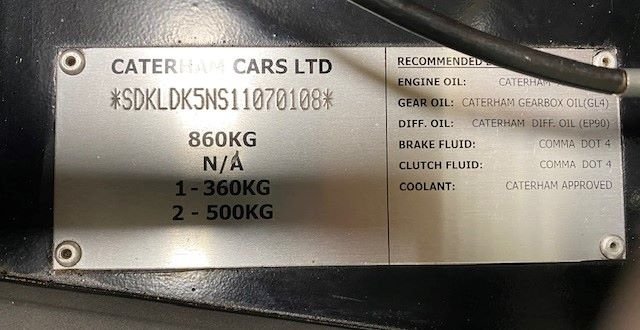
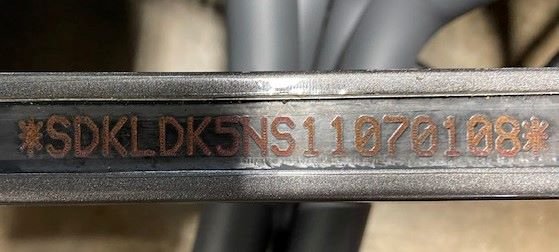
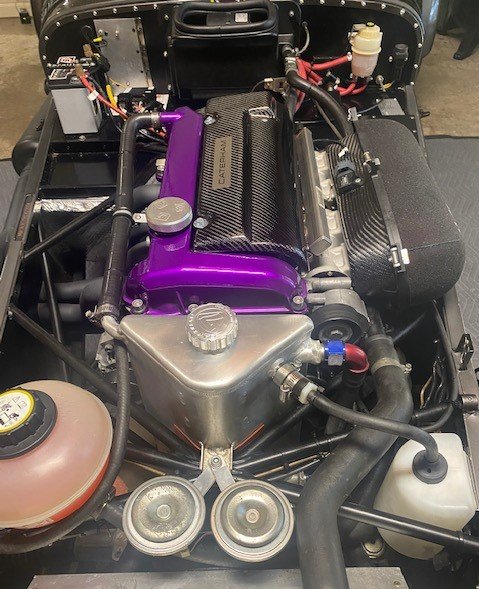
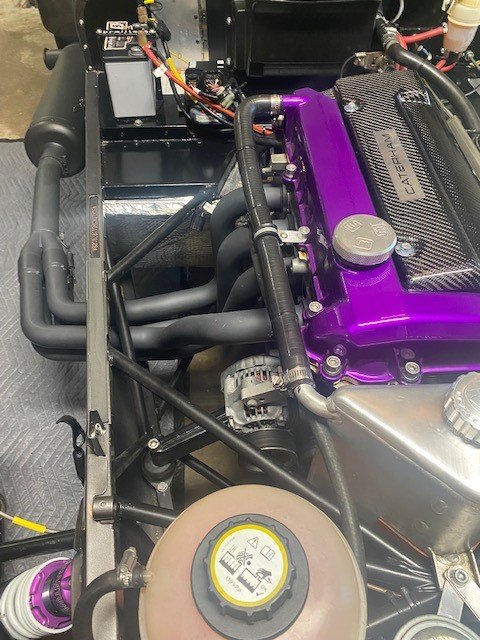
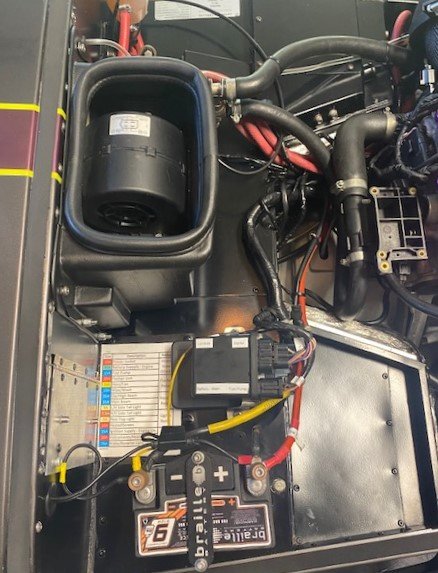
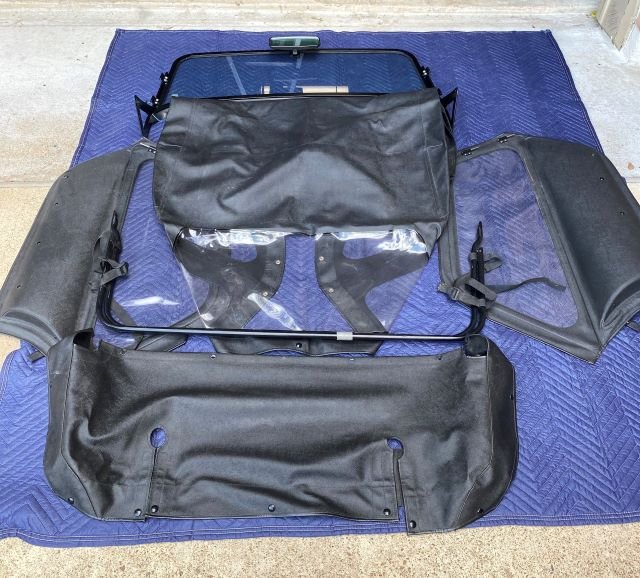
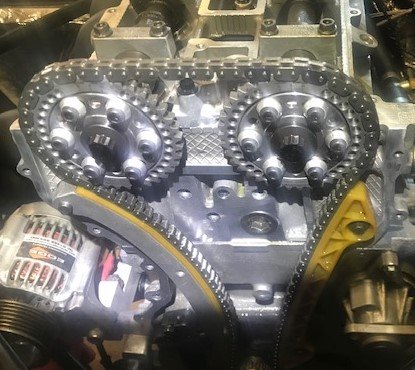
This beauty began life as a 2012 SV Superlight R400 left-hand drive kit brought to life by Caterham of Denver. I bought if from the original owner 5 years ago. Configuration was: - Caterham black inside and out - Lowered floors - Metric Chassis - Wide track DeDion suspension - 2.0 L Duratec w/standard intake @ 210 HP - Caterham 6-Speed Gearbox - 15” Wheels - Windshield and full weather kit - Car was originally titled in Colorado. After driving for a while, I undertook an 18-month complete strip and rebuild. My idea was a “GT” build balancing power for the track with durability for long road trips. Many, many upgrades were added and the current configuration is as follows: Paint/Trim/Finish - Custom multi-coat dark gray paint with 2-color painted strip. Xpel paint protective film front to tail in including fenders and wings (painted ones) - Painted frame, cockpit, inside engine bay black - Floor pans (top and bottom) and roll bar textured powder coating in black - Carbon Fiber wings, fenders, whiskers, door trim, rear wheel arch trim, front indicator covers, aero-screen (Caterham), mirrors, and rear light buckets - Note: two sets of carbon fiber fenders and wings. One set is clear and another set painted same gray as body color - Also have extra bonnet painted and striped same as the one on the car. Planed on eventually cutting one for air intake and adding R500 CF intake cover I have. - Soft Bits for Sevens mohair boot cover (UK) - Soft Bits for Sevens mohair full cockpit tonneau Suspension/Wheels/Handling - Force Racing 13” lightweight billet aluminum wheels (Force Racing UK) w/Avon ZZR’s - Also - 15” Caterham 10 spoke Orcus wheels and Avon CR 500’s - Quantum Two Zero shocks from Meteor Motorsports (UK – Thanks Simon!) - All new bushings - Upgraded to PowerFlex bushings where available. Caterham new for others. - Adjustable WESMO Uniball Camber Kit from Westerman-Motorsports (Germany) - New brake shoes and wheel bearings Cockpit - Momo D Steering wheel - Momo Round Steering Wheel - Caterham black shifter knob - Caterham carbon fiber look tunnel cover - Standard Caterham leather seats and belts - Note: In images, shift lights are not seen as they are tucked under the dash. My next upgrade was to be a digital dash and I did not want to mount/drill the new scuttle. Electrical - Stock Caterham gauge and dial package - All lights changed to LED from Just Add Lightness (UK) - LED strip brake/turn/flasher lights that mount on roll bar uprights sourced from Caterham owner/electrical engineer on E-bay (see images) - LED Headlights – China made but I have run them on off road/on road cars for 6 years with no problems - SBD Motorsports ECU – 94A w/CAN to USB connector - Braille Racing Battery - Modified fuse panel with swingout door in engine bay to make it easier to access (see images) Drive Train - Original BMW LSD @ 3.62 ratio – the replacement differential bracket from Caterham to replace the one that was breaking has been installed - Prop shaft balanced - Original Caterham 6-speed - New clutch and clutch release bearing at rebuild. Has lightweight flywheel from Caterham Motor - Original 2.0 Duratec block - Installed Caterham dry sump - Installed Caterham roller barrels - Bottom end remains stock (did confirm ARP connecting rod bolts were installed at original build) - New head - Replaced small port w/Large port reworked by Beachman Racing (Thanks Bruce!) – Ported and polished, new valve/stem springs and caps, un-shrouded valves/seats - Vernier adjustable cam gears w/new Cosworth friction washers - Cast aluminum valve cover from Massive Speed (USA) - New Caterham silencer, cat bypass, black ceramic coating on all exhaust components including headers - ARP head studs, flywheel bolts and crank bolt - Tuned and dyno’d – 225 HP (+- depending on your beliefs in dyno mfg high/low tendencies and LSD losses) Other/Extras - Installed stainless Rivnuts to connect scuttle top to vertical firewall panel to allow for removal (see images) - Extra bonnet (mentioned before – painted and striped) - Caterham Car Cover - Caterham windshield, top, boot cover, sticks and full doors - Spare front brake rotors - Spare front suspension upper/lower A arms - Wearable/breakable bits including bearings, brake lines, bushing of all sorts, ARP bolts, sensors/senders, throttle cable, belts - 100’s of pictures of the rebuild Currently titled in Texas and resides in Houston. Car has 1~1,900 miles with ~2,000 since rebuild. It is extremely well sorted and runs/handles like a dream. In the pictures below you will see different trims – 13”/15” wheels and clear/painted fenders and wings. I also continue to finish some odds and ends like adding decals, side mirrors, etc. so you will see some variance in the photos. Arthritis and reaction time are my enemies so it’s time to let this one go before I do something that requires me to start all over again. Posting here before going down the online auction route ……. $54,500 for everything. Negotiable without the spares.
-
pm sent
-
2.0 Duratec Top End Parts - Free to Good Home
TwedleJoe replied to TwedleJoe's topic in Parts For Sale / Wanted
And with that, parts are spoken for! -
Spare parts laying around after upgrade. If you think they are worth the cost of shipping, I will be glad to send them your way! Cam Cover - Plastic Caterham Coil Cover - Fiberglass Intake - Aluminum - With Throttle Body Caterham Locked ECU - From 2.0 Duratec - R400 - 210HP Fuel Injectors - From Same as Above Fuel Injector Connectors and Harness - Etc.
-
mrmustang ...... Sent a PM. Let me know if you got it or not.
-
I second Mike and Taylor Race. They are good and turn around work very quickly. I would use no one else for this work.
-
Caterham Mechanic in Northern MA / Southern NH?
TwedleJoe replied to ukchris's topic in General Sevens Discussion
Hey UKChris, I do not know anyone in your area but, i am travelling to Waltham, MA almost weekly. I would be happy to do a walk around the car with you and point out problem spots and inspection items. I am in the final stages of a complete rebuild and have a lot of "lessons learned" i can share with you. PM me if interested and we'll set something up! -
Researching ECU options for my R400 to upgrade from the unlockable Caterham one. I have looked at Emerald and SBD but am sure there are 100's of other options. Anyone have experience/advice they would like to share and make a recommendation? I just up-tuned the motor with headwork, roller barrels and dry sump and am prepping for a dyno trip. Nothing done to the lower end BTW.
-
I had them research and put some special stretchy stuff in both the paint and what little bit of filler they used knowing how much I have seen things move around while driving.
-
I noticed I would be doing a rebuild log but have not got to it yet. I am compiling links and parts-sourcing data and will eventually get around to sharing it. In the meantime, if you have Facebook, check out the paint job done a couple of months ago! https://www.facebook.com/WickedRydz/videos/394711014731274/
-
Only an opinion but here is what I did / am doing. The price for "Caterham" LED headlights was harsh so I looked at alternative's and found these on Amazon. https://www.amazon.com/Wisamic-5-3-5-75-LED-Headlight/dp/B01DZU30S0/ref=sr_1_1?keywords=led+headlights+5+3%2F4&qid=1565319813&s=gateway&sr=8-1 I have run them for over a year and there are a couple of other local Caterham runners Locally using them. They are at least twice as bright as stock and cut a wide-angle, rectangular pattern that is helpful. Plug-and-play for three-prong connections and the price is worth the experiment even if they may be OJ (oriental junk). Two spares in the boot just in case! I also invested in rears and front markers from Just Add Lightness in the UK. In the middle of mounting them on a total rebuild but I can share that lighting them with a battery and comparing them to stock Caterham is scary. Stoopid bright. and it is obvious they cater to Caterham owners. Even have LED plate light replacements and they include . ALL mounting hardware. https://www.justaddlightness.co.uk/why-change-to-led/
-
good luck and let us know how your rebuild goes. just found this. https://www.sevener.fr/fichiers_articles/Manual_Type9.pdf
-
Tech question guys, Pulling the yoke off the rear of the tranny, any special instructions? Any pointers to a good type 9 online manual would be appreciated.
-
Awesome guys and thanks for the feedback. I am going to get a Word Press site up and will share the link here. As for tear down pictures, I have around 600 all catalogued to a tear down log I kept up through the process. Note: everyone needs a big whiteboard in their garage. Also inventoried parts as I boxed them and started a "must upgrade" and "nice to upgrade" list. I have decided the theme will be a GT style car versus a full on track car; i.e., keeping the Caterham 6 speed versus sequential and not stiffening the suspension to a bone jarring level. As for the motor, undecided but looking at induction methods since I have all that SV room to put the plumbing. Researching turbo install so any actual experience would be appreciated. Will dry sump and beef up the bottom end while the motor is out in hopes I never have to see it again. Here is a list of immediate to-dos before going to the paint shop. Install new custom-order scuttle so I can have one for the aero less the wiper/washer holes and one for the windshield if I ever put is back on. I took the firewall section (vertical) off the scuttle and will rivnut them together (instead of riveting) to facilitate a quick change out. Ordered wheels from Force Racing in the UK that does mini cooper builds, Light, durable, top quality and race proven. Need them in as I'll match the purple centers to part of the new paint scheme. I already have Quantum dampeners from Meteor Motorsports and the metallic purple looks awesome against a primary black background. Pull the lowered floor pans and have them sprayed with a tougher material. I found a bed liner-type spray that is fairy light weight and super durable. Also gonna beef up the seat area of the pan and straighten out the dip from my big arse rounding it out going over bumps. KitKat - note the heat shield material on the foot wells and down the tunnel. I does make a difference. More coming soon!
-
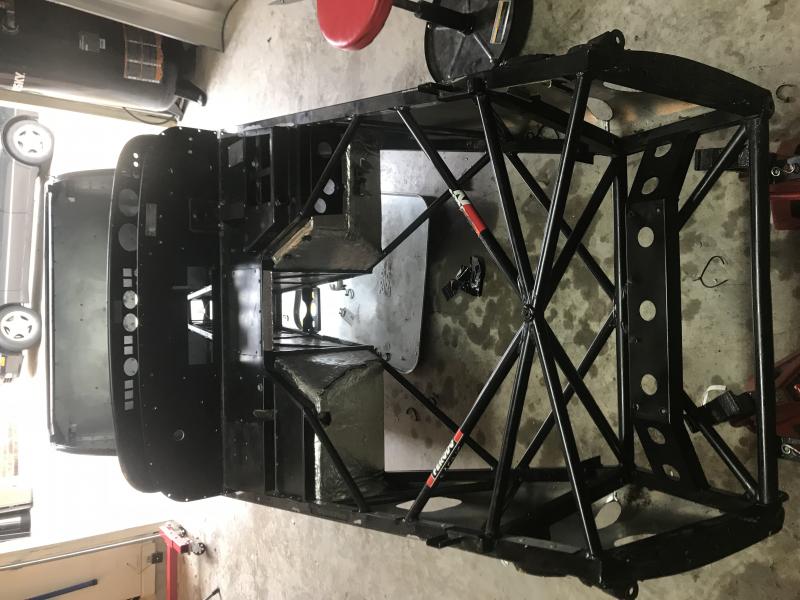
Here we go! I have just today completed a full strip of my 2011 R400 SV. I am down to 10 boxes of parts, a few odds lots that won't fit in a box, and a frame with panels as the starting point. The main reason for the tear down was to fix some inherent shortcomings but primarily to do 1) a custom inside and out paint job 2) upgrade the powerplant and 3) prove to myself I can still sling a wrench. I have not posted about the teardown as I suspect anybody with a basic toolkit can disassemble anything short of the space station. The art is in putting it back together! Learnings to date You cannot have enough 10MM, 13MM and 17MM tools How to cut wire ties and drill rivets Caterham has as many dead end wire "spares" as used connections I am considering taking the time to do a build log/blog as I reassemble/upgrade on the way back up and am curious if there is any interest in others watching and commenting on the progression?? Lord knows the uniqueness of our cars requires a "community" of experiences and resources to pull it off. In return, I'll ask for opinions, advice, resource connections and the like. If nothing else, wish me luck! I have a bet I can pull this off in less than a year...…. http://www.usa7s.net/vb/attachment.php?attachmentid=14683&stc=1 Twedlejoe
-
PM sent........thx
-
Without going into detail about "how", let me start with the "what" ............... a bent rear chassis on my late model SV. But I guess a little "how" might help to visualize. The rear wheel was hit hard enough from the side to break it from all spokes and shove it into the lower chassis and wheel well. Front to back, damage starts with bending of the square tubing right where the A-Frame bolt connects forward of the rear wheel, and ends with the round tubing right at the first rear chassis upright back of the wheel. The round chassis uprights both in front of and behind the rear wheel are slightly bent (1/4" deflection inward at the most). Finally, the lower round chassis tubing that runs the width of the back (and connects the apex of the A-Arm and the frame cross braces) is deflected 1/2" across a 8" length just past the cross brace on the opposite side from energy transfer at the braces. Surprisingly little damage to the rear aluminum panel with some slight damage inside the rear wing area on the side that was hit. Best I can tell, the main "mechanical" thing for me to get right is the location of the rear Watts Link bolt as it was pulled forward with the damage (rear Watts Link arm also bent inward from being smacked with the wheel). I am replacing a LOT of suspension parts (DeDion, Watts Links, A-Frame, anti-roll bar, etc.), but am debating what to do with the chassis and rear panel. I can order (or at least try to order) a sub chassis and panels and just clip the whole tail off. I would still have the square tubing that is bent (and the inserts for the ARB bolts pulled out) to deal with but hey, that's why the make brazing rods I guess. The thought of bending that rear panel around the upper an lower horizontal tubing scares the bejesus out of me though. Questions abound but primarily, has anyone had experience, and hopefully luck, straightening or repairing the tube frame? I am in Houston and would also appreciate any connections to shops anywhere around here that could help assess and/or repair. Happy (not really) to post pictures and will find a place to chronicle the repair work.
-
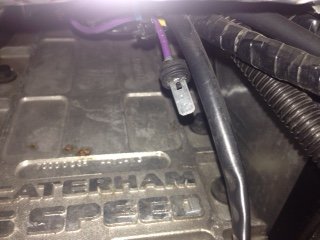
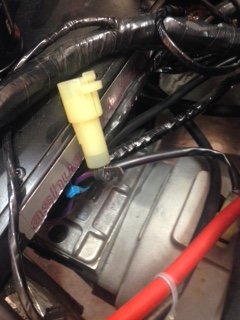
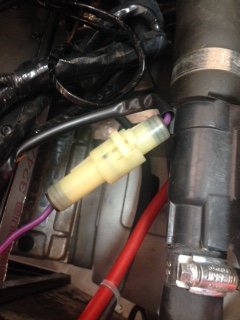
Not sure if this was Caterham's doing or if my builder did it but if you have one of these replace it!
-
Have I mentioned how much it hate spade connectors. Right where the engine loom and chassis wiring harness come together, there is a spade connector in a big, purple, main power wire. It is disguised inside a pretty, round plastic holder that even has water tight rubber plugs in the ends. But, it is nothing more than a spade connector that flops around inside the housing. It must have worked loose causing the intermittent problems and ultimately became terminal when it finally cam all the way apart. Will post some pictures in the morning........ Thanks for all of the advice.
-
I am going to run jumpers to the fuel pump to make sure it is mechanically sound. After that I will start jumping (fused jumper) around relays and connectors to get power to, first the fuel pump then, the starter in an attempt to isolate the section that may be causing the problem. Question...........All I have are the wiring harness diagrams in my build book and they lack much for detail. Not being familiar with an ECU with a MFRU add-on, I wonder if the ECU "reads" the fact the relays/circuits for the fuel pump and/or starter are engaged or if the ECU "allows" the fuel pump and/or starter circuits to complete.
-
Thanks Off Road SHO I have checked al the grounds (battery to frame, at starter, and at chassis harness). All are tight but will actually ohm them out to ensure completeness.


.jpg.2768b7fae56a78ee86628b0db1ab9b76.jpg)