DanM
-
Posts
347 -
Joined
-
Last visited
Content Type
Profiles
Forums
Store
Articles
Gallery
Events
Library
Everything posted by DanM
-
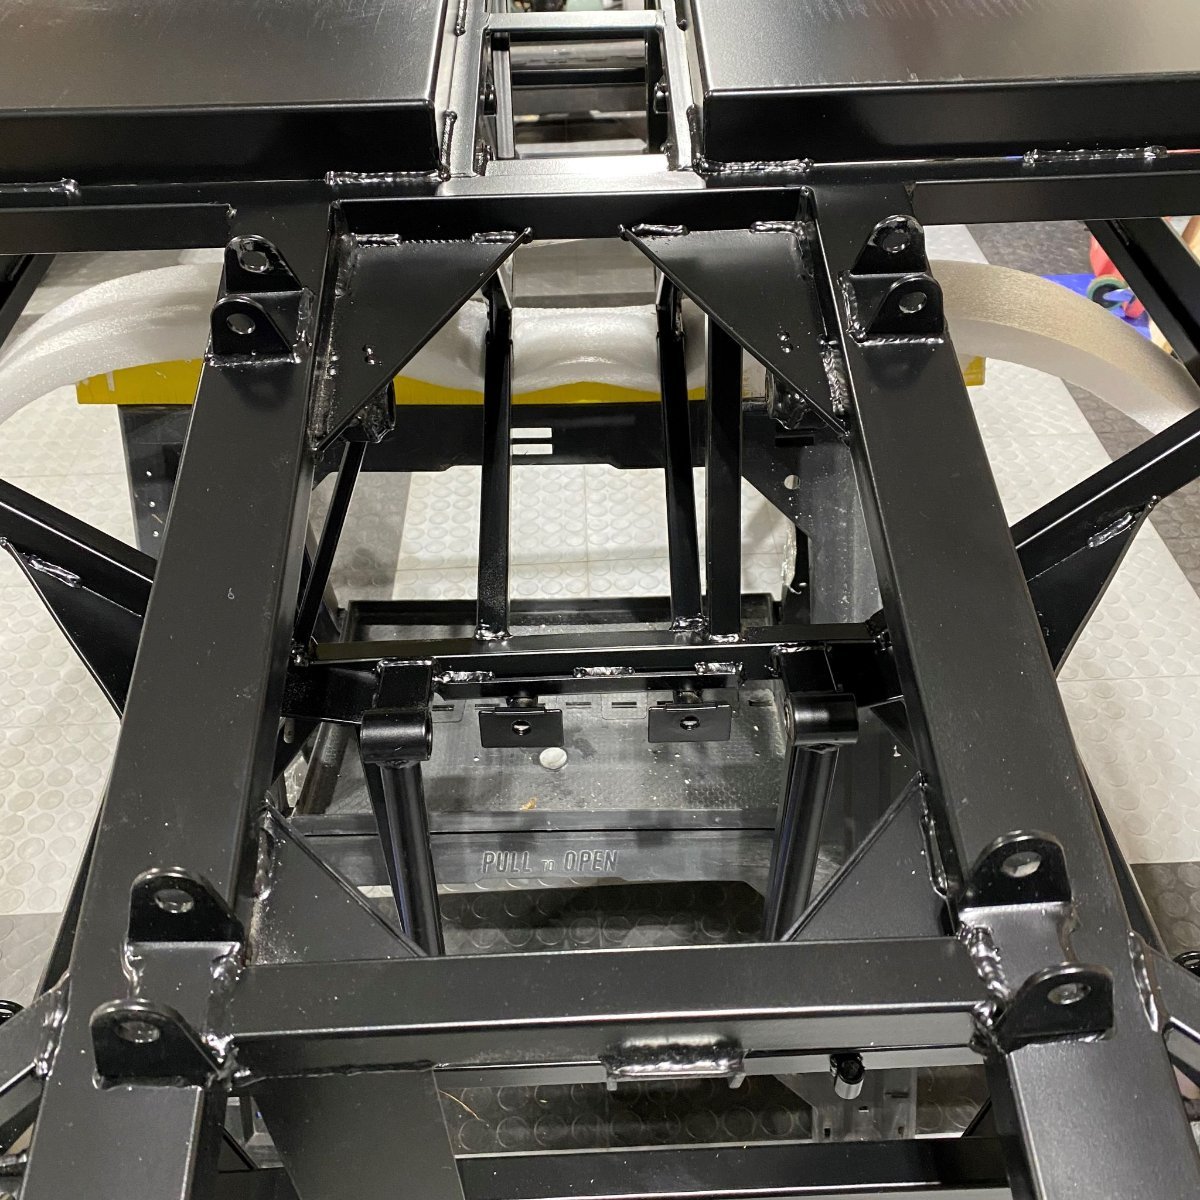
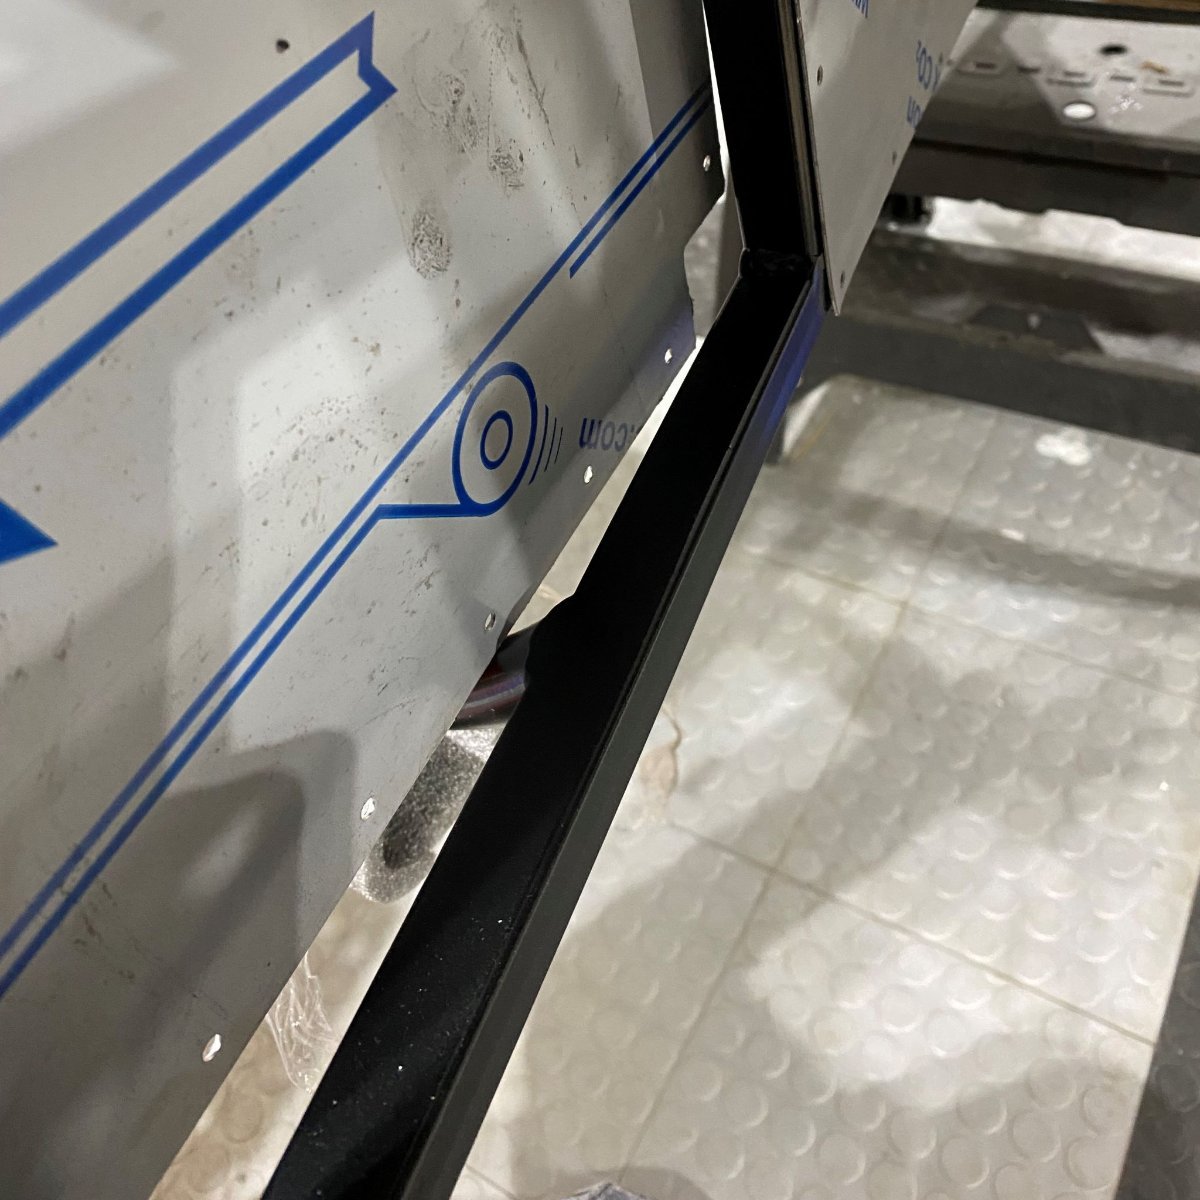
@CrocActually there are only supposed to be one pair of control arm brackets on this side. The top ones interfere with the recommended fuel line routing so I will have to cut them off.

-
Hey everyone, I plan to use POR-15 to touch up the areas on my chassis where the powder coating has only partially covered. As part of the prep process, are people removing the powder coat completely from the touch up area before doing the 3 stage POR process or are you leaving the powder coat in situ i.e. prepping and painting over it? Thanks in advance.
-
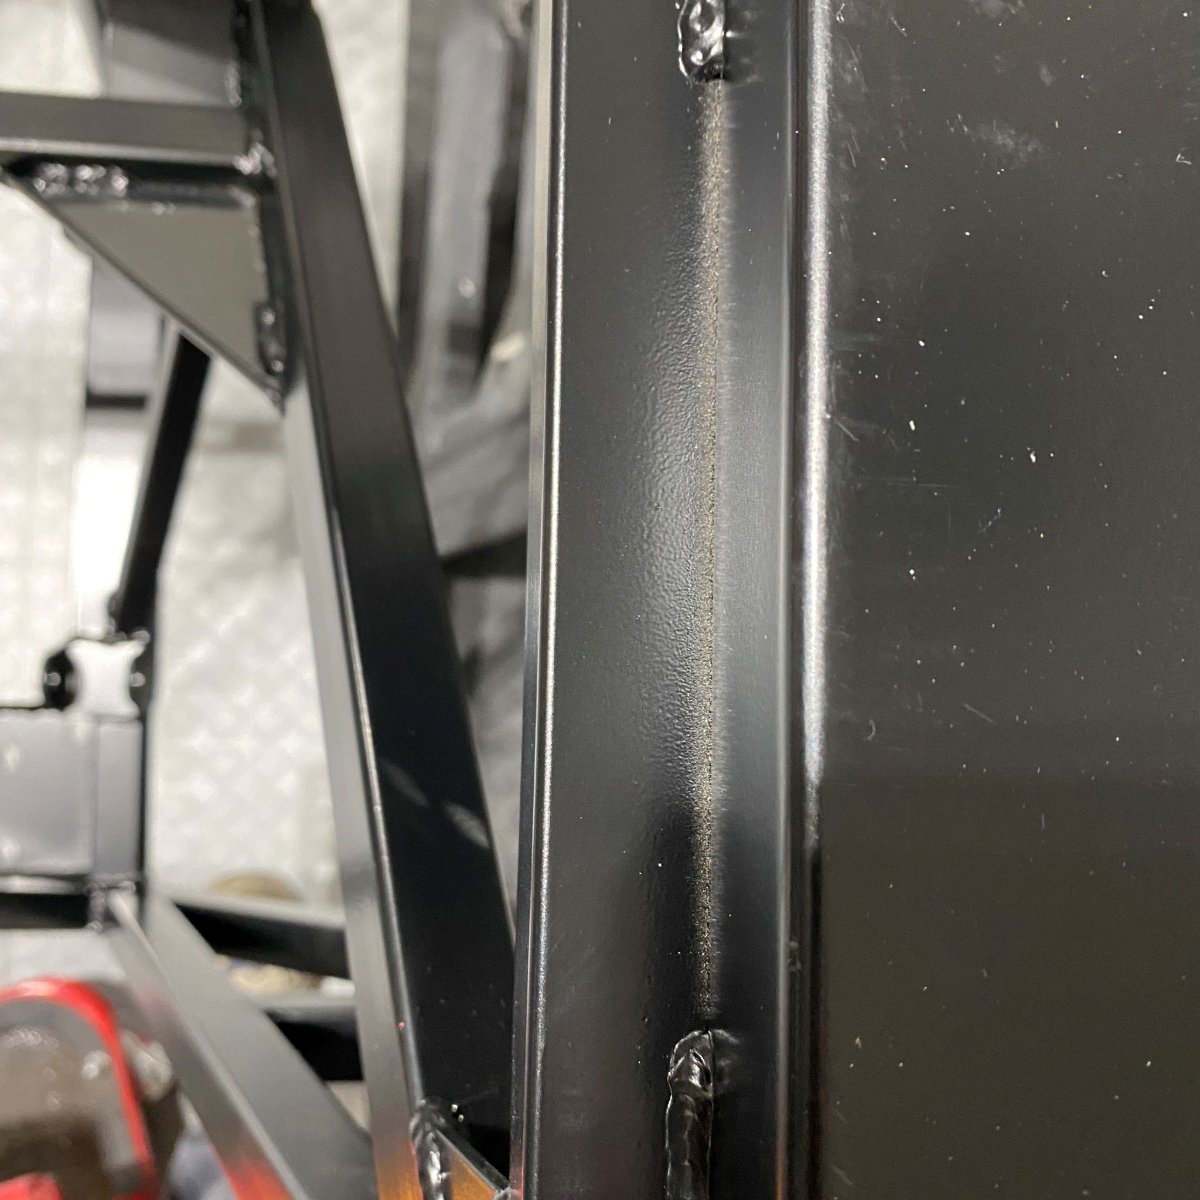
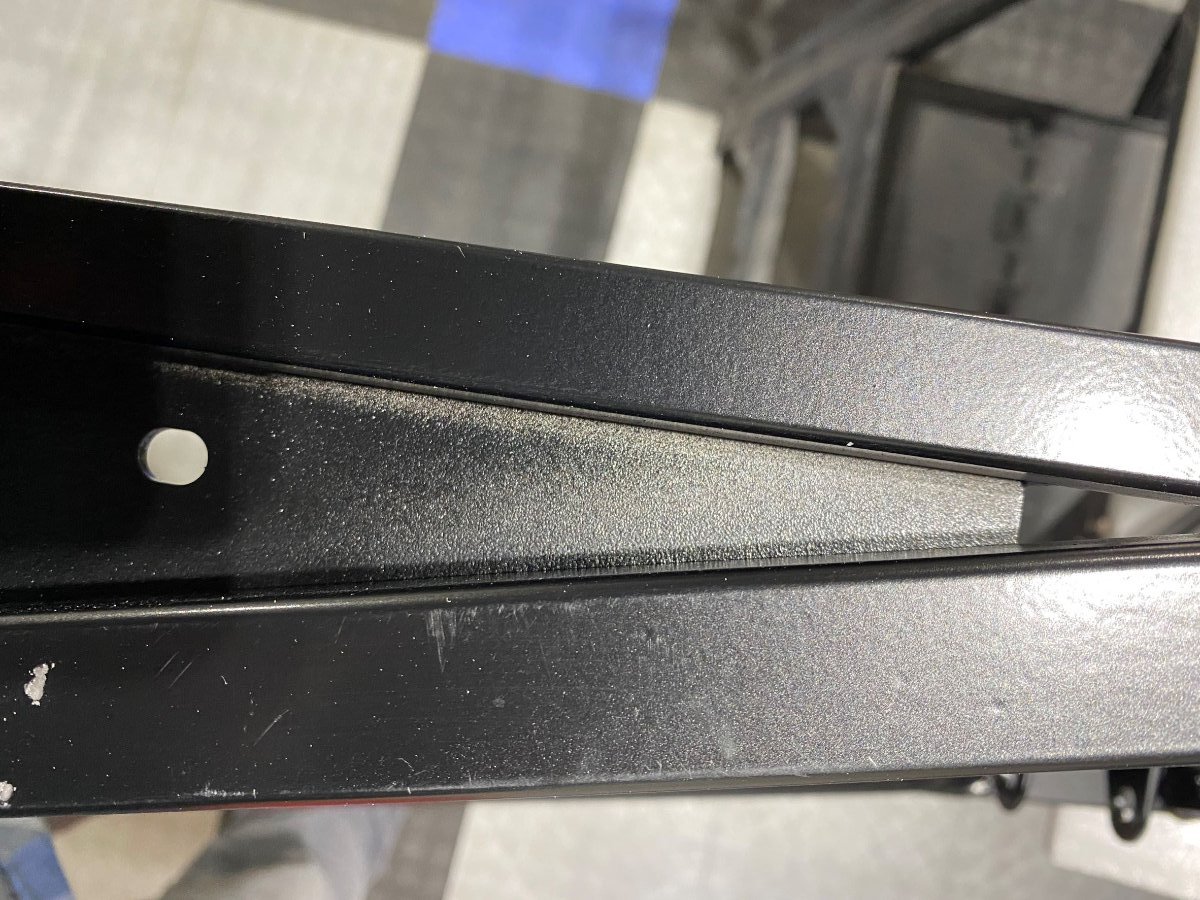
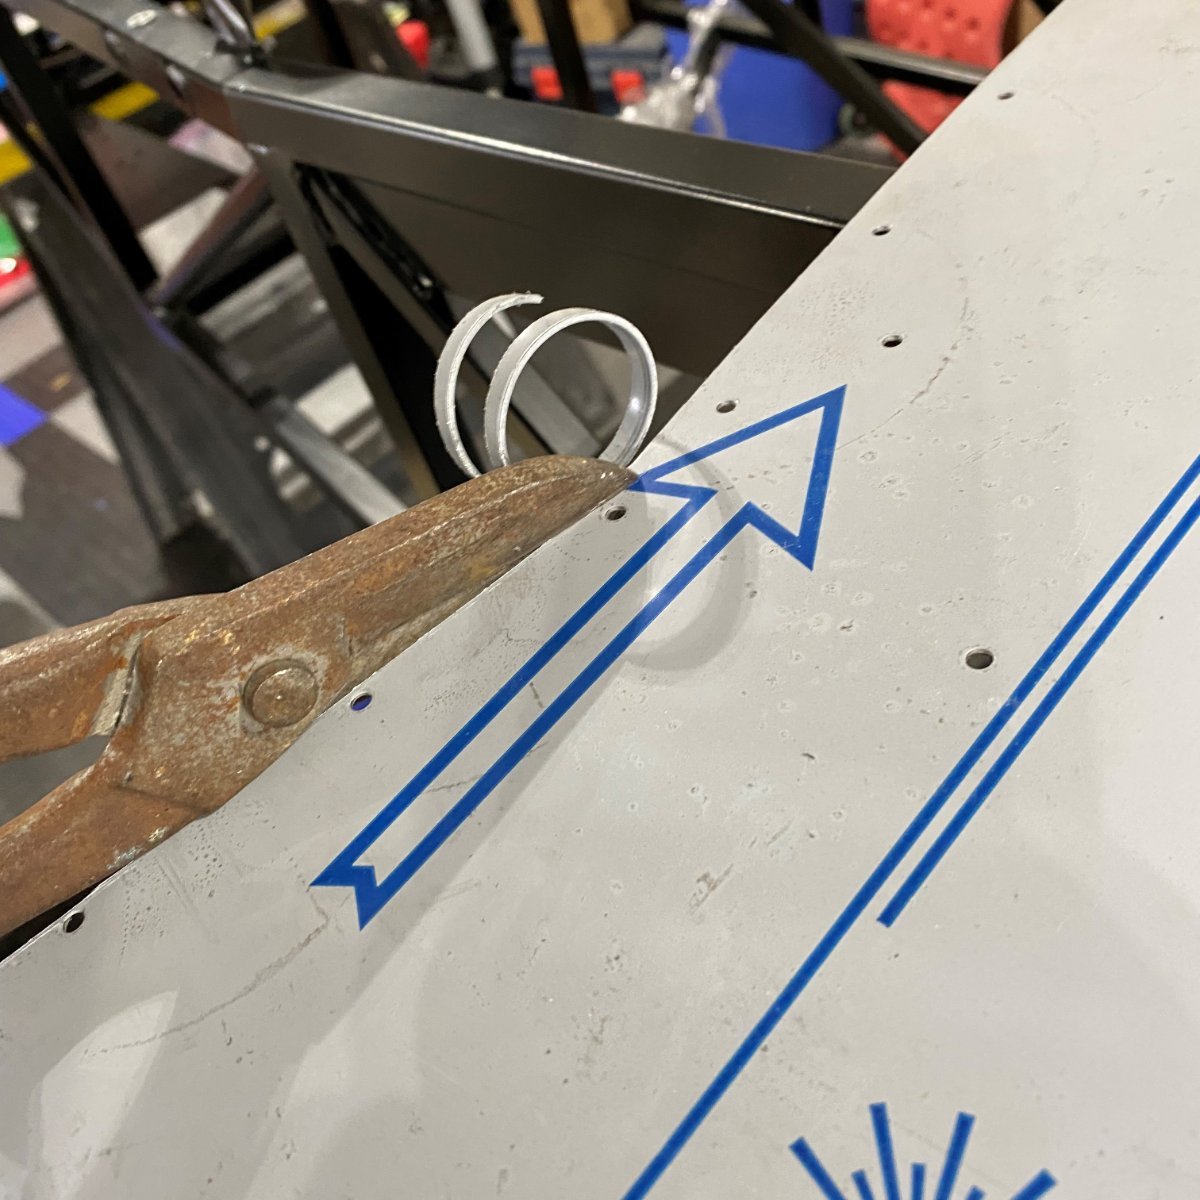
So, while closely checking out my chassis to figure out the brake and fuel line route out the back of the tunnel I came across what I believe is an another chassis issue. Is it just me or does anyone else notice it?
-
@JohnChLol I checked the back and you're definitely only expected to spin off backwards!!
-
This is amazing! Thank you for sharing the thread. That is the same drawing that Manik shared with me!
-
So I flipped the chassis over to drill and trim the under side panels and there appears to be a panel that is not in the build manual. I fits perfectly at the front under the steering rack, but when I look at other build threads I don't see any pictures of it installed. Any idea if it is actually used and if so, when should I install it?
-
Thanks @bball7754, I am trying to write it through the eyes of someone like myself who did a lot of research but didn’t find many recent threads on the LHD Westfield Miata build. Yes, I’ll definitely be peeling back the covering when I start riveting.
-
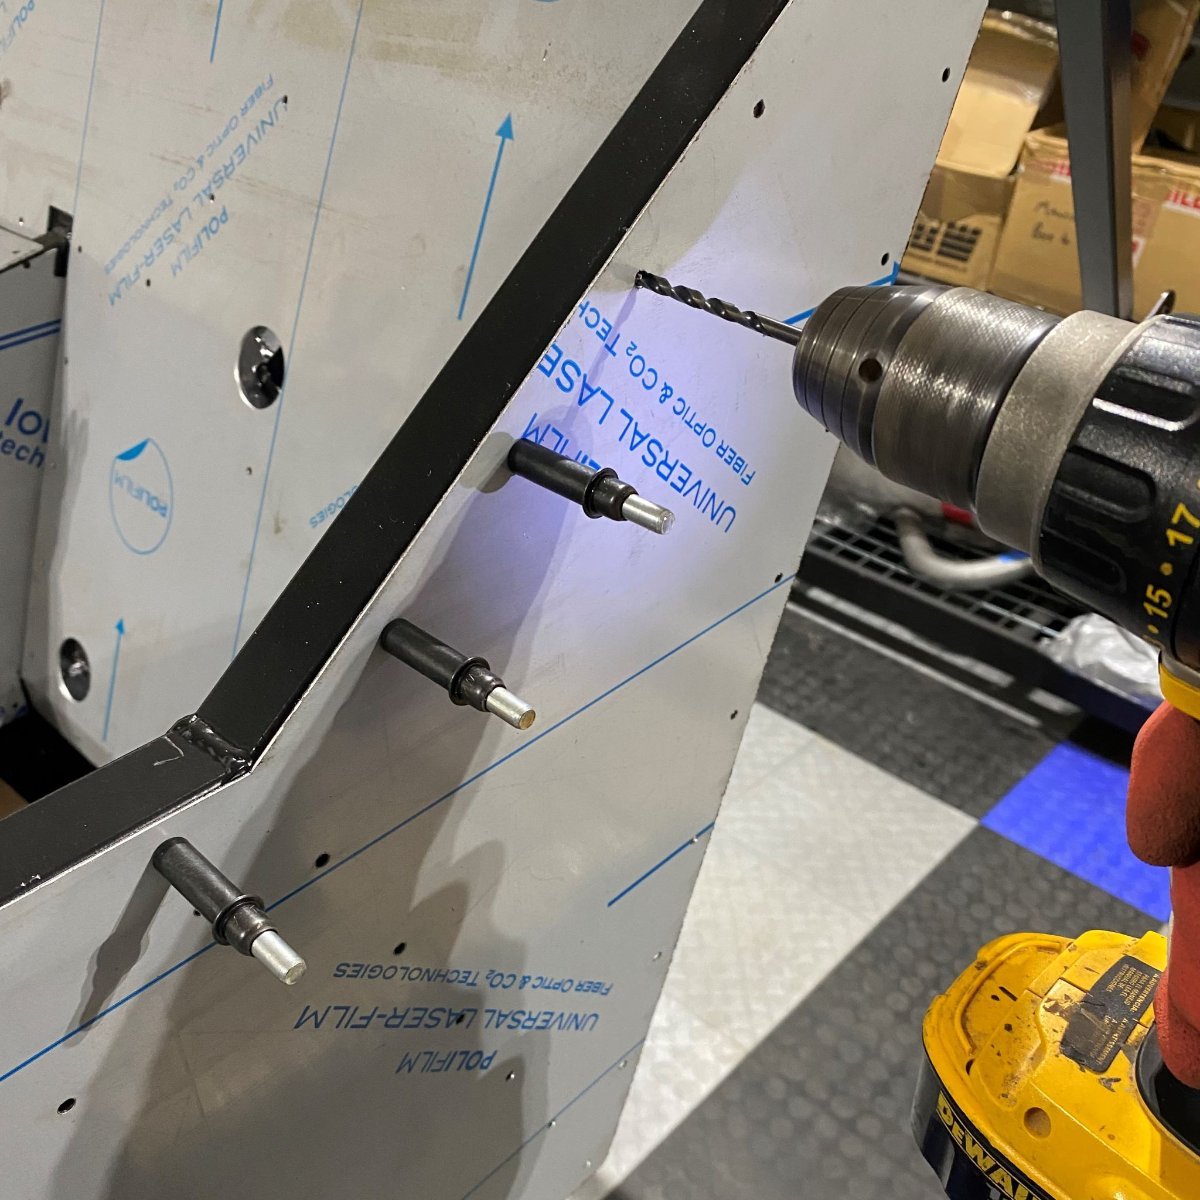
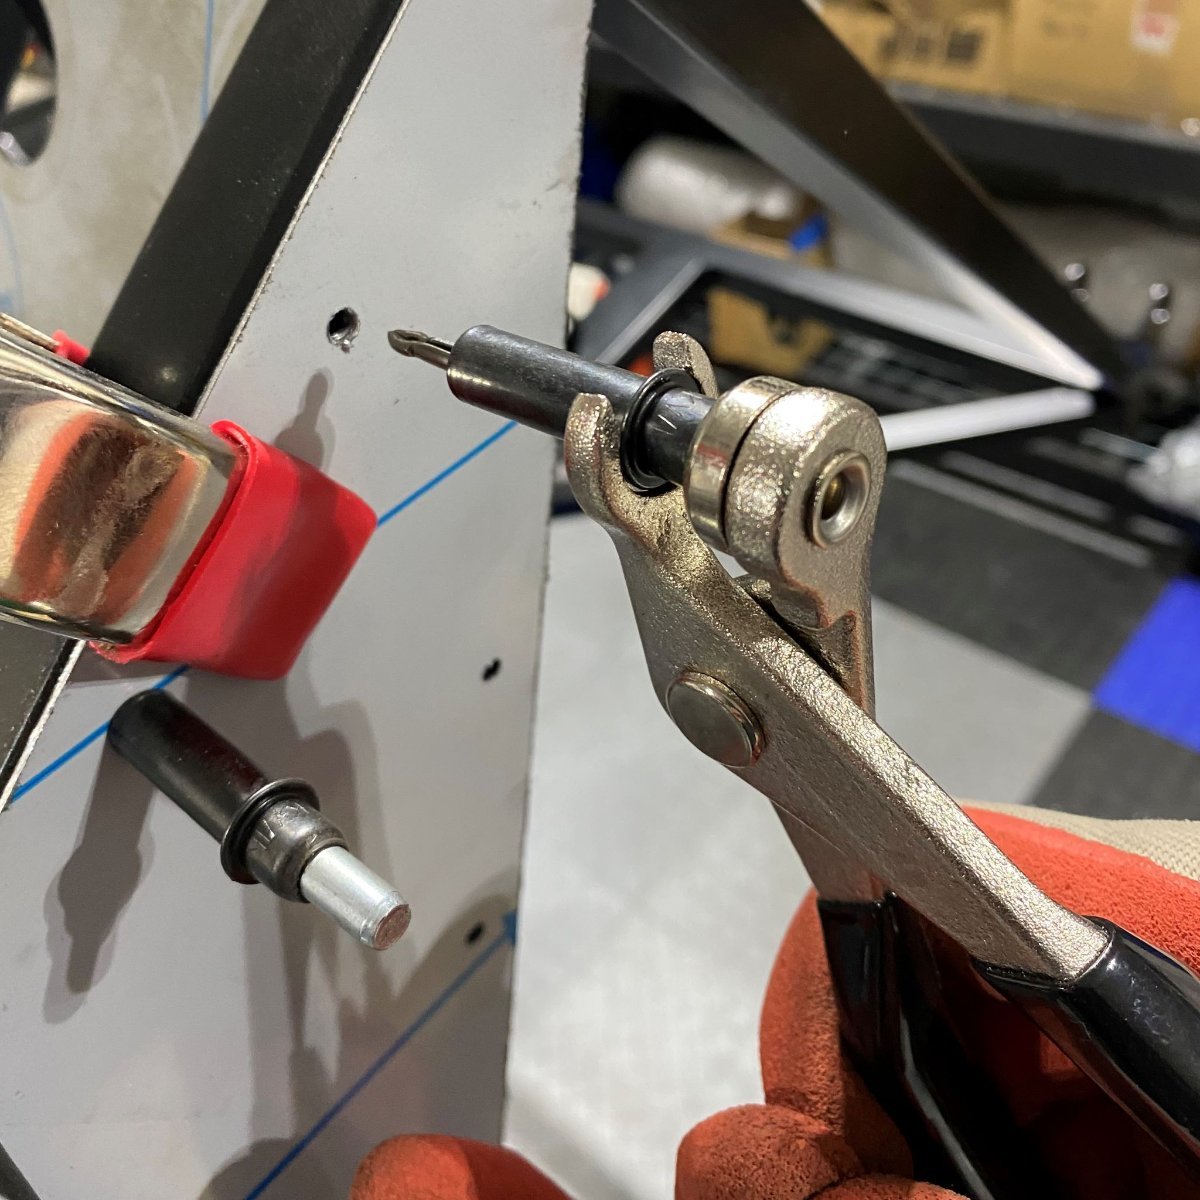
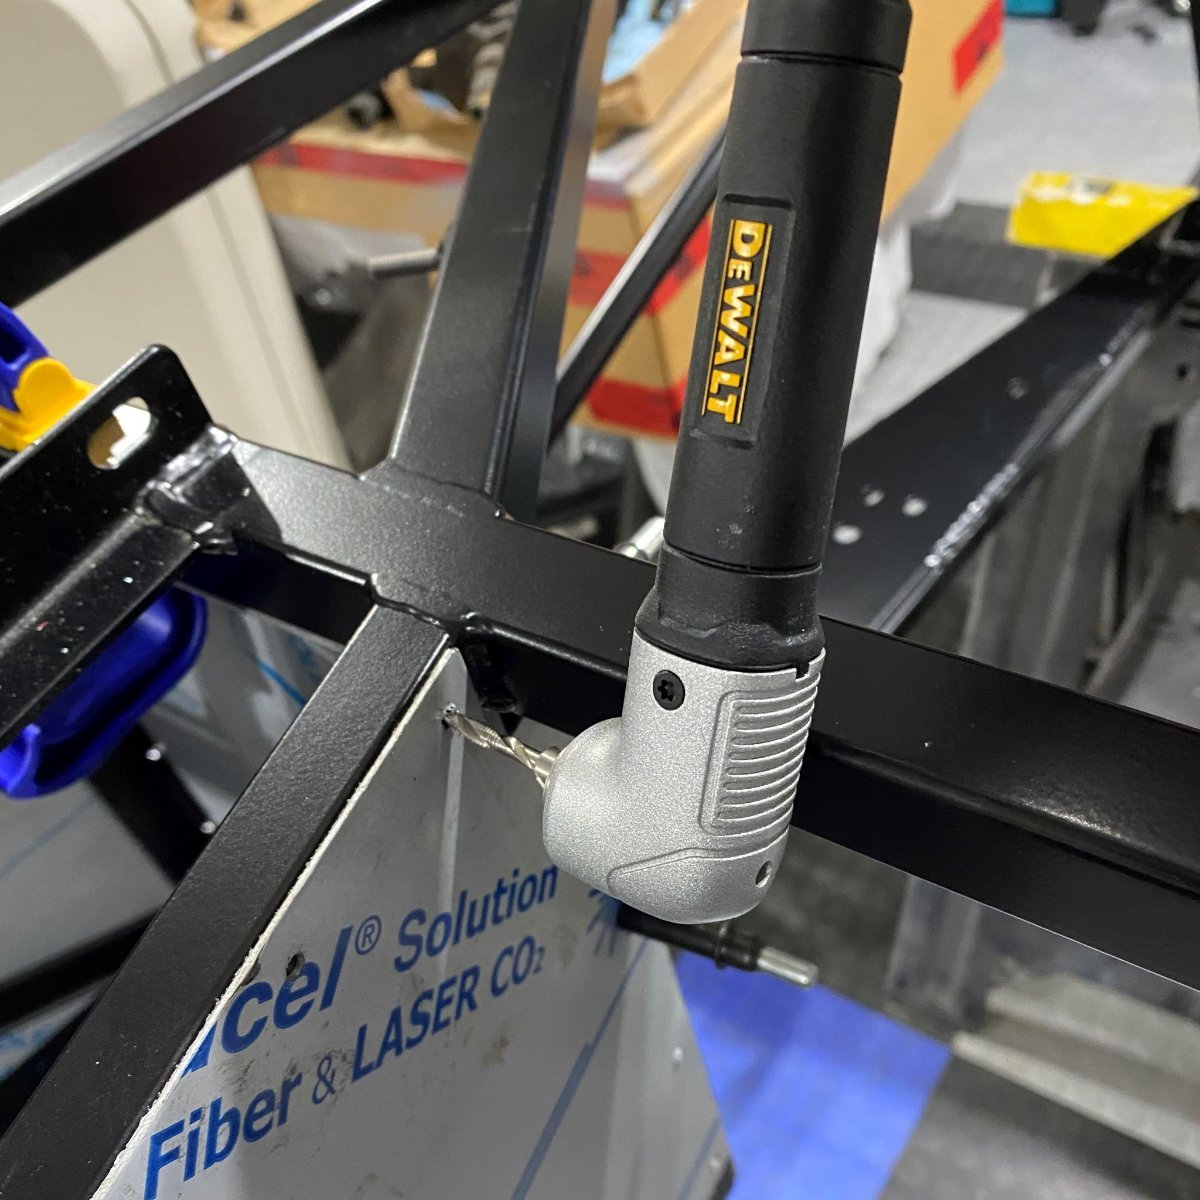
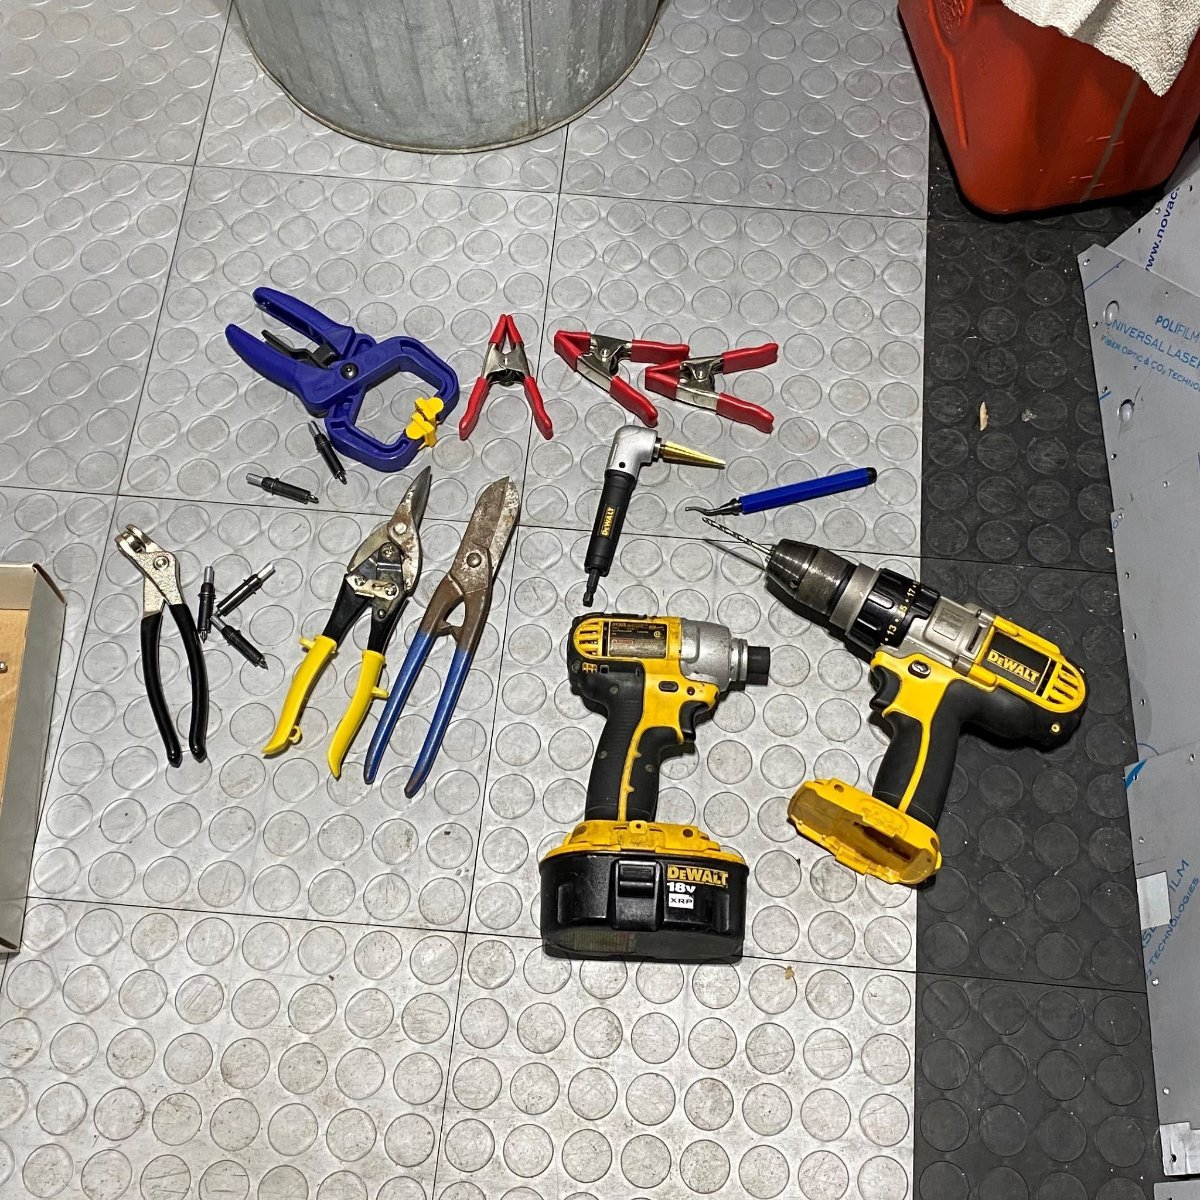
Drilling and deburring the interior and side panels has probably taken me a couple of hours over two or three evenings. It has been pretty straight forward on the whole and made a lot easier with the Clecos..... .....and the 90 degree drill attachment to get into the hard to reach areas. I had trouble finding a 4.1mm hex drill bit so ended up using a 4mm in those areas and then test fitted a rivet. If it was a bit too snug I used the deburring tool improve the fit.
-
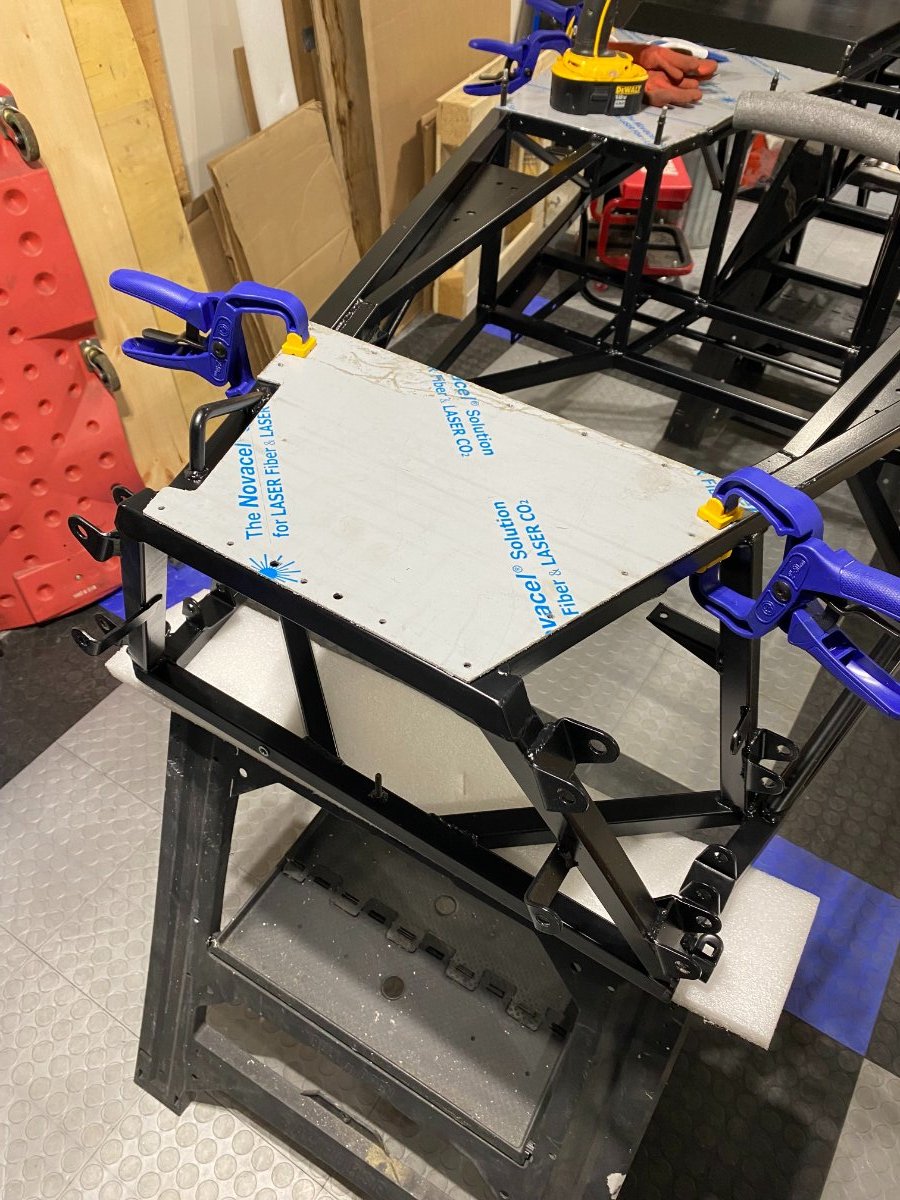
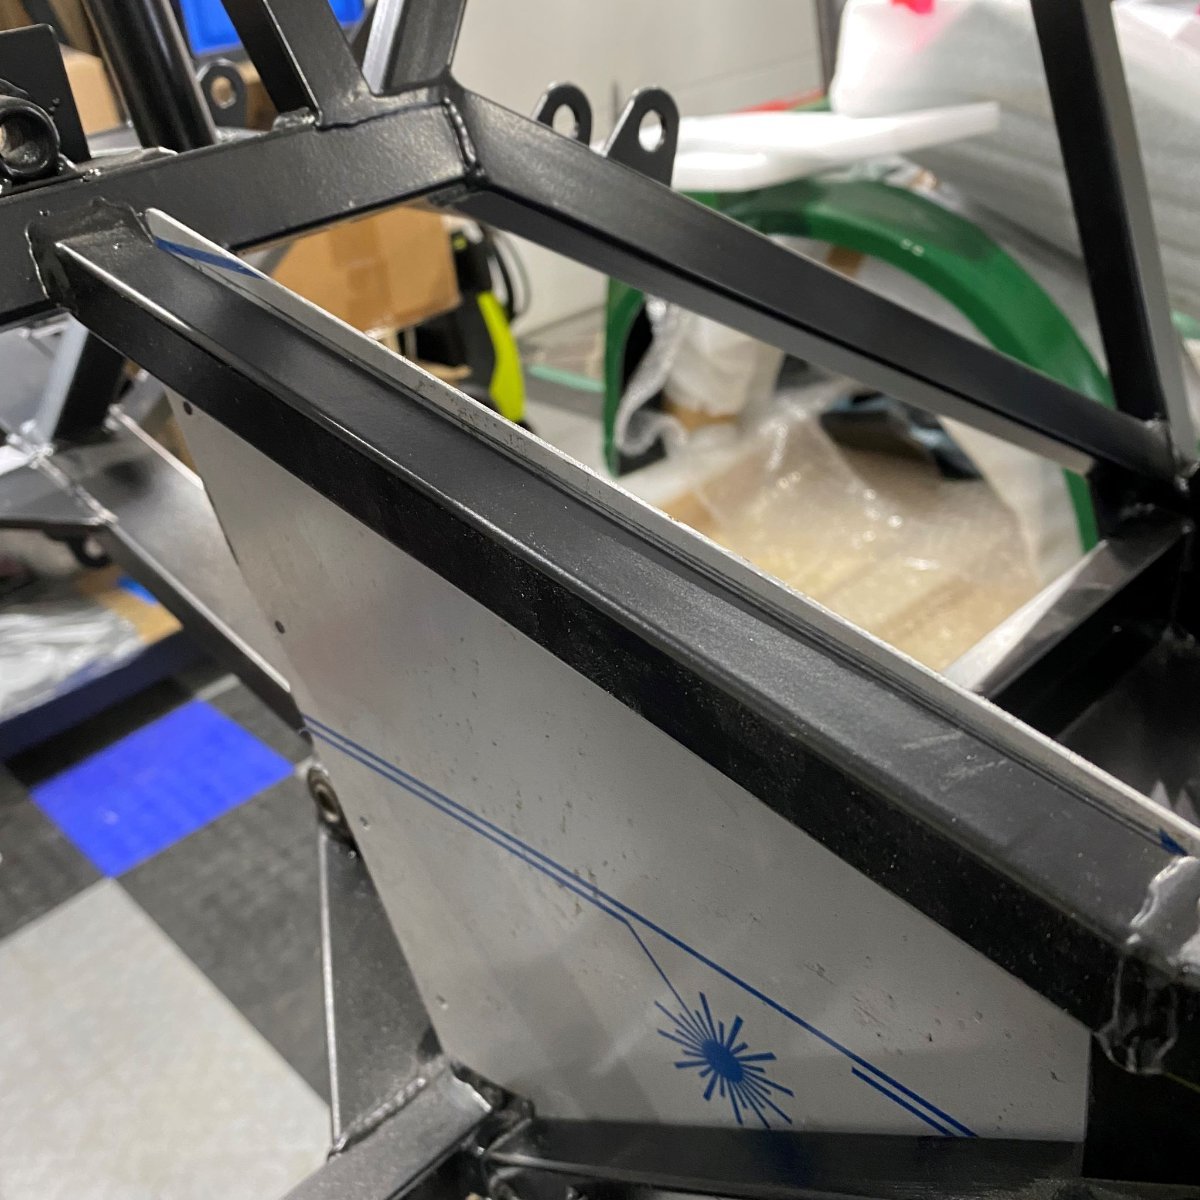
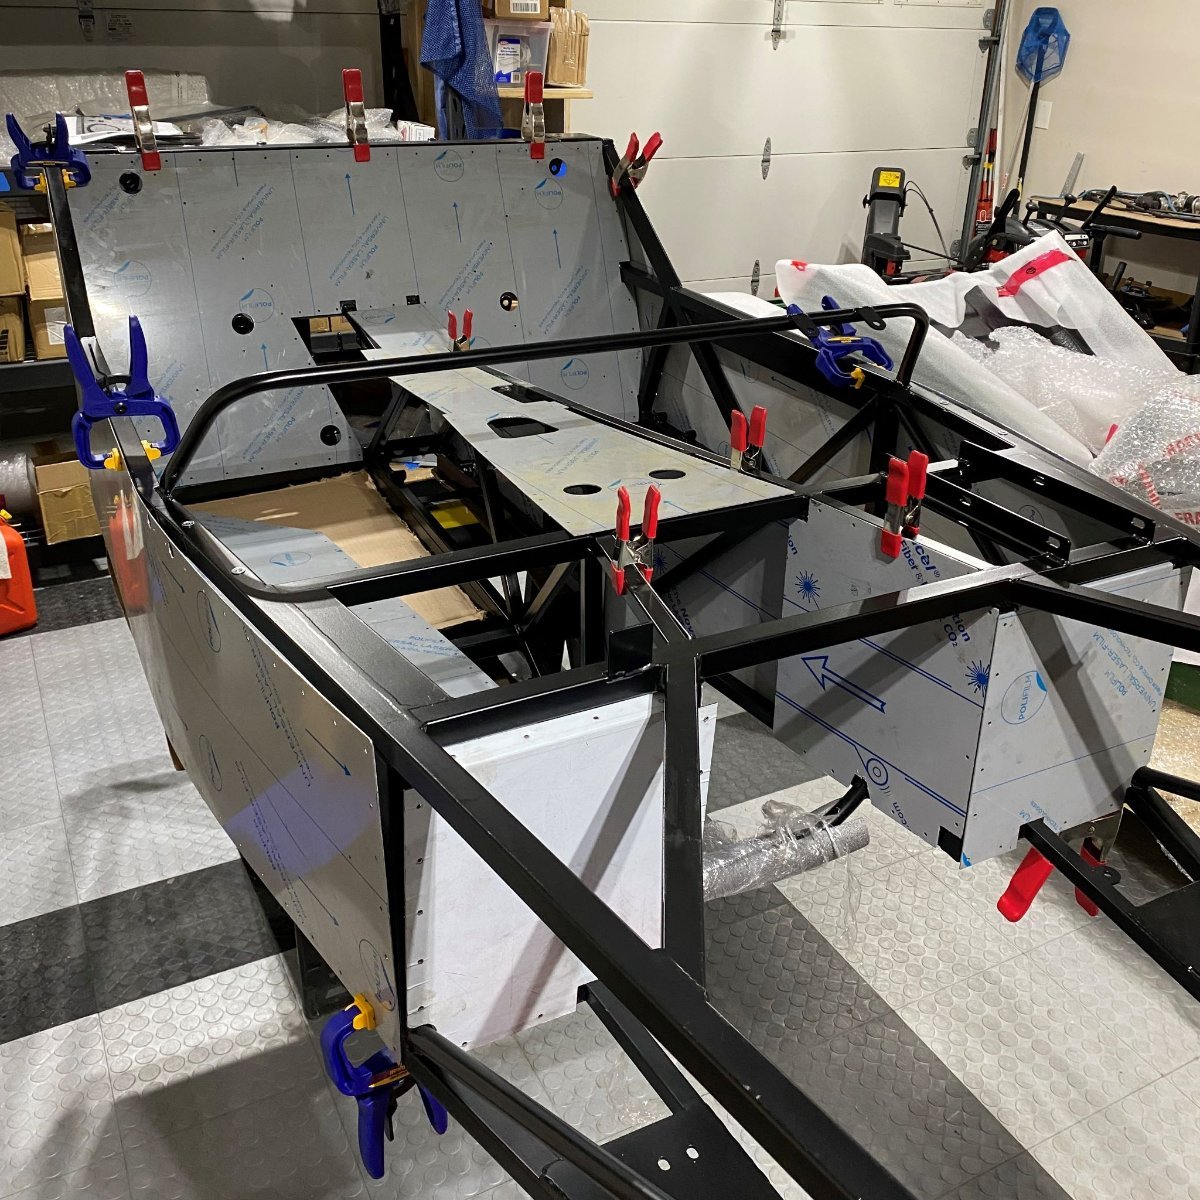
So 3 months after the kit arrived, I have finally managed to get some "hands on" time! My plan is to position, trim, and drill all the panels at once, and then do the final fit and rivet as needed. It also means I can get my moneys worth out of the Clecos and clamps I bought! The first job, fitting and trimming the panels. Most of the panels fitted very well however the tunnel sides and inner footwell panels did need a trim to get them into place. Both the Inner footwell panels were missing cut outs for the tunnel cross member..... ...and also a complete side of rivet holes. All panels (Except tunnel top) checked trimmed and ready for drilling. One panel seems to be missing next to the pedal box mount. I'll have to speak to Manik/Westfield about that one.
-
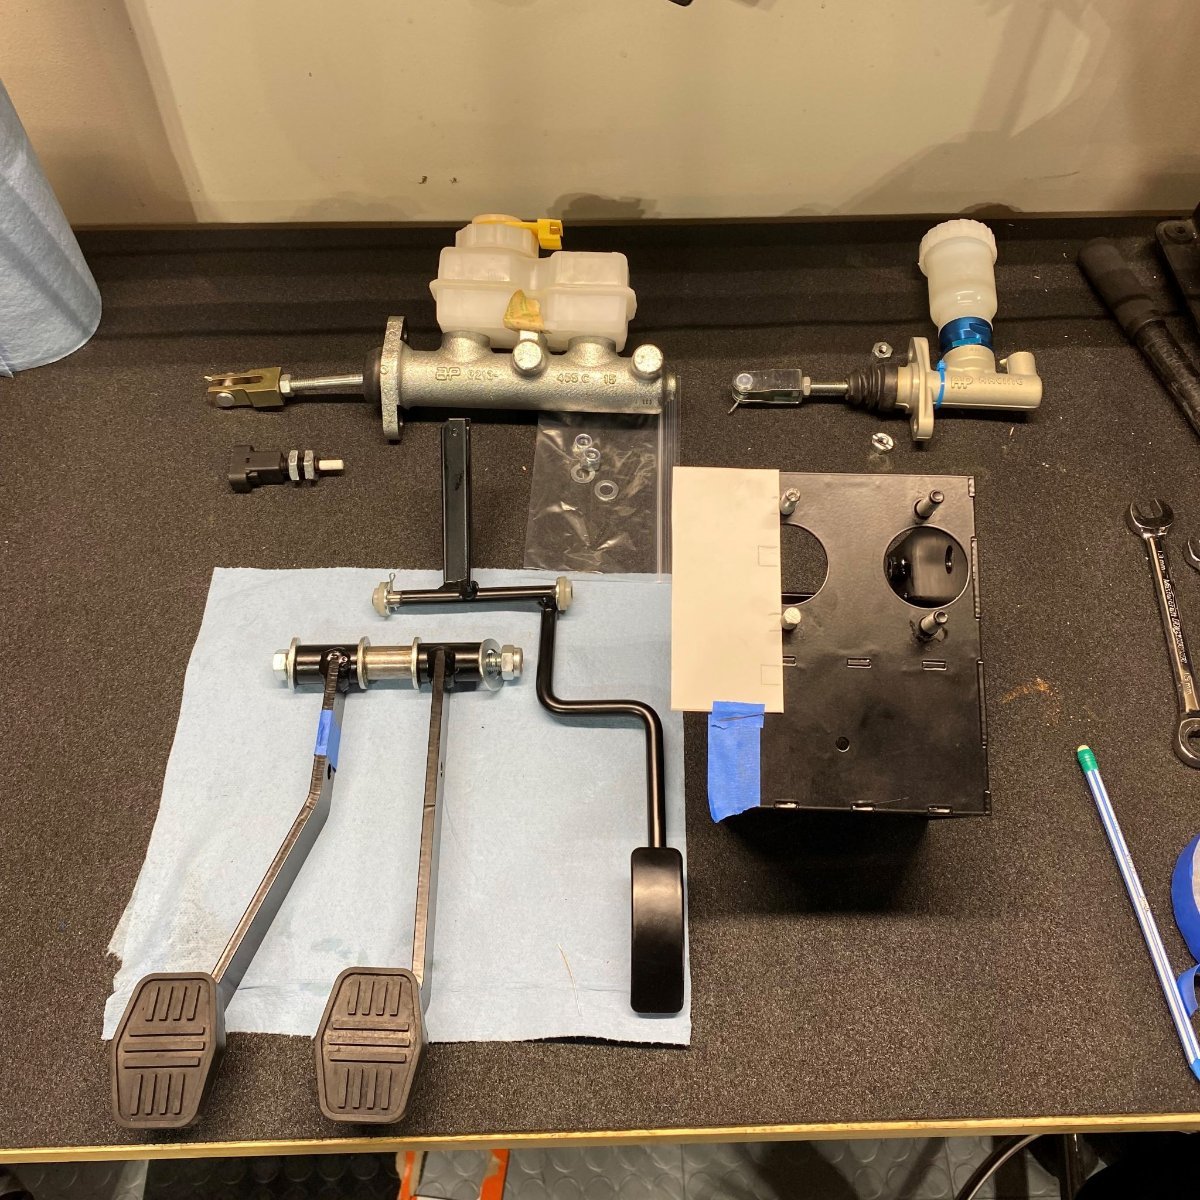
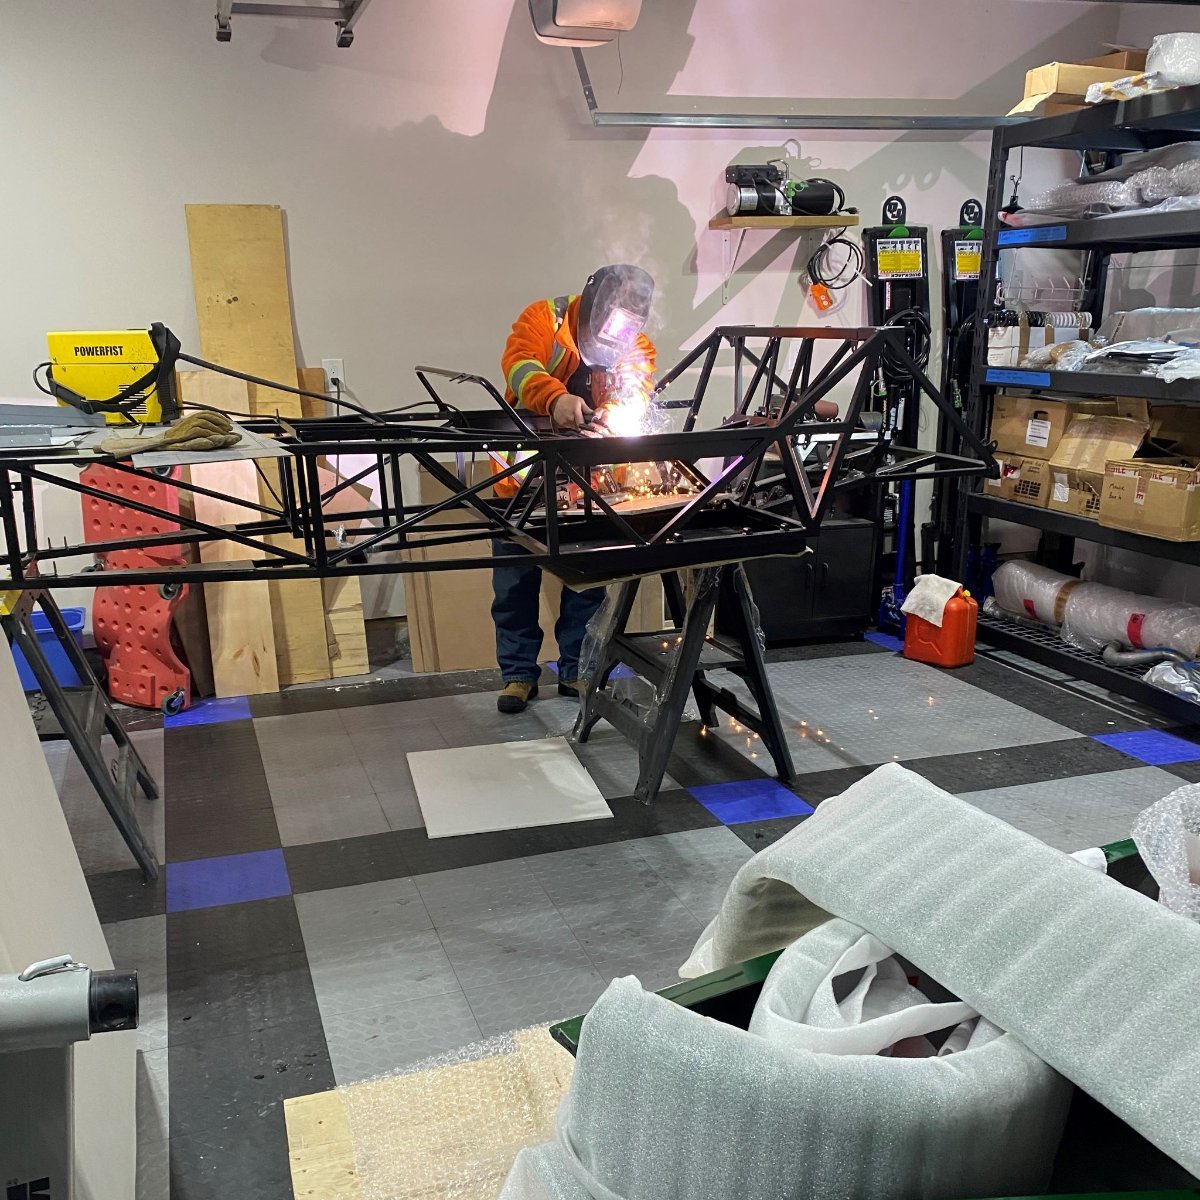
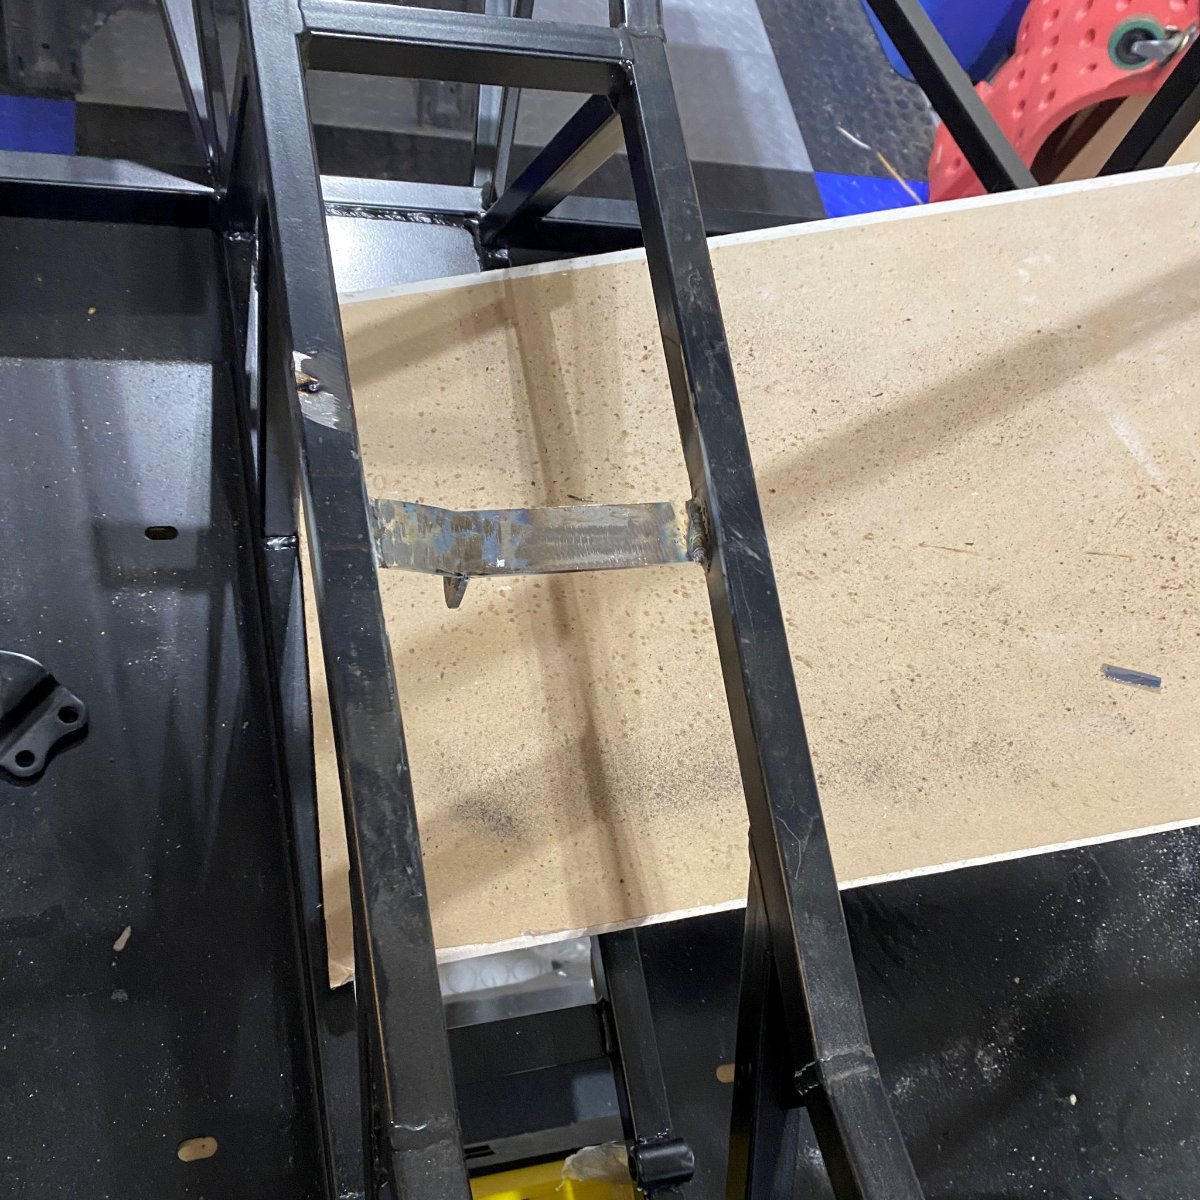
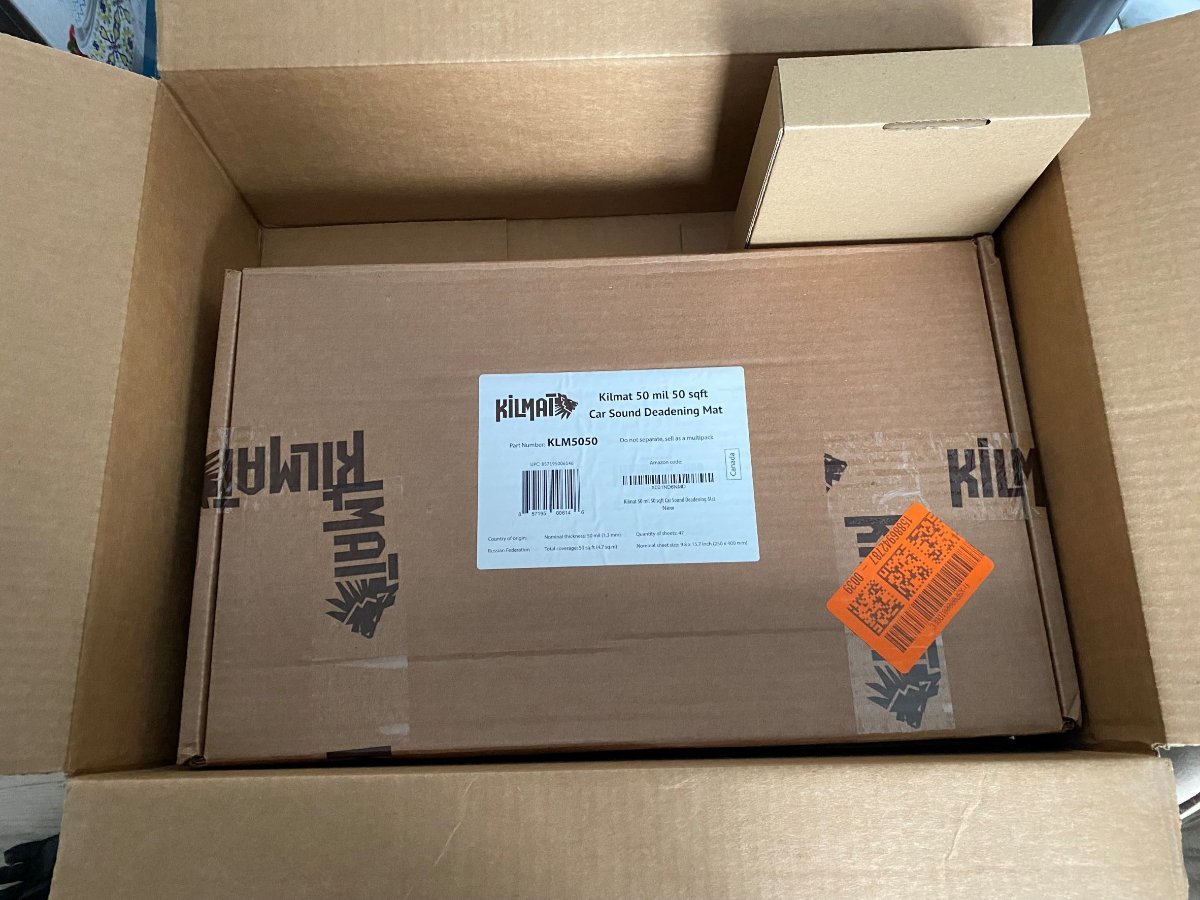
Although I'm still not making huge progress on my build, this week things are starting to move forward. First, mobility on my torn calf muscle has really improved, so much so that I was able to spend a bit of time in the garage inspecting my pedal box and taking some measurements to calculate pedal ratio (See "General Tech" thread here). Second, the welder came today and attached the replacement handbrake bracket that Westfield sent me to replace the one that was installed back to front. We had about 20 Inches of snow in the last 2 days, so I'm really happy that he showed up! BTW fuel can is empty! Last of all I noticed that "Kilmat" was 17% off on Amazon.ca so although I'm not anywhere near ready for it I decided to make the most of the offer! 🤑 My rationale for buying Kilmat instead of Dynamat or similar was purely bang for the buck. I figured I'm never going to get the full benefit of any sound deadening product in an open top, so I went for a good quality cheap product to help reduce the rattle can effect.
-
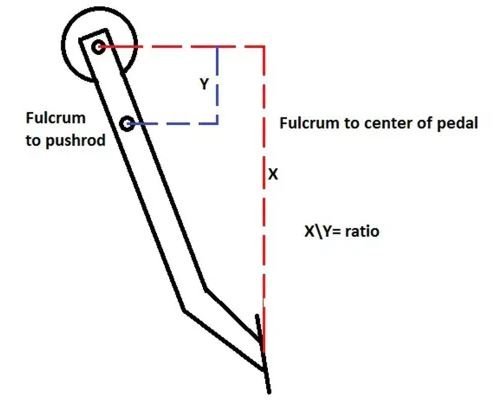
Thanks @MPG. So I spent a little time researching and learning a bit more about cylinder bore, and clutch pedal ratios, and found a couple of useful article that have helped me to get my head around it. How to Set up a Hydraulic Clutch How to adjust your clutch pedal ratio I thought I'd share my findings to help some other newbie's like me who are looking for information on this. I also reached out to Manik Sports cars (Westfields North American distributor) to see if they had some useful insights as well. From these articles I've learned that the optimal pedal ratio for a clutch MC bore of about 0.825in or below is 6:1. (My bore is 0.700.) Using this ratio and the length of the pedal arm you can calculate where the connection to the clutch pushrod should be. Taking some crude measurements from my pedal box, I estimate that the pedal ratio is close to 3.5:1 and to get an optimum ratio I would have to move the push rod connection up by approx. 25 - 30mm. To achieve this, the LHD builders have been moving their MC hole and bolts at the front of the pedal box up by that amount. Tom at Manik was kind enough to share what FM had done to their vehicle and it looks like they moved it up about 30mm as MPG estimated. While the Flyin Miata guys decided to make the modification to bring it in line with the optimal ratio, Westfield felt that the standard pedal box would still work fine and so did not make any changes. I guess the decision for us as builders is to decide if we want to make the FM mod during the build phase or wait and see for ourselves how the pedal performs.
-
Thanks for the info @MPG that's really helped me to get a better sense of things. I took out my pedal box from storage and took some photos. It looks like a vey nice unit!....... seems such a shame to cut it up!! On inspection I noticed that there isn't a second hole on the clutch pedal. I also noticed that the clutch master cylinder had 0.700 on the side, which I think may be different to yours (0.625) With this in mind I think it will be worth me reaching out to Westfield to see if something has changed in the last few years to take away the need to adjust the box. In the mean time do you have any measurements from the pivot to the 2nd hole? I can then do some comparisons.
-
Thanks @MPG, any help will be welcome. Like I said, I haven't got a clue what I need to do! It's almost like this mythical thing that only exists deep in the FM vaults! lol
-
So I'm posting this tech question separate from my build thread and its directed to those of you with experience building the Westfield Miata. I have read a bunch of build threads that say there are adjustments to be made to the pedal box to accommodate for clutch pedal issues (Bore size or something like that). Could someone please let me know if it is still an issue to be addressed and explain exactly what you had to do to correct it (With pictures etc.) because I haven't got a clue! Dan
-
Handbrake Bracket update So good news on the replacement handbrake bracket. Westfield sent through some replacement steel so I can go ahead and organize a mobile welder to come by and install. Happy Days.
-
Hey Graham, your Miata sounds like great fun! I have done a lot of reading and Youtube watching recently and am coming to a similar conclusion to what you suggested. I definitely wouldn't be looking for big HP, for the reasons you suggested but just enough boost to improve low end torque and get more than the 100ish HP that was once in the NA6. My main reason for looking into this now is to figure out what prep to do upfront so I can avoid taking the dash out etc. later down the line. Looking forward to @scannon joining the conversation!
-
Thanks for the ideas, I like the thought of wrapping it in vinyl! That way I could probably take some of the radius out of the curved section that joins the tunnel and make better use of the space! W.R.T boost gauge thought I'd put it in there to dream a little and see if I could be tempted! Lol I have already bought a Megasquirt a wideband O2 and am also freshening up the engine, so I might just approach the build with a turbo in mind incase I go for it after registration.
-
So with the wiring taken as far as I'm going to take it for now, I thought I'd get creative and play around with potential dash layouts. You may have noticed that the Westfield Miata dash is different to the standard Westfield dash as it utilizes the the gauge cluster from the Miata donor. I wasn't a huge fan of it at first, but now the look is growing on me. I think it just needs a bit of definition to make it look more interesting. Here are my initial thoughts on how I might incorporate some kind of back panel for the gauges and switches/buttons. Rectangle panel with marine rocker switches. Shaped panel with round buttons Number 2 is my current preference, but I still need to somehow make the centre console section less of an eye saw! Do any of you Westfield Miata builders have pictures of your layouts?
-
My last week on the build has been very chilled. As my calf tear is still limiting my movement around the house and my garage heater is working overtime to keep up with the Canadian winter, I spent the time slowly working through the Miata wiring loom. Task one; remove the sticky insulation tape with 30 years of grime baked on it. How many layers!!? Pile of gooey tape! Once the tape was off, I started familiarizing myself with the donor loom. With the SDV build manual, Miata Haynes Manual and Miata shop manual in hand, I slowly figured out what was staying and what was going. At this stage I wasn't too concerned with completely hacking wires and connectors off. Instead, I just focused on identifying what I thought were redundant wires, cutting one end, coiling them and labelling them. I will remove them completely when I am able to lay the loom over the chassis and double check the connectivity. I'm hoping that by spending a few days doing the monotonous stuff now while I cant progress with much else, it will make the build flow a bit better when the weather and my calf improves. The first to be organized was the headlight motor loom followed by speakers, electric windows, power steering and heater wires. To be honest, I found the heater connectors and wires the most confusing at first as I couldn't match up the wire colours with any of the manuals.......I then realized that although the connector was attached to the heater blower unit most of the wires were simply passing through the connector en-route to somewhere else. You can imagine the hours of fun I had figuring that one out! Not that one!!! 💥 Pull!!! The fruits of my labour.
-
Thanks @Dave W. I will look into. I'll also check the Ontario safety requirements for wire protection to see if I can get away with just the spiral warp.
-
Thanks @MPG. That's good to know. I think you're right the brake and fuel lines need to go in before the diff. Once I'm mobile again I will make a start on fitting and drilling the panels and securing the ones that I can to enable me to run these lines.
-
The waiting game.... So this is where I call upon the advice of all you seasoned Westfield Miata builders out there..... Due to my soccer injury I am still out of commission and barely walking. This means I'm not able to get out in my garage that much at the moment. On top of that I have two tables covered with engine parts blocking access to the chassis. My plan was to assemble the engine before the holidays, clear space and then tinker with the car during my time off. Unfortunately, because of COVID some of my engine parts were on back order and so I'm on a bit of a holding pattern. (I was also working on a family bathroom reno that is now on hold too!...but that's another story! ) Anyway, back to the point of this post....experience recommends that the handbrake installation is the first part of the build to avoid bolts in the cockpit and ensure a cleaner finish. As this is not an option for me, nor is the bolting of tunnel panels until I have the new bracket installed what other items could I be getting on with (once mobile) while I wait? Can I do some of the other panels or are they reliant on the tunnel panels being in place? While I have limited mobility I will probably start to unwrap the insulating tape from the miata wiring loom and see how far I get there.....
-
So, after about 6 weeks of backwards and forwards between me, Manik and Westfield we arrived at a way forward for the kit deficiencies. Apparently, the availability of the chrome package had been sporadic over the last year or so, and at the time my kit was ready for shipping there weren't any available. This is why I was sent the black. Unfortunately, as the chrome look is critical for my build, black isn't an option, especially as I have biscuit coloured seats and trim. Westfield have now put me on the waiting list and will send me the chrome items when they are next available. The damaged dashboard will be replaced with a new one. Unfortunately, the aluminium stone guards are no longer available from Westfield, and so I was sent the carbon ones as a replacement. C'est la vie, if I really want some I'm sure I can get some made up locally. Lastly, after a discussion regarding a potential bolt on solution for the handbrake bracket, Westfield have decided to send me a new bracket that I can have welded on. I'm happy with the outcome and now I'm just playing a waiting game until the parts arrive. My last correspondence with Manik (Westfield) was mid December and so I'm hopeful that I will receive the parts (Especially the handbrake bracket) early in the new year. Right, enough for now, time for a few beers to see in the new year!! Happy New Year Everyone!
-
Post Inventory results So, after a couple of days of checking and double checking I had identified a few kit deficiencies that needed to be discussed with Manik and relayed to Westfield. Now, my approach to deficiencies is fairly open minded, I have read enough build diaries from multiple car kit manufacturers to know that the tolerances and QC across the industry can sometime be a little weak, and we as builders are expected to use our engineering prowess to work around it. So when identifying deficiencies, I mainly focus on order errors, missing parts or damaged parts that are clearly visible as I approach or sit in the car. The stuff that makes your heart sink and wish you'd spent your hard earned cash on something else. So, in no particular order here are the deficiencies that I felt were worthy enough to hit the charts! I was sent a black windscreen, posts and headlights, instead of the chrome package option that I ordered. I was sent the black carbon fibre stone guards instead of aluminium stone guards The dash panel had a very visible scrape (dime size) on the surface The handbrake attachment point on the chassis welded back to front ....oh, and a bolt was missing! lol To be honest, I only noticed the handbrake bracket because I had been reading some build threads that recommended installing the handbrake first. I'm sure there's other stuff that will pop up as I get to it!
-
Thanks Rosteri! Yes, it was!!