NVP66S
-
Posts
486 -
Joined
Content Type
Profiles
Forums
Store
Articles
Gallery
Events
Library
Everything posted by NVP66S
-
Well, heck. I thought WF and Brunton differed in headlights with Brunton having those small diameter lights faired into the body. But due to your comment I looked deeper. It seems the Classic R has the same headlights as my WF. Now I need to find some other identifying feature. PS: Howcome the emoticon list doesn't include a Boeing Salute? (palm up shrug) When I worked for Boeing everybody seemed to pick it up without being told. PPS: I'm at home not working on my car at 6PM because it's 107F in my hangar.
-
The WF has the nose bolted to the chassis and the bonnet pinned to the nose. I couldn't figure out how to drill the holes for the nose-bonnet pins. I didn't trust myself to take measurements and drill separately. After some serious head scratching, I realized the nose and bonnet don't actually have to be on the car to do this. So I drilled a pair of holes in my workbench and bolted the nose to that. Then I slipped the bonnet into that and adjusted it with weights and clamps. Crawled underneath and drilled. Easy as Pi.

-
My hat's off to them. I plan to do some traveling after a few months shakedown, but nothing like that. Another guy who seems to not be on-line had Flyin' Miata build his Westfield and planned to travel a similar amount has this setup:
-
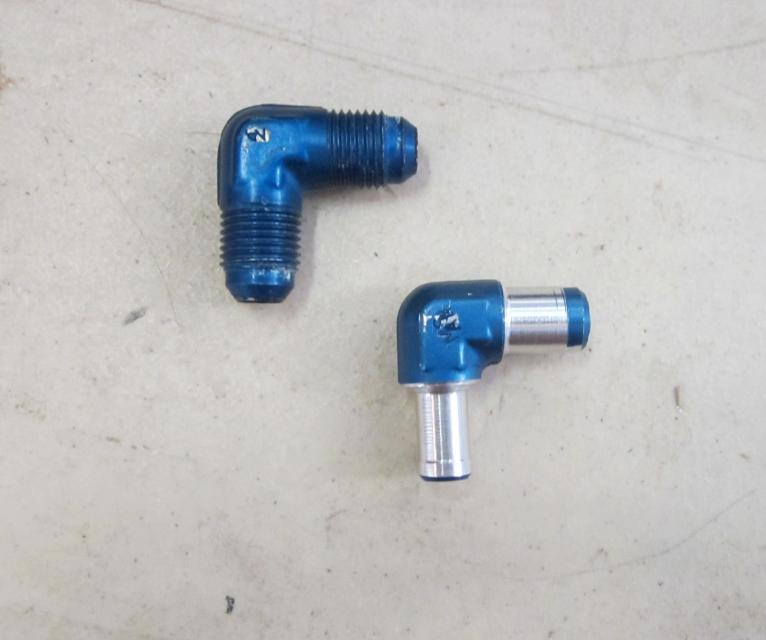
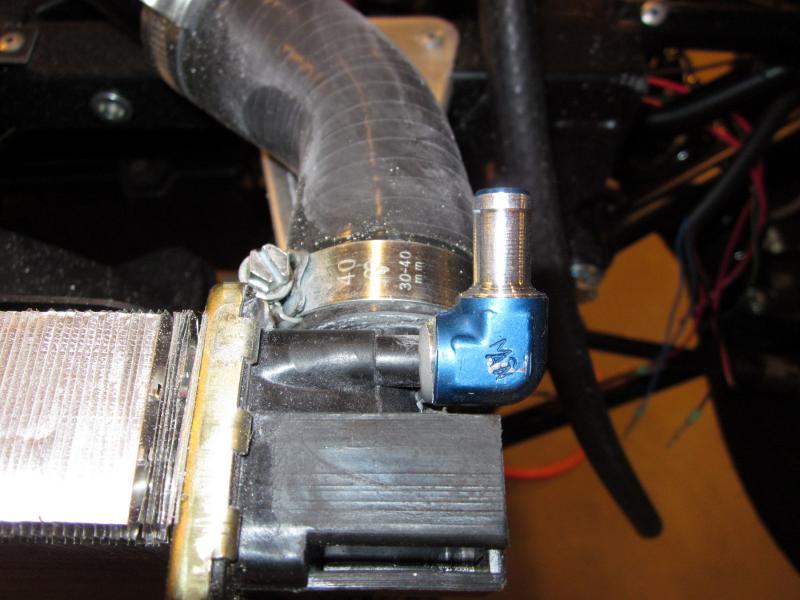
The hose nipple at the top of the radiator stuck out too far and the return air hose interfered with the nose. So I modified a 37 degree flare fitting into a right angle hose barb. Flyin' Miata did this with a store-bought fitting but my lathe is handier out here in the desert. It took me less time to set up my 4-jaw chuck and make the fitting than it would have taken to order one on-line.
-
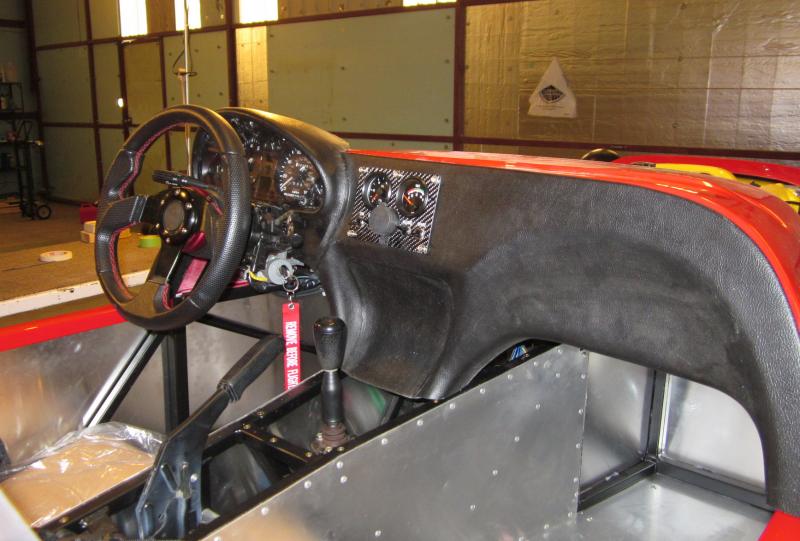
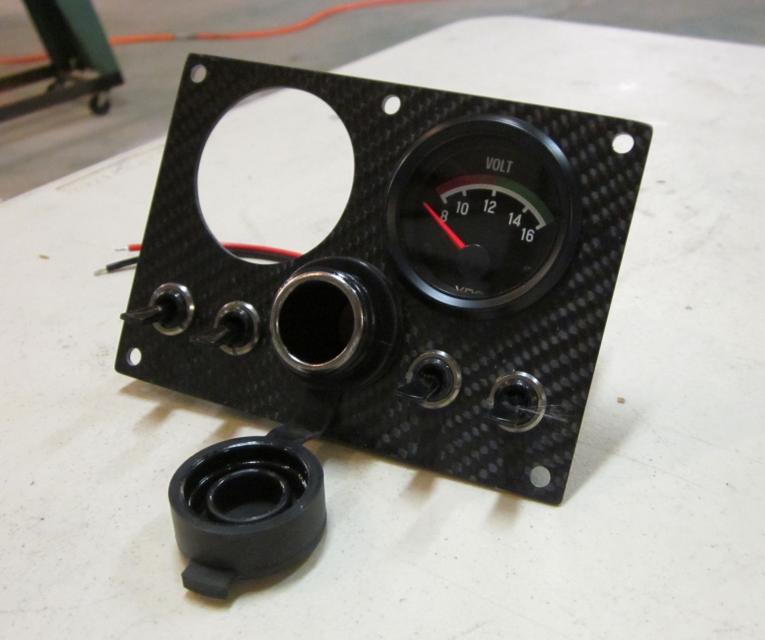
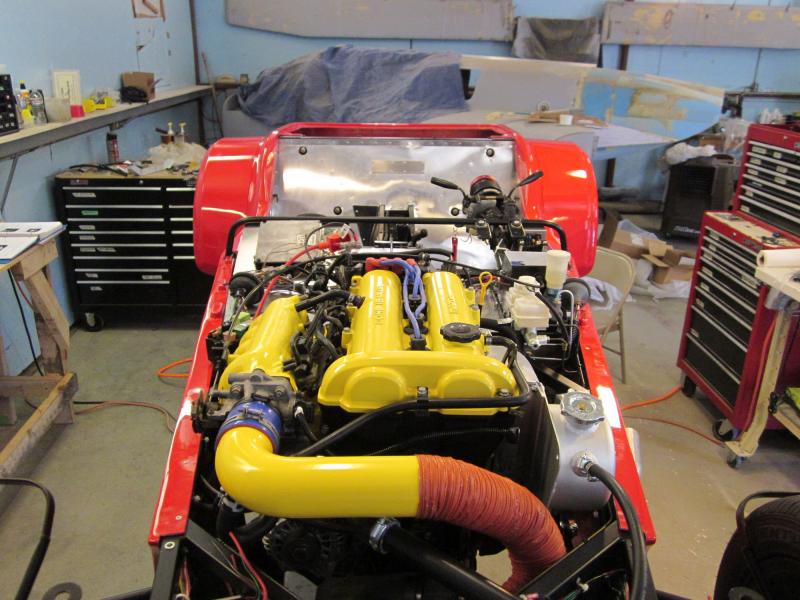
The instrument subpanel is mounted but not yet plumbed or wired. The Mazda has an oil pressure gauge, but it is hooked up to a switch with lots of damping. It's more like a really slow idiot light than a proper gauge. The gauge on the subpanel is a VDO mechanical gauge. The other stuff on the subpanel is the voltmeter, fan ON switch, windshield heat switch, 4-way flasher switch, and of course the 12V power receptacle.
-
Here's what it looks like with the grille cut the other way. Of course it's a matter of taste, but I think it looks far better. The 3003 aluminum is going to get powder coated black before reinstallation.
-
Ahhh, yes. As I recall the twin cam in my Elan was the only engine I ever owned that *needed* a tach. It sounded marvelous and kept pulling strongly right up through redline.
-
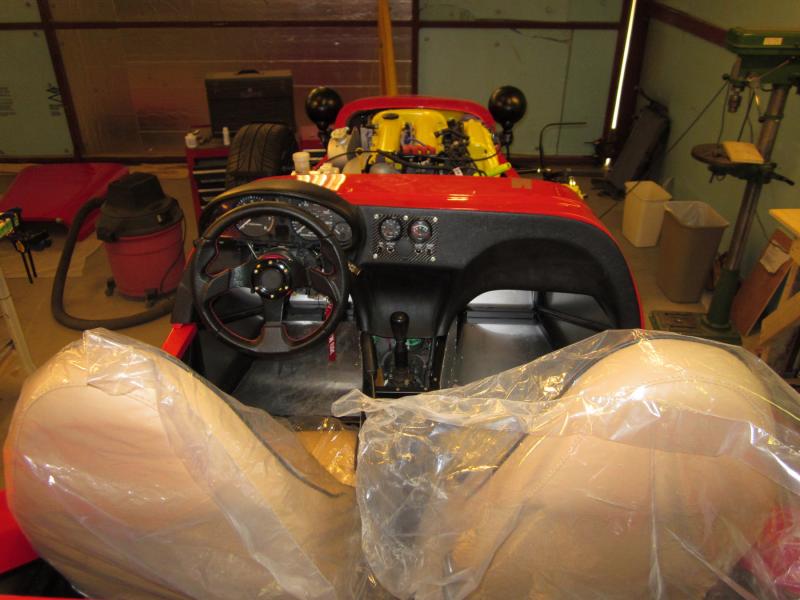
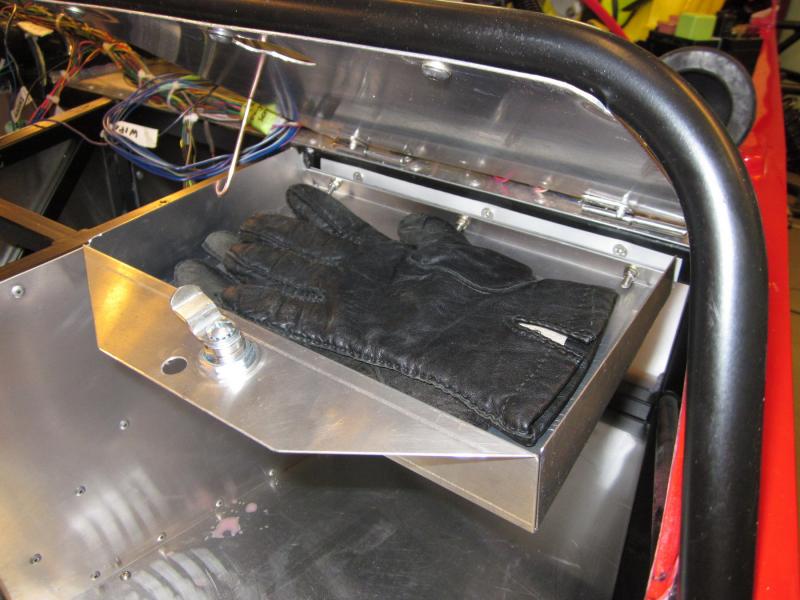
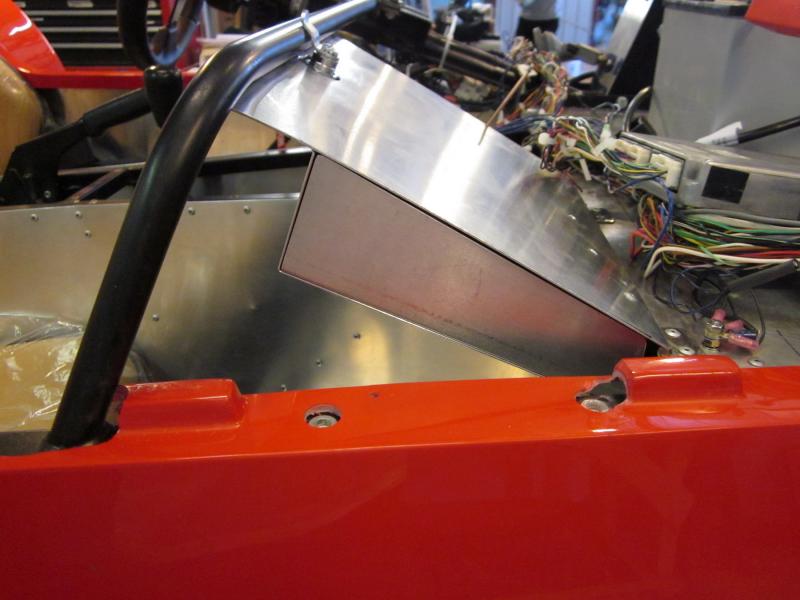
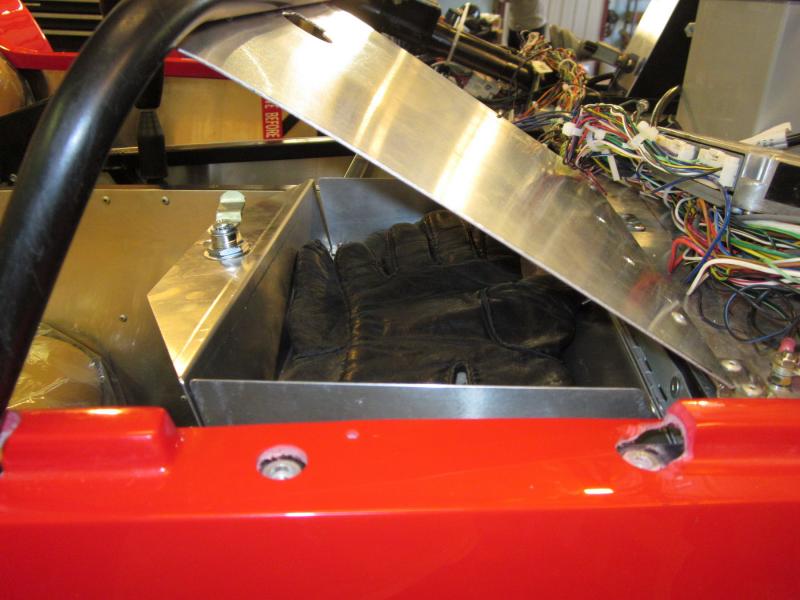
Back to the build thread. I plan to do some serious traveling in the funny little basic car, and that means at least *some* minimal storage space. So the glove box got finished today. The scuttle and IP are not in place at the moment, but when closed it completely hides behind the IP.
-
I love Red Green! One of Canada's finest exports. Right up there alongside Corner Gas. :jester:
-
Here ya go.....
-
For you car cooking enthusiasts, here's a link to satisfy the blacktop epitome in you. http://www.amazon.com/s/ref=nb_sb_noss_1?url=search-alias%3Dstripbooks&field-keywords=manifold%20cooking&sprefix=manifold+coo%2Cstripbooks&rh=i%3Astripbooks%2Ck%3Amanifold%20cooking It includes such favorites as "Manifold Destiny", "Diesel Dining", and that perennial favorite "The Original Roadkill Cookbook" This reminds me of a spoof radio ad back when I was a DJ: Come on down to Earl and Mable's ErMabe Cafe!! We use only the freshest roadkill that Earl gathers daily!! :jester:
-
There was about .05 inch clearance between the nose and the A-arm on both sides. So I added a notch. I considered trimming the nose parallel to the notch depth, and making a big arc with the notch in the middle. But with a small cutout, I can always do either of those later.
-
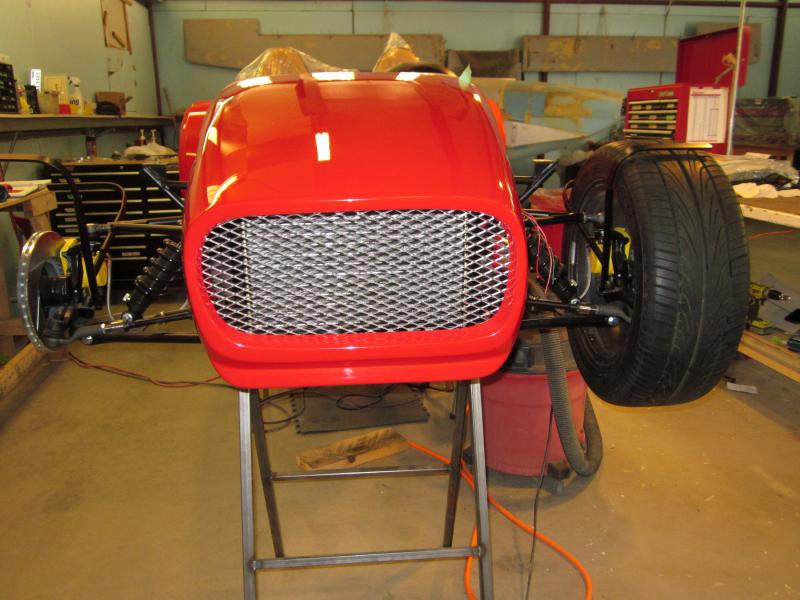
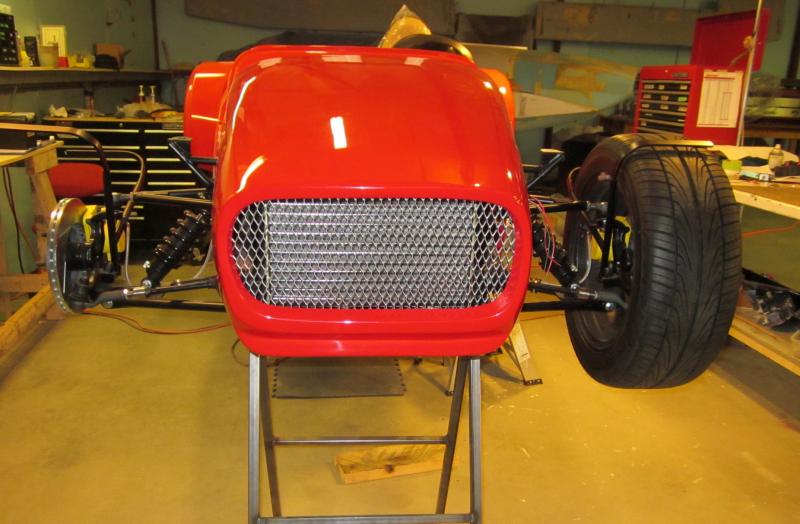
Guess what came in the mail today... Yes, the WF grille. Now I'm glad it came late because I held my hand up to the swamp cooler exit and compared flow of my custom fab and the factory grille. Amazing difference! The factory WF grille is far more restrictive. Also heavier as it's steel with a frame and mine is aluminum with no frame. But I'll probably take the logo off and put it somewhere.
-
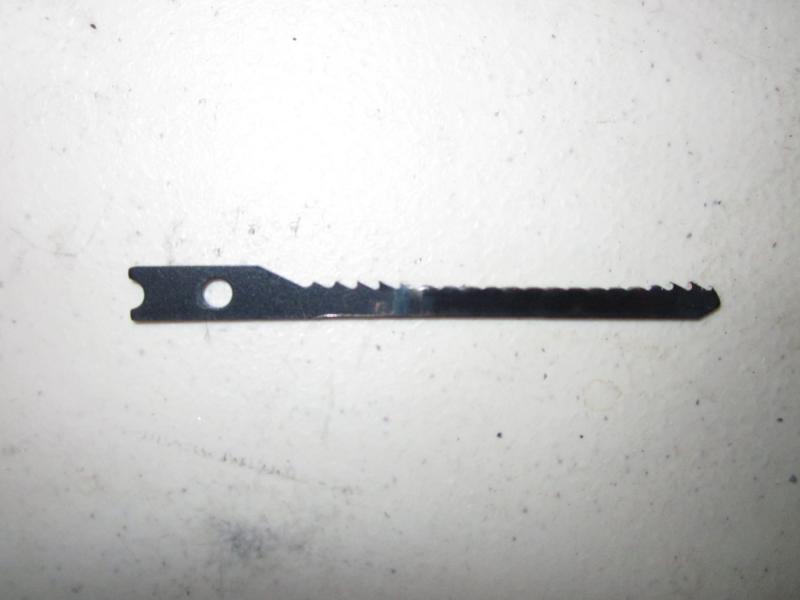
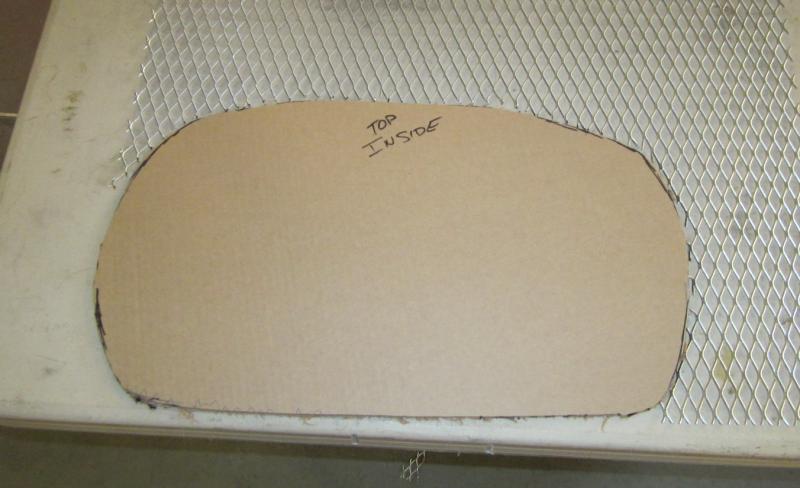
I can't get in as many hours per week now that summer has arrived here in the desert. My shop has a bit of insulation and a small swamp cooler, but I can't get good work done much above 88F. It's getting over 100 most every day now. But enough excuses. The first photo is what happened to my saber saw blade after just the 12 inch cut for the Mazda clockset. Dang! I hate to think what the glass is doing to my drills and hole saws. WF didn't send the grille so I decided to make my own from non-flattened expanded aluminum sheet. The radiator is 1/2 the size of the Mazda Miata and I'm thinking the designers live where it doesn't ever get hot outside. So I chose what looked like the least flow resistance. The second photo is the cardboard template. Last is the grille test fit. Grrr. I got it sideways and I really don't like vertical grilles. OK, gotta go buy another 2X2 foot sheet.
-
My 2 cents: IXLR8 260N4 alternatively, TO60N4
-
Pretty picture. Don't fly there. I had never seen a lenticular until I moved just downwind of the Tehacahpis; here they're kinda common.
-
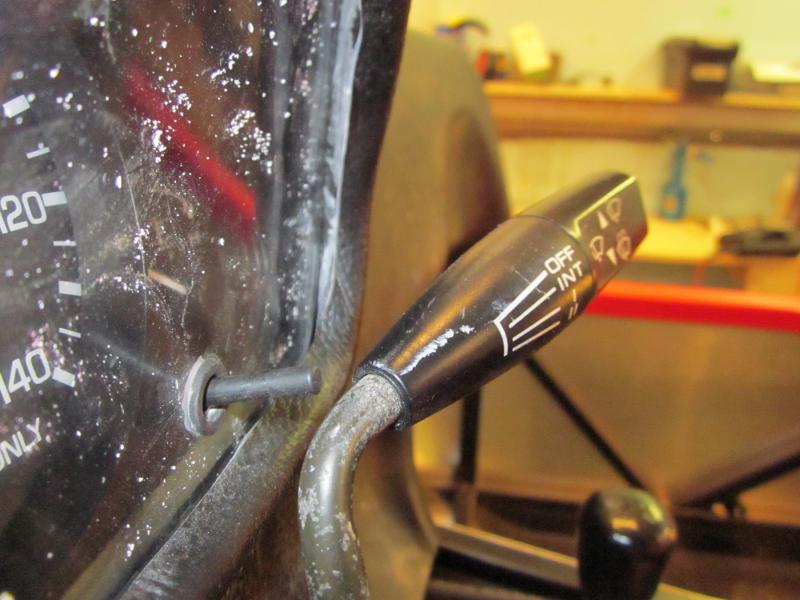
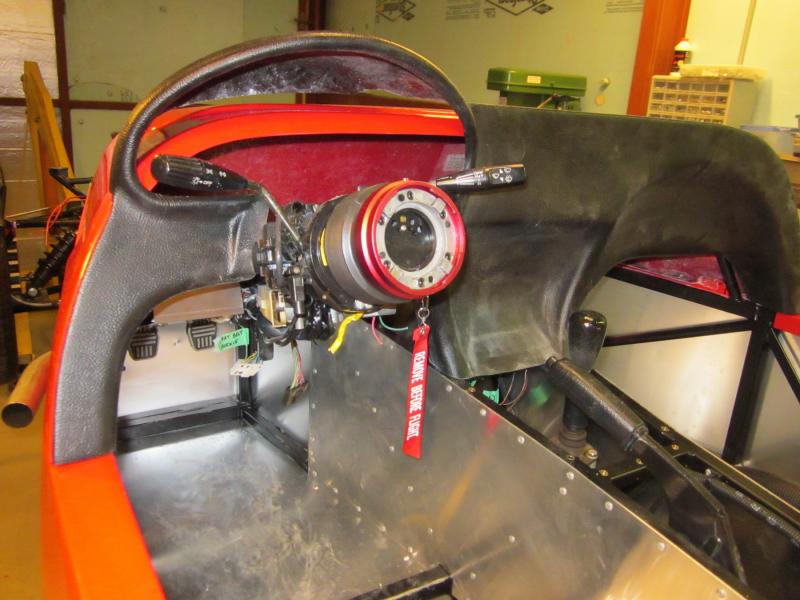
The software is limiting me to 5 photos per post. Here's the final (probably) location of the Miata gauge cluster. It shows how close the odometer reset is to the wiper stalk. Looks like I bent it in one of my many fit checks. Oops.
-
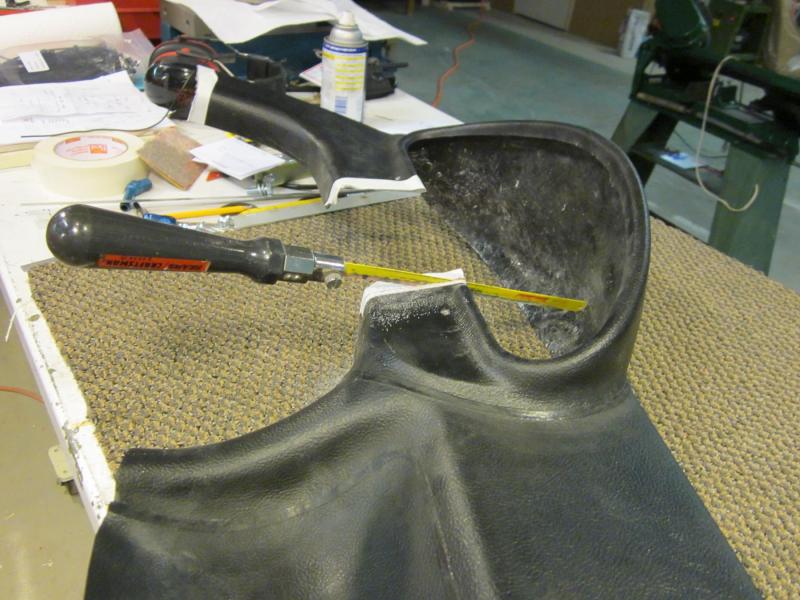
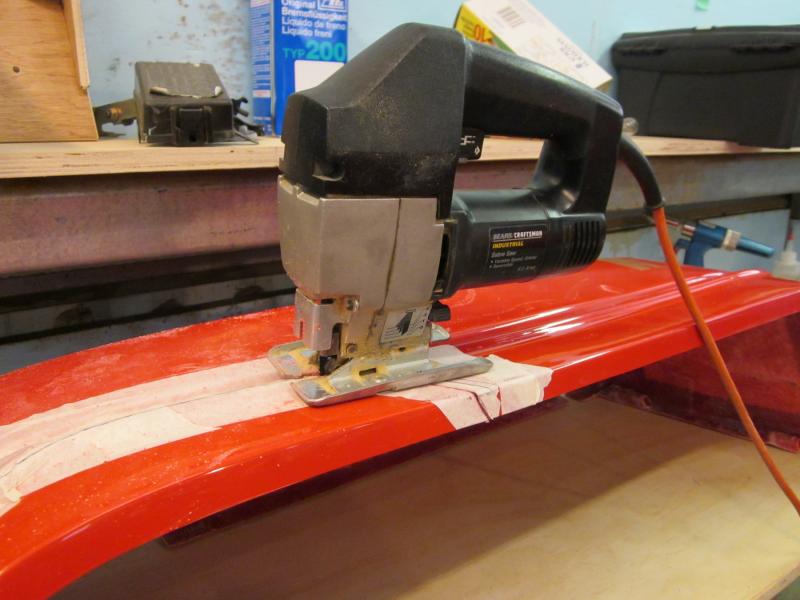
The first photo in this block shows cutting with the hand hacksaw. I was concerned that a power tool would catch and break this part as it's rather flimsy without the mating parts. The second photo shows the masking tape with an 8 mm offset to create the first cut line. Then, cutting with the sabre saw. The first inch went quickly, then it really slowed down as the glass rapidly dulled the blade. The 4th photo is getting a little better fit. I'm the kind of person who doesn't trust himself, so I end up spending more time making multiple iterations. Photo 5 shows a bit of this. I need to trim a bit more around the switches.
-
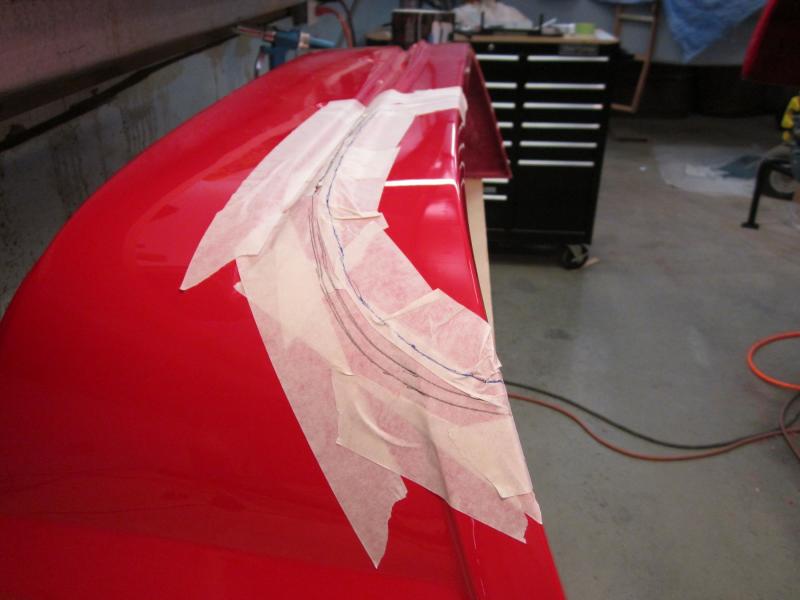
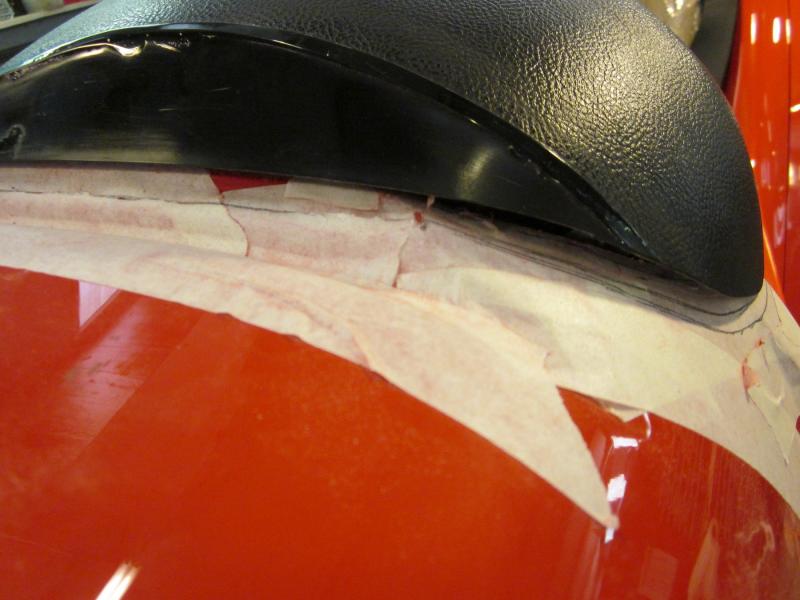
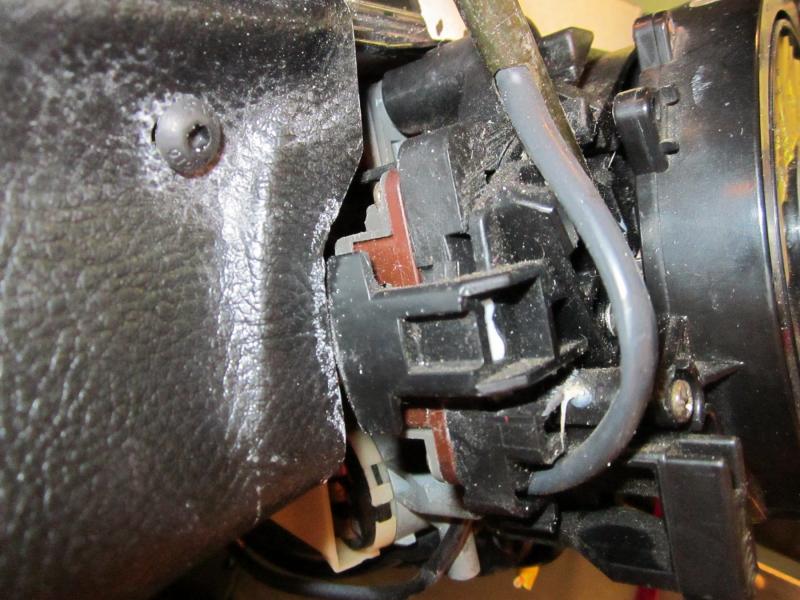
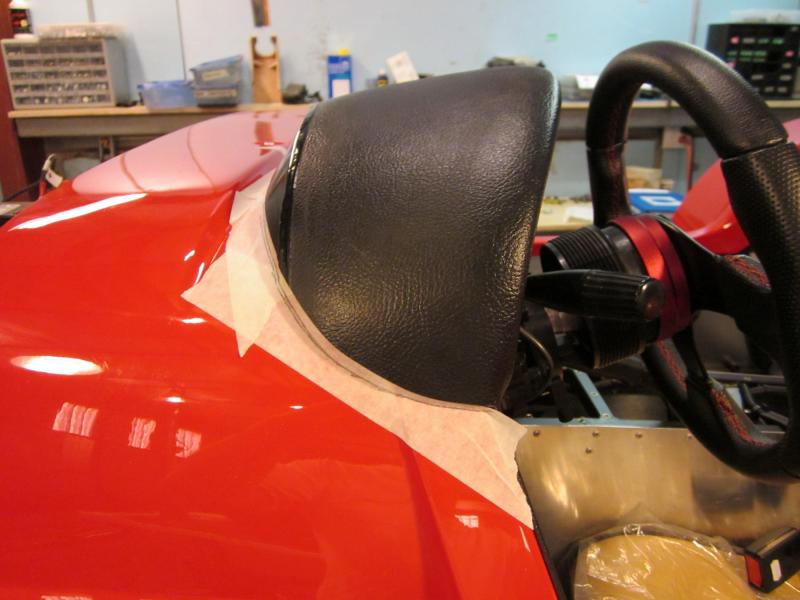
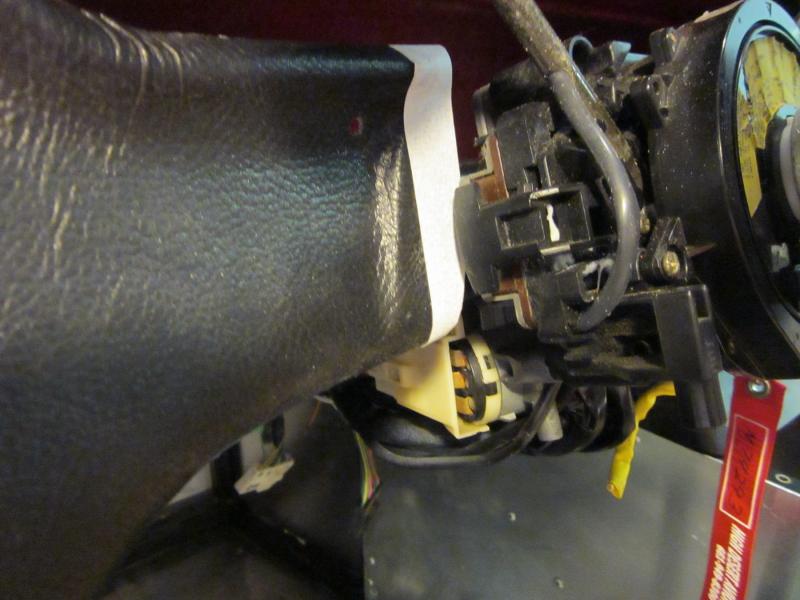
I've been working on the instrument panel. There's extra material in some places but mostly it's trimmed to fit as it arrives from WF. The first photo is how it fit the first time. You can see the gap looking forward through the gauge cutout. The second photo shows about 3/4 inch sticking up above the scuttle. The third photo shows lots of masking tape with a line drawn to create a "don't cut here!" area. I took it apart and put it back together and got 2 lines. Hmmm. I marked them both. The 4th photo shows some trimming needed around the steering column stuff (the turn signal canceller here).
-
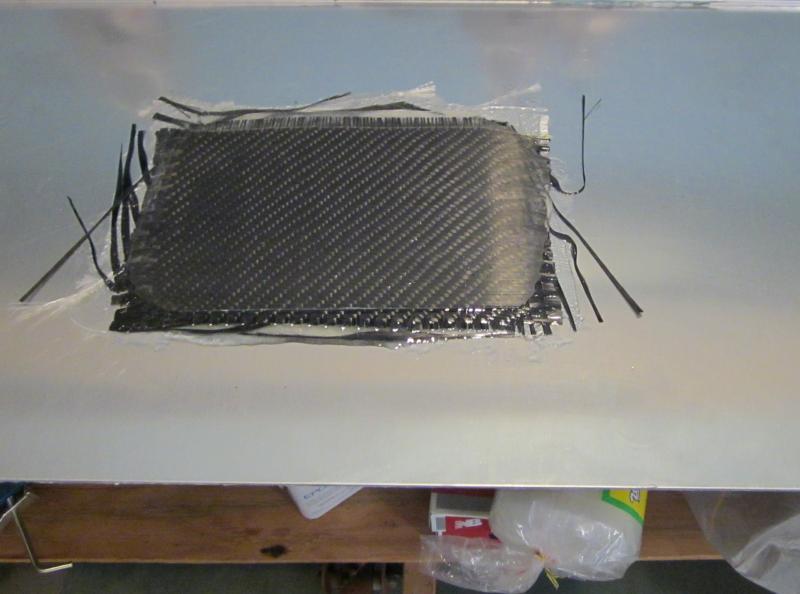
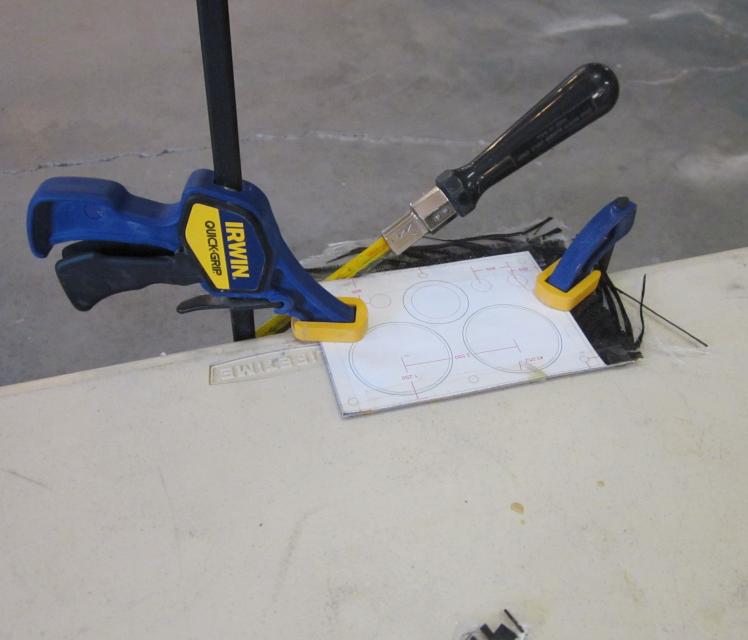
Flattery will get you everywhere. I made a little detour in the build to make a panel to house 2 gauges, 4 switches, and a power socket. First a wet layup with 1 ply carbon BID, then 6 plies E-glass BID, and another carbon ply on the other surface. I waxed an aluminum panel for a mold. Then after sticking on a full scale drawing, I cut it out with a hacksaw. The bandsaw would be faster, but the blade would dull in about 1 minute cutting glass. The small holes were drilled with a Unibit, and the bigger holes with a hole saw. The final product turned out really nice. The missing gauge is the mechanical oil pressure gauge (on back order from JEGS). The Miata claims to have a gauge, but it's lying. What appears to be a gauge is a switch hooked up to a well-damped needle.
-
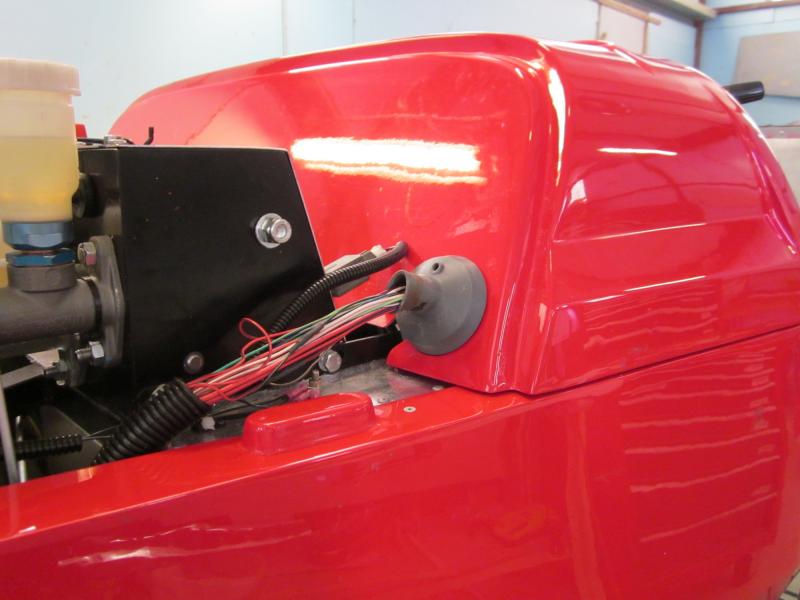
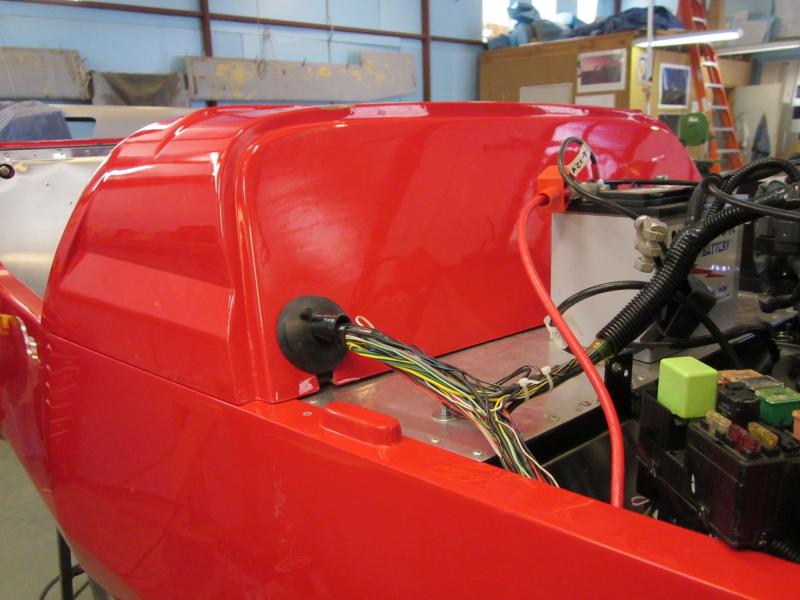
I really wanted to cut & fit the scuttle and did not want to pull all the wires back and hang them in the cabin. So I cut notches for the wires at the grommet pass-through holes. THIS DOES EVIL NASTY THINGS TO THE STRUCTURAL INTEGRITY of the scuttle, so I added a few plies of glass bid, which helps a little. The big thing I'm doing to restore the structure is to add two bolts in the middle near the battery.
-
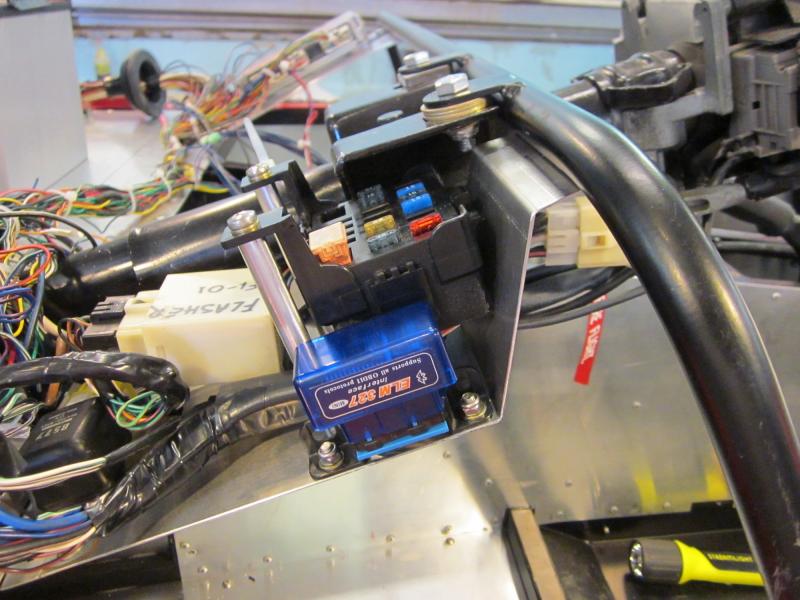
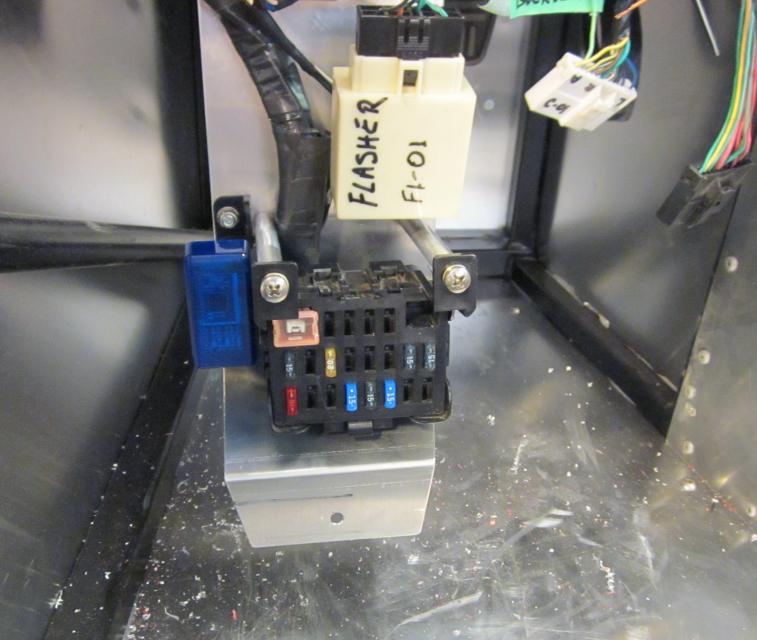
There are 4 danglies hanging in the driver's footwell. The OBD connector, the fuel pump relay, the flasher unit, and the inside fuse block. I noticed some people ty-rap them to the steering column, but I thought a swing-down sheet metal shelf is neater. The first photo is from above in the stowed position without the scuttle, and the second photo is hanging down for access.
-
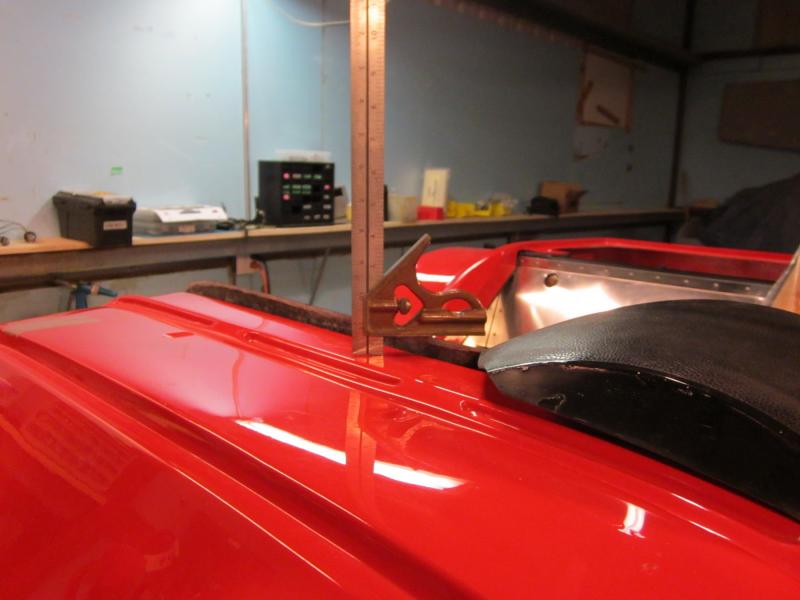
I thought about that and came to the conclusion that I can always make it bigger. I plan to watch this space on initial runs to see if it contacts. The mounts that come from WF are quite stiff compared to the Mazda mounts, but........ there's a continuous string of decisions while building...... Maybe now that I'm done patting myself on the back for hitting the location, I'll go back and enlarge the hole.
-
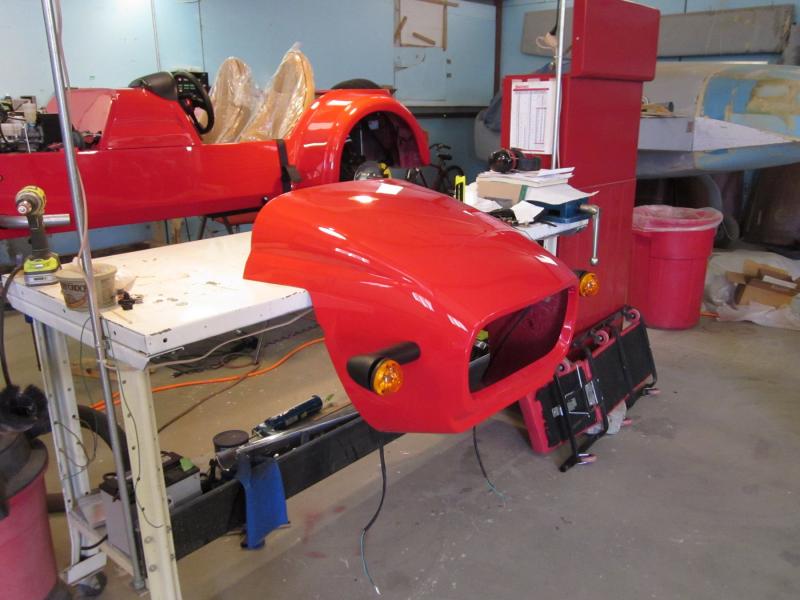
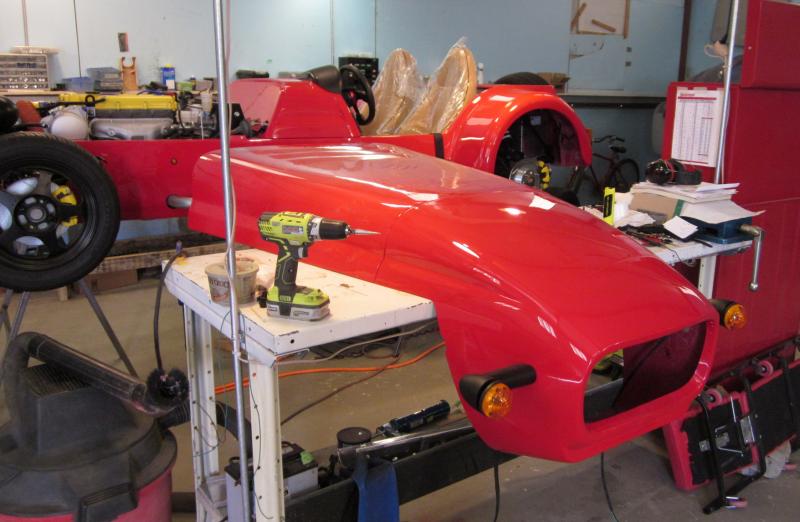
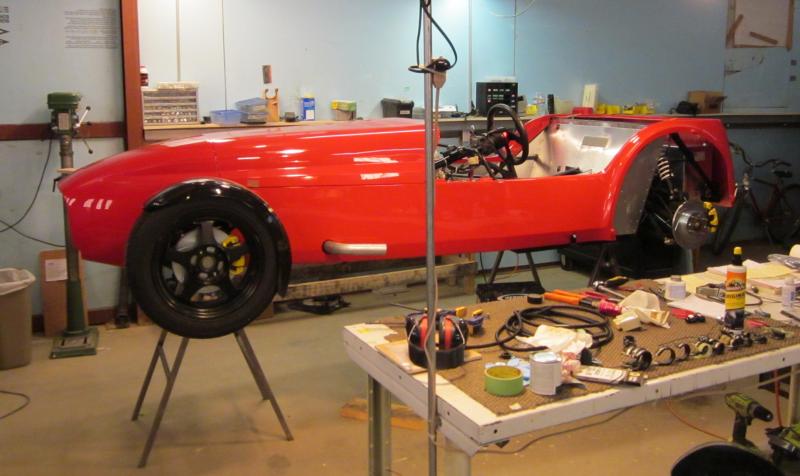
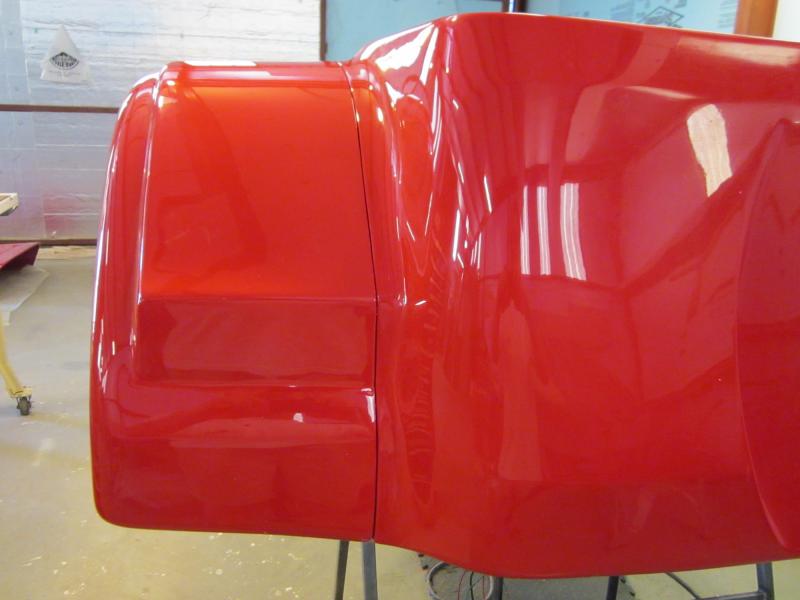
I put the rear fenders on today after lots of rivets attaching the body to the chassis. WFs are available with either fixed or removable rear fenders. The theory is that (especially at the track) if a fender gets damaged they are easily replaceable. The first photo shows the body, bonnet, and nose in place but not yet attached. The second photo shows the bolt circle with big washers holding a fender on. The third photo is looking forward and the 4th photo shows both fenders attached. It looks wide, but the rear width is determined by the donor Miata diff & halfshafts.
-
As one of the few other Westie owners here, I say welcome. Interesting dynamometer setup. I don't recognize the gas tank, is that from your kit? Dan