NVP66S
-
Posts
486 -
Joined
Content Type
Profiles
Forums
Store
Articles
Gallery
Events
Library
Everything posted by NVP66S
-
That was a joke and I get it :seeya: , but allow me to be serious for a moment. The Admiral described some rules that he learned and that work for him. They can work for you too and he shared them with a graduating class. Here's one I had hanging up in my office for several years: "Nothing in this world can take the place of persistence. Talent will not; nothing is more common than unsuccessful people with talent. Genius will not; unrewarded genius is almost a proverb. Education will not; the world is full of educated derelicts. Persistence and determination alone are omnipotent. The slogan press on has solved and always will solve the problems of the human race" Calvin Coolidge And in this civilian version, you don't have to make your bed just perfect every morning.
-
No platitudes, all reality. I'm impressed. Thanks for that.
-
Great photo! I printed it and hung it up in my office.
-
:iagree:very nice car
-
Very nice. I'm always impressed at how different the makes are under the skin. On the outside they all resemble an old Lotus, but inside.... nada.
-
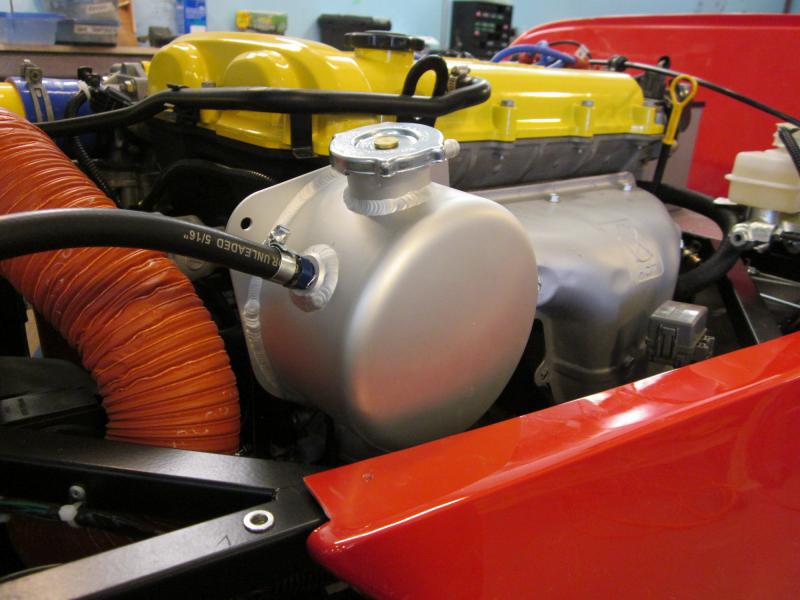
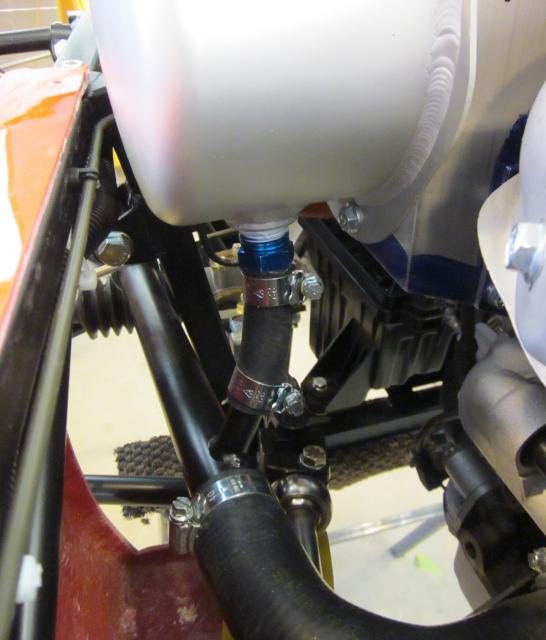
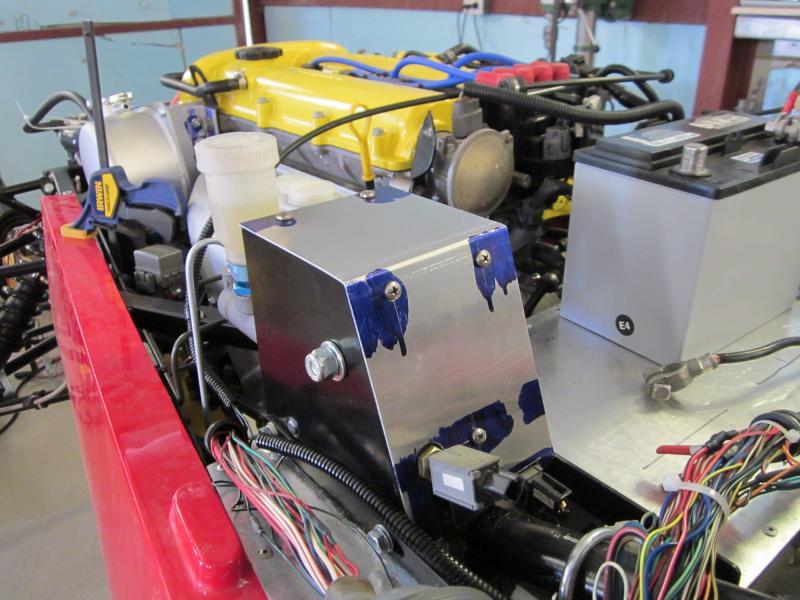
I also got the expansion tank mounted this weekend. WF sent a plastic bottle that mounts to the scuttle. That seems to work fine for all the other builders but once again I decided to do it differently. I got an aluminum tank from JEGs and mounted it forward over the system fill fitting. The structure mounts to the lifting eye attach and to the power steering pump mount. The mount is bolted together but I plan to get it welded.

-
Sounds like a plan. I took a break today from 1 to 6 PM as the hangar/shop was over 90 F even with the swamp cooler running. :ack: And I *am* interested in comparing your WCM to my Westie. Dan
-
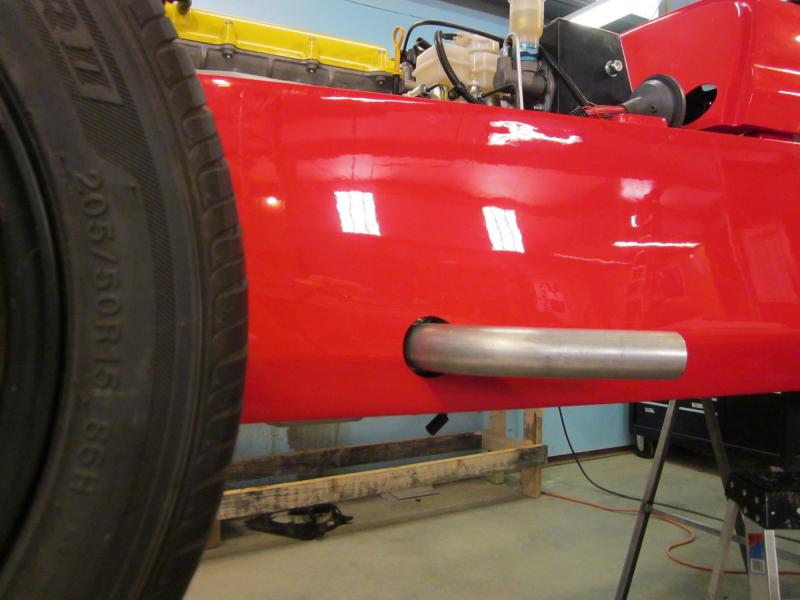
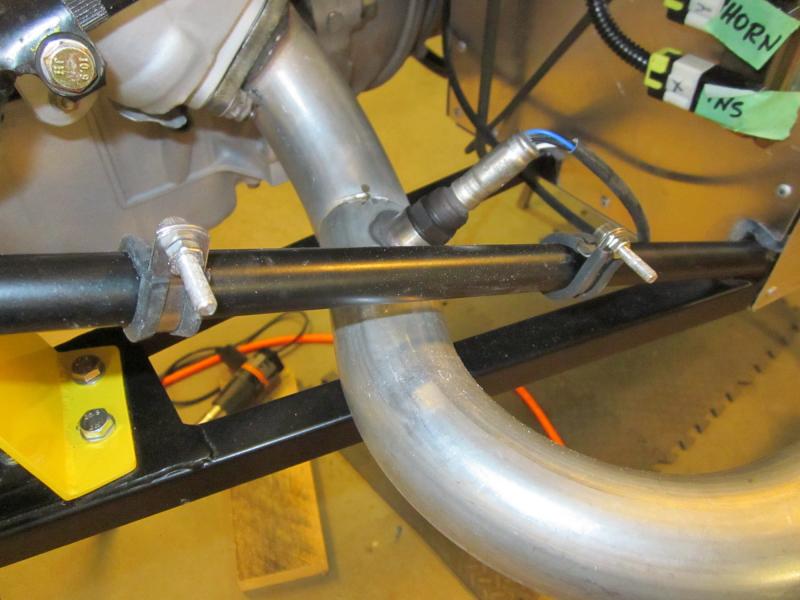
The plywood template for the exhaust hole worked just fine. After locating the body, I drilled a 1/4 inch pilot hole from the inside. Then the hole saw through from the outside. After a bit of sanding drum action, it fits rather well.
-
Nah. I'm the kind of guy who sees a cut-off wire (that I cut a week ago) and wonder what it's for, and why haven't I spliced it? I added probably 20 hours to the build time being paranoid and labeling stuff. I'm home in the middle of the afternoon answering questions on the internet because I leave the shop when it goes over 92 with the swamp cooler running. The donor car didn't have ABS but it had the fuse block and ECU wired for it. Not any more.....
-
Correct, the OP has no immediate plans for a turbo. Flyin' Miata added a turbo to theirs, so there is actual builder support for that. Back to the build thread. In my opinion, there is no such thing as too much maintenance access. The plans have you riveting the pedal box cover in place. Not for me. I made a new cover, shown in the first photo before bending. The second photo shows the 5mm screws threaded in to the tapped holes I made in the structure. You can tell I was a machinist in a previous life as I like to use Dykem layout fluid. The paint comes next.
-
Nice tidy installation you have there. :driving: Who signed the pedal box cover? Dan
-
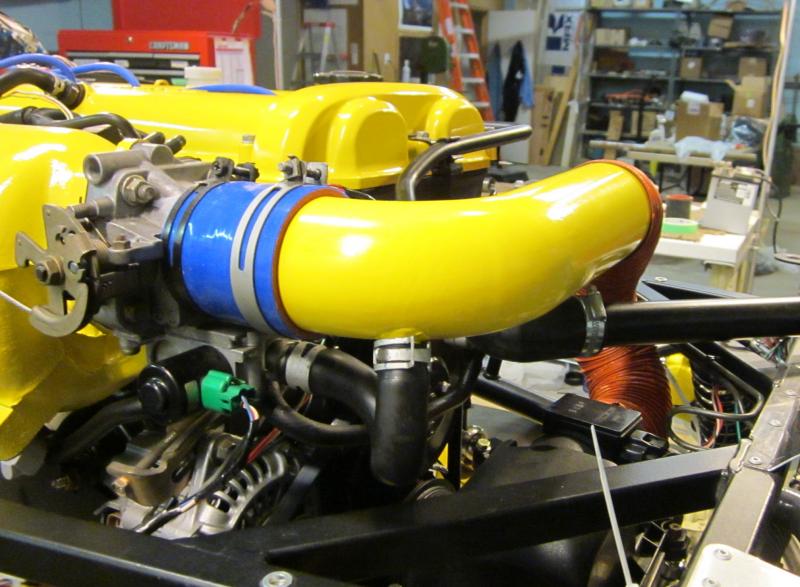
Some more little jobs. I posted photos of the induction elbow before welding, so here it is after welding, paint, and installation. Second, I wondered how to determine where the hole goes in the bodywork for the exhaust. So I cut a hole in a piece of plywood just big enough for the pipe. Then I used a pair of wire clamps to locate the plywood after fitting the body. Hey, it might work. And the third little job is making and installing a blankoff plate for the inertia reel seat belts. I'm putting in 4 point harnesses and won't be using those holes.
-
Gorgeous car. :hurray:
-
Not yet. I got a spare oil pan from Flyin' Miata but I haven't done anything with it yet. I haven't reserved the time in my schedule yet. I did add two 1/4 inch spacers to the motor mounts, so mine should have 1/2" more than stock clearance. I'm sure that if you offered them for sale you would get multiple takers. I would much prefer to buy one than design and make one by myself.
-
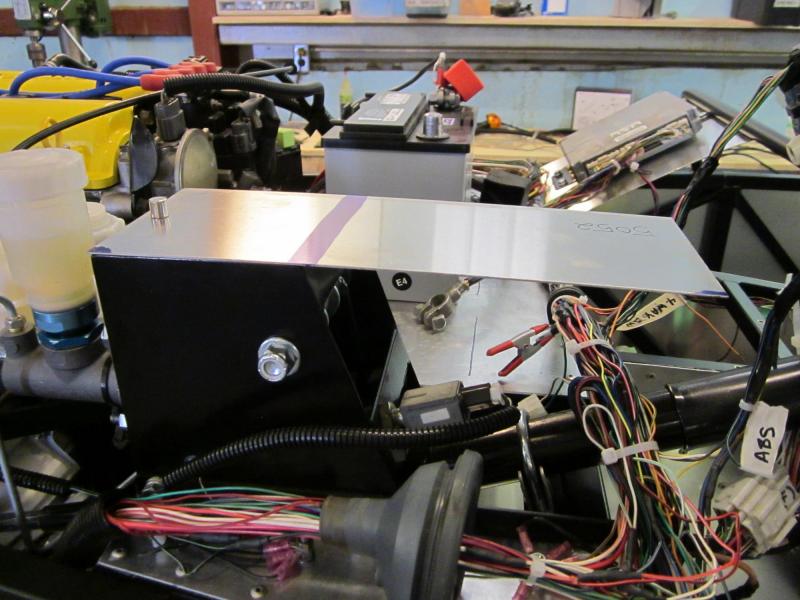
Yes, I admit, I like building stuff. The Westie is turning out to be a bigger project than I initially thought (when has that ever happened before? ). I've now passed the 400 hour mark. That's 130 on dismantling and overhauling the donor and 270 building the new car. I'm likely slower than average. For example I studied the Mazda schematics and labeled every wire on every connector before starting surgery. That probably added 30 hours, but it started and ran the first time I turned the key. Also witness the cleanup and airbrush painting of stuff like the brake calipers, and my unique induction manifold with lathe-turned parts. The good feature to balance that is the price. I've been keeping a folder with expenses and so far it's $25,400 including the good condition 1997 Miata. I expect the total to get to $27k on the road with the planned MegaSquirt. So now I'll go out on a limb and estimate that if you buy a refreshed donor pallet from Flyin' Miata, you'll probably spend $2k more and spend 100 hours less.
-
I received my Westfield kit in February and am doing my own donor car refurbishment. I'm not going to comment on car makes on this site and in particular on this thread, but you're welcome to PM me about my experiences. Also, he hasn't been here recently, but MPG is building a Flyin' Miata Westie near Boston.
-
Yeah. I've read the Miata forums and talked to owners. Their stories run the whole range from 'ticks for 10 seconds' to 'ticks for 20 minutes', although I would do some serious investigating if mine ticked for 2o minutes (like disassemble the lifters). I ain't worried yet. Thanks for the comments, Dan
-
IT SOUNDS GLORIOUS! It has a world-class valve tap, probably because it hasn't pumped up the lifters. And I'm sure it's throwing Check Engine codes like a major league pitcher. I was surprised the ECU (stock Mazda) would go out on strike. I haven't run it more than 10 seconds because there's no water in it. OK, back to the build thread..... Dan
-
Please allow me to take this back to the public forum, as others may have a better answer than I do. That's the press knurl on the wheel stud in the tinypic, and you are looking for the studs to match your holes, correct? Mine were pressed in at the Mazda factory, as my WF uses the uprights and spindles from the donor MX5. Other WFs use other spindles and I don't know how standard the auto industry is on this. I would NOT assume that yours and mine are the same. If you have the hub with holes and need to buy the studs, you need to measure your hole diameter and buy the studs that are designed to press into that hole. The amount of interference for a tight press will have been calculated by the stud manufacturer. I know of 2 good ways to measure hole diameter. Unfortunately, both need tools not found in the average home shop. One is to use a gauge pin set like this: http://www.use-enco.com/CGI/INPDFF?PMPAGE=335&PMITEM=326-1332 and the other uses a small hole gauge and a micrometer. http://www.use-enco.com/CGI/INSRIT?PMAKA=615-6260&PMPXNO=950942&PARTPG=INLMK3 I don't know where you are, but I would be happy to measure your holes (but not Slomove's stud :ack:). Any other ideas out there?
-
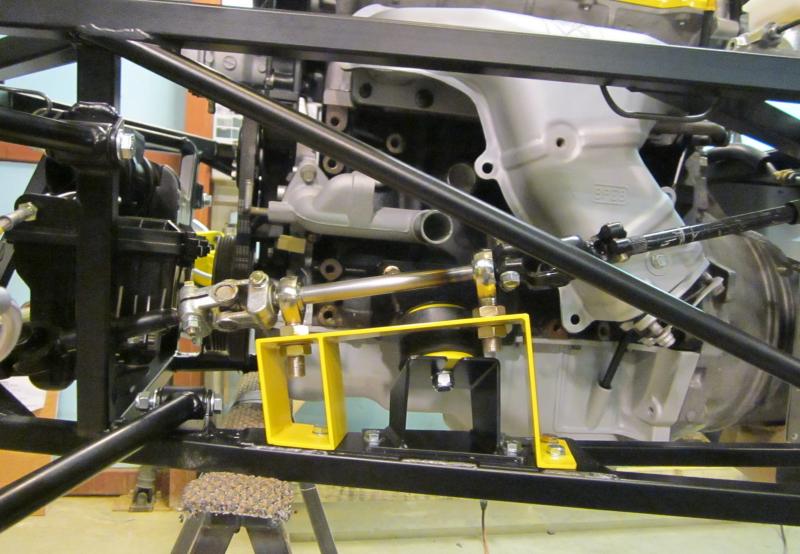
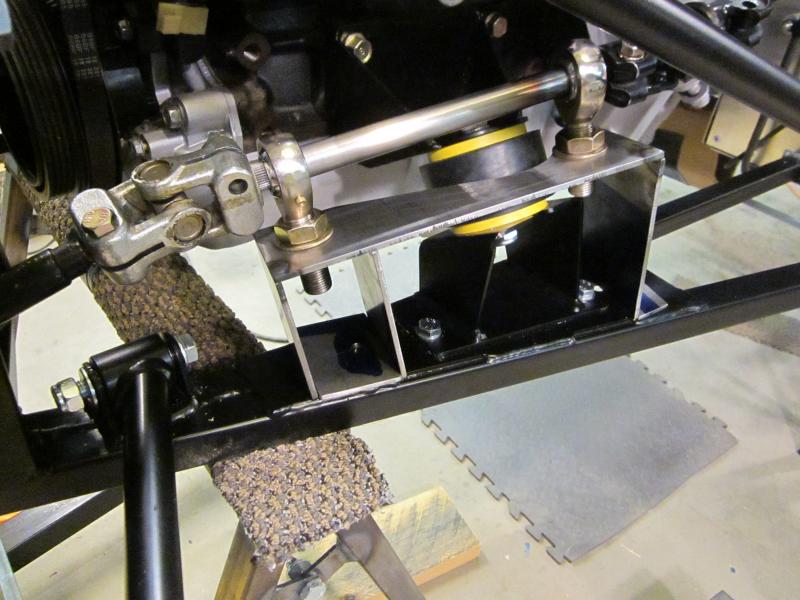
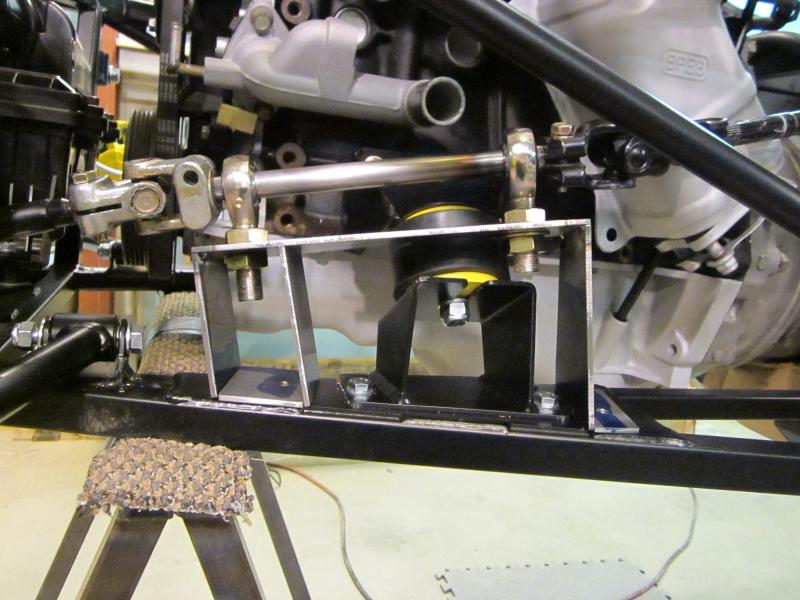
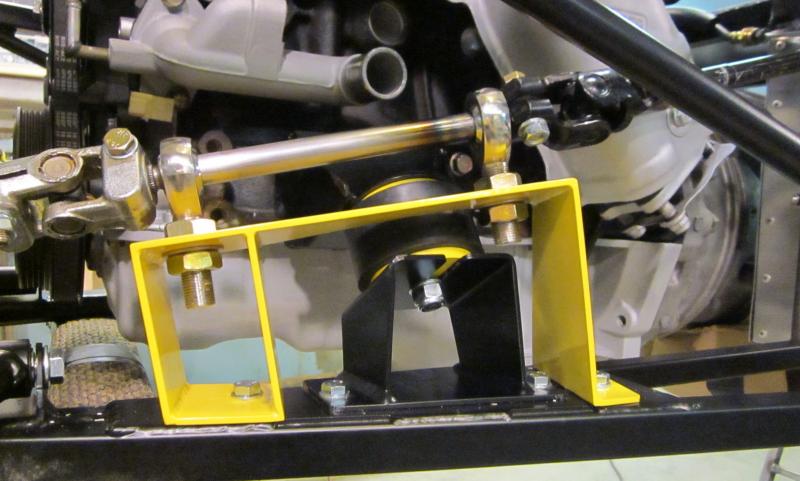
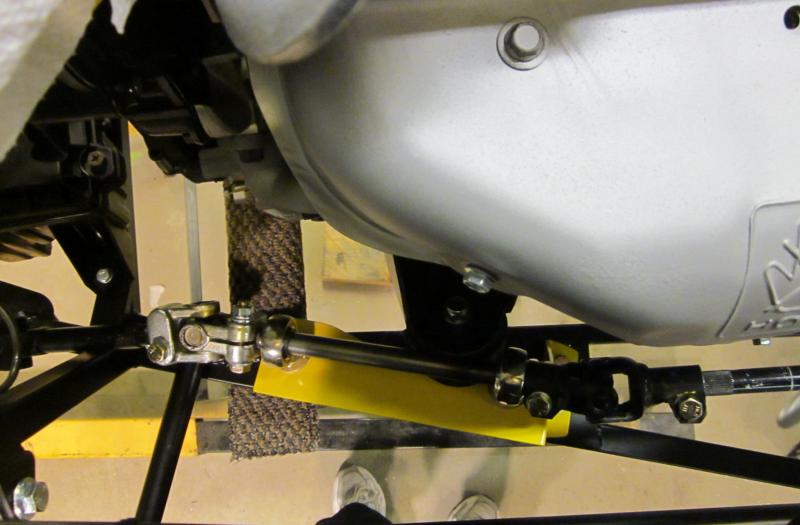
I assume the manual is intended for RHD (as it claims it is) and there are a few problems building a LHD car. Here's my solution to the steering column puzzle. I use the bandsaw/grinder/lathe at my disposal and hire out the welding to an expert. In this case, I bought a pair of 5/8 rod end bearings and invented a bracket to hold them. This design maintains the telescoping function of the steering column in case my front end gets a foot closer to me. That's a safety feature I really want to keep.
-
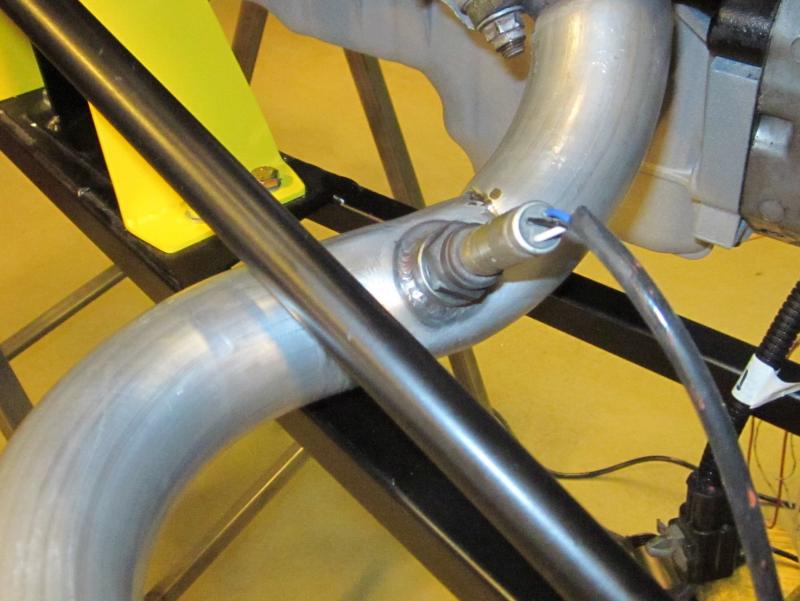
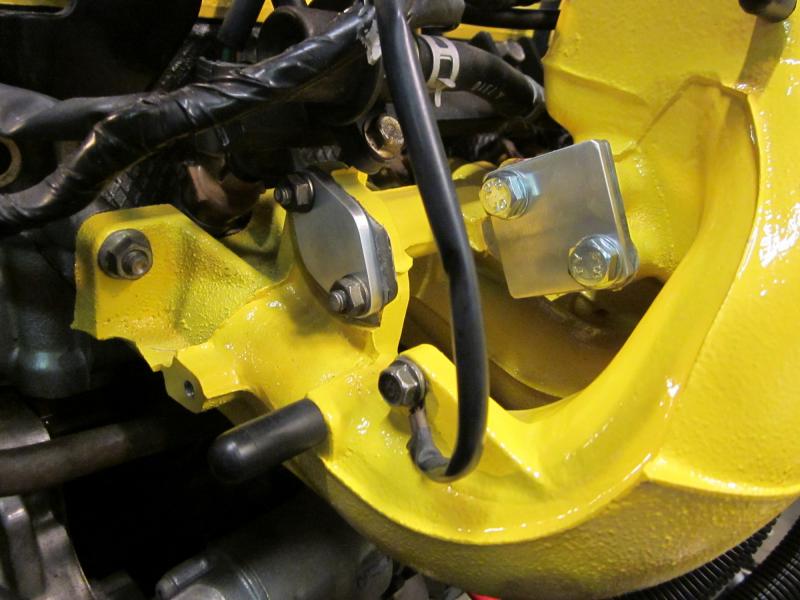
Yes, the clutch master was moved up 1 inch so that the force and stroke match the slave. The half of the forward plate that holds the clutch master (not the brake half) was removed and a new plate welded in. Then all was powder coated to hide the rework. And speaking of welding, the WF kit came with the exhaust downstream of the Mazda header, but there's no O2 sensor bung. So I added that. The second photo is the EGR blank-off plates. I was planning to keep the EGR valve but it just didn't fit. It does very little for emissions control, but it does increase highway gas mileage a bit.
-

Clueless About Solar Panels; Another Avenue of Learning
NVP66S replied to xcarguy's topic in General Sevens Discussion
My personal experience is with rigid panels. Flex panels are certainly lightweight, but you need to stick them to a relatively stiffer substrate. I know metal building roofs work and they oilcan a bit. -
#12 says: "Avoid birdcage structures" I guess by that time, our sevens were pretty much obsolete.
-
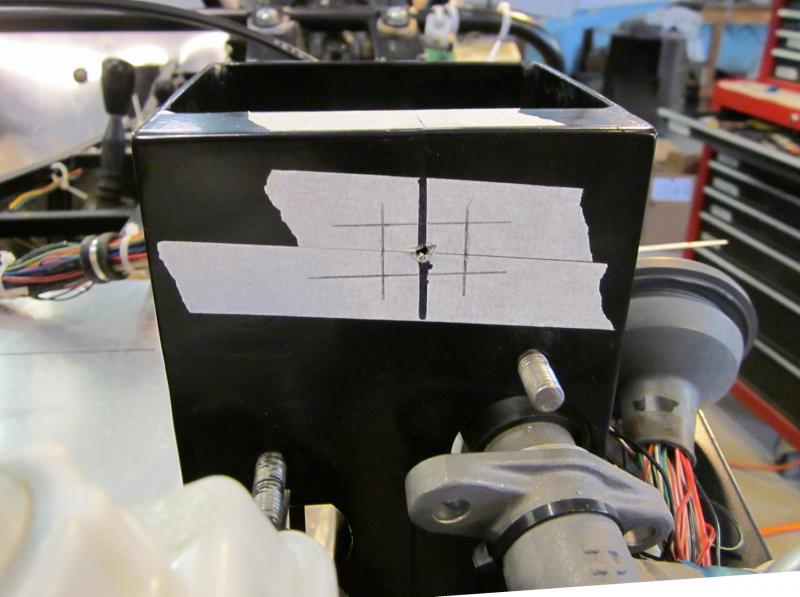
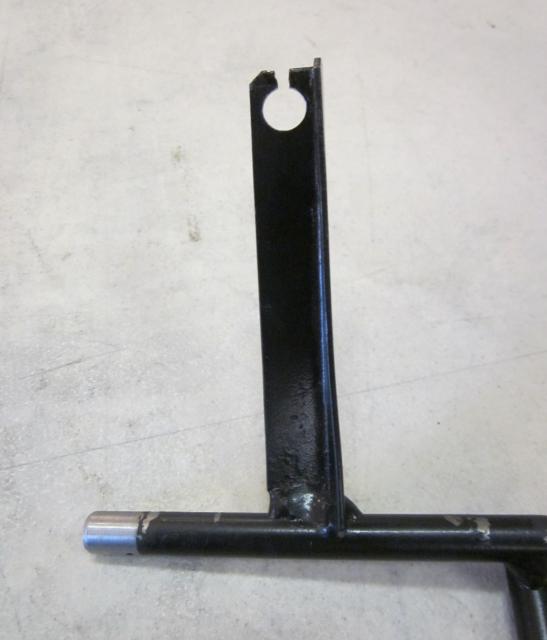
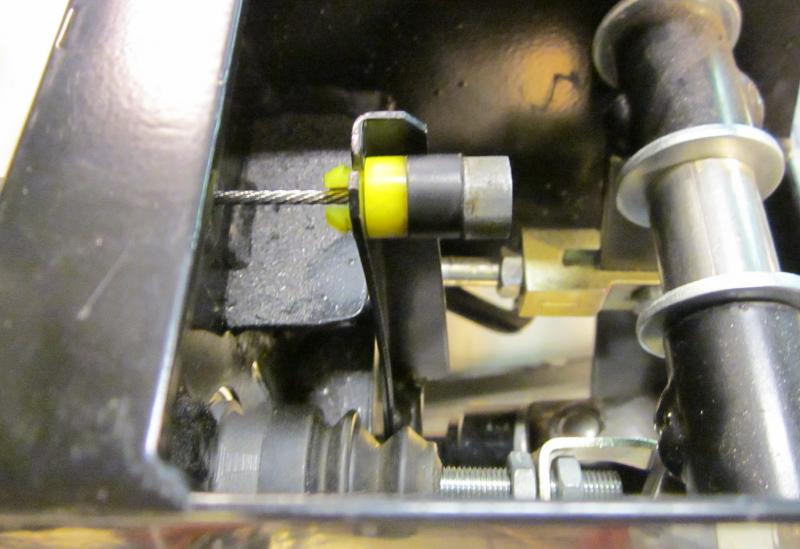
Been workin' on the throttle cable. WF sent a cable that needs some extra bits, and the Flyin' Miata build diary used a modified Miata cable. So I had a decision to make and I decided to do it a 3rd way. I modified the WF pedal box to take an unmodified Miata cable. I figure if I'm in Lower Slobovia and need a cable, the Miata part will be easier to get. why the paranoia? because I dumped my motorcycle when I was 17 and didn't notice I had bent the clutch lever and it was tightly grabbing the cable end fitting. About 100 shifts later, the cable tore. getting home without the clutch was OK except for the stop signs. The first photo is the outline for the rectangular pedal box cutout. Second photo is after drilling 5 pilot holes for the Dremel. The brush on the left is the shop vac that sucking up most of the grit. The 3rd photo shows the mod to the throttle pedal ( as sent from WF it was a single small hole). And the 4th photo is the installed cable. The yellow and black bits nearest to the pedal make up the spherical bearing that's supposed to keep the wire from flexing.
-
Clueless About Solar Panels; Another Avenue of Learning
NVP66S replied to xcarguy's topic in General Sevens Discussion
Arizona Wind & Sun sells this line of stuff and their web sites have lots of technical info and advice. I've installed 2 systems of about 100 W each, and looked in great detail about a 3 KW roof system. The good charge controllers (like Morningstar e.g.) need to be set for flooded or immobilized electrolyte (AGM, absorbed glass mat) as the float charge is a slightly different voltage. http://www.solar-electric.com/