
Pokey
-
Posts
410 -
Joined
Content Type
Profiles
Forums
Store
Articles
Gallery
Events
Library
Everything posted by Pokey
-
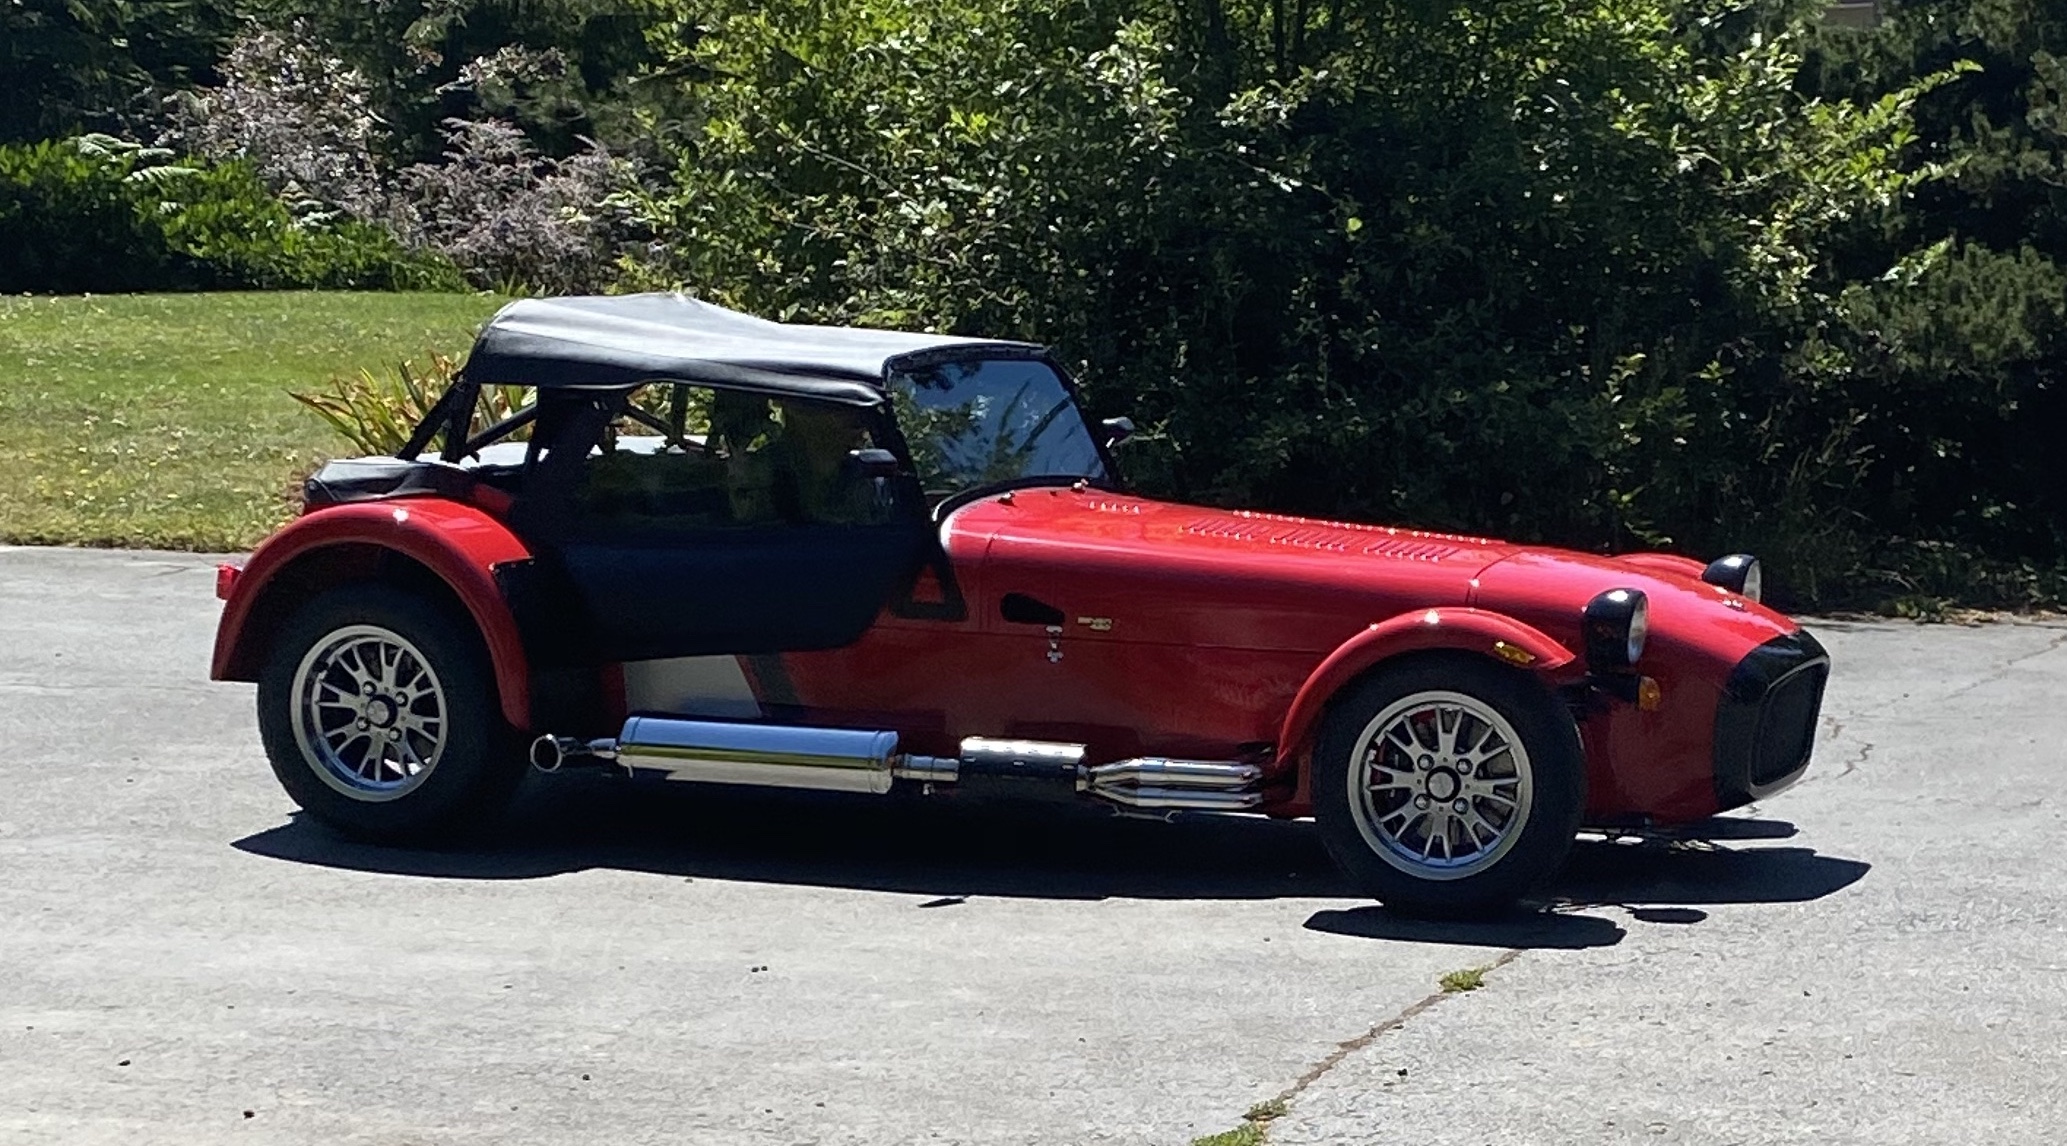
I liked Vovchandr's response to my comment about the front wings, these little things just highlight that the Seven is a car made by hand. Pretty much lemon/lemonade thinking, but it works for me.
-
Sadly John, your explanation rings true to me...
-
Makes sense, thanks. A thought that came after I posted the question was perhaps the carbon fiber won't conform perfectly to the wing so if I don't use the rubber trim small gaps will be evident between the attachment points? I wanted nylon bolts to affix the rear wings anyway, so added button head socket bolts to an order I was placing with McMaster. I'm not sure I can guess what circumstances would lead to my having to replace a carbon fiber stone guard that also doesn't involve replacing the wing it is attached to, but there is so much I don't know and appreciate being able to benefit from other's experiences. Thanks again!
-
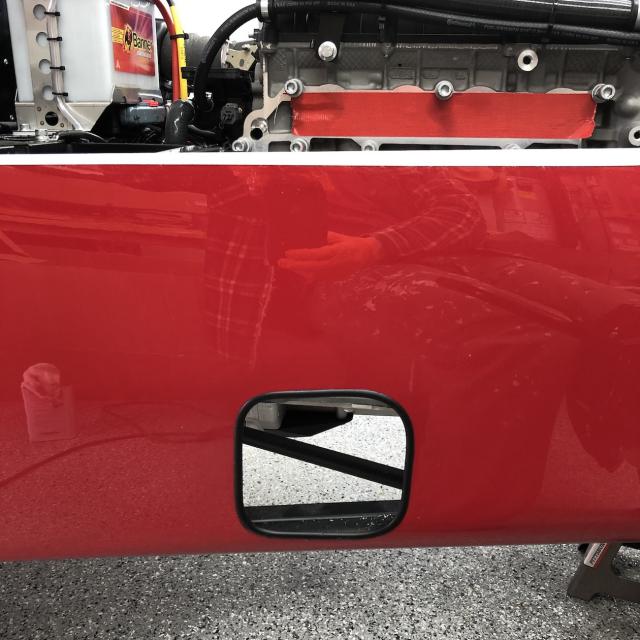
To all you recent builders, did you use the rubber trim around the rear wing stone protectors? I'm considering not using this trim so that the stone protectors lie flat against the wing and don't dimple at the rivets. I'm also unclear as to what the purpose of this trim might be? Is this an IVA thing the Brits have to deal with?
-
I think you win Anker, I'm missing a retaining clip. I've not found a Ford OEM part number yet, but ordered a clip from Dorman that looks to be somewhat universal. If that doesn't work then this may wind up being something I'll have to rely on Bruce to get from Caterham.
-
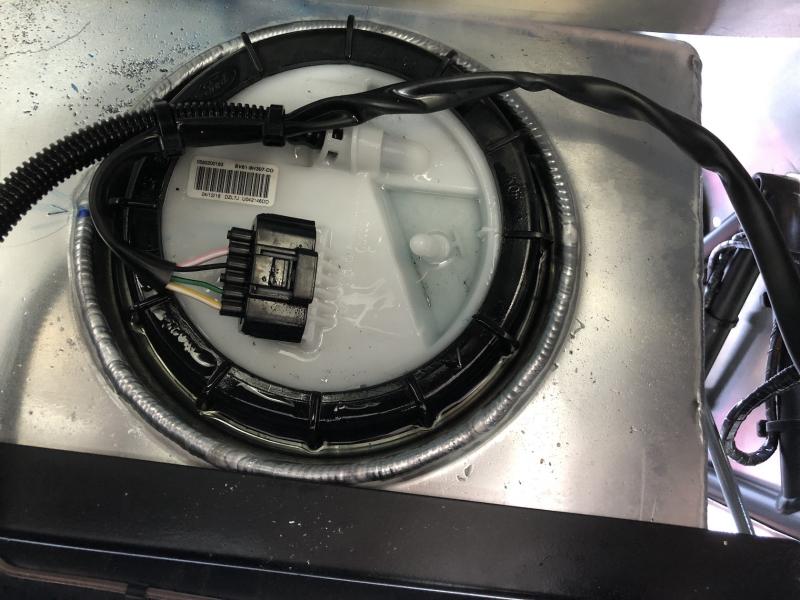
That, my friends, is gasoline puddling on top of the pump housing. We tried to fire the engine last night but it was apparent it wasn't getting fuel. Then someone noticed something dripping... The end of the fuel line presses into the pump housing and it wasn't pressed all of the way in. Having said that, I'm not sure if it came from the factory like that or if the fuel pressure pushed it out as there is no mechanical fixing, just a press fit. I've reached out to Bruce to ask him as that just doesn't seem right to me. Maybe a circlip is missing?

-
Let me guess, you needed the Elan because the Westfield wasn't safe in the wet... I'd call it a perfect fit if the gears slide on after a little polish. Best slow things down or you will wrap it up before I do.
-
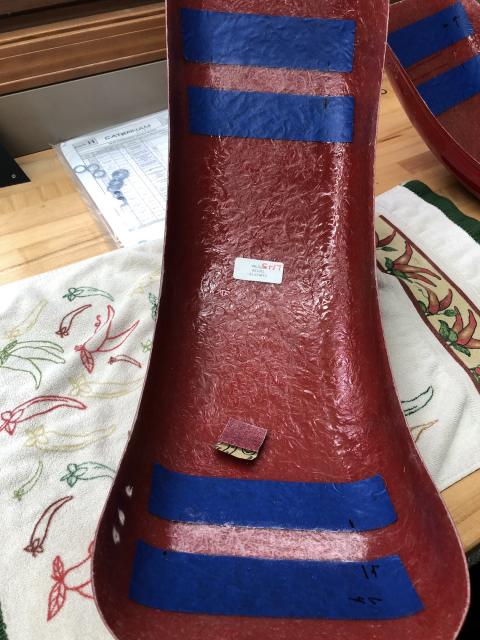
I did see your post about the wings and the spray on liner some time ago and was toying with the idea of doing something similar as I've read about "star" cracks forming from rock hits. But then I unwrapped the wings last week and realized how insubstantial they are. I haven't put one on a scale but would guess not too much more than a pound apiece. That got me thinking about their purpose, weight, how carbon fiber would be a nice upgrade, that wings must really be a consumable on a Seven, what a pain it is to do anything with COVID around, etc. so I decided to not make a decision and just roll on. Well, what I really decided was to get the wings on and then think applying an undercoat myself. Any words of wisdom regarding the application of the epoxy? I'm using a 3M version, but same thing, two-parts, a gun and a mixing nozzle. My thinking is a thin bead on each wing stay, set them down on the stay and gently tape each end to the tire - no pressure to speak of just keep things from moving. Then after a day come back and lay down a larger bead on each side of the stay and wipe smooth like I would caulking with silicone. The first step seems the trickiest - getting things to stay put. Another thought was a strap around the tire and wing but that just seems like it would be harder to do and I don't think I need to create a clamping force as the goal is not to drive all of the epoxy out of the gap.
-
Hadn't thought about the pump pulling air from the sump tank. I added a quart to the tank before cranking to create oil pressure.
-
John, I'm sure your wife loves you dearly and it isn't her fault that you neglected to mention that the dyno was for your safety. My garage is the safest room in our house, full of every manner of safety-related tools (toys).
-
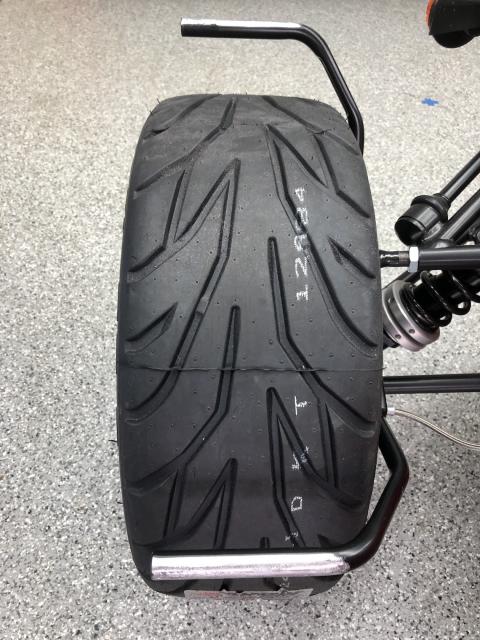
No Big Heads, just fixing straight to the stay. All prepped and ready to go.
-
Well that would explain it then! Off to pick up some acid.
-
Yes, I believe their jigs are handmade I'm going to epoxy the wings on. Bruce B. recommended a 3M panel epoxy, and an epoxy sounds to my ear better than the alternatives.
-
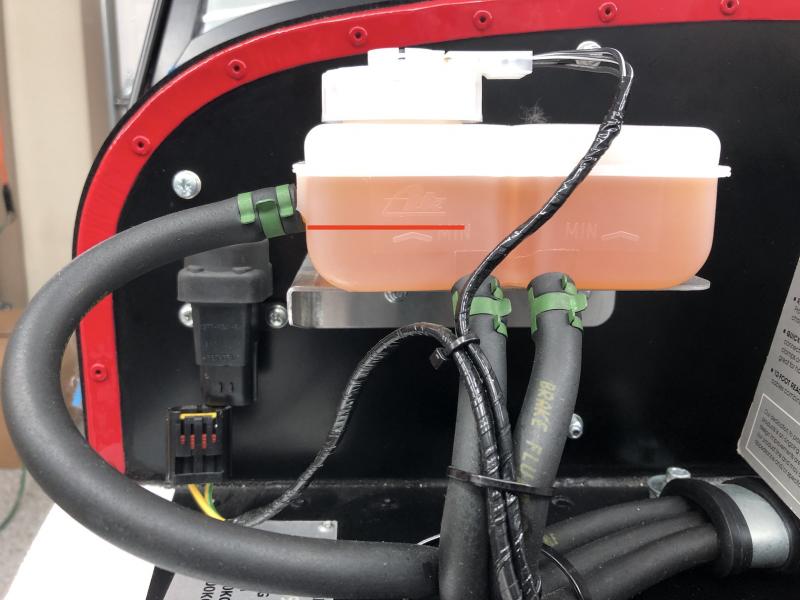
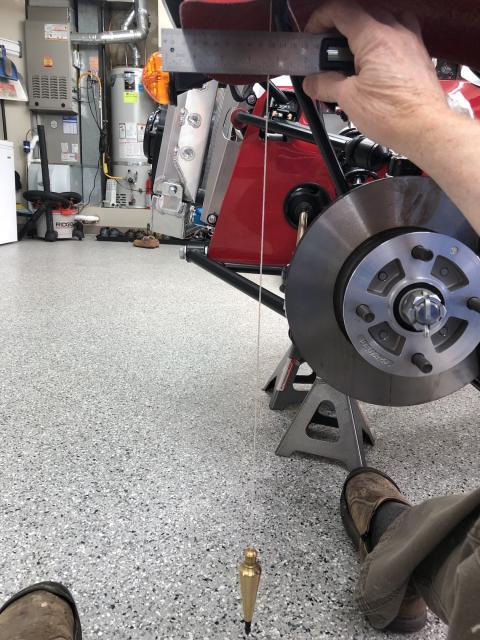
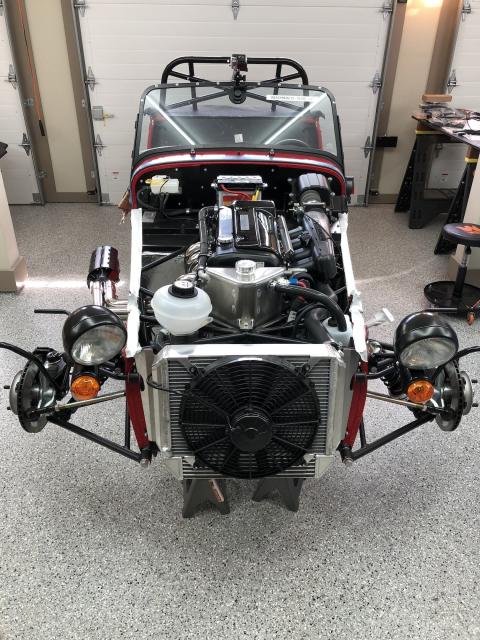
Two days of some non-dreary weather got me thinking about turning the motor over so I deemed it time for fluids. Six quarts of motor oil into the top end and still nothing showing in the sump tank. This is my first dry sump setup and I was assuming gravity would create equilibrium between the motor and the tank, but I guess it has to be pumped there. Coolant is added by filling the overflow tank, well not so much an overflow tank as a pressure-release vessel, and air released through a bolt hole in the top right of the radiator. Caterham very thoughtfully made the overflow tank opening just the right size for a mouth, so bleeding the system was easy. I’m just glad there were no witnesses. Bleeding the brakes was equally convenient as the wheels aren’t on yet. The clutch bleed screw was a little harder to access at the top of the bell housing but not that bad. However, my helper (wife) and I spent 20 minutes at the end of the day trying to bleed the clutch with no luck. It was apparent that air was getting in but I couldn’t see any fluid leaks anywhere. That got me thinking about the leak I wouldn’t be able to see down in the bell housing where the slave cylinder lurks. And so ended the day with thoughts of pulling the motor again. The next morning I decided we would try to bleed the clutch again but this time having my helper release the clutch pedal slowly as a diagnostic test to see if we were drawing air around the seals in the master cylinder. It was about the third time topping off the reservoir that I realized one of the three hoses exiting the reservoir did so at the side rather than the bottom, and that it did so above the min line. Funny what happens when I slow down to really see what I’m looking at. So even though I thought I was keeping the reservoir full I was in fact allowing the fluid to draw down below the top of the outlet for the clutch. Perhaps someone smarter than I am knows why Caterham puts the clutch outlet on the side rather than the bottom, but it will take a truly gifted individual to understand why the outlet is above the min level. Oh well, my fault for not paying attention like I should have. With fluids in and the inertia switch disconnected it was time to turn over the motor, well it would have been time if the battery wasn’t flat. I’m writing this the day after and have subsequently found that the battery isn’t taking a charge. I’ll look up the battery spec’s in a bit to make sure, but I’m assuming it is an AGM which means it wasn’t shipped dry so the battery is DOA. Eh, today the weather is, in fact, dreary, so I’m not in the mood to start it up anyway. Yesterday ended with getting the front wings prepped. I put a plumb bob on the front wing stay and measured out 80 mm as stated in the build manual and marked. Comparing the two wings to make sure the marks were in the same place was puzzling until I realized that Caterham drilled the holes for the running lights on one side about a half-inch back further than the other.
-
Oh don't think that I didn't double-check after it was installed given I had just finished one axle-end assembly only to realize I didn't silicon between the De Dion ear and the tube. So, yes, I'm well versed in doing and then doing again. I like to consider the first attempt practice.
-
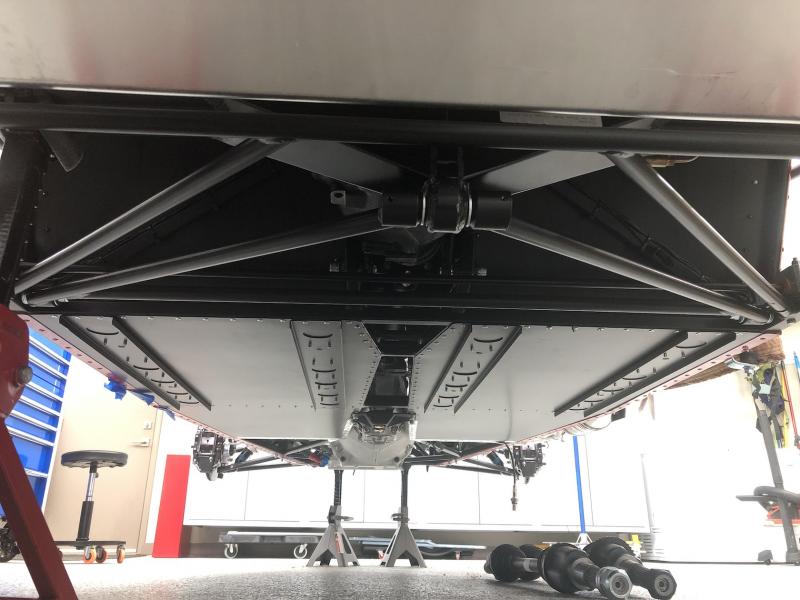
Today was rear suspension day. No drama, but if there was a video of me with that A frame and you sped it up just a little I think it would pass as an episode of Benny Hill. I'd shim with washers to get the axle centered, measure, nod in satisfaction, torque, measure, mumble to myself, disassemble and repeat. Ironically, when all was said and done I wound up with an equal number of washers on both sides.
-
I tried every angle I could think of and every time it wedged against the painted skin that wraps around the frame along the opening of the boot. Maybe desperation would have given me inspiration, but all I needed was enough room to work with the dremel so I didn't push my luck.
-
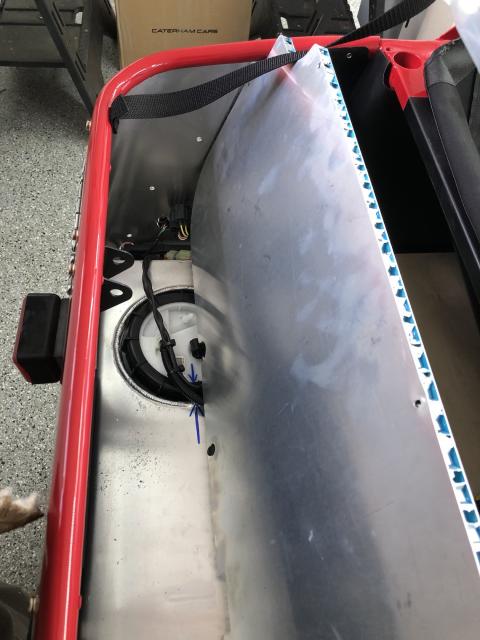
Screwed down, no adhesive. I could not figure out a way to get the honeycomb out from the top, so am assuming it was installed from below first and then the tank.
-
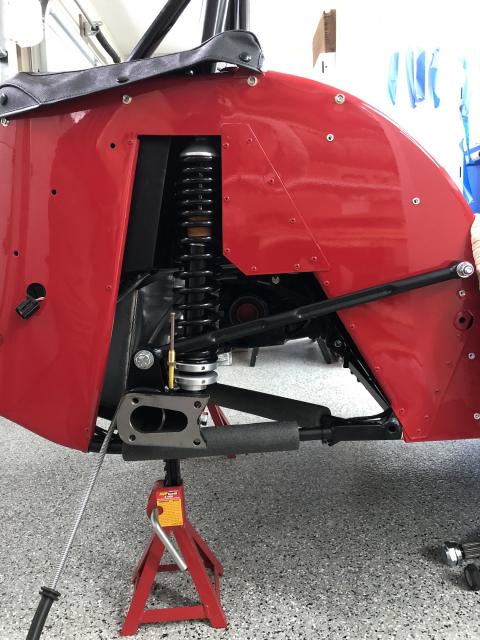
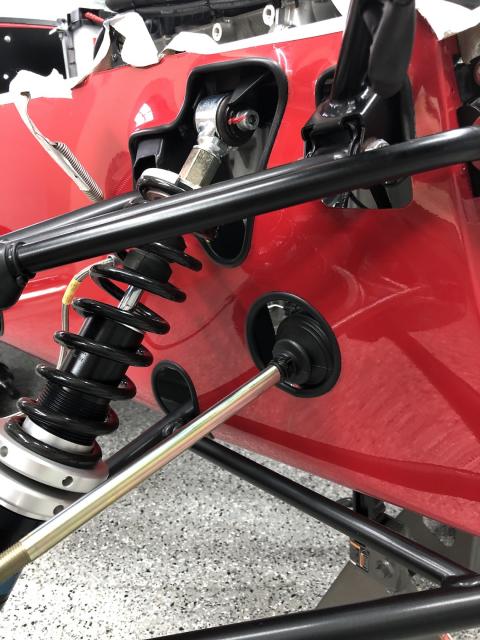
Next step is to attach the shocks, but you can't access the holes to mount the roll bar through the chassis from beneath with the shocks installed. Oh those tricky Brits... Thankfully I noticed otherwise it would be annoying to learn I needed to dismantle the rear suspension later in the build. So here it is with the roll bar installed:
-
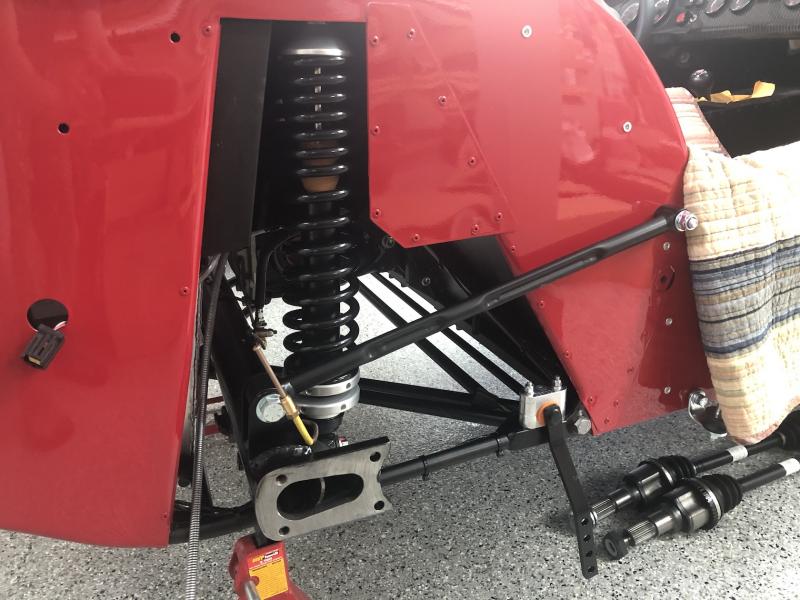
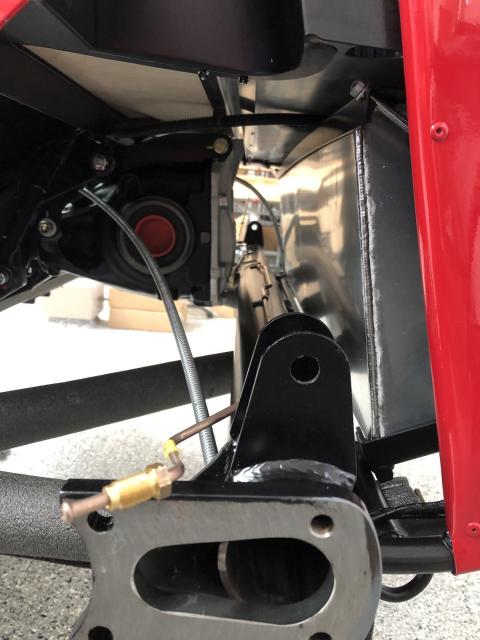
Even though I couldn't connect the braided brake line to the DeDion tube, I went ahead and fastened down the copper line with rivets and placed it in the chassis.
-
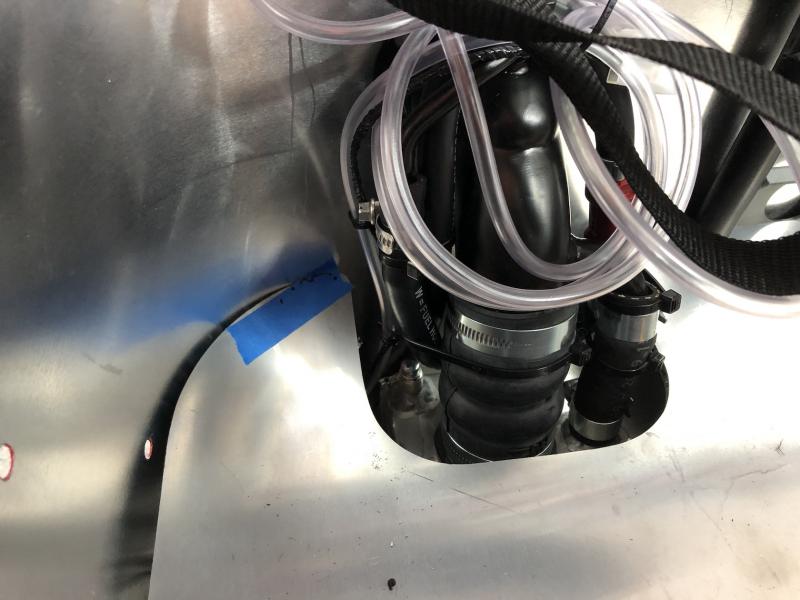
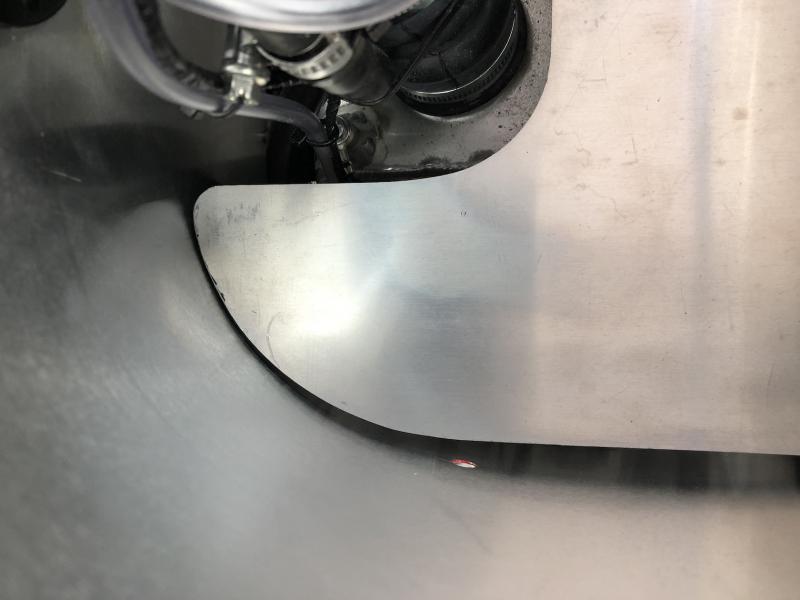
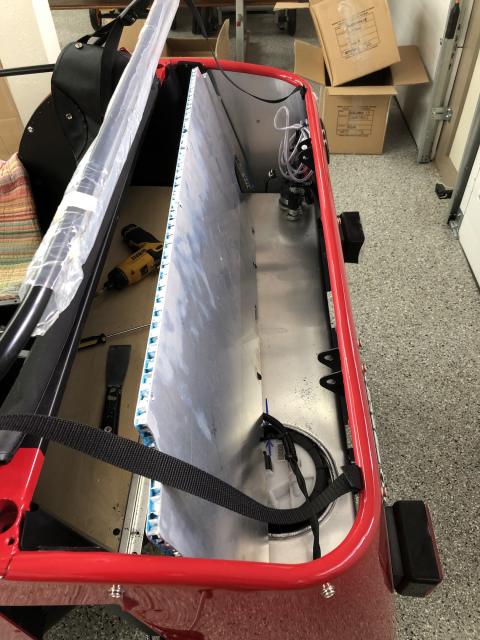
And when Mr. Beachman came by the other day he pointed out that the aluminum honeycomb in the boot that sits over the fuel tank was touching the skin, and that over time a crease will develop. I tried to remove the honeycomb to trim it but it must go in before the fuel tank, so with a dremel, 6" file and a little contortion was able to take off enough to create an air gap. Before: And after: And if you are curious what the side-profile of the honeycomb looks like:
-
With that in mind, I decided to finish the edge trim job.
-
Well, for those of you that don't pay attention to the news of Washington State, our governor announced the stay-at-home program continues until at least the end of May. That means I need to slow down the build even further if I'm to have something to occupy myself on the rainy weekends to come. Thankfully the inventory pickers at Caterham do what they do best and left yet more bits out of the build, this time the two jam nuts for the rear brake line. So good news is that will add a week to the build, bad news is the $1 of nuts cost me $11 with shipping.
-
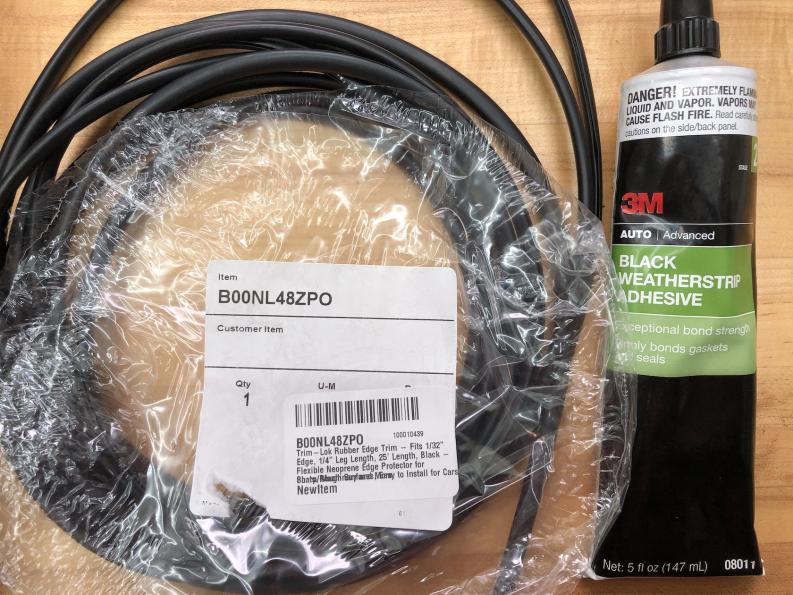
I chose a product that didn't have one leg longer than the other, but would have preferred it had the adhesive built-in like what you purchased. Here is what I used:
-
I might do the circle and control arm hole, but that's how far I got before being told I was done playing in the garage . I did, however, do the exhaust hole. Before anyone says it, I do realize the heat might be too much for the adhesive, and if so I'll just peel off the trim and clean off the adhesive residue - no biggie. I had the material and thought I'd see what it looks like. The front hole where the headlight bracket attaches is a real pain. I decided to only do the top half, as defined where the skin pinches against the chassis on both sides, and even that was tough. I didn't get the edge trim from Caterham, didn't see what I wanted on their online store, but after sleuthing settled on a product Trim-Lok makes. The next trick was figuring out what size, both the width and the gap. I wound up ordering 25' of three versions and settled on the smallest of the three. I liked the more petite look, and being smaller it conformed to the corner radii better.