sltous
-
Posts
184 -
Joined
Content Type
Profiles
Forums
Store
Articles
Gallery
Events
Library
Everything posted by sltous
-
No ports. Idle (hot) is around 1100. At this point TPP is 0% I did some data collection (I know I know I should have synced first) and I'm struggling to find any clear data to show the problem. There is a clear (if small, around 500RPM) bump in RPM on both good and bad downshifts, lambda drops outside of my narrowband sensor in both scenarios. After finding a carb sync and checking sync is good, possibly reducing idle and maybe adjusting throttle sensor (currently my resting voltage is at 0.36v and my resting throttle site is at 0), options for further testing include: swapping in my wideband innovate lambda setup for more rigorous data collection, upgrading to a much more robust data logging platform (I have my starry eyes pointed at the AIM PDM although that's a lot of $$ and a LOT of wiring for what is essentially a science project), maybe finding expert help.
-
The best setup I found when I was looking for a standalone O2 sensor was the Innovate DB Kit. I went to RCA garage who have good prices and a terrible website https://rcagarage.com/shop/gauges-pods/gauges/innovate-db-red-kit-red-leds-lc-2-o2-sensor-3796/ and then built a little MDF holder for it. Because the gauge was about the right size for my dashboard I could also temporarily pop it in.

-
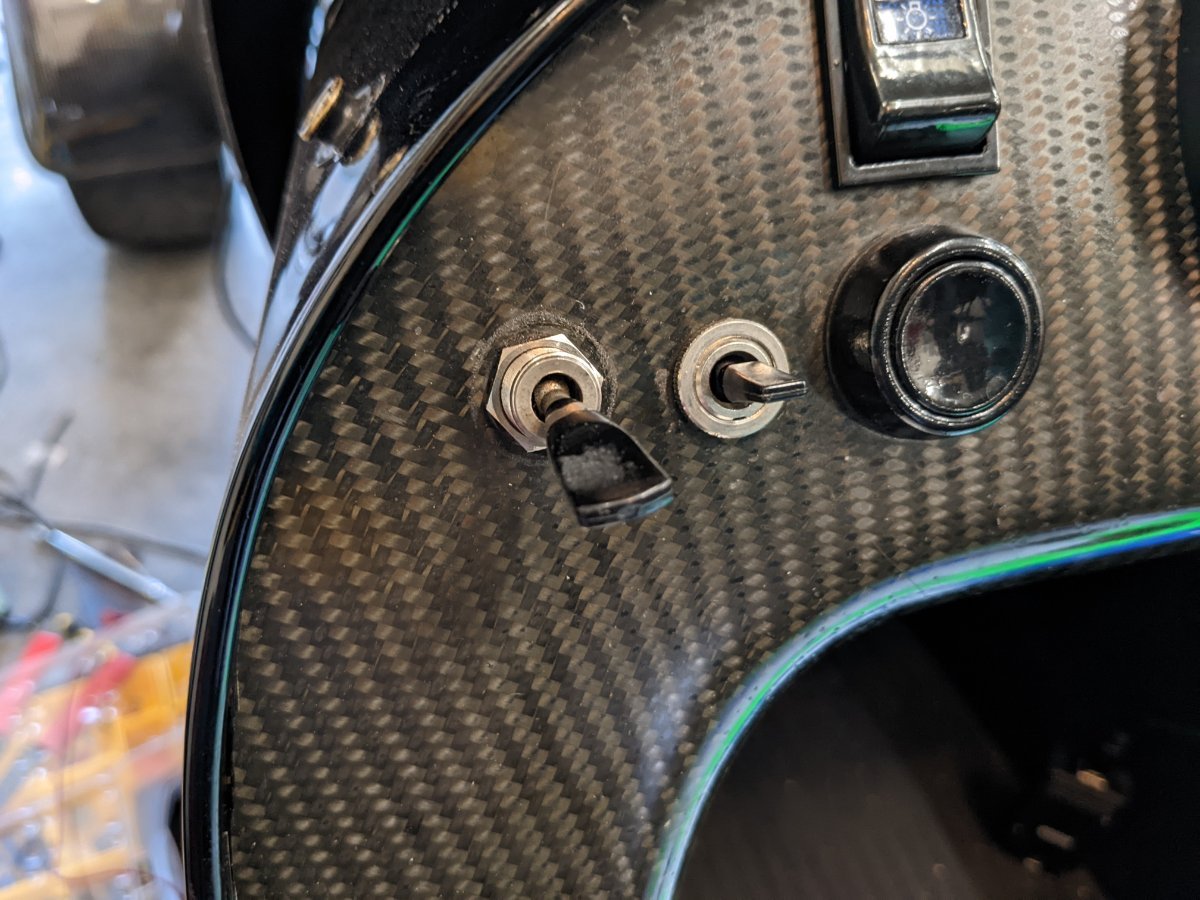
Thanks to ashyers for the pointers to look through how the various programmable functions are set up, I ended up changing from the push button I had originally planned to use to a toggle switch which is connected to 5V through the normally open pin and GND through the normally closed pin and the ECU 'thinks' I have shifted many gears. There is no actual gear sensor on the Caterham manual 6 speed (I think, feel free to correct me if I am wrong) and the ECU is not programmed to do anything different in different gears so this should be a very brute force way to trick my way into being able to track weirdnesses through a CAN data channel. PXL_20220425_012107889.LS.mp4
-
Fuel pressure is through an aeromotive pressure regulator at ~58psi and has looked stable every time I have looked at the gauge. It is not wired to my ECU so I have not been able to log that, something to consider adding. There is a secondary surge tank with a high pressure pump so I generally have not spent too much time considering if there are issues with the fueling system. TPS at idle looks stable and correct. I have not checked if the throttles are synchronized. I can try and find some 6mm rod stock and check. MBE maps sent your way, thanks for the offer. I have not touched the throttle or fuel maps.
-
Hi ashyers, I have been running into a problem where a significant amount of the time my intake spits instead of blipping when I try to blip for a downshift. I spent yesterday afternoon playing with AIM's math channels and trying to extract the 'bad' blips from the 'good' blips.
-
Well I am once again confused and a little frustrated by the lack of documentation. I have replaced my sureseal connector with an Econoseal 4 way connector, connecting the 5v line to a button on the dash, terminating the 12v and oil pressure lines with rubber plugs and grounding the ground line to the frame. Subsequently I was able to connect the 5v line via a button to an unused programmable pin input on the MBE 9A4. I did this based on the SBD motorsport FAQ https://www.sbdmotorsport.co.uk/ufaqs/input-pin-suitability/ but when I probed the output of pin 27 I discovered it is already outputting 5v. I tested: use of air conditioner compressor input both regular and inverted use of gear input both regular and inverted plotting voltage on the easimap screen Have I gone through a lot of effort to get a nice 5v signal when all I should have done was pulled the input to ground with my button? The SBD pinout document specifies all the outputs are LSD (Switch to Ground) is this also true for the inputs and simply undocumented?
-
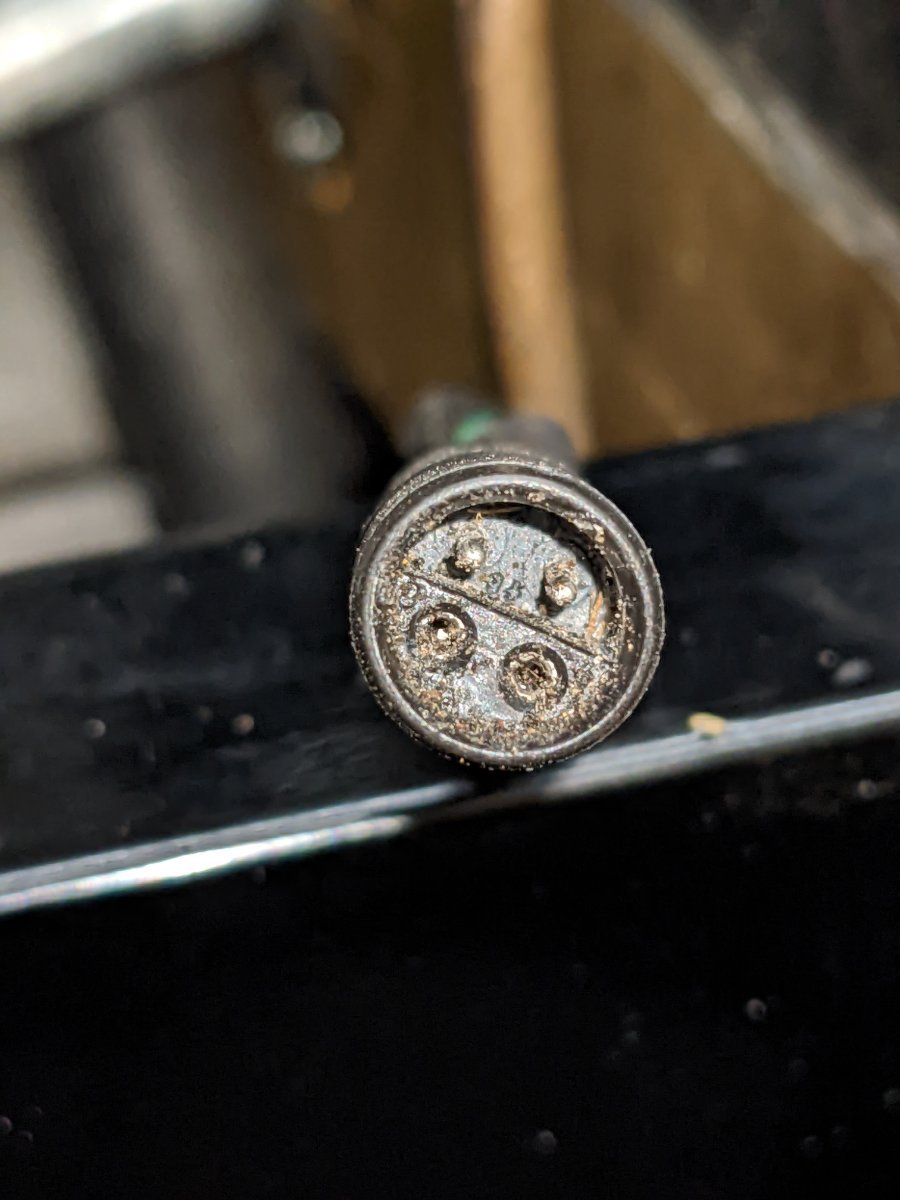
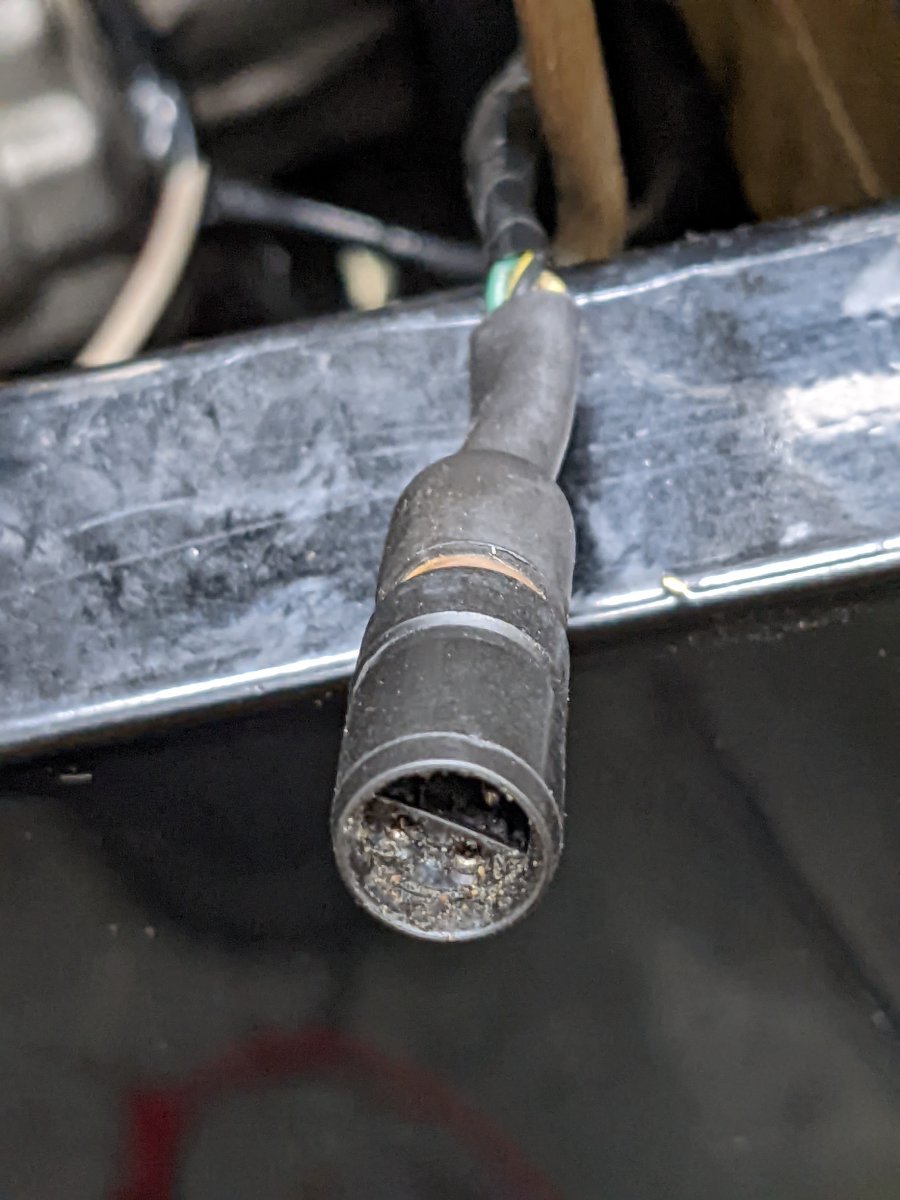
My current working theory is that this is a mini sureseal connector. It looks like Stack supplies sureseal connectors with their sensors so I am assuming that at some point this car had a Stack oil pressure gauge or sender or another sensor piggybacking on this portion of the wiring loom and this is a vestigial connector that it is safe to remove. Does this seem correct?
-
Fun plug identification game I have this plug in my car directly in front of the driver's footwell. It has 4 pins, two male and two female. The plug has a 12v, a 5v, a ground, and what appears to be the oil pressure output. Any ideas (a) what kind of plug this is (b) if I need to keep it (c) if there is a sensible way to purchase a mating plug What I am really looking for is a sensible place to tap into 5v in order to add a button to flag weird events to my ECU to my AIM Solo DL and I was hoping to use of the 5v reference feeds from the ECU at pins 4 and 22 on my MBE 9a4 so alternatives are accepted with gratitude
-
@MV8 I appreciate the advice. For me, this car already holds approximately 6 liters of oil, I'd prefer to keep it close to topped up and I'd prefer not to puke any over-fill into the passenger footwell, but I think I personally can't justify an expansion tank for a dry sump tank for a race engine for a weekend driver street car.
-
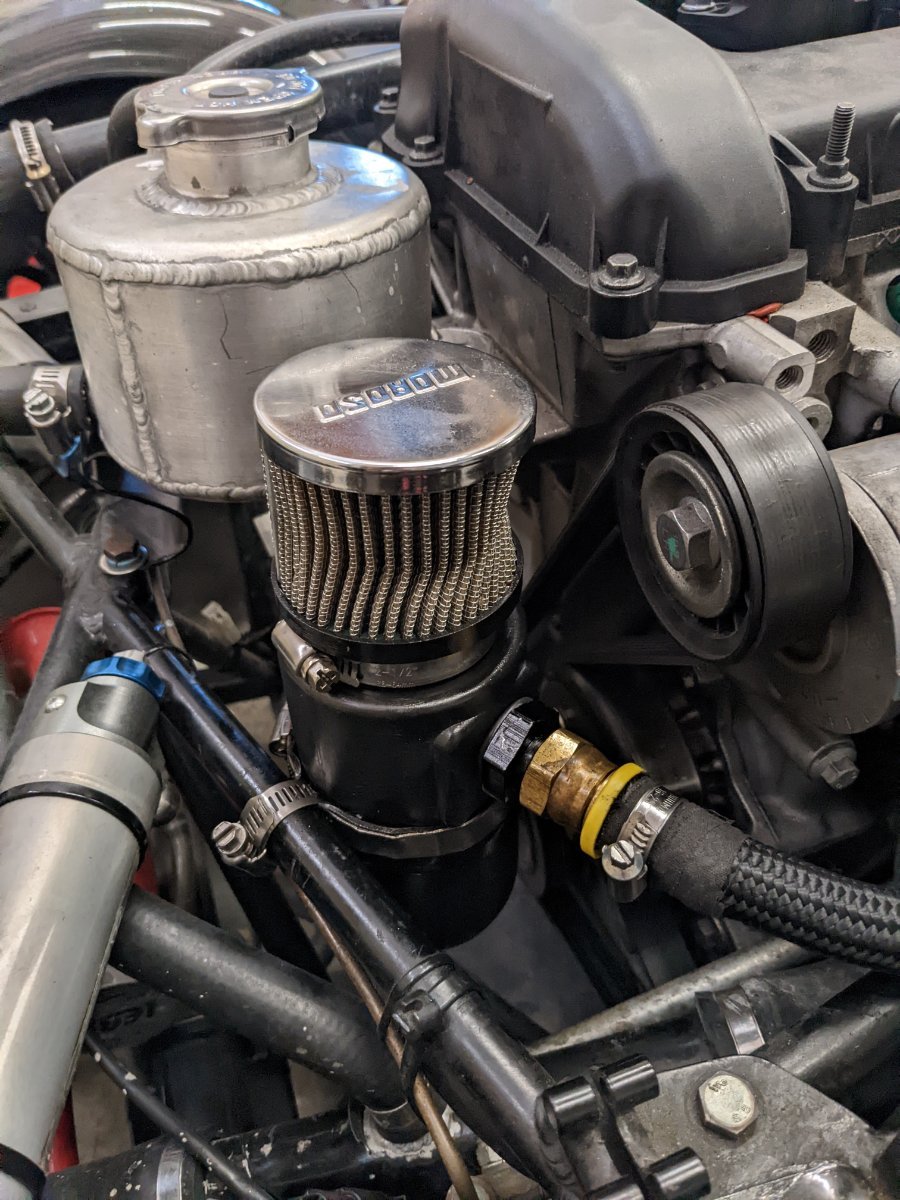
For now I have re-fitted the Moroso breather tank as provided by the previous owner. Neither of us is over the moon with the band clamp installation, and it is inconvenient that it is under the nose cone, but it has approx 1 quart capacity and doesn't puke oil so while I try and decide a new product this keeps me, the car, and and the roads clean.
-
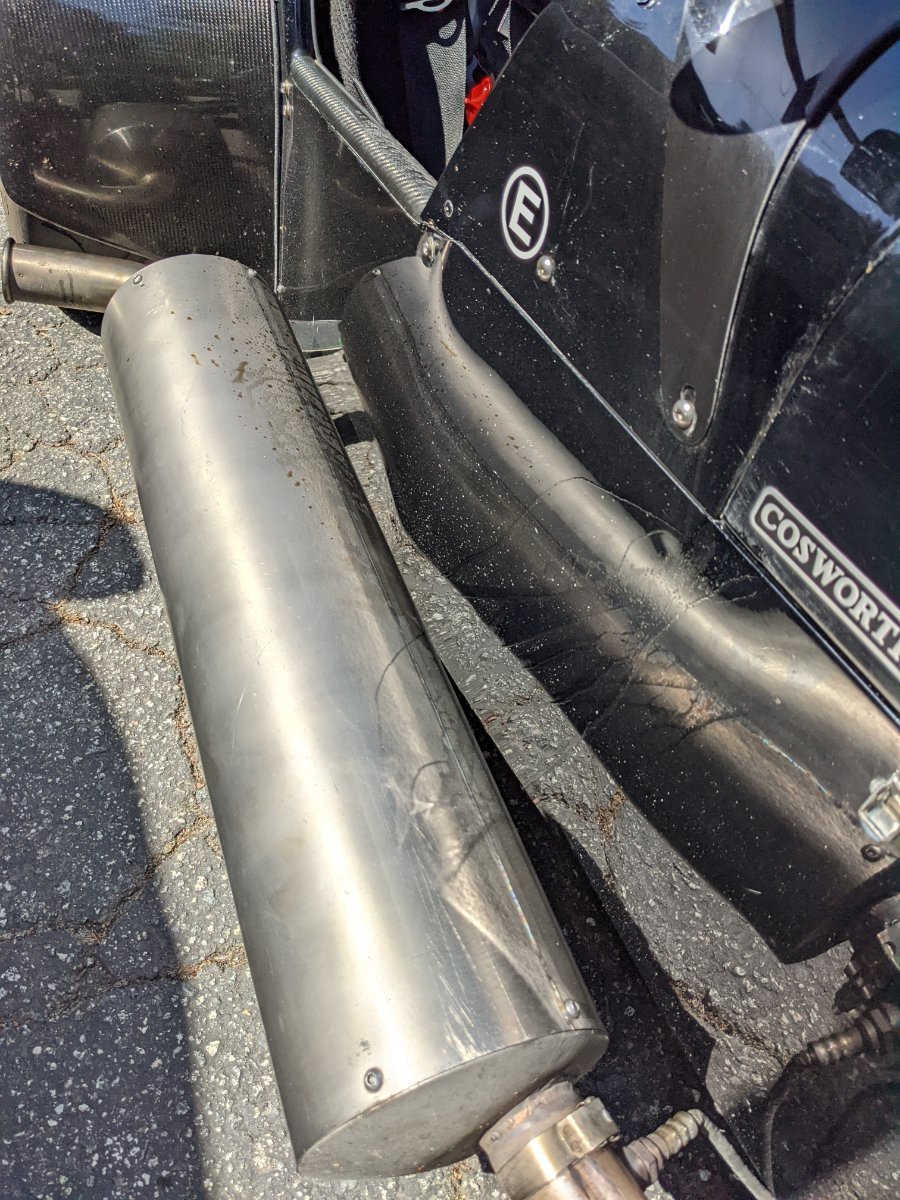
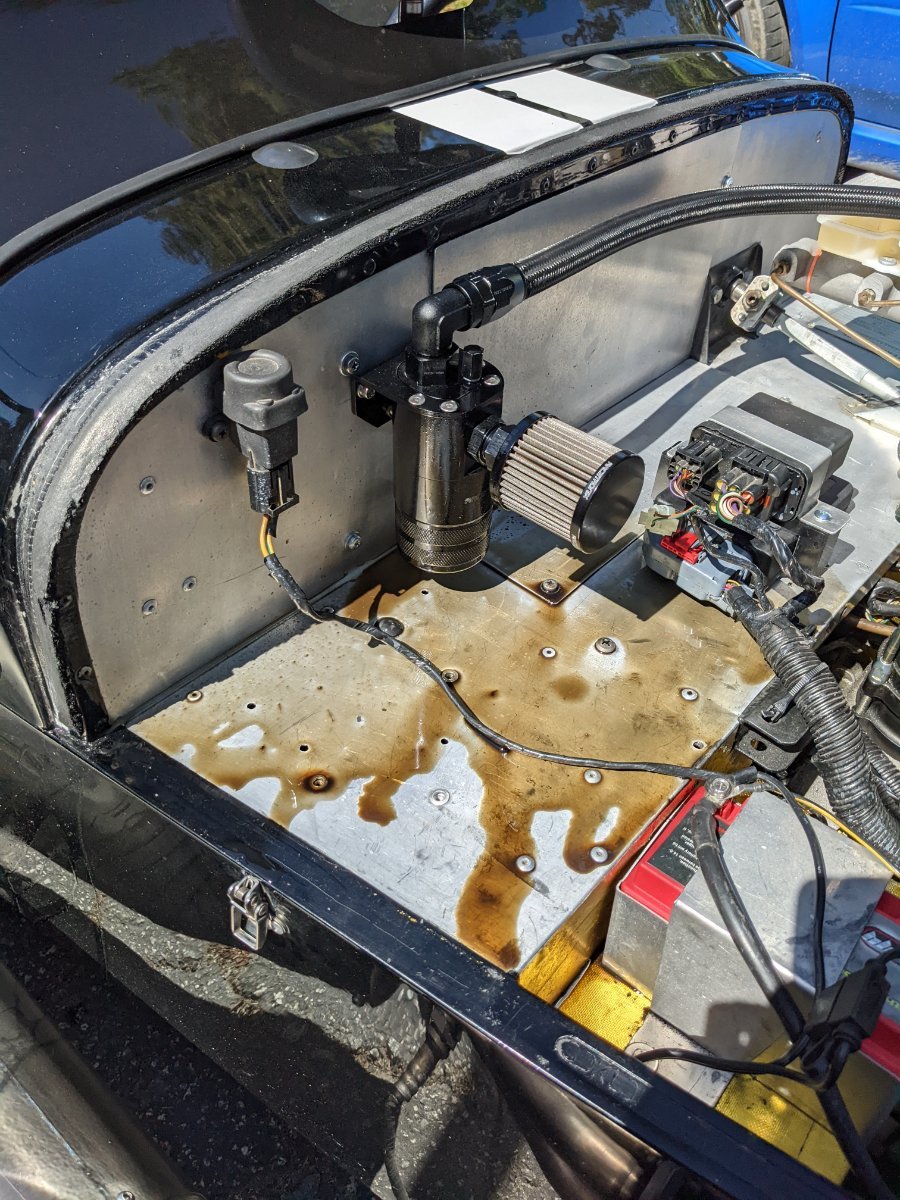
Today I went for a nice blat and got to really exercise the catch can for the first time. In a word, horrible. Not sure if the breather puked oil because it overflowed or because the stainless mesh somehow provided too much back pressure but I stopped to chat with a coworker and they pointed out an oil leak that was spilling down the side of the car and onto my muffler. The ECU came out, the catch can came out, the heater blanking panels came out, floor mats came out, it was 30-40 mins of cleanup once I got home. I'll be replacing the catch can with a larger unit immediately. I had topped off the car with ~60ml of oil this morning on top of 120ml from before changing my engine mounts. Likely, when I was taking a quick drive between installing/torquing the engine mounts I did not work the system hard enough to overflow the main tank but all 60ml from this morning is currently decorating paper towels from blotting up the spill before I got home. A system that just barely is big enough may be all well and good in theory but really a PITA in practice. It may be possible to make the system work by swapping the locations of the breather and the input line but that requires spending $$$ on an 90 degree -10 ORB fitting that seems like throwing bad money after good at this point.
-
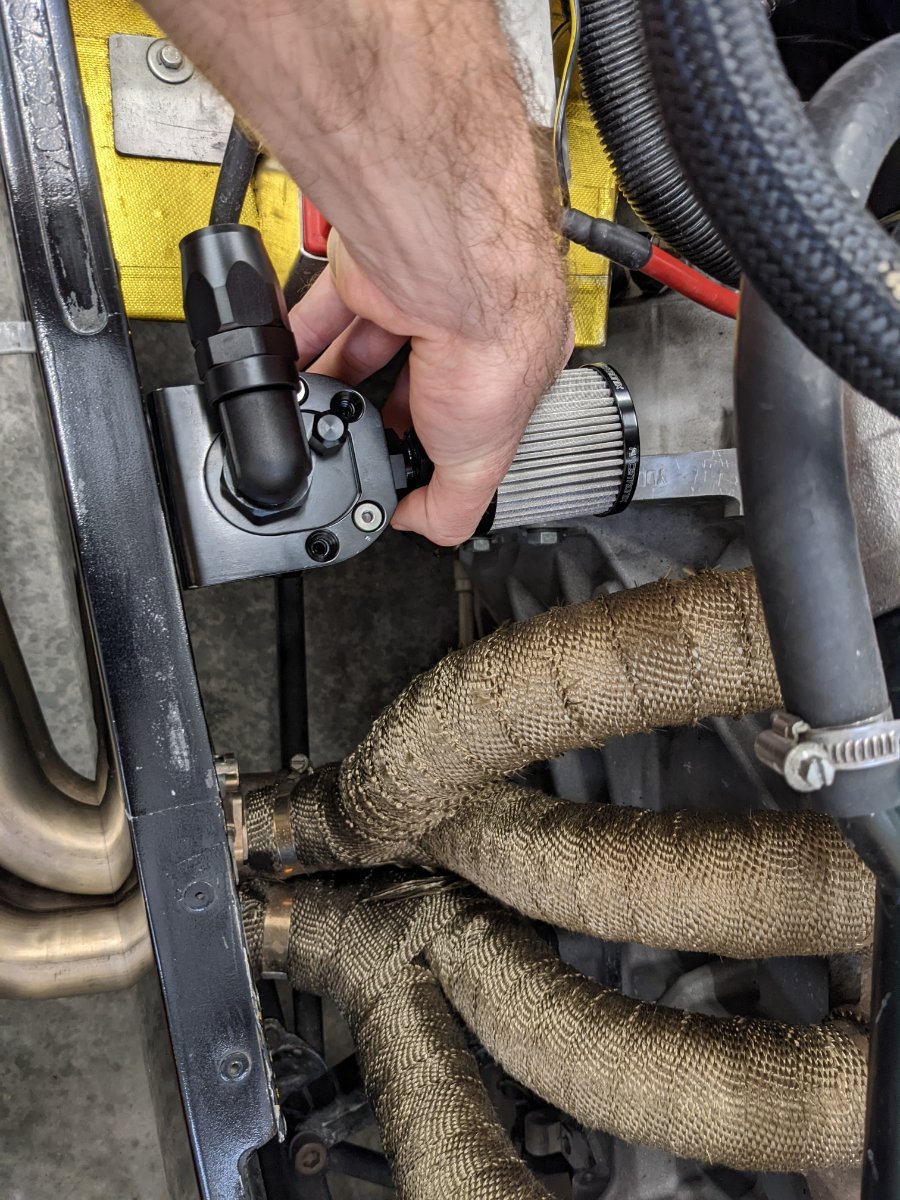
As a small followup to the assembly issues I mentioned in the first post. The Koul Tools AN Hose Assembly Tool made re-fitting the AN10 end of the line a walk in the park. If your budget extends to specialized assembly tools and you are struggling with something like an AN10 fitting I was happily surprised.
-
I have noticed enough condensation in the catch cans that I would tend to prefer to avoid reintroducing this oil to the car. Radium sell a very flash heated catch can that is designed to avoid this problem http://www.radiumauto.com/Universal-Air-Oil-Separator-Return-AOS-R-P890.aspx but at $300 I can buy a lot of fresh oil.
-
Hi mca, congrats on the new car. In short, no issues I saw with the use of a sightglass instead of dipstick. I chose the dipstick model because I recognized I was picking from a somewhat budget brand and as such I did not trust the glass in the sightglass vs. dipstick was properly tempered and would not have issues with thermal stress when it got hit with hot oil. Personal preference, not based on any specific issues I have found reference to anyone facing. I think a larger catch can would be nice, the Racetronix I picked has just a 6oz capacity which is approximately 180ml. However, I typically store the car with the bonnet off so it's easy to check the catch can before each drive and typically I add oil using a 60ml syringe in place of a funnel so I can be relatively sure I am adding less than 150ml at a time. Additionally as Croc noted, the dipstick can be used to draw out the oil with a vacuum pump so I have a bit of a relief valve against overfilling the catch can.
-
Thanks for the notes. Unfortunately this particular engine eats oil. I have seen references to approximately 1ltr/1000km oil consumption, so in an average week with 80-100 miles driven I'm consuming on the order of 150mL of oil. Combine this with the frankly bizarre, hard to measure belltank/dry sump and the exotic nature of the parts it is fairly worth topping up regularly.
-
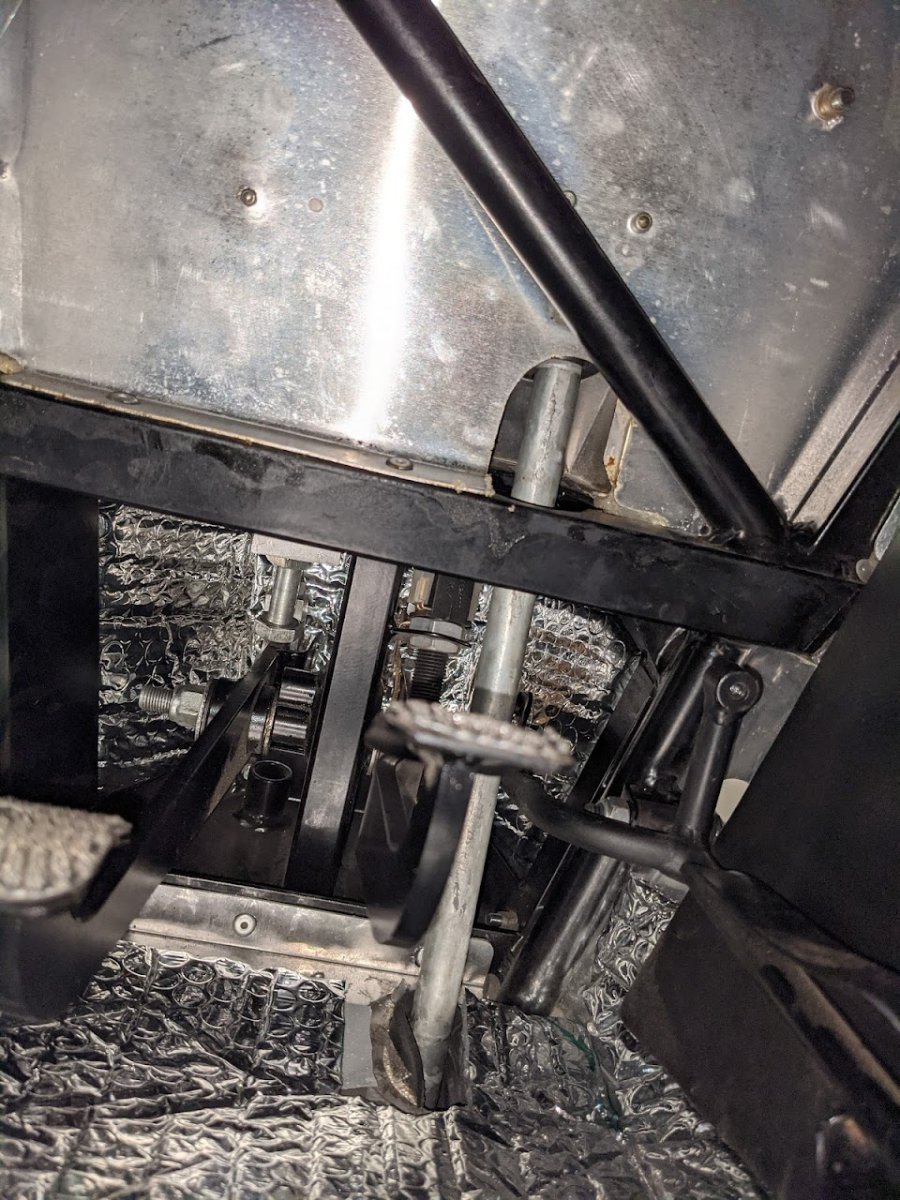
A few months back I added footwell insulation to the inside of the pedal box cover. Admittedly, it has not yet gotten hot but I have been pleasantly surprised that so far I have not had to stop and get out to let my feet cool down. If you are already thinking about fitting insulation I would recommend considering this area as well as it is just a thin aluminum wall between the hot engine compartment and the driver's footwell.
-
Hi Croc, Yes the dipstick hole is large enough for the 1/4" tube on my oil extractor pump.
-
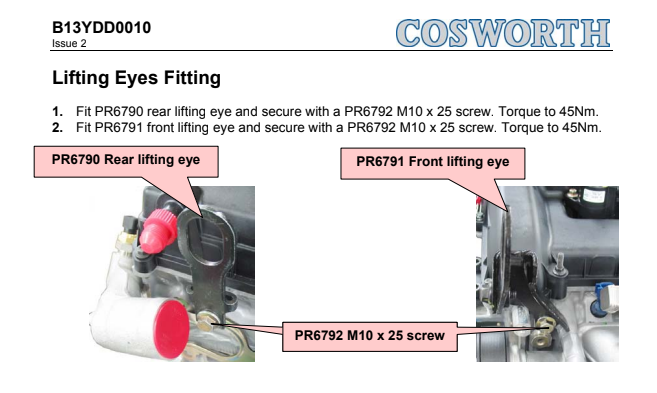
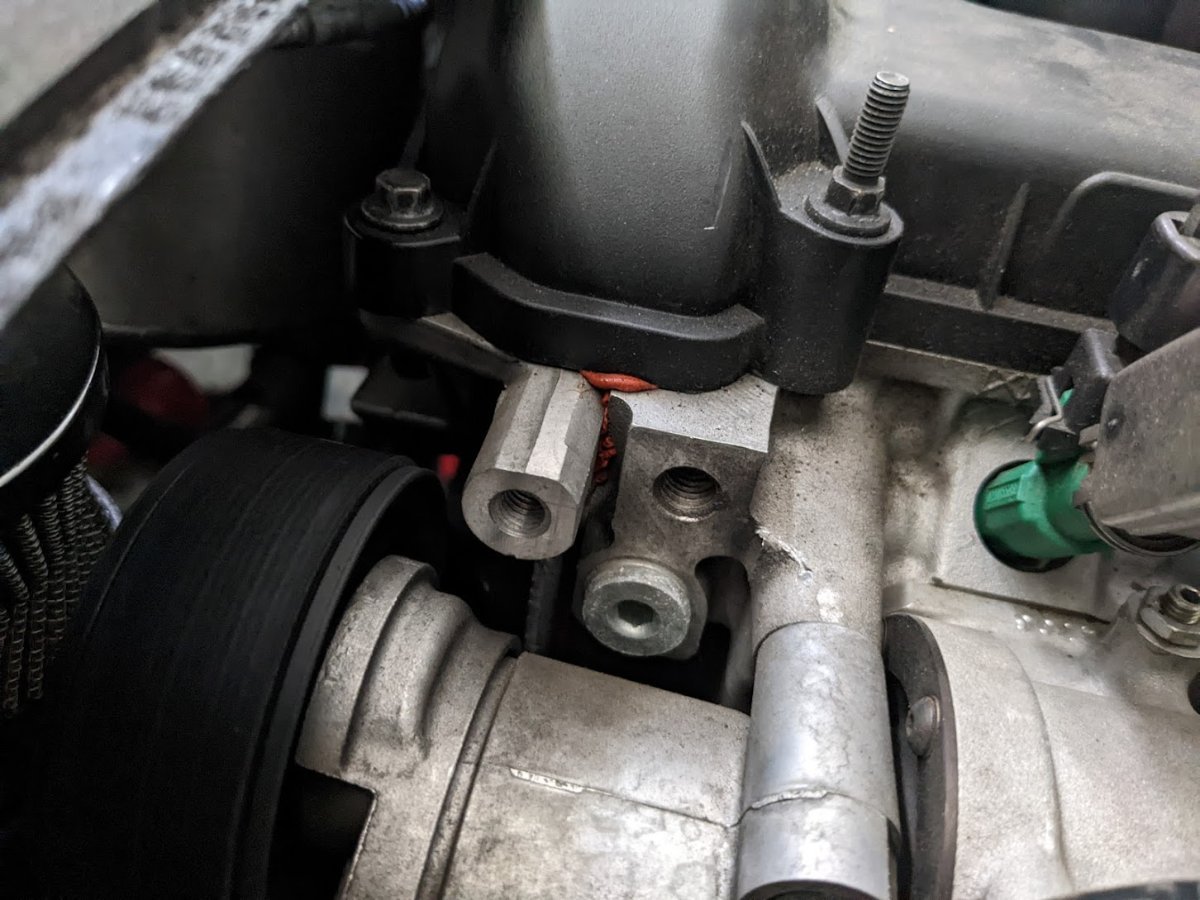
I decided if it's good enough for the factory it's good enough for me and used an engine hoist and the lift points as specified in the manual. To be on the safe side I had my floor jack in place under the engine-bellhousing mating point and only removed one side at a time. Process was pretty straightforward: Lift the front end to clear the legs of my hoist Loosen the transmission screws slightly so the transmission could shift around if needed Apply a small amount of lifting tension to the engine Remove the big bolt into the rubber mount Remove the little bolts holding the mount to the frame Remove the old mount Put the new mount in Install the little bolts holding the mount to the frame Realize the engine shifted enough when I picked it up I had to remove the bolts holding the mount to the block <- Only surprising part of the process Loosen the bolts holding the mount to the block Install the big bolt into the rubber mount Do it all over again on the other side Torque all the bolts to spec Remove the hoist and jack Put the car back on the ground Check all the bolts are still torqued to spec Be a bit sad it's getting dark and I can't take a quick run to check everything is good
-
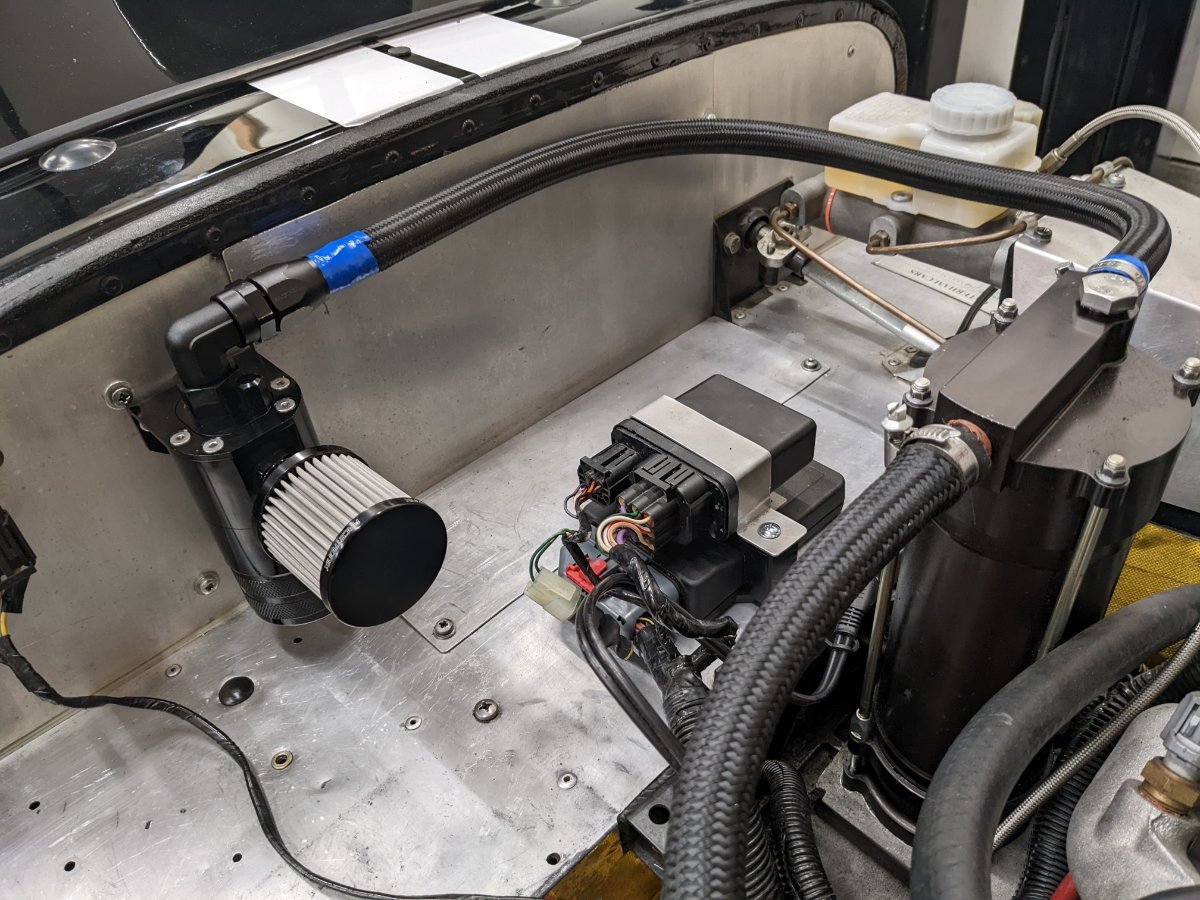
Opinion after use: horrible, too small, pukes oil everywhere, don't use for a CSR engine. I wanted to leave a quick review for the Racetronix CCK-D6Z oil catch can / breather catch can. For the Cosworth CSR engine the oil level procedure is convoluted and officially includes the guidance that every engine is different and that the best way to check your oil level is fully topped off is to add 250ml of oil at a time until it starts to overflow into the catch can. The car as modified had a catch can underneath the nose cone and unfortunately the screw on the drain had become locked. This meant that in order to check if the oil had overflowed into the catch can it was necessary to remove the nose cone and the breather filter on the top of the catch can. Not a huge deal but frustrating so I was not as consistent about doing so as I would have liked to be. Inspired by Bruce Beachman and Croc's choice of the Radium catch can I was looking for a unit with a dipstick and an easy to remove oil catch container. I additionally was looking for a unit with a matching 10 ORB filter rather than a filter that was hose clamped into place. Last, I was hoping to buy the catch can, filter, and the associated hoses and fittings in one place. Again, inspired by Croc and Bruce Beachman I am initially placing the catch can on the firewall in front of the passenger. This is barely low enough for oil overflow to drain from the dry sump into the catch can and I may need to choose a different set of fittings to bring the hose lower in order to drain better. I considered a few other locations and the most promising one from a space and access standpoint was immediately above and behind the exhaust primaries. In using a thermal camera to take some pictures I basically believe this would be fine from a heat standpoint and I may end up moving the can here. The can is nicely made, has O-Rings on the seal between the can and the main body, as well as the dipstick. The dipstick is idiotically placed and requires that you place the filter on the side of the can as otherwise the filter blocks you from removing the dipstick even though in their advertising copy the filter is clearly shown on the top of the can. The included mounting bracket is a little frustrating in that it only permits one orientation for mounting and you cannot easily access the bracket-to-car mounting screws without removing the catch can, and you cannot easily remove the catch can without removing the plumbing and of course you cannot easily remove the plumbing with the catch can installed, but with some judicious use of angles everything went together without too much fighting. The dipstick is somewhat frustrating because it is green and it can be difficult to tell how much oil is on it or indeed the level of oil vs. the mating surface between the main body and the removable oil catch container. I will probably end up removing the green coating on the dipstick in order to make it easier to check the level. The dipstick hole is large enough to permit use of the small (3/16") tube on my oil extractor pump allowing for easy oil removal, which is very nice. The AN10 hoses P/N RBNH-10 from Racetronix neither like to fit into their AN hose end FIT-189010 nor over the metric push-on hose end that is on my belltower. I am awaiting a shipment of Koul Tools' AN hose assembly tool to re-do the AN hose end. The price for performance was very acceptable and the convenience of getting one box with all the components was nice. If I were to select components again I am not sure if I would go with Racetronix again as the installation process was frustrating but I was out the door for $180 and after the initial frustration everything did come together.
-
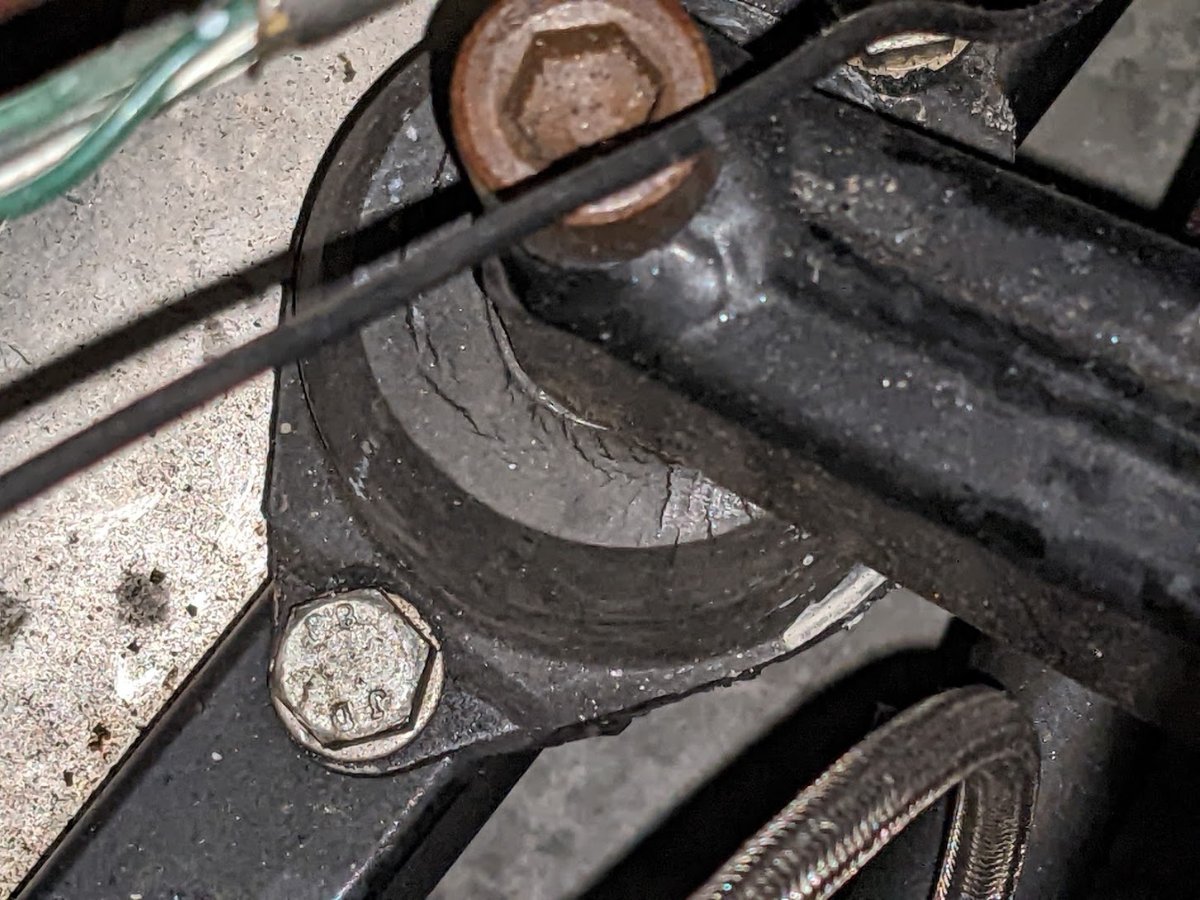
I was reviewing some items on my car and noticed cracking in the engine mounts. I have decided to replace them and the new items should be delivered today or tomorrow. Is it viable to lift the engine slightly with a floor jack (with a block of wood perhaps) or is it a better idea to use an engine hoist? I have the Titan dry sump and the dry sump / bellhousing so I'm not sure where the safe lift points would be if they exist. The CSR engine build manual does clearly specify where the front and rear lifting eyes would be bolted and I believe I have identified those holes on my engine and both are readily available to receive bolts so this is likely my best option but I am open to advice where it's available.
-
https://web.archive.org/web/20200222194640/http://www.simplesevens.org/dsk/history/dsk01.htm Happy to remove at any point. It looks like some of the files don't link properly but the majority come through nicely.
-
With your permission I could link the archive.org version of your DSK page.
-
The Regular Summary of Classified Ads of Se7ens Found For Sale
sltous replied to Croc's topic in Cars For Sale
https://bringatrailer.com/listing/2016-westover-speedsport-1800/ This appears to be a weird one day long Bring a Trailer listing. -
Another hour of driving data collected, still no evidence of TPS bouncing! Wet greasy roads out today so I wasn't able to push especially hard but I think I'm increasingly confident that the TPS data bouncing problem was a problem with the TPS and not with wiring. I didn't notice any kangarooing but I was a bit more focused on keeping the rubber on the road: water on the road, temp is somewhere in the 40s, and I did see a car flipped on its side.
-
First 30 minutes on the new TPS are in and the data looks really clean, I tried to drive on similar roads to the ones I was having difficulties on previously and there is clearly no TPS percentage bouncing going on. More/longer data collection to come to see if this has actually solved my TPS problem and more/longer data collection to come to see if my TPS problem was also my kangarooing problem. Better take another drive!