anduril3019
-
Posts
157 -
Joined
-
Last visited
Content Type
Profiles
Forums
Store
Articles
Gallery
Events
Library
Everything posted by anduril3019
-

Formula Ford Kent Engine Parts List
anduril3019 replied to IamScotticus's topic in General Sevens Discussion
And here: https://mountuneusa.com/products/ford-kent-crossflow-engine-block?_pos=10&_sid=e73890b28&_ss=r -
Thanks for the tips. I mocked up the radiator and it's a better fit than I thought, no clearance problems, with some tilt, of course. For the radiator cap, are you basically saying to make sure the radiator cap is a higher pressure than the main filling cap at the expansion tank? What about a standard non-pressurized cap at the radiator?
-
I like the uncut tube idea, maybe next time! The UCAPs are both double shear, except for the shock mount which shares the pivot bolt. I've been thinking about double shearing the LCAPs, as well as the upper shock mount. Now that you've mentioned it, I'll probably sleep better if I just go ahead and do it. I've got one of the aluminum Honda civic radiators which seems like it will just fit vertically. Worst case, I thought about removing and patching the filler cap and adding a bleeder if it doesn't clear. I also like the tow loop idea. Not sure I want them exposed, but maybe easily reached by removing the nose cone.
-
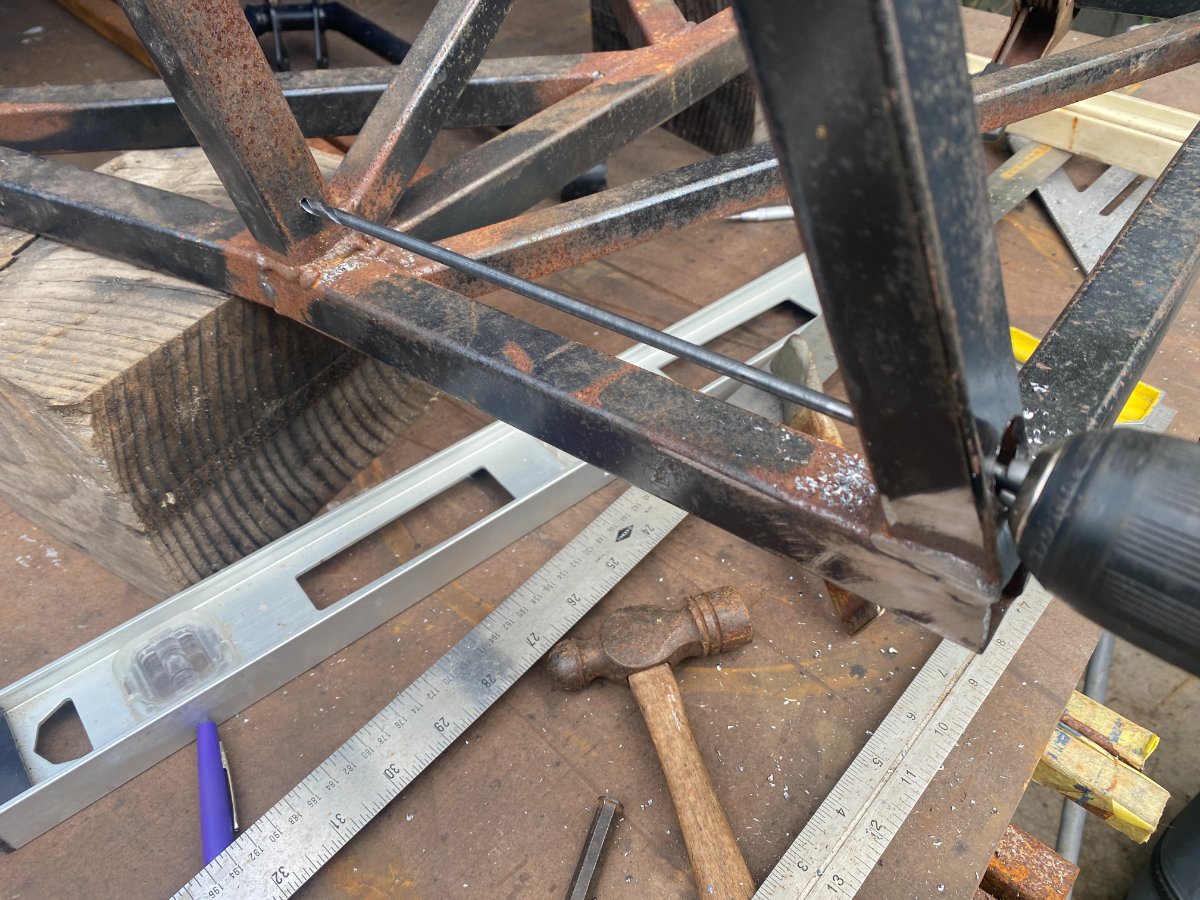
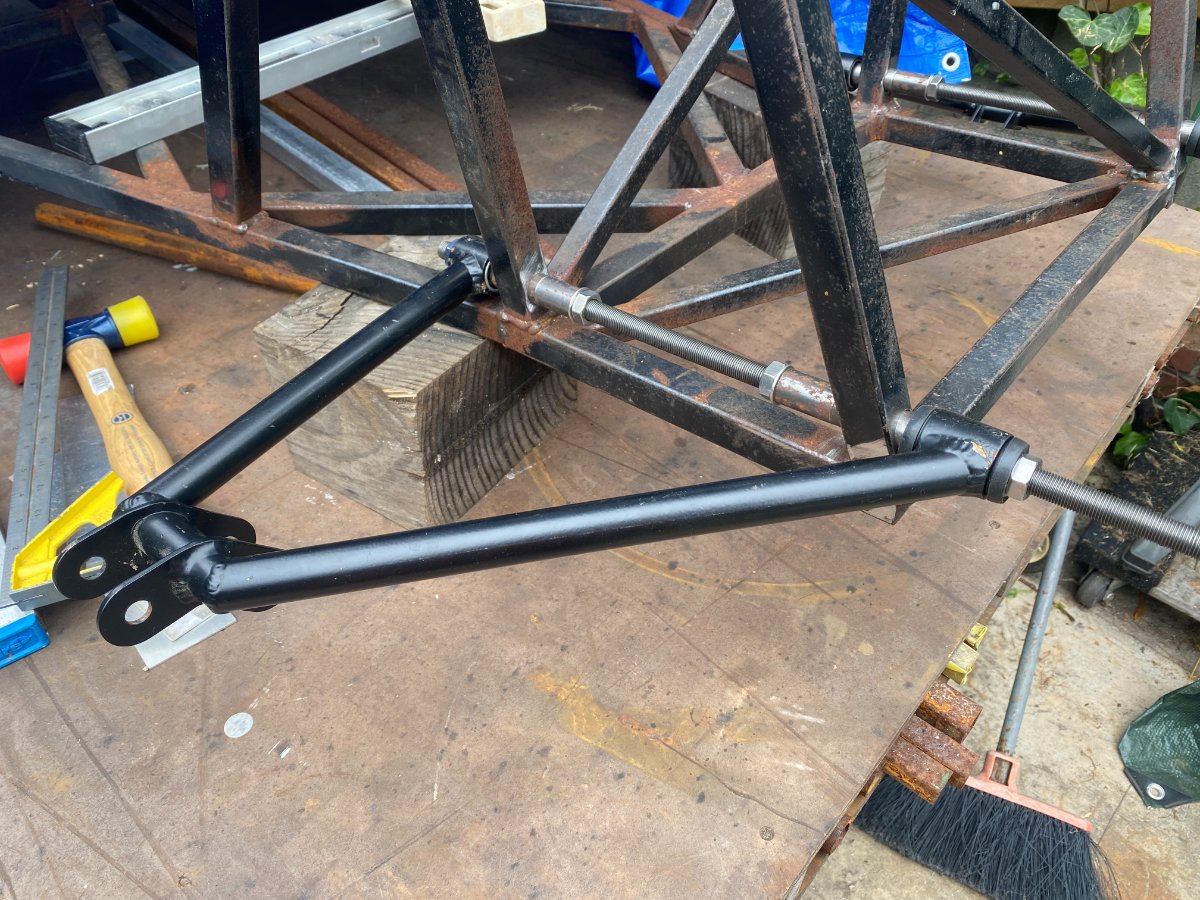
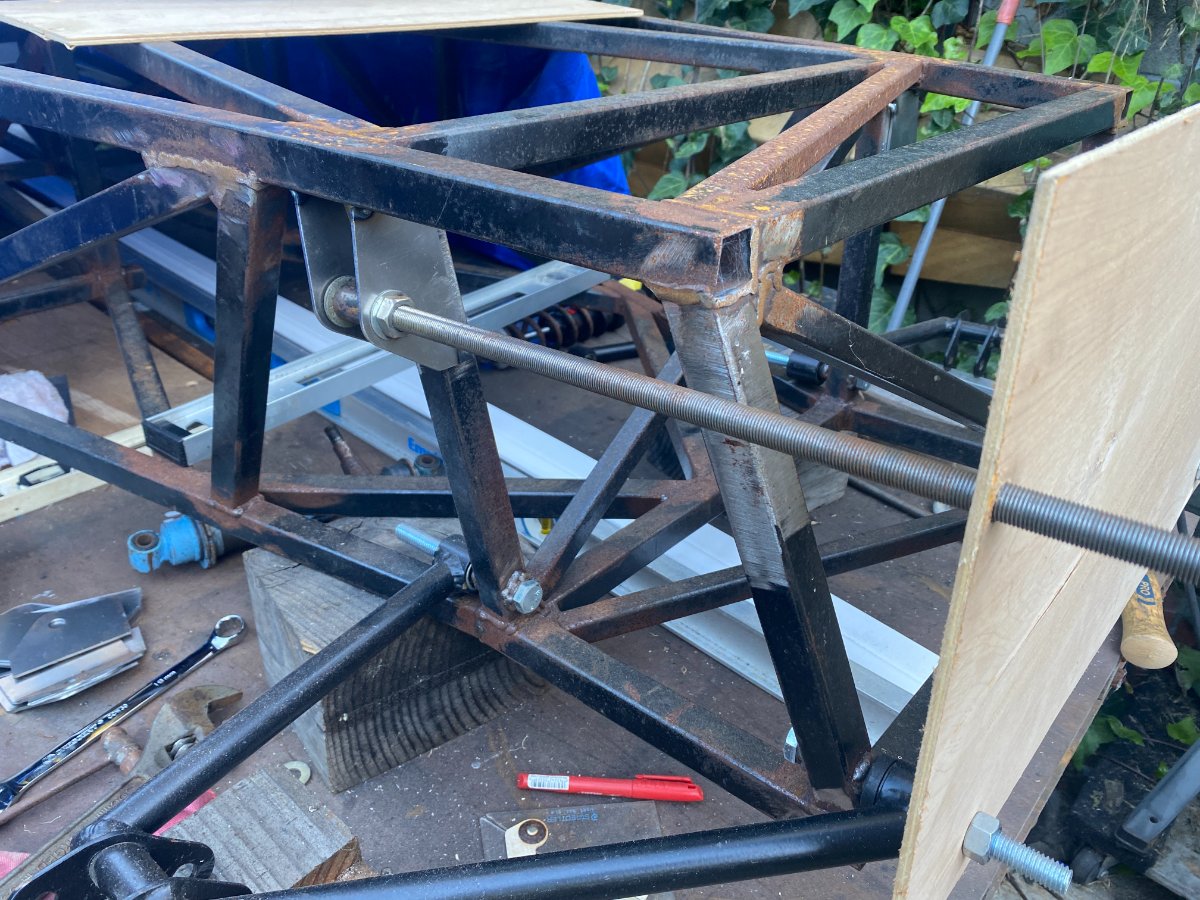
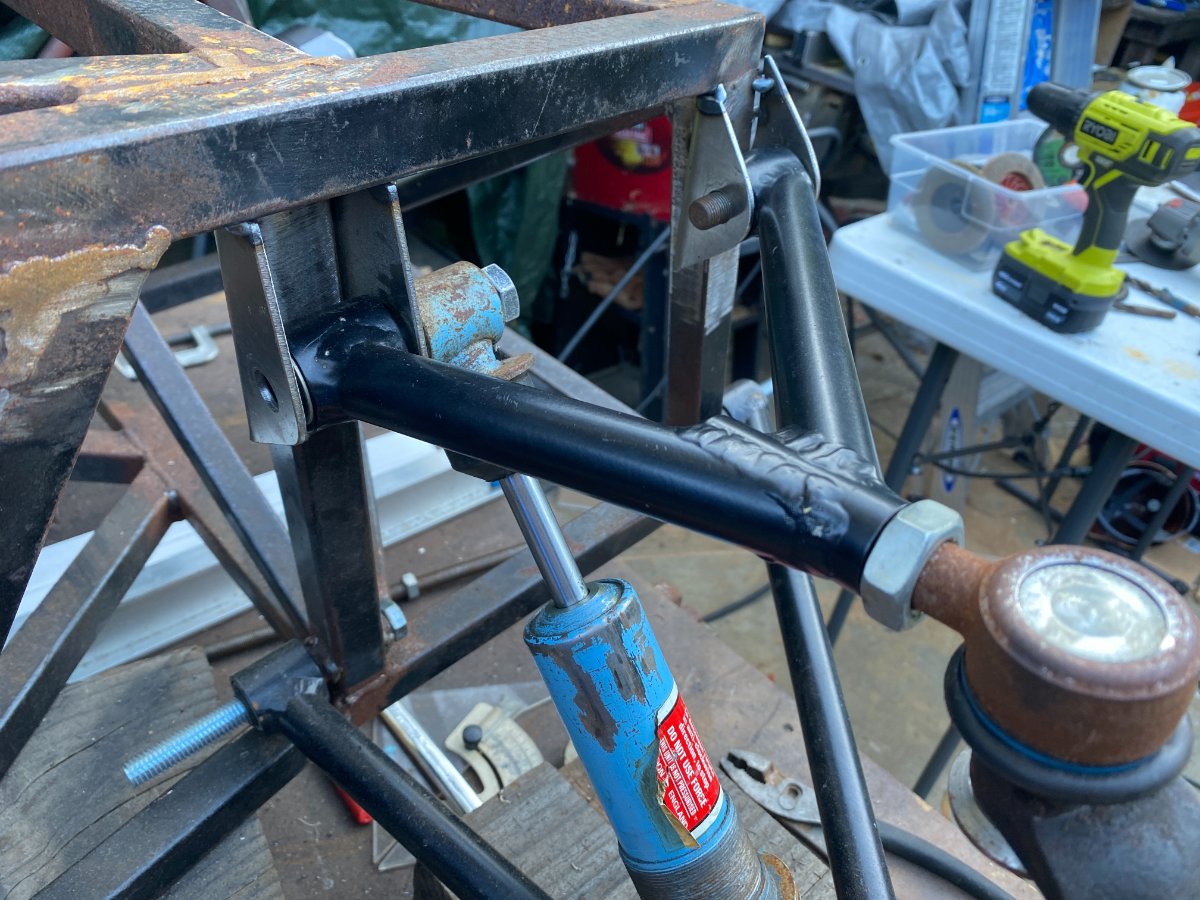
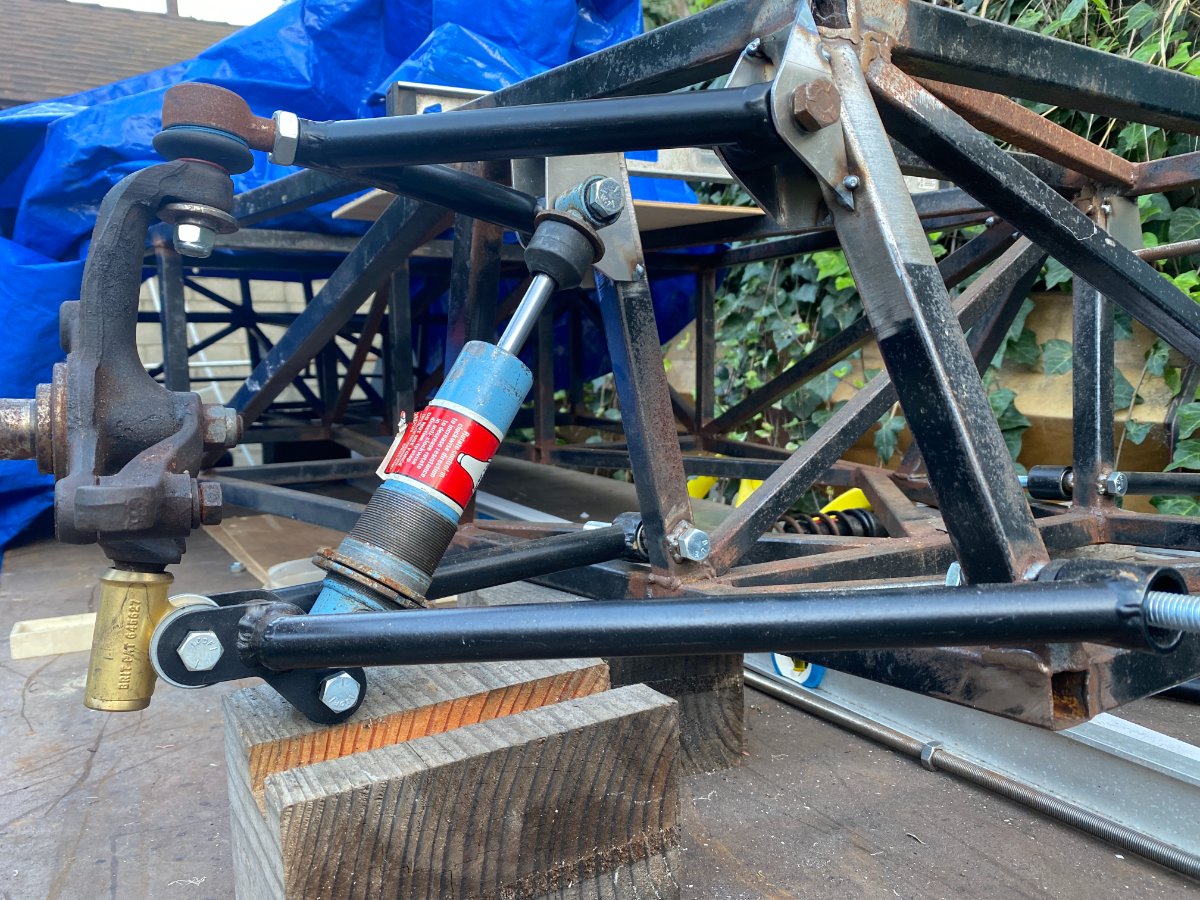
A little progress has been made... Front suspension is coming together. Most of the frame welding is done and everything is still pretty straight and true so I started by leveling the frame and locating the lower mounting points. I used an extra long drill bit through the front holes to try and keep the rears parallel, and then an all-thread fixture to ensure everything was aligned before tacking the sleeves in place. From there, I made wood templates for the upper mounting points and cardboard templates for the brackets. I ended up getting the brackets made at SendCutSend.com for around $5 each, which saved a few hours of cutting and grinding. They still needed finessing for final fit, but they got me 80% of the way there. Used the all-thread fixture again to keep everything in line. A little more work on the left side, then it's time to get my steering rack back together and figure out the mounting.

-
I've had some luck with these guys: metalsupermarkets.com 1-855-271-1555 They have a small warehouse in Anaheim I usually pick up from to save a bit on delivery when buying small amounts.
-
Xtra Special Sevens Website Down
anduril3019 replied to anduril3019's topic in General Sevens Discussion
Sorry to hear that. I didn't have much contact with him, but from what little I did, he seems like a good bloke. -
Well, it's a sad day. I (and others, I know) have been trying to contact Mick at Xtra Special Sevens for a while, without luck. I've been hoping he was just busy or sidetracked with something temporarily, but now his website is down. http://www.xtraspecialsevens.co.uk/ (Sorry if this is already common knowledge!)
-
Hi, I'll give these a good home. Sent you a PM. Thanks!
-
front fender top running/turn signal lights
anduril3019 replied to ptegler's topic in General Sevens Discussion
Here are a few places to try. They pop up on ebay every once-in-a-while too. https://www.s-v-c.co.uk/categories/stafford-vehicle-components-lighting-front-side-lights https://www.autoelectricsupplies.co.uk/c/side-lamps -
I'll second the recommendation. Both good, thoughtful books. I preferred the first, the second seemed to get a little repetitive to me. For anyone considering a read, each could alternatively be titled "7 Shop Class as Soul Craft" and "Why We Drive 7s"
-
Sorry if I missed this part of the discussion, but which tubes are we talking about here, and how are they being accessed? If doing repairs or building from scratch, there is access, but on a finished frame there aren't any open ended tubes. Are holes being drilled then capped? Are rivet holes being used? If spraying through small holes, it doesn't seem like you'd actually be getting good coverage on the interior.
-
Sent you a DM
-
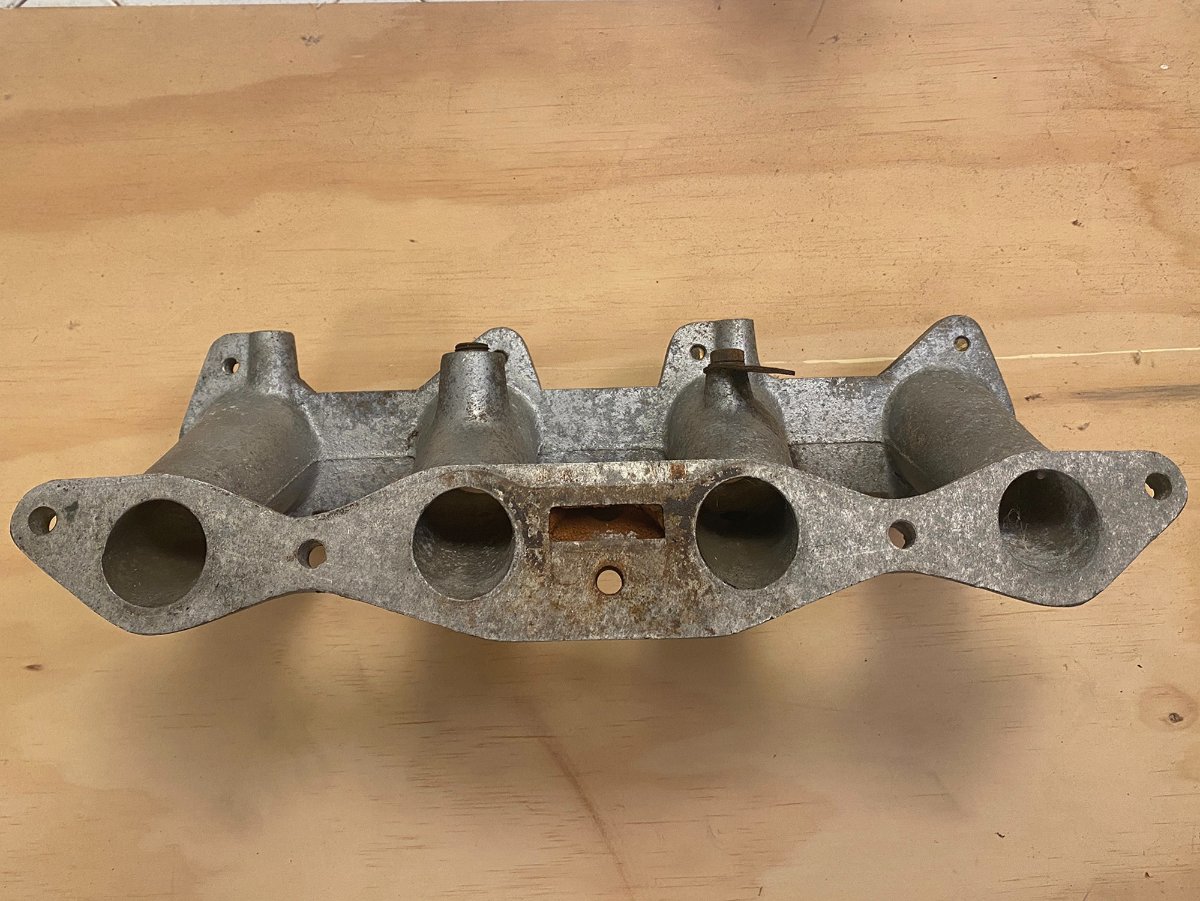
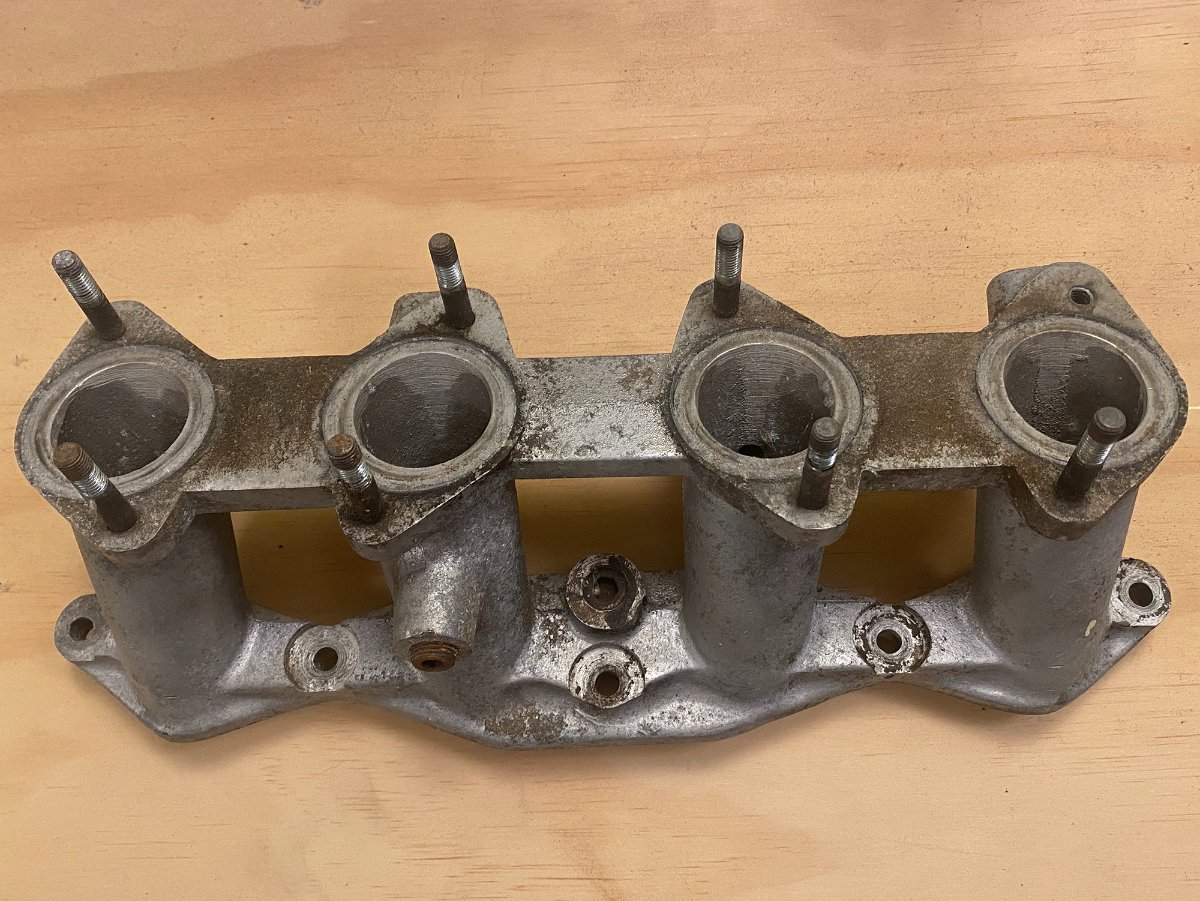
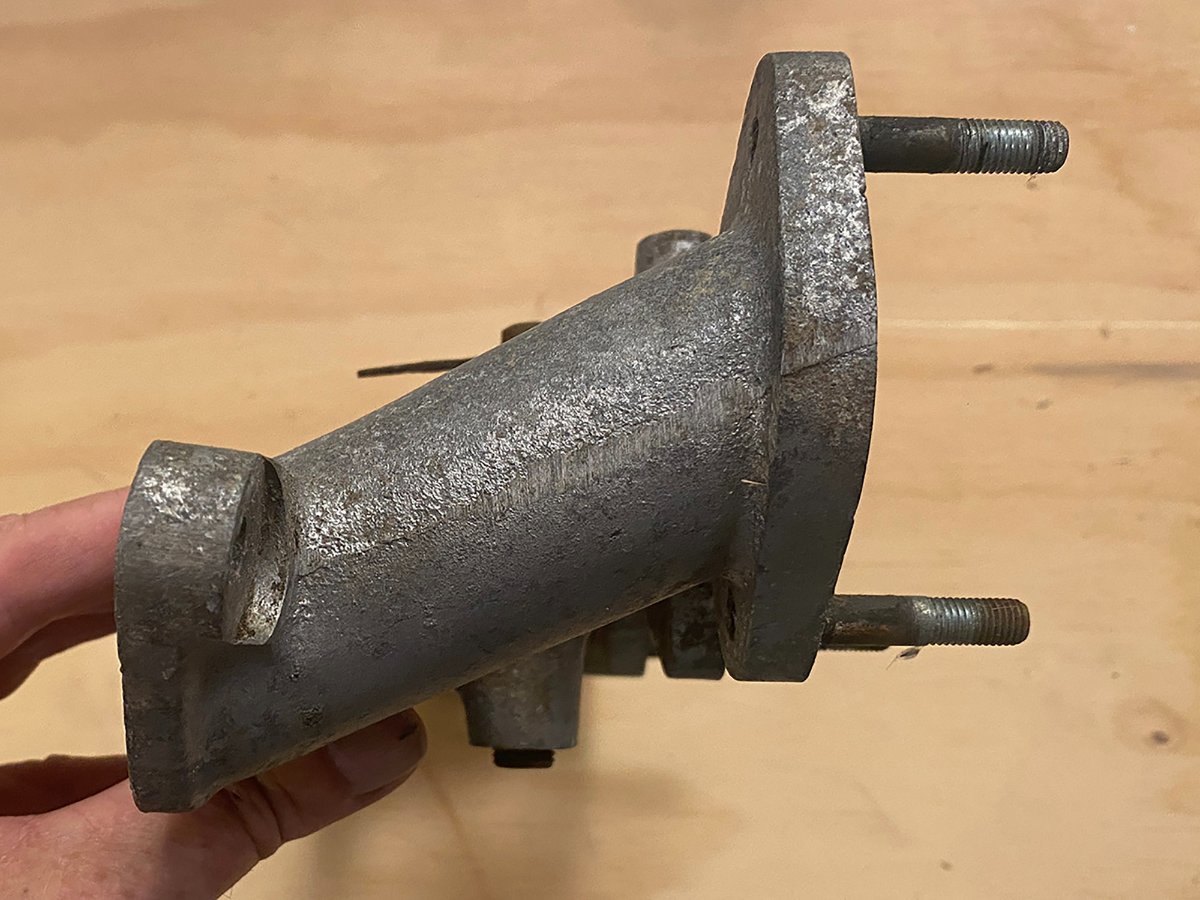
Interesting. Mine does have longer runners, not sure if it's an issue or not. I've also seen the center support cutout. DCOE slides right on the studs, no problem.
-
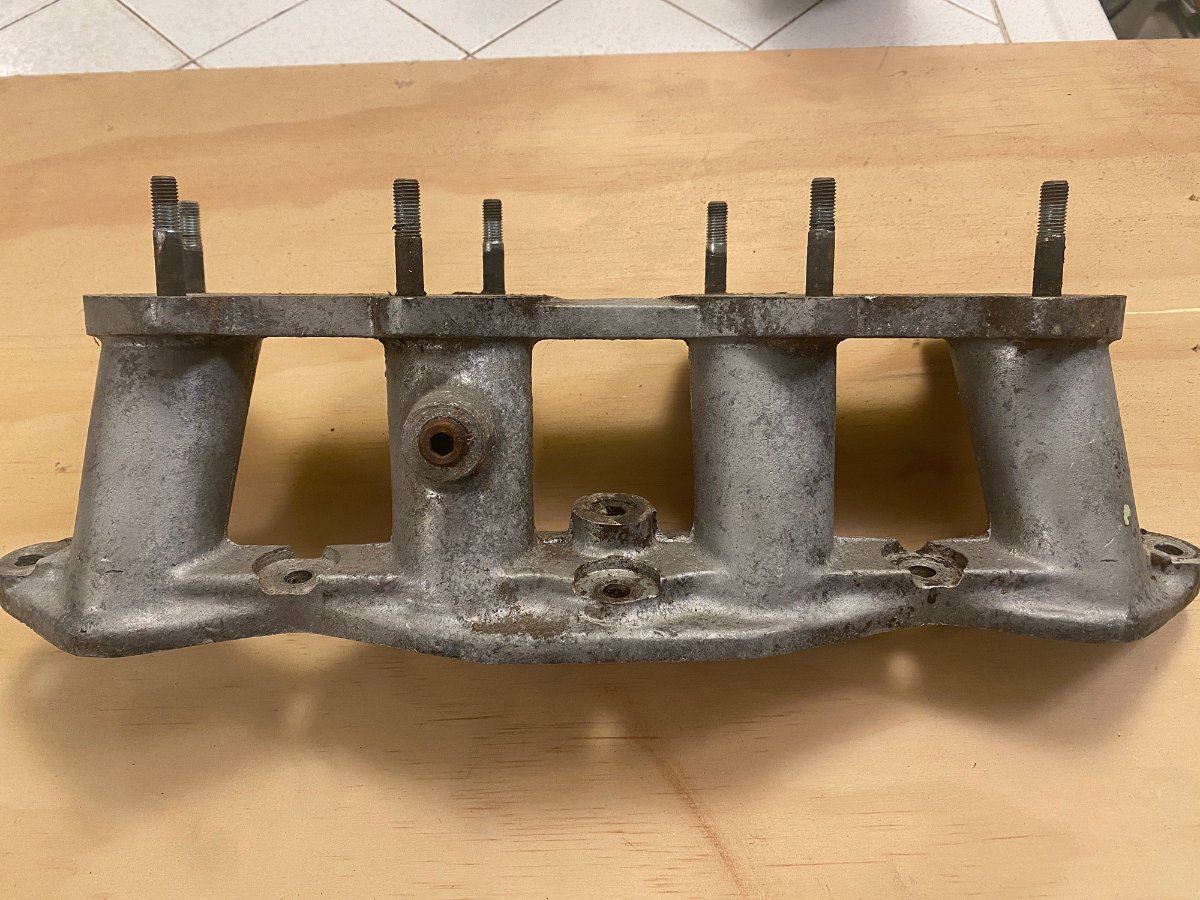
I've got one that I think is correct, but I'm not 100% sure. The person I got it from said it was from a 2L pinto, but I think it's from a 1600 X-Flow. From what I can find online, the Pinto has 2 bolts between the center ports, this has 1. A few measurements are below. If anyone else knows how to positively ID it, let me know. The 2 outside mounting holes are at 14 7/16" Runner spacing is 3 7/8", 3 5/8", 3 7/8"
-
Here are a few other sources: https://www.merlinmotorsport.co.uk/s/suspension-steering/alloy-hubs-and-bearings/alloy-hubs https://www.spitbits.com/store/ALUMINUM-FRONT-HUB-P6467.aspx
-
If you are going to blast the valve cover, make sure the interior is sealed with plywood or something. The media, especially glass or sand, can embed in the aluminum and later be released from heat and oil. Nasty stuff you don't want circulating in your engine.
-
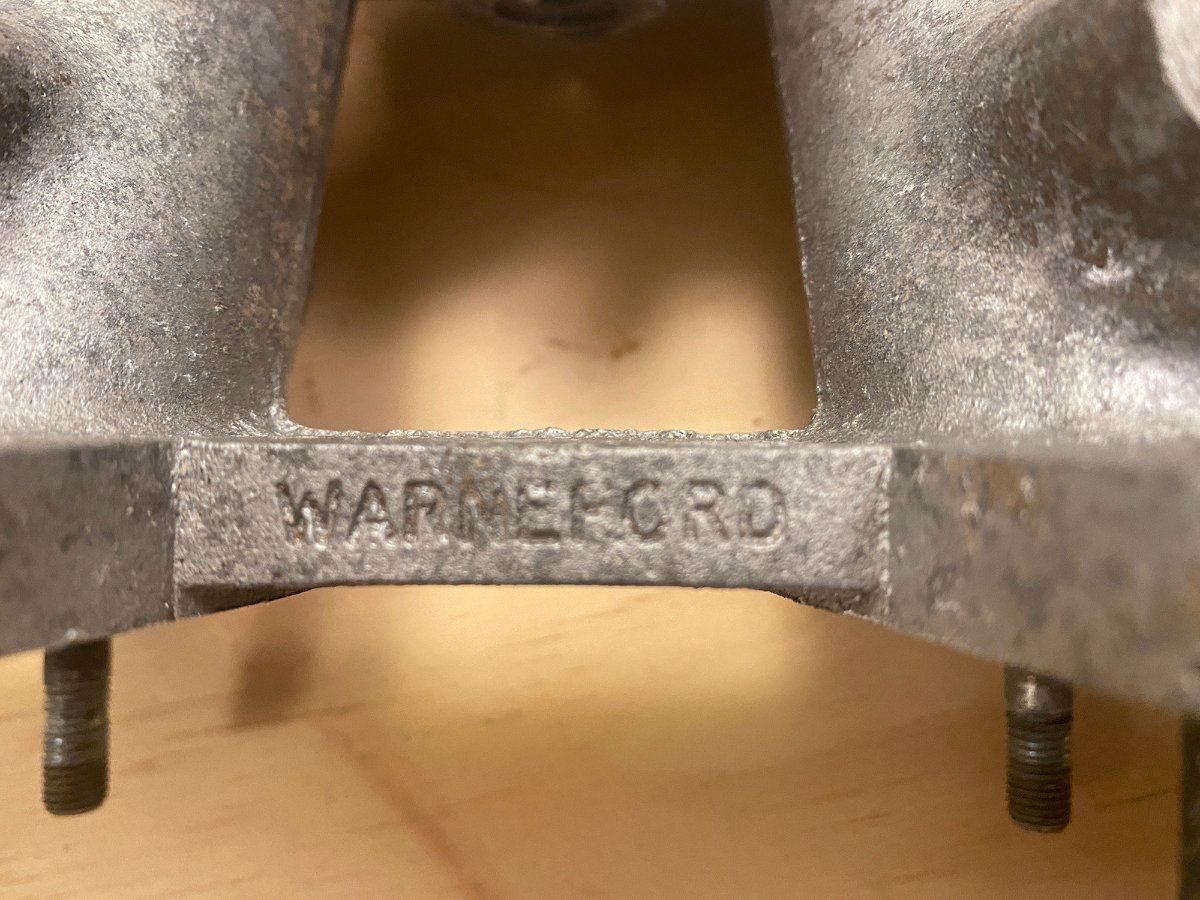
For anyone who was doubting the authenticity, now it's confirmed as a "Super" 7!
-
I’ll 2nd that. I was going to ask the same thing! Looks like a coffee can lid or something like that.
-
The screen name is a Lord of the Rings reference. Anduril, or The Flame of the West, is the sword wielded by Aragorn in The Return of the King. A fitting name for a defense company.
-
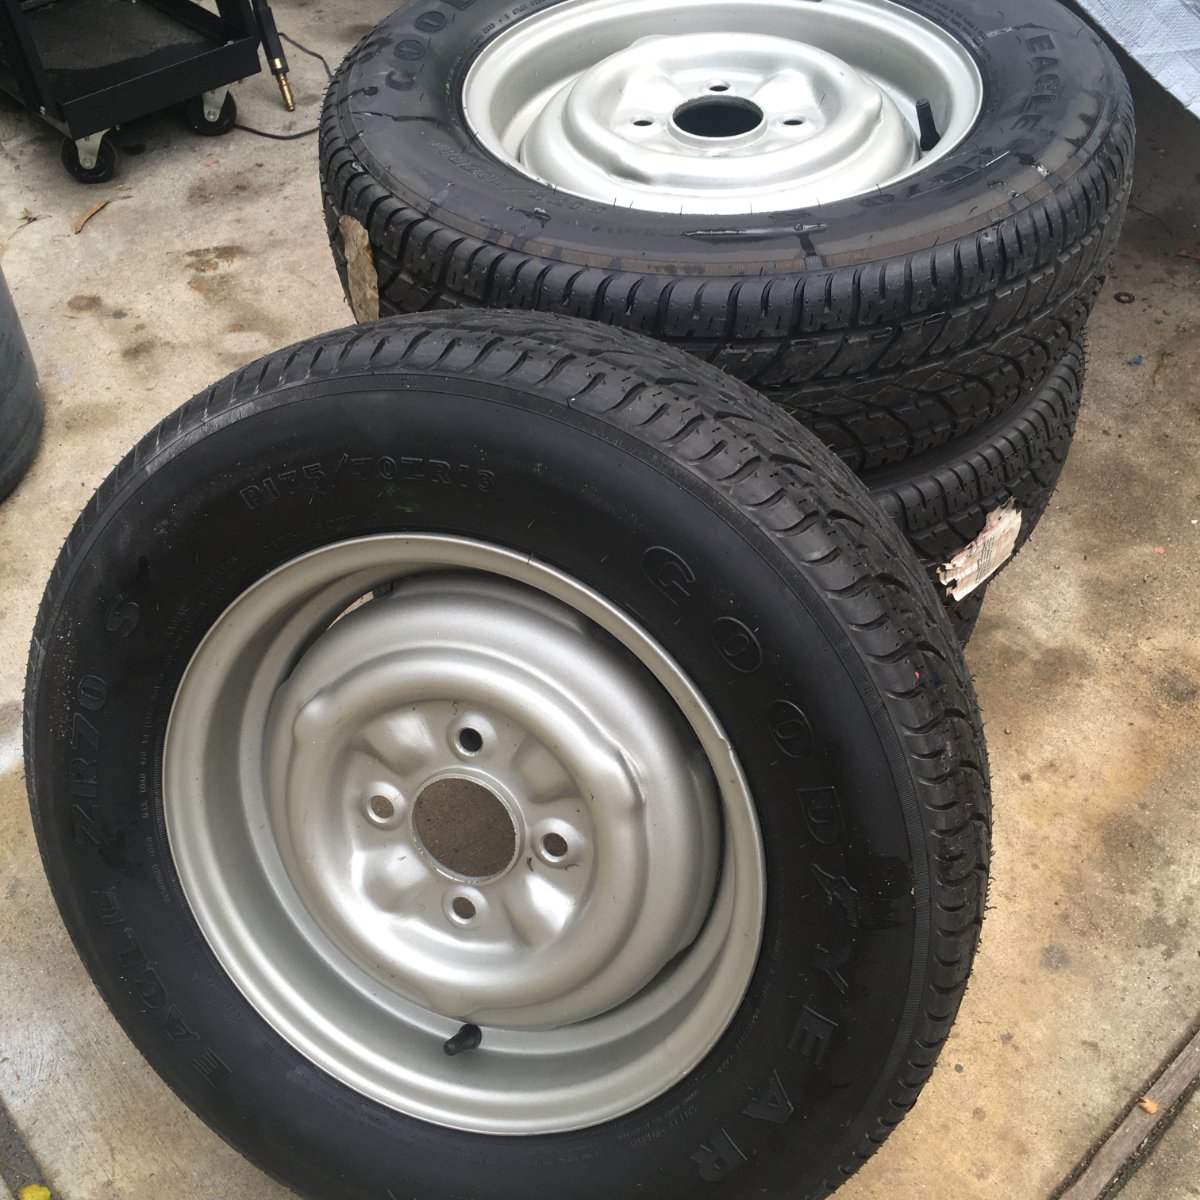
Elan wheels with hubcaps is a good look on an S2. My original post said 4" PCD for Triumph, corrected to 3 3/4" which is what your Standard axle and Elan wheels should be.
-
Those wheels look like Ford Anglia, or early Cortina. But the chassis is too early for a Ford rear axle, and the front drum brakes are going to be Triumph PCD, which is 3 3/4", and typical for Lotus. Ford PCD is 4 1/4". Steel wheels in either PCD are not too hard to find, I've even seen steel Lotus wheels for sale occasionally. But you'll need to decide what to do at both ends depending on the parts you have and what direction you want to go. Keep the drum brakes, or upgrade to period discs? Keep the Triumph front hubs and use a Triumph rear axle? A few more variations you could go with. Here's a '69 Cortina GT wheel for comparison, slightly wider, but not by much! (4 1/2" I think)
-
Yes, good advice! I haven't yet decided if I want to go with a concentric. For those with concentrics, any recommendations for or against various brands or models?
-
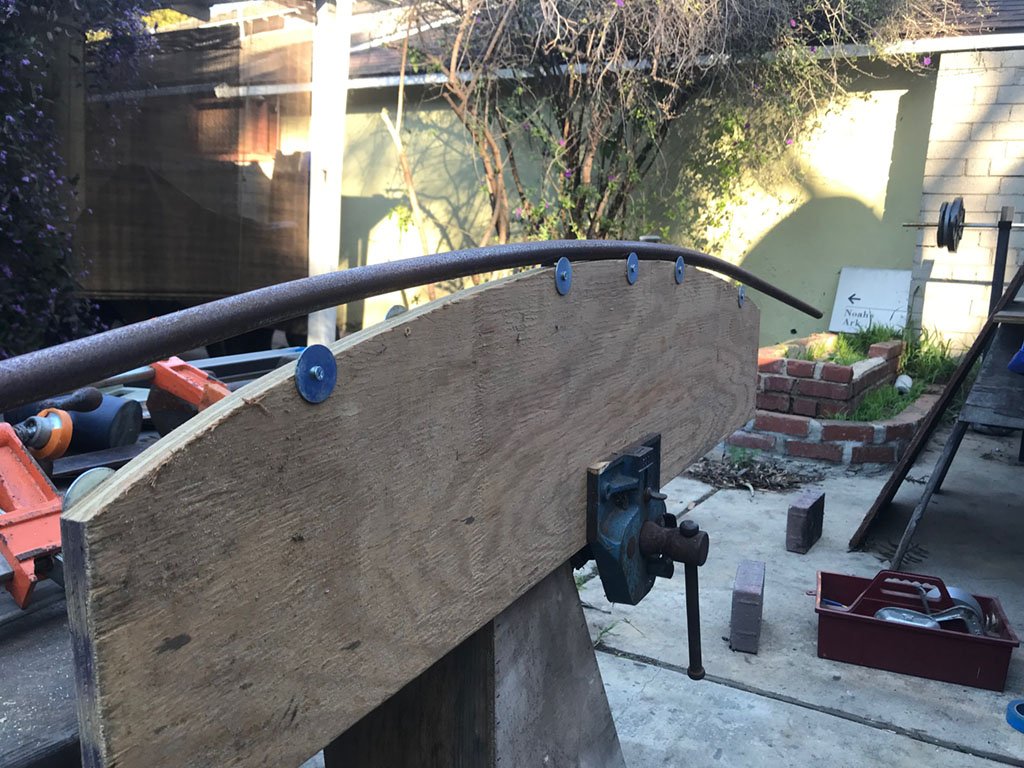
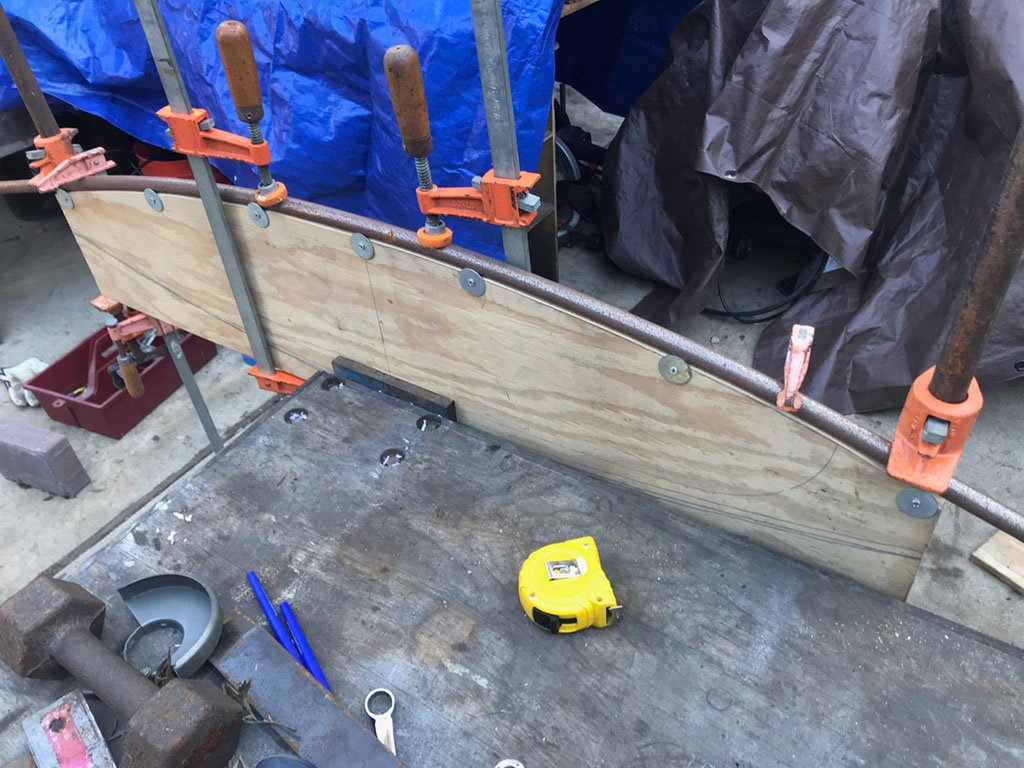
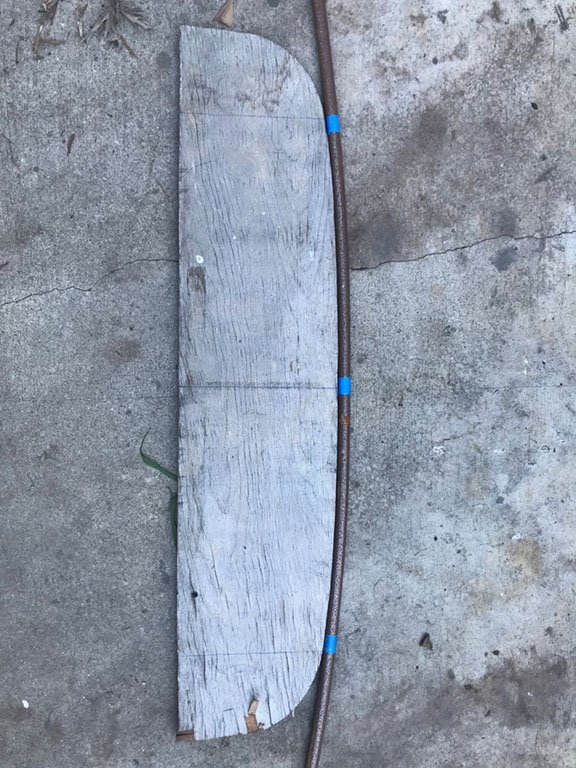
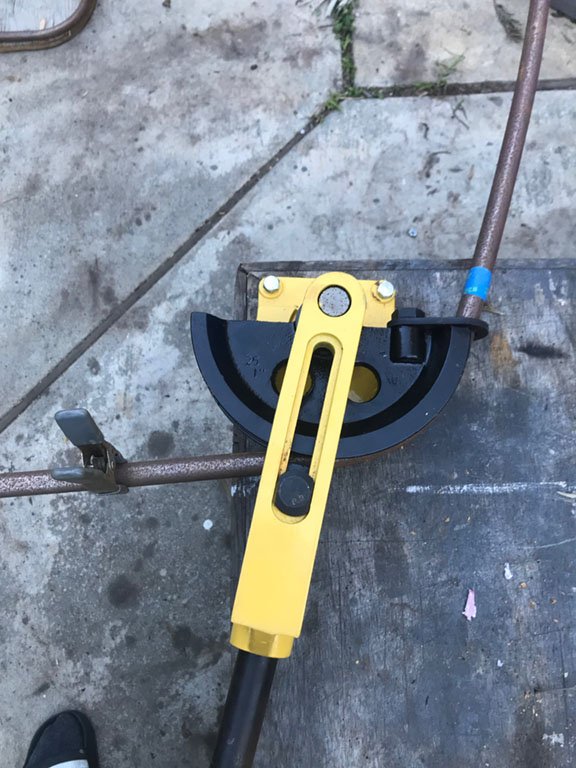
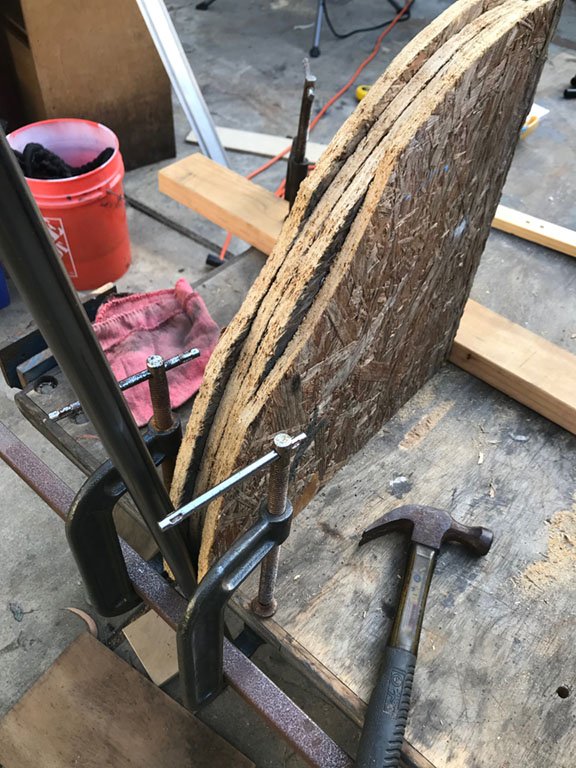
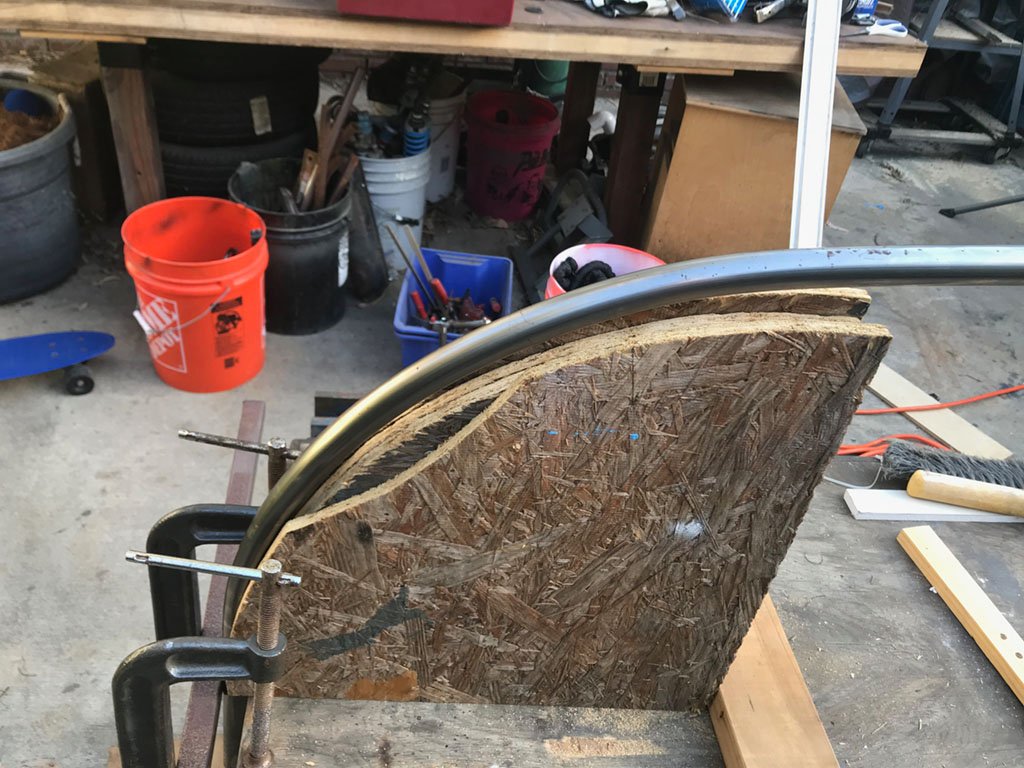
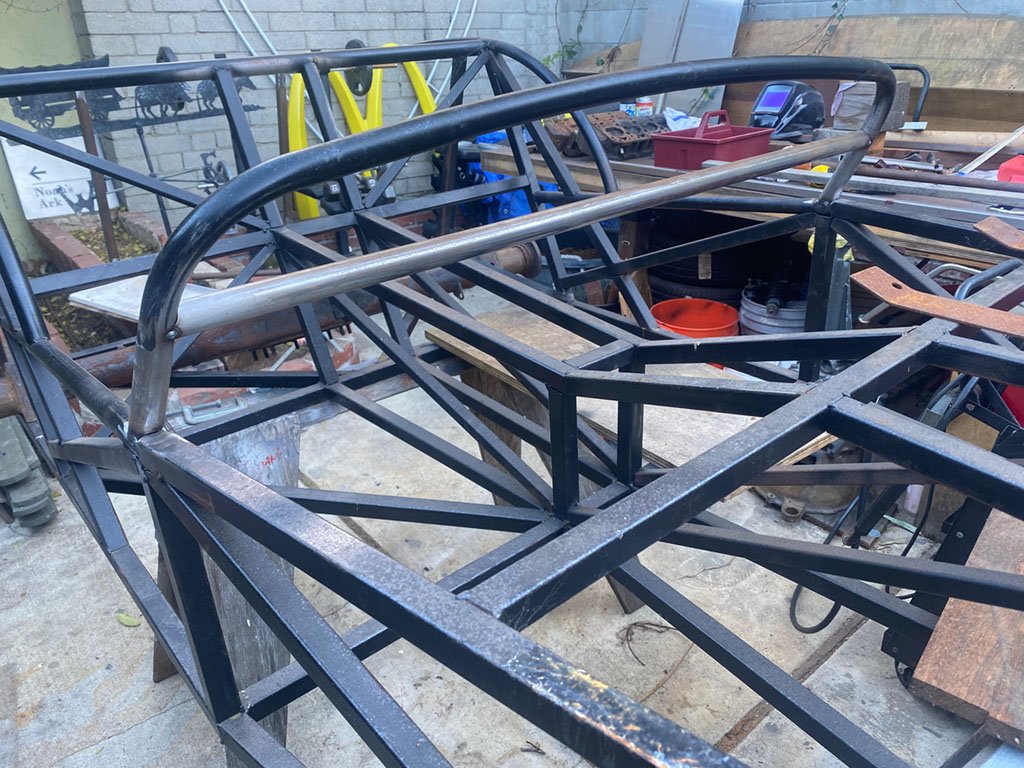
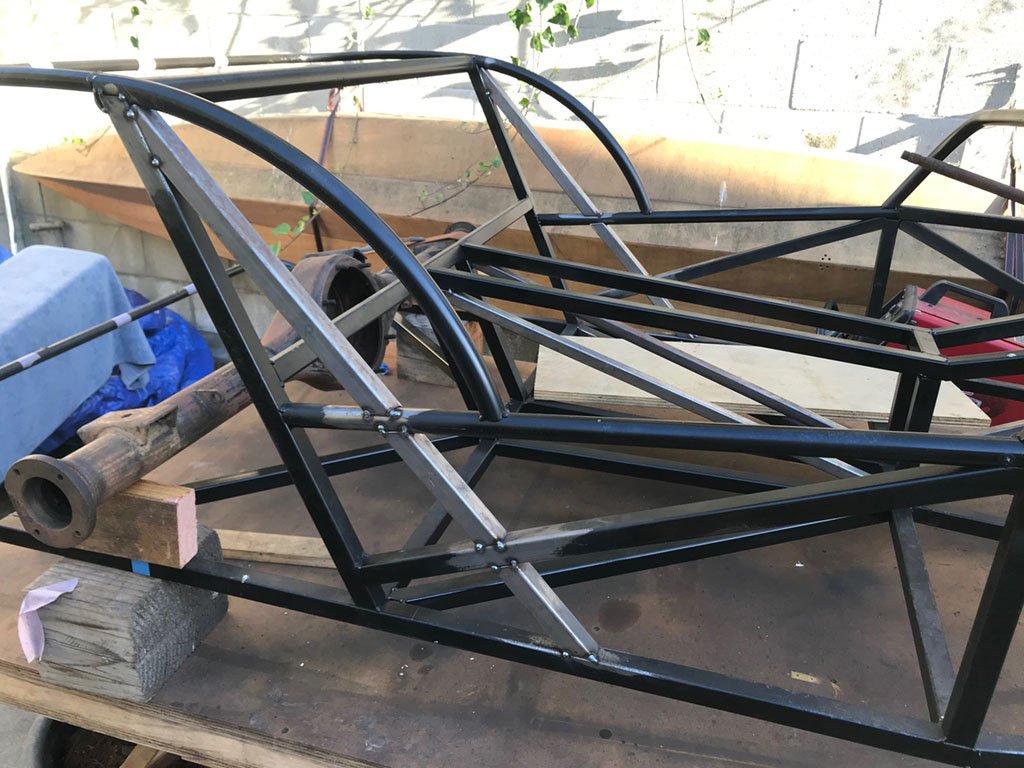
Jumping ahead a little... Frame core is tacked up, but I've been avoiding the curved pieces: dash hoop, cockpit sides, and rear hoops. I shopped around a little, thinking I could get a local shop to do them, but had a hard time finding someone who would bend just a few tubes, and do it for an unreasonably low cost (Locost?). So, I used a cheapo pipe bender from eBay, along with my own super precision bending fixtures . It worked out surprisingly well, I'm happy with it. Took a few tries to figure out the amount of spring-back. I tried to get the rear hoops and dash hoop each bent as one piece, but couldn't quite nail the width without burning through too much tube stock through trial and error, so I finally settled for a 2 piece dash hoop and 3 piece rear hoops. I was striving for a nice elegant arch to the dash, and the top rear hoop is gently curved in profile to blend with the cockpit sides.
-
You're partially right. Things are further along than the current posts suggest, but still a long way from completion. I started the thread retroactively and am playing catch-up to current status. And now back to our regularly scheduled program...
-
It's MIG. I don't have access to a TIG, so may braze (without a gas fluxer) some smaller items that may be hard for me to MIG, like tabs and brackets. I'll see how the MIG goes on smaller stuff.