wdb
-
Posts
670 -
Joined
-
Last visited
Content Type
Profiles
Forums
Store
Articles
Gallery
Events
Library
Everything posted by wdb
-
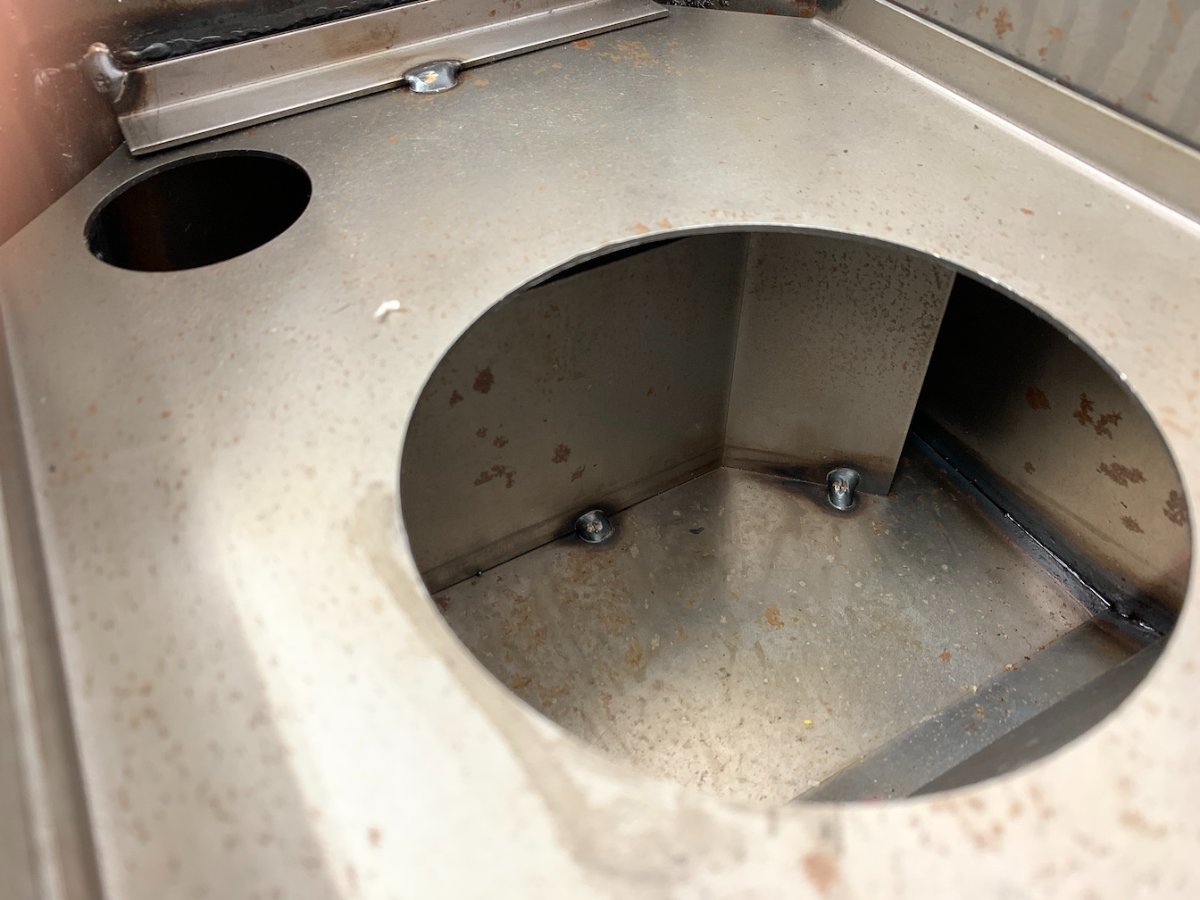
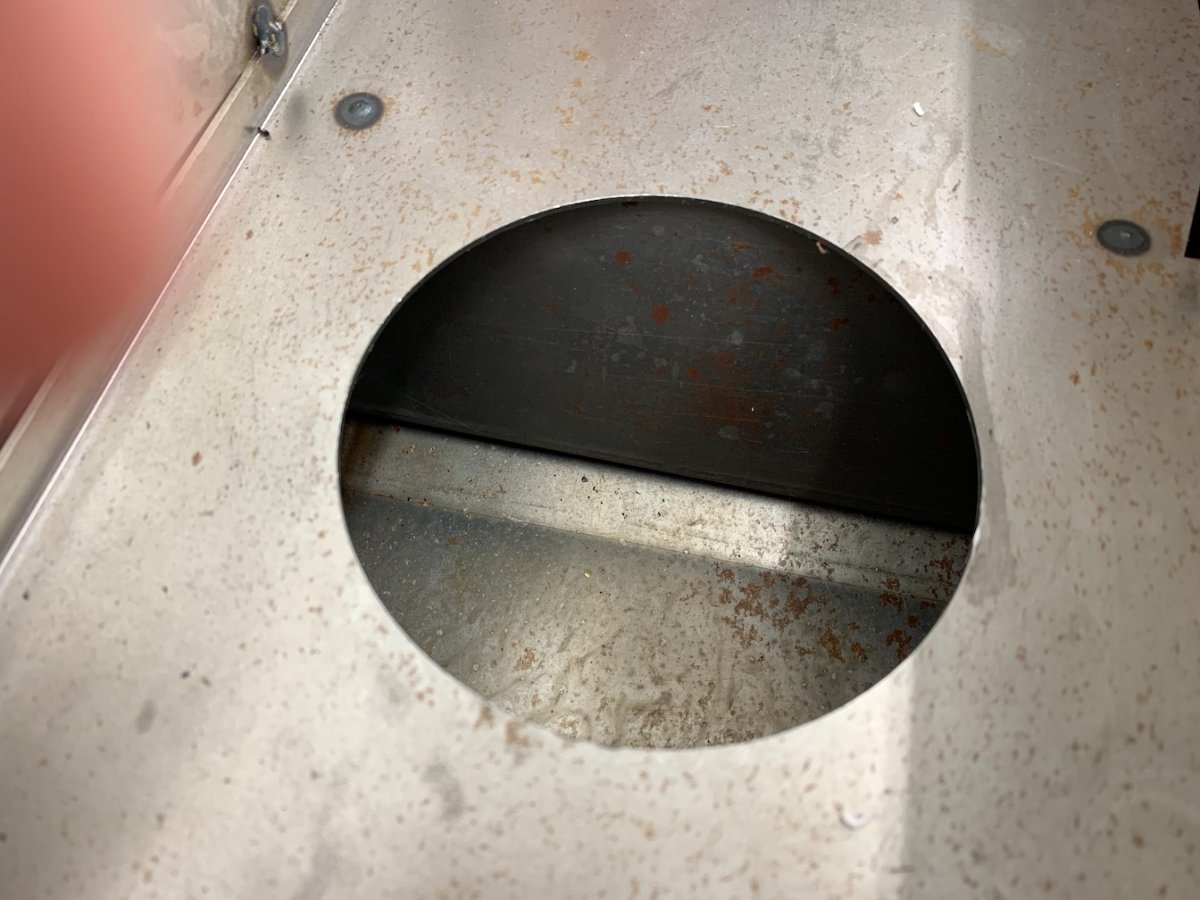
We didn't have any modeling clay in the household so I taped a felt pad to the pan and tweaked the pickup until I could feel it touch the pad when I lowered the pan onto it (the engine is inverted in the stand). Worked a treat. Final resting place is more centered in the hole in the sump baffle, with the pickup pipe (not the screen) about 1/2" off the deck. That is really close to where the stock setup was. I read an interesting story while researching pickup depth. Some fellow with a high output V8, high volume oil pump, and a stamped steel pan was generating enough suction to pull the pan up! The flexing eventually caused it to split. Next I need to find a way to increase the diameter of the pickup at the other end; that end rattles around inside the hole in the block. I'm hoping some heat and a shaft of appropriate diameter will let me expand the tube and give me a tighter fit. As it is the pump will suck air from around the outside of the pipe. After that I'll be figuring out the dipstick. It needs to move from the front of the engine to the back. I took plenty of depth readings on that as well, so I know how deep I want the oil to be in the sump. And there is a hole in the block the block for the dipstick, thankfully! There are pipe diameters to deal with there as well. Small steps.
-
That appears to be essentially the stuff I have in a box. I'm sorry to read that it makes shifting less fun. I guess I'm back to trying to find another lever in case I ruin the one I have when I cut it down.
-
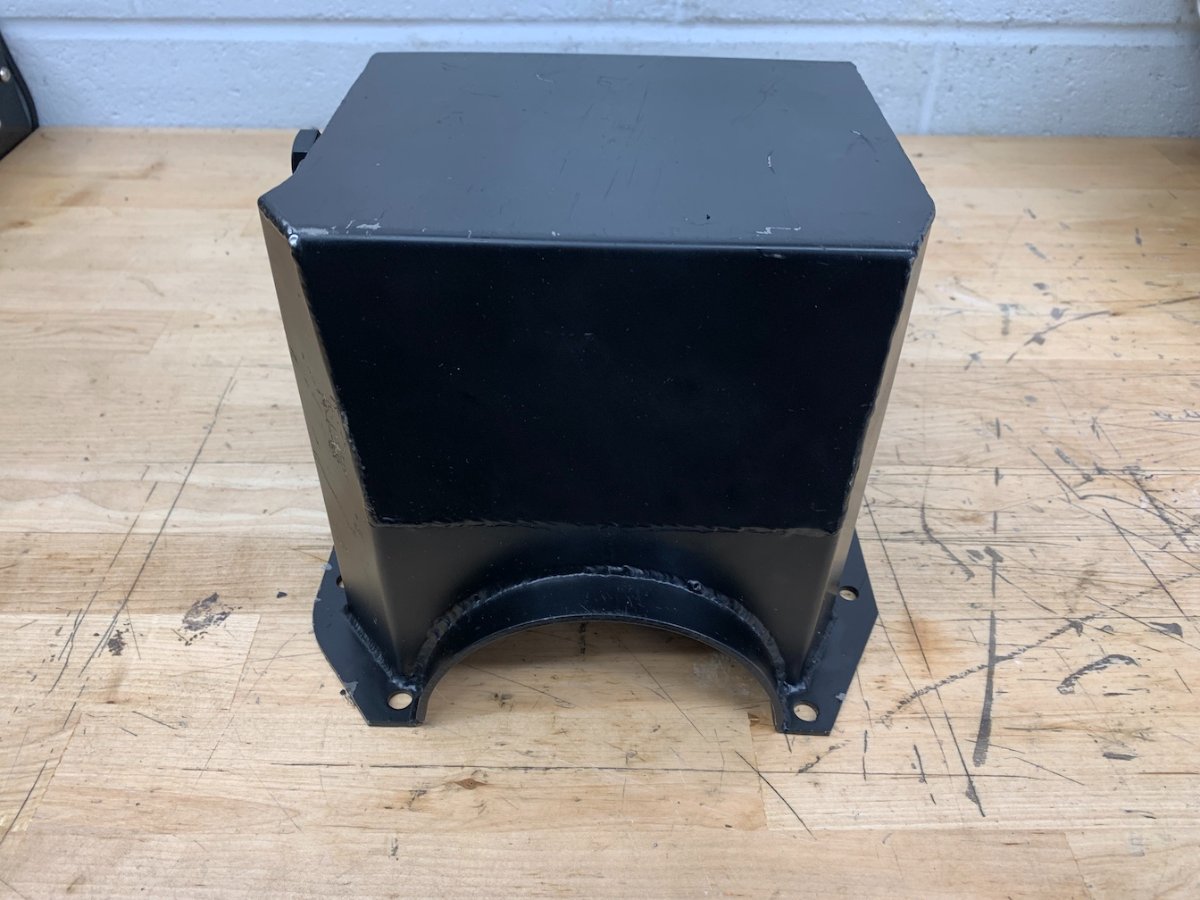
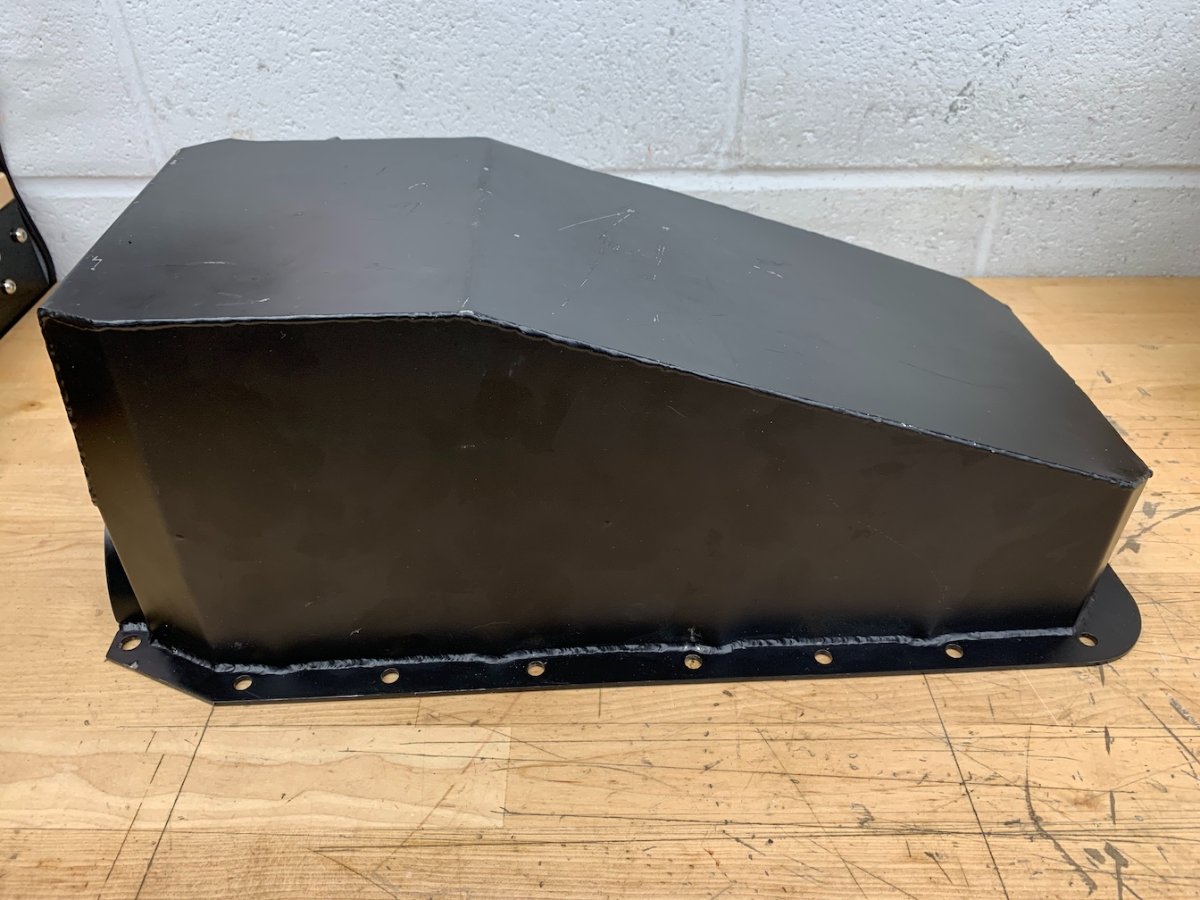
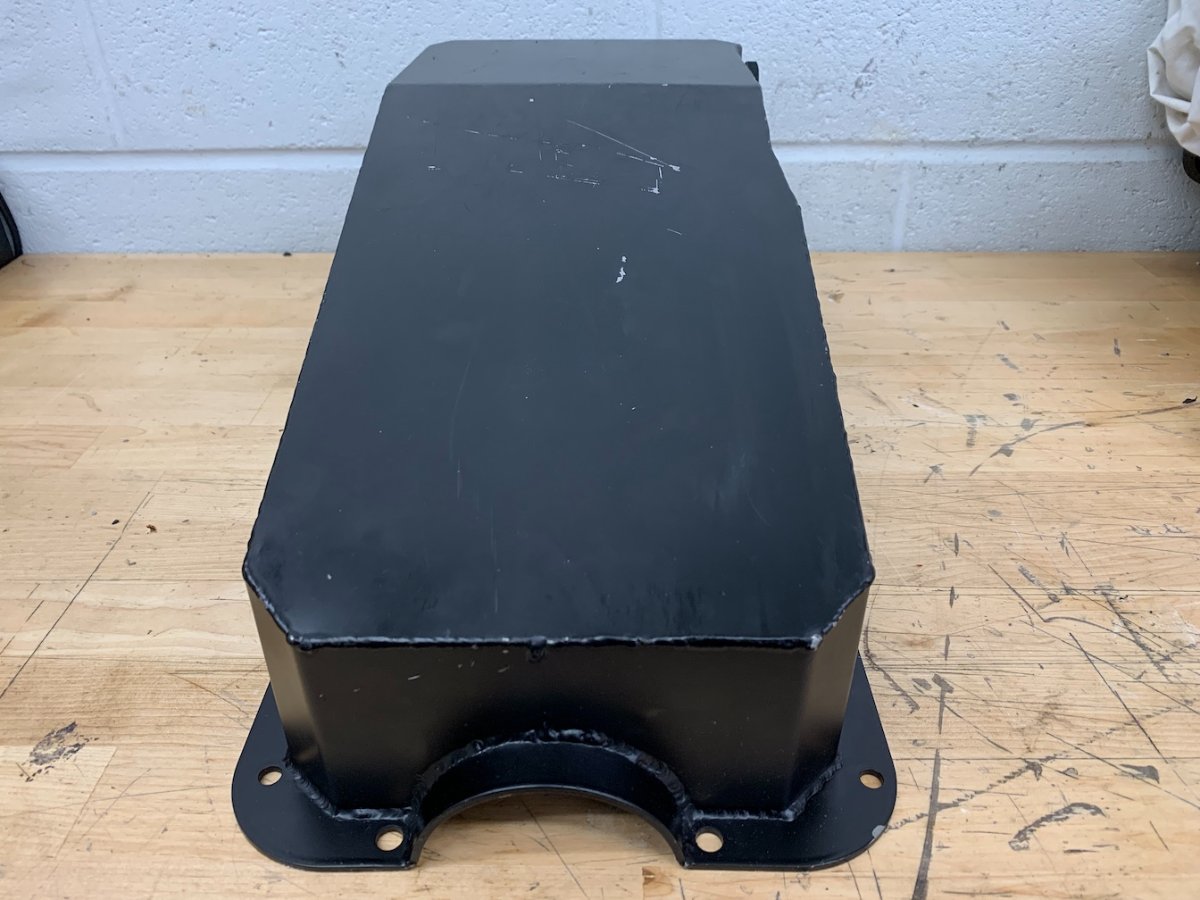
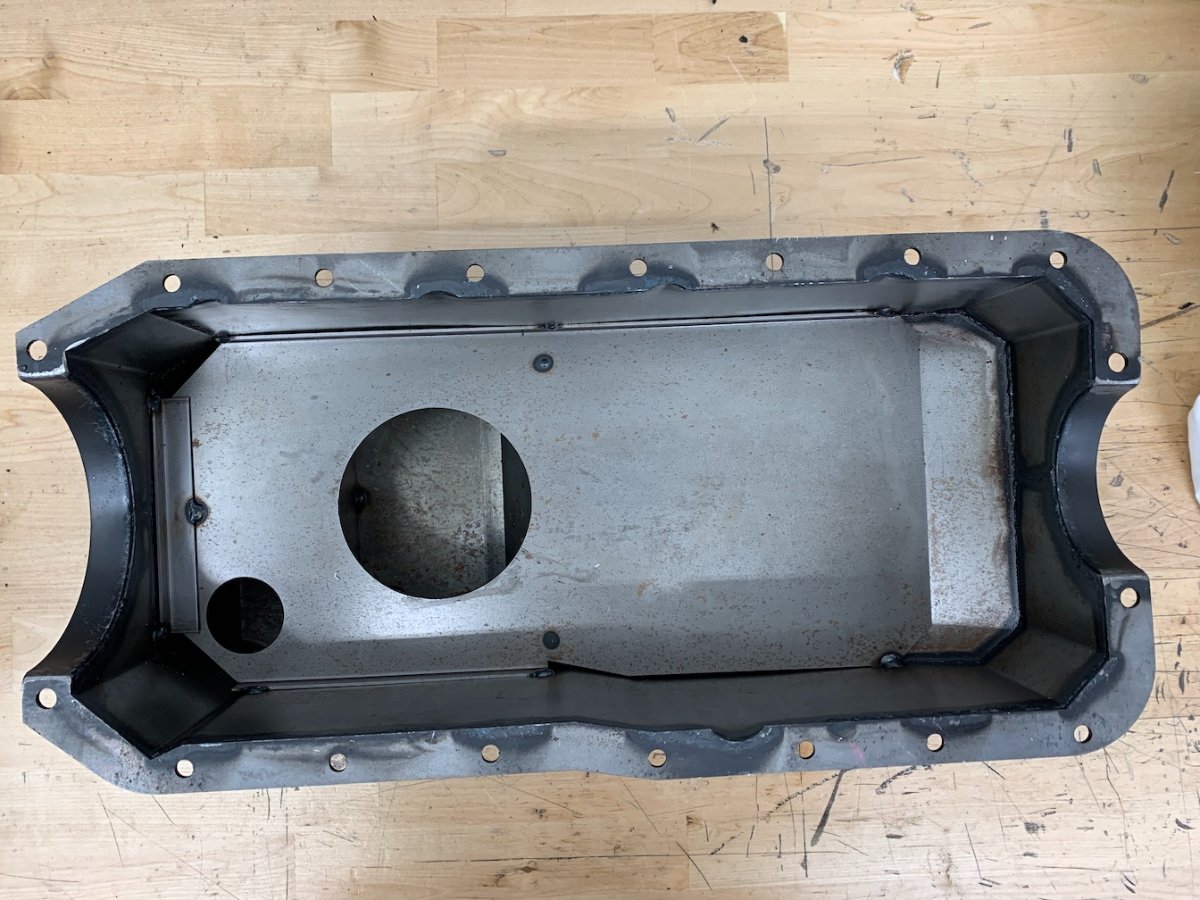
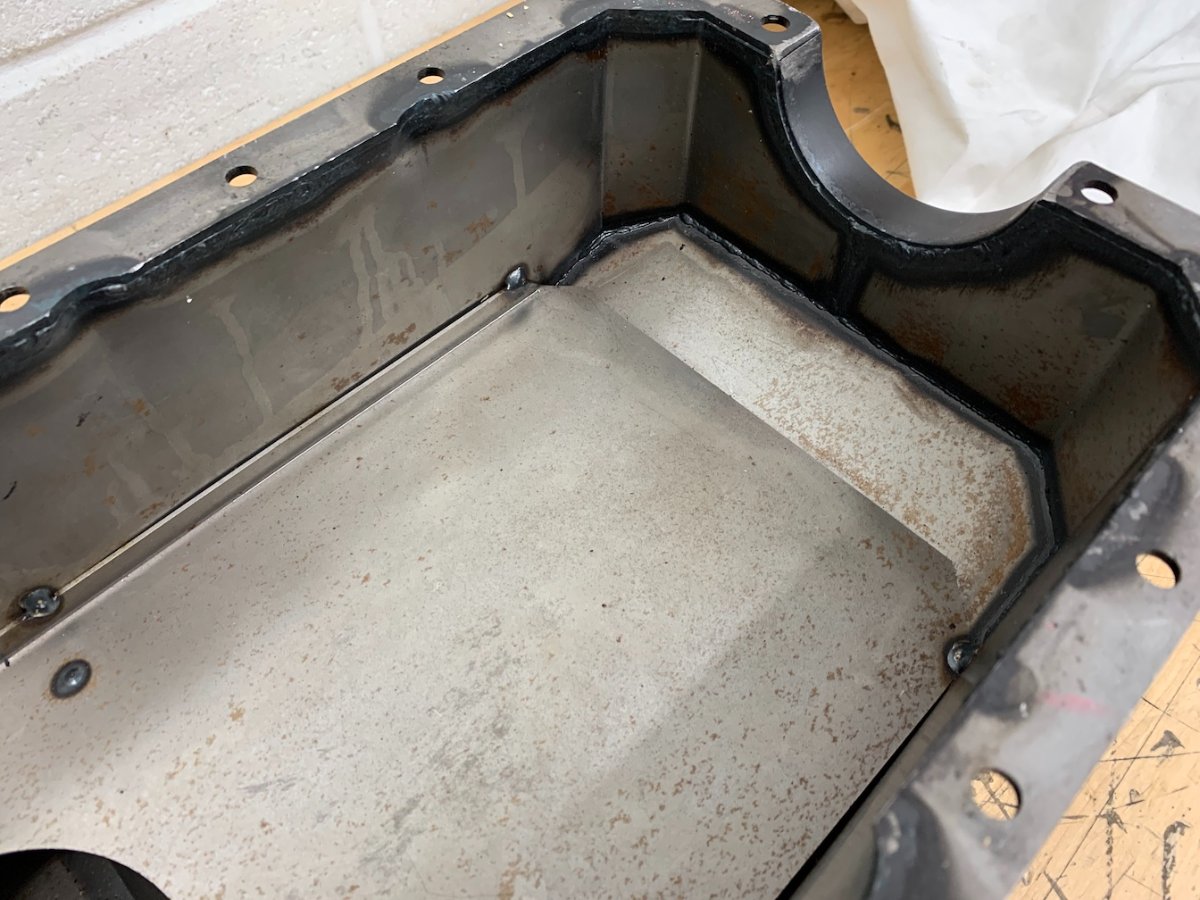
I promised some pics of the fabricated sump. Here you go.

-
I have a bunch of bits that are supposedly a remote shifter extension. I'd love to see some pictures of how they mount in the tunnel so I can figure out if I can adapt them to my (not a T-9) gearbox.
-
I'd love to hear/see more about your modified sump. Did you go wider and shallower? Baffles? Etc. I'm still working out where the fabricated sump originated. The entire outer surface is made from 1/8" steel plate, with thinner material inside for baffling. It's a beast. I'll take some detailed pictures and post them up.
-
In other news I visited Ray at r.d. enterprises again this morning and picked up some more bits. I have what I need to fully button up the gearbox now, which I'll do later today. Sadly his Elan shift lever will not work for my purposes. We also did some sleuthing on a supposed Cortina limited slip differential I bought on eBay. It does indeed appear to be a Cortina unit, because the axle splines are right and the ring gear fitting is a match. He says it would fit an Elan as well because the differential on both cars are interchangeable. It's a clutch pack type differential, but neither of us has any way of knowing what sort of lockup, slip percentage, etc. it might provide. None of it matters to me because I can't use it in my Italia rear no matter what. If you know someone who might be interested in it, I'm very flexible on terms. I'd like to see it get used somewhere.
-
The stock tube is quite long enough to reach nearly the bottom of the pan. The screen is spring loaded and although I did not reinstall to verify I'm 99.997% certain the screen sits hard against the bottom of the sump, under spring tension. Both stock tubes are press fit into the block. I'll make sure I have a good fit for the relief tube. I have a piece of brake line that should do the trick. Thanks for the information on its length. The fabricated pickup has a bracket that mates up to a threaded hole in the center rib of the block, so that should be secure once all is said and done. It needs to drop about an inch though to be near enough to the bottom of the sump. I think I have some room to play, as it hits the back edge of the sump baffle opening as it stands. I should be able to bend it forward and gain some depth.
-
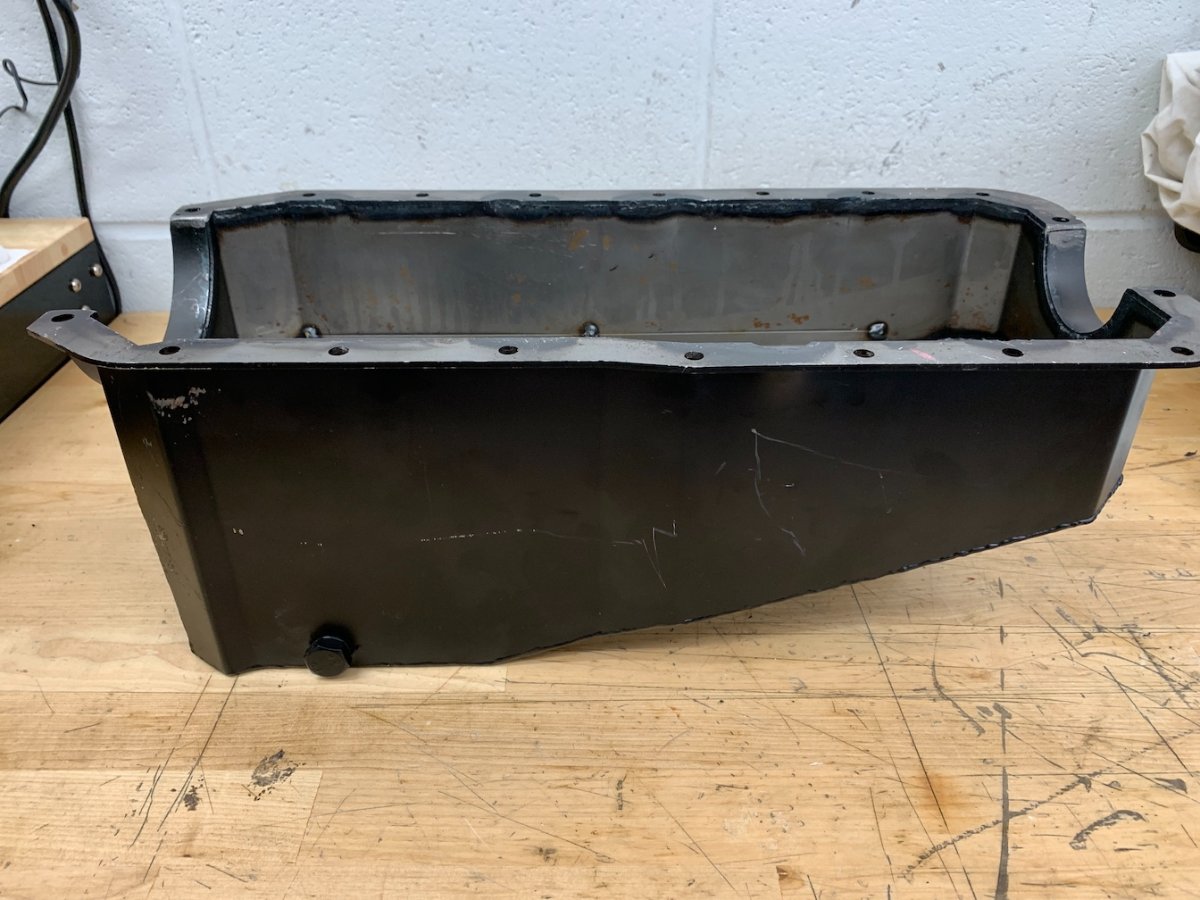
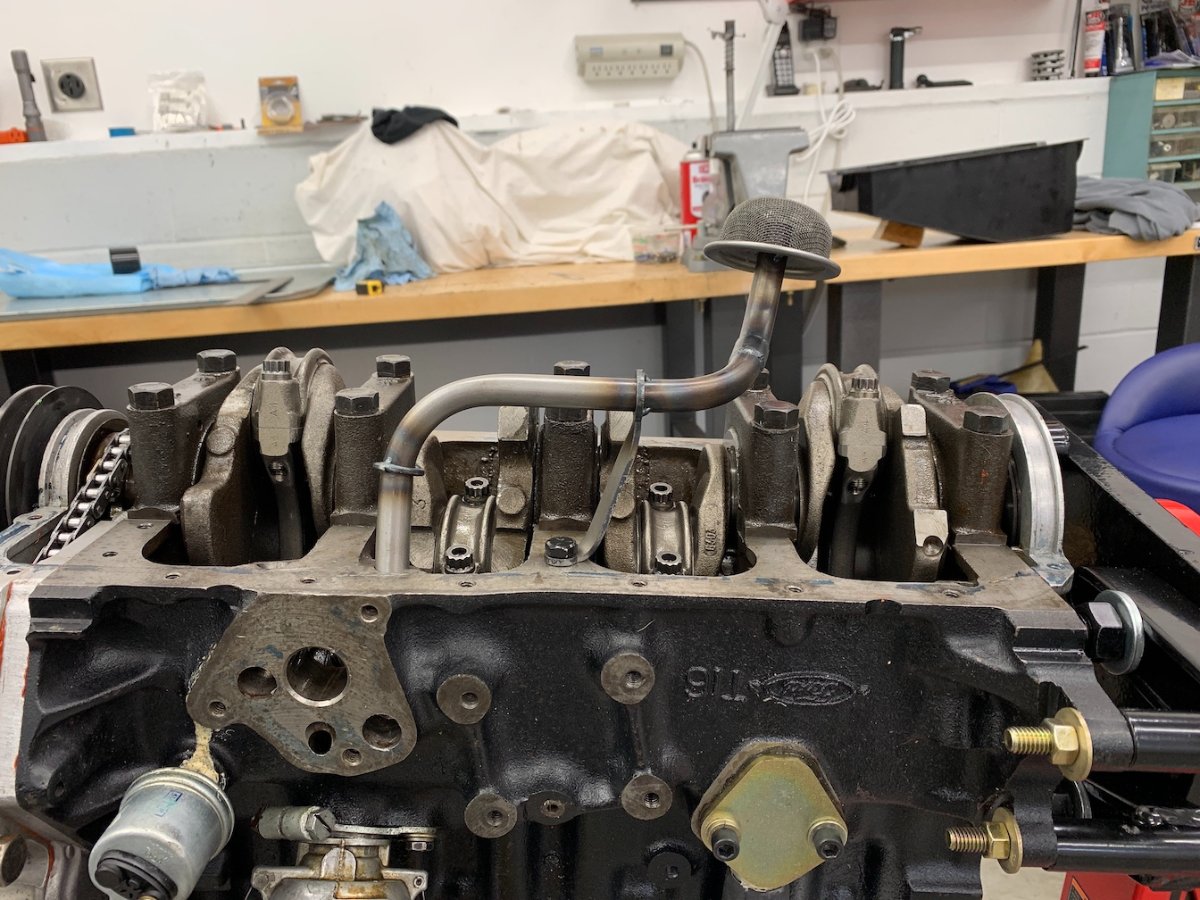
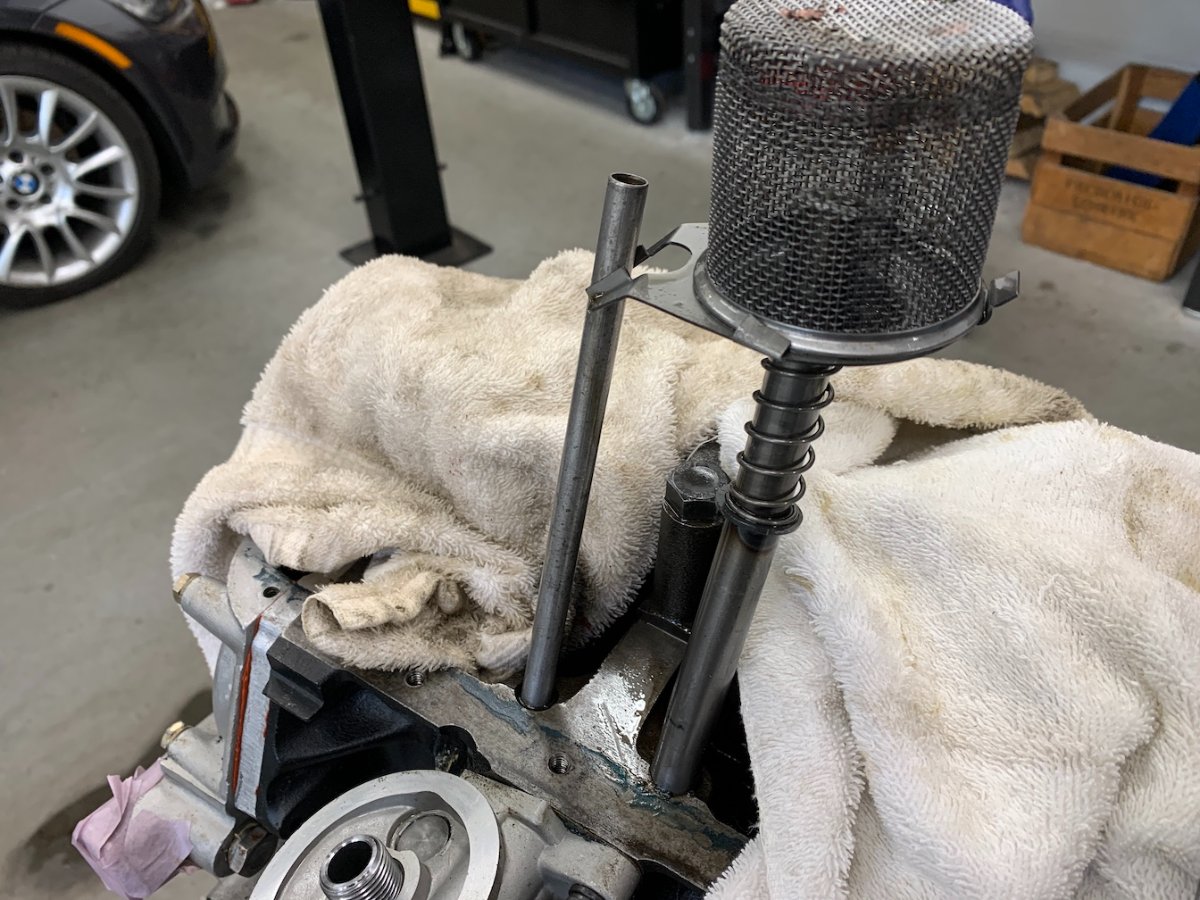
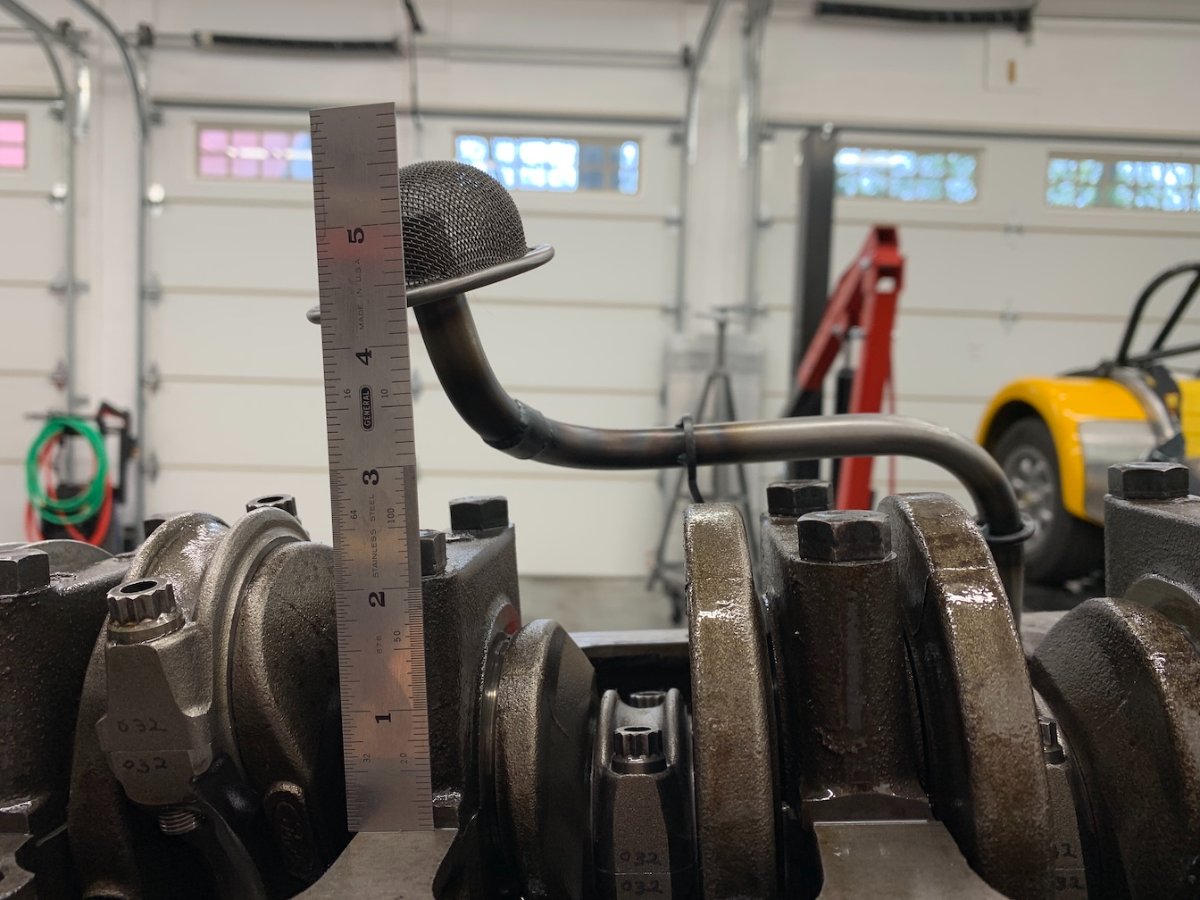
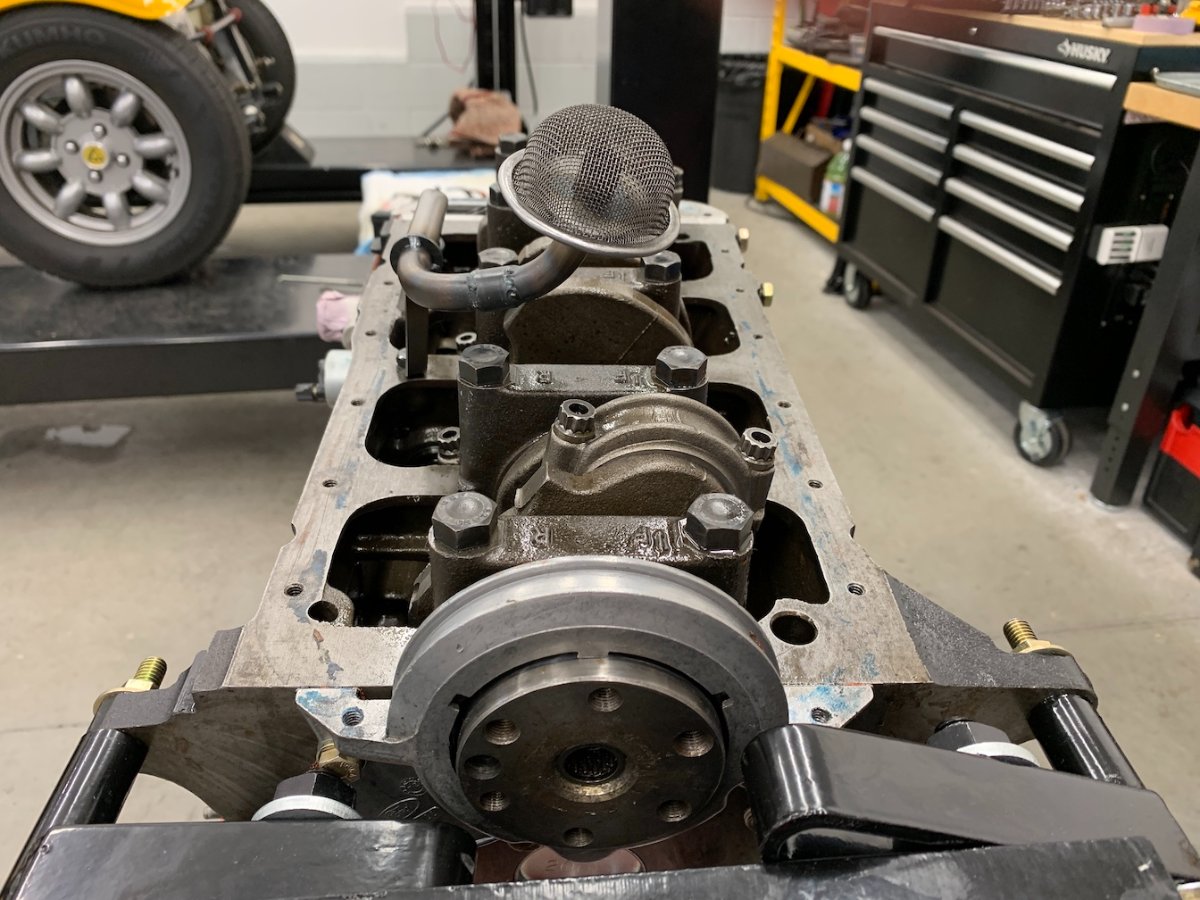
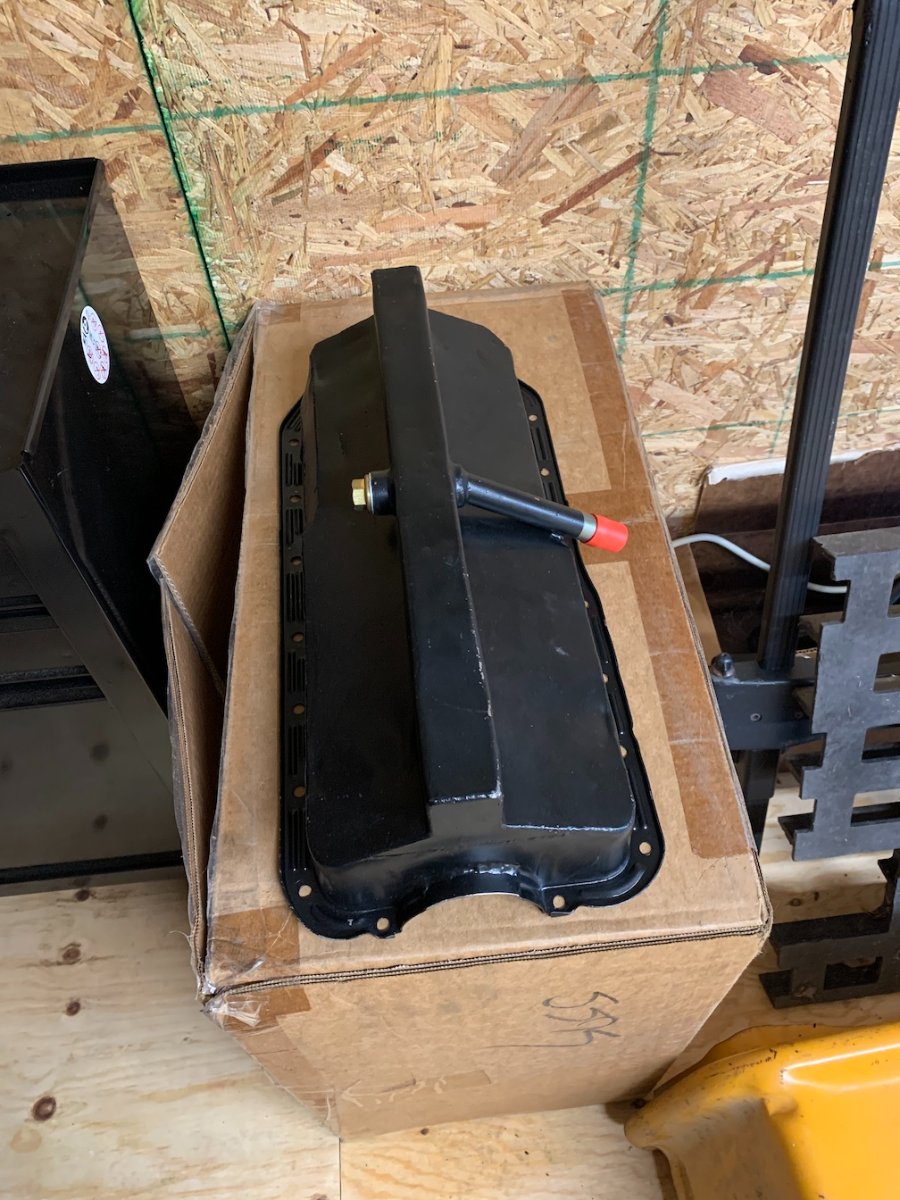
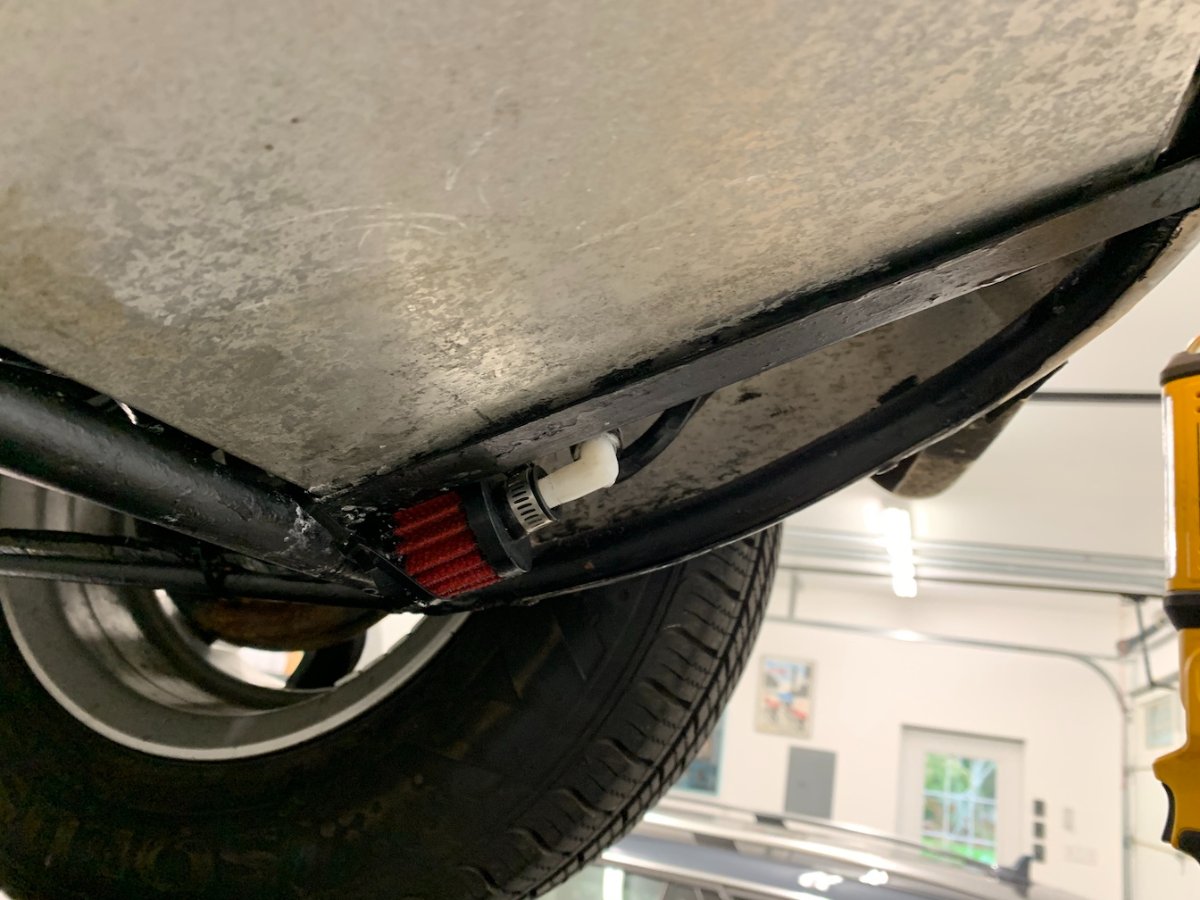
I finally pulled the oil pan off so I can change over to the fabricated pan. The oil pickup tube was a total BEAR to get out; I ended up gashing it up with a pipe wrench after all other attempts failed to move it a millimeter. It will still work but it's ugly. Now I find myself in a situation however. The fabricated oil pan came with an oil pickup that doesn't seem quite right to me. As can be seen in the pictures, it is at a bit of an odd angle. Also it doesn't reach as deep into the pan as I think it should, based on the old pickup at any rate. The pan depth at the pickup is about 6-3/4" but the pickup only goes down about 5-1/2". The old pickup was more like 6-1/2" into the pan. Secondly, what should I do about the overflow/pressure release tube? Should that also reach to the bottom of the pan, or is a shorter tube sufficient? I should note that the original pan was deep at the front, while the new pan is deep at the rear. If I need an overflow tube to reach back there it will be quite long and curvy. First picture is the old pickup and overpressure tube. The others are the new pickup.
-
Thanks for the encouragement. I was texting with friends this morning and said that "this car is proof that bad things happen when a car isn't driven". The poor thing has sat still most of its life, and now that I've put miles on it all of the stuff that stuck, rotted, and dried out during that time is making itself known. The more I think about it the less surprised I am. Besides, now I get to put more cool stuff on my car.
-
Well well. Today was interesting. I found two battery cable ends that came off in my hand after a gentle tug. Not mentioning any names but look at earlier posts for hints as to the perpetrator. I reattached them and soldered them up and they're good to go. I found what is almost certainly a leaky front brake caliper. I found a leaking shock absorber. This is turning into more of a project than I first imagined.
-
And lawyers. (Insert Shakespeare quote)
-
At least 3 of the 5 bolts securing the tail housing are open into the gearbox. I didn’t check the other two. Also on my setup the 3 bolts fixing the lever housing in place at the back end of the tail shaft also open into the oil. I’m probably overreacting due to the mess but I only want to do this once. On another note I came up with a possible shift lever. Maybe even a ‘short shift’ rig. More on that as I get more information. As often seems to be the case with these little lovelies, there may be some fabrication involved.
-
Yep. The 'breather' is a ~1/8" hole in that steel plate, with a baffle under it to keep the splash from simply flying straight out. I thought it might be blocked and therefore the cause of the gearbox leaking literally everywhere, but it wasn't. I think the previous assembler was just a bit too enamored of RTV. The gaskets were literally impregnated with the stuff and I was cleaning excess off from everywhere. The tailshaft seal, which I thought had melted, was actually oozing excess sealant. It would not surprise me to learn that they used an entire tube of the stuff. Whatever type they used, it did nothing whatsoever to stop oil seepage past the gaskets.
-
I lucked into my 1995 Caterham last year. It had 535 miles on it when I took it in. I hereby nominate the 3 former owners.
-
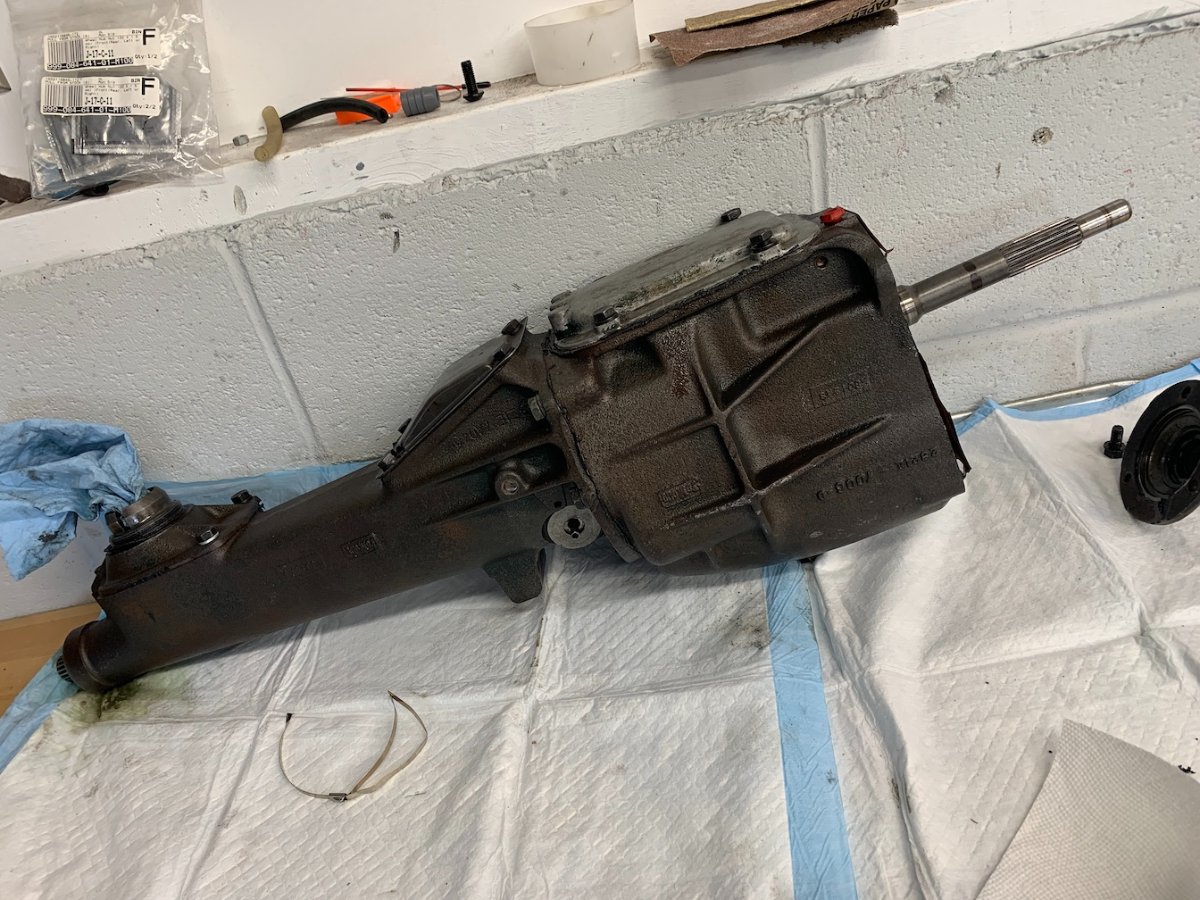
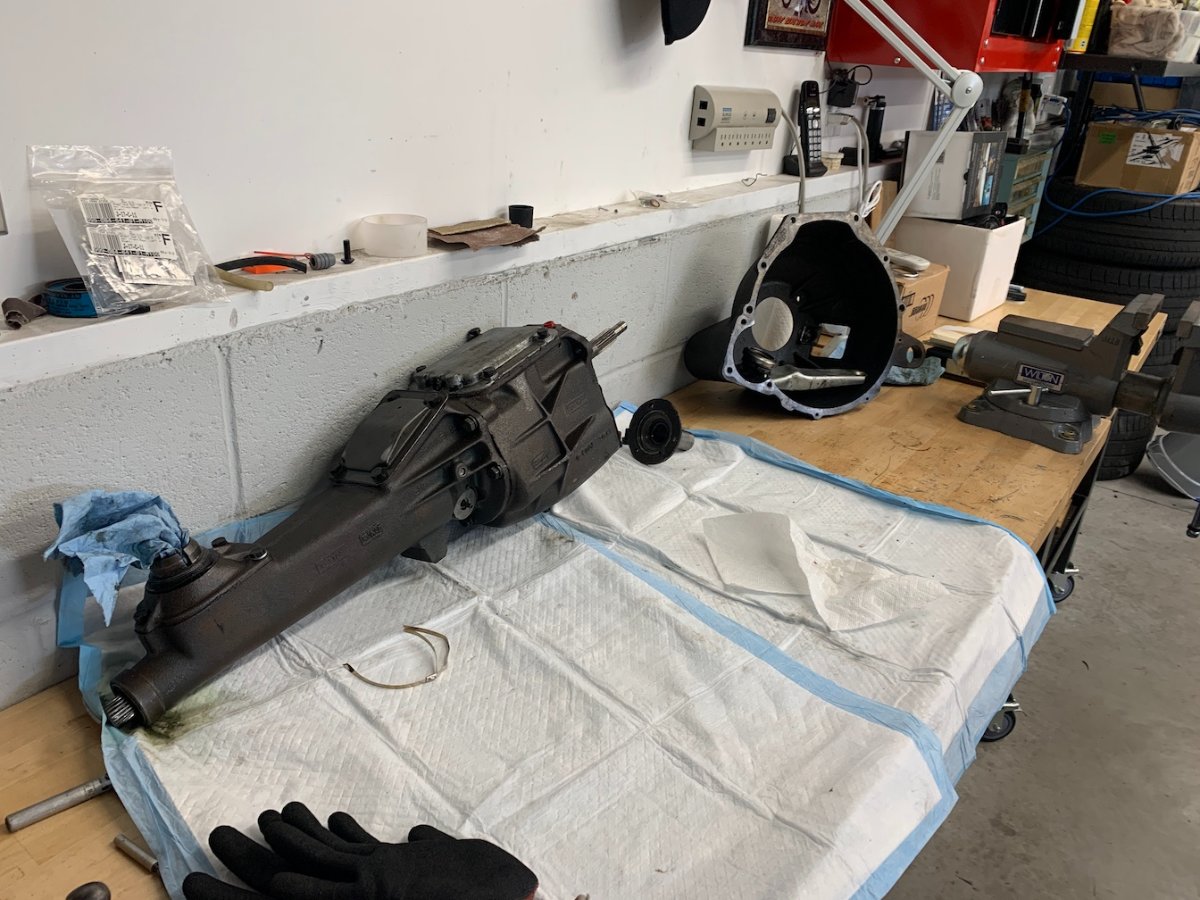
Hmm, looks like my last post was never actually posted. Anyway, the gearbox is done-ish. I still need an input shaft seal but then that's it. I gave it a coat of paint while it was apart, and I used some copper spray gasket coating to hopefully fill some of the gaps in the coarse cast iron surfaces. I used non-hardening Permatex on threads where they are exposed to the gear oil as well. Turns out to be a surprising number of bolts.
-
This got me curious so I went to the Panasport website + did some googling. I didn't find an official answer but it is quite obvious that Panasport is adamant about race wheels not being meant for street/highway use. Plenty of conjecture as to why, most of it having to with weight and construction.
-
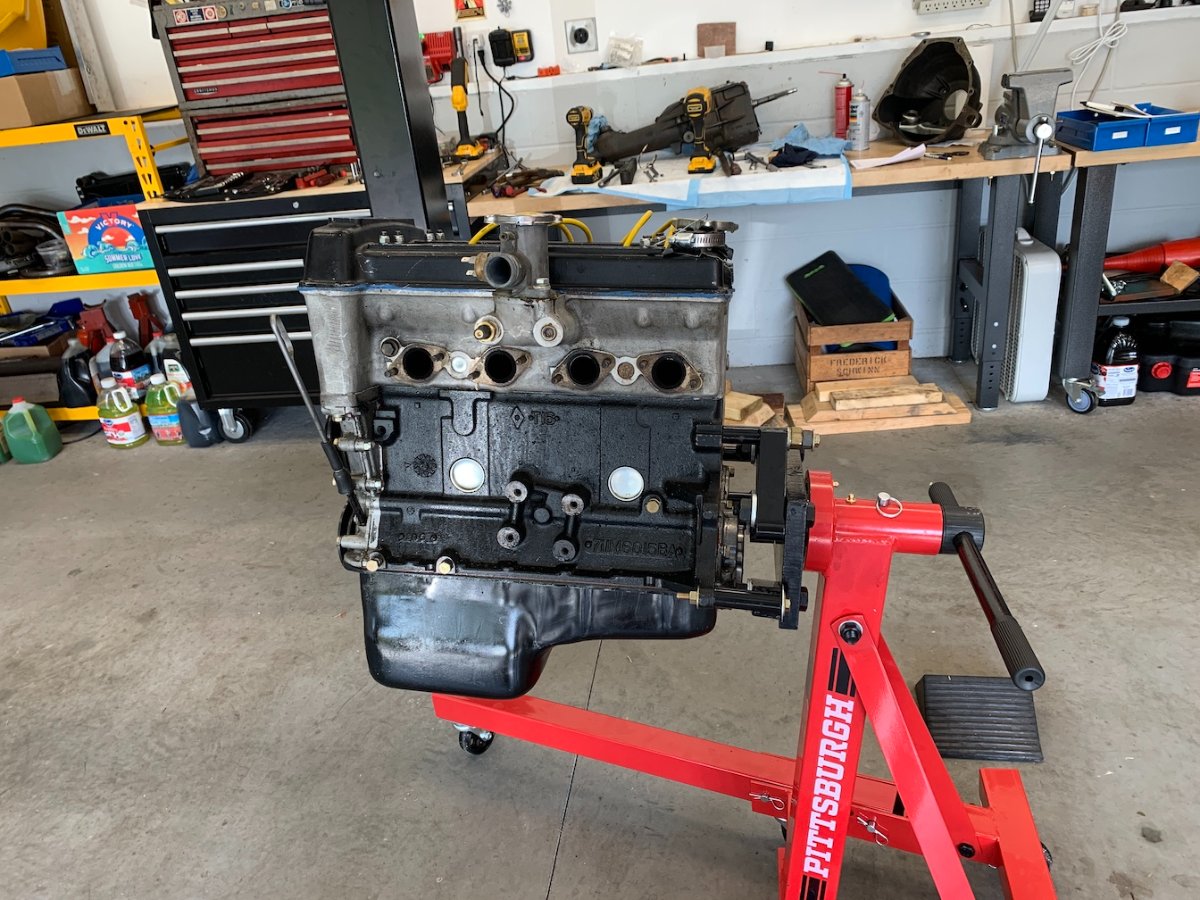
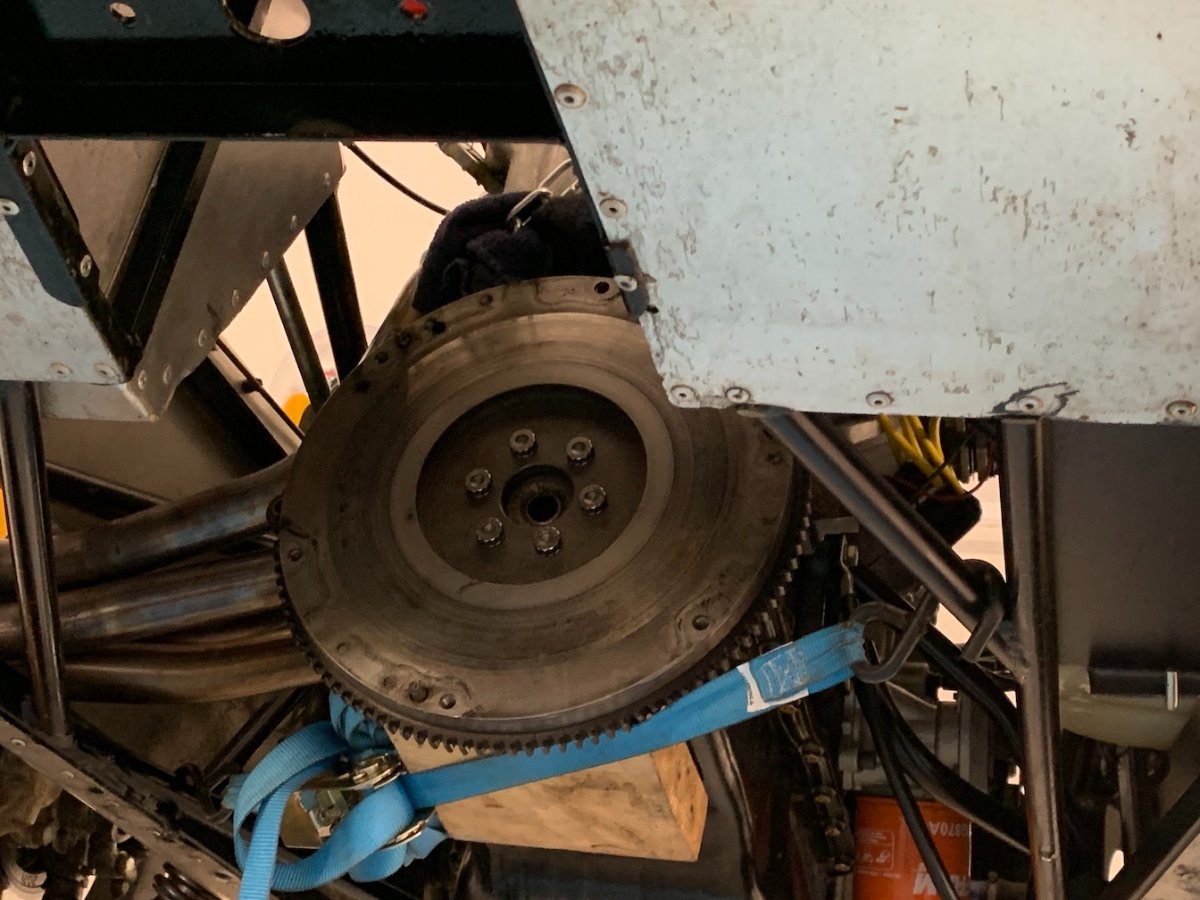
Engine is now out and on the stand. I found quite a few bolts that were not as tight as they should have been, plus one bolt that was missing entirely! This puts me in a certain frame of mind about a certain restoration shop. And that's all I'm going to say about that. I put together a list of stuff I want to do. And I've been to r.d. enterprises, which is nearby, and collected some bits for sealing things up. I now know that there are 3 possible front seals for the transmission, which means I get to make the trip back over there after I do a bit of sleuthing. But it’s not the worst of drives, and I'm hopeful that the end result will be less goo where it shouldn't be. Next big decision is whether to go with the heavy duty fabricated oil pan, or bite the bullet and do a dry sump. The oil pan is very vulnerable on the car, to which the current stamped steel pan can attest! I should have taken a picture but let's just say that the drain plug hex flats are no longer even.
-
Speaking of gears, I am trying to source a spare shift lever to hack up. My lever has a ball at the end; everything I see online seems to show a fork. (Note: my lever has been bent for clearance by the prior owner.)
-
I do. It's in a box of parts that came with the car. The shifter comes through the floor under the dash now and I am going to look into using that stuff to move it back. Or I might just cut the lever and be done with it. Still looking into it. Thanks for the information. I already sussed out the bell housing bolt. I wanted to start disassembling further but it appears as though there may be springs and such under the top cover so I am awaiting the arrival of a manual. This gearbox was literally leaking from everywhere. Every gasket, every seal. I need to make sure the vestigal breather is actually functioning. I spent yesterday obtaining and assembling a 'cherry picker' and engine stand. It's been a while since I pulled an engine but the last time I did it was much more economical to rent; not anymore. Harbor Freight has put the kibosh on that I guess. I bought both from them and the quality is surprisingly good. They're upping their game. My only problem now is where to put the blasted things when I'm not using them. The garage is downright crowded at present.
-
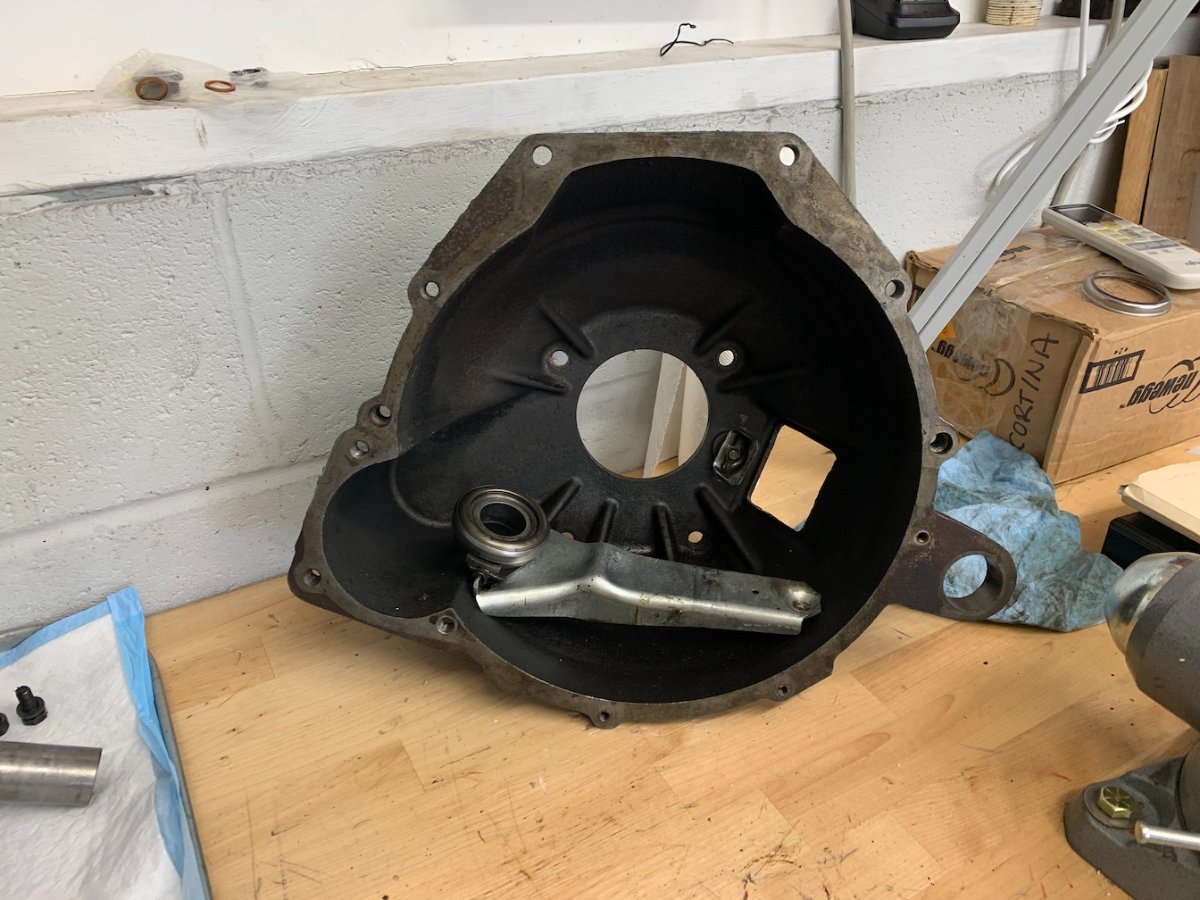
And now to the reason I started this thread -- the gearbox. It's a Ford Cortina 4-speed that was last assembled in 2006 according the docs. It sat unused until about 2018 or 2019, at which point it was fitted to the car. During that extended period of time I suspect all of the seals and gaskets dried out, because it leaks everywhere it is possible for it to leak. I mean it. I wanted to pull the gearbox to reseal it and assumed that meant engine out. However I read a BaT article about someone having pulled a Caterham gearbox out the bottom and thought I'd try that first. tl;dr is that it can be done. But don't. I'll be pulling the engine next.
-
My next effort was to address the flaking powder coating on the frame. The car had mostly sat still its entire life -- it had a whopping 530 miles on the odometer when I bought it -- and some of that time must have been in damp climes. I've also heard that the powder coating may not have been of the highest quality in those days. I don't have any pictures but it was a peel-scrape-wirebrush affair followed by Eastwood Industries Rust Encapsulator applied by brush. I really like the product, and it doesn't hurt that the company is 1/2 hour away from my house. The result isn't a concours job but it did cover the bare bits. And this car ain't no trailer queen. https://www.eastwood.com/eastwood-black-rust-encapsulator-paint-over-rust.html
-
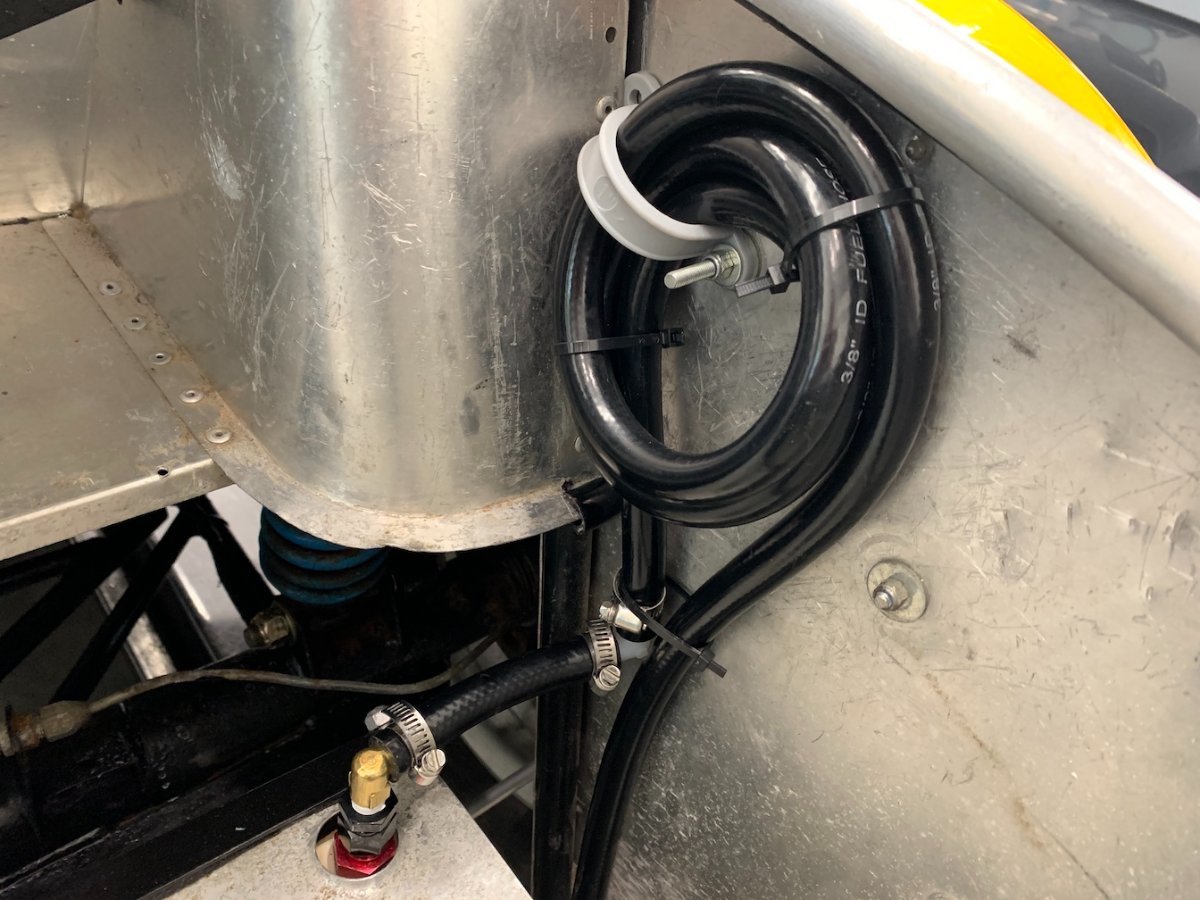
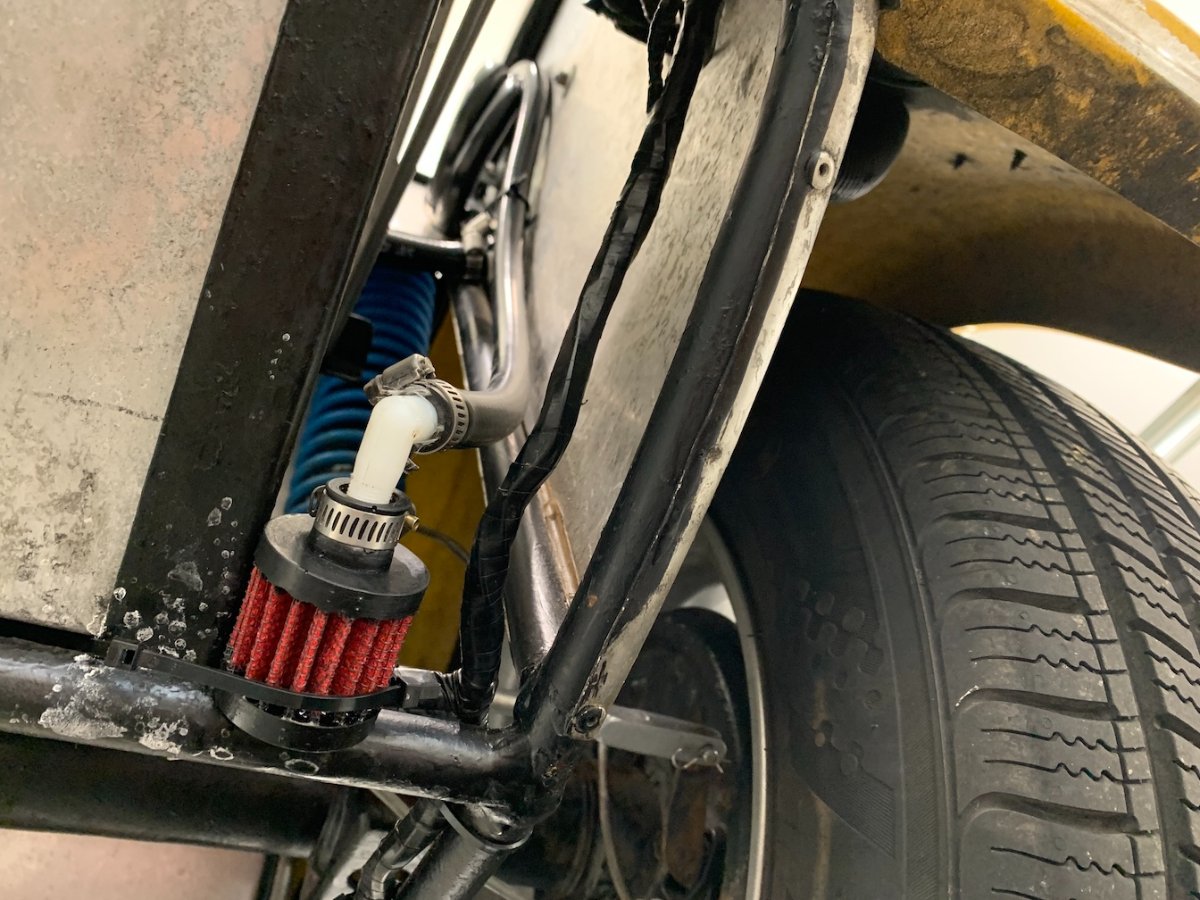
The first thing I did was attempt to corral the copious amount of gas fumes the fuel cell was dumping into the atmosphere. My moderately well sealed garage would fill up with enough vapors overnight that the smell was quite noticeable. I found an online drawing for a vent system and made one up. Works pretty well. There is still some eau de octane floating about but much much less than before.
-
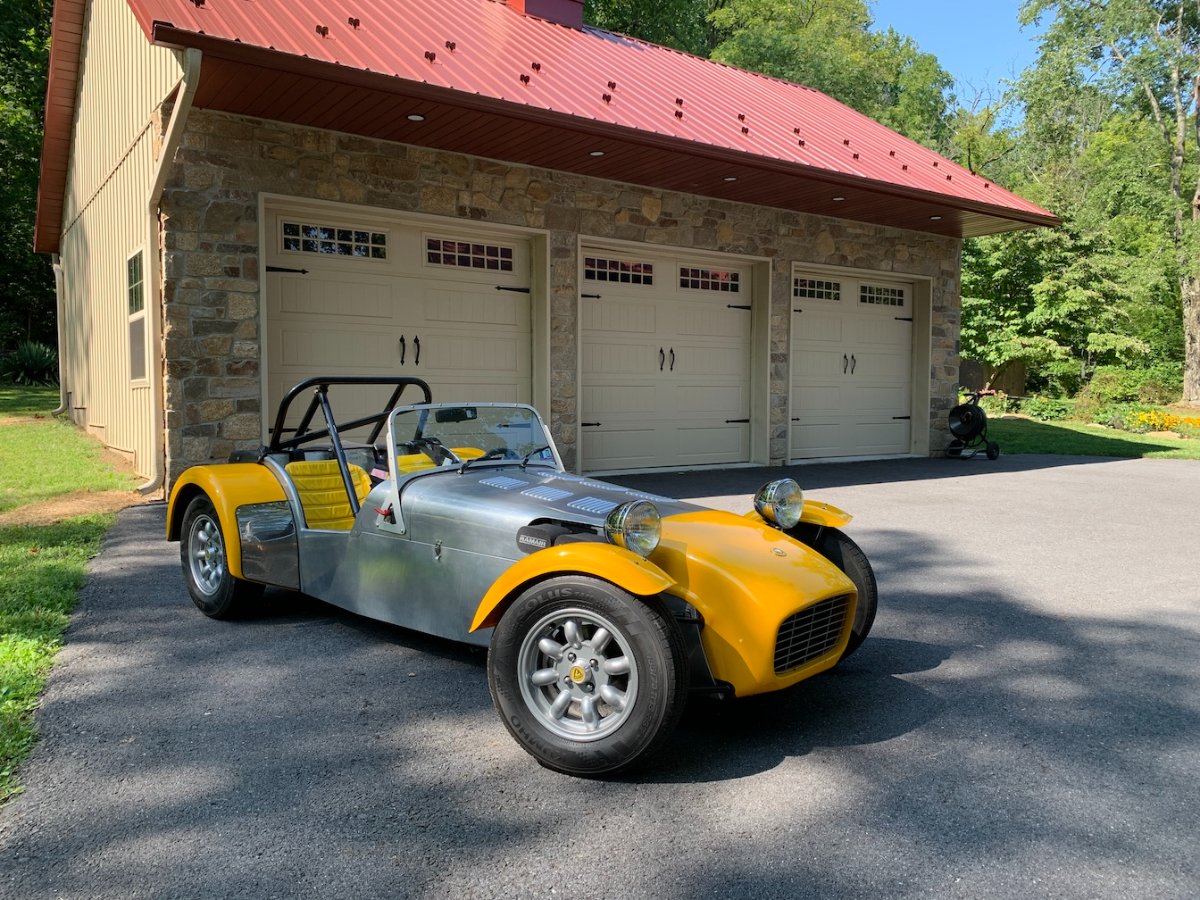
I suppose I should start a "build" thread; even though the car was built when I bought it, I've done a thing or two to it already and intend to do more. I'll document work on the car and modifications and so on here. I'll drop a picture of the car "as received" in here so the post doesn't look bare.
-
Thanks for the offer. If nothing else comes in closer to home, I'm game.
-
Yes I suppose I could just stuff a pillow under there for now, or equivalent. The rollbar is the "FIA" bar from the period (I think!) which is why it leans in. I'm not sure how it compares to newer bars in terms of clearances. Not sure what you're referring to re "3 inch strip of mat" or "full pan mat". My interior surfaces are bare-nekkid aluminum with the exception of the dash.