wdb
-
Posts
670 -
Joined
-
Last visited
Content Type
Profiles
Forums
Store
Articles
Gallery
Events
Library
Everything posted by wdb
-

Some of the Ferraris in "Ferrari" were Caterhams
wdb replied to Nick OTeen's topic in General Sevens Discussion
A bit more on the making of the cars here. -
I guess I'm old fashioned. I've always gone with the color of the spark plugs. But this does seem like a nifty idea. The location looks logical and also possibly the only place to do it. As for air being drawn in, the result would be an artifically lean reading; I'd rather have my mixture richer than necessary than leaner, so... there's that. I'm intrigued. Keep us apprised of progress please.
-
Which is why I adjust my mirrors before I strap in -- when I remember!
-
I have those mirrors and windshield frame mounts and do not have a problem with them coming loose. They get knocked out of whack easily but I just reach out and turn them back and they stay put. Until the next time they get bumped anyway!
-
I like Chemical Guys Headlight Restore. It too is a mild polish but also claims to have protectant qualities. I don't imagine the protection lasts through many washes though, so I reapply a couple of times a year. Headlights that are farther gone need to be sanded. I've used 3M kits but I'm sure a lot of them will do the same. I'd get one with a polishing pad and discs to simplify the process. Any sort of factory applied protection will be lost, so finish up with something that at least claims to help with UV rays.
-
How many miles did you drive this year?
wdb replied to Vovchandr's topic in General Sevens Discussion
But you can make up for it during the months when we cold staters can't. So get to it! -
How many miles did you drive this year?
wdb replied to Vovchandr's topic in General Sevens Discussion
I don't track milage that closely but probably in the high 3 digits. I like the idea of counting the number of outings. -
I measured my ride height according to Caterham and it is spot on. I have a blown front shock, plus I want to go to Avon tires which will cause a loss of clearance, so coilovers will be on the agenda along with the dry sump. That will give me proper ride height adjustment. I truly think I need a guard of some kind though -- even with a dry sump -- because I never even saw what destroyed my lovely fabricated sump; there's just too much crap thicker than 2-3/4" on the roads around here I guess. Thanks for the reply. I won't junk up the thread any more.
-
Looking for an update and hopefully some pictures and maybe information on what hardware you used -- oil pump etc. I've just ruined my second wet sump and don't want to add 50 lbs. of skid plate, so I'm delving into dry sump on my twincam.
-
Free bump with a request to see some pictures of the dry sump setup. I'm getting ready to do mine (after my second ruined wet sump) and could use ideas.
-
I wonder if those center lock adapters could be swapped out for a 4-bolt arrangement...
-
It has a 6-speed shift knob...! EDIT: just saw this. "Primary damage: ALL OVER" "Secondary damage: FRONT END"
-
Dave's doing well! He and his wife did the heavy lifting for the run yesterday. He still had the Birkin as of a couple of years ago, not sure about now. In other news, my car has sprung a leak. I went out to the garage this morning and found about a quart of oil on the floor under the car. I hit something in the road yesterday so that could be the cause; I came around a sharp turn and whomp! Never even saw it. I'm lucky to have made it home.
-
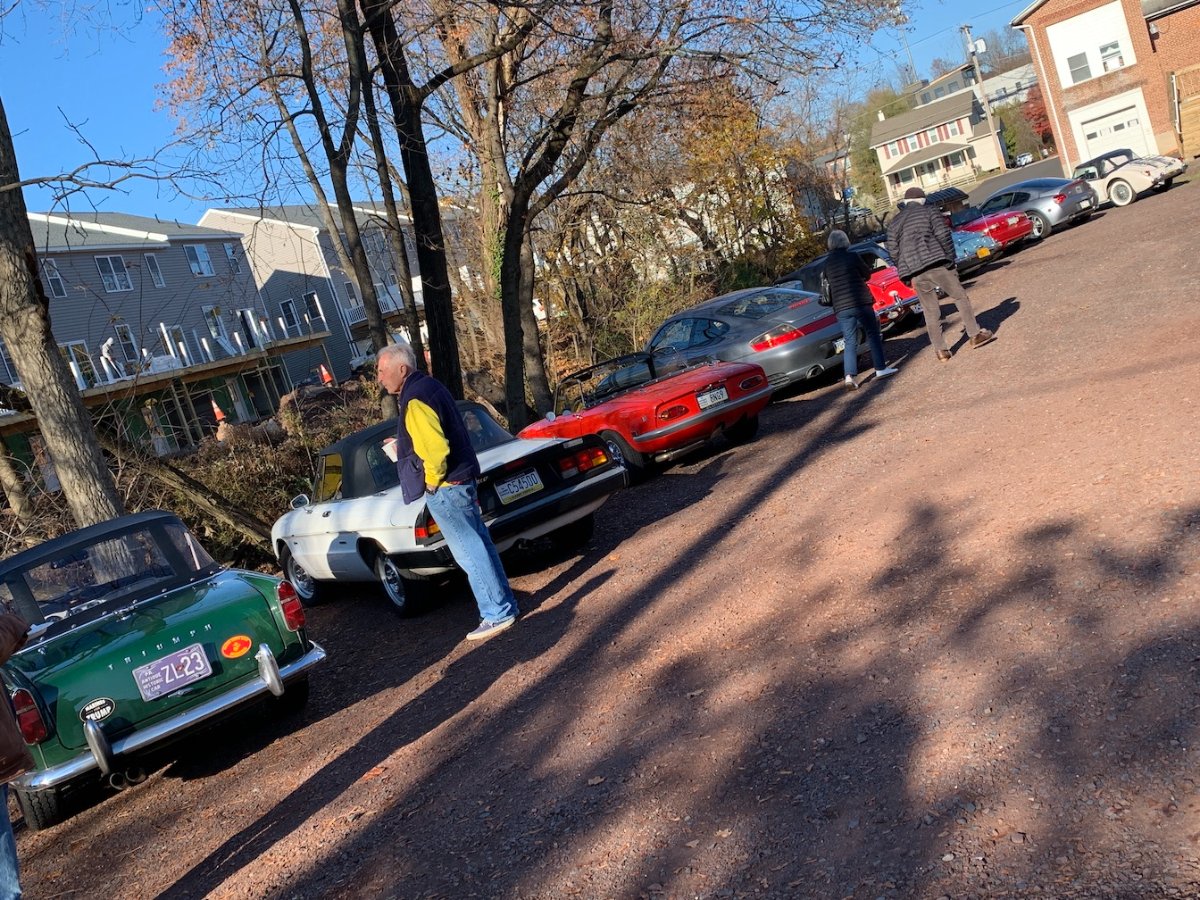
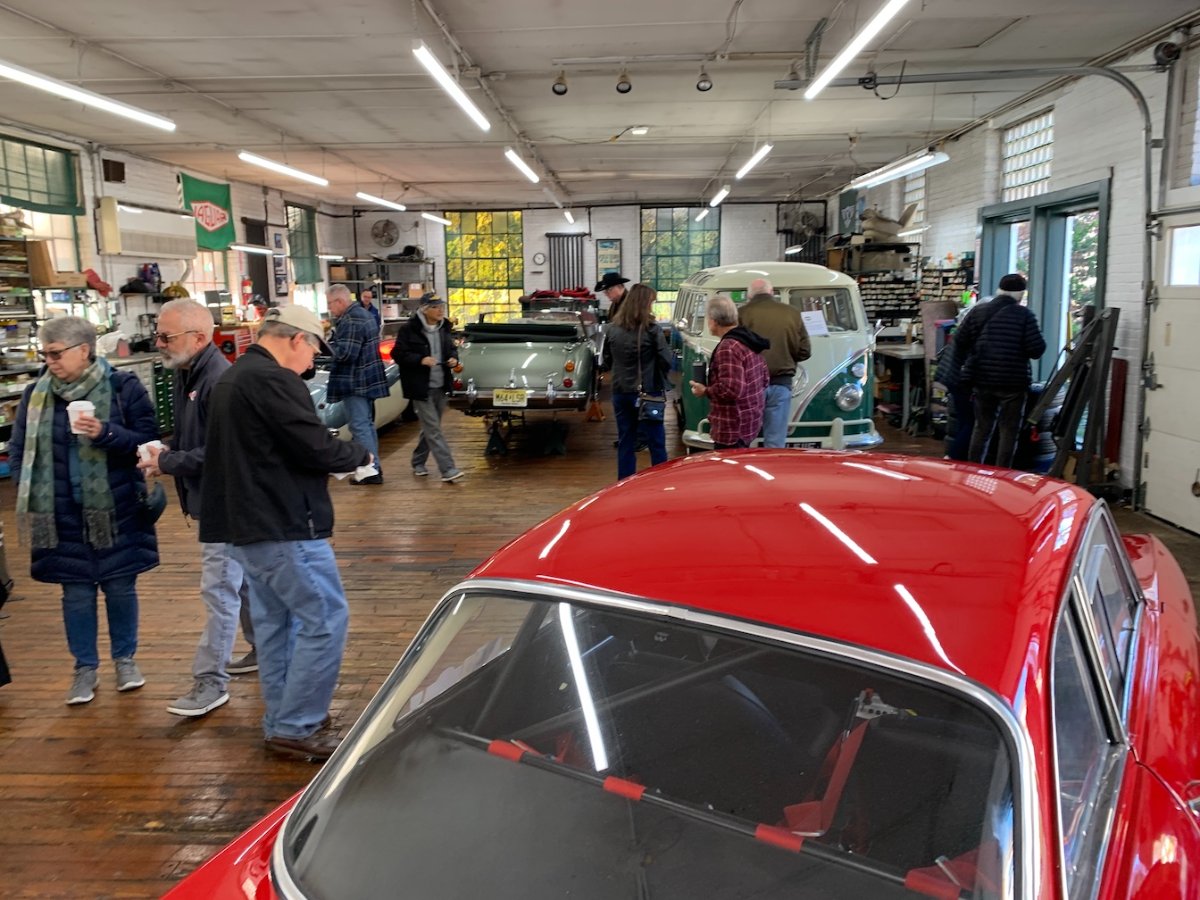
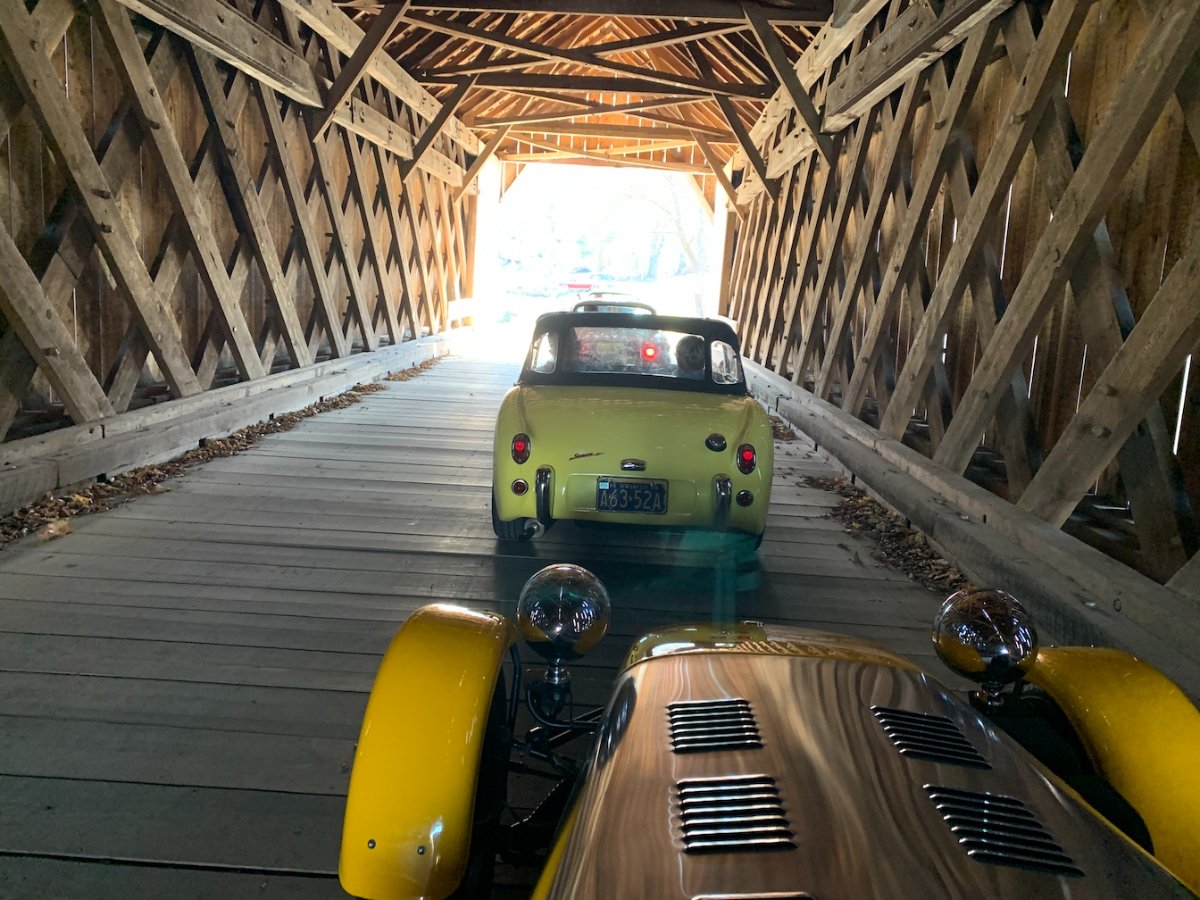
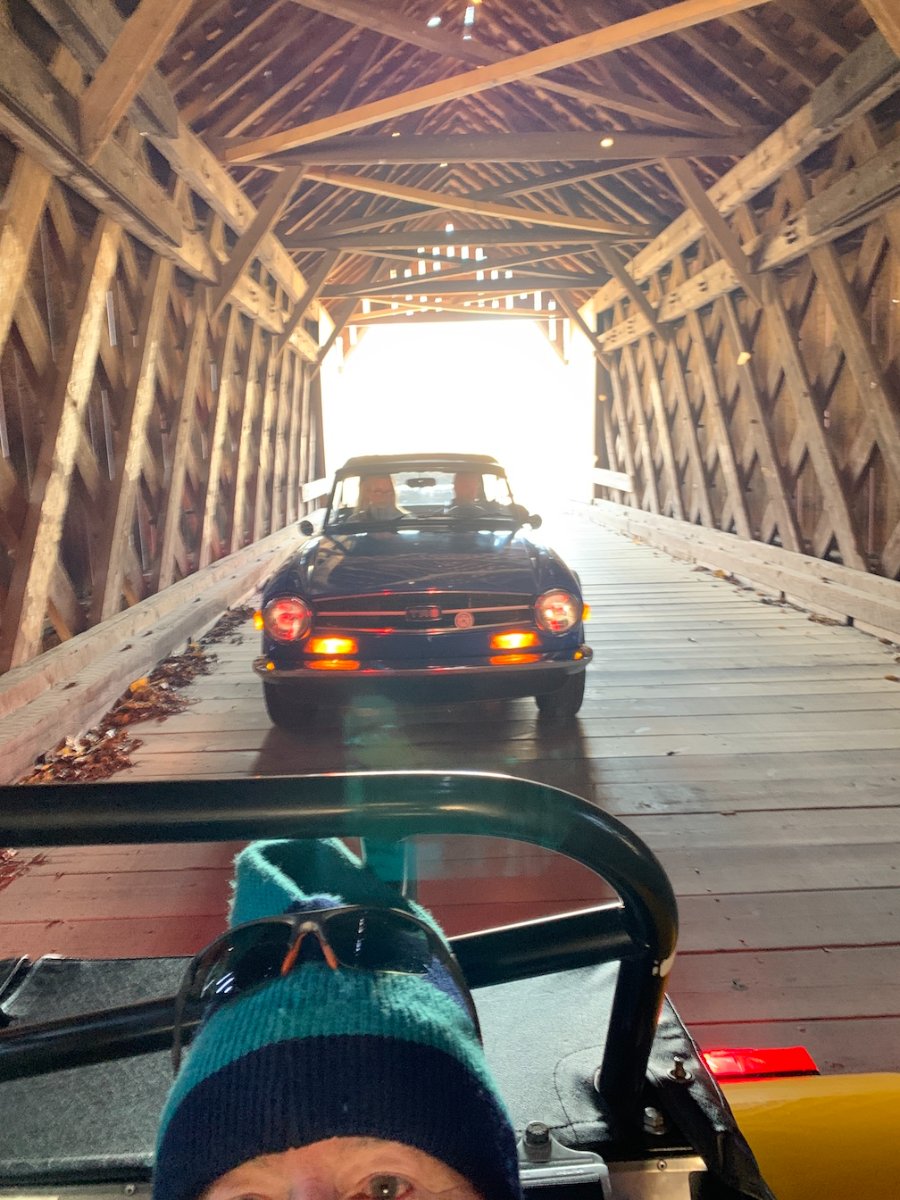
I went for a "before we put 'em away" drive with a bunch of (mostly) British cars yesterday. A bit nippy but fun. We did a tour of covered bridges in the area; managed to see 5 within about 90 minutes! 25F when I left home. I keep threatening to buy doors... Some of the other participants. The Italia is owned by the shop's manager, who also led the drive. Inside Ragtops & Roadsters, the restoration shop that hosted the event. The drive leader stopped several times while we were on the covered bridges, so he could take pictures and videos. We held up traffic a little bit, but it was all good fun and smiles all around. I took advantage of one of the stops to take a couple of shots. Apologies for the quality...

-
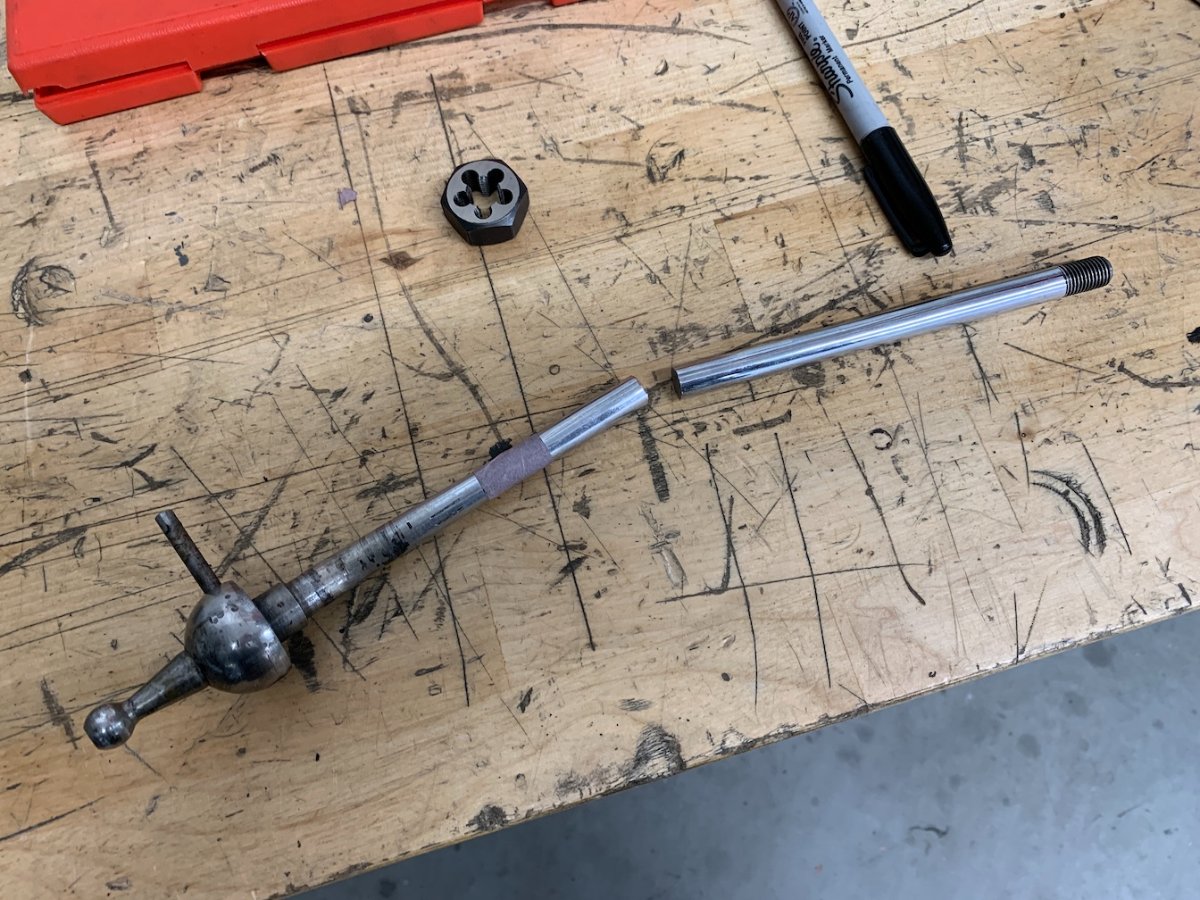
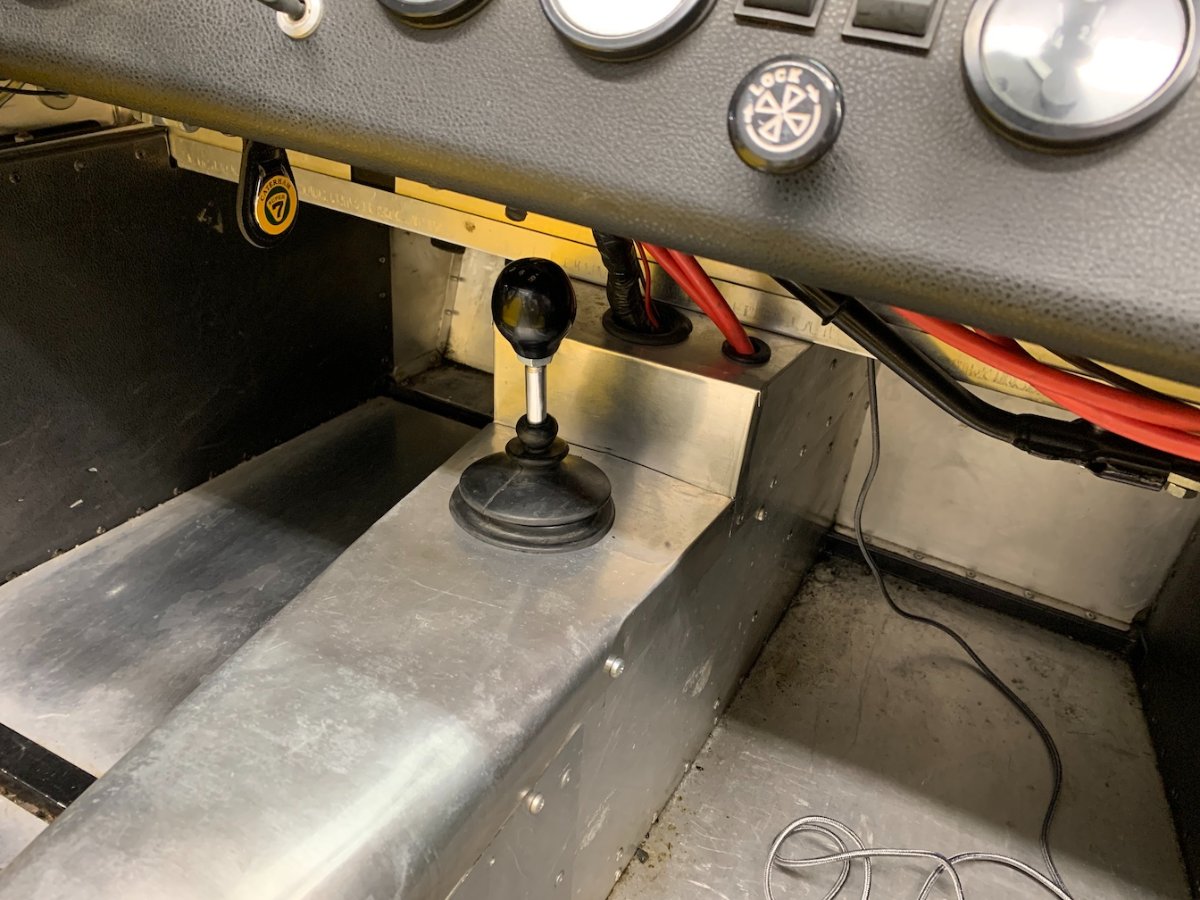
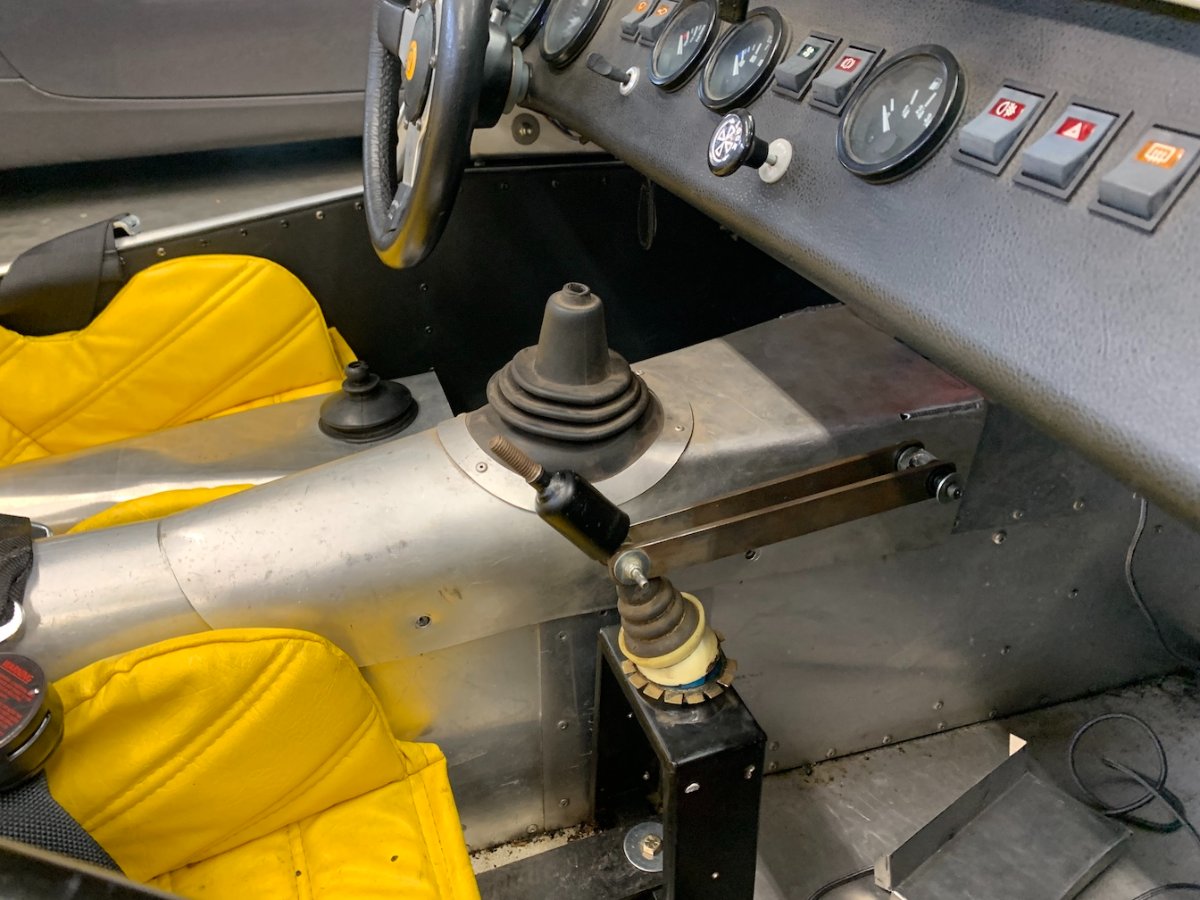
Yep. The lever has a bend in it already, about 1-1/2 inches above the pivot ball; it's more easily seen in my Nov. 2 post. It could be bent more but I think you'd have to straighten it first and move the bend further up. In the second picture the lever is in first gear; when it is in second/fourth the lever is far enough back that it pulls the dust boot out of the aluminum panel, in spite of me using rubber lubricant where the lever passes through the boot. I gorilla taped it underneath to keep it in place! Bending it more, without first taking out the first bend, would make that worse. The lever that was in the car when I got it has more of a bend, and that's what they did; straighten it, then move the bend up. I considered using it as basis for the shortened version, but the bend covers a significant portion of the length and it looked to me as though I would have had to try threading a curved section. As it is I can still cut the shortened lever down to use with the extension assembly, and I still have the long one as a backup in case I make a hash of the thing.
-
@Vinman1 you inspired me. It's quite a long reach, but a very short throw! I just came back from a shakedown run. It works just fine but will take a bit of getting used to.
-
Fingers crossed for you.
-
One of my concerns with the lever being under there is me mangling my hand when I reach in and out for the lever. Any issues with that? Also there is the spaghetti bowl of wires that hang perilously just above that area.
-
Found it.
-
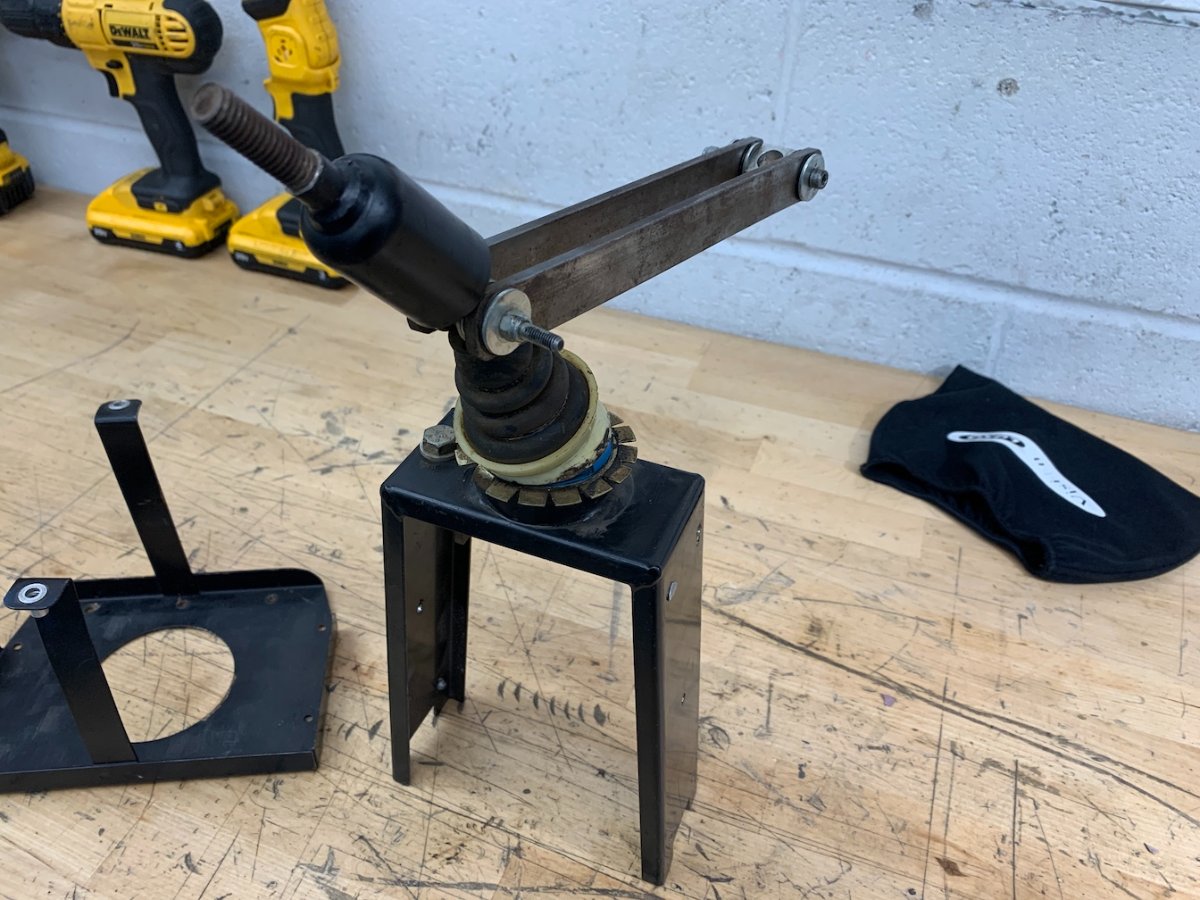
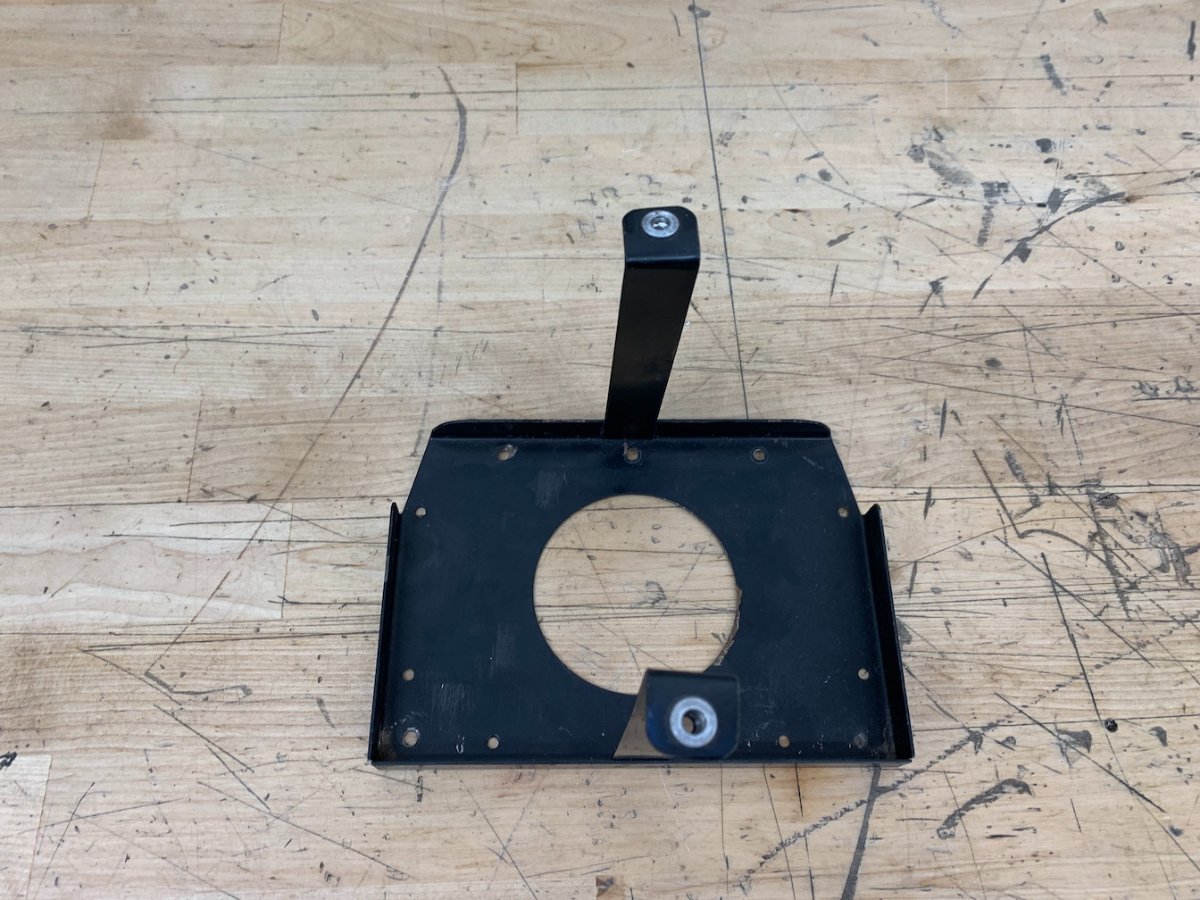
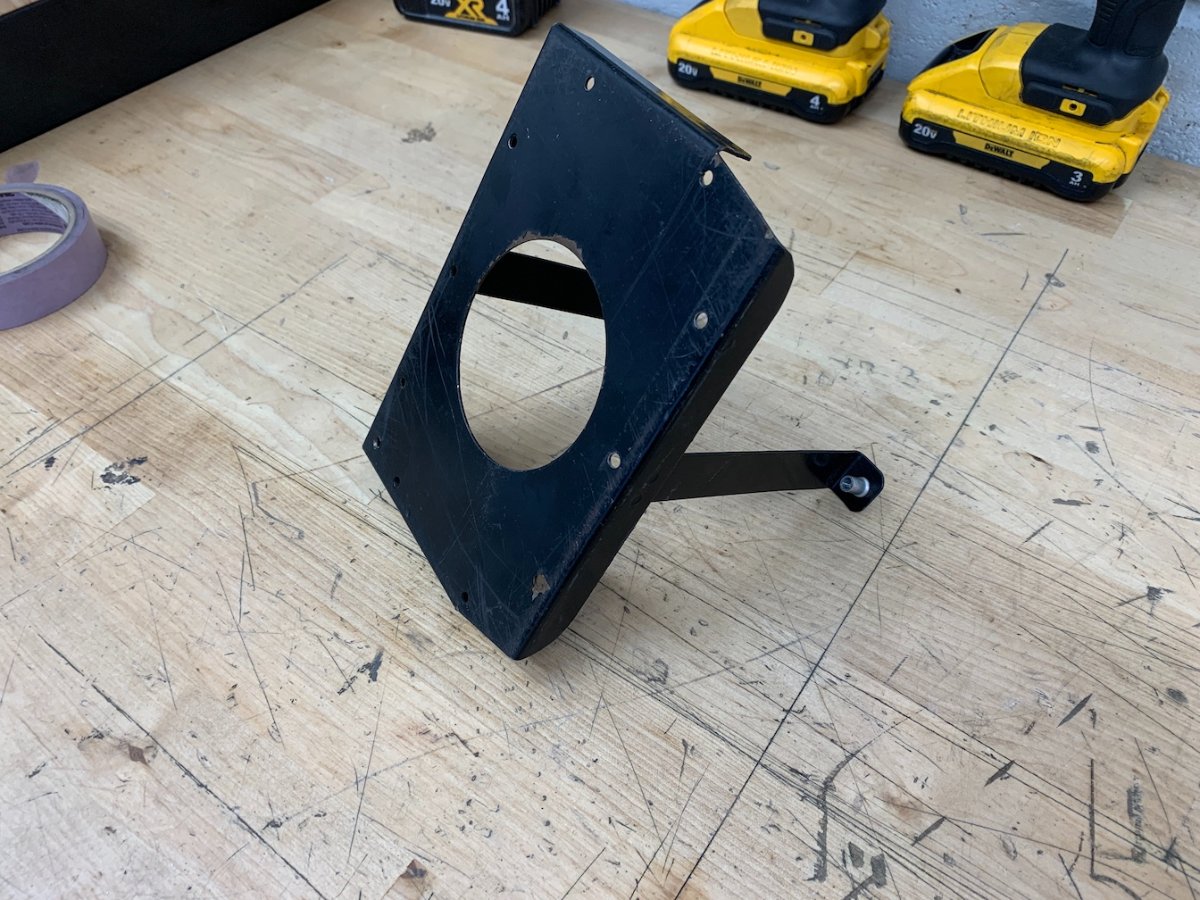
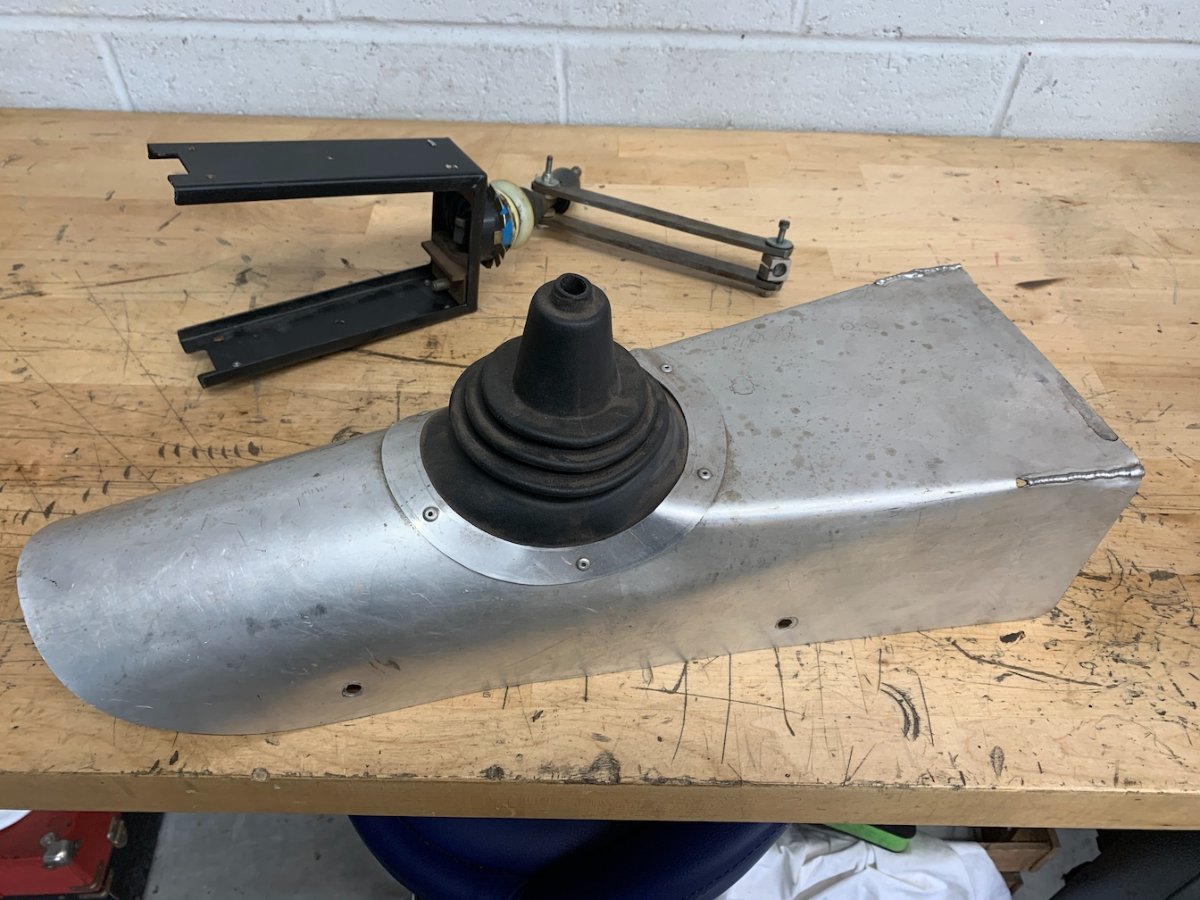
I've decided not to cut the shift lever. I know, I'm wishy-washy. A flip-flopper. On both sides of the fence. So be it. But after sizing up what would need to be done and where the lever would end up being, namely entirely underneath the dashboard, I decided that was not what I wanted as a result. As things are the lever is long enough to poke out from under the dash, and that just makes more sense to me. For the time being at least. I revisited the remote shift mechanism that came with the car. I want to try to reinstall it. I can see where the piece holding the lever used to be mounted and it should still fit. I'd need to cut one of the levers down to a 4" - 5" stub so it fits under that cover, then drill it to accept the forward end of the remote mechanism. Seems straightforward. I also have an aluminum cover plate with shift boot which would fit over the whole works. The problem I'm having is figuring out what the other part does and where it goes. It has a shift-boot-sized hole in the plate, and two arms with nutserts at the ends of them. I'm assuming it has something to do with the shift assembly but no idea what that might be.
-
New article posted - British Motor Museum and Goodwood
wdb replied to Croc's topic in General Sevens Discussion
Great writeup as always, thanks very much for sharing. When I was a kid my dad took me to the SCCA races being run on the perimeter road around Reading (Pennsylvania USA) Airport. It also was used during WWII for training pilots and crews. More up and down than Goodwood, with some 90 degree bends at intersections and so on, so I imagine the experience would have been quite different. The main straight ran down the main runway. I remember the sound of the V12 Jags too! I saw Bob Tullius' Group 44 cars race at Watkins Glen back in period. Quite a noise. I also recall the Matra V12 F1 cars, which were hands down the most glorious sounding engines I have ever heard. -
Thanks all. I believe I'll be "going Colin" on this. (Also apologies to Willie the Shake)
-
...that is the question. Whether 'tis nobler under the bonnet to suffer The slings and arrows of outrageous oil temperature, Or to take up coolers against a sea of centigrades And by added cooling lower them. I'm planning on putting a dry sump system in the little yellow thing over the winter. I'm debating whether to add an oil cooler while I'm at it. I don't have one now, neither do I have an oil temperature gauge. My oil pressure is high and very steady during spirited street use, even on hot hot days. Also, once upon a time, I had a Mini Cooper to which I added an oil cooler, and the darn thing would take forever to warm up in cooler weather. Thus: A sympathy in choice.
-
You may want to check out Hagerty auctions. They vet bidder and seller, and act as intermediary in the transaction after the auction ends.
-
The Regular Summary of Classified Ads of Se7ens Found For Sale
wdb replied to Croc's topic in Cars For Sale
Must be British pounds. Each one is equivalent to 1.2 US pounds. ;-)