wdb
-
Posts
670 -
Joined
-
Last visited
Content Type
Profiles
Forums
Store
Articles
Gallery
Events
Library
Everything posted by wdb
-
Is your dad a mathematician? I can't grok the calculation on the door.
-
Uhh “ visible ferrous debris”. Maybe I need to read back farther in the thread…
-
Oy. Thank you for that, I think. Your post prompted me to do some googling and I've gone from a can of worms (PCV) to a rabbit hole (twincam crankcase ventilation) which apparently are notoriously entertaining to ventilate. A lot of stories about excessive amounts of oil coming up through the block vent despite various attempts to avoid it. Sounds like it occurs during very spirited driving and/or racing. I hope your solution continues to work well. I'm thinking about adding a 'Hart breather' outlet at the front of the cam cover, although it feels a tad sacrilegious. https://www.tonythompsonracing.co.uk/parts/engine/hart-engine-breather/ Random googled image to give the idea:
-
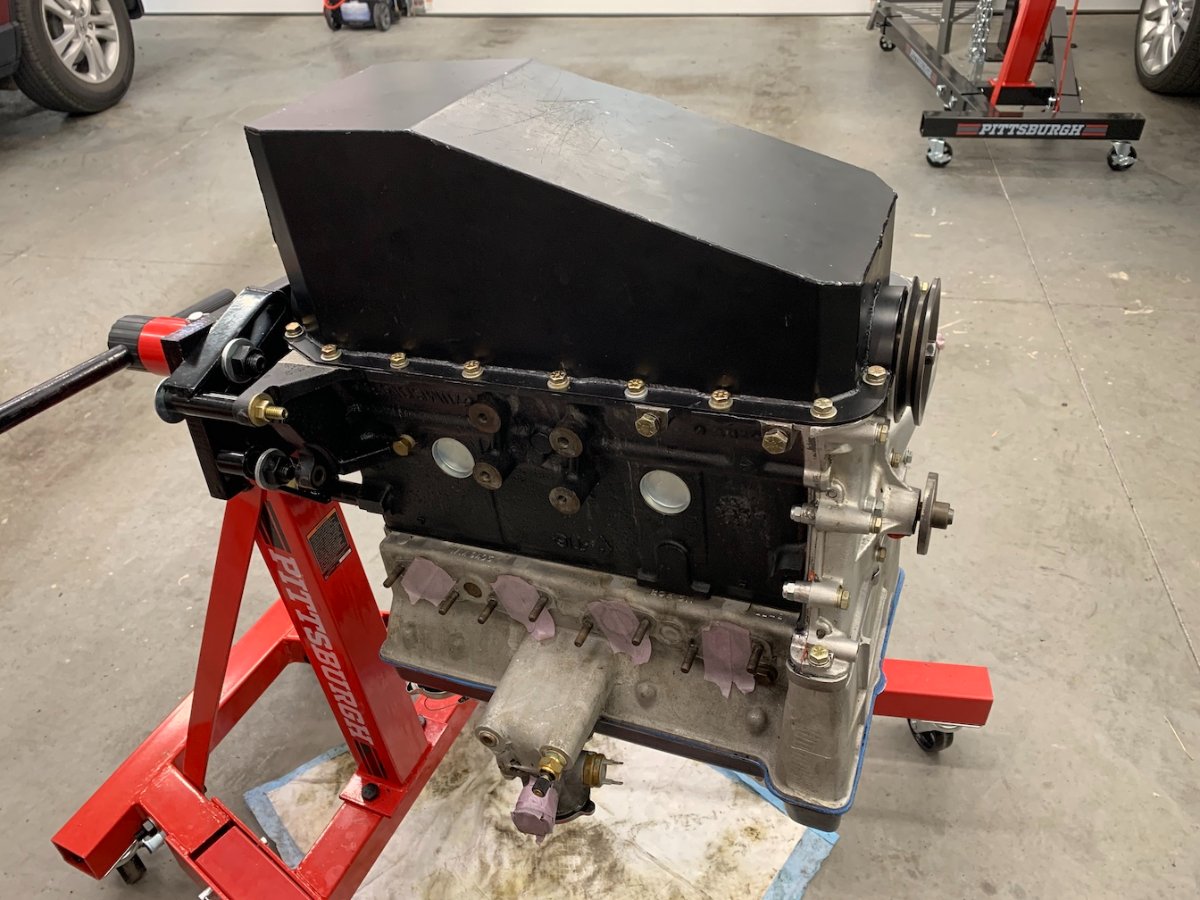
There's a largish black tube exiting the cylinder head at the right rear, behind the carbs. A hose goes from there to a catch can. I made some 'improvements' to the catch can to prevent the cap from constantly coming loose, and thought I may have tightened things up enough to possibiy allow some crankcase pressure buildup. So I drilled a hole in the top of the catch can. I also tried capping off that hole and the dipstick tube with plugs and then running up the revs to see if they popped off. They did not. I hesitate to ask because it sounds like a can of worms, but has anyone retrofitted PCV on these? You can see the vent tube at the back of the cylinder head in this picture, if you squint. It has a red plug stuck in the end of it.

-
I couldn’t use anything like that with my sump. No room for it. I ended up sourcing square section material from McMaster for the curved bits and used gasket maker goo for the rest.
-
MkII Cortina 4 speed. I went for a short drive today. No nose, no hood. It was fun looking out and seeing the engine. Transmission looks dry, woohoo! Sump has seepage though. And for some reason the dipstick tube seems to be drawing oil up and out. Perhaps too much tube inside the engine? But I made it the same length as the old one. Scratching my head on that.
-

ABC Fire extinguisher "corrosive problem" with aluminum
wdb replied to Vovchandr's topic in General Tech
Suppose you’re not the one using it though. I think a thing like a fire extinguisher should be intuitively simple to figure out. -
It fired up. Wasn’t happy. Throttle and choke cable intricacies. The damned radiator still leaks from exactly the same damned place. I will throw money at that, no point in doing otherwise. I’m also 99.997% certain that my oil pan gasket cobble is a fail. Dry sump in my future. In the meantime my webers no longer spew fuel all over the sparky bits, and my speedometer still works! I need my lift back, and I very much need a drive in my little yellow. Both come soon, leaks be damned. Still need a donor shift lever. The amount that needs to be chopped off is considerable and the outcome is in question. A MkII Cortina went up on BaT last week and after poring over the pics that is definitely my gearbox. For now I will continue to be discreet with my fingers when going into first.
-
ABC Fire extinguisher "corrosive problem" with aluminum
wdb replied to Vovchandr's topic in General Tech
Subbing. I need to update the 30 year old fire extinguisher in my cat and was considering a suppression system 'while I'm in there'. -
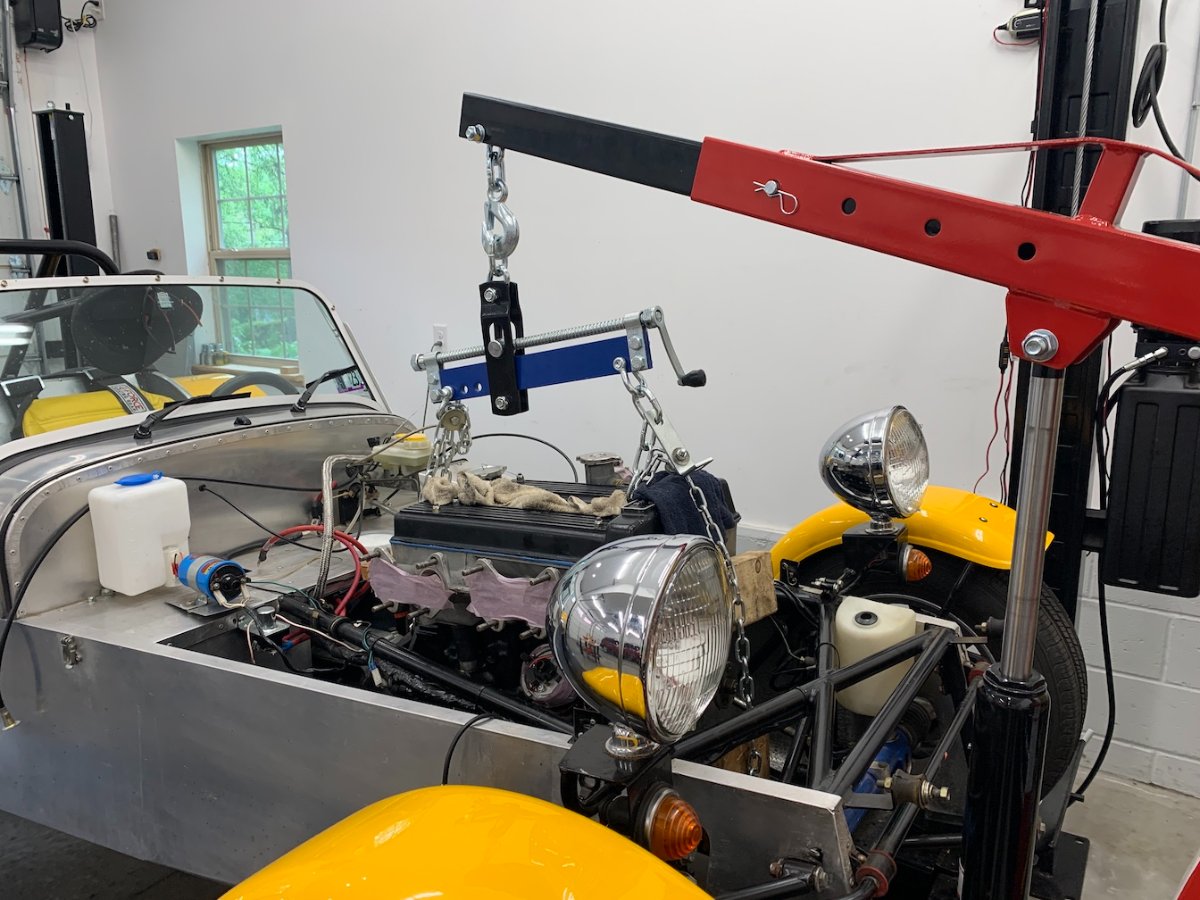
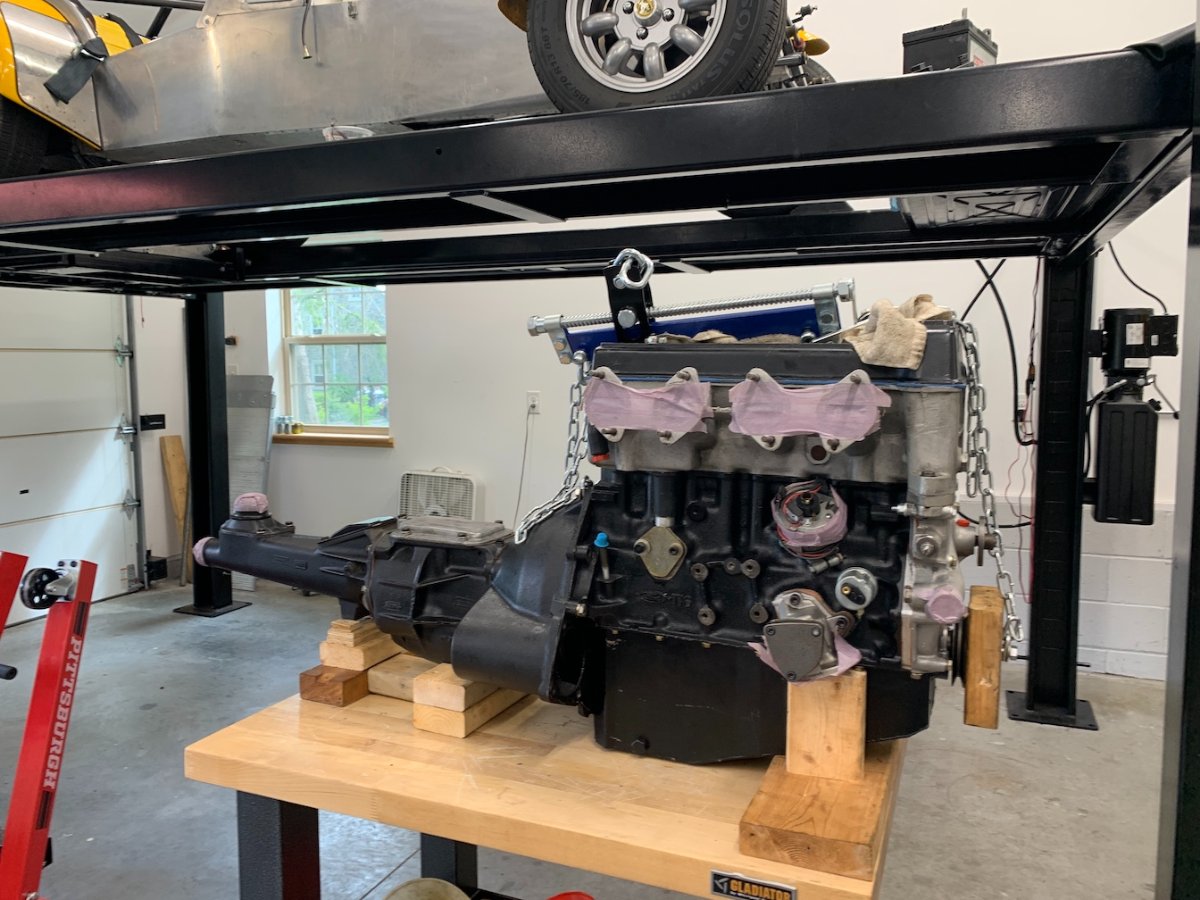
Some pictures this time. I had plenty of vertical space to work with, even with the lift up high enough to allow me to creeper underneath if needs be. The leveling bar tilts one way at the same time the hoist arm tilts the other way, and they collide, plus it was a challenge to operate the crank. I angled the hoist a few degrees to alleviate the issue. I would put the leveling crank on the back side next time. I might also put a clevis between the leveler and the hoist, to add some space there. Also the reach thing again; the hoist was hard up against the front of the car. Angling the hoist gave me another couple of inches. Going in from the side was not an option with the car on a 4-post lift, but that would have solved both of the above problems. There was no need to go under the car for any reason. There was ample clearance to ease the whole works back and down while keeping the transmission above the crossmember. The block of wood on the crank pulley made things very tight at the front end of the engine. I had to let the engine down and re-do that connection in order to gain forward clearance. There is a TON of access on these little lovelies, from every angle. As I was reassembling things I worked my way up from the bottom of the engine to the top, all from above. I almost never had to go underneath for engine related assembly.
-
Engine is in, petro fluids are in. I have oil pressure, w00t! Took a while to come up; I cranked for a few secs, waited, cranked a few more. A bunch of times. Pics later maybe, it was a busy time and my hands were gloved and/or greasy. Just now my fingers ache. I need some Weber carb gas line seals because these are leaking. And then we will add fire.
-
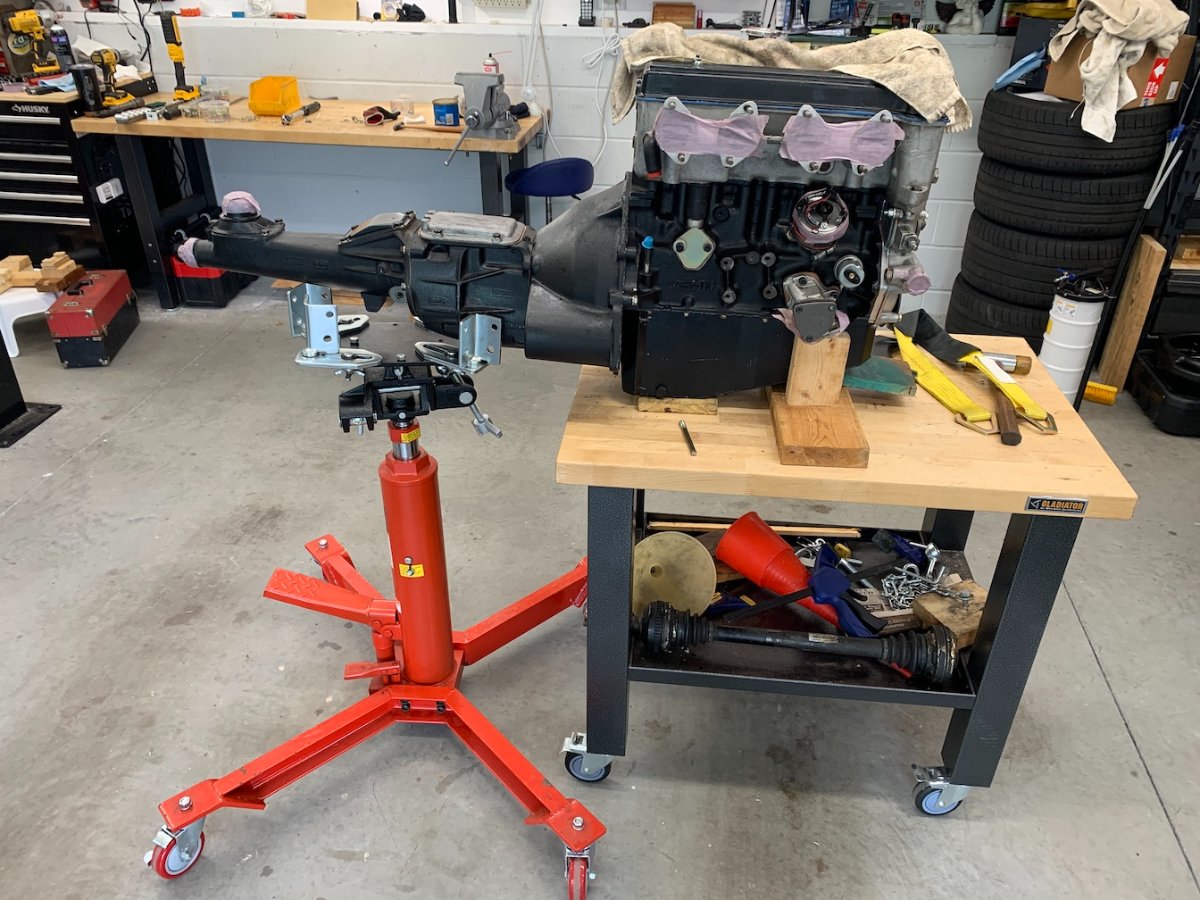
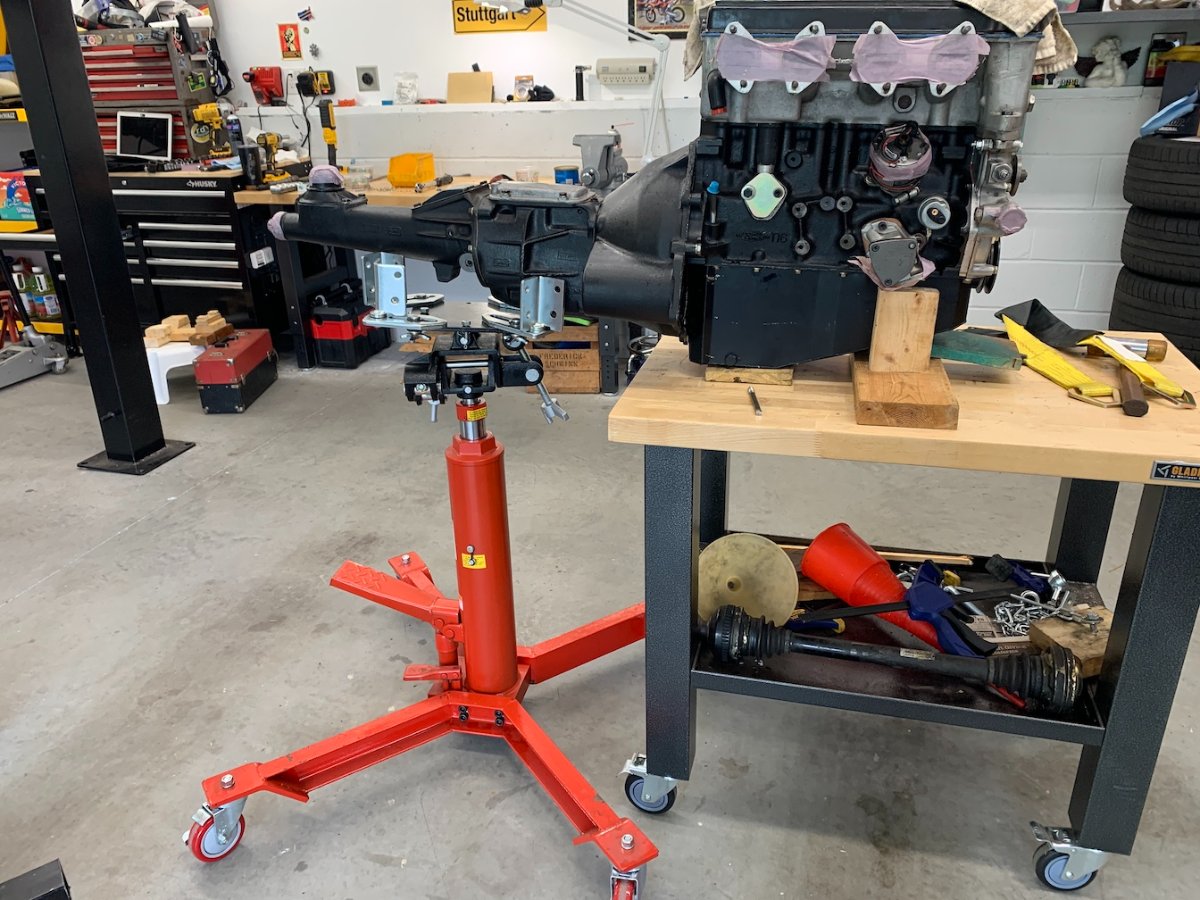
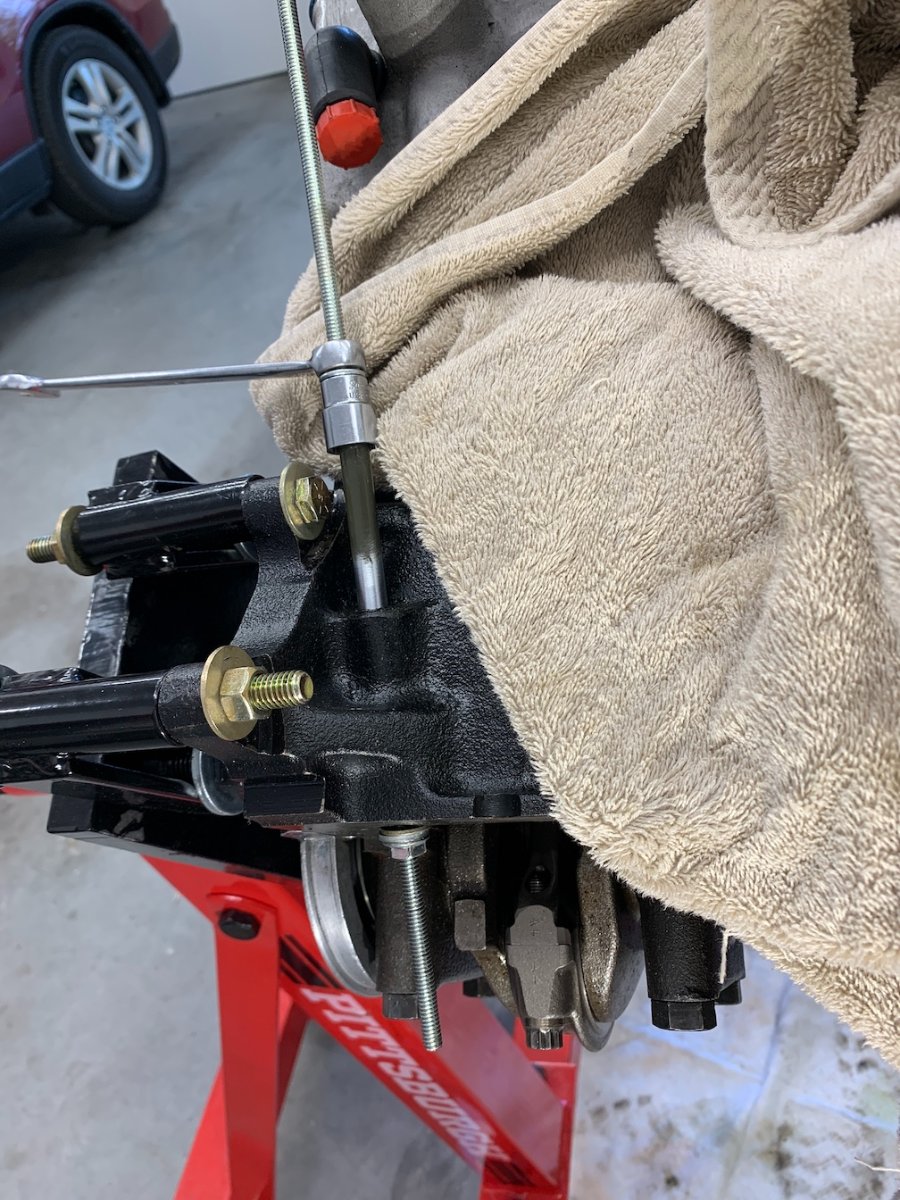
I wish the legs on my hoist extended/retracted but they don't. I got the engine off the floor and onto the rolling workbench. Flywheel, clutch assembly, transmission is mated back up. I purchased a transmission jack when the lift went in, thinking it would be handy for all kinds of things under vehicles -- which it has been. It also came in handy when mating up the engine and transmission. You can see the wooden stands I cobbled together to keep things upright. A pile of scrap wood is pretty handy too! (Insert pack rat joke here.) I had to get creative with one of the bell housing bolts because the relocated dipstick tube sits right in front of it. I solved that by extending the threads on a long bolt and cutting off the excess, then running it in from the bell housing side. I was then able to use a nut on the dipstick side. Also the lower plate piece between the engine and bell housing no longer fits due to the different oil pan; it isn't really needed because the pan covers most of the opening anyway. I am going to fab up a small piece to cover a gap on the driver's side. Then I think I'm ready to go back in. In terms of the hoist and its reach to access the engine compartment: I didn't have a problem removing the engine and I don't anticipate having much trouble reinstalling engine/transmission. One concern is the entry angle. I have the levelling bar biased so that I should be able to get enough. The other fun part might be accessing the tail housing under the car in the event I need to jack it up as things progress. I hope to have the lift high enough that I can roll under there if the need arises. One good thing about this cherry picker is that it has a great deal of vertical range, which will come in handy.
-
It wasn't the tool's fault that the crash happened, it was mine entirely. I was too clever by half. It's a Harbor Freight 'cherry picker' hoist. It's decently made. Harbor Freight seems to have upped their game recently in terms of quality. https://www.harborfreight.com/automotive/lifts-cranes-stands/2-ton-capacity-foldable-shop-crane-58755.html I suspect it is a common complaint with this style of hoist, but it doesn't extend very far. The problem I was trying to solve when everything came tumbling down was how to get the engine over top of the workbench. Afterwards I realized I had a rolling table, which I tend to forget about because it sits next to the workbench, looks just like the workbench, and gets used mostly as an extension of the workbench. Hindsight is wonderful.
-
I'm good with all of the hardware, thanks. I finally decided to go with the crank pulley bolt as the front attachment also. I found a long bolt, drilled a hole in a piece of wood to move everything outwards, cranked it home. Worked well. What didn't work so well was my attempt to get the engine onto the workbench so I could finish the flywheel etc. and mate it to the gearbox. I ended up with the hoist on its side and the engine laying on the shop floor! I was very fortunate that it didn't land on me as well. Apparently the flight reflex is still firing pretty well. The "I'm an idiot" reflex too. Damage appears to be manageable, but firing things up will be the ultimate test of that. One thing is certain -- my fancy oil pan now has a fancy dent.
-
Some good points there. I was originally not inclined to hang the engine by the intake runners, tempting as it may be, but having seen several pictures of it being done I started to feel less antsy. But you're right, it's a rare thing. I think I will use your suggestion of the two top bell housing bolts, then use a strap under the front side. There's just no good place on the front right side of the motor to bolt something on, and I like the idea of using the crankshaft bolt about as much as I like hanging it by the head.
-
I saw images of hoist straps being used around various bits of the cylinder head. It looked secure and substantial. Another one used longer slings completely under the engine but I did not love the front sling tucked behind the driveshaft pulley. i like the idea of straps versus chains. I do have a balance beam.
-
The oil pan is on! I had to make a few tweaks to bolt holes, and I had to invent my own gasket, so we will see how that all goes. But it's on. Next I need to rig up a more appropriate way to hoist the engine; with the transmission hanging on it this time my former method won't cut the mustard.
-
This sounds... ...suggestive.
-
Wow! A treasure trove for the right buyer.
-
Back in the game! And a (probably stupid) question.
wdb replied to Saudio's topic in General Sevens Discussion
Interesting topic. I've been telling people "It's a Caterham" (KAY-ter-hmm), to which they say "a what?", after which the topic either devolves or is dropped altogether. I always add "Super" to "7" if the discussion gets that far. I may have to adopt the @Croc method, although my frequency of using the first of his replies will probably be, sadly, never. -
Speaking of remote shifters, I saw one today on a car built in 1937 -- the Ingalls Special.
-
I have successfully relocated the dipstick, hurrah! I found some nifty stuff, CRC Freeze Off, which allowed me to chill the old dipstick tube enough to work it out of the front cover pretty easily. I bought a piece of 3/8" fuel line with flared ends and used that as a new dipstick tube. A long piece of 1/4" threaded rod and some other bits let me press the new dipstick in at exactly the depth I wanted. A small victory! I still am working out the oil pickup tube though. My first attempt at expanding slightly was not a success. At least I didn't break anything.
-
The Regular Summary of Classified Ads of Se7ens Found For Sale
wdb replied to Croc's topic in Cars For Sale
You can sign up for email alerts when certain vehicles come up on BaT. Gives the quick fingered folks an advantage. I just finished reading the auction text and ogling the pictures myself, after having gotten an email. That passenger headlight... -
The bypass pipe was purely a press fit before, as was the pickup pipe. Both would probably have been stopped from falling completely out by them hitting the bottom of the pan first. The pickup pipe also had that nifty spring-loaded screen on the end. The new pickup has a fixing bracket and bolt, which I hope to secure with safety wire. I am also going to see if I can use a piece of the old pickup tube as a sleeve; there is enough extra room to make that a possibility. I should be able to set the length of the bypass tube so that it can't fall all the way out. Both pipes looked to have some black permatex type stuff on them so I plan to add a wee bit of that as well.