jmaz
-
Posts
53 -
Joined
-
Last visited
Content Type
Profiles
Forums
Store
Articles
Gallery
Events
Library
Everything posted by jmaz
-
This is a big help. With the control cable coming at the valve from the opposite side compared to a RHD car (and compared to the assembly guides), I'd been trying to decide if I needed to install the valve upside down in order to have the valve operate in the correct direction. It didn't occur to me to just have to cable loop back on itself to mimic the direction of a RHD setup.
-
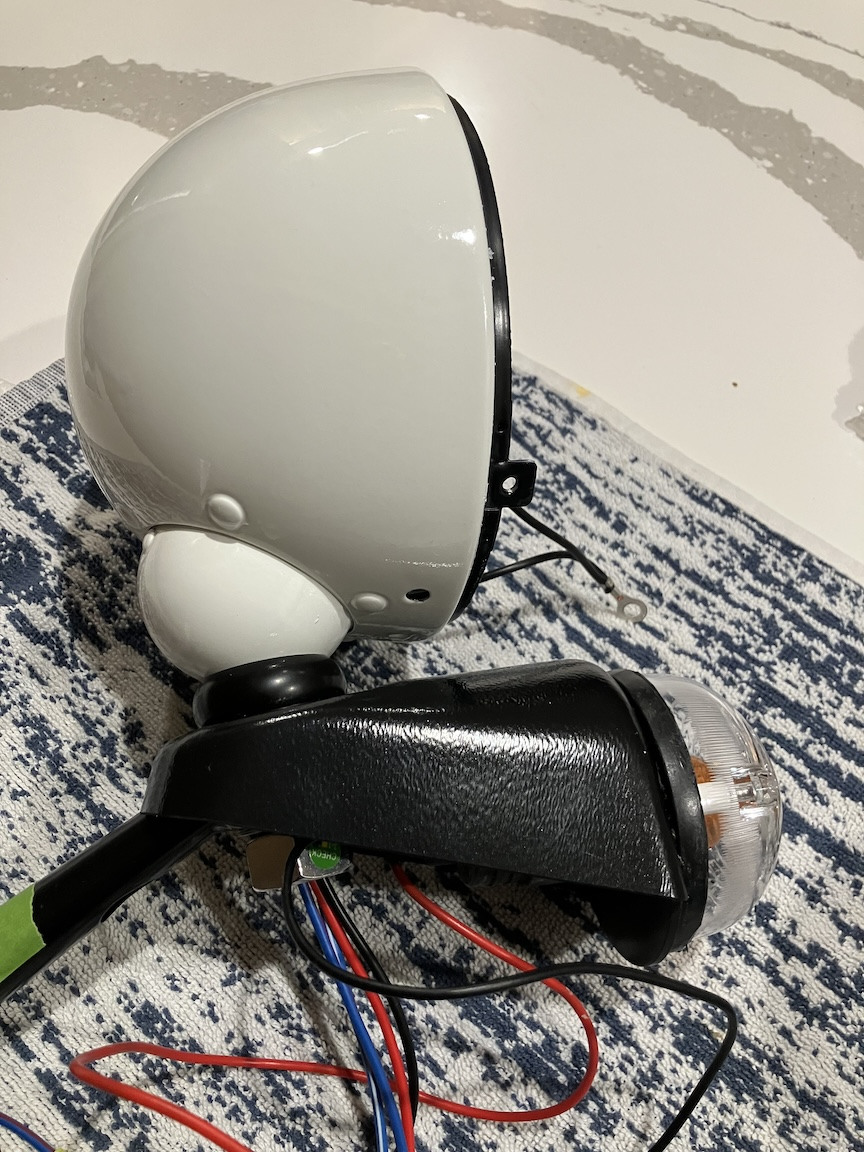
As you did, I plan to route the ground wire from the pod into the headlight bowl anyway, so adding the second wire wouldn't be hard. I'm trying to keep the wiring as neat as possible so doing it now would make sense since I can tweak the heat-shrink arrangement, etc. easily, at this stage of the build. I'd likely replace the indicator bulbs with LED versions as well, at some point. (Which LED headlight options to go with is a whole different topic - but I'm leaning toward Morimoto Sealed6. Expensive but get good reviews)
-
There's been some discussion in another thread, "What you wish you knew before ordering your car?", regarding headlight+indicator pod options. One of those is to not install the indicator pods at all (to achieve a more simple, stream-lined look), and instead use the internal turn-signal capability of some types of replacement LED headlights. If I go with the standard look and install the pods, I'm wondering if there's any reason to not extend the indicator-circuit wire into the headlight pod so that there's a connection available for an LED headlight turn signal, if (when) I install LED headlight upgrades.
-
No tall, gray-bearded person has scratched any dwarf-runes on it yet, as far as I can tell
-
Thanks. Josh Robbins at RMC just confirmed that it's indeed unused. (Its intended for an exhaust solenoid that only fitted to EU models). To be fair to CC, the assembly guide does mention that some connectors might be extra. They just don't say which ones...
-
Thanks. The 2 wires are brown/black and orange/white. I'm not seeing any connector in the diagram with that combination. AI suggests perhaps a wiper motor/motor parking role, or a brake reservoir fluid-level sensor role. I'm not seeing any compatible plug within range of it though. The plug is close to the reservoir but the reservoir already has two spade connectors attached. I've read that there can be unused connectors, so I'll just move on and see if something crops up later
-
No, not the Lambda. That's a green connector that's zip-tied lower down on the chassis
-
What you wish you knew before ordering your car?
jmaz replied to Exarkun1178's topic in General Sevens Discussion
The no-headlights versions really bring out a no-nonsense 1960's sprint car look -
What you wish you knew before ordering your car?
jmaz replied to Exarkun1178's topic in General Sevens Discussion
For my Encore order, I was debating on the painted headlight bowls but thought that, for the extra $350 or so it would have cost, it would be fun to paint them myself. The Encore comes with the 620 nosecone. It's intimidating looking, even just sitting in my living room (along with other parts that my wife is starting to give the side-eye to). That nosecone along with the tiny lights would be cool -
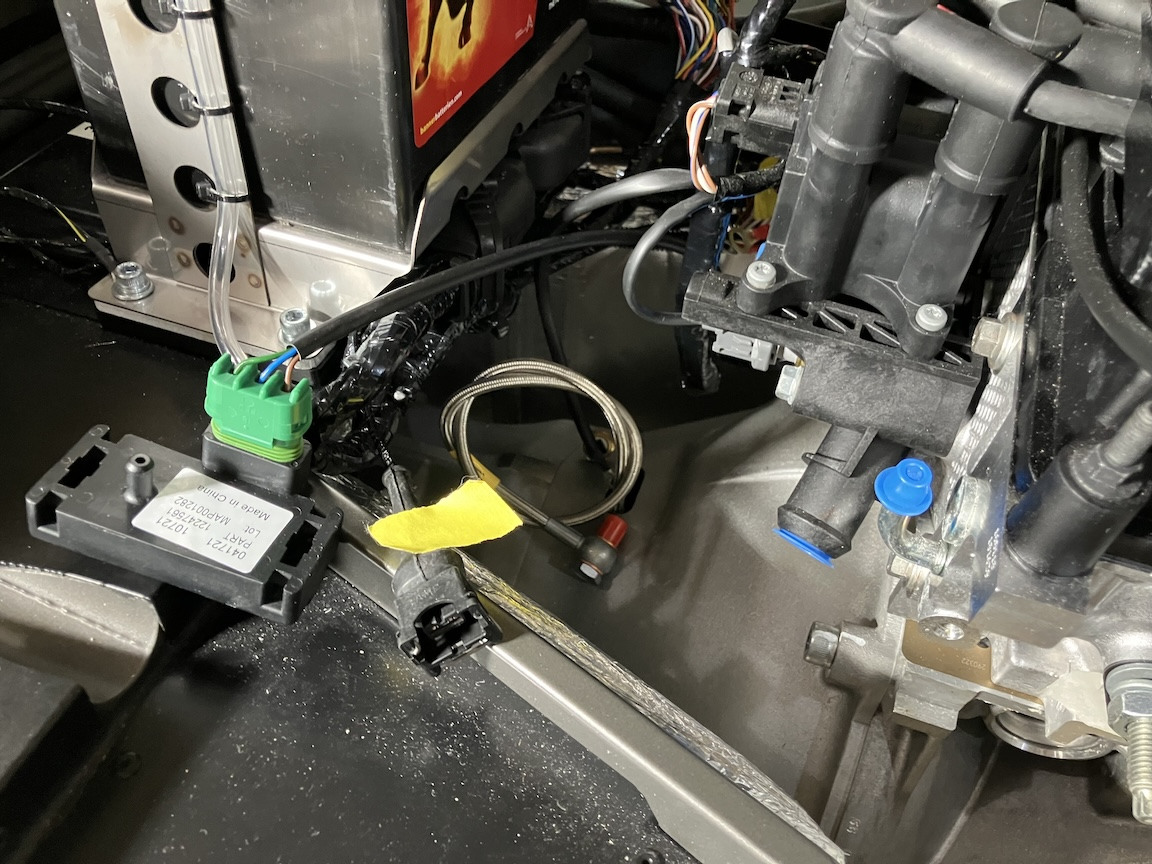
Can anyone offer advice on the black connector in this photo; the one with the yellow tape on it? It's a 2-pin connector, and I can't find anything accessible in the engine bay that it looks like it should attach to. And, for the MAP sensor (attached to the green 3-pin connector in the photo), the info. I can find suggests that it's hose nipple port should be left unattached to anything since, on the Seven, the sensor's supposed to be measuring ambient air pressure. Is that correct?

-
The center filler cap is one of the standard features CC added to make the Encore a bit different. There are a few other things they pulled out of the parts bin, such as the red 4-pot calipers.
-
What you wish you knew before ordering your car?
jmaz replied to Exarkun1178's topic in General Sevens Discussion
That's an interesting idea. The revised wiring ought to be pretty straightforward. If I stick with the standard pod approach in my build, maybe I'll add another extra wire to the wiring harness while I'm assembling the headlight+pod indicator unit and passing the wiring through the headlight brackets. That wire could then just sit unused in the headlight bowl, but could be plugged into the Econoseal connector in place of the pod's power wire after connecting it the the LED headlight's turn signal connection. Or the pod's red wire could be cut and routed into the headlight bowl directly but I'd want to leave it as-is in case I (or future owner) wanted to revert to the traditional pod+headlight look. -
What you wish you knew before ordering your car?
jmaz replied to Exarkun1178's topic in General Sevens Discussion
The standard black plastic pod section (just the black housing - not the lens or wiring) I've got weighs around 47 g (1.7 oz). So, pretty minimal mass. -
I'd played around a lot with the Configurator and kept coming back to a white-with-blue-trim combination, with red versions coming in second place, so I was glad that white was one of the two no-extra-cost colors. Black is the other choice, which I think looks really sharp but I wanted a high visibility paint color. The other four Encore-theme choices cost an extra $1,750. If I'd wanted red or any other custom color, it would have cost $3K
-
What you wish you knew before ordering your car?
jmaz replied to Exarkun1178's topic in General Sevens Discussion
The pods aren't all that bad, I think. It's just that the carbon fiber ones would look better with the CF wings and powder-coat black suspension.
-
What you wish you knew before ordering your car?
jmaz replied to Exarkun1178's topic in General Sevens Discussion
Re. considering your order options: I ordered lowered floors for my S3 (which I'm now building) with the understanding that I could add spacers under the seats if need be. Seats are standard leather. I'm 5'7". With the seats set into the car, without spacers, the seating height feels good. But that's with just sitting in the car and using my imagination. I spent a lot of time trying to decide on the optional limited-slip differential (my car is a 310 Encore, so it's an option, not standard). For the types of driving I expect to do (mountain roads with the possibility of a few track days), I decided to stick with the standard open diff. There's plenty of info out there on the positives and negatives of the standard Titan LSD. I could see potentially upgrading to another brand of LSD at some point. One thing to consider regarding getting factory-built options vs. "saving money by doing it yourself later on" is that, even though it might be possible to add stuff later, there's work done at the factory that I can see would not be easy for someone like me to do later on. The space to work in is very tight in many cases, the wiring looms are not easy to trace, cutting access holes (for a heater, for example) would be a pain, drilling out rivets, removing and installing floor panels would be time-consuming, etc. That work could be rewarding in itself, certainly, but to me it definitely doesn't look trivial. The Encore specs are mainly a "R" model - sport suspension, light-weight flywheel, along with upgraded brakes, 13" wheels, leather seats, but minus the LSD. It also has a 620 nose cone and 420R radiator as standard. I was mainly happy with that configuration. Options I added, which I'm happy with so far (but I'm still building, not driving), include: - Track-day roll bar - Quick-release steering wheel - Heater (a "could live without" option but one that seemed worth the cost) - Clear indicator pack (they also send the amber lenses, but the clear lenses seem worth it) - I skipped the $1000 for Caterham's LED headlights since I can upgrade those for less money and likely better performance (for example, Morimoto Sealed6 replacements) - It wasn't clear in the Caterham specs, but the kit came with LED side repeaters (LED rear lights and LED side repeaters, but standard headlights and indicators) - half hood - crutch straps - I didn't select "fully carpeted interior", but I'm considering not installing all of the carpet bits they sent anyway Items that I i might have added in hindsight include: - battery master cut-off switch (I was leary of the exterior standard mounting, but I might have been able to get the switch factory-wired but positioned in a footwell) - painted headlight bowls (which now are a no-cost option) - I agree with JohnCh that the standard indicator pod housings don't look pretty cheap. Retrofitting different indicator pods once the full assembly and attachment is done would involve multiple steps - carbon fiber rear wings (at $1,150, I was trying to limit costs at this point but I think they would have looked really good. Something to maybe add someday) - -
Current AI capability is already phenomenal. But weird. I've found that the conversational AI tend to be too self-assured, so I've asked it to assign "confidence" assessments to its statements. I was using Claude to help me develop a design for a 3D-printed bracket to handle a specific range of forces and environmental conditions. Claude kept making obvious mistakes about the optimal orientation of the part on the 3D printer bed that would result in the greatest strength in the direction of maximum force. When I dug into why it was getting this wrong, Claude finally told me that it's not particularly good with spatial reasoning on multiple dimensions, or something along those lines. I asked it why, given that knowledge, it tended to make very self-assured statements rather than offering any cautionary language. It basically said that that's how people talk on the internet! (Which its trained on, of course).
-
The tariffs for my 310 kit, which arrived in the U.S. in mid February, ended up being around 9.5% of the total. That was less than the initial estimate, which I think was around 12 to 13%.
-
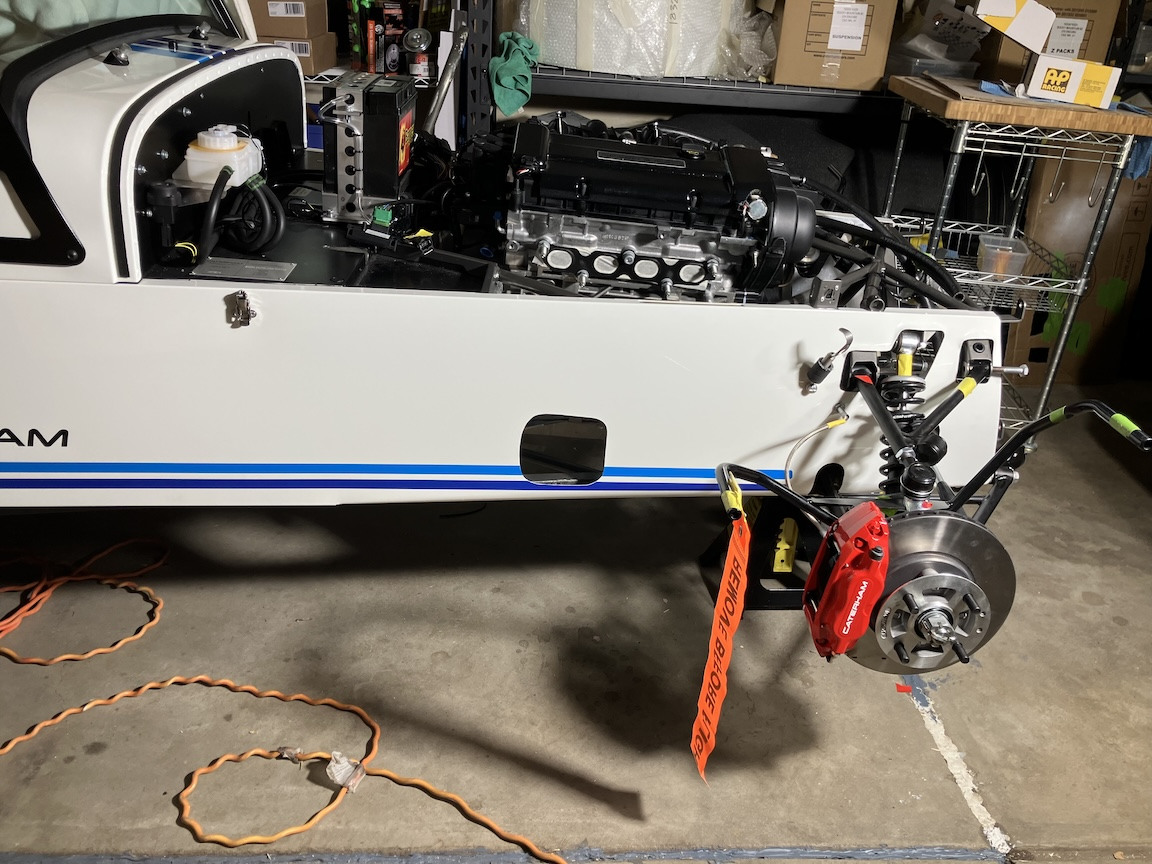
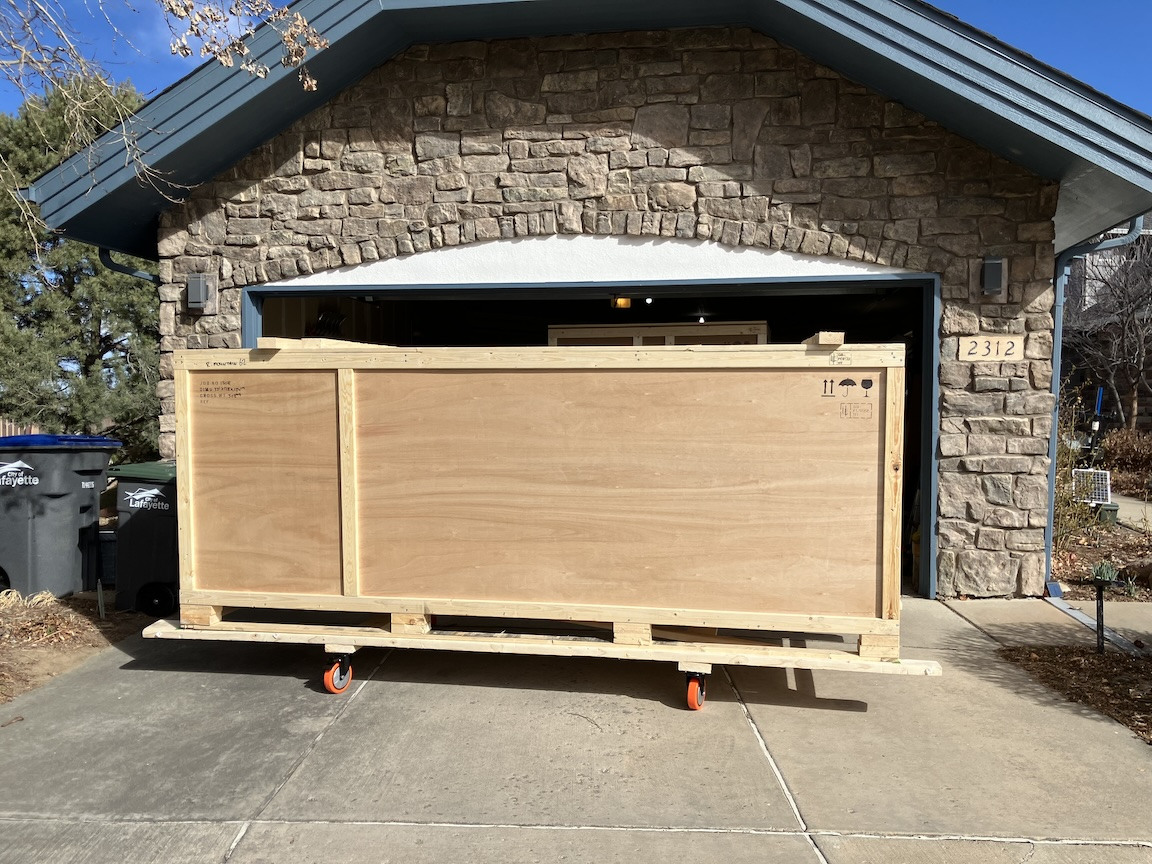
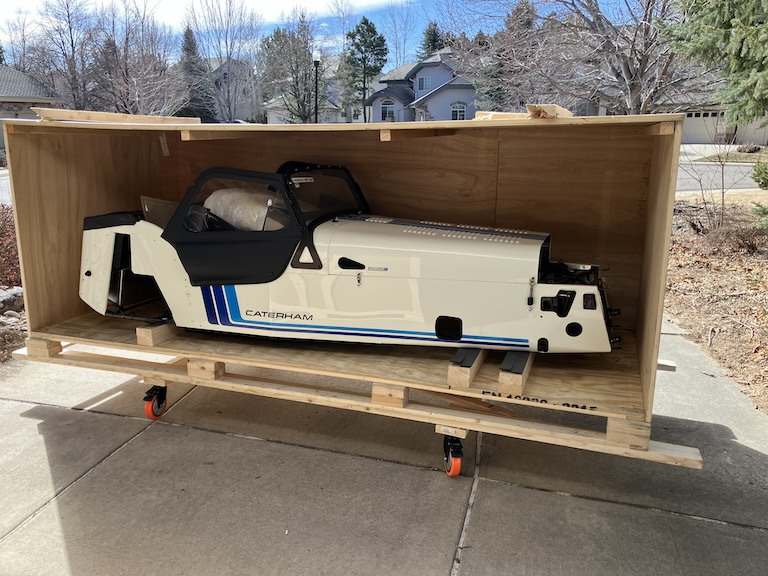
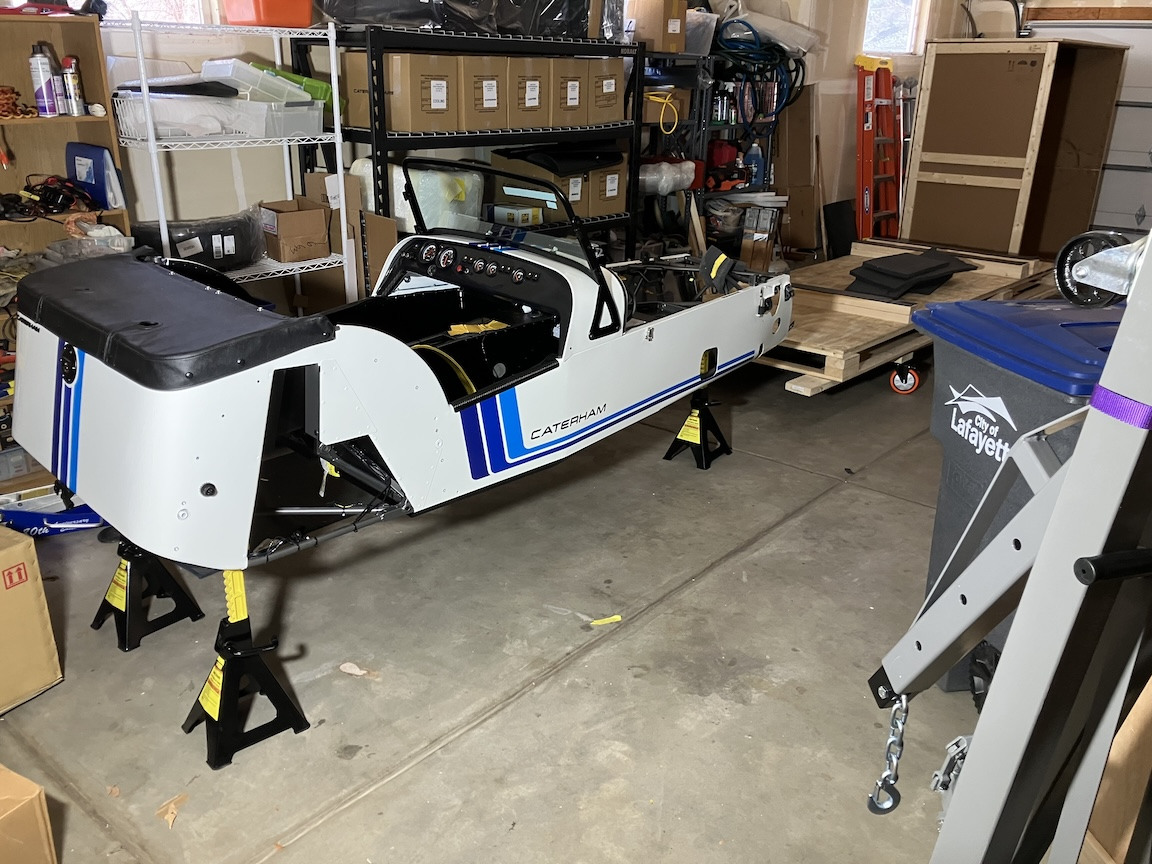
Hi All, I'm in the early stages of assembling a 310 Encore. After reaching (and passing) retirement age, I figured it was pretty much now or never to scratch a long-time itch of owning a Seven, particularly if I was going to do the build myself. The 310 had always felt like the best combination of power and balance for my needs, so when Caterham announced this summer that they were planning a limited run of 25 new 310's, I decided to take the leap after some discussion with Josh Robbins at Rocky Mountain Caterham. The build has gone well so far, with no new issues encountered that haven't already been discussed in the various build blogs and forums. I'd like to thank everyone who has taken the time to document their builds and to help with questions and problems that other builders have run into. It's scary to imagine trying to put the car together using just the official manuals. Along with using Josh R. as a resource, my main go-to blogs so far have been caterham420detailedbuildblog.co.uk, 310build.com and www.caterham7diaries.com. I'll then check several others (cat310s.wordpress.com, www.caterhamr500.co.uk, purplemeanie.co.uk, www.caterham310.co.uk, caterham170r.wordpress.com, among others, along with some of the instructional youtube videos such as Caterham 7 Diaries and The Caterham Cave) to help fill in some information gaps. All of them have additional bits of detail and tricks to offer. I'm sure that, so far, I've spent way more time reading than I have on the actual build. Yoram's Yellowjacket build posts here on usa7s proved particularly valuable for suggestions on dealing with the initial hurdle of the crate delivery. Since I couldn't be sure that the delivery truck would have a forklift that would fit in my garage, and having 3 (4, as it turned out) big crates sitting on my driveway in the middle of winter wasn't ideal, I'd followed Yoram's suggestion and construction plans to build a dolly for the chassis crate so that it could be pushed into the garage. I made a second dolly for the engine crate. The delivery donkey lift did in fact turn out to be too tall for my standard-height garage entry, so the dollies saved the day. The tall crate was too high to allow use of a dolly, but the lift operator was able to nudge the crate far enough into the garage. Again following Yoram's suggestion, Once we'd pushed the chassis crate into the garage, my helper (son-in-law) and I used the engine hoist and lifting straps to move the chassis off the crate base and onto jack stands. (Here's a hint from "should have realized that" category: remember to unbolt the chassis from the crate bottom before trying to do the lifting.) I mentioned 4 crates. One of the crates was intended to be delivered to RMC but was left with me by mistake. The chassis is an S3 with lowered floors.
-
How did you manage to get the crates lined up so neatly in your garage? Were the delivery folks able to use their forklift to assist with that?
-
Regarding the transmission tunnel protection, instead of corrugated cardboard I was thinking of using waxed cardboard from milk cartons - thin and slippery. Your flexible plastic approach sounds better though. What specific material did you buy? I haven't yet found a good choice on Amazon - either they're in small sheets, or are more than a few mils thick
-
I've got a kit due to arrive in the US on 4 Feb. and at this point am looking at something like the original ~2.5% duty plus Trump's initial 10% to 13%, and now a bonus ("give me Greenland") 10% starting on 1 Feb. I'm holding my breath that he doesn't slap on another increment. I can't imagine how companies can operate businesses under this kind of uncertainty and risk
-
Thanks, Bruce and NSXguy, for your responses. I'm not currently trying to diagnose any issues but I expect to be starting a 310 Encore build next month. Jim
-
Are there steps that might be taken early in the build process to verify that the engine harness has been assembled correctly by the supplier? Are there similar factory-/supplier-related weak points that warrant checking in the kits, rather than assuming things are going to be OK out of the box (crates)? Volt meter connectivity tests comes to mind, but is that feasible and comprehensive enough? And is there a good set of wiring diagrams available? I've seen the ones in the 2015 Build Manual, but they're not very clear - at least, after an initial look.
-
What did you use to maneuver the crates into the garage? Pallet jack?