Joe Petty
-
Posts
66 -
Joined
Content Type
Profiles
Forums
Store
Articles
Gallery
Events
Library
Everything posted by Joe Petty
-

Looking for bellhousing for twincam/crossflow
Joe Petty replied to Healeyracer's topic in General Sevens Discussion
The lever with the round ball is the rare part. The collar, plastic swivel, spring... are shared with the Cortina and fairly common. Trouble is that the Cortina shifter uses a flat sided ball to engage the shift rails and that just will not work. The blowup parts picture shows a plastic cup and spring that sit down inside the long internal shift rod. I have never been able to locate those parts, so mine is metal to metal. Good Luck! Joe -
Looking for bellhousing for twincam/crossflow
Joe Petty replied to Healeyracer's topic in General Sevens Discussion
See the "Lotus Seven S2 Shifter" topic on how I cobbled up a shift lever. Good Luck! Joe -
Looking for bellhousing for twincam/crossflow
Joe Petty replied to Healeyracer's topic in General Sevens Discussion
Please keep us posted on your progress. You have attracted the right people on this topic and they are getting harder to find. You may still have some "challenges" getting all the right pieces together! Good Luck! Joe -
I believe the heater was required for defrosting the windscreen, long before heated screens were available. Any heat that made its way to the occupants was unintended! I don't see any evidence that my S2 ever had a heater or the slots cutout for the defroster. Lotus Eye: Inflammation caused by wind/cold due to looking around a fogged up windshield. Lotus Elbow: Soreness due to driving with elbow hanging over the siderail. Joe
-
NSU Ro80, Rotary engine well appointed 4 door sedan. Excellent condition! Never saw one before and I thought it was French!

-
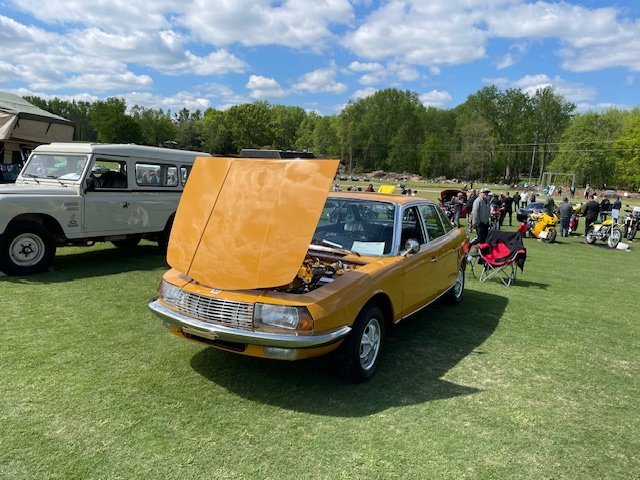
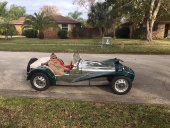
I try to setup a trip every year to a "destination" car show and this year I trailed my 7 up from Florida to the Euro Fest. Very well done by the organizers and of course beautiful weather! The "Hybrid" theme was kind of quirky, but brought out several cars I had only seen in pictures (NSU, Bitter, Scimitar...). Maybe these are common in the Greenville area, but that was part of the reason to travel and see something different. And, I got to meet Bill and J and put faces to fellow forum members! Great event and well worth the trip! Joe
-
Some shows may have specific instructions. If there is a judging team, they will probably inspect the engine and may even want to see lights, wiper, horn... Generally, you are on your own. Looks around and see what others are doing. Most of the C&C folks are gearheads and may have never seen a 7 much less the mechanics! Hood off - Yes I have 2 square pieces of tool box liner/cushion that I put on the clamshell fenders to keep the front corners from gouging into the paint. If anyone asks to help my standard reply is " Thanks, but I would rather do the damage myself". Once off, I stand it on end behind the car straddling the spare tire and secure to the rollbar with a bungee. Guest seating - Yes Kids do great! Only problem I ever had was a 2-3 yr old who screamed when his folks tried to take him out. Be careful with grownups, many don't know realize getting in is like going down a slide and get their inside leg trapped between the tunnel and the steering wheel! Good Luck - Joe
-
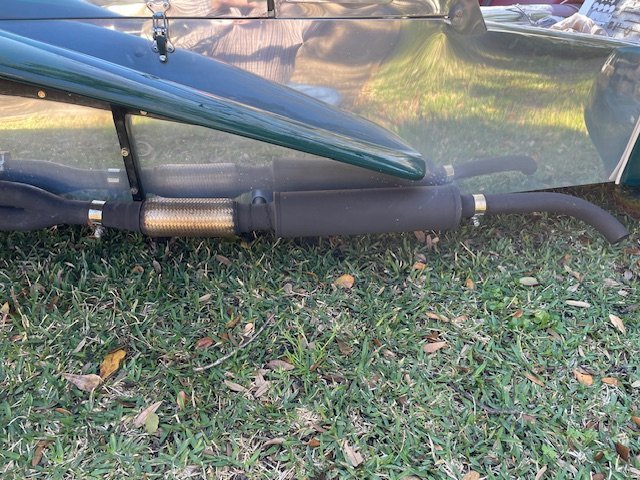
I built my own exhaust: Maniflow 4-2-1 header, 1 3/4 flex, tractor muffler, various sleeves... I can't find the receipt, but the muffler is 1 3/4 in and 1 1/2 out, the can portion is 13" x 3" It is a standard tractor muffler that I bought online somewhere. These mufflers are straight through and kind of loud. I stuffed some expanded wire mesh inside to baffle to an acceptable level. The flex pipe has sleeves welded on to adapt to the different size pipe and is also welded to the muffler. The flex pipe and sleeves is 12" Maybe not the most elegant arrangement, but saves trying to get the pipes to fit and not leak! Not obvious in the picture, but there are 2 short brackets welded to the inside front and back of the muffler can that bolt to rubber mounts to the frame. Good Luck! - Joe
-
My original Weber carbs for my 1962 1340cc were long gone before I ever found the car. The CoP shows: Weber 40DCOE2 12059 & 11795 Good Luck!
-
My 7 uses a driveshaft with a straight collar like that black one. My transmission is the "Internal Remote" which is slightly different from yours, but I suspect it is the same overall length. Thing with these old cars is that the owners pickup parts at swap meets or wherever so they have them for the rebuild. Unfortunately, many "English Ford Line" cars use very similar parts and it takes a sharp eye or a good reference book to know what interchanges! I got 3-4 disassembled pre-crossflow and crossflow engines with my car. I sorted out 3 complete sets of different length pushrods, multiple valve rockers, oil pumps,... Looks like you have a good engine/transmission pair, be careful adding anything or swapping stuff. That one rear axle looks to have the proper emergency brake ball crank and rods, don't lose track of that! As always - Good Luck! Joe
-
I just looked at my mounts and I think yours look like they are giving slight setback. On the right side, my bolt pedestal is directly in line with the center of the oil pump plate. On the left side, the pedestal is maybe 2" in front of the generator backplate. Both mounts use straight bars. I saw something onetime about moving the engine back a couple inches. Don't remember if this was a racer mod or a factory thing. Might be early, but when you get the engine in the front belt pulley only clears the frame crossbar by an inch or so. There is not much clearance between the starter and the footbox on a RHD, so I don't see how the engine could move back. Not so big a problem on LHD. Always an adventure! Good Luck, Joe
-
Mystery switch under the hood-----can you identify?
Joe Petty replied to mrmustang's topic in General Tech
Looks like you have the best of both worlds for checking oil pressure: gauge or light! That block may be a universal solution, cheaper to stock one item and maintain one part number... It was not uncommon to use very low oil pressure as a method to cutoff an electric fuel pump in racecars. In the event of an incident, the pump goes off with the engine before safety arrives. Hence, a gauge to monitor oil pressure and a on/off oil pressure switch (and circuitry) to cutoff the pump. Downside is that a momentary switch (push button or spring toggle) may be needed to prime the carbs on startup. Good Luck - Joe -
My S2 7 was raced and most of the wiring was ripped out and since it was completely apart I figured it was best and easiest to rewire the whole thing. I wanted to stay pretty much original (Positive ground, Generator, Points/Condenser...) but avoid what I felt were some of the common problems. There are several wiring diagrams available, so I looked for the one that seemed to fit my car: no heater, cooling fan switch, mechanical fuel pump... A used MGB wiring harness from eBay cleaned up nicely and provided all the correct colored wire I wanted in adequate length and sizes. No burned or brown spots were found, and cutting off a few inches usually got to nice clean copper. All connectors (bullet and slide on) were replaced and soldered. I don't trust that cut, strip and crimp tool that comes in the box of crimp connectors! I grew up in the Keys and dealt with a lot of corrosion/connection problems, even soldered wires to bulbs a few times! I have never liked the way Lotus ran the headlight power through multiple switches. I planned to use upgraded headlights, so the headlight power was used to control fused relays situated close to the battery and saved adding an additional fuse block. Wiring a 7 is surprisingly simple once you set your mind to it. Particularly the early ones where most of the gauges are mechanical and there are few "accessories". Good Luck - Joe
-
Original fenders are 8" and I got a pair from Tony Ingram a while back. My original fenders were in pretty bad shape and getting them ready for paint was going to be very expensive, plus I had 2 right fenders! I normally use my magnesium American Racing Silverstone wheels wheels: 5 1/2 x 13 with Kumho 155x13 Solus tires. I also have a set of Elan wheels with 155x13 Kumho Solus tires and they fit well. I suspect 165x13 tires will fit, but I have never tried them. When I got the car, it had Goodyear Blue Streak racing tires from the 1970's: Front 5.00x13, Rear 4.75/8.50x13 You may want to look at Simple Sevens and get a feel for how cars look with different fenders and tires. Yeah, anything but copper for brake lines! I used regular steel with aeroquip fittings and braided hoses. The story is that Lotus was prohibited from selling an assembly manual, so they sold a dis-assembly manual that you read back to front for assembly. I have never seen one, but there are early publications that may be helpful. My car came with the Weale and Ortenburger books which are both very helpful but I believe are out of print! Regards and Good Luck - Joe
-
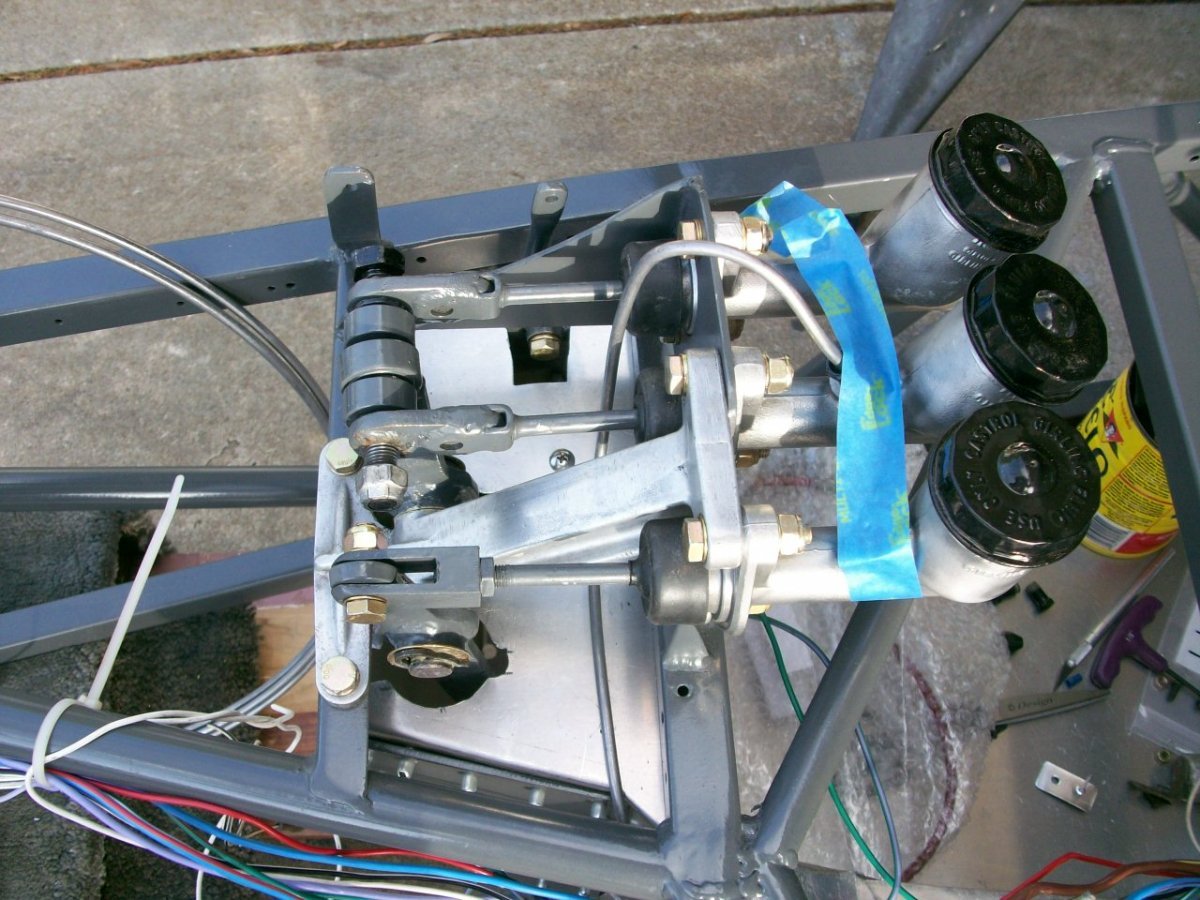
This is the arrangement I have on my 62 Super 7 The standard aluminum bracket is used with a secondary bracket that is welded to the frame and supports the second brake master cylinder. I saw this exact setup in one of my books, so I guess it may have been done "back in the day" when the front drum brakes were upgraded to disk. The angled reservoirs are probably from Triumph Spitfire. There is no balance adjustment and the brake pedal arm is bent above the pivot pin to center the cross bolt and apply even pressure to the cylinders. Primitive, but works well!
-
Did you try it later after it cooled down? If it ran OK then, I would suspect hot electronics (module breakdown) or loss of fuel pressure/flow. Good Luck!
-
My 1962 Super 7 was VIN'ed in California in 1971 I have found 2 state issued tags: Driver's left, lower frame rail in the engine compartment - aluminum tag very similar to the Colorado one in previous comment. Similar aluminum tag (but thinner) with same information glued to the top of rear axle housing. Seem to recall way back that it was standard procedure to put a VIN tag on the rear axle as a theft deterrent! Good Luck! Joe
-
The Lotus does not have a tray under the rear axle, so the rear flange is easily accessed from under the car.
-
Not a very accessible access panel for the u-joint, I think you would just pull the driveshaft and do both u-joints rather than try to change one in place! I'm not sure how the tunnel was formed, but I think all the flanges are simple 90 deg. bends. The rear top of the tunnel requires the 90 deg. bend and some stretching since it is curved. Probably simpler to manufacture with the rear piece separate and rivet it in place. I've seen mention that the tunnel is structural, so I would suspect that there is a reason for the design! Good Luck - Joe
-
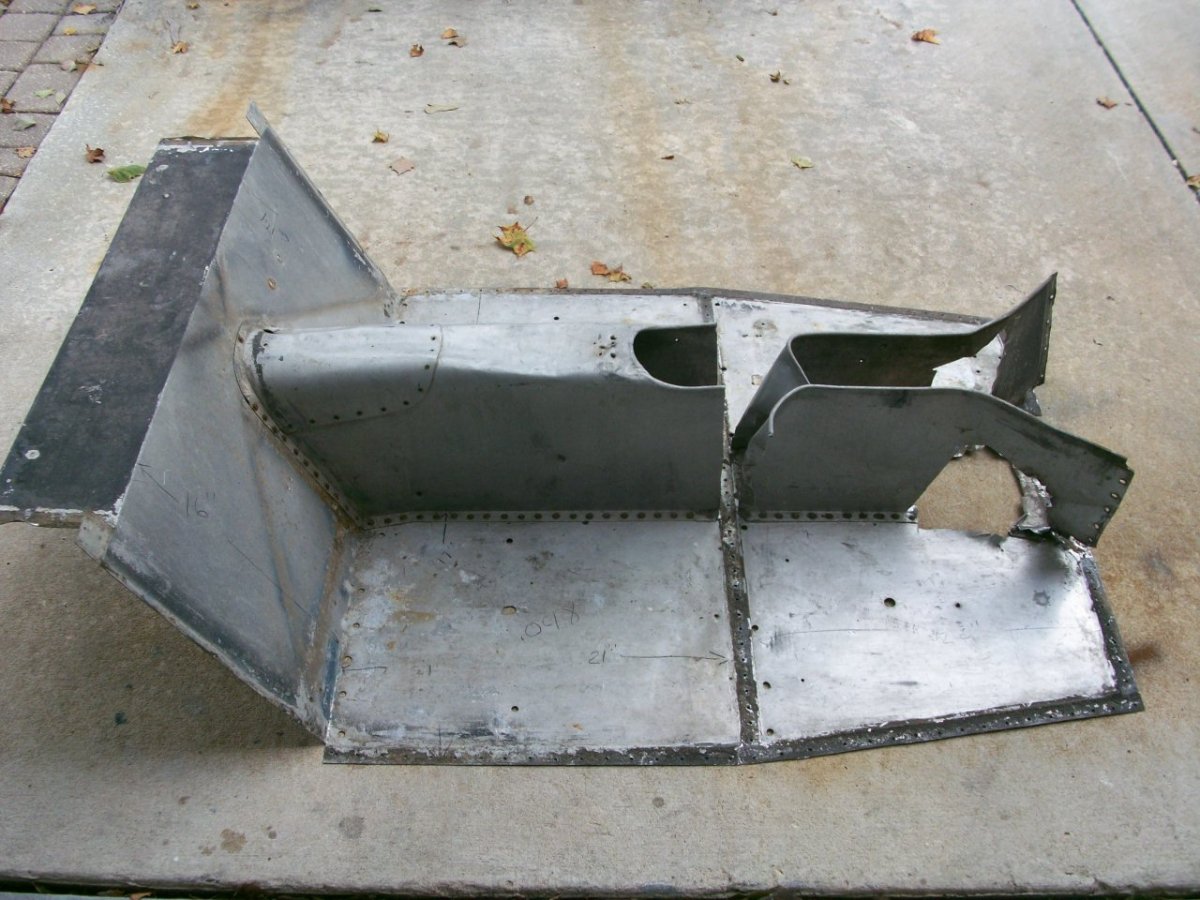
That looks original. I have attached a picture of the belly pan and tunnel I removed from my '62 Seven and which I believe was original and appears very similar to yours. We were discussing the tunnel to handbrake clearance over in "WTB Handbrake Lever" and it seems that there are some differences in the shifter cover plate, but they all seem to go from rounded to flat as they go toward the firewall. My frame is by Universal Radiator, so there may be differences due to the supplier. Regards and Good Luck - Joe
-
Lotus are like Bear Claws, "No 2 are alike"! Your handbrake curve dilemma got me thinking, so I went out and looked at mine. My car was raced and the handbrake was removed, but I believe the one that came with the car and parts was original and seems to fit well except the cable was missing. I got a long clutch cable from a local Harley builder and it does the job well. My handle is straight and gets close to the shift lever in 1st and 3rd, but clears the lever and the tunnel. I notice in the picture above that there is no space between the top of the tunnel and the cross bar the brake mechanism mounts to. My car has a replacement tunnel and this provides almost 2" clearance which allows for a straight brake handle. I checked the original tunnel and it has a little less clearance, but still enough. My car has the "integral remote" shifter, so it is not very tall compared to the Elan style "Triumph extension" shifter which may have required additional tunnel height. Also, I have a Universal Radiator chassis, so not sure who may have done the original aluminum skin. Good Luck and Happy New Year! Joe
-
Not sure! I don't recall reattaching the pipe inside the tank. I only had to touch up the outlet since I soldered a fitting to the pipe on the outlet.
-
The Serck gas tank on my 7 was patched, so I opened up the patch to clean out the varnish from the old fuel. The bottom of the tank had probably 1/8" thick solid layer of varnish that I broke up and scraped out with a putty knife. The fuel pickup tube is just a plain piece of tubing that drops down maybe 1/2" from the bottom of the tank. No filter, No one-way valve... Just as simple as you can imagine! When I got the tank all back together, I used 2 packs of motorcycle tank cleaner and sealer. Note- My tank was sitting for over 20 years, so de-gassing was not a problem. Be Careful and Good Luck
-
1964 Lotus Super Seven Engine Questions
Joe Petty replied to TEM's topic in General Sevens Discussion
109E is the 1340 cc 3 main bearing (the 20 minute engine) and 116E is 1500cc 5 main bearing engine. Yes, both are pre-crossflow. Be gentle and Good Luck! -
Traditional places were the frame square section near the clutch and brake master cylinders and on the floor cross member for Universal Radiator frames. It would not surprise me that owners would stamp ID numbers in obscure places, I have several on my frame. Check any Lucas items for date stamps. I have found month/year codes on the starter and generator. also the voltage regulator and turn signal flasher! Good Luck!