DanM
-
Posts
347 -
Joined
-
Last visited
Content Type
Profiles
Forums
Store
Articles
Gallery
Events
Library
Everything posted by DanM
-
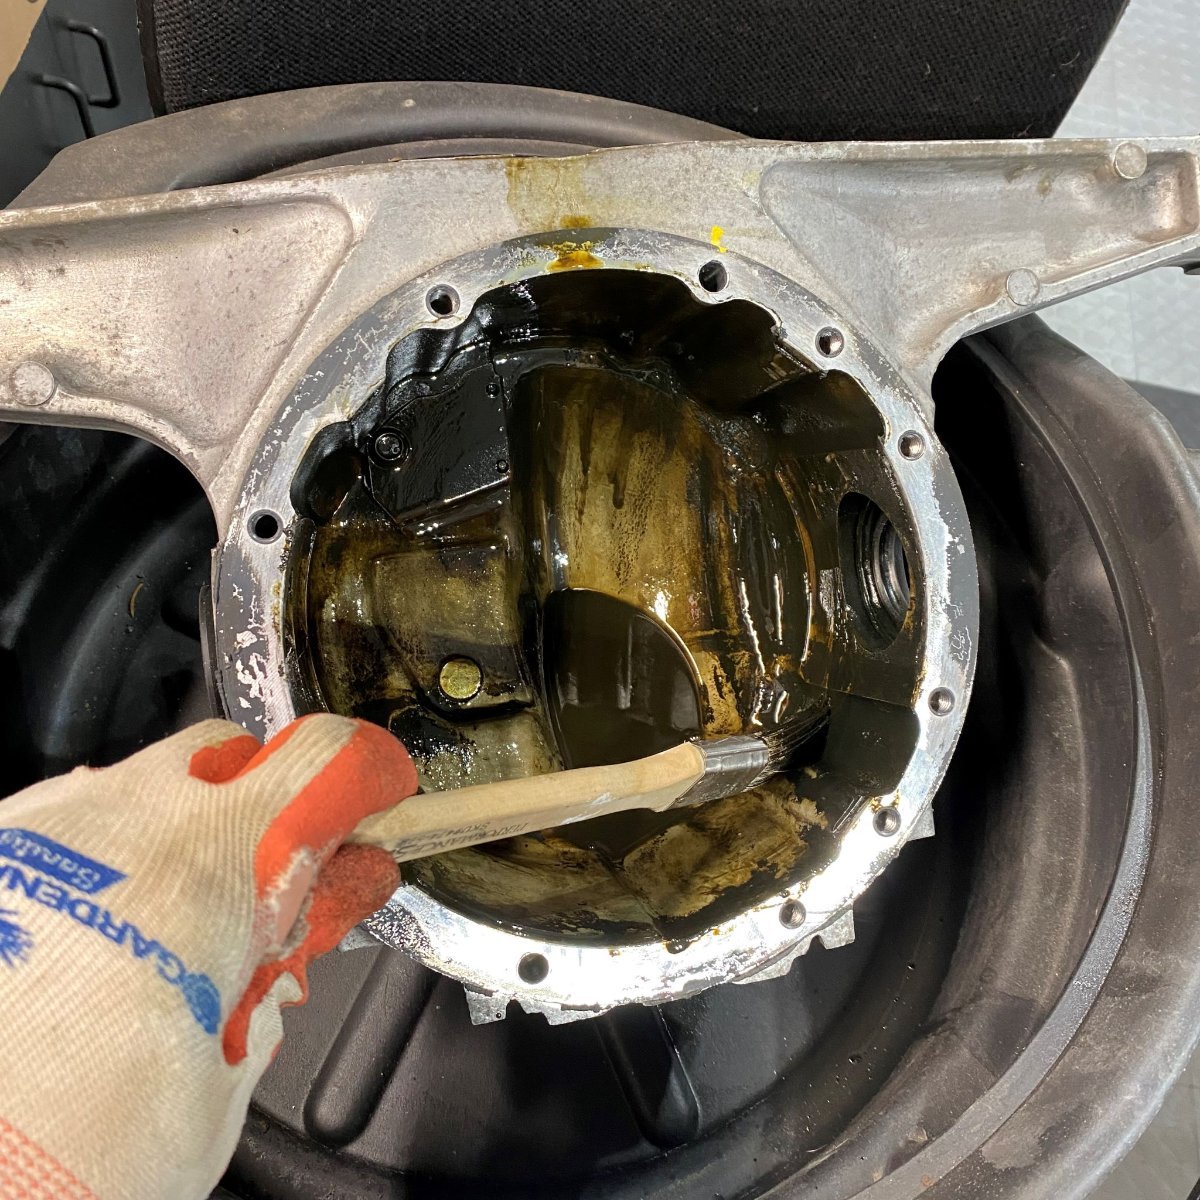
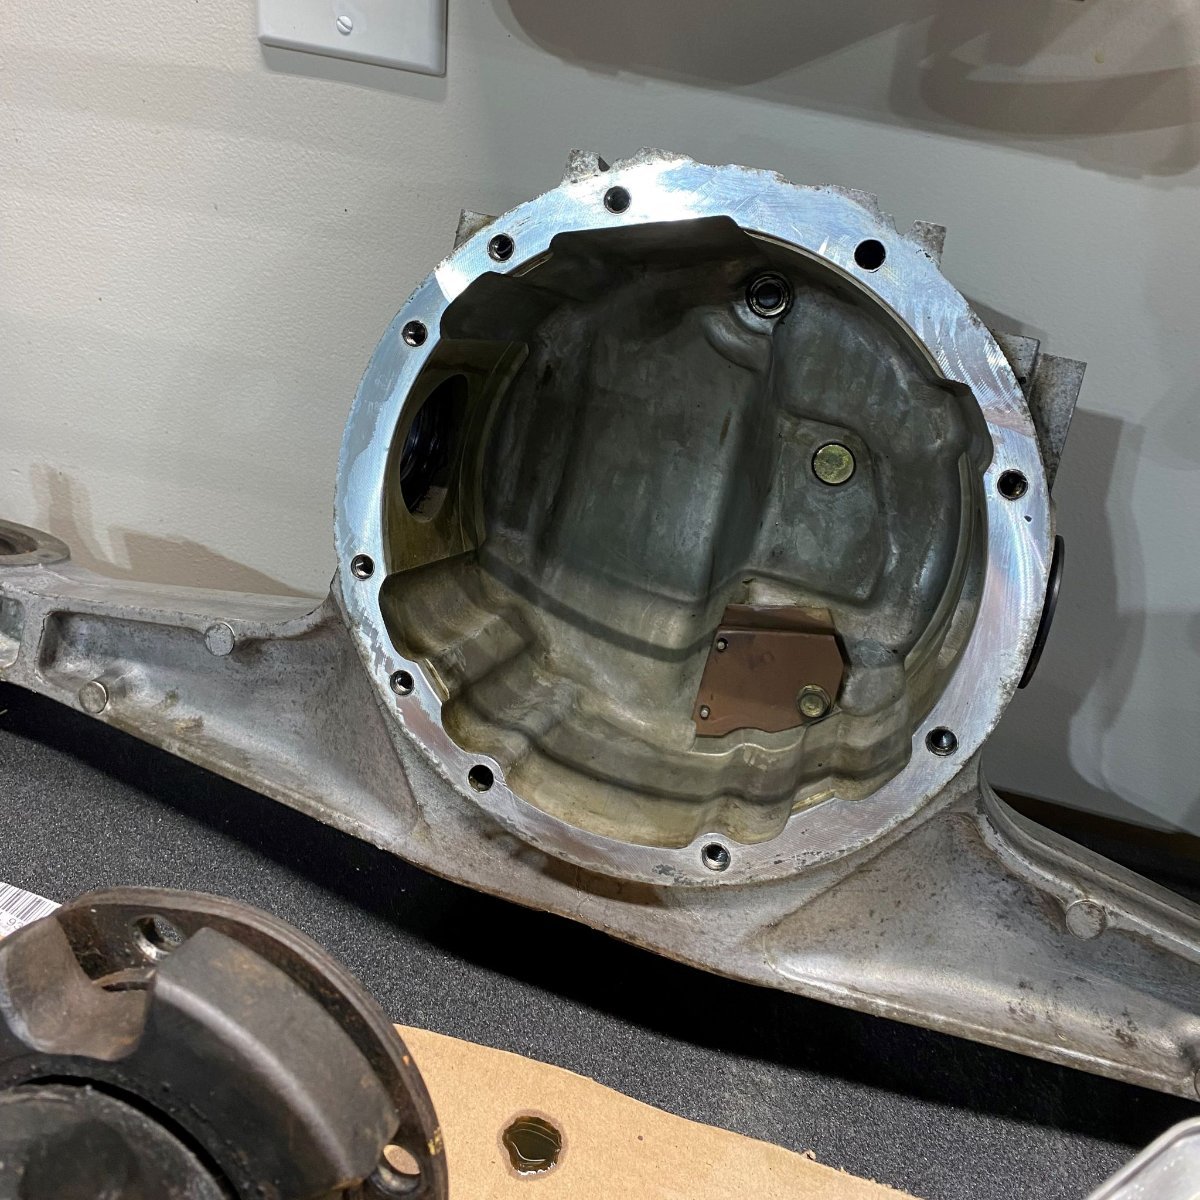
I (Almost) finished off the diff today. First I installed the new CV axle seals. Then moved on to the pinion seal. I needed to buy a 26mm socket for this one, so as soon as it arrived this afternoon I cracked on with the job. Off came the bolt (with a little help from my home made lever). The flange came straight off and there was a destroyed seal underneath....I'm so glad I took the time to check this!! Old seal out and a quick clean up with lacquer thinner on a rag. New seal in. Flange back on I just need to get a new nyloc bolt and I'll be ready to install.
-
Thanks @MV8, definitely worth further investigation for future reference!
-
Yes, there seems to be a 3.6 available for Europe and Australia, not sure how available they are over here in north America.
-
Hey Austin, Thanks for the insight on the gearing, what gear ratio do you have in yours? Mine is a 3.9.
-
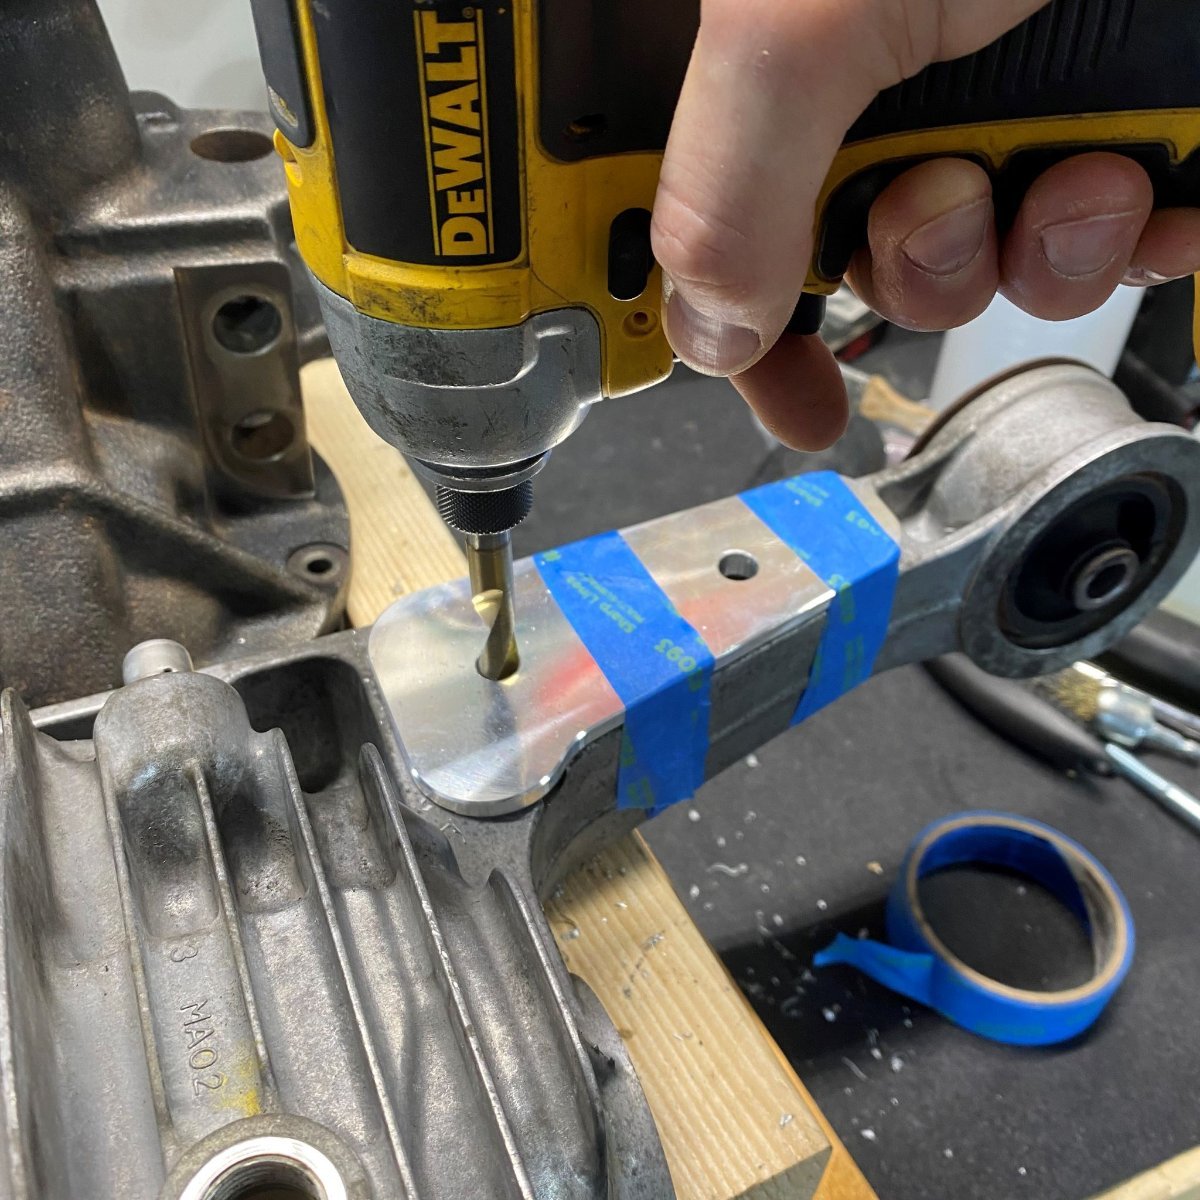
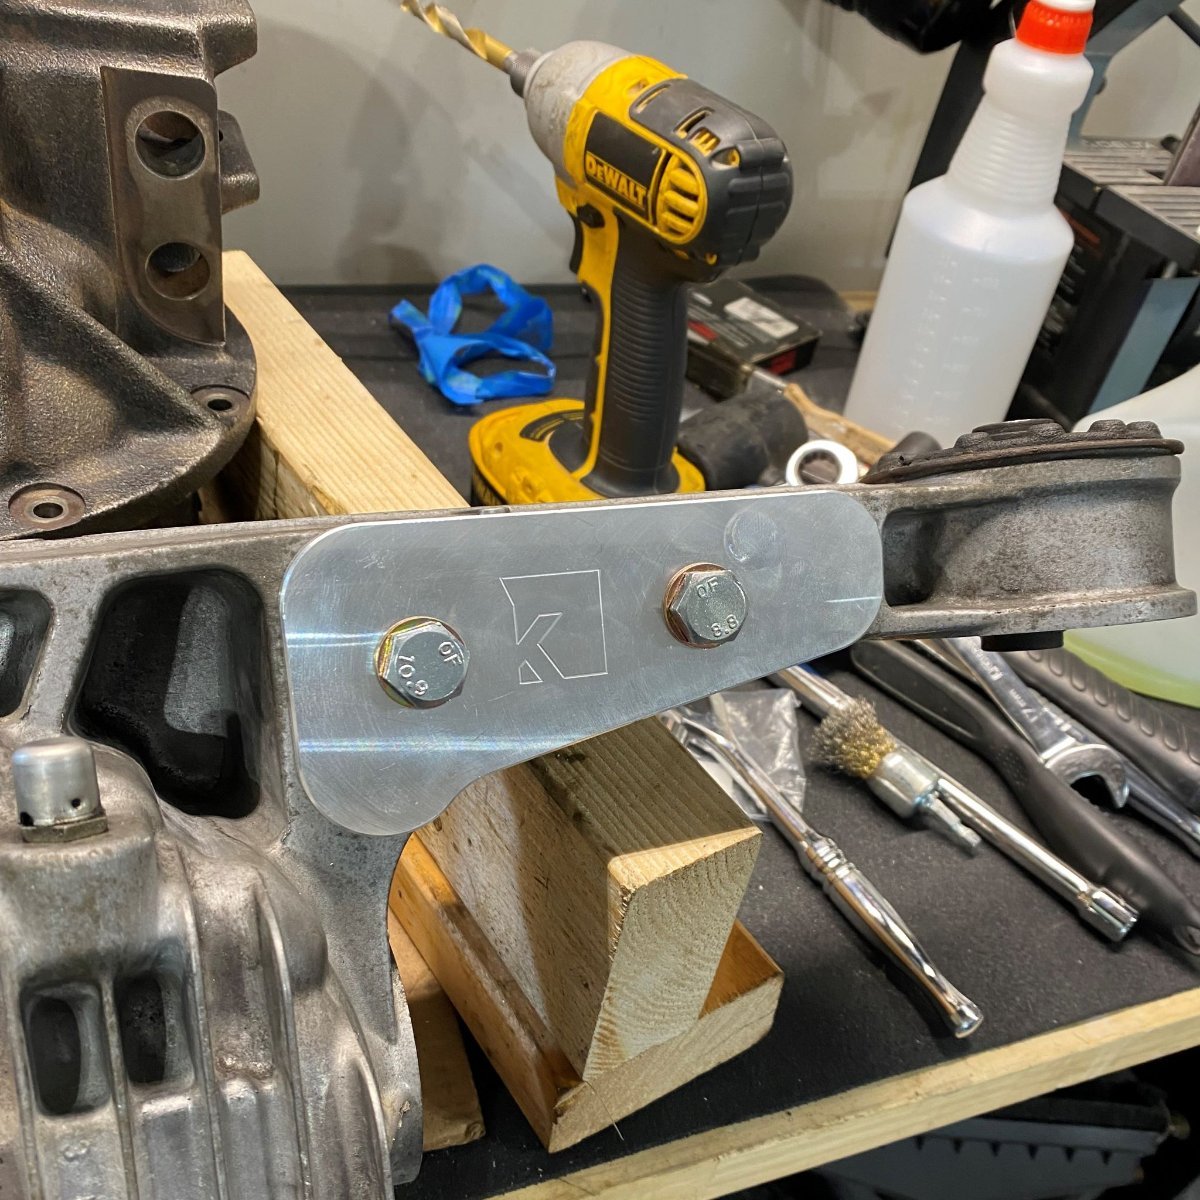
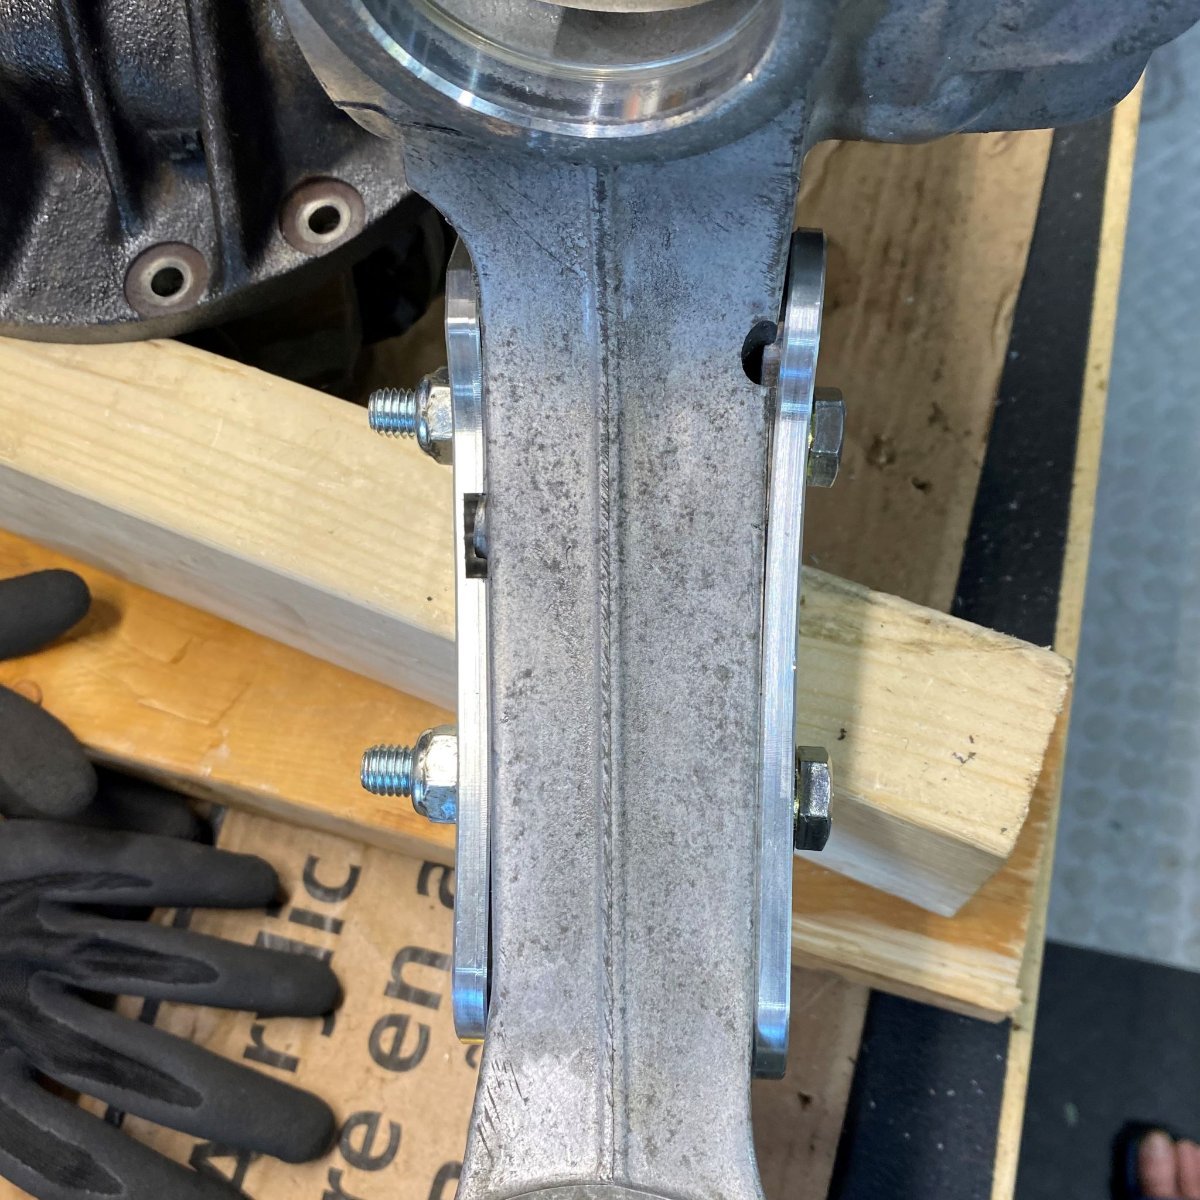
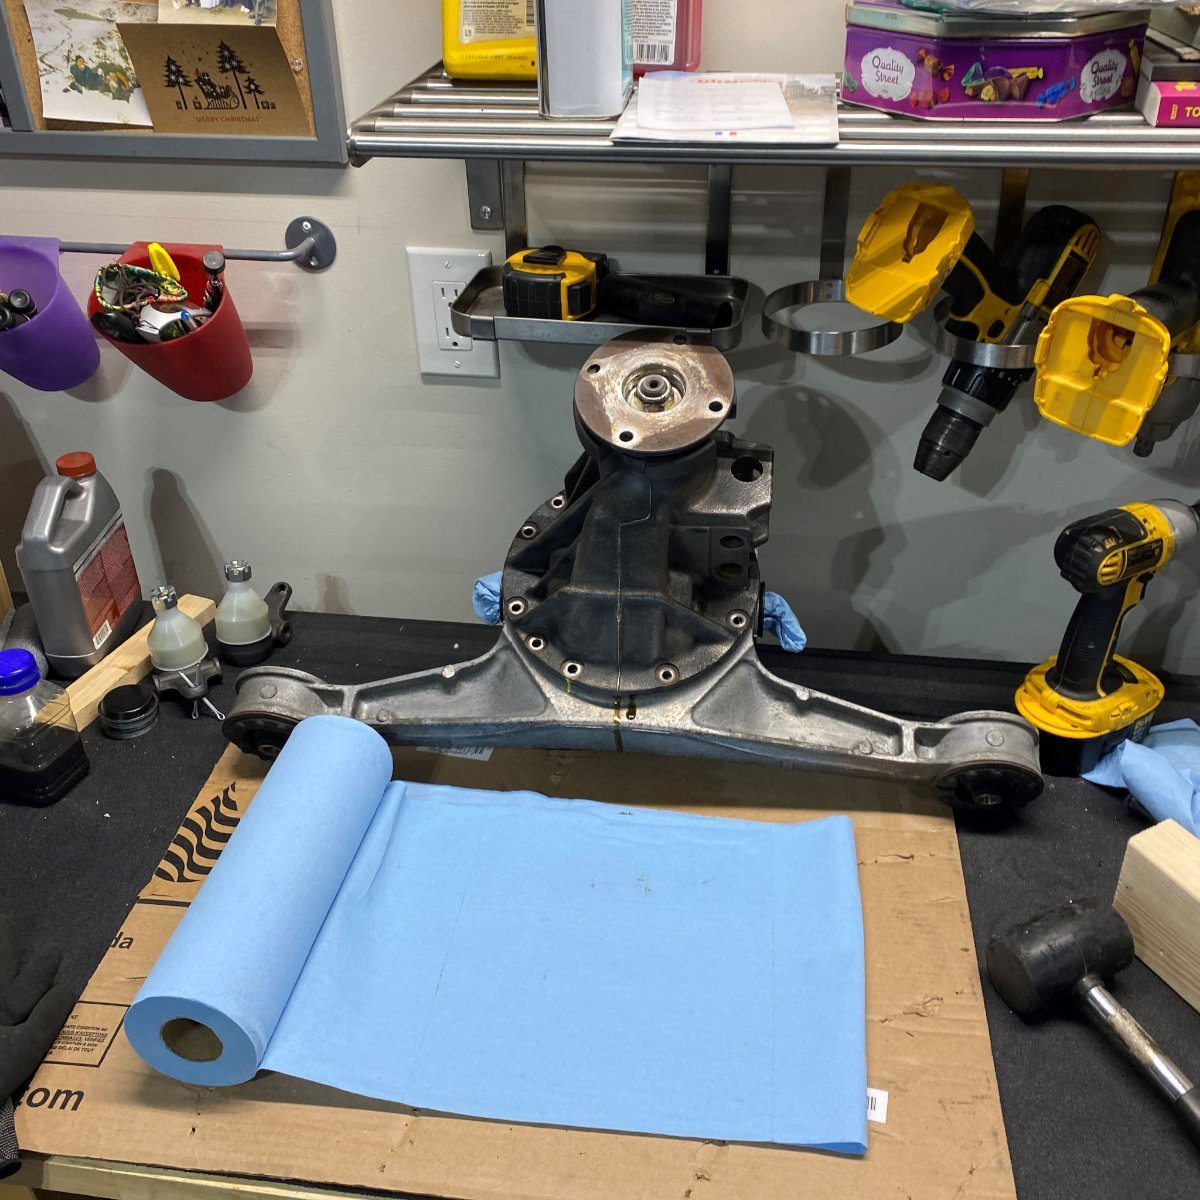
So, I didn't get around to installing the seals today, I'm going to do that just before I reassemble the diff. I did however find some time to install the bolt on differential arm reinforcement plate. For those that aren't aware, one of the Miata diff mounting arms has a couple of notches cut out of them. This is a failure point that has been designed onto the arm so that it will break in the event of a collision. Unfortunately, this is also a failure point for those that have decided to put some extra power in the car and is known to break under heavy load. As I'm considering putting a turbo in the car down the road I figured I would strengthen the area with one of the many reinforcement plates available on the market. I decided to go for the bolt on option. The kit comes with two billet plates and the necessary hardware. You just need a 25/64 drill bit and some wrenches.

-
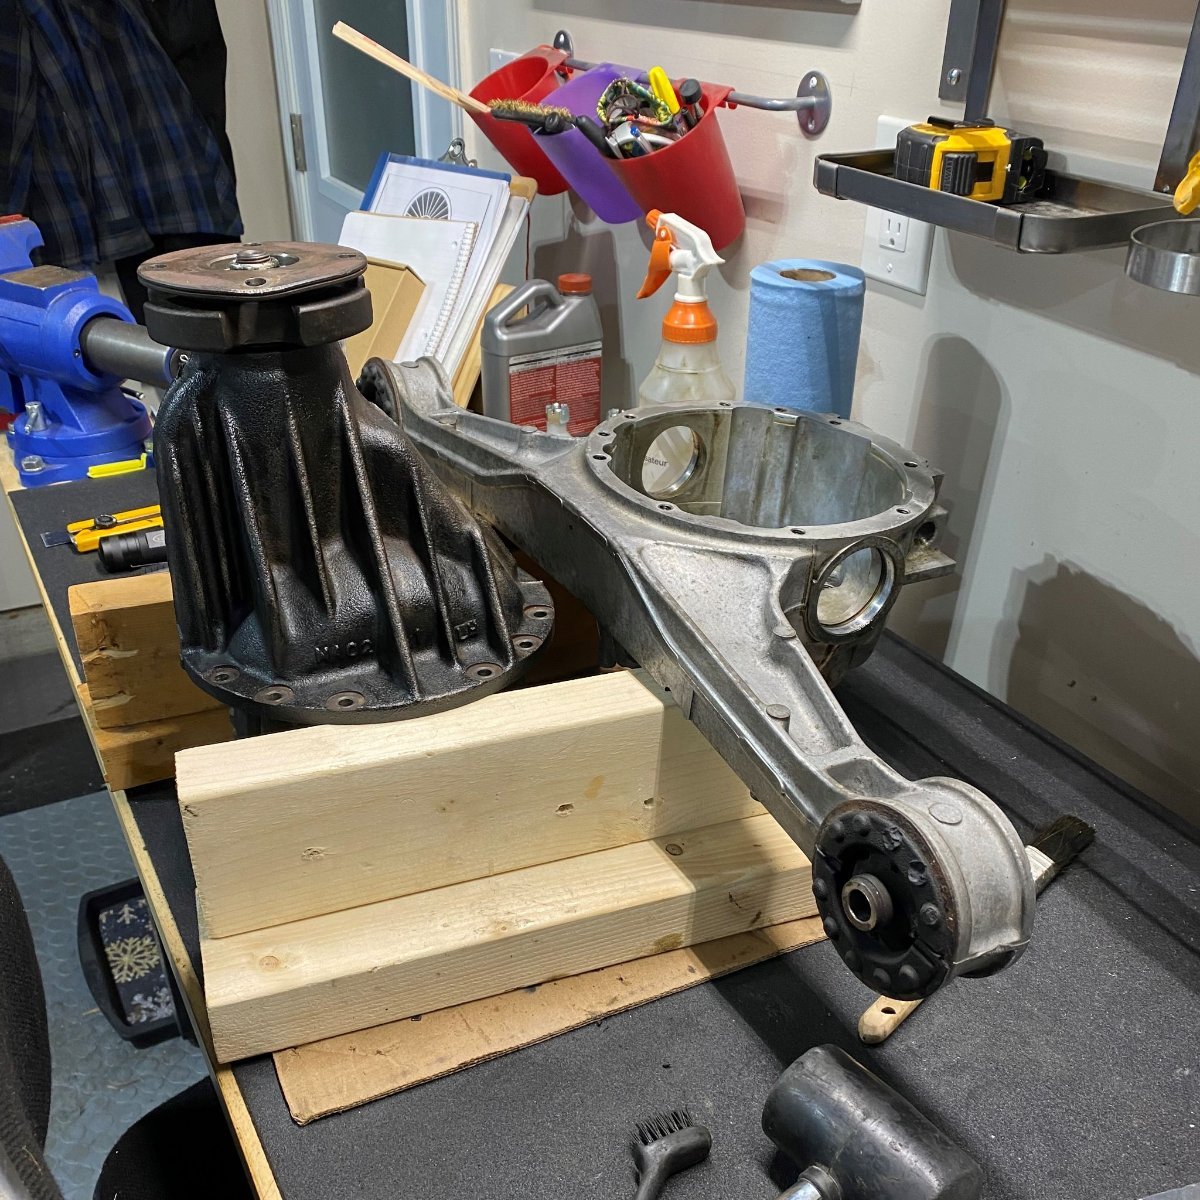
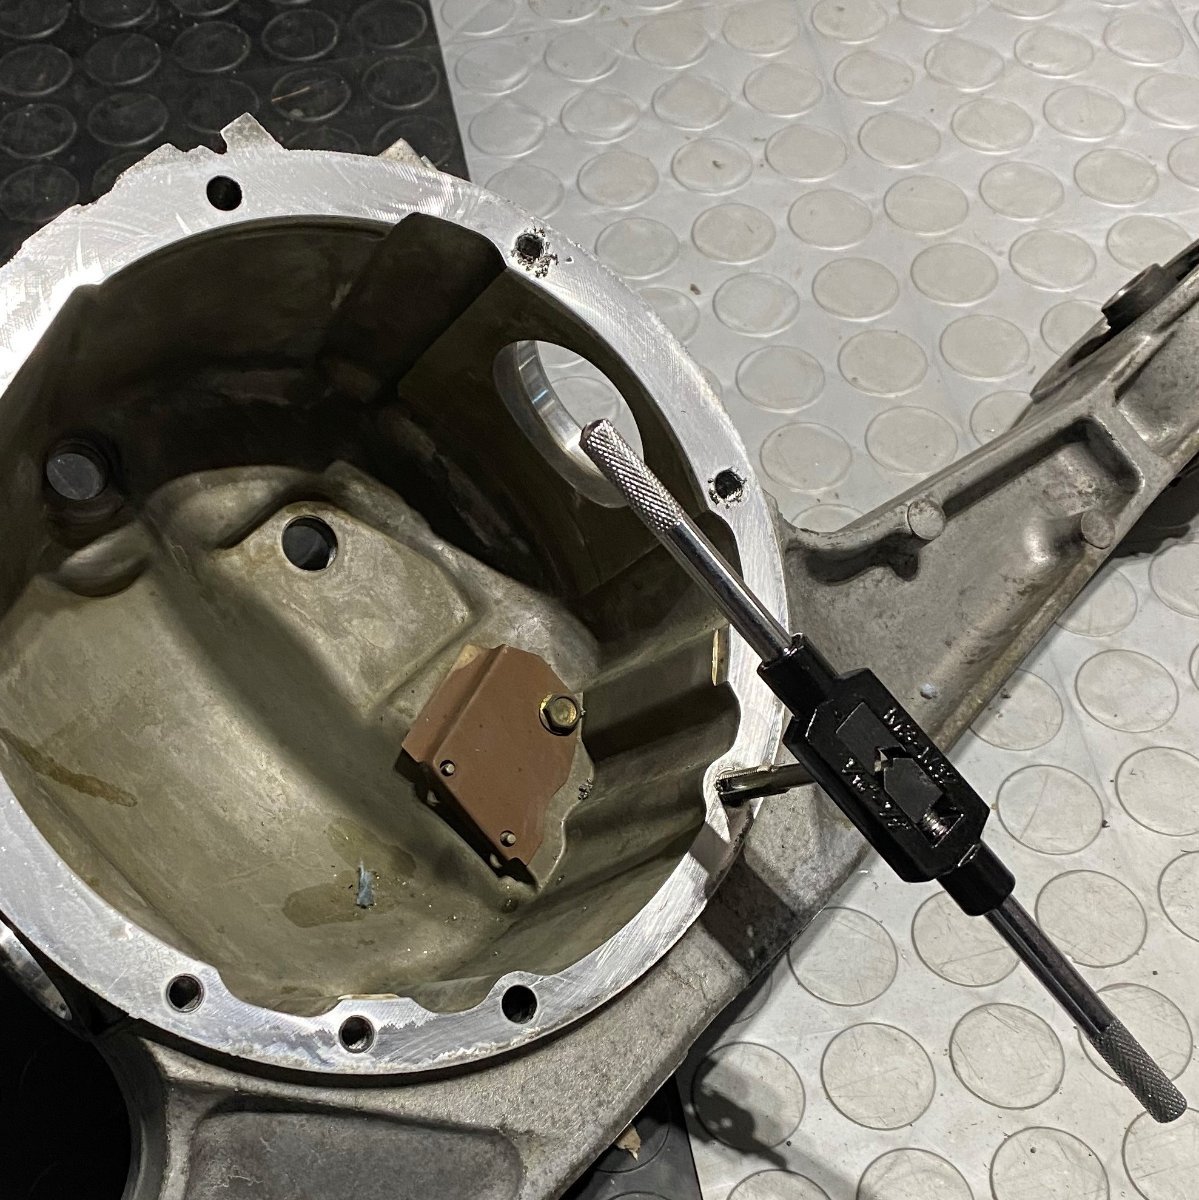
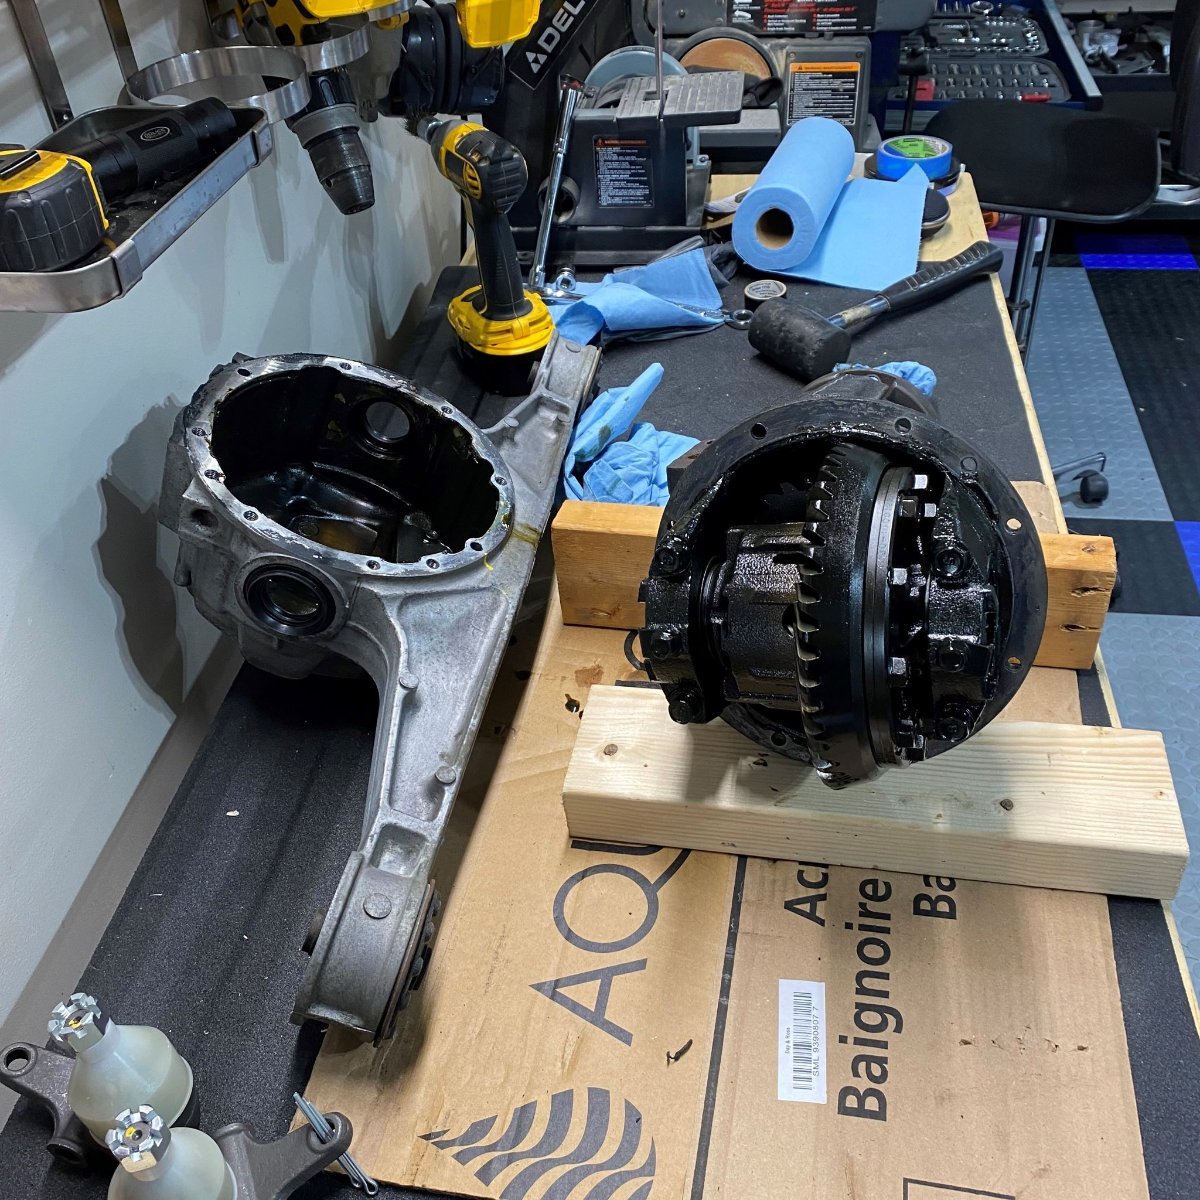
Differential Prep One item that I did not get around to prepping last year (other than the engine, the transmission.........) was the differential. I managed to get my hands on a 99-05, 7" Torsen LSD with driveshaft and CV axles to swap out the 6" open diff from my 1990 donor. Not planning a major overhaul, just cleaning it out, installing new seals and plugs and attaching my bolt on Reinforcement plates from KPower Industries. I also bought Poly bushings, but the original ones look in great condition so I'll keep them. First job was to separate the gears from the casing. Then gave it a good clean out with lacquer thinner, brake clean and a plastic scraper. Finally, I cleaned out the bolt threads with an 8mm 1.0 tap. Tomorrow I'll attach the reinforcement plates, give it one more clean out and fit the seals.
-
You only put it in the slot when your driving. Apparently it took away the fumbling!
-
Thanks for the reminder. I bought a pot of Copper last week and have been using it for the screw in bushing threads and tie rod end threads. I’ve not put any on the bolt shanks through the bushing liners, I’ll go back and do that.
-
Did you see the "Wheeler Dealers" Caterham episode, where they made a little dash slot for the immobilizer? It's now on the Motor Trend app.
-
Just catching up with your diary. I have the same observation with the Westfield Build! BTW, the car looks amazing!!
-
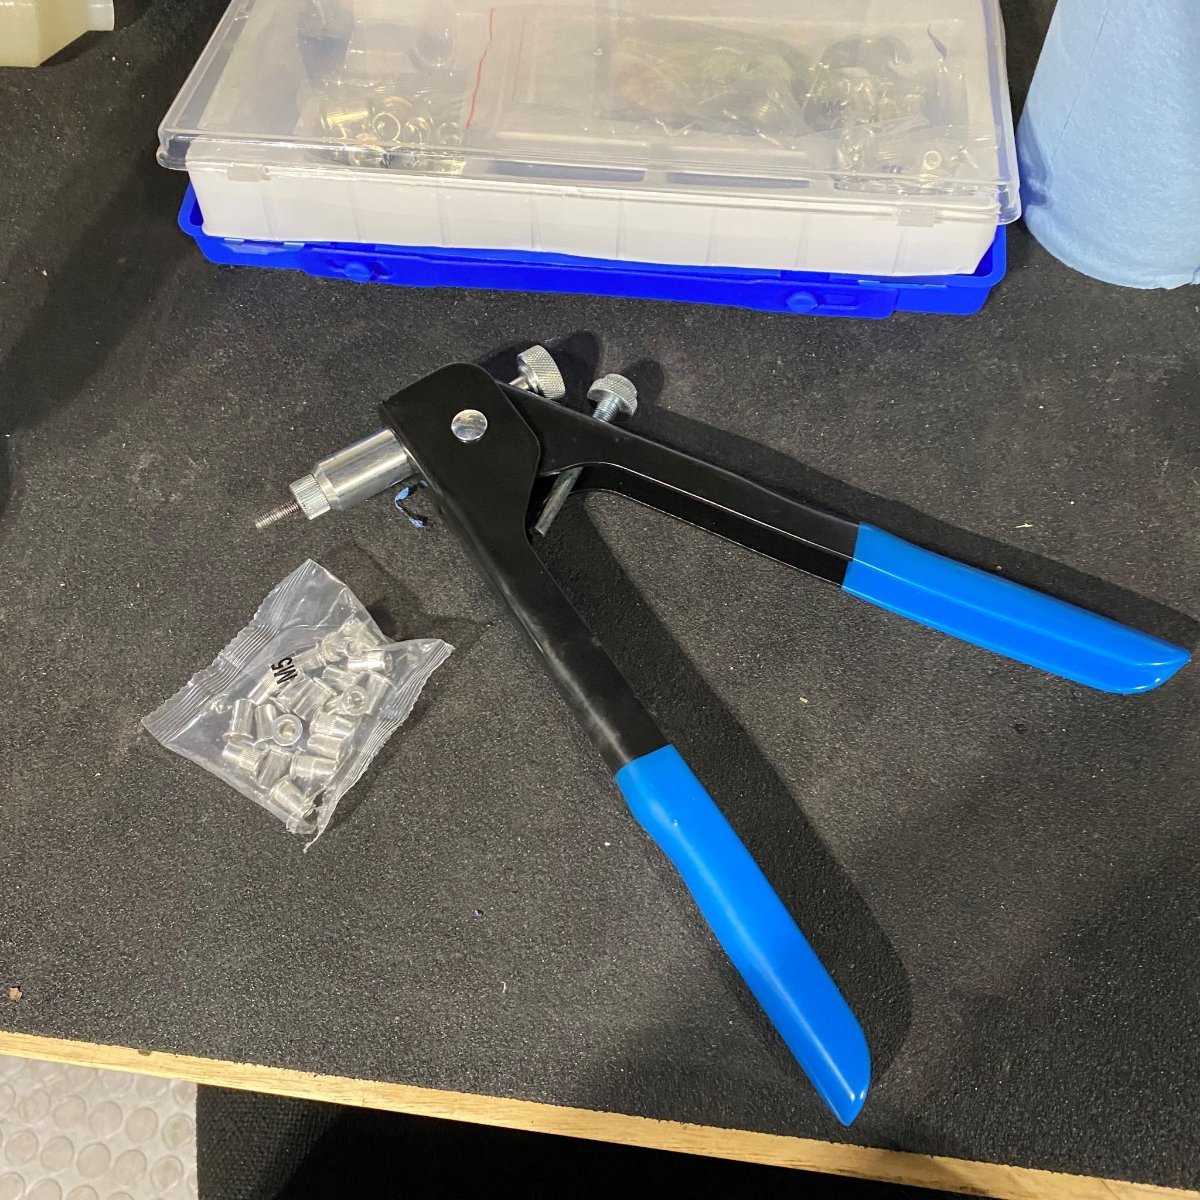
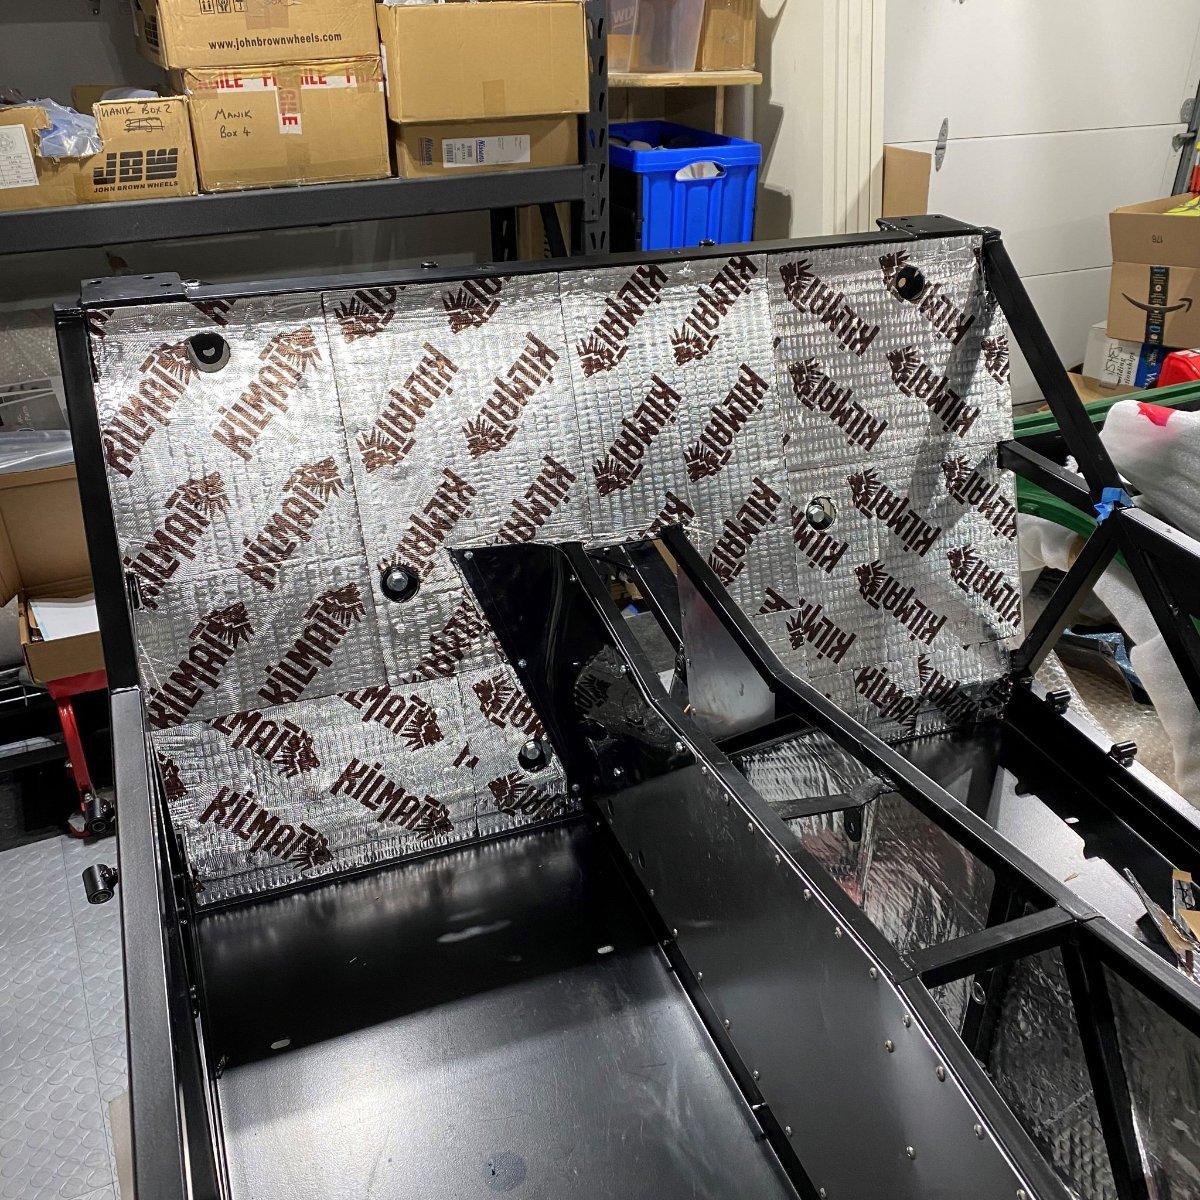
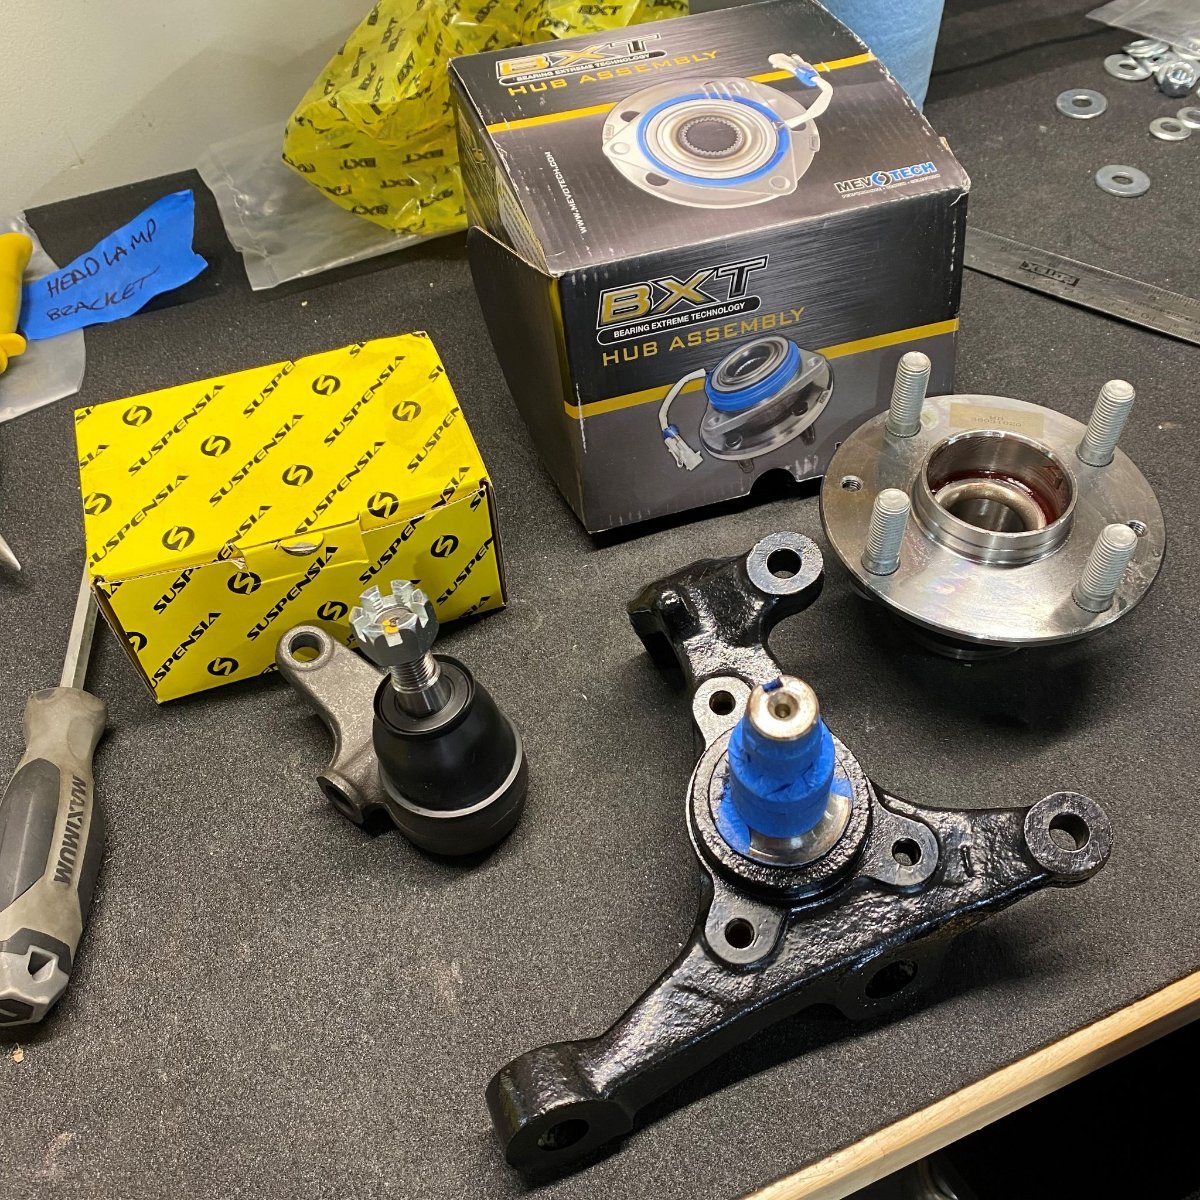
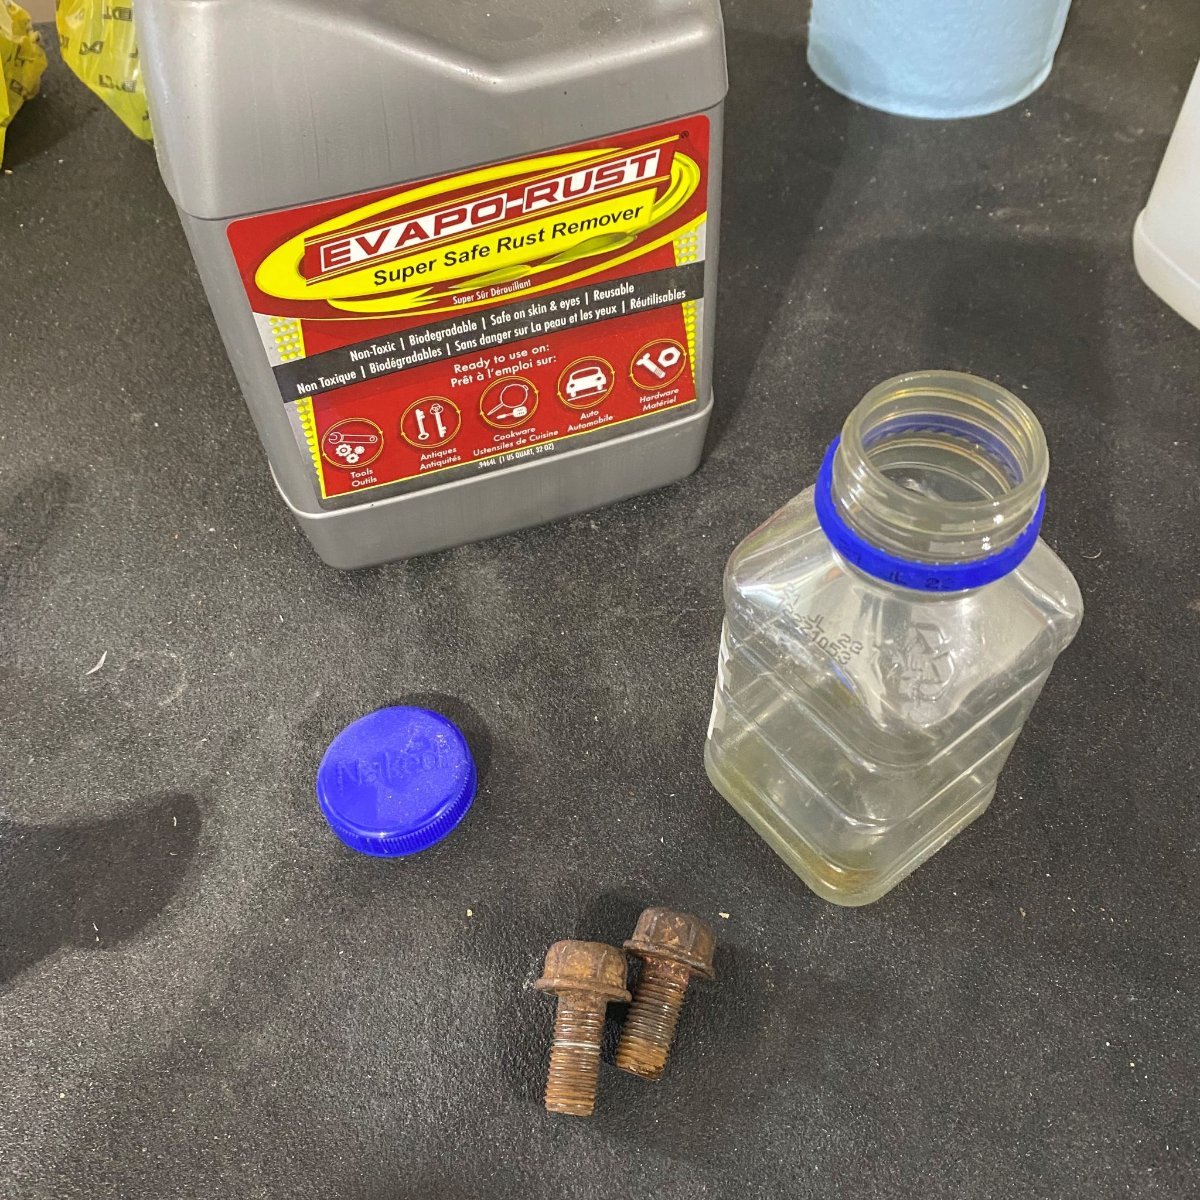
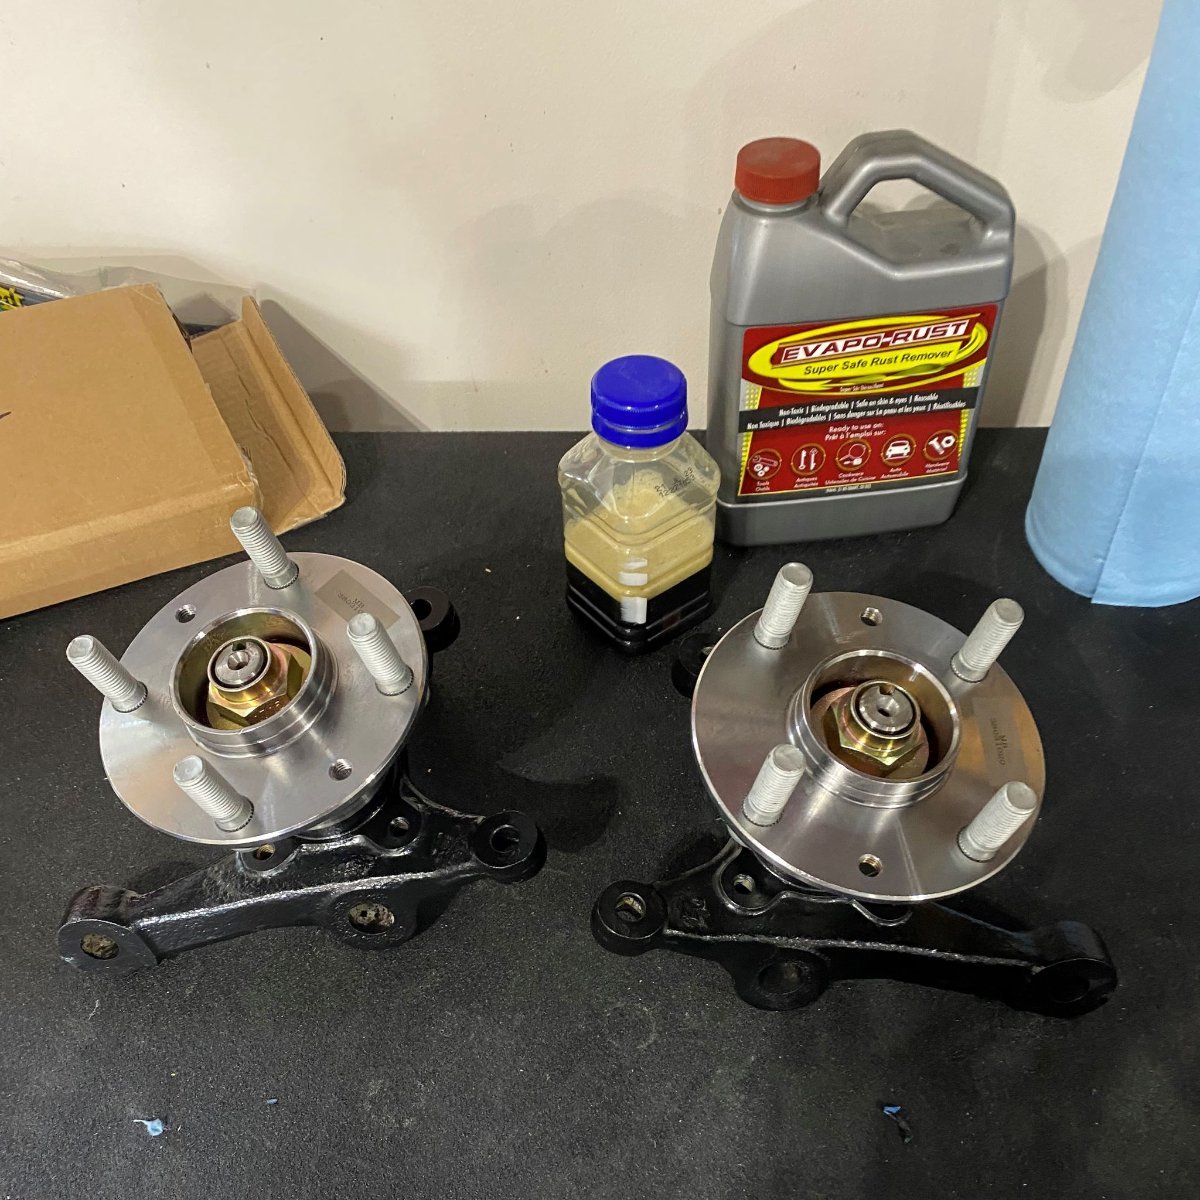
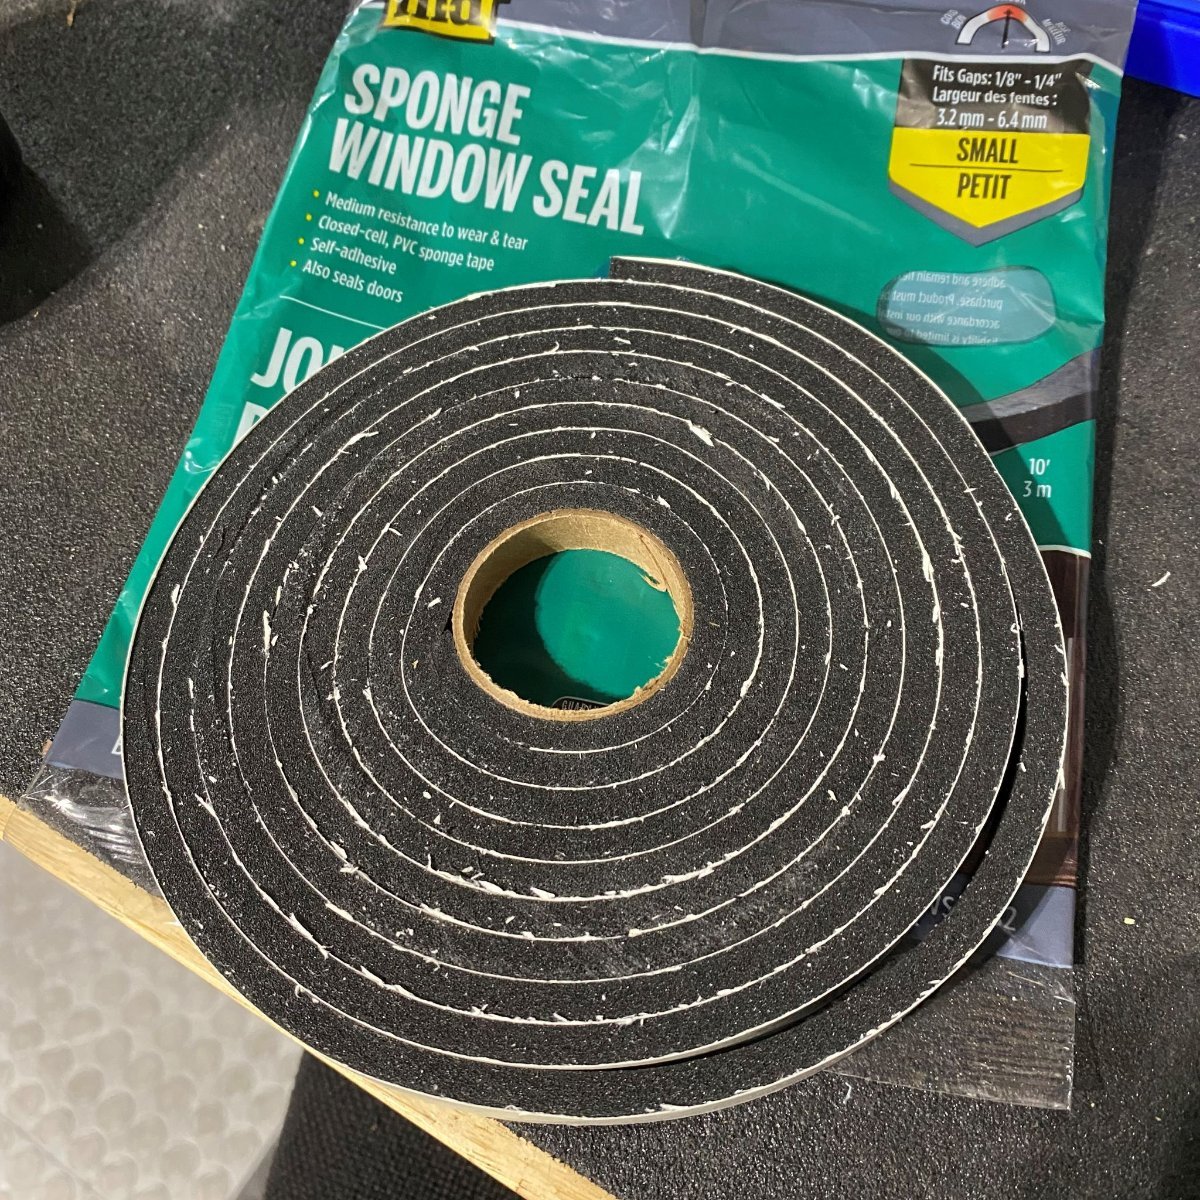
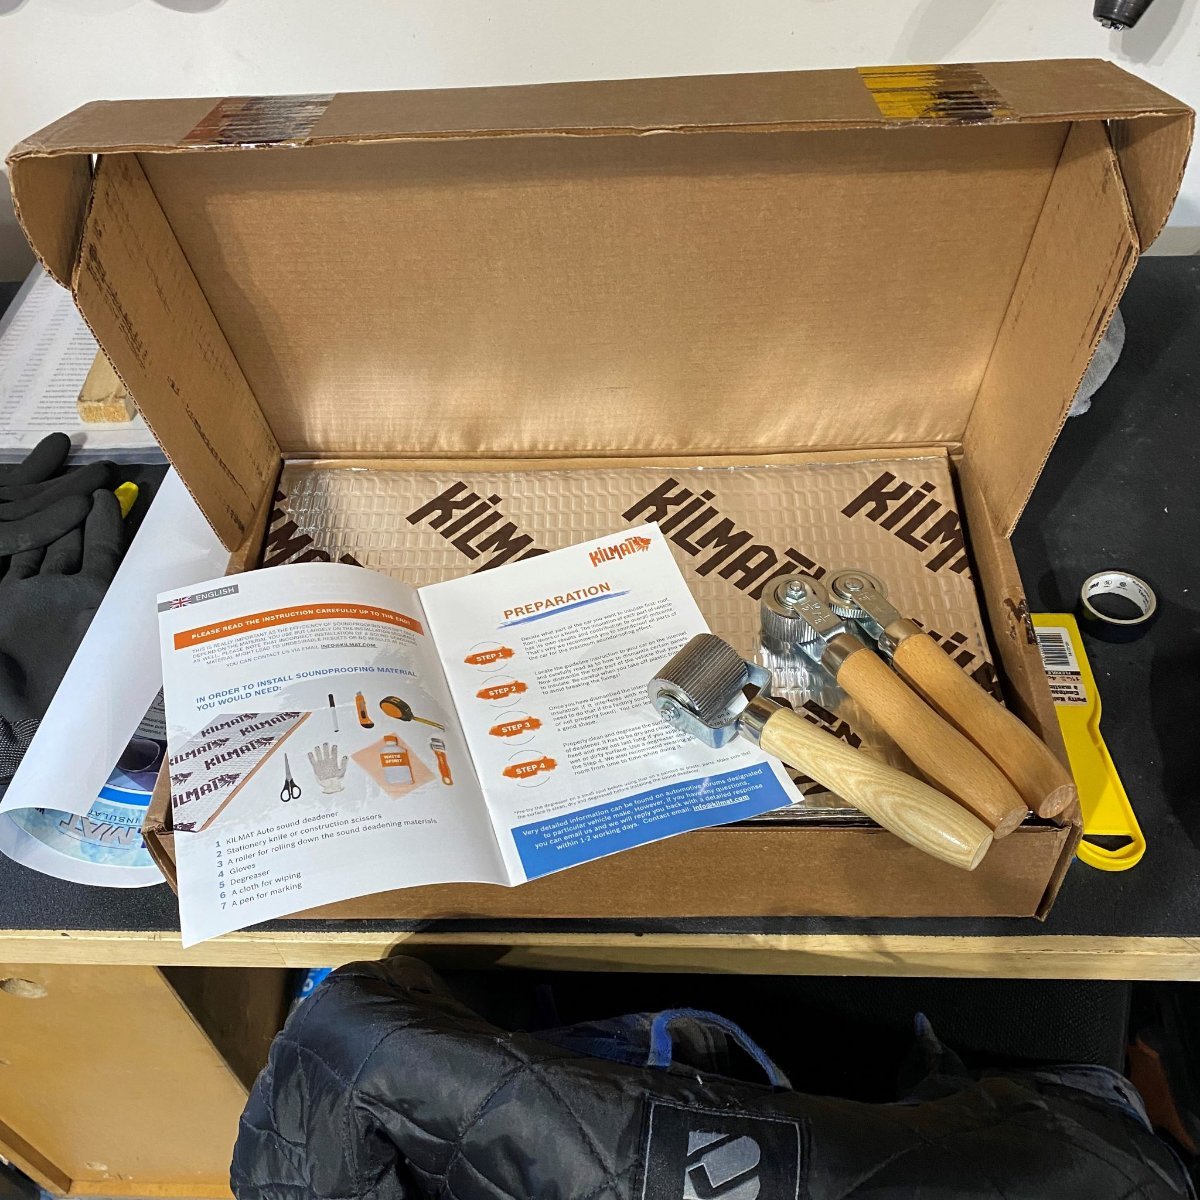
Today was a real mixed bag of stuff... New Front Hubs My garage has shelving all over. On one side is all the donor parts that I stripped and painted last year (Hidden behind the snow blower, garbage cans and other random stuff) and on the other side is all the new shiny stuff from Westfield. Today was the day that I started to tuck in to the donor stuff! When I tore the MX-5 apart last year there were a few items that were unusable and needed replacing. One of these were the front hubs. I ordered most of my replacement parts from RockAuto.com so it was nice to open some boxes that had been sitting there for 9 months and assemble them. New hubs and Lower ball joint with my refurbished (and painted with POR-15) spindles. Ready to be installed and torqued on the car. I thought the lower ball joint mounting bolt would be part of the kit, however reading the manual, it seems that I needed to take that from the donor. Thankfully I kept lots of small parts just in case and found the original bolts. Out came the Evapo-rust (Love this stuff) and in they went. We'll see what they look like tomorrow...... Nothing else I can do here today so on with something else... GRP Diff Panel After a brief reach out on WSCC UK's "Tech Talk" I decided I would screw the GRP diff panel to the chassis. I bought myself a cheap Rivnut tool on Amazon which I figured would be fine for the smaller screws and then spent the afternoon installing the rivnuts. The panel didn't quite fit right so I had to trim it a little with the Dremel and smooth it off with some fine sand paper. Happy with that! When I do the final fit I will install some weather stripping underneath to stop any dirt and debris sifting in. More Kilmat This evening I installed a bit more Kilmat. This stuff is so easy to work with. Peeling off the backing...
-
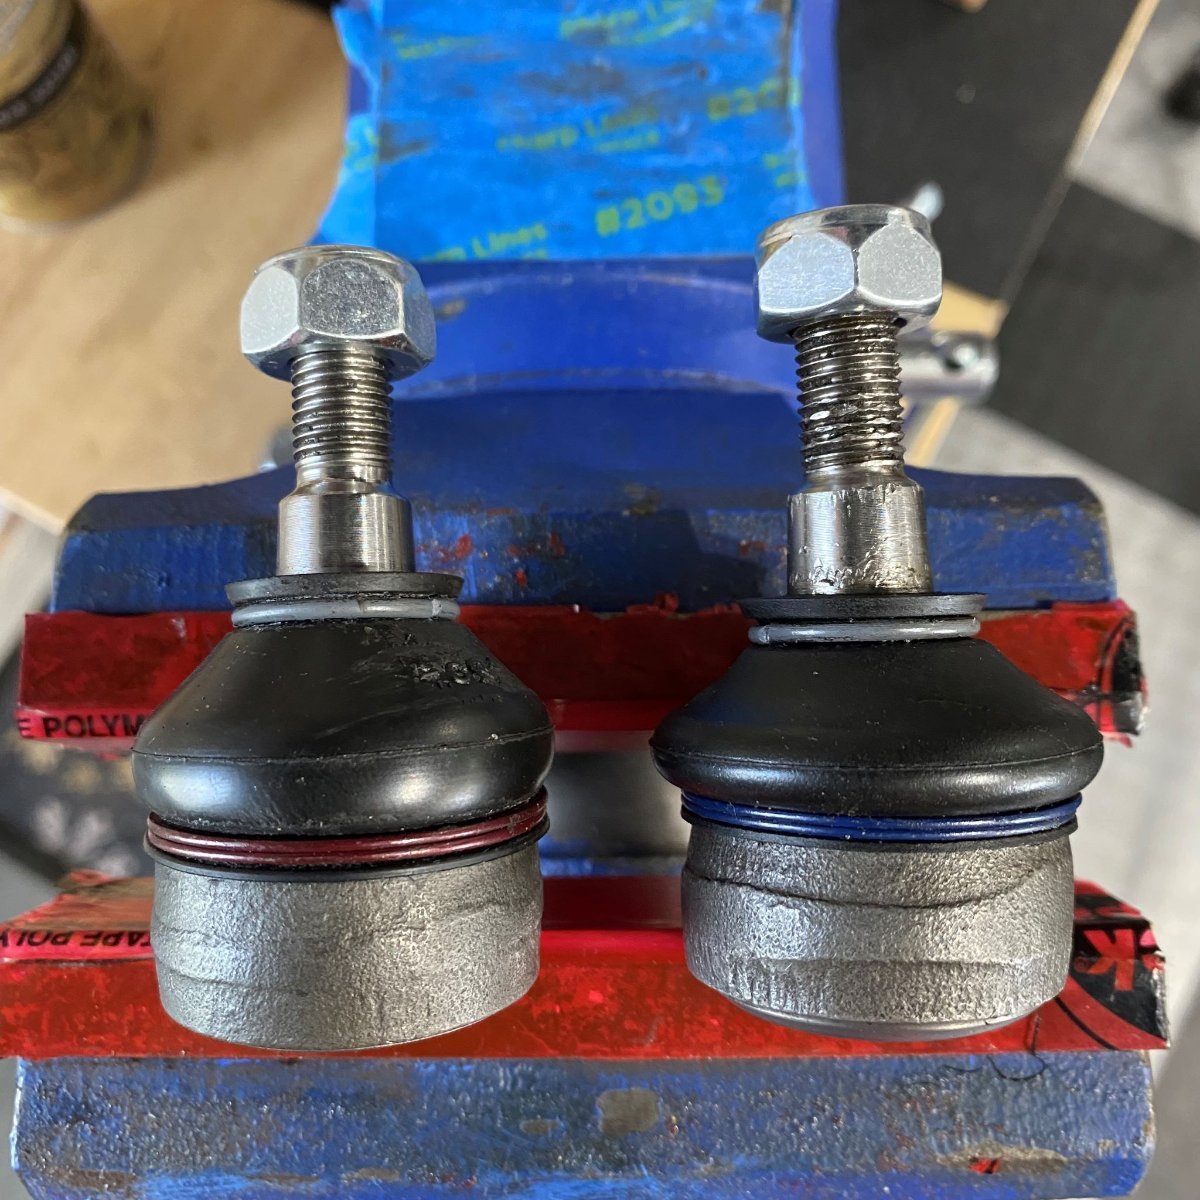
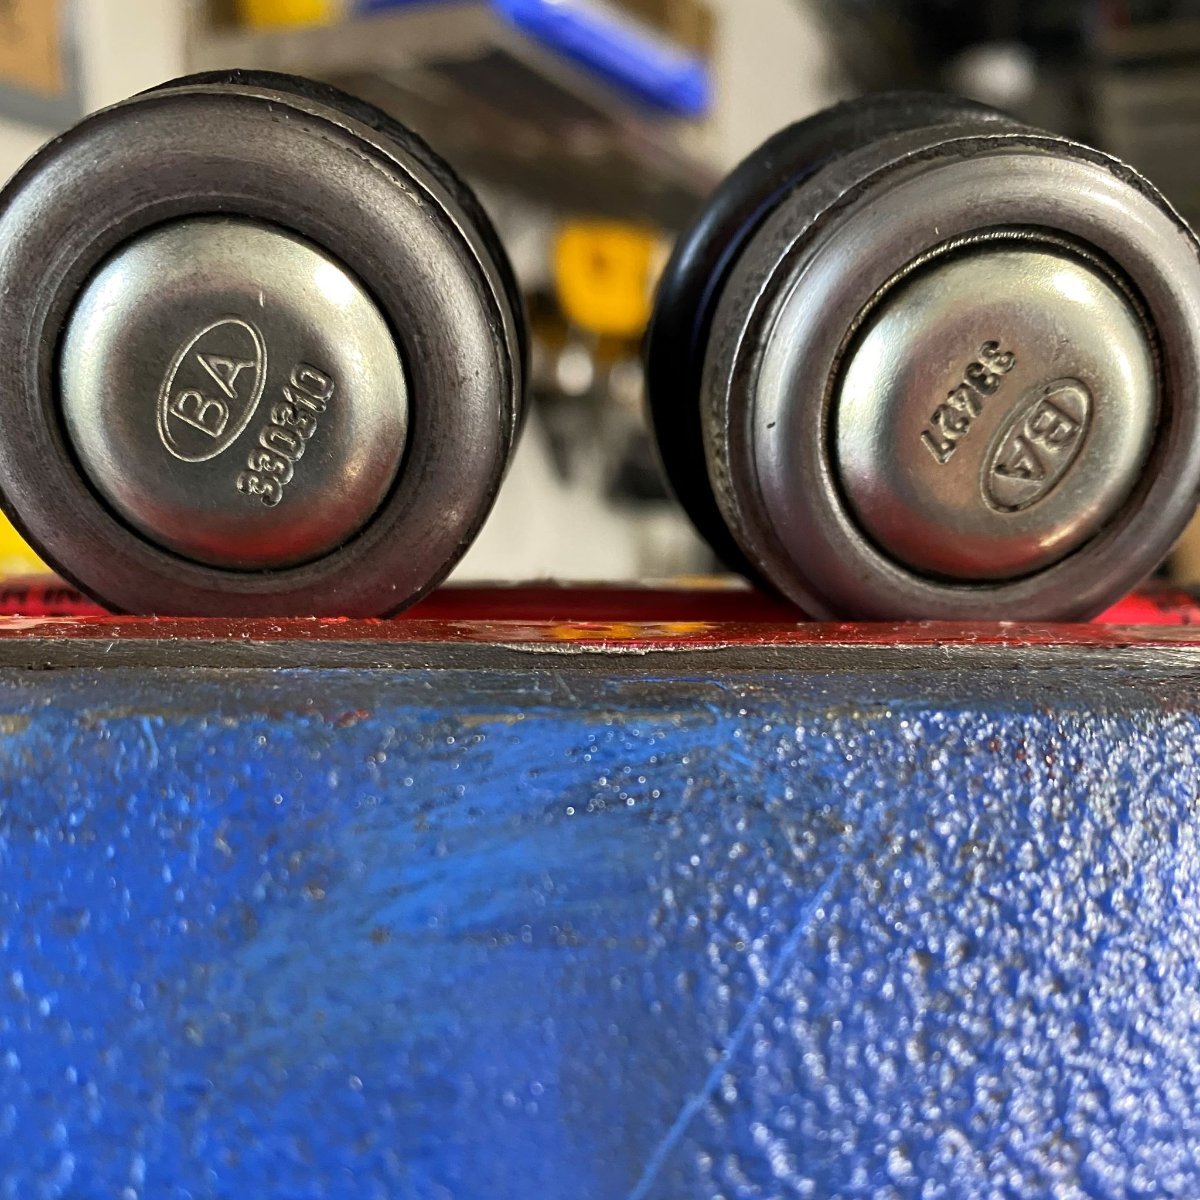
Managed to get 2 half days in the garage this weekend which was awesome! For those that aren't familiar with the climate in southern Ontario, the winters are cold and the summers are hot and humid. We got a taster of that this weekend with humid temperatures in the 30Cs. Needless to say the fans were on full!! 🥵 Front Control Arms First task on Saturday was turning my focus to the front Control Arms. To my surprise and joy all the brackets lined up nicely! (Woohoo! Crowd goes wild!) Sadly, however my euphoria was short lived when I discovered that I was sent two different tie rod ends for the front upper Control Arms! One of them was in a bad shape and the threads were not compatible with the arm. Photos have been sent to Manik, so hopefully I'll get a resolution pretty soon. Not to be deterred, I continues with the front control arms and headlight bracket install which went pretty smoothly. I couldn't for the life of me find a 30mm M8 bolt for the headlight bracket (As per the manual) so I'll leave it for now and see if one mysteriously pops up later! RHS control arm without tie rod end! LHS Headlamp bracket spacer
-

Overseas orders, when are we liable for import duties?
DanM replied to Vovchandr's topic in General Sevens Discussion
I don't know what its like in the states but being in Canada I order a lot of stuff from either the US or UK. I always get asked to pay import fees separately by the carrier. it stings a little (along with the exchange rate!) lol!. -
Ouch! I hope you and the passenger (If there was one) are ok. That's my worst nightmare being hit by a truck!!
-
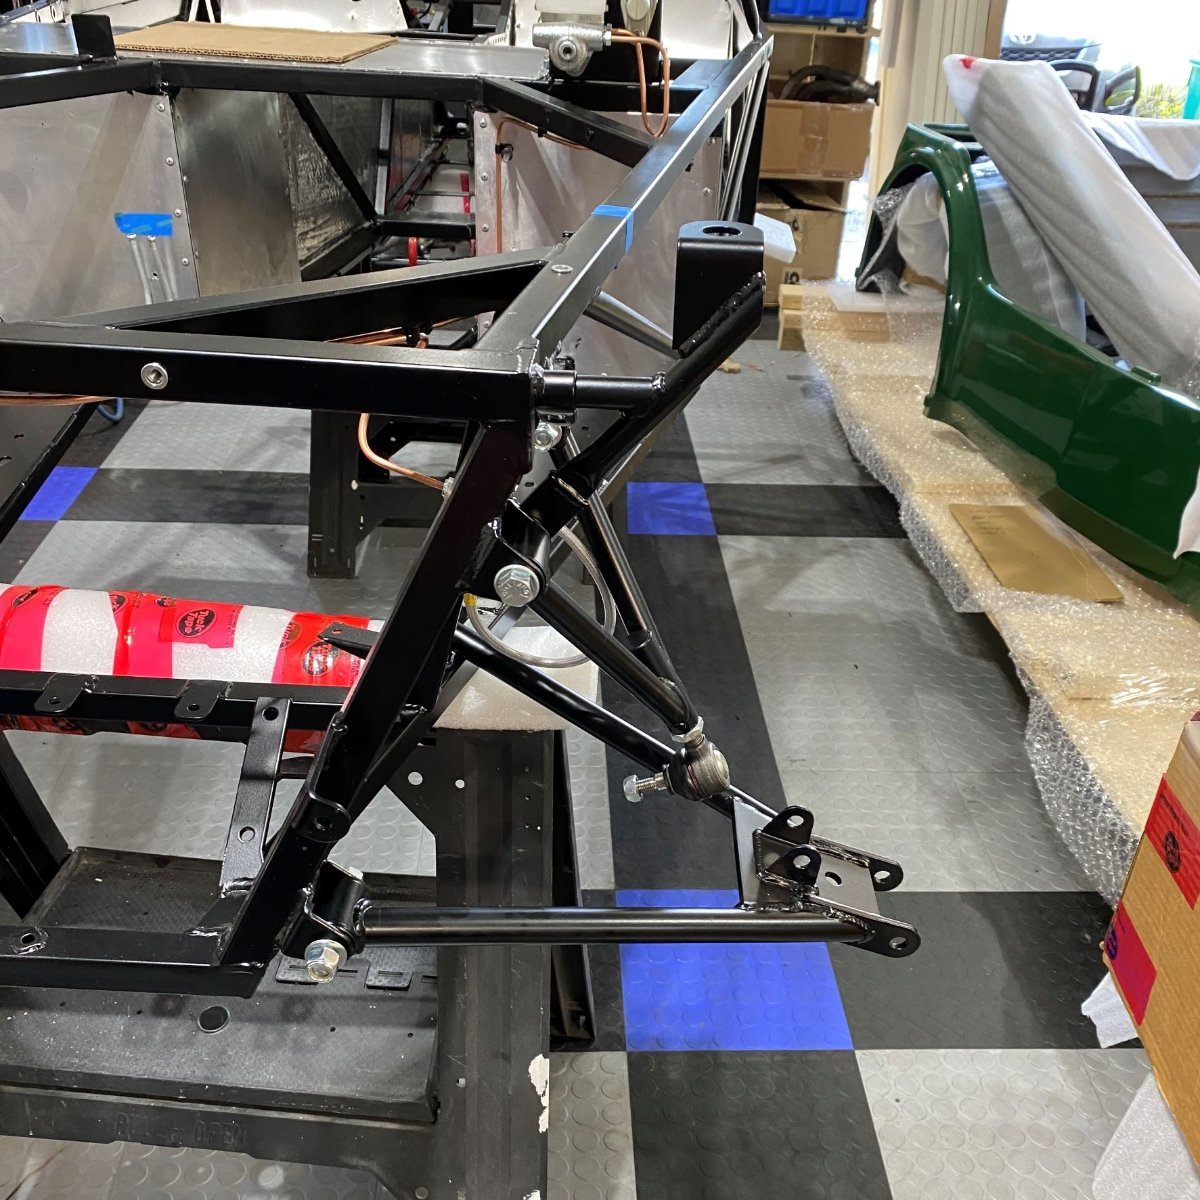
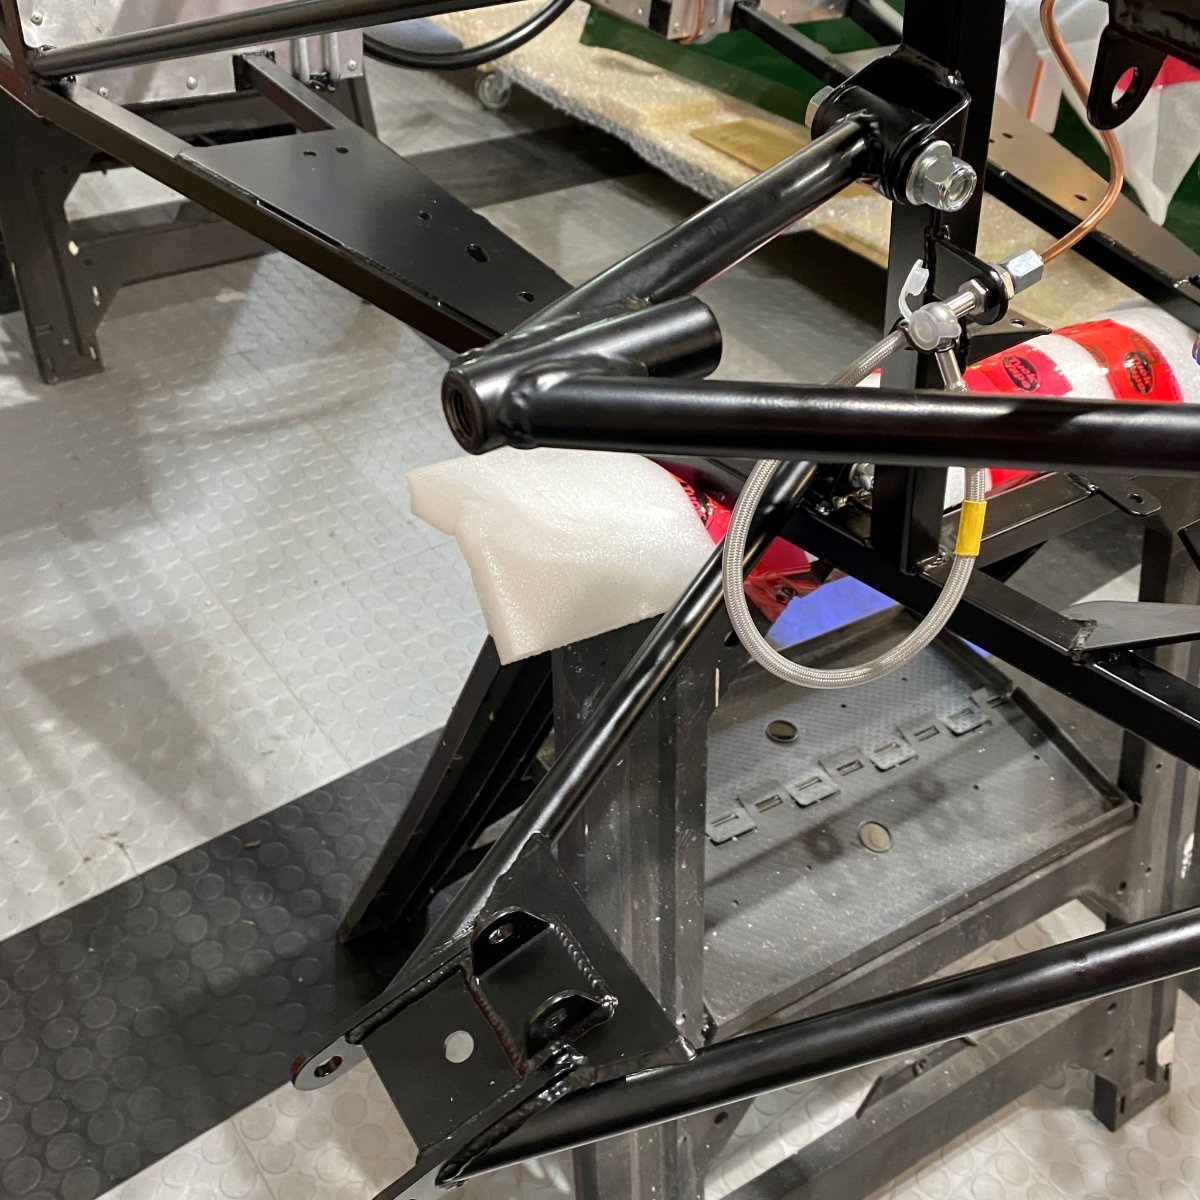
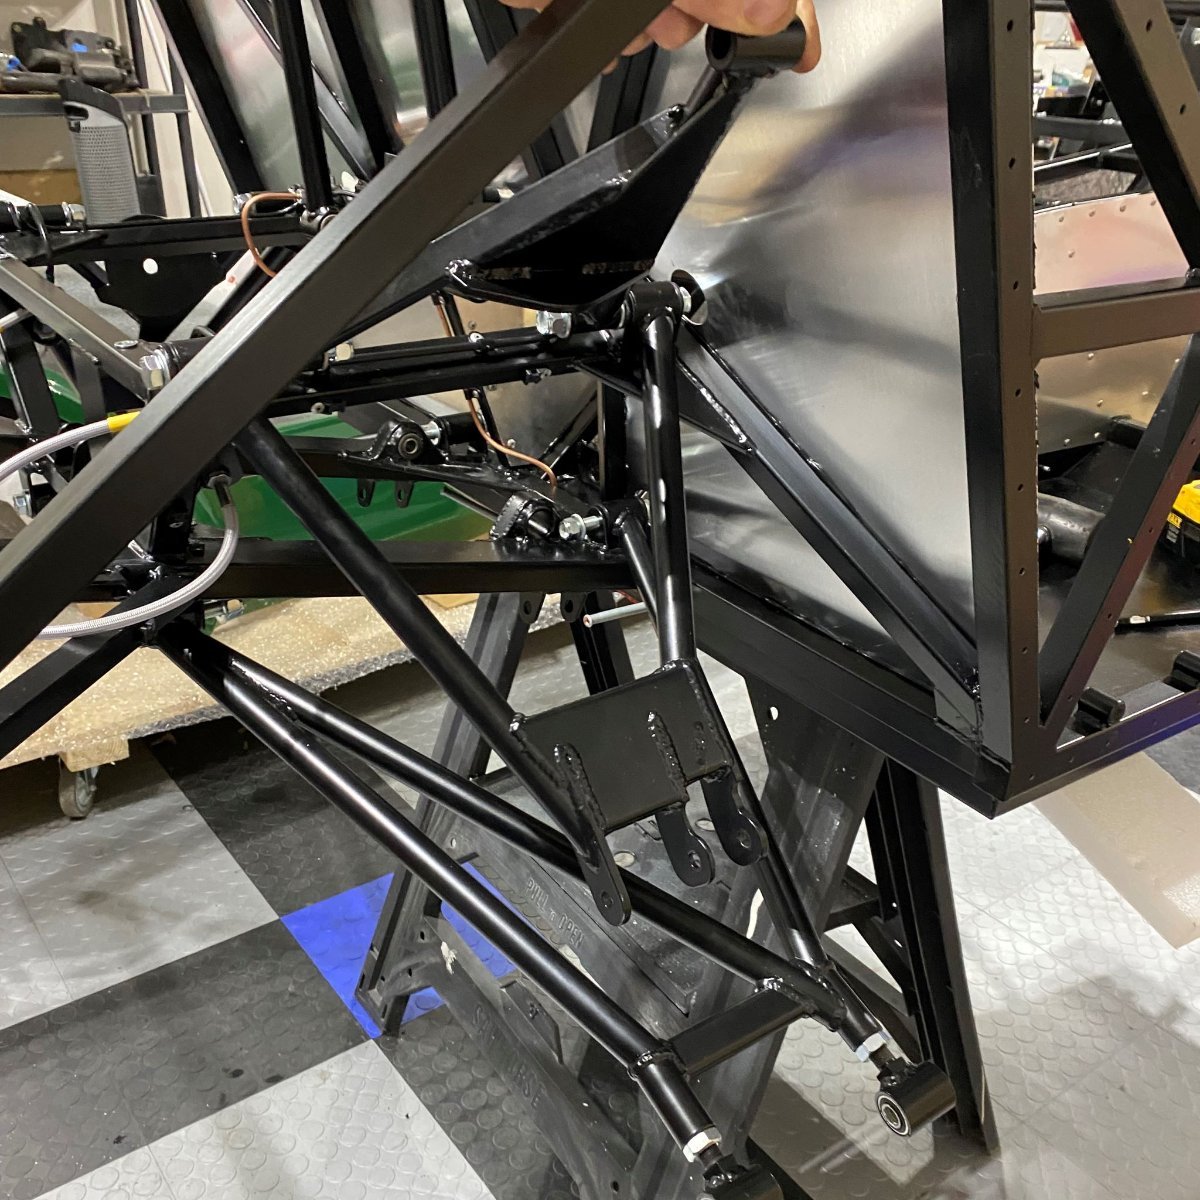
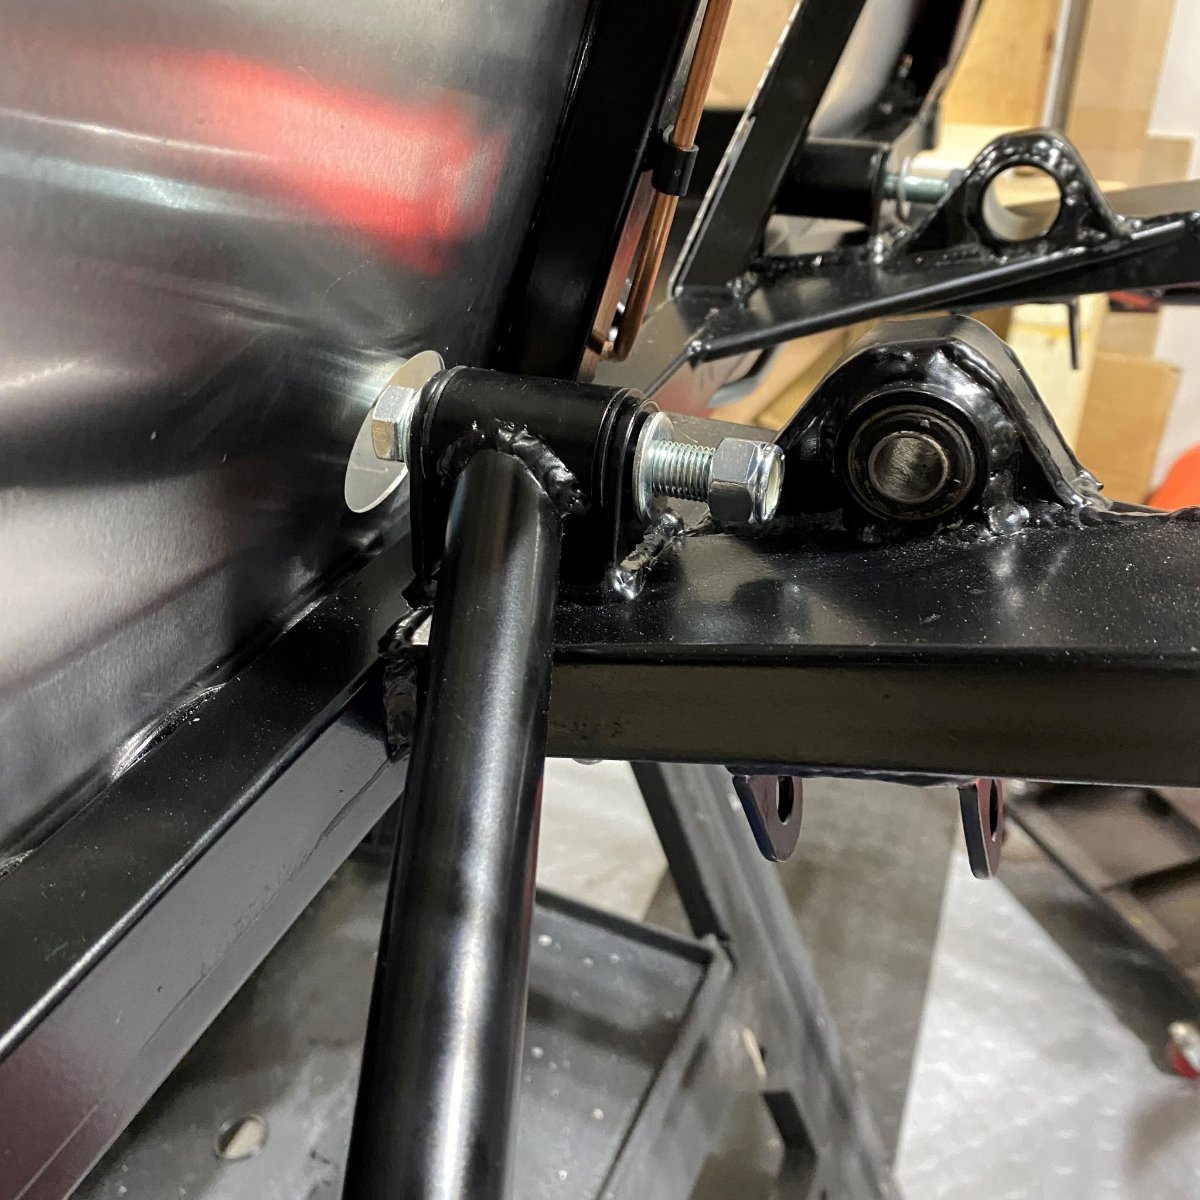
So after a bit of time "massaging" the brackets I managed to get the rear wishbones in place on both sides. With that done, I also tried my luck at installing the diff mounting bracket. I did have to bend the brake lines slightly and reduce the diameter on a couple of flat washers to stop the interference, but in the end it seemed to work out ok. Tomorrow I will see how the top of the diff mount lines up....I didn't have the energy for checking that today. Time for beer! 🍻
-
.....on closer inspection it looks like the brake lines will also interfere (with the diff mounting bracket) so will need to be re-run..... Time to break out the NiCop coil and flaring kit again!
-
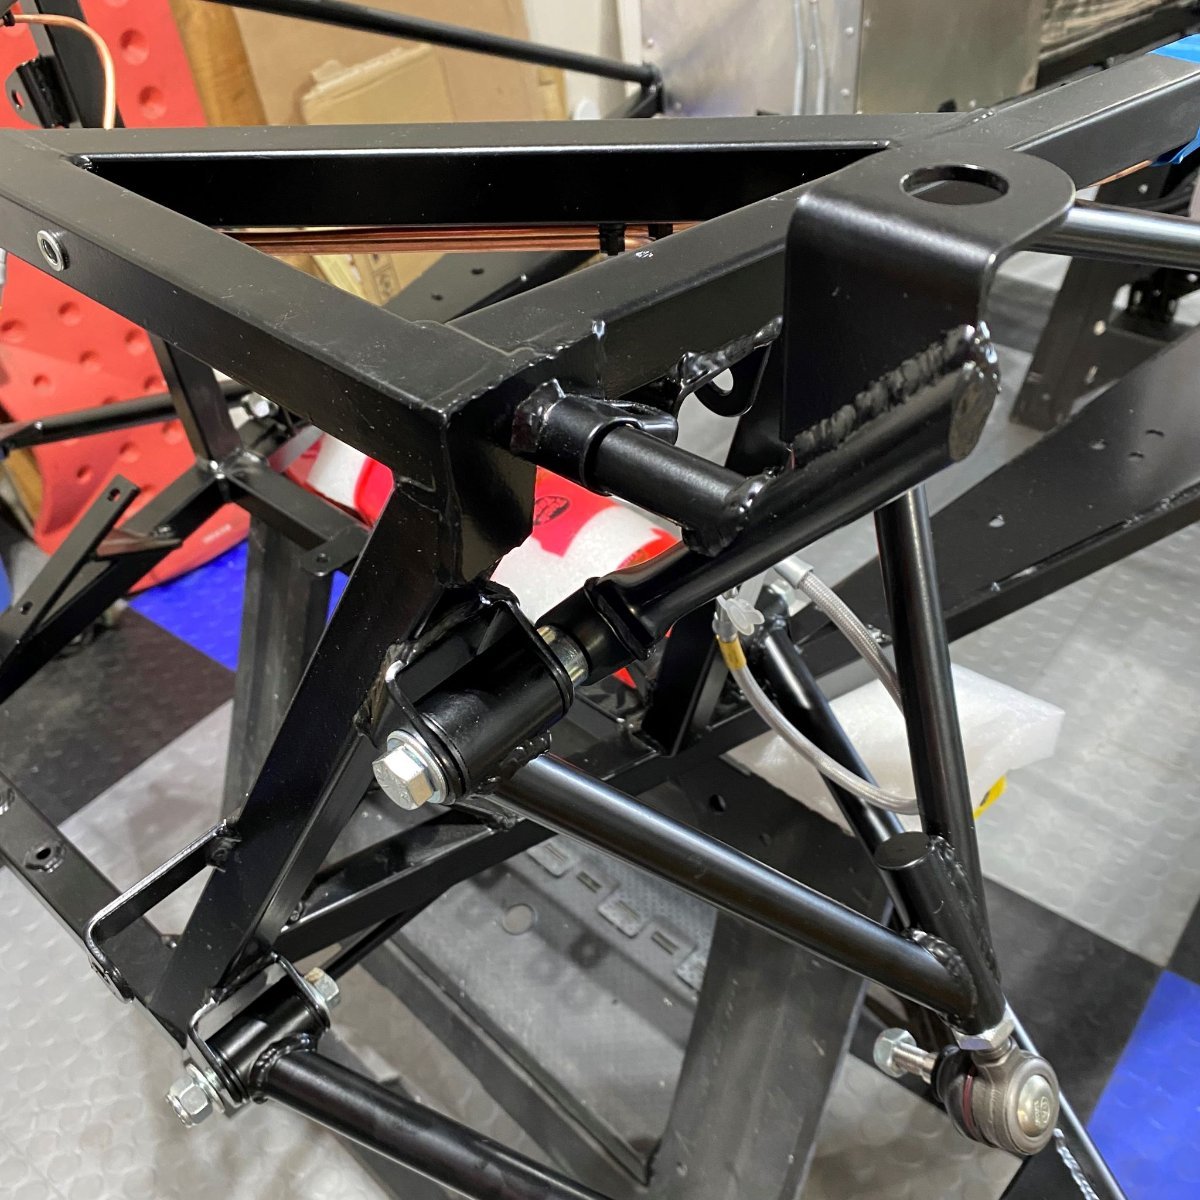
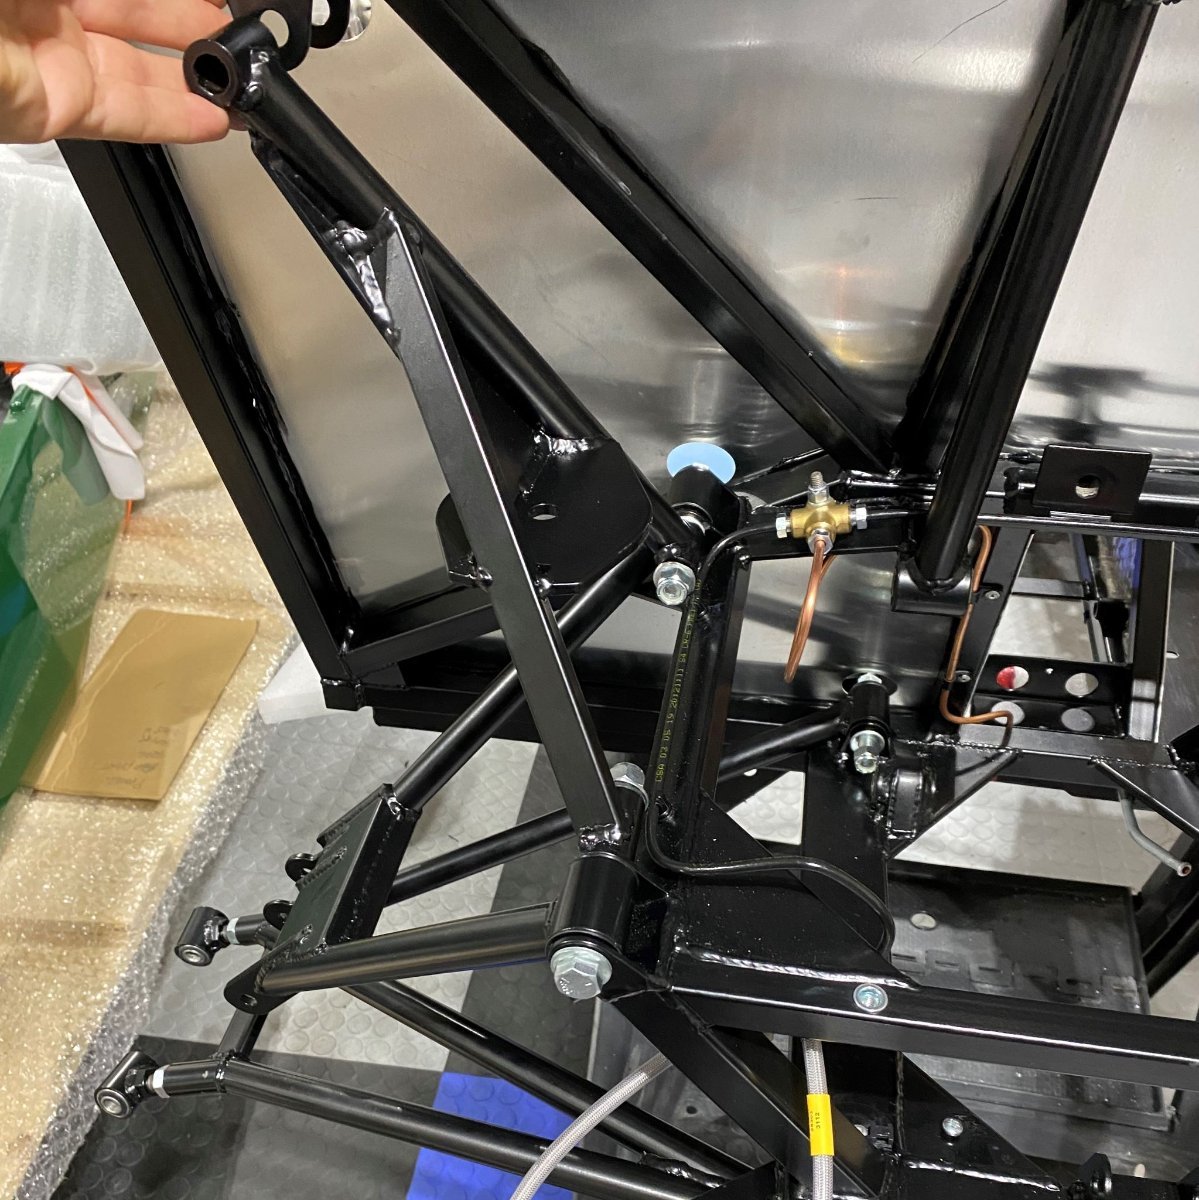
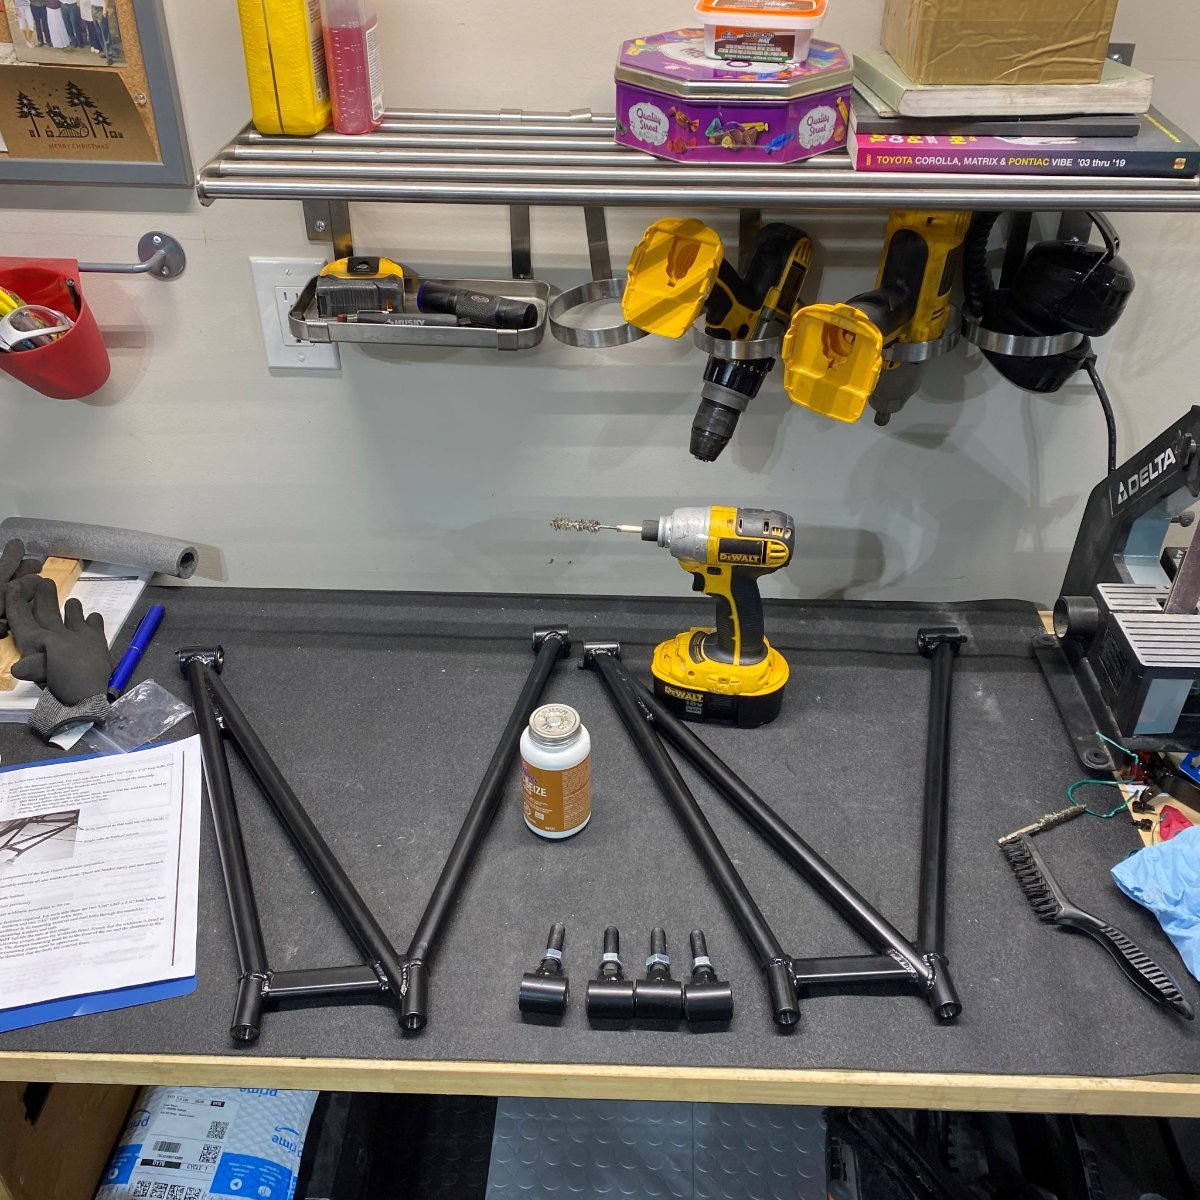
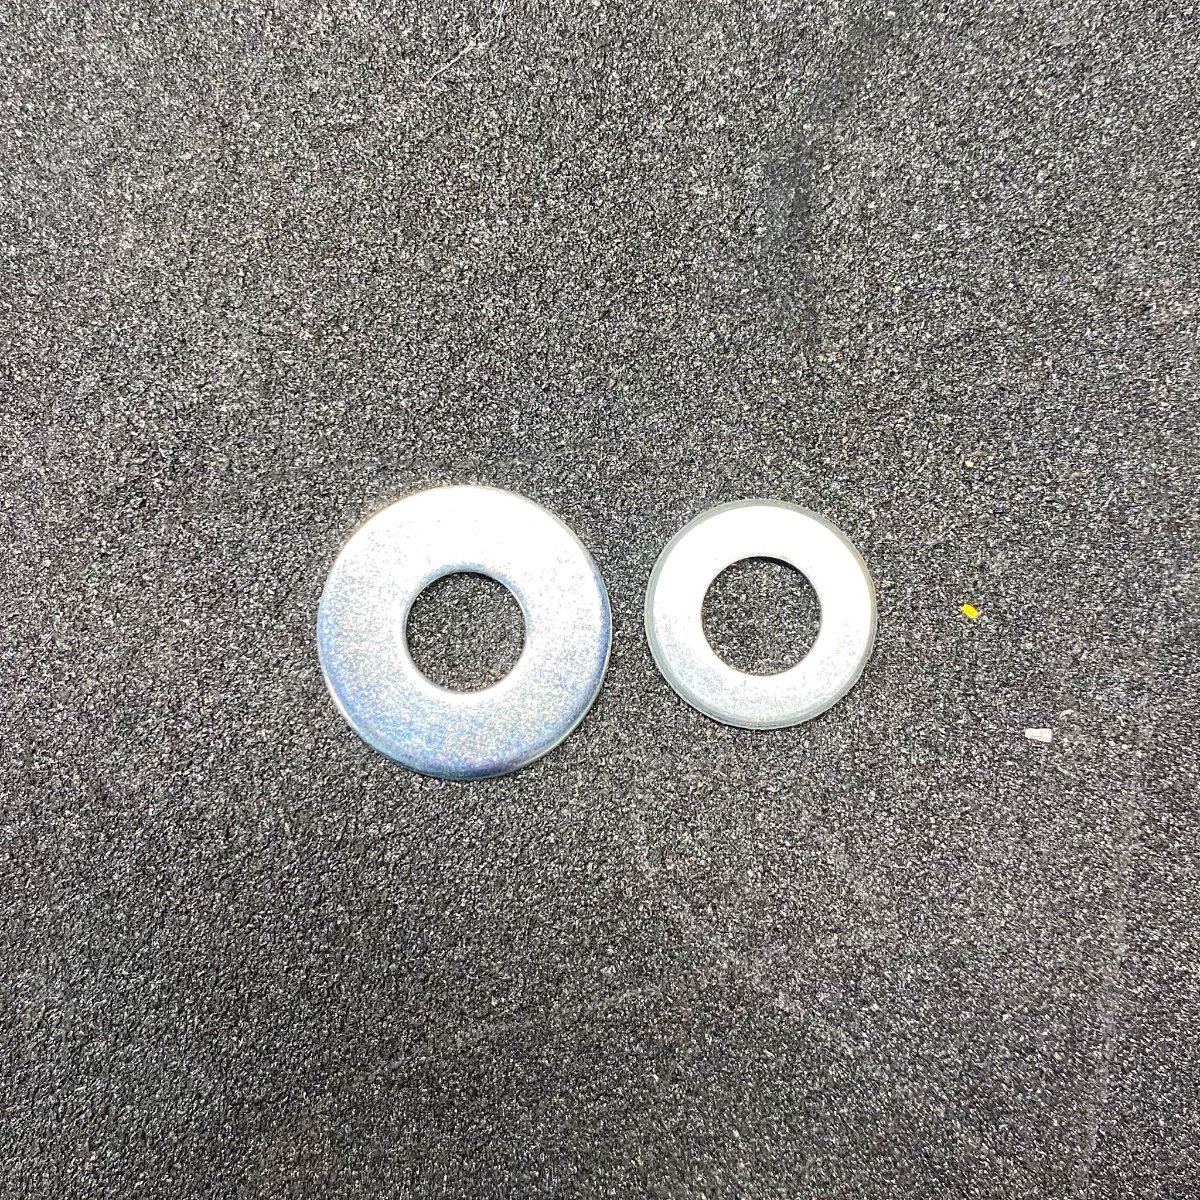
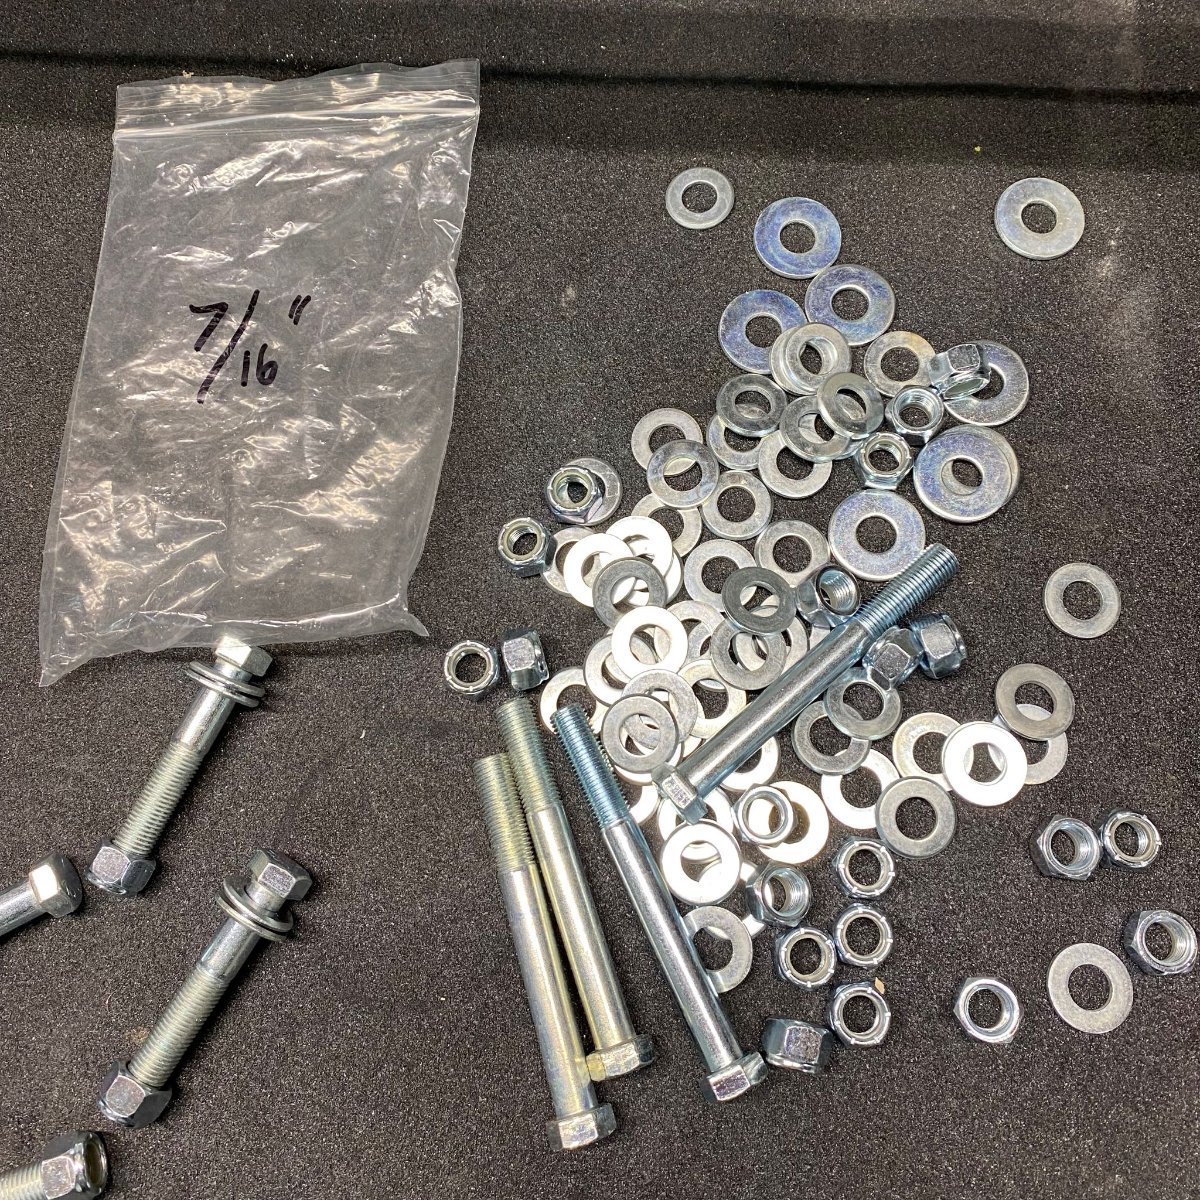
Rear Control Arms I made a start on the rear Control Arms today. It was nice to take some of the larger parts off my shelving unit and see some space. Looks like progress! 🤣 I didn't have a 1/2" tap as the manual suggested (all mine are metric) so decided to gently run through a wire brush to clean out some of the surface rust and debris from the threads and blew it out with compressed air. The bushings seem to screw in fine. It says in the manual to use 7/16 hardware so I emptied out my bag of 7/16 fasteners on the bench and rummaged through them. There were 2 sizes of 7/16 flat washers so I went for the smaller size, for no other reason than there were more of them! If anyone knows different let me know! 🙂 The lower wishbone seemed to go on without too much massaging of the bracket. Not so much joy with the upper. It seems that the chassis has another "Feature" that may need to be corrected. The bracket seems to be 2-3mm out and will need adjusting. Any other builders experience this?
-
Sound deadening While I was in the rhythm for cutting and sticking, I made a start adding some Kilmat to the footwells and floor panels. I'm leaving the bulkhead panel until I figure out how I want to secure the fuel lines there (Rivet or screw). I think this task will continue on an ad-hoc basis throughout the build. I find it quite relaxing and a nice "Fill in time" exercise.
-
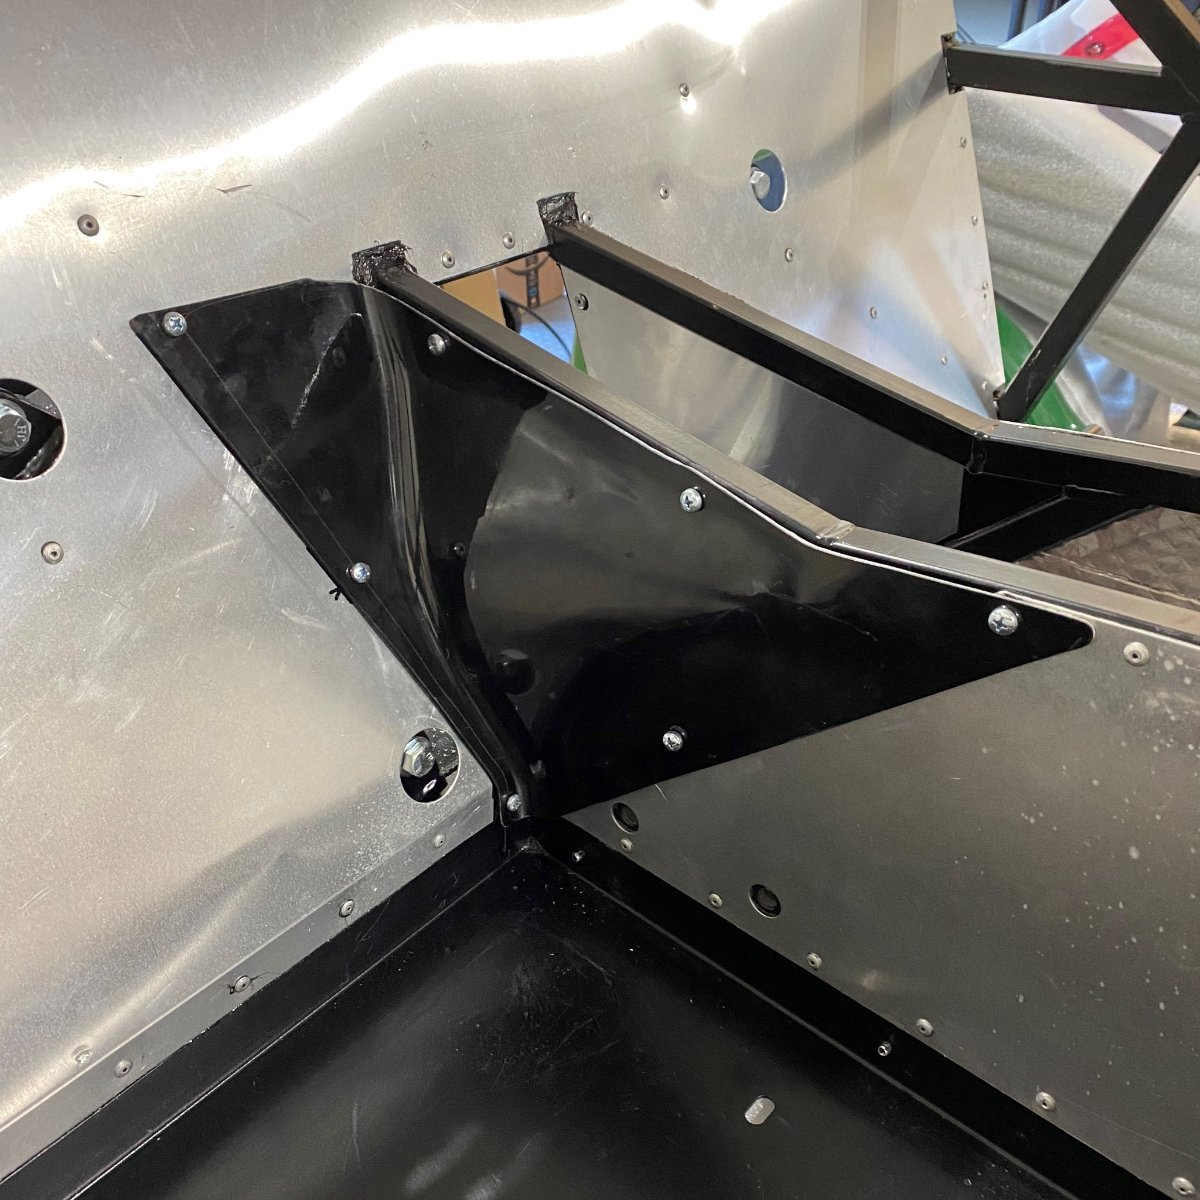
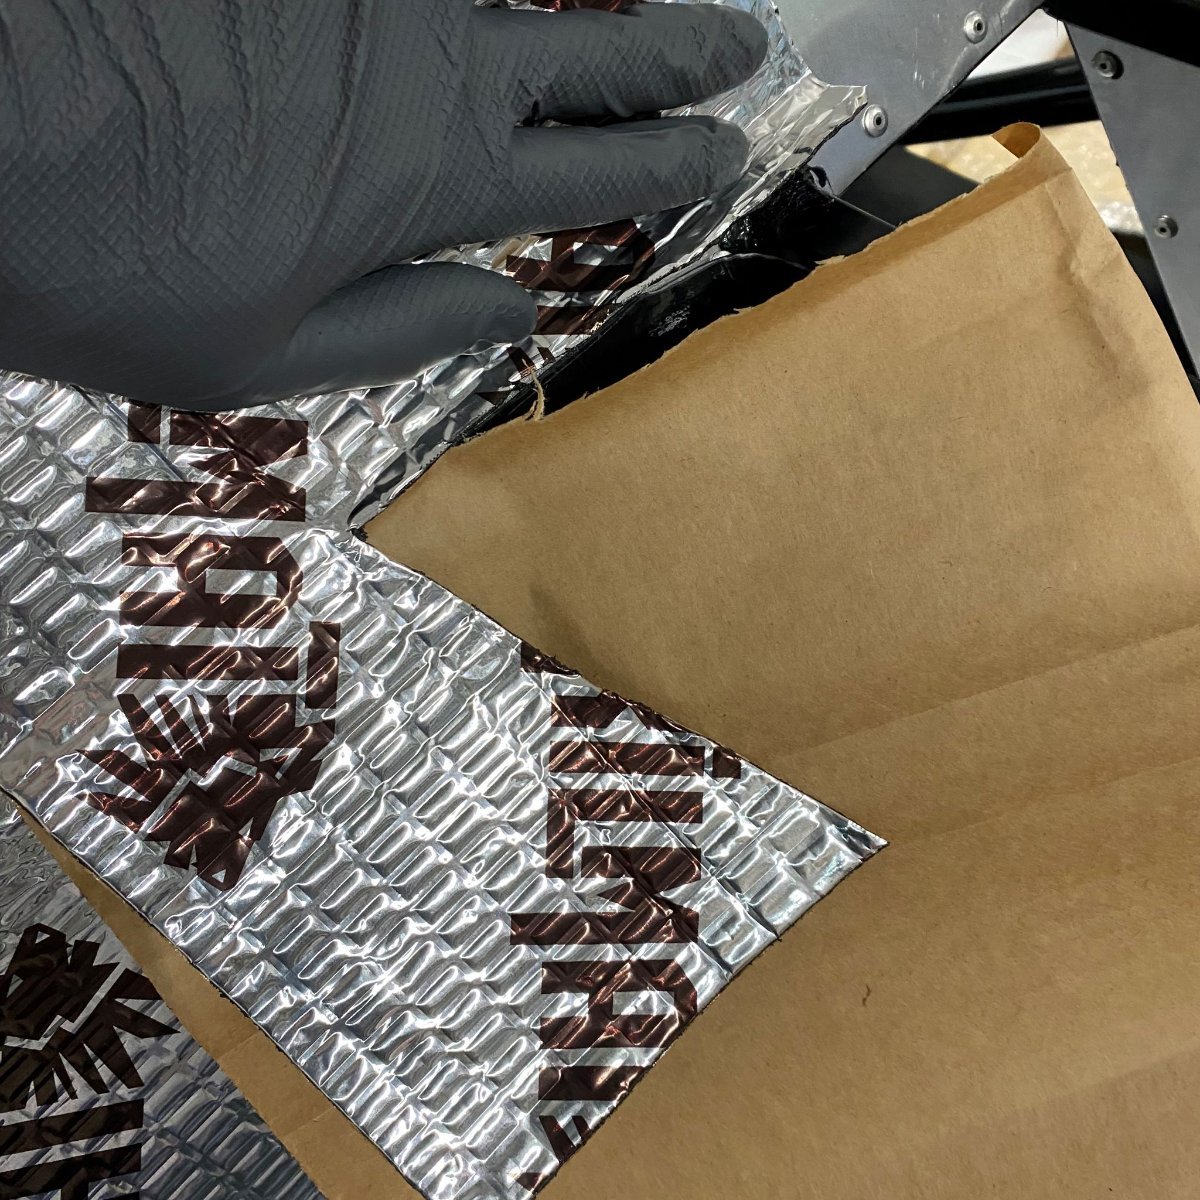
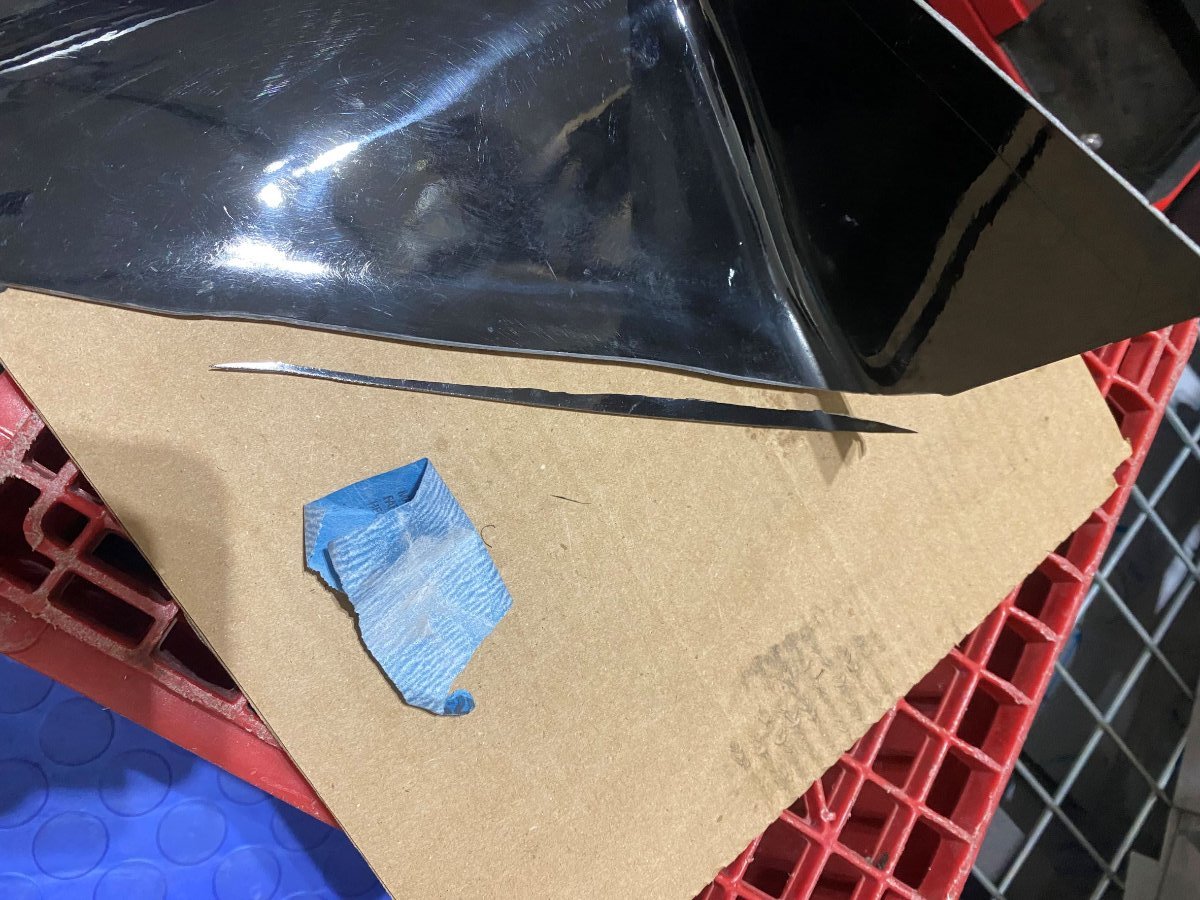
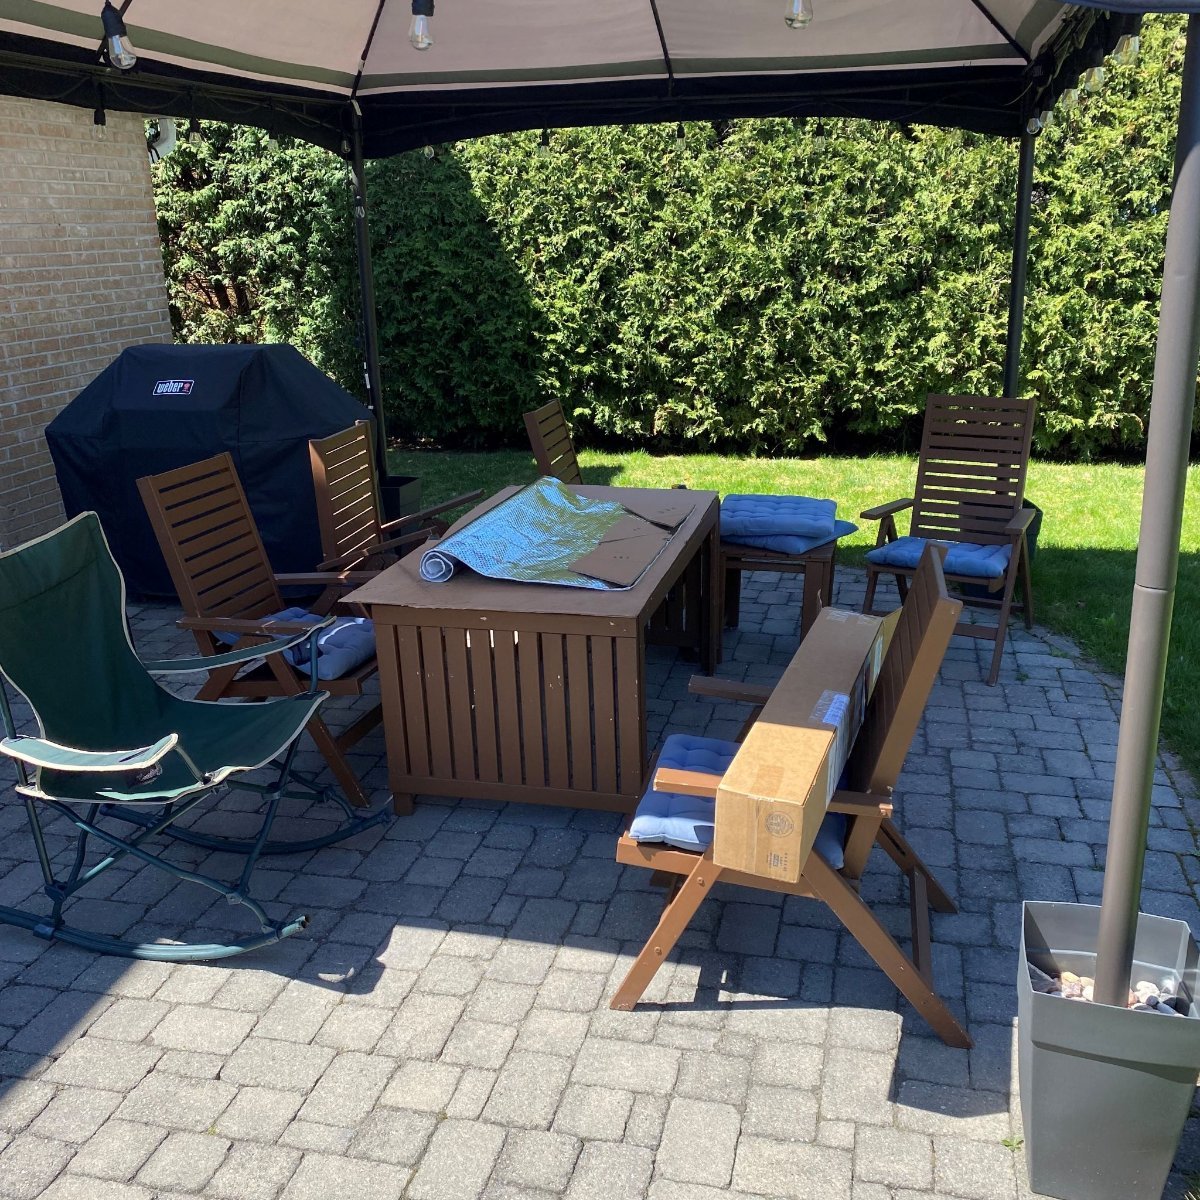
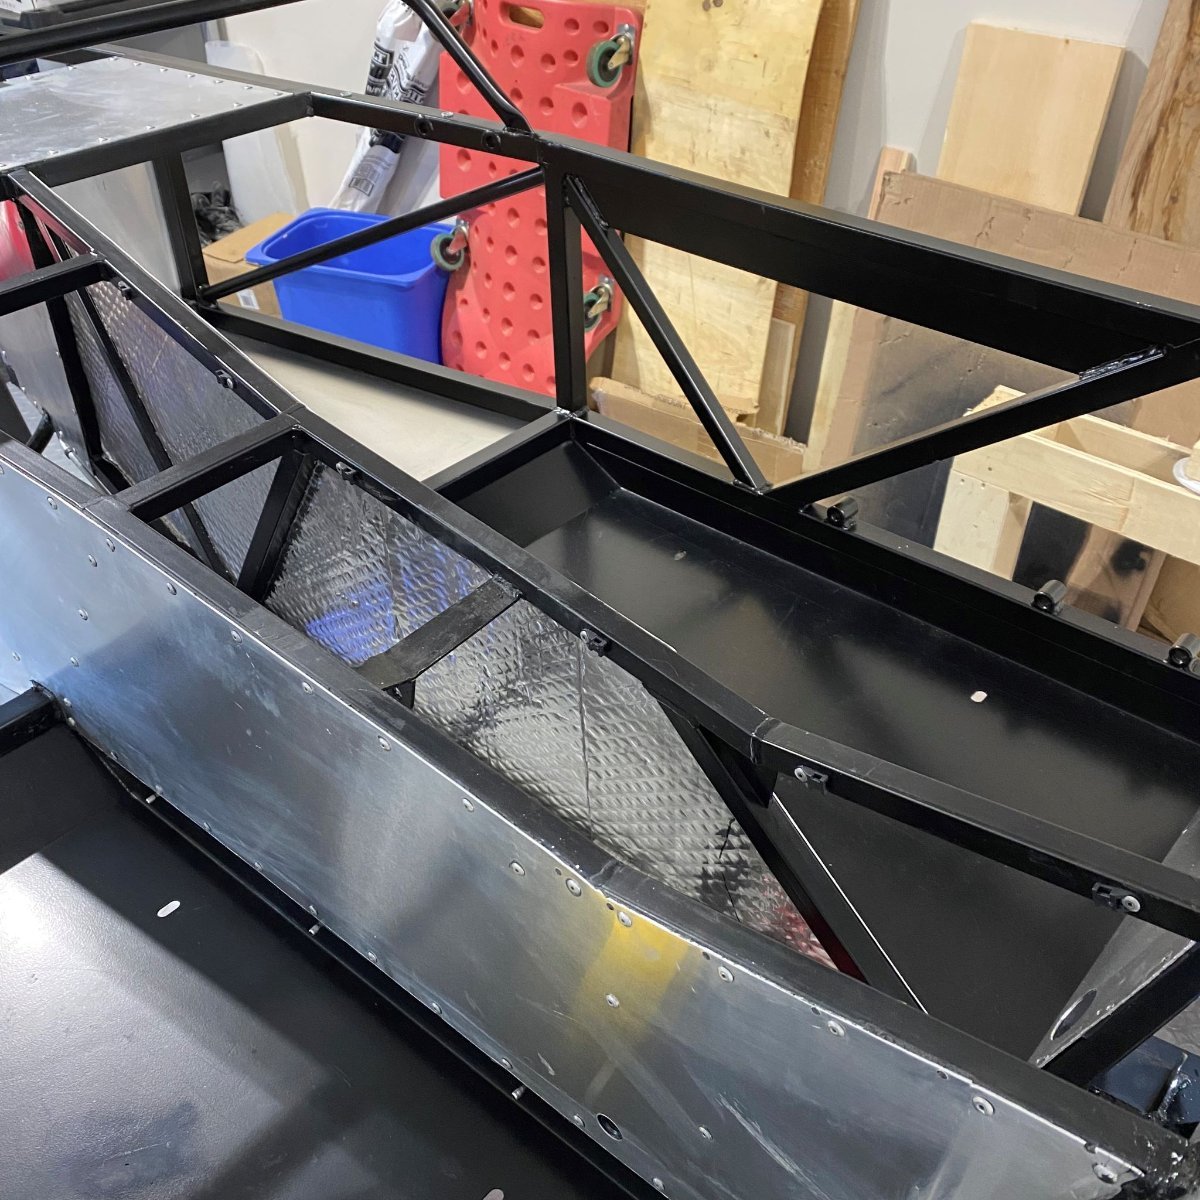
The sun was out and the garage doors were open! The weather has been great this weekend and I managed to spend some time on the car. First, I had some loose ends to take care. Although I had finished the front and tunnel brake lines I still had the two at the rear to install. Once completed I then blew out all the lines with compressed air to get rid of any debris that may have been lurking inside. Tunnel Insulation While the tunnel is still clear and free from wiring etc., I wanted to install my Koolmat heat shield. First, as it was nice and warm outside I relocated my working area to the patio table where I had a bit more room... ...and then I made some cardboard templates. These were then used to draw out the shape of the panels on the roll of Koolmat. Using some tin snips I was easily able to cut out the shape without any hassle. Then comes the tricky part (for me at least), attaching the cutouts to the panels is a one shot deal because of the strong adhesive backing. Starting at one end I carefully positioned the insulation and slowly peeled off the backing. For the larger ones I cut them in smaller manageable pieces. Its not perfect, but I'm happy with result. I just need to finish the edges and joints with high temp. tape and I'll be done the tunnel area. Wiring prep. The last activity for the weekend was to start getting my head back into the wiring by starting some wire run prep. I drilled and tapped the 5mm ground screws at the back and rivetted the wiring zip tie connectors along the tunnel and rear chassis. Same procedure as always, Drill, deburr and clean, then spray with wax before riveting.
-
Best location for Heat and Sound Protection (Westfield Miata)
DanM replied to DanM's topic in General Tech
Thanks everyone for your insight. It’s really appreciated. Does anyone have any feedback re: Interference? From the uk forum Ive heard that if I put dynamat or similar on the outside of the tunnel it may restrict the seat adjustment. Are there any other areas that people have heard of or experienced? -
Best location for Heat and Sound Protection (Westfield Miata)
DanM replied to DanM's topic in General Tech
Looks like an interesting product. I got the Kool Mat from Breeze automotive. They supply a lot of stuff for the cobra community (Factory 5, etc.). -
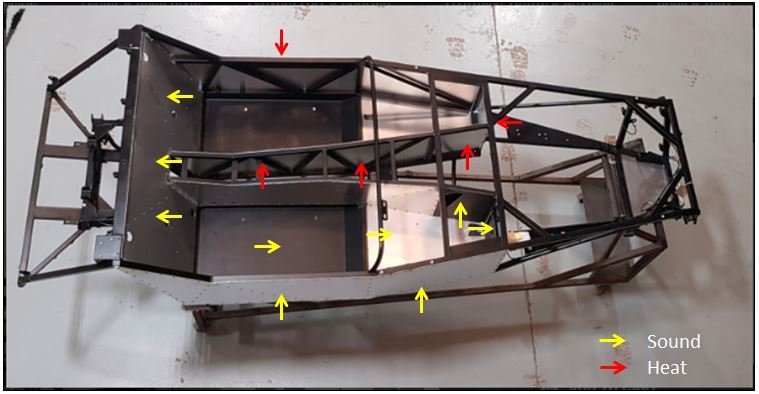
I have chosen Kilmat 50 for sound dampening and Kool Mat ZERO CLEARANCE / PSA for heat insulation (For future Turbo), and am looking for advice and insight into the best location to install them on my Westfield Miata build. I have read in some forum posts that depending on the location of install the mats can sometimes interfere with other parts of the car. Here are my current thoughts: Heat All tunnels walls (Gearbox/Driveshaft side) Both Footwells (Engine bay side) LH Side panel (Outside - for exhaust) Sound All Cockpit floor panels (Inside) Seat back panel (Inside) Both Footwells (Inside) RH Side Panel (Outside)
-
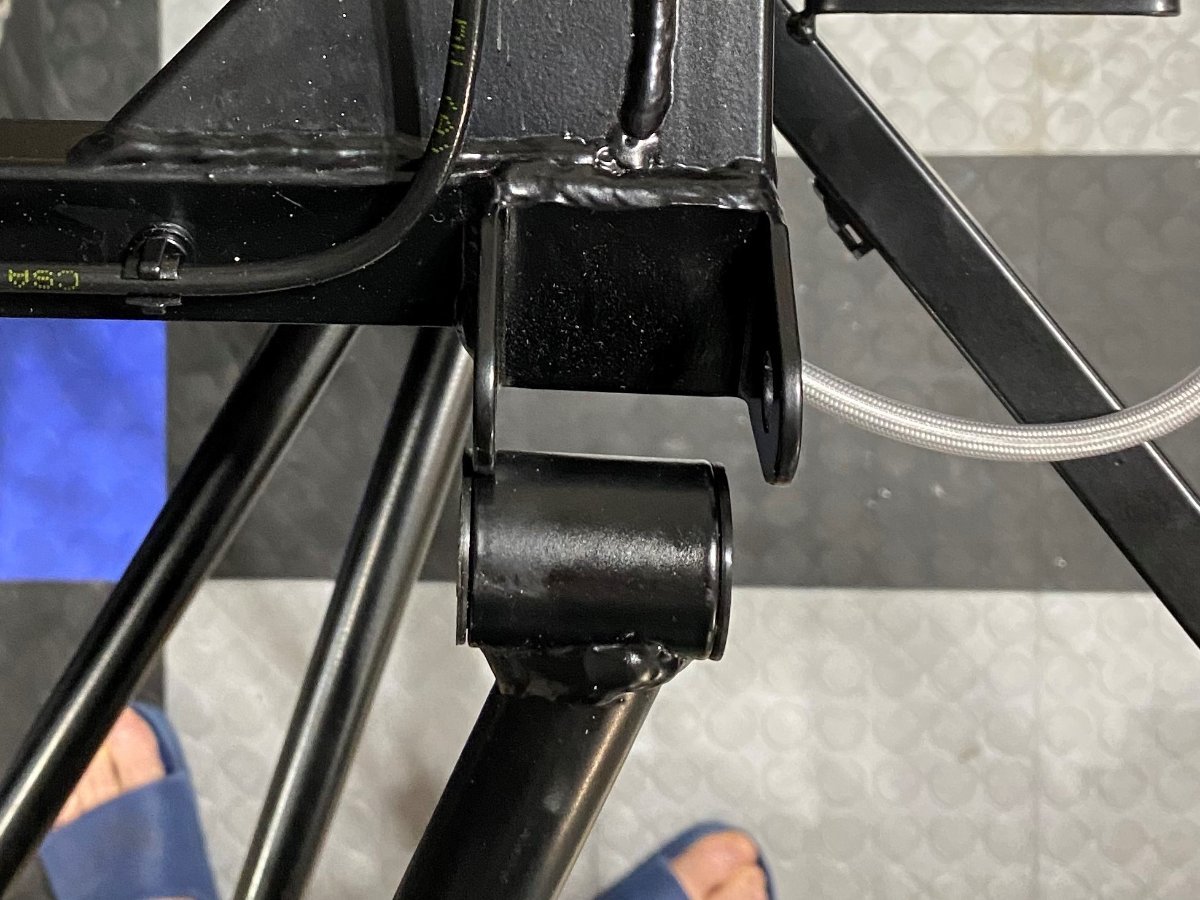
Brake Lines Lots of mistakes & practice = Learning & Progress. I'm happy to say that after wrecking the Westfield supplied brake lines and a coil of NiCop, I have finally started to get into a rhythm with the brake lines.....(I said I was a noob! 🤪) One of my biggest frustrations were my pipe bending pliers. They kept digging into my lines. In fact, after a number of attempts, I thought had successfully completed the long run between the master cylinder and the rear T. However, on closer inspection, I noticed that the pliers had dug into my lines in a couple of places.....enough to put so much doubt into my mind (road worthiness inspection, cracking over time, etc.) that I decided to tear them out, buy a new coil and start again. New coil of NiCop. One of the plier marks. The other challenge for me was that because my chassis is slightly different to the other SDV build threads I have seen, I didn,t have any pictures of the route so had to figure out a new one at the end of the tunnel. Old chassis New Chassis Finally I settled on running the pipe through the small gap in behind the rear hand brake cable bracket and follow the chassis towards the T. Hopefully there will not be any interference.... only time will tell! 🤞 Here's the front end.... As always, any feedback, critique or pointers are very welcome. I will start to rivet everything in place over the next couple of days.
-
Thanks @lg2k. Sounds like you've had to overcome a few problems. Are you doing a lot of track?
-
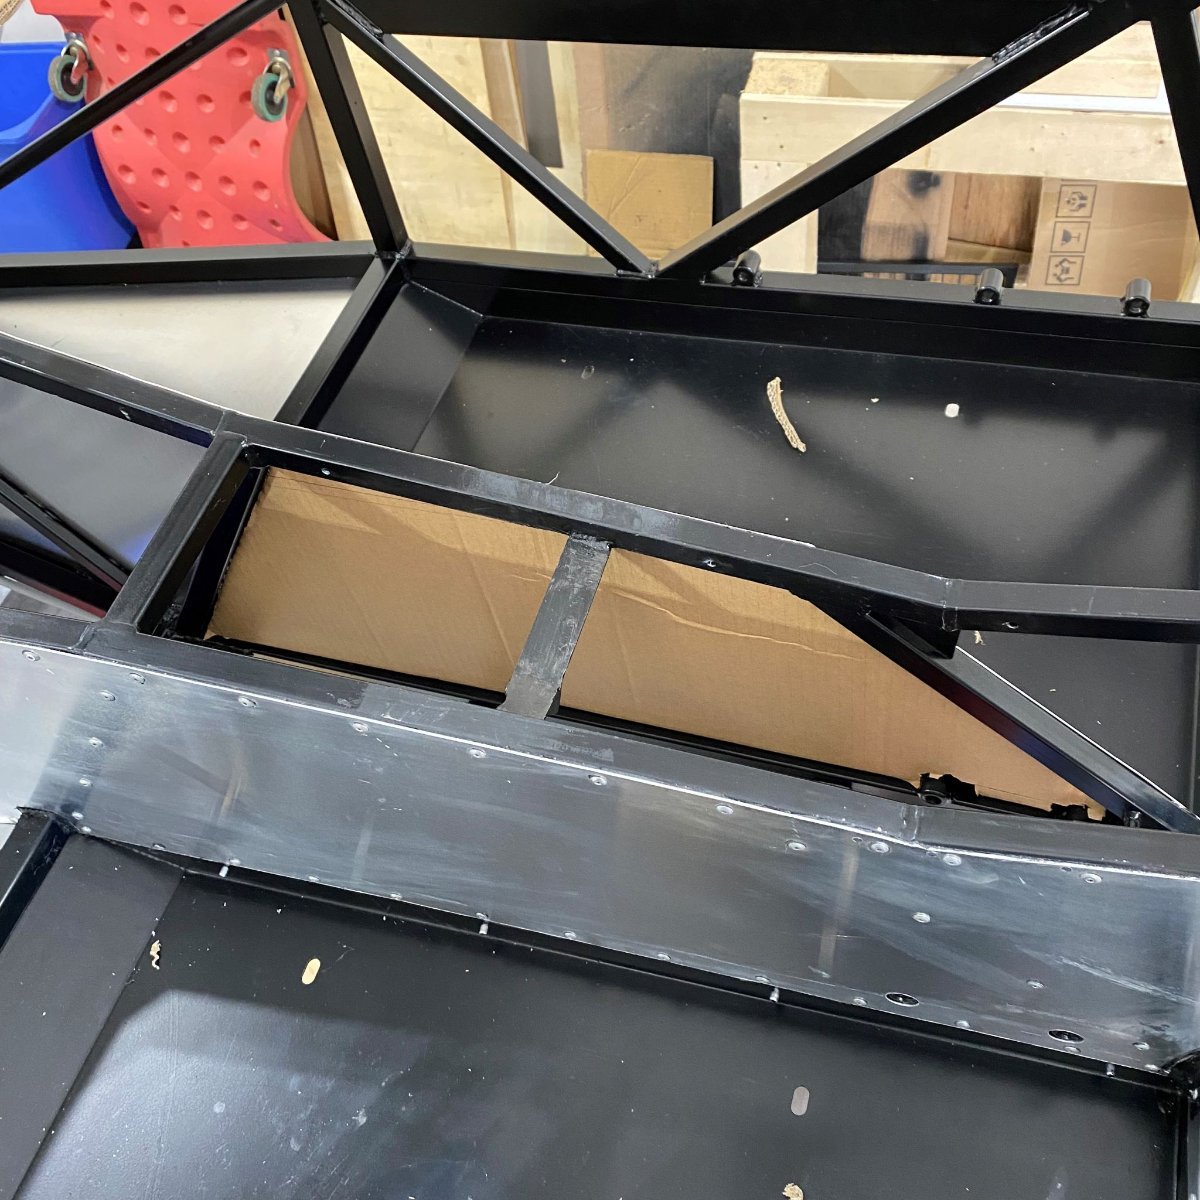
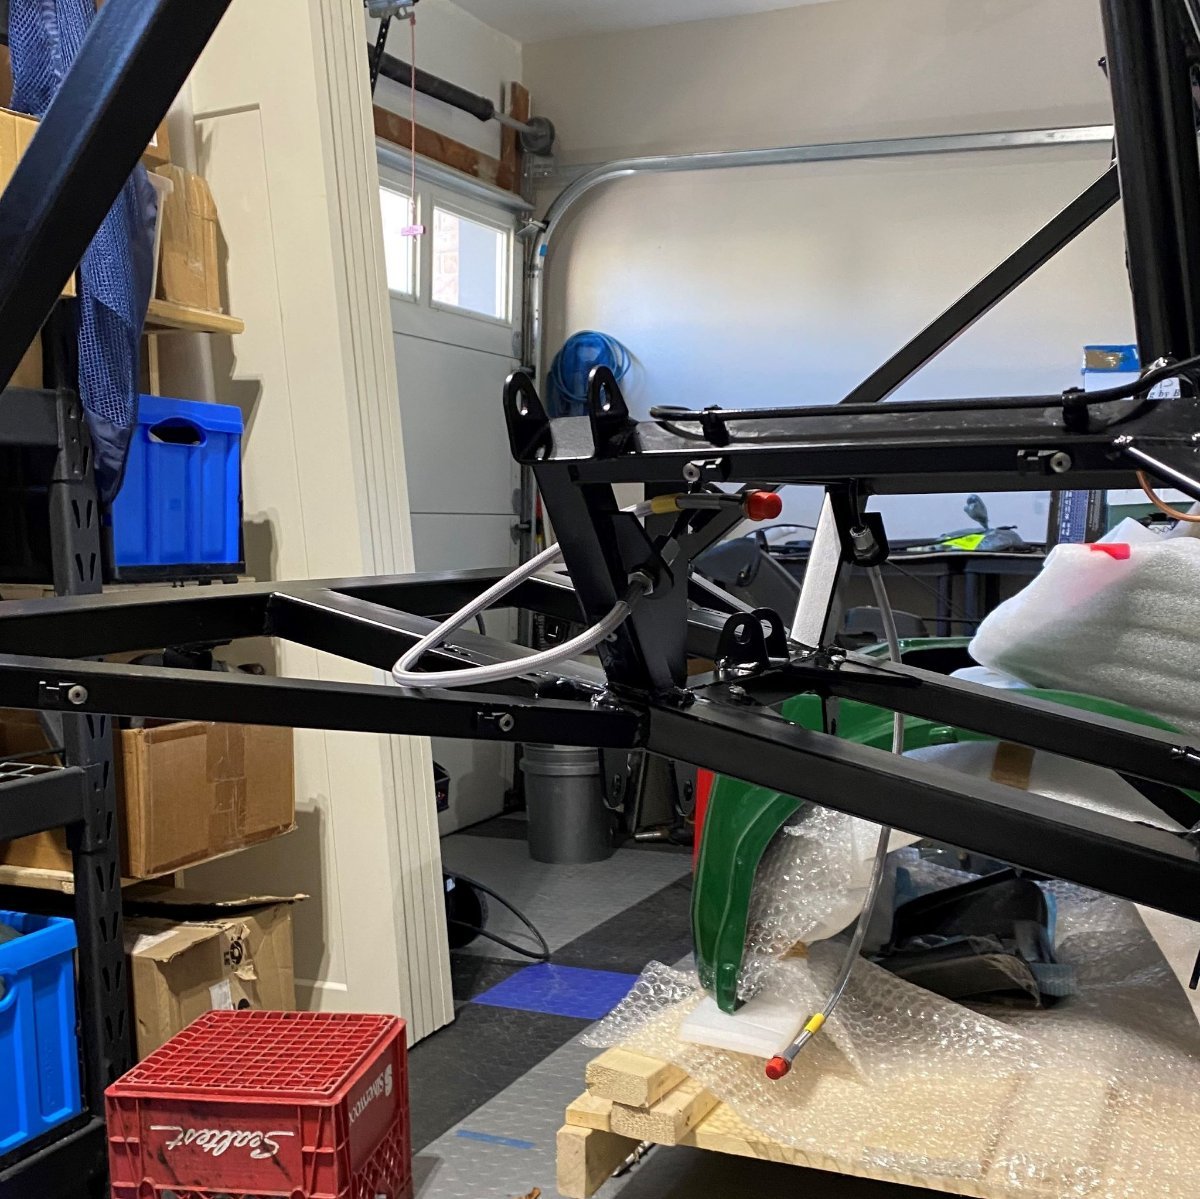
Fuel Line 2nd (3rd, 4th 5th.....) attempt 😣 Without doubt running fuel lines has been the single most frustrating part of my journey so far......and the includes the Miata tear down, parts refurb and wiring harness clean up. For some reason, it just didn't come together easily for me, even with all the great tips and tricks that people have shared with me on the forum. I feel a little embarrassed by the shear amount of pipe I had to go through to get it to what I think is "done"! Before I do cartwheels, I just want to run this photo past the Westfield Miata builders in the group to check that where I have terminated the pipes at the rear will not interfere with any other part of the build. Any help will be greatly appreciated!