
.jpg.53511fa583dc4e7ee82da3496ab6ffdb.jpg)
hahuang65
-
Posts
221 -
Joined
-
Last visited
Content Type
Profiles
Forums
Store
Articles
Gallery
Events
Library
Everything posted by hahuang65
-
.thumb.jpg.9ffdd2cf708d472aae35e80097bfc46d.jpg)
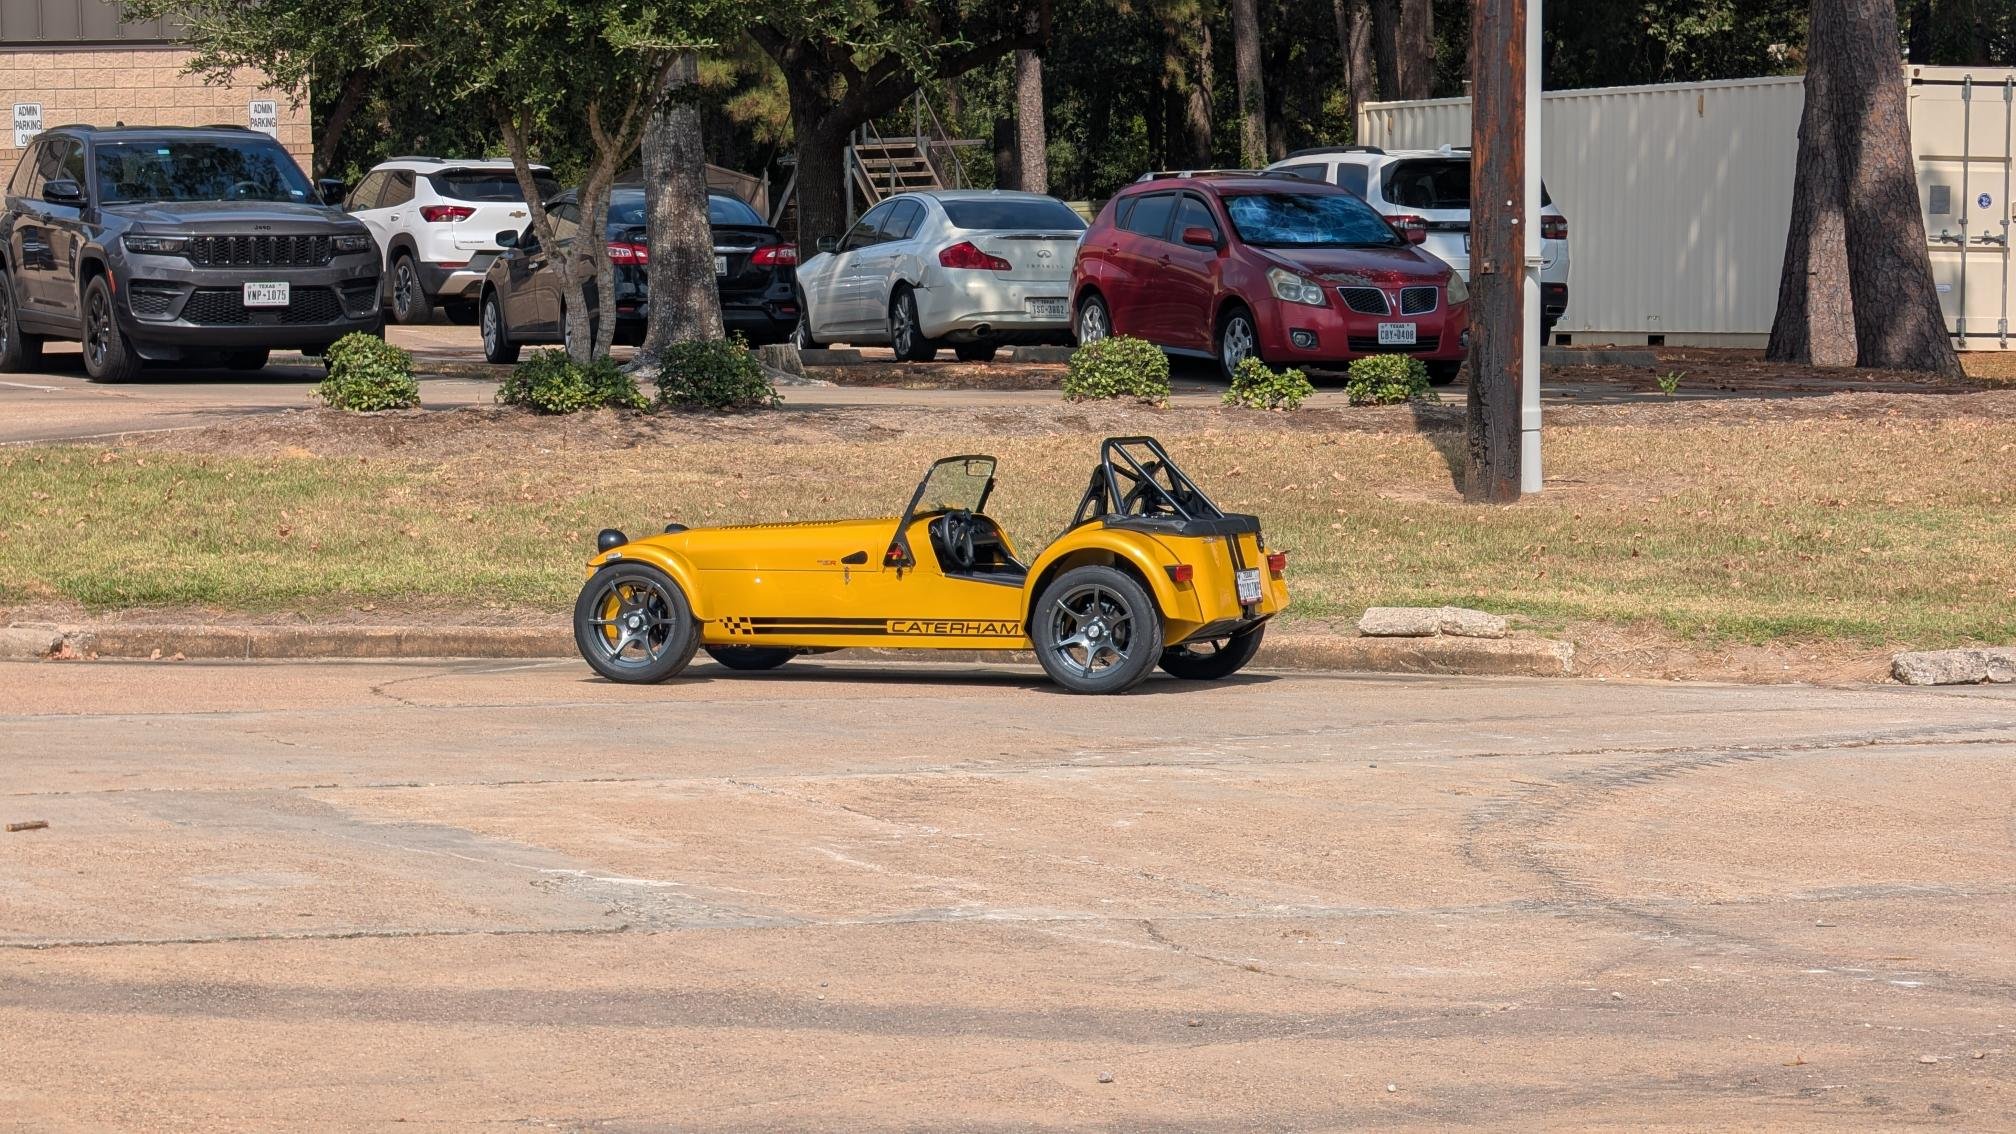
Title and Registration in TX today
hahuang65 replied to hahuang65's topic in General Sevens Discussion
@panamericano any suggestions on finding one? We're new around here so I don't know anyone that knows an officer. -
Title and Registration in TX today
hahuang65 replied to hahuang65's topic in General Sevens Discussion
@CBuffthat may be true. I had originally planned to go get it...but when I went to the tax assessor's office (where I actually get my title and registration, as the DMV just provides me a letter to take to there saying it's okay to title) to get my temporary permit, I brought all my papers to ask about it. They were the ones who told me I wouldn't need the inspection. Unfortunately, this is the situation I'm in. I may try to go to the other DMV first as October 21 is still a while away. I have that appointment set up and will go there for inspection if this DMV also turns me away. -
Title and Registration in TX today
hahuang65 replied to hahuang65's topic in General Sevens Discussion
@MV8 no the 30 day permit was to go and get my ASE inspection and weight certification. There are no limits to where I can drive however. But I have not driven much beyond that. Here is the doc that says it can be either the VTR-68A or the MSO...unless I'm misunderstanding it.
-
Title and Registration in TX today
hahuang65 replied to hahuang65's topic in General Sevens Discussion
@panamericano @240 so I was able to get a 30 day with just my chassis code from Caterham. Been driving around with that. I went to the DMV for the first time today...and I got rejected. I had all my documents in order. However the supervisor there was adamant than I get a VTR-68A. That's the form from a law enforcement inspection to verify the VIN/chassis code. The instructions on the application say that a Manufacturer Statement of Origin can stand in for that, which we do get from Caterham... But the supervisor was not okay with that. I went to the Houston DMV Regional Service Center. Now my choices are to get that VTR-68A and go back...or try another DMV. I've set up my appointment for the inspection, but it's not until 10/21. In the meantime, I will try to go to the Beaumont RSC and see if they'll grant me the title letter. Will update again. -
Yeah I may end up doing that but I was hoping to place the phone where that netting is in your picture.
-
Thanks for the help guys. I may still pursue this in the future, because it seems like a great thing to have at eye level for just navigation. But I think I need to figure out how/where I'm going to mount my phone first. I've been looking at and it's got a great suggestion, so I'm going to try that first.
-
I'm trying to figure out a way to mount my phone and this looks like a great solution... however, I will have a passenger fairly often, and so I'm wondering, if I got a longer arm (https://rammount.com/products/ram-b-201-201u-c), would I be able to mount my phone in a landscape orientation sort of angled upwards but also tucked under the dash, in front of the shifter. There's a bunch of space there that's un-used. My phone also tends to overheat (Pixel 8 Pro) so having it under the dash away from the sun seems like a good idea... if feasible.
-
@JohnCh curious if there are any updates or changes you've made since this post. I'm curious about getting a Moto II and would like to know if there are any similar mounting solutions to yours that are off the shelf. I don't have a 3D printer.
-
Through my recent issues, I've finally completed my build and done a fun test drive today. Just wanted to say thanks for everyone's comments, suggestions, and tips. Much appreciated! The build took me 107 hours... Then 12 hours to disassemble due to my clutch issue, and 24 hours to re-assemble... Grand total of 143 hours across 8.5 months. Here's a pic!
- 5 replies
-
- 10
-

-

-
Even if I'm not pushing on the clutch? I was bleeding the clutch, it felt like something popped...we stopped pressing the clutch and if I opened the bleed screw everything drain in real quick. Left it alone and it drained half the fluid reservoir in about an hour.
-
I'm not a mechanic, so I'd defer to you normally... However this experience has made me want to err on the side of caution. My current slave cylinder has no visible issues, but is slowly leaking. While it was in the transmission, it was leaking quite a bit more quickly. That makes me feel like I haven't found the real issue yet, as well as suspicious of parts being busted even if new. Perhaps I'll just fill the new unit and see if anything seeps as a smell test...
-
Yeah I'm waiting for some new parts. What do you mean by clamp it so it can't extend?
-
Safe to assume if I just have the slave cylinder unmounted, I can just connect it to the master cylinder to pressure test? Or does it have to be mounted to the bellhousing?
-
@7Westfield DOT4. Never hurts to double check
-
So it looks like the slave is indeed leaking or seeping. I took out both the bleed line and the clutch line...filled both sides with fluid... No leaks from compression...left it on a clean paper towel and an hour later, there's a small puddle on the paper towel...also see it on the lower lip of the cylinder. Also one of the videos shows that filling the line and then loosening the cylinder from the bellhousing for some reason made it leak also. But strange there
-
Yeah that makes sense. I assume Beachman gets them in from Caterham and has shipping and tariff costs factored in etc
-
More photos and vid from today https://photos.app.goo.gl/TrU2pvdg1K1JM4Mz7 When the slave was bolted in fully, I added some fluid...no leaks. I loosened the bolts...leaks from below. I took out the slave cylinder,and wiped it down. And topped it off... No leaks. Compressed it...still no leaks. I've left it on a clean paper towel to see if it seeps. But it's strange because when it was leaking,it was flowing quite quickly...not just seepage. Any one have ideas what else I should test?
-
@MV8 I need to do more testing. Thanks for the suggestions. I will probably try what you're saying, but I'm also awaiting my dealer's guidance since this is will be a warranty issue. I had a flare nut wrench but it didn't fit around the fitting. I've also found https://www.beachmanracing.com/clutch-slave-cylinder-and-bearing-duratecsigma and https://www.walmart.com/ip/Dorman-CS360062-Clutch-Slave-Cylinder-For-95-07-Contour-Cougar-Mondeo-Mystique-Fits-select-1995-2000-FORD-CONTOUR-1995-2000-MERCURY-MYSTIQUE/538630283 Given the huge range of pricing, I'm a little suspect about the quality of the Walmart piece... though it claims to be the same item as the one you posted.
-
I wonder if I suffered the same issue as As described by @MV8.
-
So I pulled the engine and transmission tonight and opened it up. I'm still trying to figure out what exactly is the issue, but it appears that the slave failed? Also the slave wasn't fully tightened to the bellhousing. See attached videos. The photos where I point is where there is residual brake fluid, they appear to be around the slave, but also at the fittings on top of the slave, so I guess it's possible it's from that. I'm awaiting my dealer to give me further instructions on testing/diagnosing, but would love to hear what other people think as well. Also, if there's a place that these slave cylinders are available to purchase, it would be nice to have that info in the back pocket as well. Thanks! @EdWills as requested, here are the photos and videos. https://photos.app.goo.gl/XMQUmy3QQfmccsyx5
-
Thought about this a bit more and I'm not sure this is possible. There's a crossbar almost right where the bellhousing joins the transmission that makes it impossible to drop through. Also, (at least in my case) the transmission tunnel is V shaped if you look at it straight from the nose of the car. The bottom is not wide enough for the transmission to drop through regardless. This is why when I installed the engine, I had to make sure the transmission didn't go lower than the floor of the car, cuz you just cannot tilt it back up.
-
@CarlB thanks for the info. I re-attached the propshaft to the diff last night. I did remember to loctite the bolts. I also drained the transmission. I figure it's easier to just re-fill it since I'm pulling it anyways,rather than deal with a bigger mess when pulling it out.
-
Understood. This may end up being an easier way to work on the engine and trans, but I certainly don't have the equipment for it. You're right that one would still need to figure out how to get the driveway yoke out. May end up needing to pull the diff in order to do so. Or lift the engine a bit anyway.
-
For my car, this job ended up being trivial. Undo the clamp that joins the top column and the lower column. Pull out top column. Mark alignment of lower column to universal joint. Undo lower column from universal joint Pull lower column out
-
@wemtd thanks for the pointers. Pretty much doing this now. I've just drained the tranny fluid since I'm pulling the transmission anyways. Makes it a bit less messy when pulling.

.jpg.5d34d05f111ebf8bd4a239c7829f802a.jpg)


