jevs
-
Posts
316 -
Joined
Content Type
Profiles
Forums
Store
Articles
Gallery
Events
Library
Everything posted by jevs
-
Great info, that saves me from realizing those facts when it is too late. I will stay away from ball connections based on this.
-
How do you like your hood props? That is something I thought a tiny bit about, but will have to figure out soon. One thing about the hood, it is rock solid now when closed, but as soon as you open it, its a wet noodle. You almost need to be able to hold it in the rear center and reach both prop rods. If you grab just one side and lift, it really twists a lot.
-
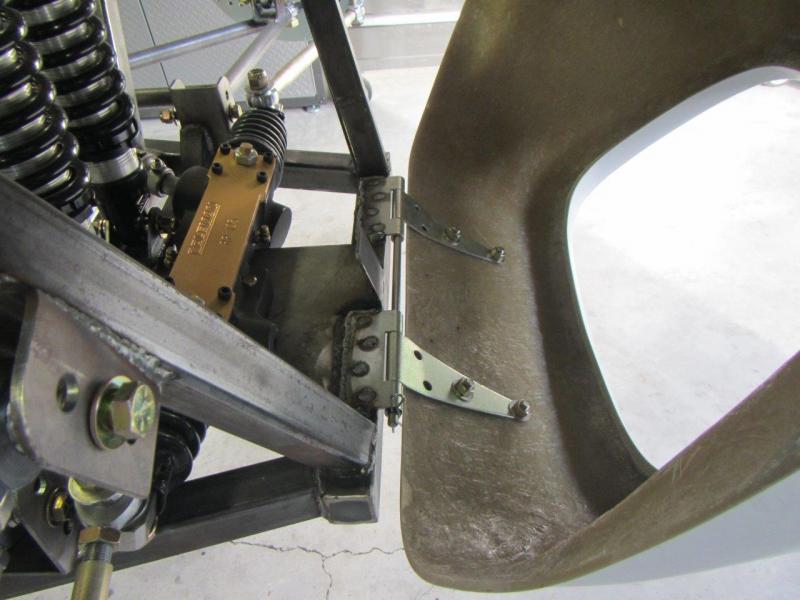
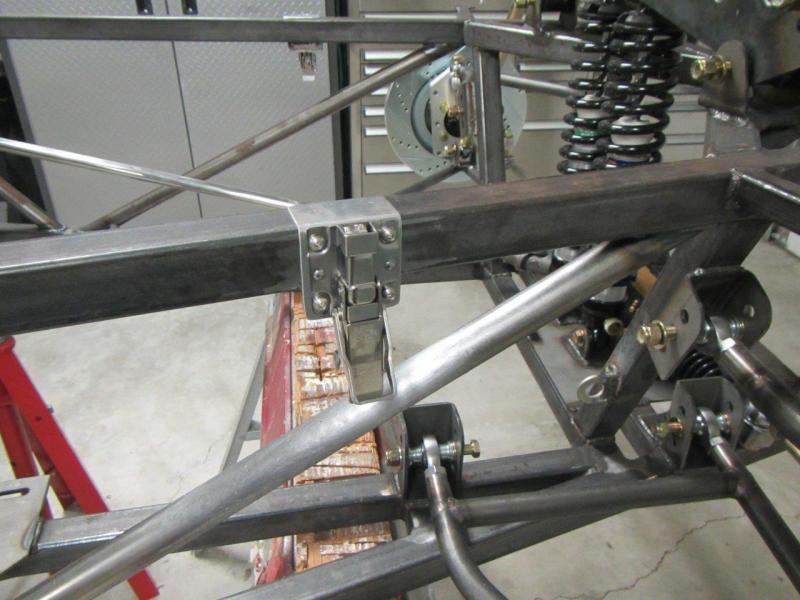
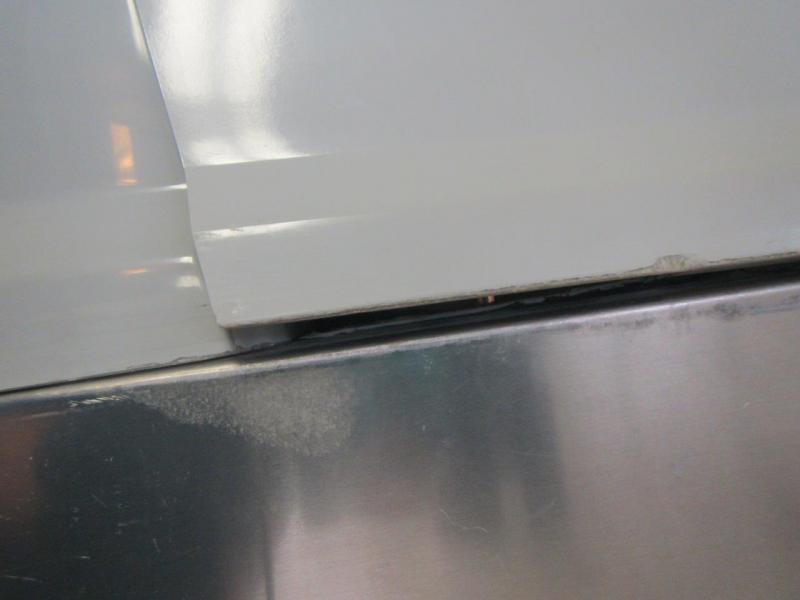
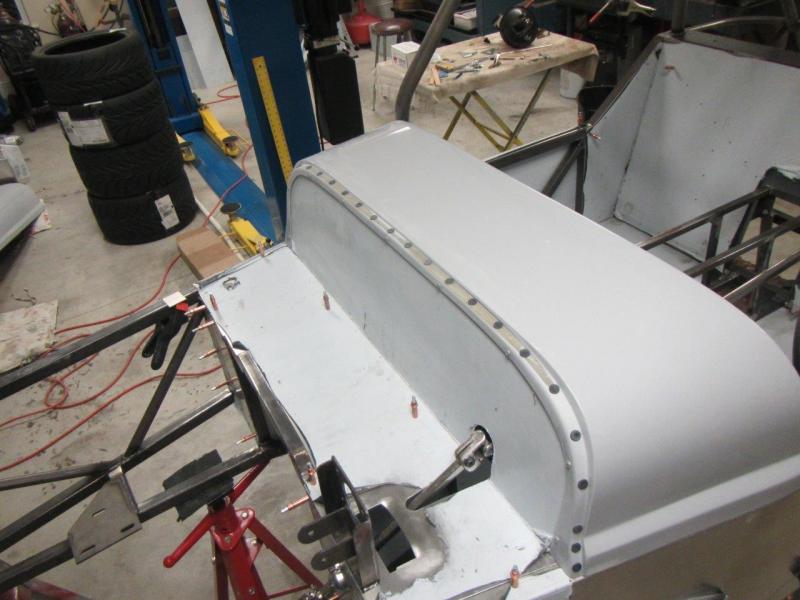
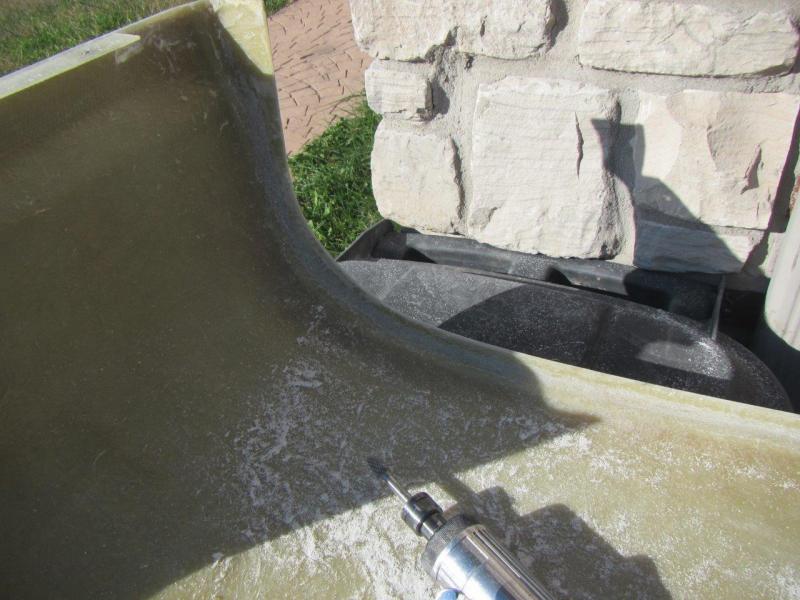
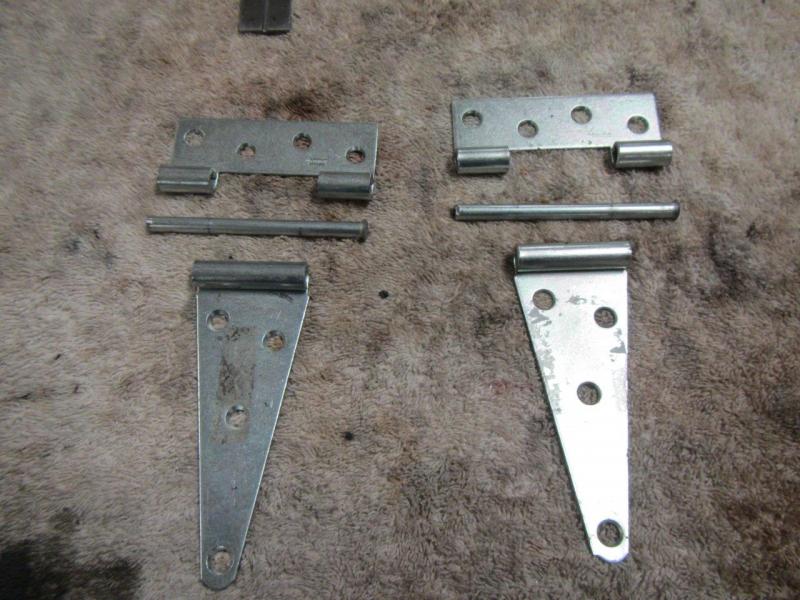
Hood hinges installed. Stainless steel pin fabricated. I decided to make a long single pin instead of two. I also used it to keep the hinges in line with each other for welding. This is faster to remove. Everything is nice and snug. Nothing to rattle. I positioned everything so there would be a tiny bit of tension. I decided to not use the round rubber buttons on the scuttle. The scuttle needs to support the hood all the way around or it is never going to be positioned correctly. The lip does not match the hood no matter what you do. It only touches in the center and maybe down by the frame rails. The corners are a 1/4" + away. So, instead of fighting this further, I ground all the gel coat off the lip with a wire wheel and I will re-fiberglass this to match the hood perfect once I get my 1/16" thick 1/2" wide adhesive backed neoprene seal. I will put the seal on the hood and then build the glass up to match. Later, I will put the seal on the scuttle, but I need it on the hood to get the gap just right. I also straightened up the lip of the front opening to make it consistently wide. I did notice that the flare on the passenger side was much wider than the drivers side. I cut down the passenger one to match the drivers. I will have to glass the bottom outer edge and then round it off to match the other side better. The hood and scuttle are requiring more work than I had hoped. There will be a lot of surface straightening to get a slick finish even after this is all done. Worst part of building a car.....I am ready to go back to mechanical stuff, but this has to be done sooner or later.

-
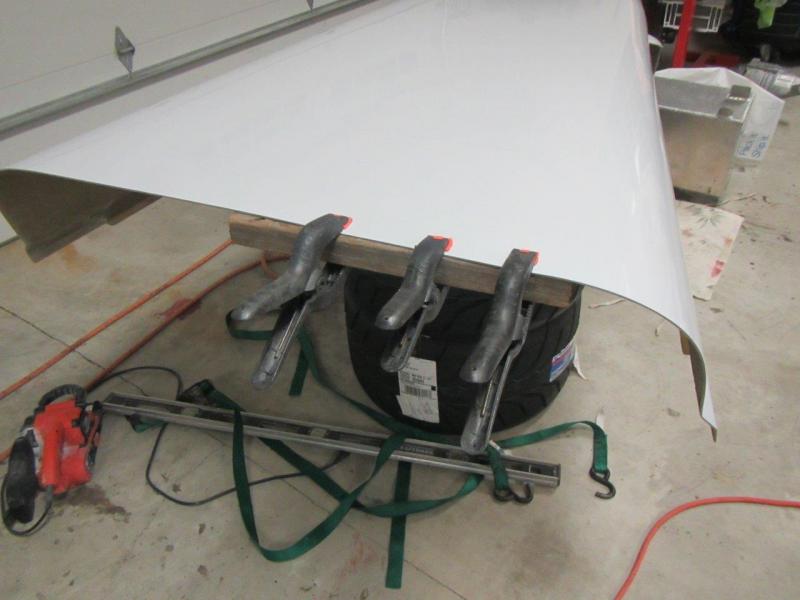
More hood tweaking with the heat gun after getting the clamps installed. You have to get creative with stuff laying around to push it where you want I only have two hands. It is getting closer.
-
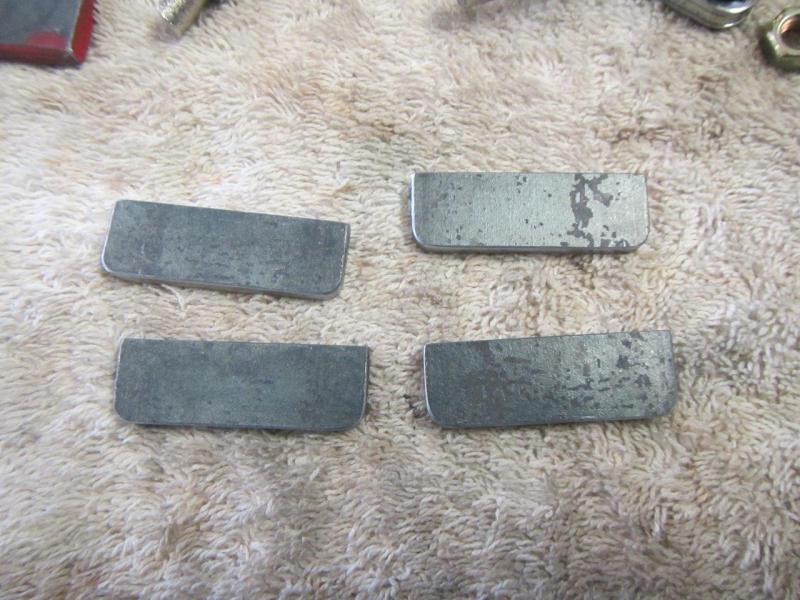
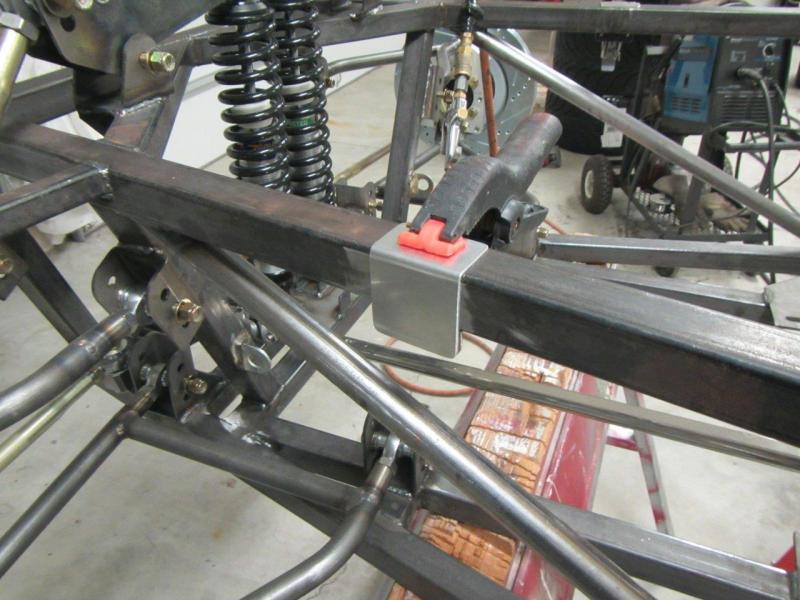
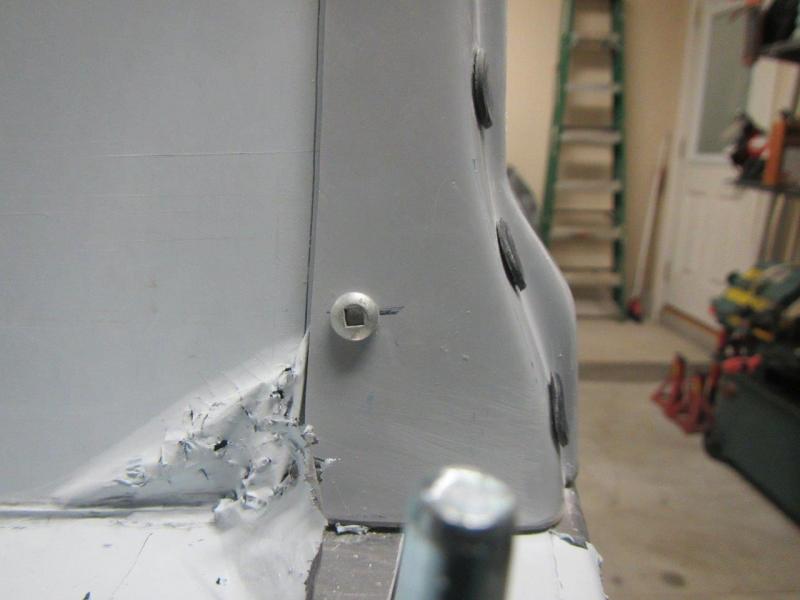
Made pieces to weld on the frame so the bottom hood clamp holes have something to fasten into. These are much thicker than the frame wall thickness for more thread engagement. I am using a lock washer under the 8-32 x 1/2" stainless button head screws. I made an aluminum piece for the front hood clamps. This way it holds the hood up the same as the rear. It also allows me the ability to add side panels later if I want without it affecting or needing to modify anything with the clamps or mounting. Just remove the aluminum spacer and insert the side panels in it's place.
-
1/8" is really too thick. I would have to cut down even more of the lip in the center. As it is, the 1/16" bumpers I had on there put the hood at level in the center even after taking almost all the gel coat off in the center. A simple flat strip was all I needed. Nothing that needs to be compressed or actually provides a seal. Also, those seals on the dart are likely not long enough and may be shaped to the window (have not seen it). They are also probably more expensive. If anyone is looking for a hood seal that has compression or is thicker than 1/16", I found many inexpensive alternatives. The 1/16" thick and 1/2" wide is what was making it hard to find. Here are some.... http://www.steelerubber.com/peel-n-stick-extrusions
-
I have not seen anything at the lumber yards, big box lumber stores, McMaster, or Grainger, or elsewhere that meet my requirements. McMaster had some stuff, but not less than 2" wide I believe. I already ordered the stuff I posted previously. So, now it is just a matter of waiting for it to get here. I am working on ordered the fuel line stuff now. The fuel kit I bought from Brunton won't work for me due to being made for only a 40 micron pre-filter. The insufficient fuel filter call out requires changing things up to add a slightly larger pre filter and a post filter. So that was kind of money wasted I am also changing some of the fittings to keep it more -8AN instead of hopping up and down through the system with a mix of sizes. Now the only -6 will be from the regulator to the fuel rail. I am hoping I can still use the long line. I won't know until I get the rest installed.
-
I just looked at the data sheet from that website and it says it is DUROMETER 60A NOMINAL According to this web page that is like tire tread: http://mykin.com/rubber-hardness-chart This should be about what I wanted. I will keep my fingers crossed. The guy on the phone also used the tire tread description when I was discussing the hardness with him.
-
I don't think so. This is supposed to be more like rubber instead of foam tape. I talked to the guy on the phone and discussed what I was looking for and using it for. The problem with these materials is that it is hard to really know what it is like until you have it in your hand. I was not looking for squishy weatherstripping. I am hoping it is more like the rubber bumpers I tried first or at least something not too soft and pretty tough. I will report back when I get it.
-
After talking with this company I ordered from them based on what they suggested. The shipping was too high and it might take awhile to get, but I could not find this size anywhere else. I bought more than I need because I need a sacrificial piece. http://rubbersheetroll.com/neoprene-rubber-strips-commercial-grade.htm NEOPRENE RUBBER STRIPS, ADHESIVE BACKED, .062 THK X .500 WIDE 10FT $ 9.50 Quantity: 2 Item total: $ 19.00 Subtotal: $ 19.00 Shipping and Handling: $ 18.83 Order Total: $ 37.83
-
Anyone know of a good hood to scuttle gasket for a Stalker XL. It must be 1/2" wide or less and as thin as possible (1/16" or so, maybe a little thicker). Adhesive backed. I am not going to do the little rubber bumpers like originally planned. I got my hood all fitted as far as the hood clamps and hinges go. I spent a great deal of time with a heat gun forming the hood and getting it close. However there is too big of a gap on the corners between the scuttle and the hood. It just kind of moves around, so it needs to be supported and properly gapped. So, I took the wire wheel to the lip of the scuttle and stripped all the gel coat off. I need to find a robust strip to use as a gasket to go any further. I will attach a piece to the inside of the hood and then glass the scuttle until it matches perfect. Then when the car is painted I will pull the strip off the hood and put a new piece on the scuttle. I just have to have the strip in place to make the glass the right thickness on the scuttle. I am also thinking of eliminating the jog where the body line is near where the scuttle meets the upper frame rail. This is an area that is not needed. The scuttle lip can just come straight down so there is not weird area to attach a seal there. The hinges I am using hold the hood in place in all directions, so no backer support for that little area is fine. All I can find so far is foam stuff that would tear and anything in rubber seems to have a bulb which makes it too thick. I will post some pics of my progress on my build log soon. I have spent a lot of time on the hood making some other fixes too. There is still much to do, but I am stuck until I find an appropriate seal/gasket/bumper. I looked on McMaster Carr some, but it is hard to tell what material will actually be close to the stuff used as car seals.
-
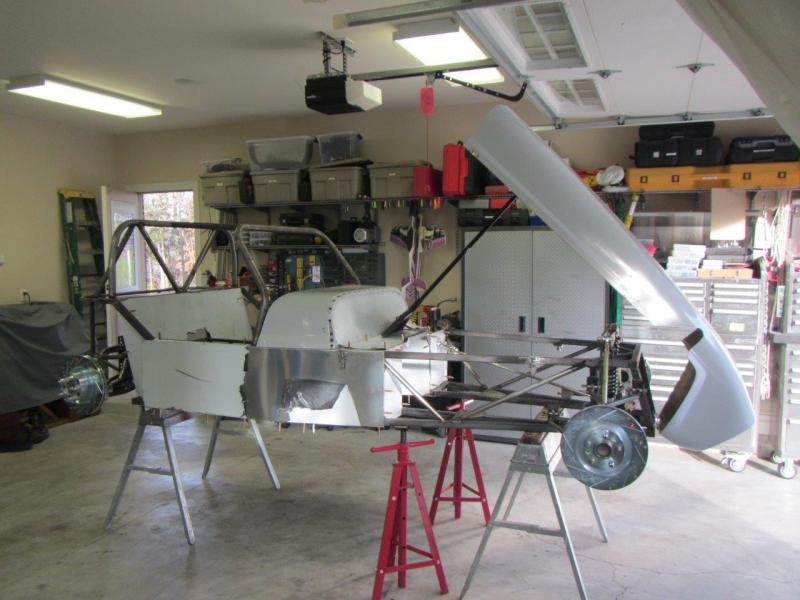
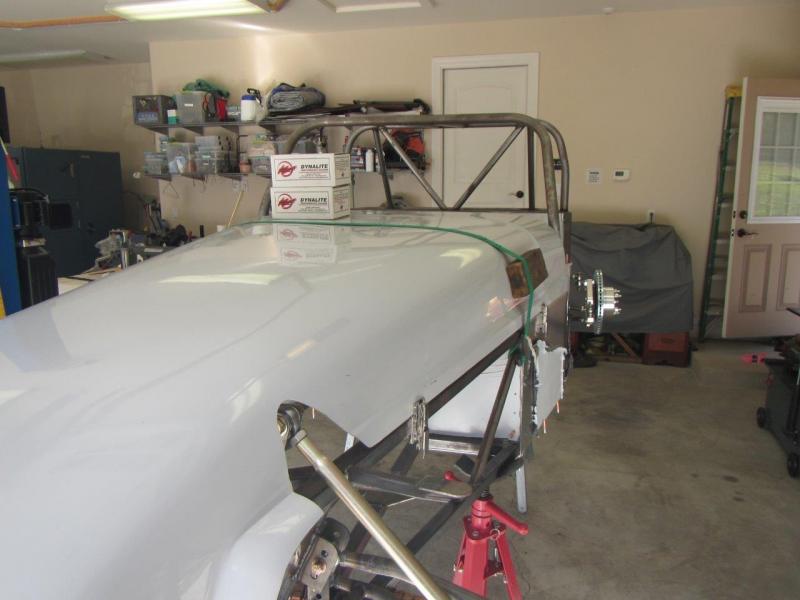
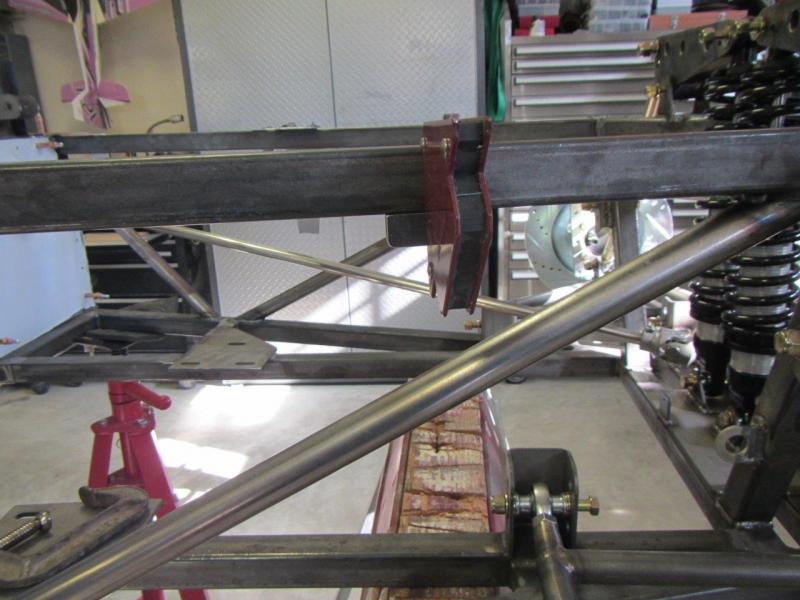
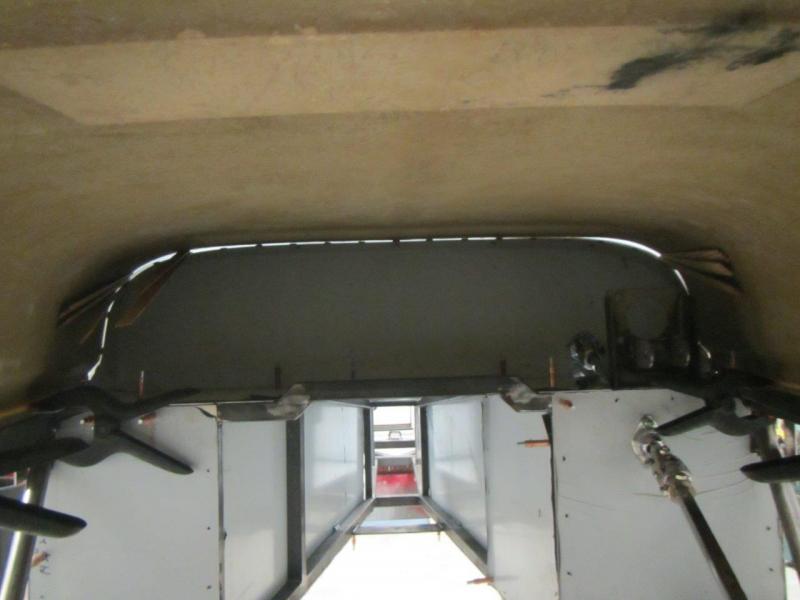
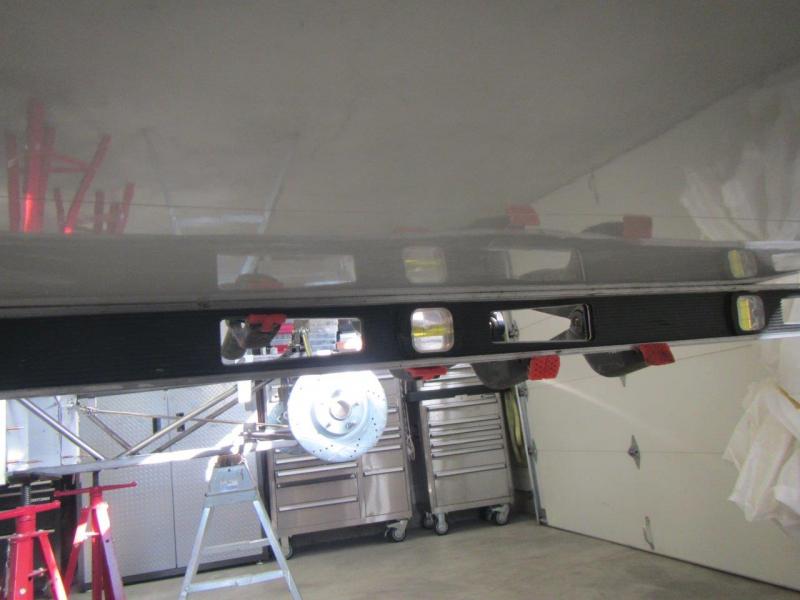
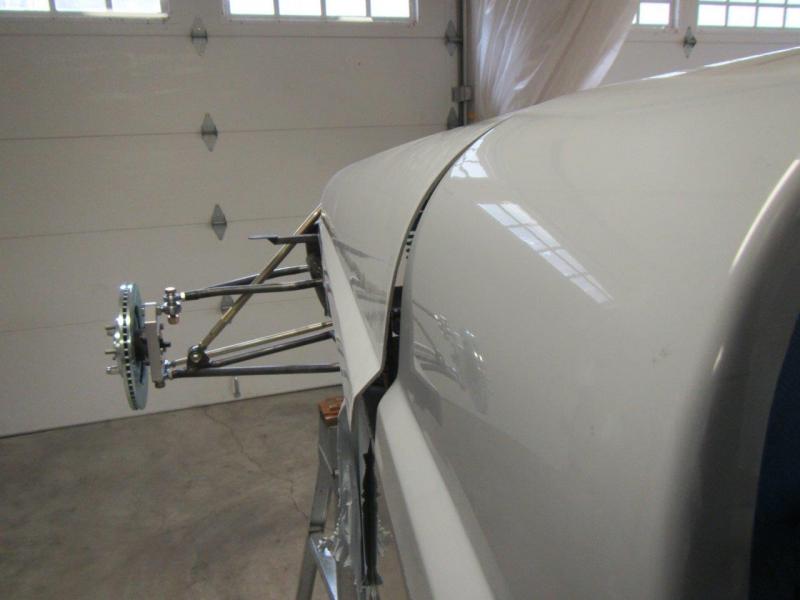
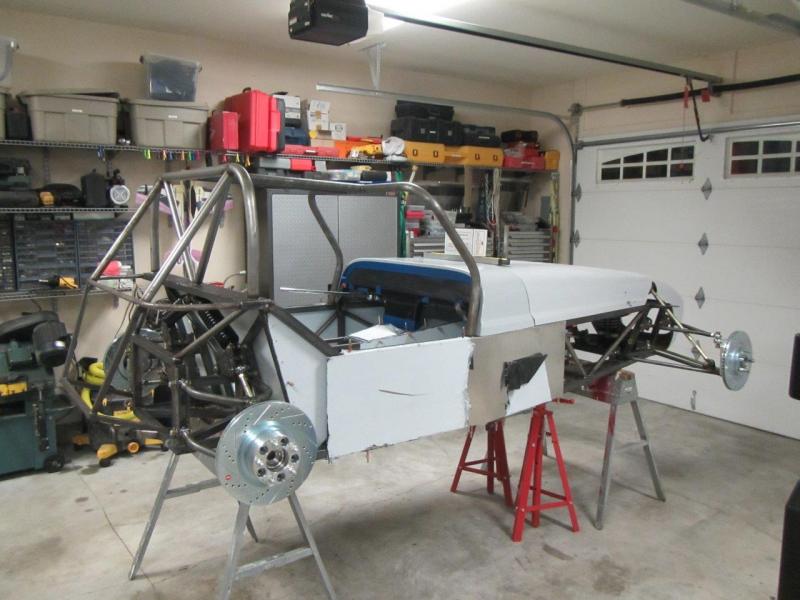
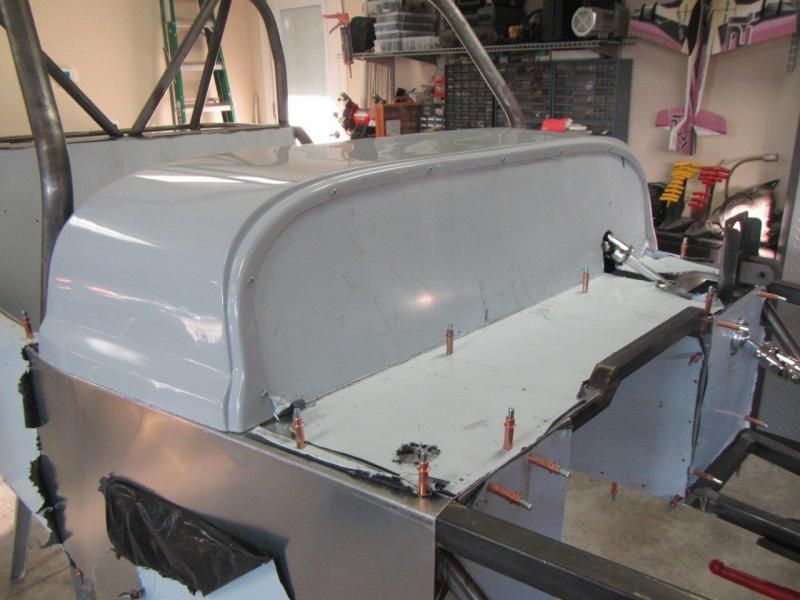
So this is where I am at this point with the paint sticks jacking things up on the inside. I have to get some hardware for the hood clamps tomorrow. I will put those on next before I do any more. I think it is close enough to do that now. I do think I will order two more clamps to put up front. If you don't the body will never stay lined up with the frame rail. It really needs them in my opinion. Even if it was lined up good (which it won't be), the hood will be flopping in and out up there when your driving. Adding in the "hoods" over the suspension rocker link like Brunton does would help stiffen things up, but they did not put those on our hoods. I might do them. Haven't decided yet. It looks a little unfinished with just a cutout there.
-
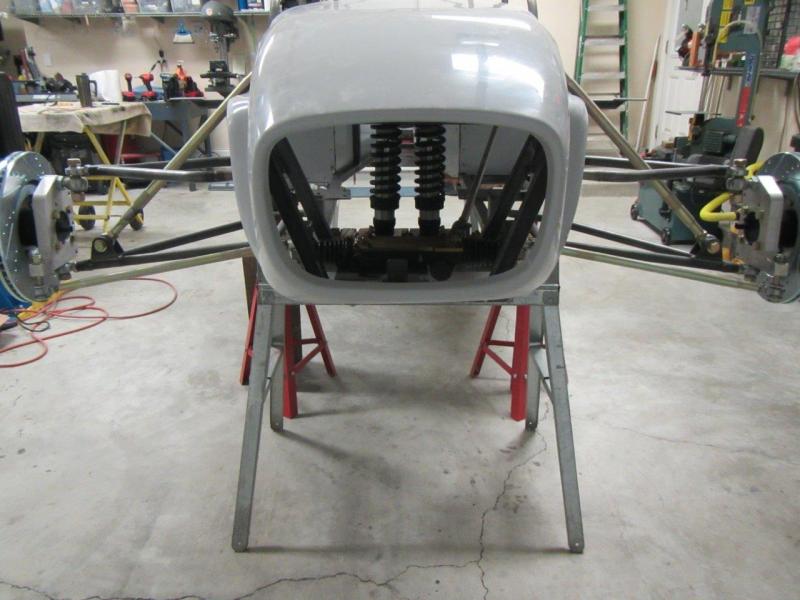
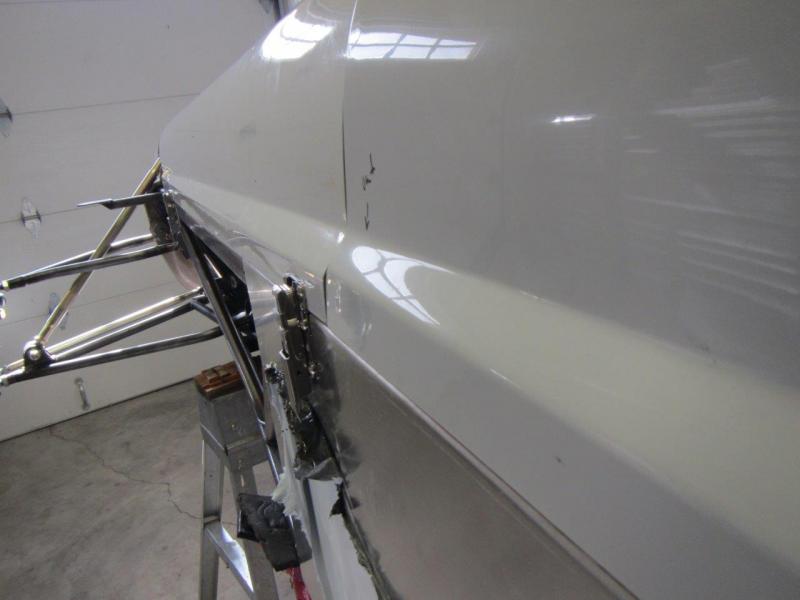
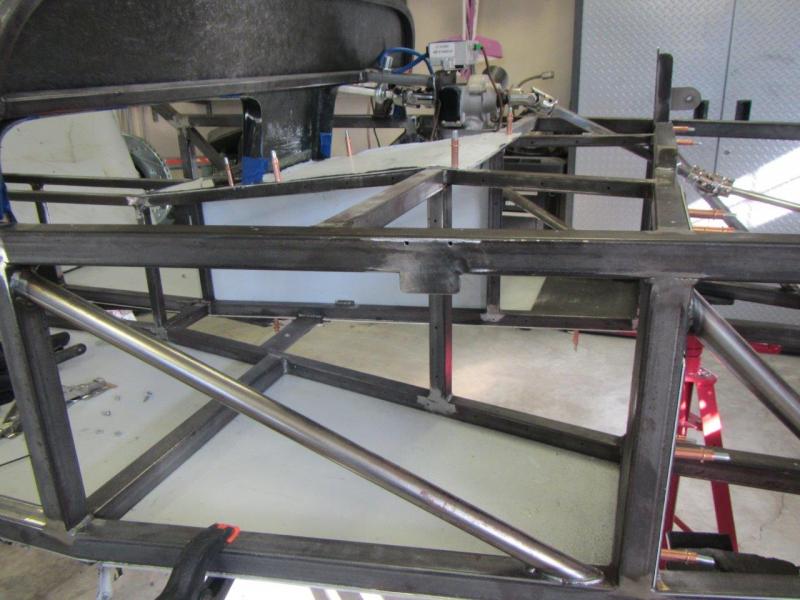
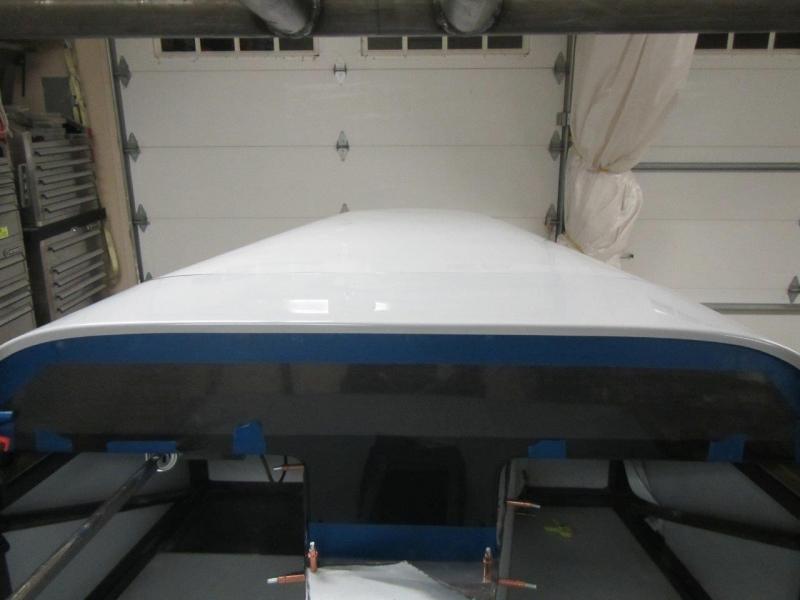
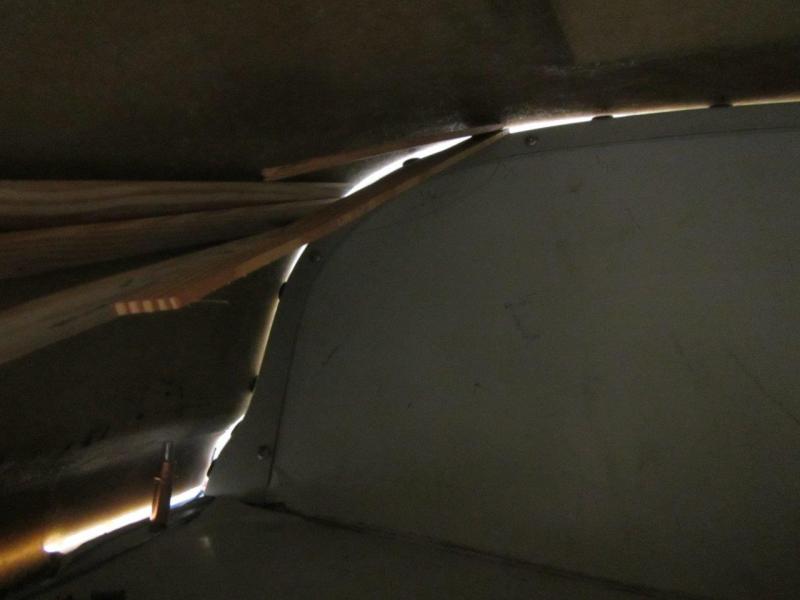
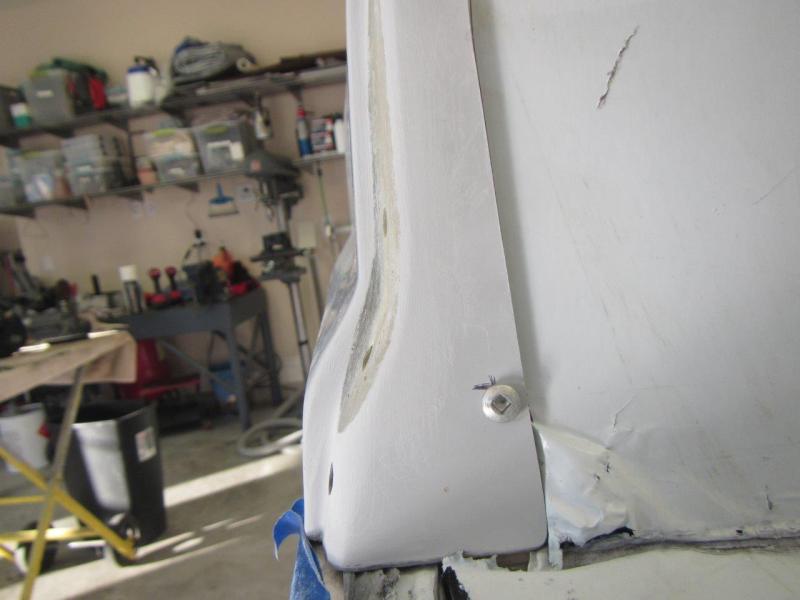
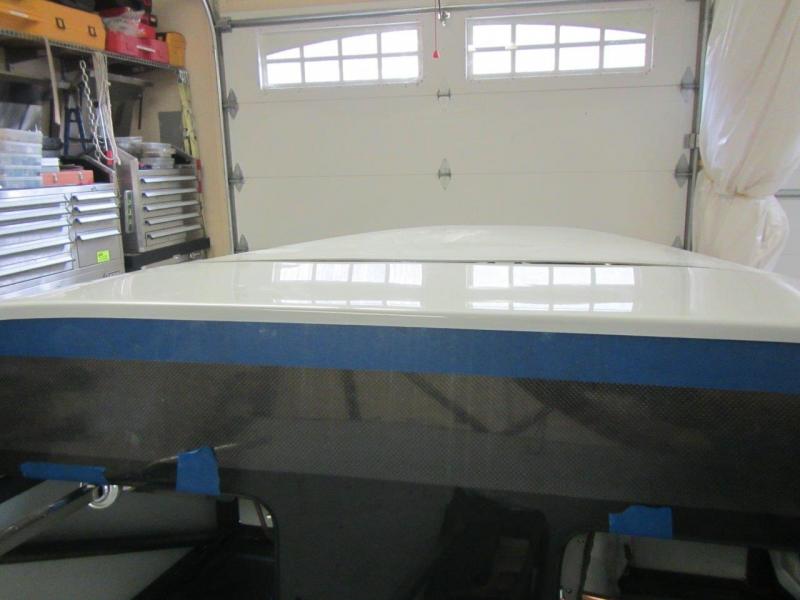
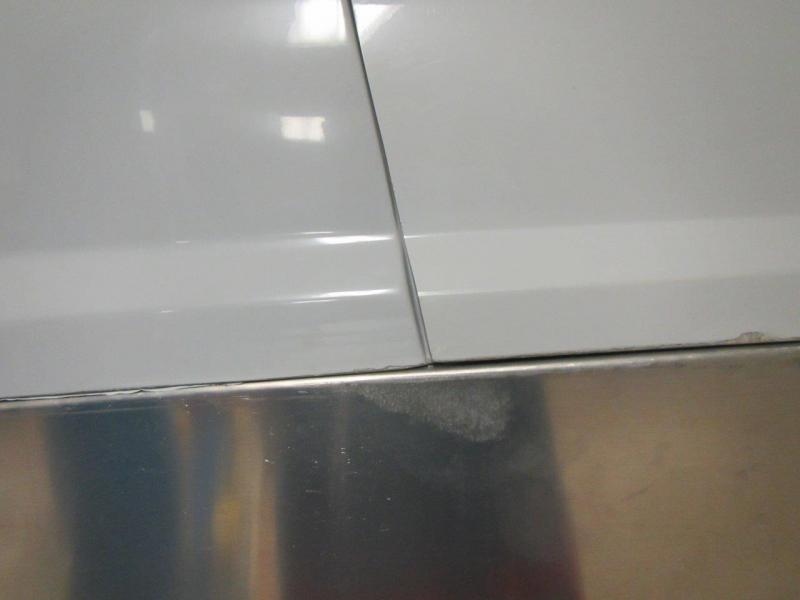
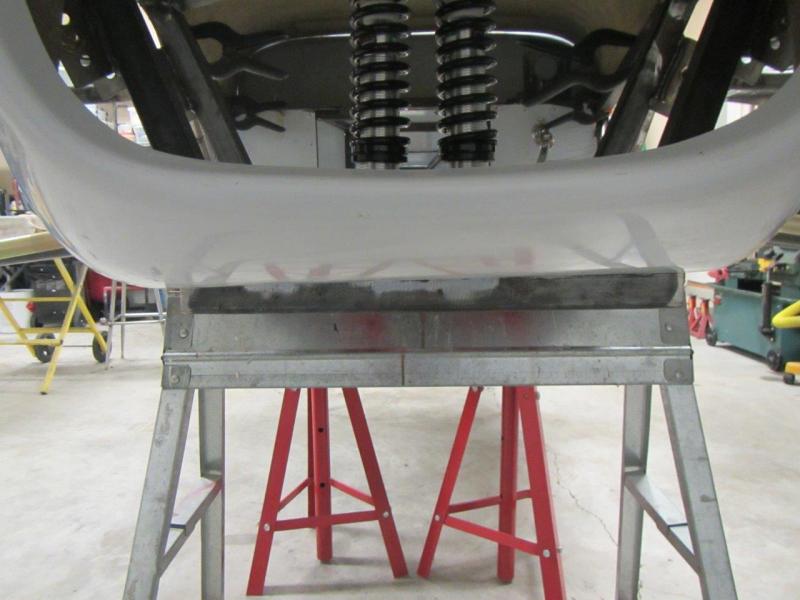
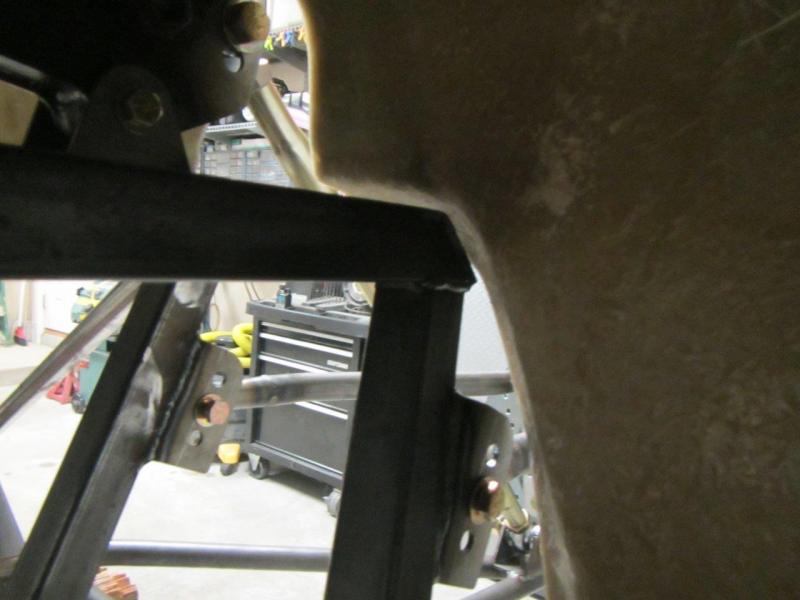
This is what it takes from the inside to get the outside close. There is a good bit of pressure on some of the sticks. I am going to have to either have to build up the cowl to match or build down the hood to match. This can't be left flopping around in the corners. Even if I make the bodywork match, there is just no support. The heat cycles of the motor and sunshine will let it shift around. It might stay close, but it won't be OEM looking. I am going to try to keep the gap under 3/16", 3 to 4mm would be my target, but it will likely open up a bit more by the time all is said and done.
-
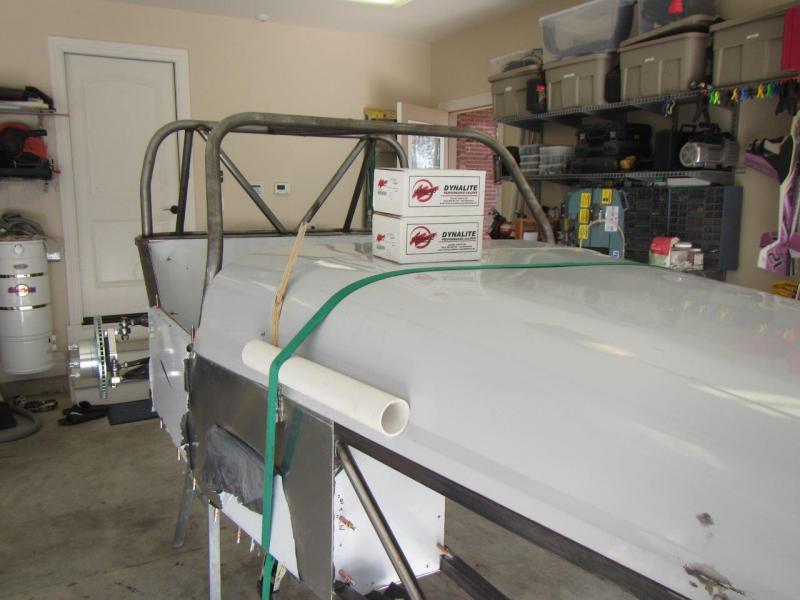
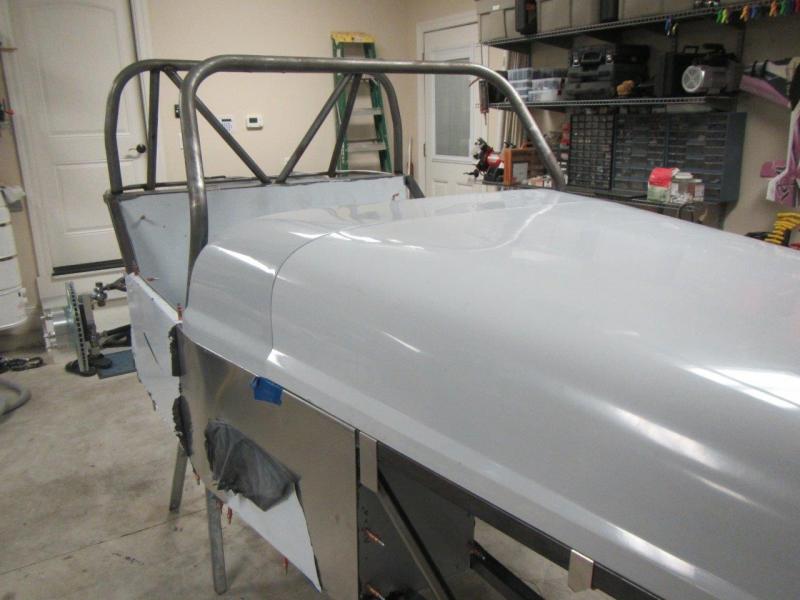
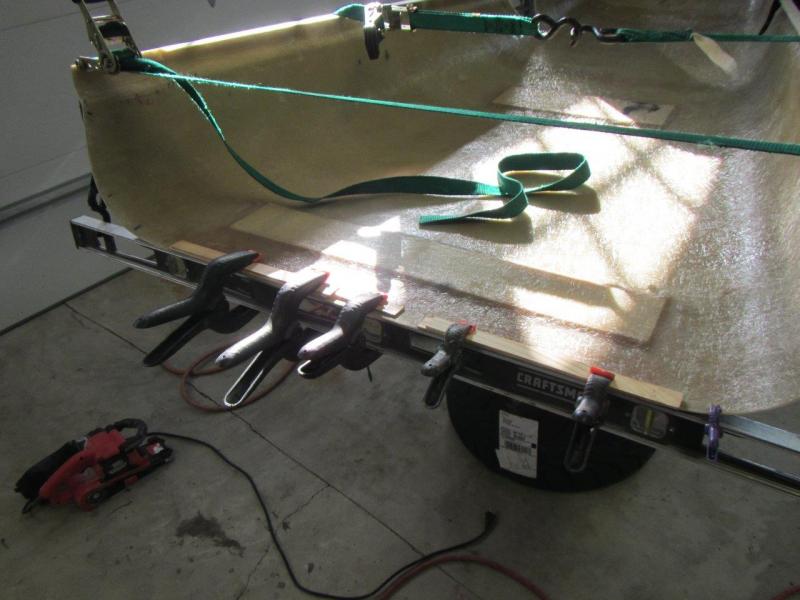
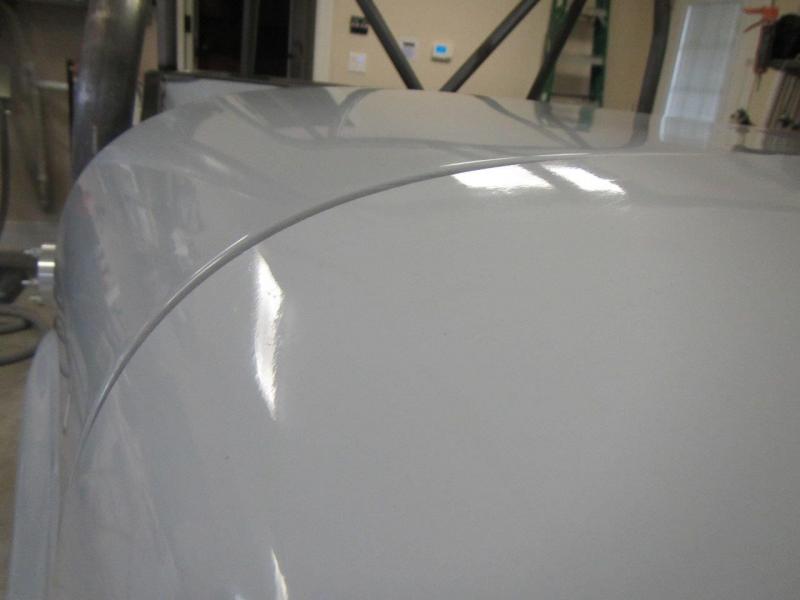
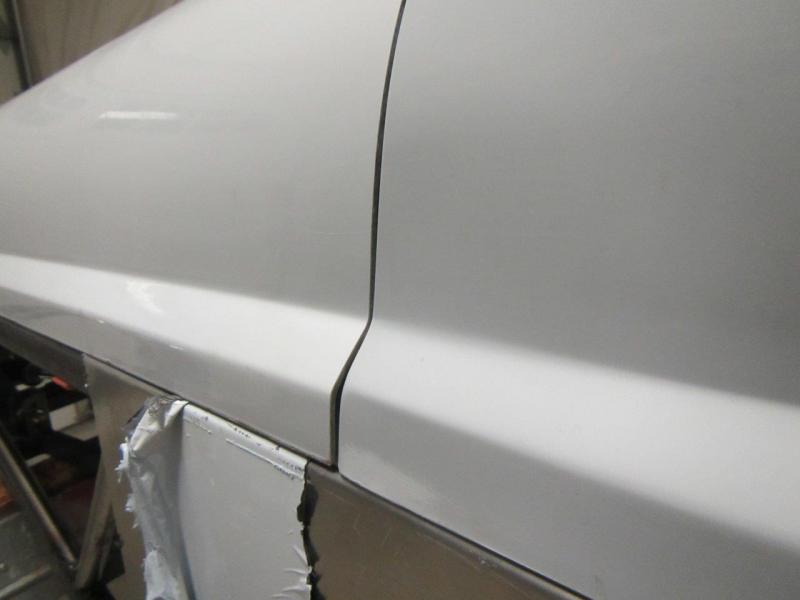
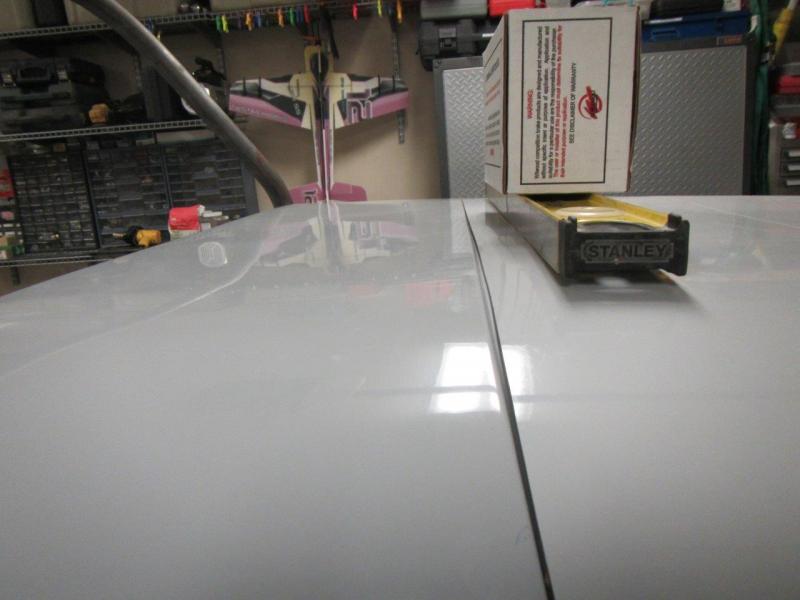
I made up a "jig" using my level and two tie down straps. I measured across the car and sucked the front of the hood in the same distance. I then went a little bit further so it could spring back some. I heated the inside and outside of the radius on each side down the length of the hood. I then heated the back lip and clamped to the level on one side and a double stack of paint sticks on the top. I heated and added clamps before it could cool and then heated the whole area after the clamps where on. This did a lot of good. The next time I took it off I camped one more spot and got a hump out. There will be some fill and block sanding in my future. The reinforcement inside the hood is keeping things from going where I want. I pulled the lip where it needs to be anyway. There will be hump to sand out I am sure. There is plenty of beef in that area to shave some off though. I also ground out and sanded a bunch where those corners come in at the body lines. There is a good bit of clearance now so that won't be an area knocking paint off. I will have to add a little glass on the back side of the passenger side. It got thin there. The drivers side will be ok. It is hard to tell from the pics, but I would say I took about an 1/8"+ out of there.
-
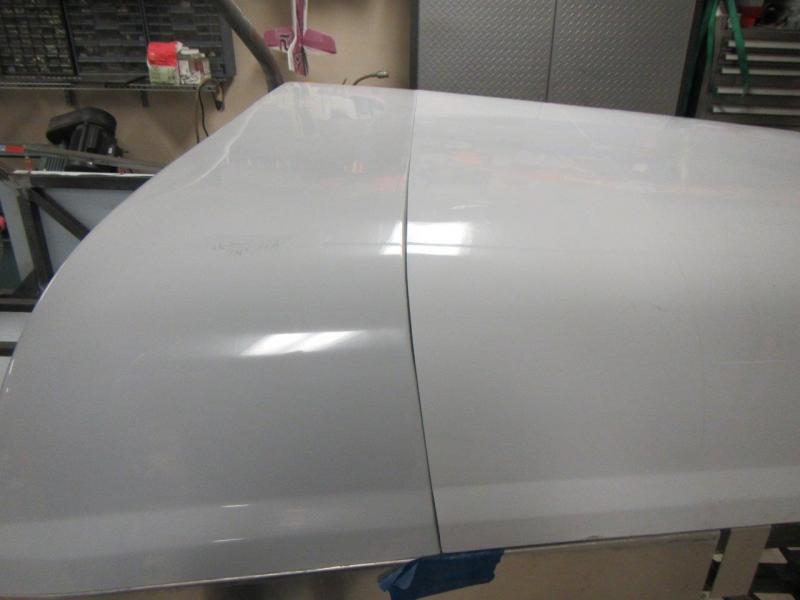
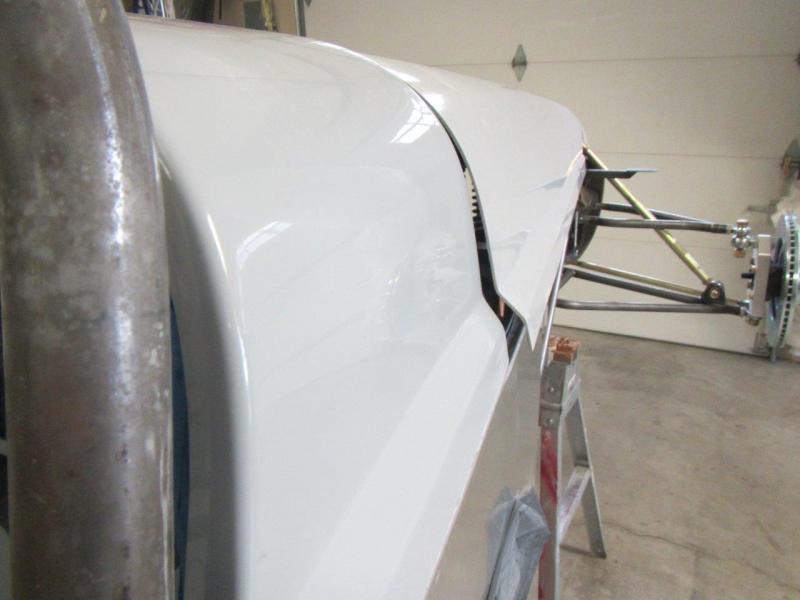
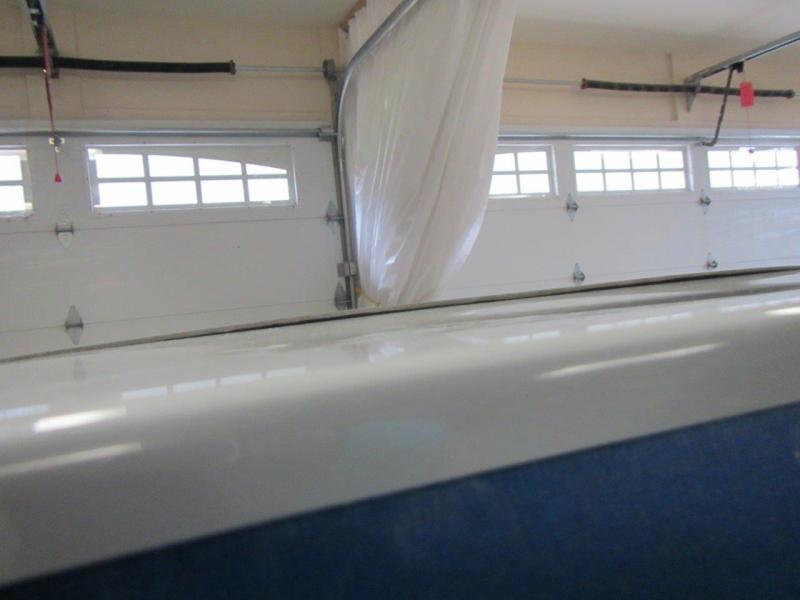
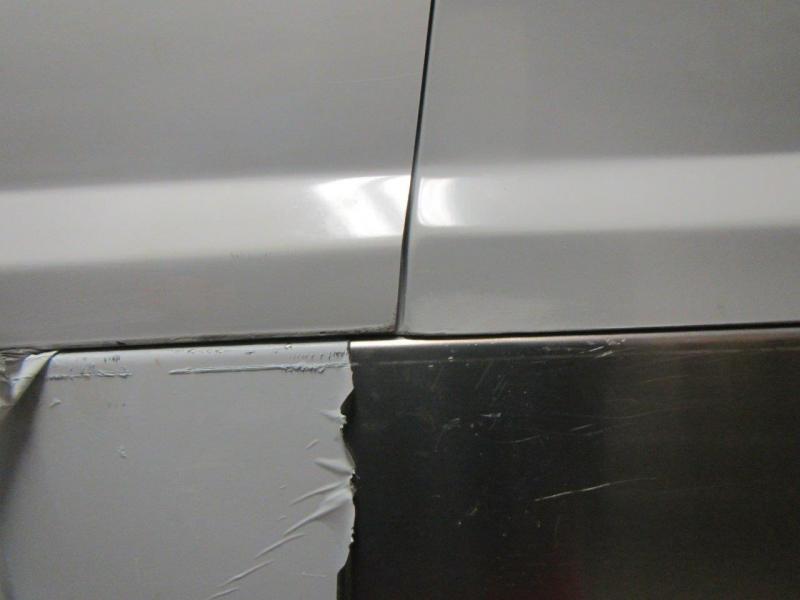
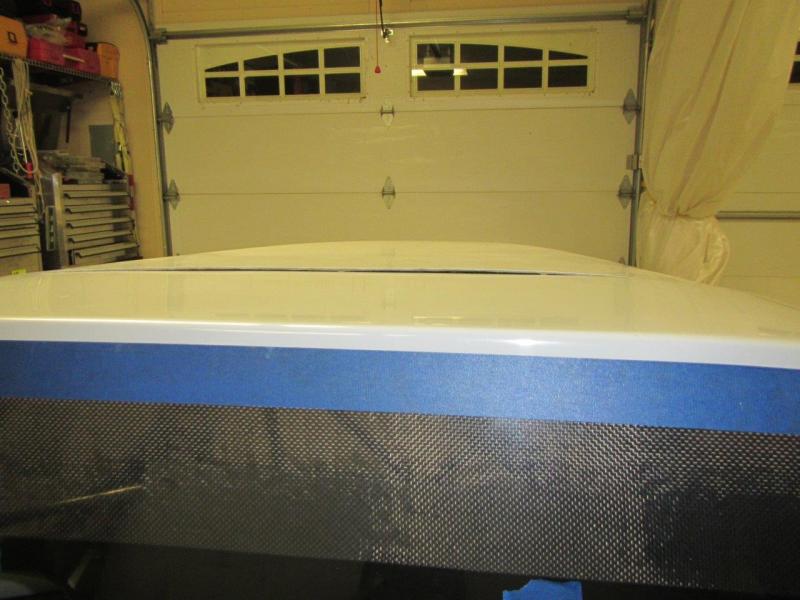
Another day down on the hood. I think I made good progress though. I got it somewhat close and had to do a trim. The gap was too big on the passenger top corner to do much else. I trimmed all but that spot down, so this was as little as possible to trim off. At this point the rest of the pictures show where the hood wanted to be in its relaxed state. Not good.
-
I am actually considering black. I already have the paint that I bought for another car and did not use.
-
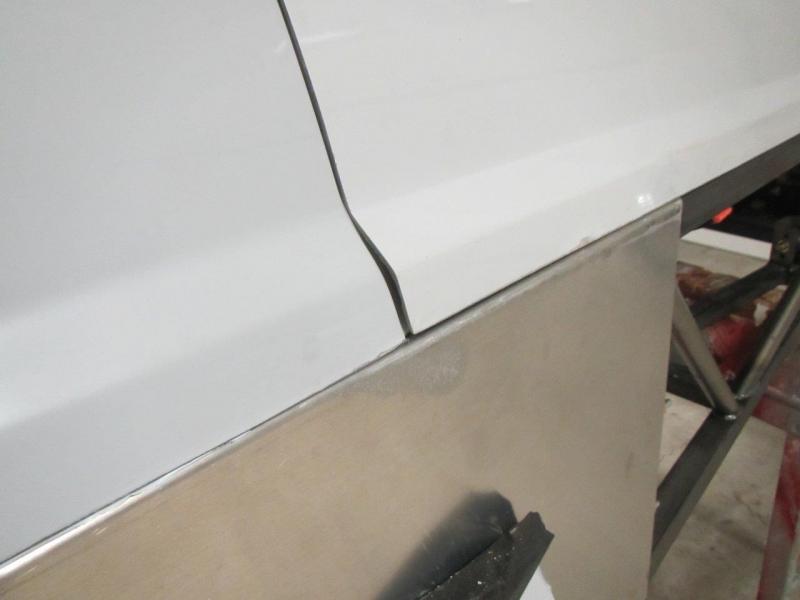
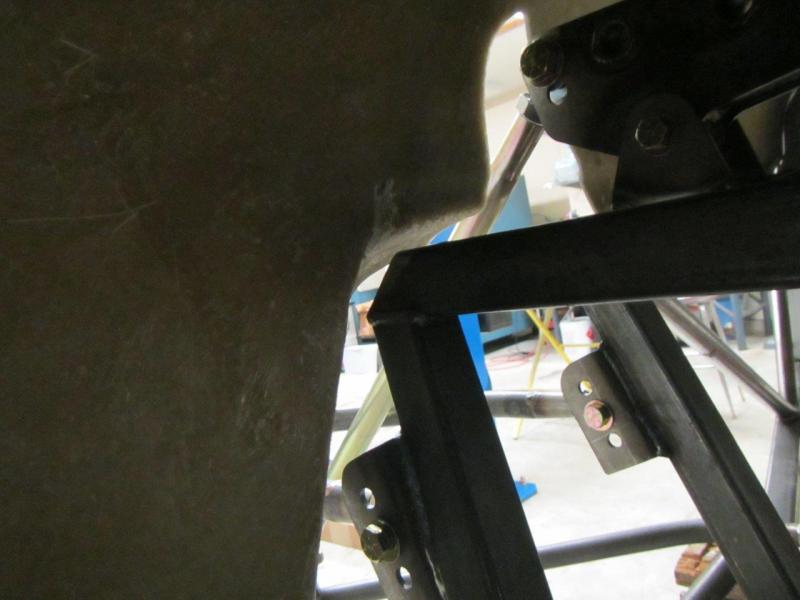
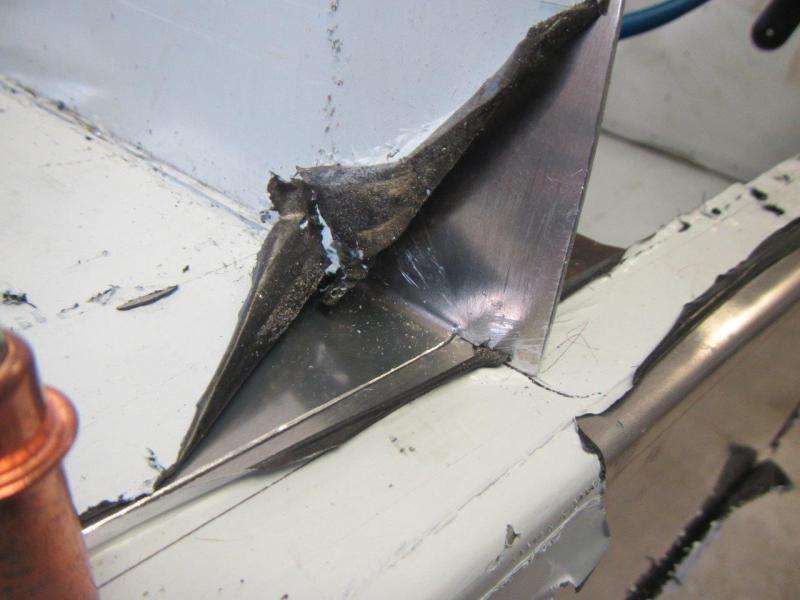
I am going to have to grind out the cowl where the indent corners are. As you can see there is not much room there and does not match the outside lines. The hood rubs and does not allow it to go in there.
-
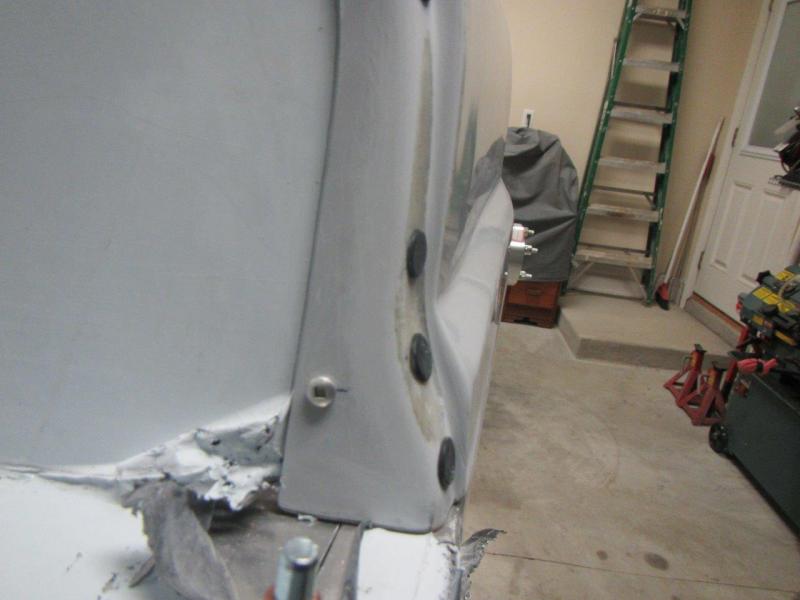
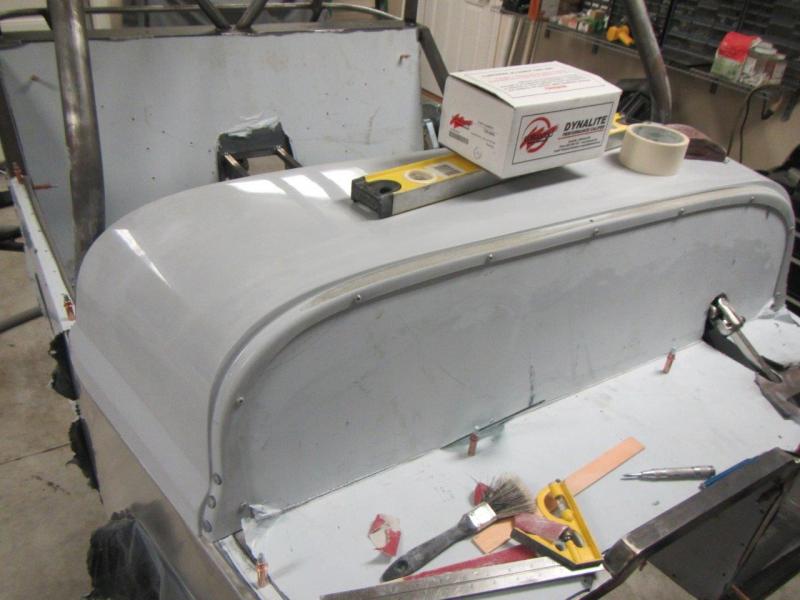
Did a bunch of sanding on the cowl trying to get a good lip. I got my rubber bumpers installed. The lip on these XL cowls is smaller than the old ones, so the small bumpers barely have enough room. They might show through the hood gap. This is disappointing, but not much you can do about it. By the way, the ideal hole size for these was 9/32 for me. Any smaller and they are way to hard to get in. 9/32 lets them poke in with a small tool pretty easy. They also hold very well. I spent a bunch of time trying to get the hood to fit well after this. It is better than when I started, but still not good enough. I spent a couple hours with a heat gun and got it better, but the middle is still popped up and the rounded corners are in too far.
-
Unless the bolts were a light press fit in both mating parts, they can't be used in sheer. Otherwise you have movement between the two pieces and going from reverse to forward and jerks etc would wear the bolts out or break them. If you think about it, there is a little slop in there no matter what and the only way for all the bolts to touch all the sides of the holes is to twist the two parts very hard opposite of each other and tighten them. Of course going in reverse would negate that sheer as well So, my thought is that fully threaded or not will not matter much other than the non threaded part of a bolt is stronger. Your relying on the clamping force and the bolt being in sheer will only come into play if things come loose. Something else you can utilize is that you can buy a bolt that is not threaded far enough for you and sometimes if the diameter of the non threaded part is correct, you can run a die up the bolt and make more threads. Just throwing out some ideas. I am hoping mine is just welded different than yours
-
These should not be in sheer. The two parts should be locked together like a clamp. No movement and no sheer on the bolt unless something is loose and then you do have a problem and a grip length wont matter . This same topic comes up on wheel spacers....
-
OK, so I ordered: 9309K121 Rubber Push-in Bumper, Tight-Grip Ridged Stem, 1/4" Hole Size,17/32" Diameter, 50 Pack $9.00 1670K2 Plastic Push-in Bumper, Tight-Grip Ridged Stem, Fits 1/4" Hole Size,100 pack $14.28 I will just thicken the fiberglass as needed for a good fit. Any more thinking about this will take me longer than doing it
-
So, how are you adjusting the hood surface to the scuttle surface? I assume these are just being used for protection. It would be nice if you could get different thicknesses with all the same other dimensions so you could put whatever thickness in each location that puts the hood right where it need to be. The only way I can think to do it would be to put these bumpers in, then shim everything out where it needs to be with temporary shims. Then go back and add a little patch of fiberglass where the shims were needed to make the hood thicker in that spot, or you could even use an epoxy for this purpose. I can already tell I need to make one side push over a little on the passenger side. That's the only way I am going to make the two parts line to each other precisely.
-
The parts where the body lines of the hood meet the lines of the scuttle will need a little work depending on how good I want it to look. I notice a lot of people just kinda leave it as is. Most people would not notice I suppose, but unfortunately I am picky. I have not gapped or mounted the hood or anything, this was just a preliminary test fit to get an idea of how it was going to go. Fiberglass is never perfect on kit cars, this is pretty good so far overall. I have definitely started with way worse on other things
-
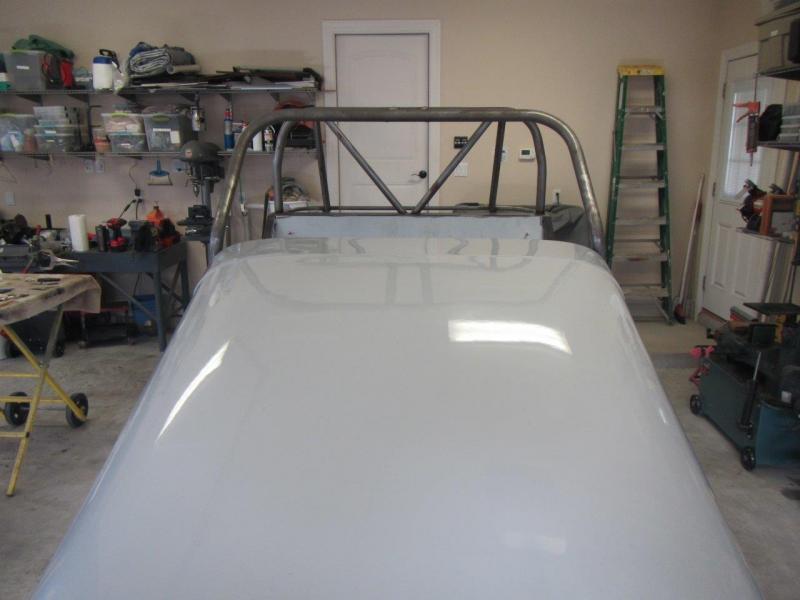
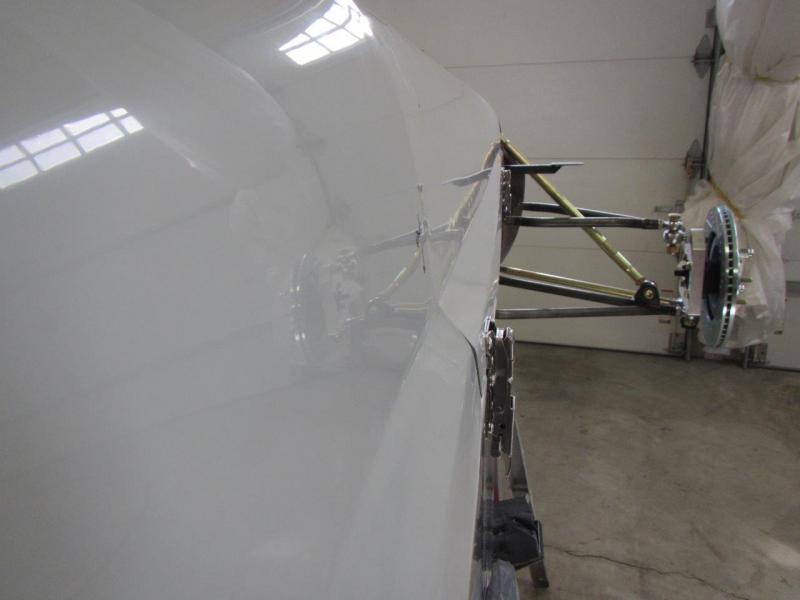
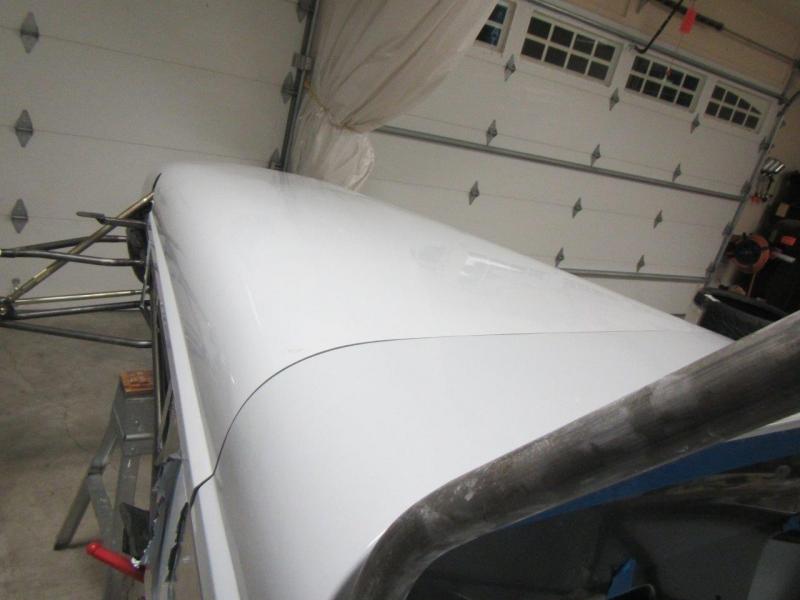
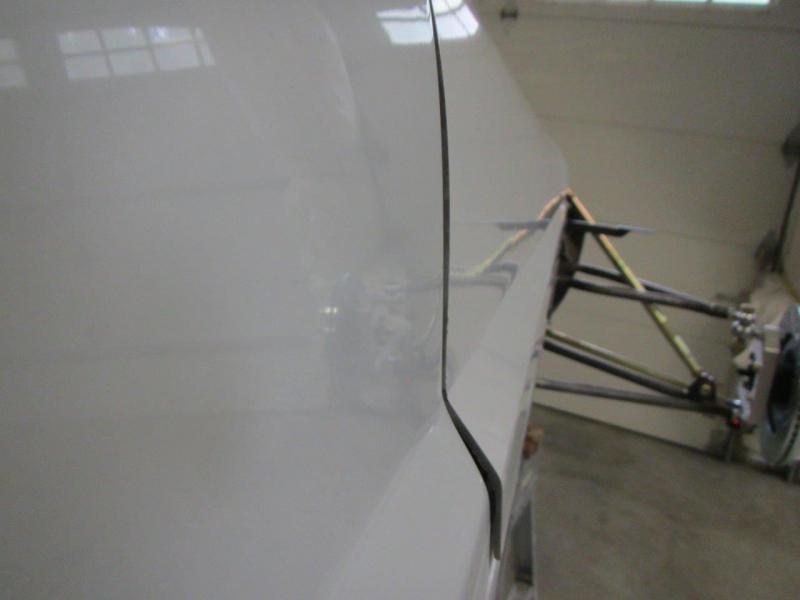
I think my hood fits a little better than that lump toedrag had to deal with. I left my hood stored in a way that was applying pressure up. Mine is now popped up just a bit, but with a little pressure it goes down pretty good. Once I get things more in place I will give it a little heat and let it relax a bit. The front is going to need a little persuasion. As you can see it is a little crooked with the frame, but I think I can get that out once it is mounted. The clearance between the top front frame corners and the hood looks like it is going to be acceptable.
-
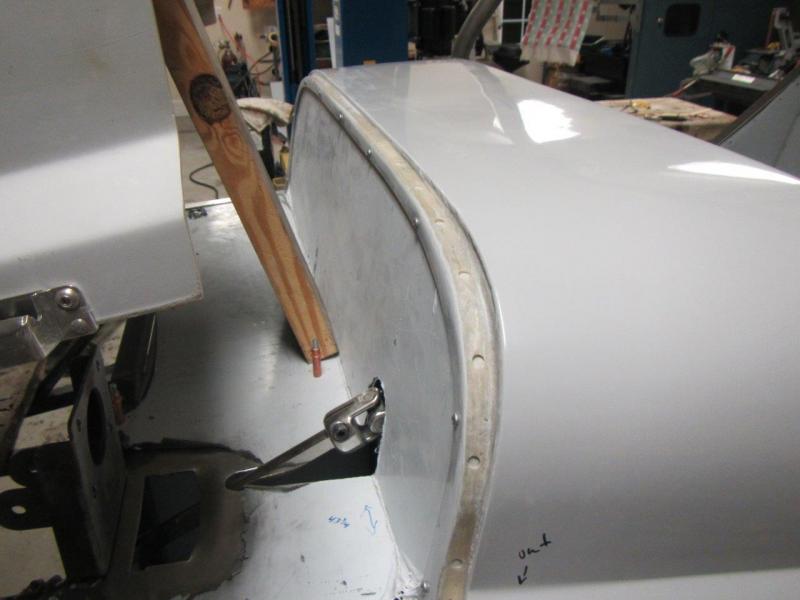
Unlike what I have seen others do, I left a little of the firewall panel to set on the top of the side panel top flange for a little support on the ends before putting the screws in through the scuttle panel. I also spent a lot of time carefully trimming. I notice some of the panels I have seen, the screws missed the panel and just made a notch in the edge. I wanted to ensure this did not happen. I also cleaned up the inside of the scuttle with a die grinder so I could keep as much metal behind it as possible. I ground the end of the pins on my hinges and removed the pins. It appears my pins are 7mm instead of 5/16 as noted in the build video. There are a bunch of manufactures for this type of hinge, so it is luck of the draw. I will have to order some rod to make the pins. Honestly, I think these should be included in the kit since they are cheap and it would be easier and I think most people probably don't deviate on this part. I might order stainless steel. Edit: I ordered this from McMaster to make the hinge pins: 1272T37 Multipurpose 304 Stainless Steel Rod, 7 mm Diameter, 1-1/2' Long $8.00