

TMRL7
-
Posts
55 -
Joined
Content Type
Profiles
Forums
Store
Articles
Gallery
Events
Library
Everything posted by TMRL7
-
Congrats on your purchase!
-
I agree with @IamScotticus.
-
I would be so excited to have this project to work on. Good luck!
-
Jimmy, Great looking Caterham. Good luck! I would offer two thoughts to consider. Take your time and enjoy the process, it is so much fun and it is not a race. Also, the stands seem a bit high. For safety I would consider lowering them and perhaps connect the stands together (front to back) for more stability, especially if you are moving it around a bit. Anyway, just my thoughts. Good luck!! Tim
-
Looks great! Brings back memories.
-
If you have not already done so try RD Enterprises, they are in PA r.d. enterprises ltd. Home Page (rdent.com) Tim
-
Caterham badge wanted/LOTUS badge offered
TMRL7 replied to jordway's topic in Parts For Sale / Wanted
I have this one I would be willing to swap.
-
Awesome! Very exciting!
-
I actually dipped every rivet in a dab of silicone prior to inserting.
-
@E55 Another resource for you is a deconstruction and rebuild series that had previously been available on Vimeo but is now on YouTube under Redux Garage. This is a complete disassembly and rebuild done in 13 episodes. Specifically in episode 3 he de-skins his car. I will not tell you how it all plays out but there are some twists and turns to his original plan. Hope you enjoy it, I have watched it a number of times over the years. The link below is to episode #1 Tim
-
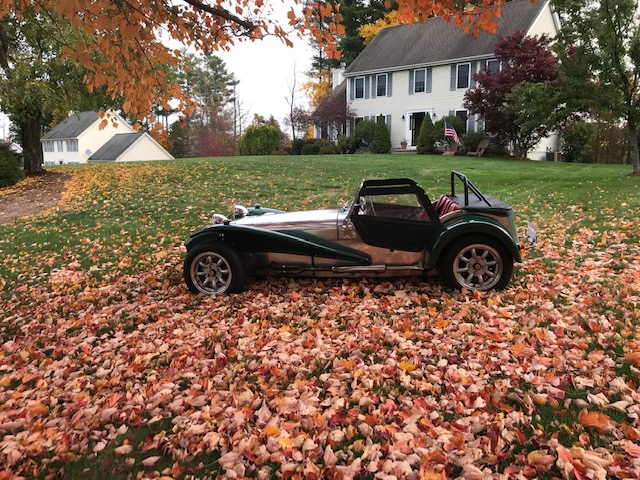
Awesome picture!
-
@vinman1 For the wiring loom you may want to consider British Wiring in Pennsylvania.
-
@E55. I acquired the side panels and the rear panel from GMT racing in CT. I used local expertise for other pieces and I made the simpler ones. The side panels came formed but required some final fitting and the rear rounded area created. The back came as a flat piece so that was professionally fit up as well. I did all the riveting. I have not yet had the seam welded up because it is nicely overlapped, very clean and completely hid by the rear wheel arch and the tonneau cover. So not a huge priority at the moment. if your car body is in reasonably good shape I would want to retain it if at all possible. As was pointed out previously refilling of the existing chassis holes is an added bit of complexity. If you keep your body panels that will be very easy to refit and match up the holes. Clecos are very handy for the paneling process. Good luck. Tim Tim
-
@Carlb. All my exterior panels were replaced and the foot box was remade as well. The floor and scuttle were retained. If you watch the video closely you will see that all the holes in the chassis were braised closed. I started with a bare frame so I did not remove the panels. I do have the originals and they are cut. My new panels do have a seam above the back wheels. @senc thanks for providing the video link. Tim
-
My project was complete body off rebuild. So I do have direct experience with this activity. I did not powder coat the chassis as I was advised that the coating might crack over time and not hold up. I had my chassis professionally media blasted and then I had high quality epoxy primer and paint applied. This seems to have worked very well. As for painting the body and then applying to the chassis I do not see how that would work. The body panels are quite fitted to the chassis and will require some slight forming even in re-application, especially the rear section, not slight. I do not see the paint withstanding that kind of treatment. Based on my experience if you need to remove the body to make repairs or paint the chassis I would very carefully do so and then re-apply and paint the body after it is all refitted. If interested you can watch my restoration video that may help give you some insight Good luck Tim.
-
Congratulations! Enjoy your car! Tim
-
As an added measure of safety I added the LED bulbs to my tail lights. The Thorpe PT675 lights are extremely difficult to find and would be ruined if the standard incandescent bulb overheated them. Of course the benefits of the LED lighting are also a consideration. I find the LED bulbs in the vintage assemblies to be a win win option. Thanks, Tim
-
Calvin, The plywood was cut to fit snugly in the dollies. The plywood did not move at all when in place but could be easily lifted in and out if needed. Also, this configuration worked well but I went to the wheels in the dollies before engine drop in.
-
Calvin, I actually used both jack stands and wheel dollies that I secured together with wood. Ultimately when I had the project on wheels I moved to just the dollies. The configuration below was actually very stable as long as the dollies are properly secured together. You can see versions of how I used the jack stands and the wheel dollies throughout my project build in the video provided.
-
Bill, I would lean towards the JB Weld product. Be pretty generous with it. Good luck. Tim.
-
Bill, My Lotus With the original radiator installed just as you described. My rad has non threaded posts that come off the bottom of the rad and I do not think they are removable. They are about 3/4” long and accept the rubber insulators (not threaded) as it inserts into the frame. Perhaps you can bond posts onto your rad? From the photo it does not appear that you have much thread depth available to screw in new threaded posts. Good luck. Tim. Solder or braze on the posts might be a good way to go.
-
Thanks James! I am glad you got some pics I did not do as good of a job at that. Tim.
-
I plan to make it to the C and C since it is an early start and I can adjust my schedule to accommodate. Hope to see many Sevens there.
-
I will be in NH on Saturday and unable to join in. I would certainly be interested in meeting up in the future. Have fun, take pictures. Thanks, Tim
-
I went to the Sudbury meet up on Saturday (10/02) and was the only Seven in attendance. I thought that I might see some of the local Seven folks there. My brother brought his TVR and we were the only two British cars. Good guys that showed interest in our cars but otherwise pretty lightly attended, when we were there anyway.

