
SENC
-
Posts
719 -
Joined
Content Type
Profiles
Forums
Store
Articles
Gallery
Events
Library
Everything posted by SENC
-
I like that idea, too. There 7 someway mimics the sngle of the windshield.
-
I like simple too. I think I'd like green better than red... and someone with some artistic talent could do a lot better, but conceptually...

-
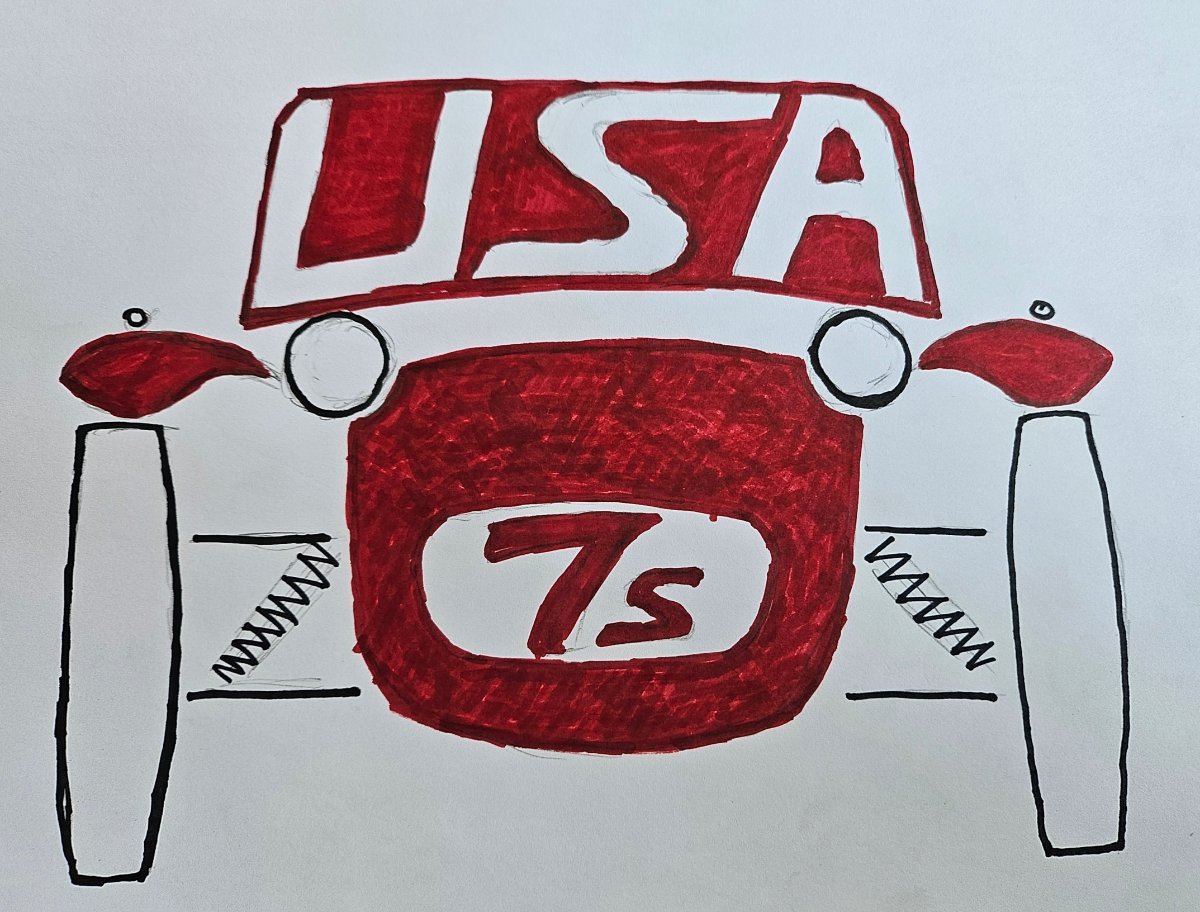
I'm no artist so can't draw or design it, but I've always thought the front view of the 7 was among it's most unique and distinctive. A more artistic rendering of the following that uses "USA" as the windshield and "7s" as the grill?
-
If they are Lotus 7 parts (vs Caterham - or other), you might reach out to Ted Taylor. He buys and resells parts for old Lotus, and is relatively close in Delaware, as I recall. http://taylormadeclassiccars.com/parts/lotuschassistypeparts.html I have no affiliation with Ted, but have bought a few used parts from him over the years. Otherwise, hopefully a MD-based member might see this and offer assistance.
-
The "2"s would be of that time. My 7 has "2"s with numbers matching the Lotus logbook.
-

End of import duty free imports under $800 for us.
SENC replied to Vovchandr's topic in General Sevens Discussion
I've had the same experience. -
I'll be at my shop later this morning and will grab a couple pictures for you for comparison, but as others have suggested I think you'd have noticed other chassis or aluminum mods if they move things back 6". The most visibly obvious would be gearshift location in the car, exhaust outlet hole in port-side aluminum, and chassis/firewall entry point for the gearbox (I don't recall exactly, but I'm certain my gearbox couldn't go backwards anywhere close to 6" before fouling on the chassis).
-
Ugh, what a loss!
-
Here's how mine was done (likely when it lived in Australia), in the event it helps...
-
I'm sure others will disagree, but if you're aligning for toe, it isn't worth huge effort to get perfectly level. Digital levels are nice, but a long spirit level or even a short spirit level on a long, flat board are perfectly sufficient if you want to get close. But IMO for toe, the main thing is to make sure the surface isn't horribly uneven/sloped and shifting the cars weight. Loading the drivers seat with body weight is more important for toe than getting level within 1/4" or so. If you're also doing camber (and caster), then sneaking up on level is more important.
-
I missed the measurement "by front tire bulge to rear tire bulge". I'm not sure how you'd determine toe in or out without 2 measurements per wheel (preferably at the wheel), and tire bulge suggests to be 1 measurement at each. Comparing front to rear rather than side to side is also confusing. Perhaps TLK can clarify and we can help better.
-
I'm an Android user (Samsung Flip), and downloaded their beta app for Android. It's not as "fancy" as the iPhone screenshots in the video, though that may also be part of buying the package. I did the initial sensor test and the app reported more variance than ideal. I then did the parallel surface test (start on a flat vertical service to get initial "lock", rotate it 10 degrees or more while keeping it on the same flat plane, return to the same vertical surface) and could see the variance visually. I think I have an app on my phone that recalibrates the gyro sensors and will play with that some tomorrow and try again, but it may be that my phone sensors have different tolerances than the iPhones for which the product appears designed. Notwithstanding the above, it's pretty easy to see how you can prove to yourself it would (or wouldn't) be accurate enough for you by mimicking the movements and choosing 2 known parallel surfaces for the 4 wheel readings. I'd be interested in findings of others, if you try it out. Very cool and simple. Hope I can get it to work on my phone or that future software enhancements allow calibration to more phone/sensors types.
-
Now that is a cool product! Have you (or anyone else here) tried it? I may download the app just to check it out.
-
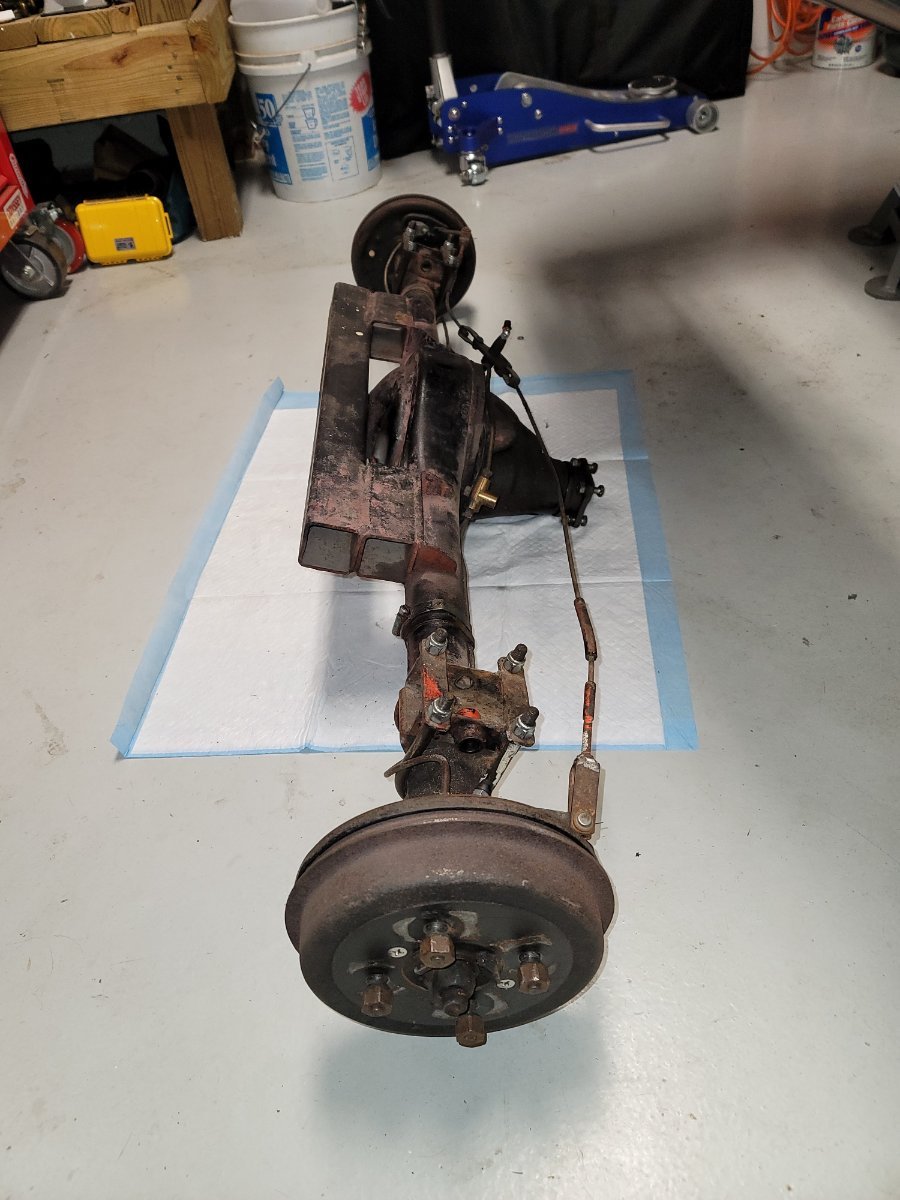
Are you saying there is rear toe-in only one 1 side? Assuming you have the Standard 10 live axle that would suggest to me an issue with axle location, perhaps from a bent or incorrectly installed radius arm? But I would expect toe-out on the opposite side in this case - and a tracking issue. If you're saying you have toe-in on both sides, then probably as designed. I don't remember checking mine. The live axle doesn't have provision for toe adjustment. But if you look at other Lotus of the period (like the Europa) that have independent rear suspension with ability to adjust, the manual specs are for a small toe-in (1/8" on the S2 Europa).
-
-
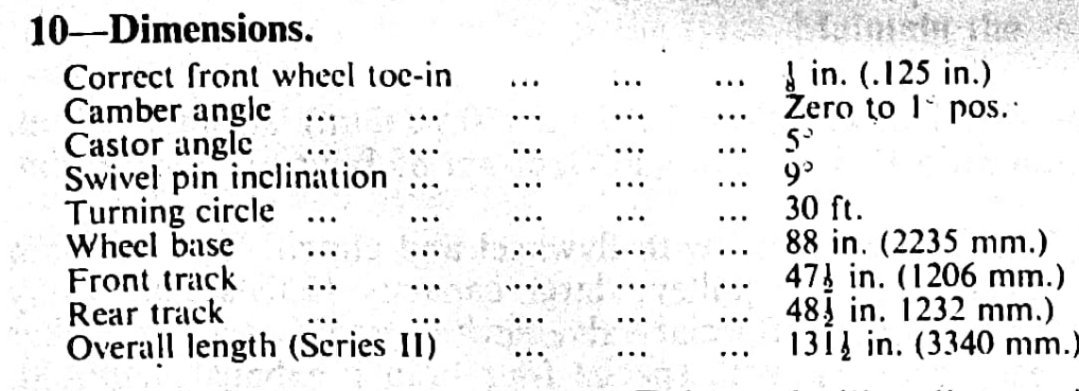
I'll take a look through my files later today to see if I have an instruction document, but it is pretty simple on early Sevens. Look for the string method for front end alignment as a simple way to measure alignment. Adjustment is by rotating track rods. My recollection is that toe-in should be 1/8" (in total, so half each side), but I'll see what I have to confirm that if you can't find it in the shop manual.
-
Great news, Al!
-
I ran into similar frequently immediately post-Brexit, and some smaller companies still don't have systems updated to suit their compliance folks about staying within trade/tariff/tax rules so still take this stance. So, may not be liability-relatwd. I believe I'd just call them, explain that you're currently in the US but would like to purchase and have the item shipped to your (forward2me) British address but the system is stopping you due to your current location. You'll get charged VAT, but that may be a small price to get what you need.
-
The Regular Summary of Classified Ads of Se7ens Found For Sale
SENC replied to Croc's topic in Cars For Sale
Sold for just under $40k - seems about right. -
The Regular Summary of Classified Ads of Se7ens Found For Sale
SENC replied to Croc's topic in Cars For Sale
Just saw this one and was coming to post it - a great-looking example! -
Great pics, hate I couldn't get there!
-
LOG overlaps with an annual trip to S TX with friends, so I'll be coming through Austin but not with either Lotus nor doing LOG, unfortunately. I have to leave my gathering in Uvalde on Saturday rather than Sunday to begin the trek back to NC - so if timing allows I may try to slip through on Saturday. If not, I hope to see plenty of Lotus on the road. Hope you all have a great time. Henry
-
Which DCOE40 type? I just read yesterday a comment elsewhere that the posts from which the floats hang were different length in early DCOE40s (that used brass) than later. Conceptually it shouldn't matter as you can adjust the flange on the floats to achieve the level you want. I wouldn't change them unless you have a known reason to do so (brass can develop holes and hold gas, pin is bent or worn and float can't move freely or alternately be too loose and jiggly, etc). Check your fuel level in both carbs from the top after letting it idle. Remove a main jet and tube in each and look down from above with a light. Part way down you should see the orifice through which gas is pulled into the venturi - it's a good reference point for comparing fuel levels across carbs. Alternately use a paper matchstick or similar to actually measure and compare. If they are different that might suggest one of them has a float issue to investigate.
-
I use ethanol free unleaded at the highest octane level (no problem finding it in southern US states as it is heavily used for yard and farm equipment - maybe find out where farmers buy gas for their non-diesel equipment?). I do add Redline lead substitute just as a precautions though I've been told it isn't really an issue on our engines. I've periodically bought Sunoco "race fuel" - they have a wise variety including some specifically for older (non-racing) engines. My car loves the 104/105, but it is expensive and technically not road legal so I don't use it much.
-
I think "wind" is not the buffeting issue, rather the extreme low pressure pulling in air. In other words the more you block the wind, the more you're increasing low pressure in the cockpit and the more buffeting introduced. Thus, brooklands type screens increase wind but decrease buffeting relative to full windscreens. I have wind deflectors from Redline and at certain speeds they do help - but mainly by moving the air flow eddies slightly rather than blocking wind. I suspect the real answer to addressing the issue when using a full windscreen is not attempting to block more wind but in finding other ways to get air into the cockpit to increase air pressure behind the screen and reduce buffeting from the side and rear. I've not yet gotten around to trying to develop some sort of scoop to attach to the windshield (like those for Miatas) to pull in air and distribute it down and outward, but thay might be beneficial. I also like the idea someone else here implemented of a scoop below the car ducting air into each footwear. My bet is either would be multiples better than the side deflectors.