Rosteri
-
Posts
179 -
Joined
-
Last visited
Content Type
Profiles
Forums
Store
Articles
Gallery
Events
Library
Everything posted by Rosteri
-
Mating Transmission to Engine, need tips and tricks
Rosteri replied to TexasDreamer's topic in General Tech
Since everything is still on the floor, you could first align the clutch with the transmission itself - just take the bellhousing off. At the same time you can also check the distance between engine and transmission. -
Stick position as delivered: Installed backwards with the pushrod shortened by 38.5 mm: The pull direction is much better. This is the only other Sadev to Caterham thread that I found: https://www.pistonheads.com/gassing/topic.asp?h=0&f=101&t=1425357&p=1 It was extremely valuable (I copied a lot of the tricks) and it was the main trigger for me to consider a Sadev in the first place.

-
Mating Transmission to Engine, need tips and tricks
Rosteri replied to TexasDreamer's topic in General Tech
I had no luck with the plastic alignement tool, it simply was not tight enough to really align the clutch. I now use a cut off splined tip of an old T9 input shaft as my alignment tool. -
And its in. And it is tight. I still need to connect the shift lever cable and I can’t even reach the point with my hand, so I need to lift the package back up a little. Now would be a good point to consider the stick flip…
-
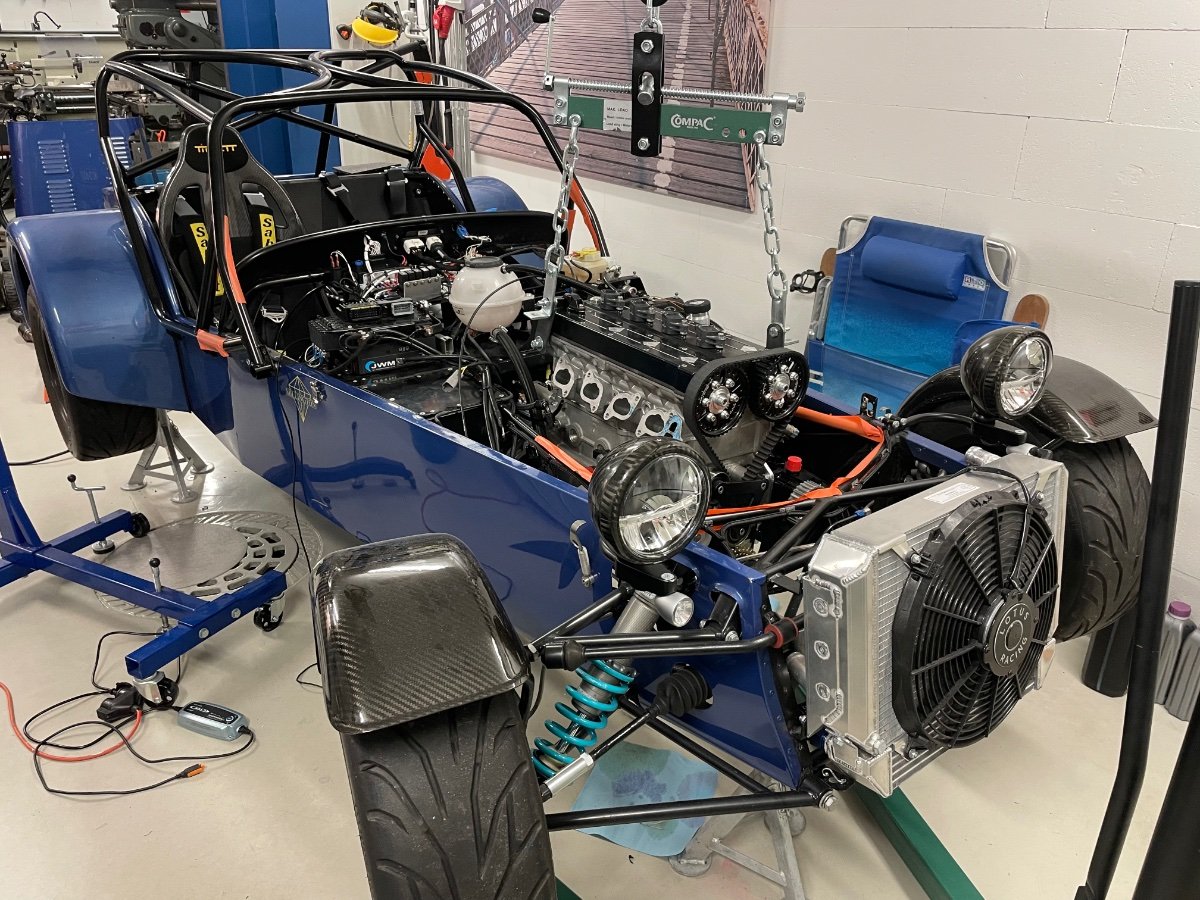
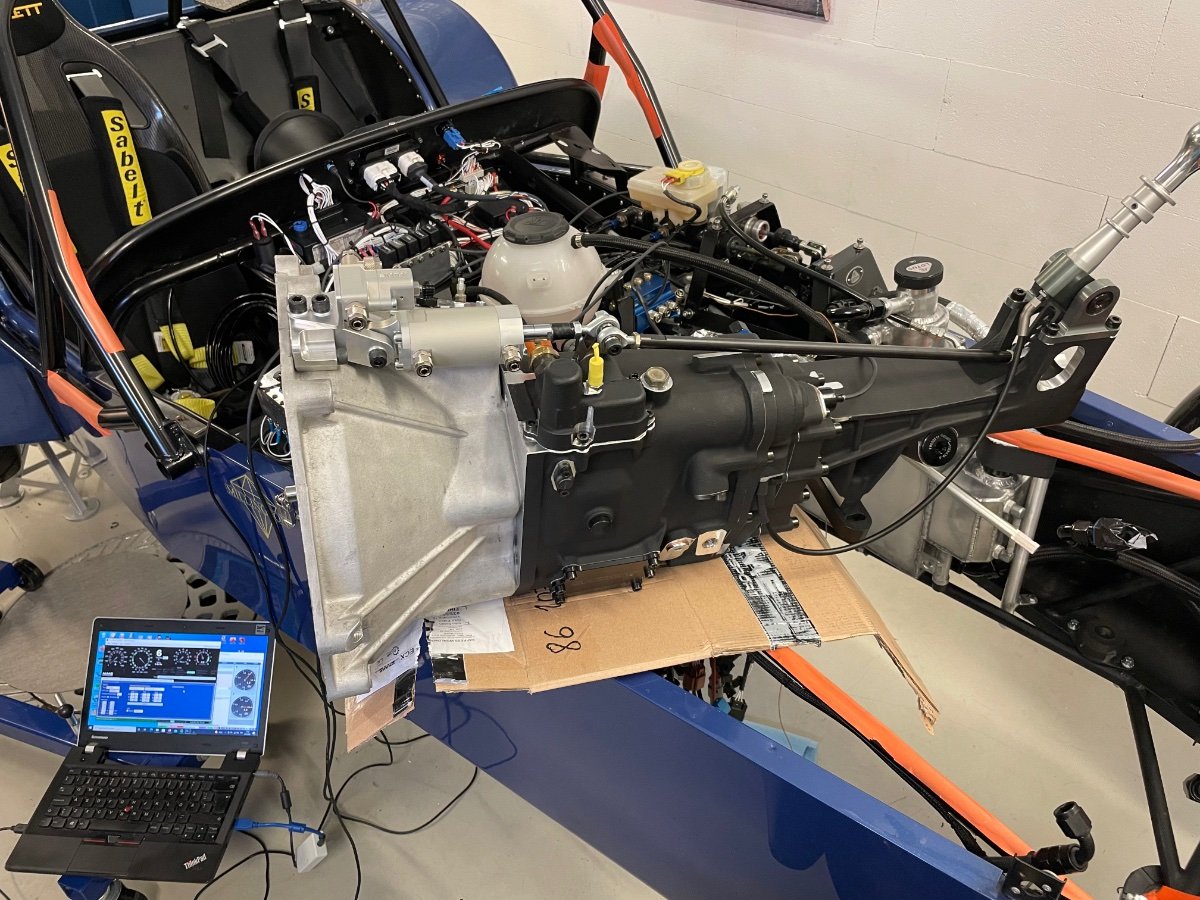
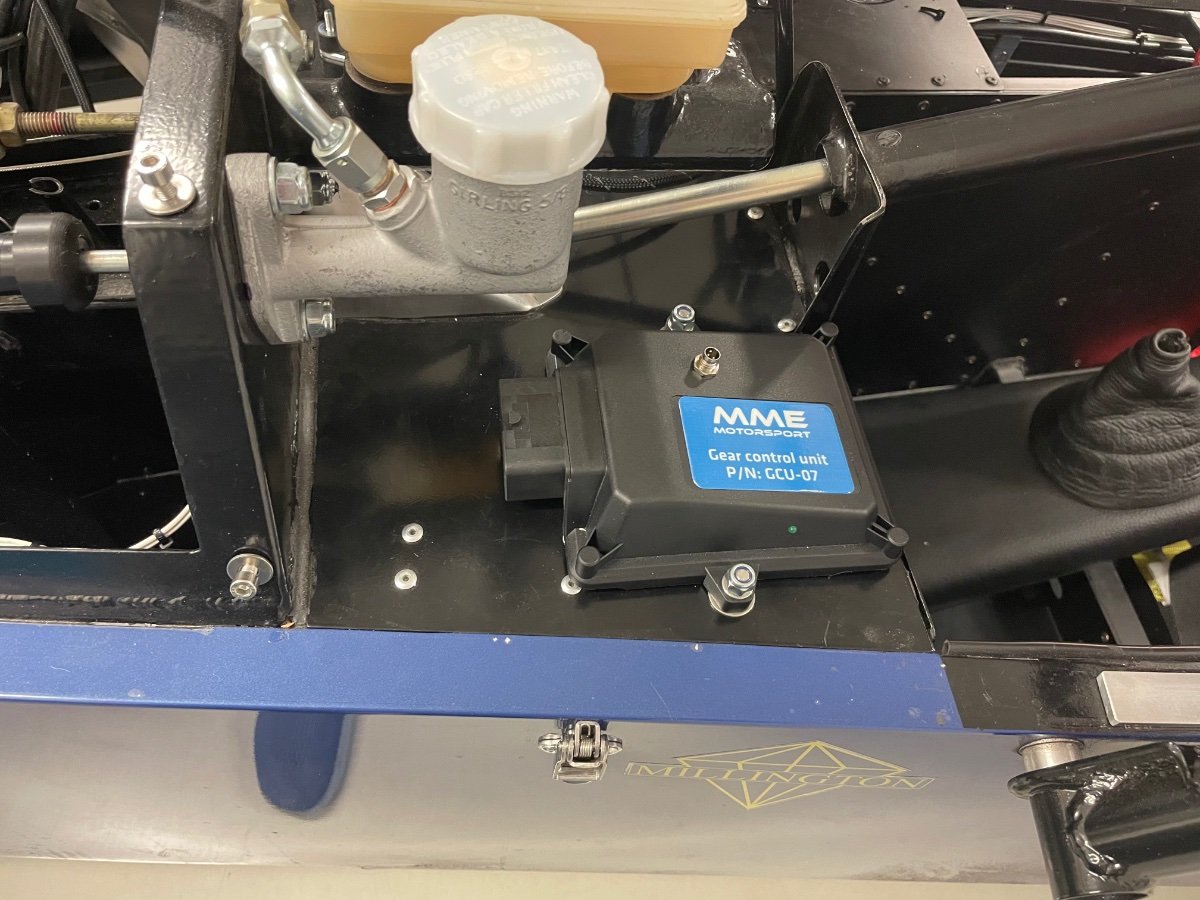
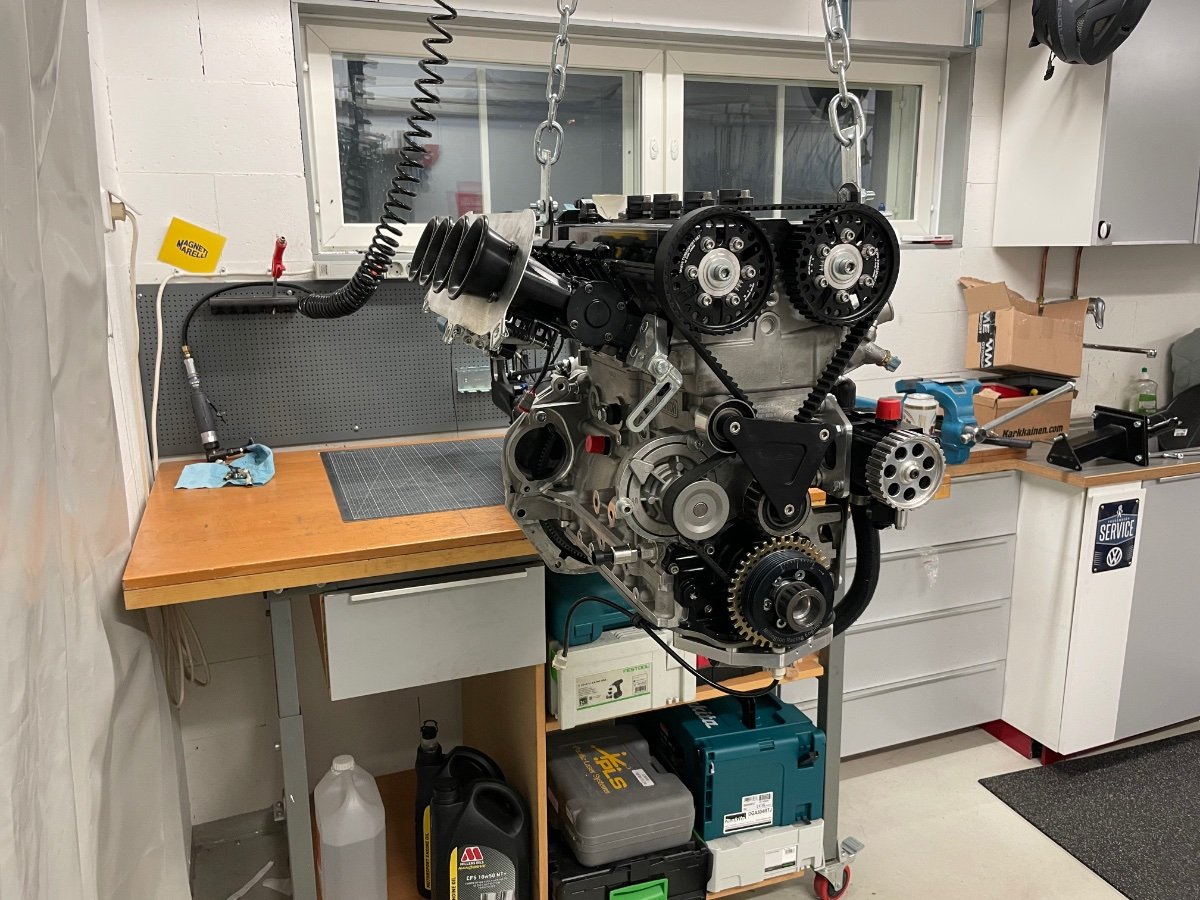
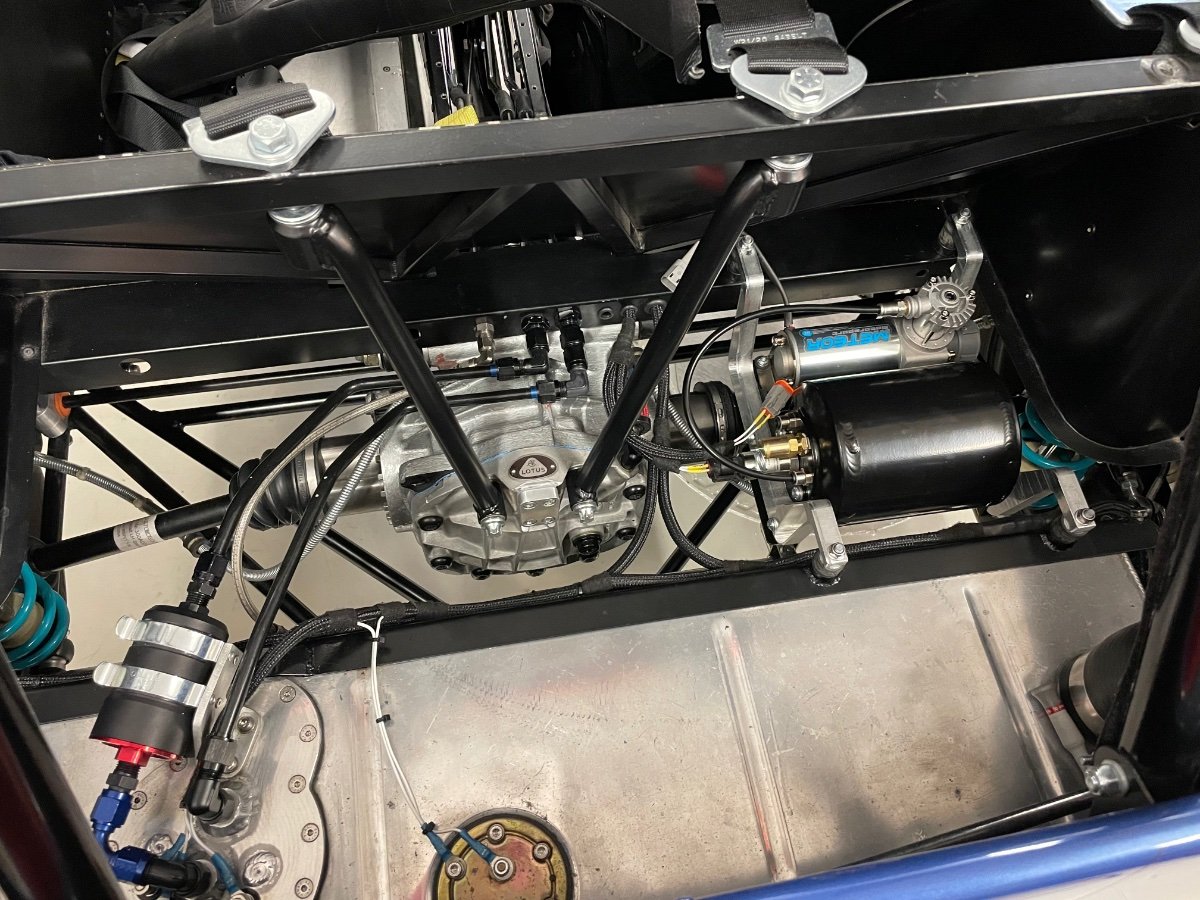
Good progress again. I made the gearbox loom last night, it looks so innocent, but it took 6-8 hours, even when I had the chassis and ECU loom prepared and ready to go with connectors: And testing all functions was a positive surprise - the CAN connection, ECU connections and gearbox sensors all worked without issues. The gears are now calibrated on both the ECU and GCU and AIM displays the selected gear nicely via the ECU can stream. Marko from MME also recommended to use the pneumatic actuator as the end stops of the gear shift and not the gearbox, and once I have that adjusted, then the gearbox and engine are ok to be installed into the car. Summer, here we come! Edit: Adjusted pneumatic actuator stroke to 23 mm.
-
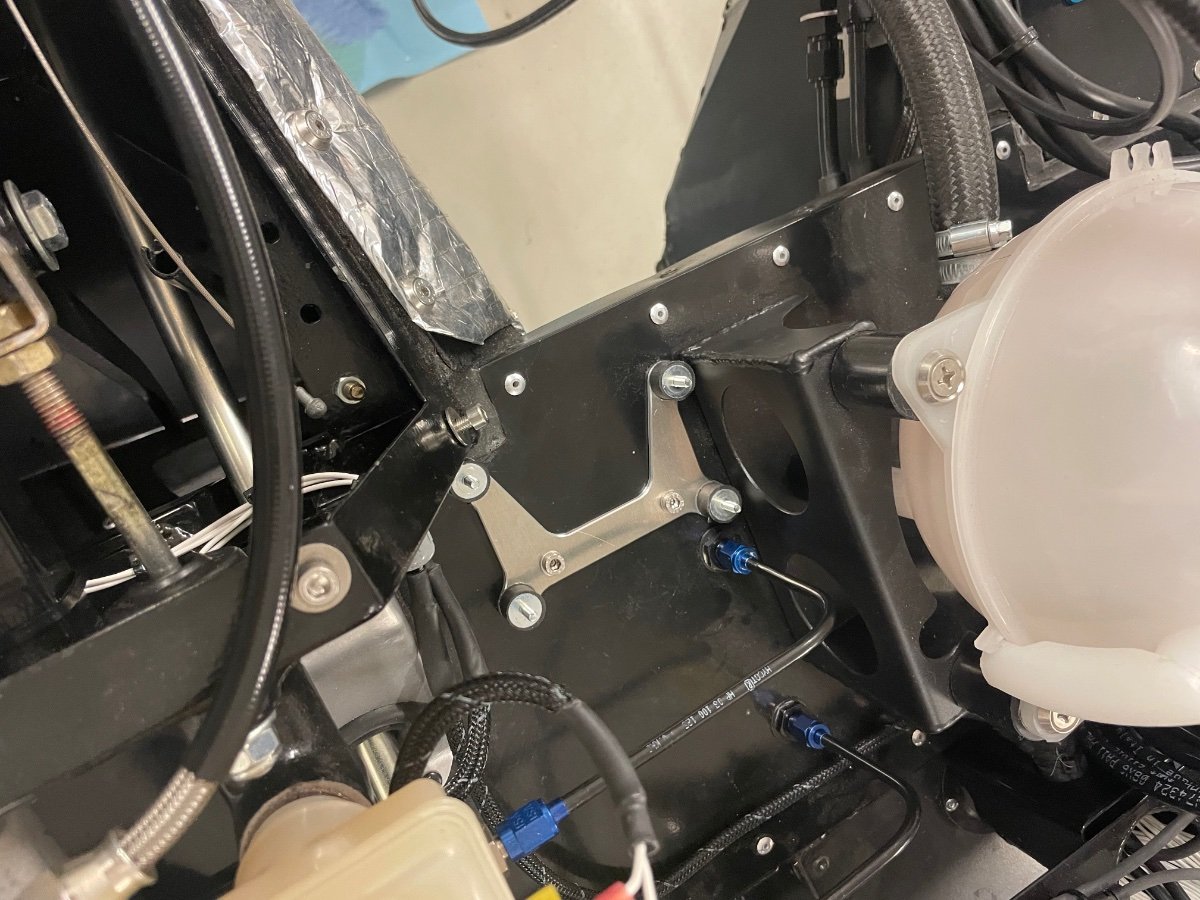
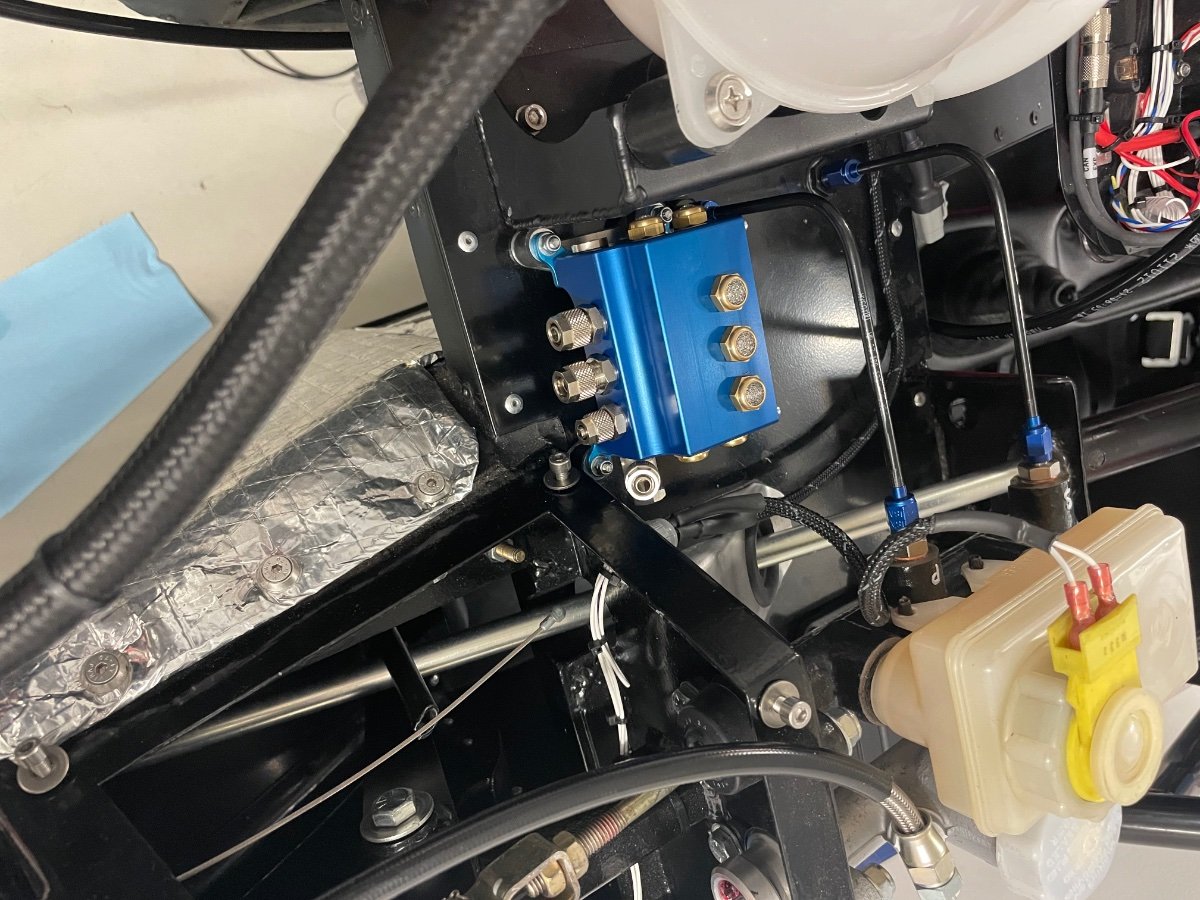
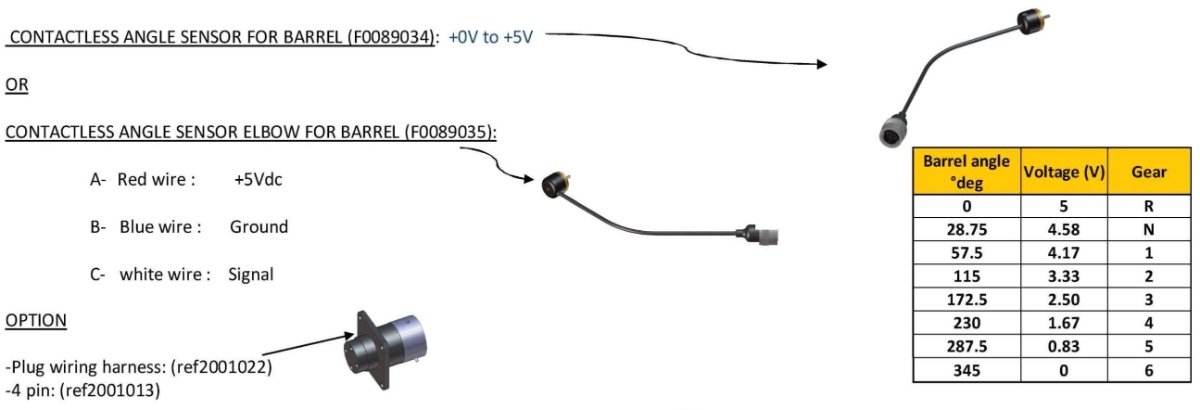
The GCU and the valve block found their place as well Sadev GPS is a hall sensor and I could not find information on the pin-out in the right manual. Some other Sadev box had this info, the connector pins are labeled A-D:
-
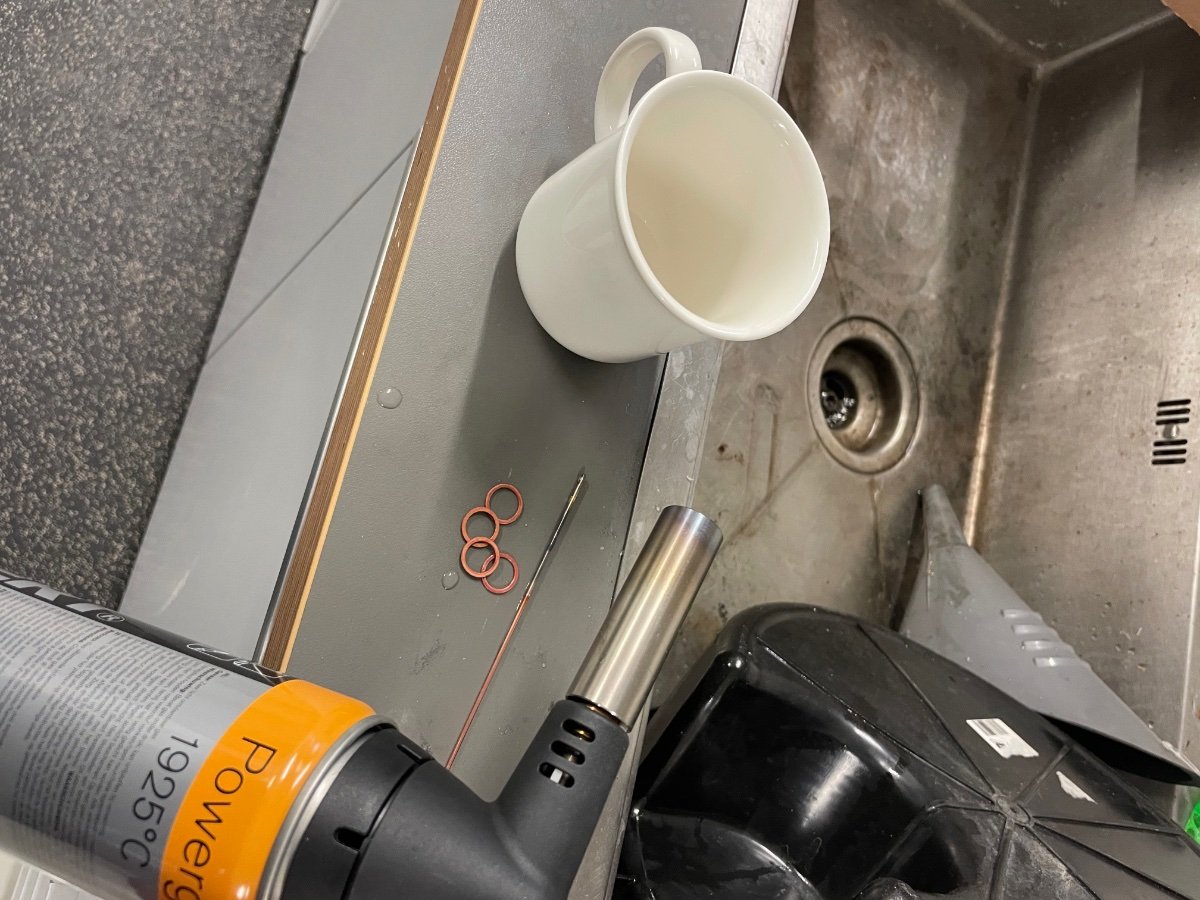
And a warm recommendation for everyone using copper washers - heat treat every one of them prior to assembly to ensure they are soft enough to seal. Butane torch, glowing red and drop into water. One hose had to be extended by 20 mm. AN4 for master to slave and AN3 for bleed.
-
We all have our soft spots… 😀
-
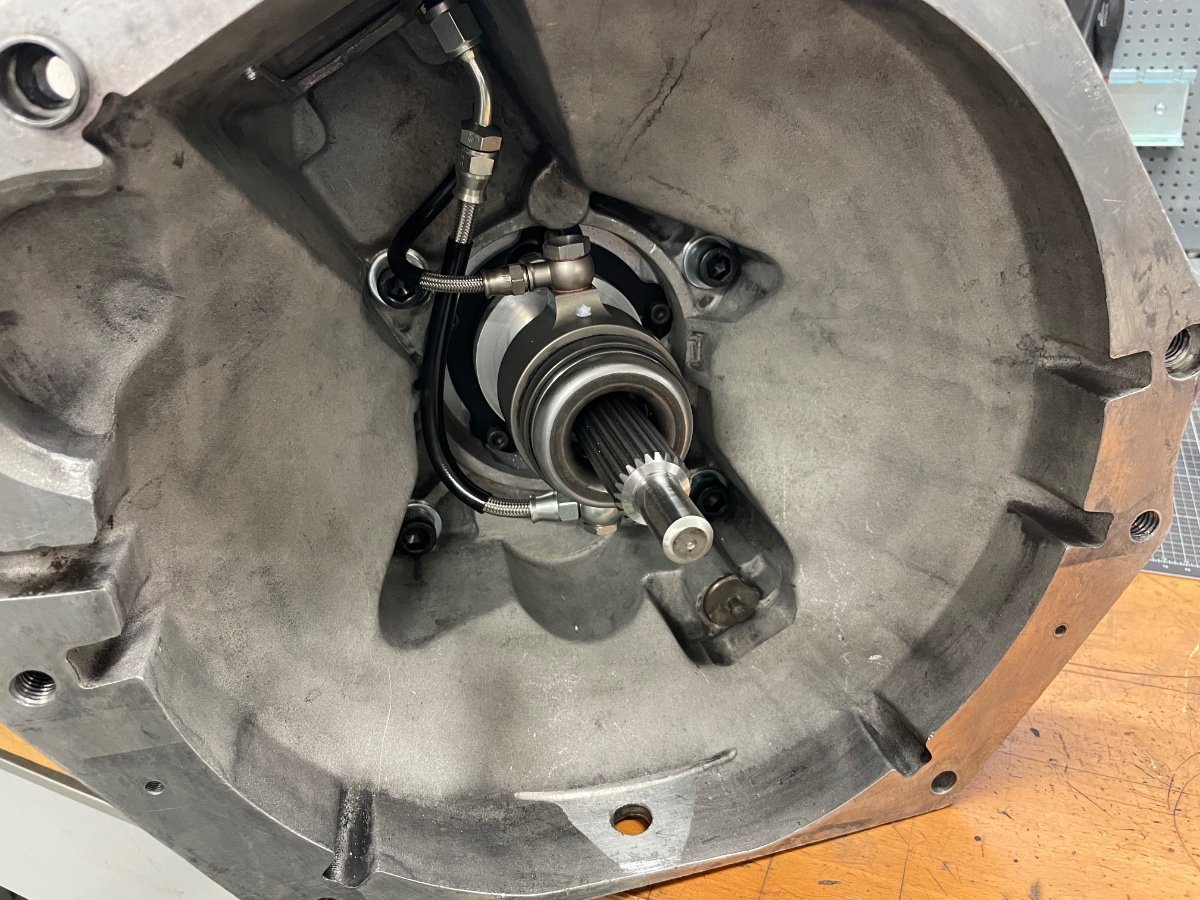
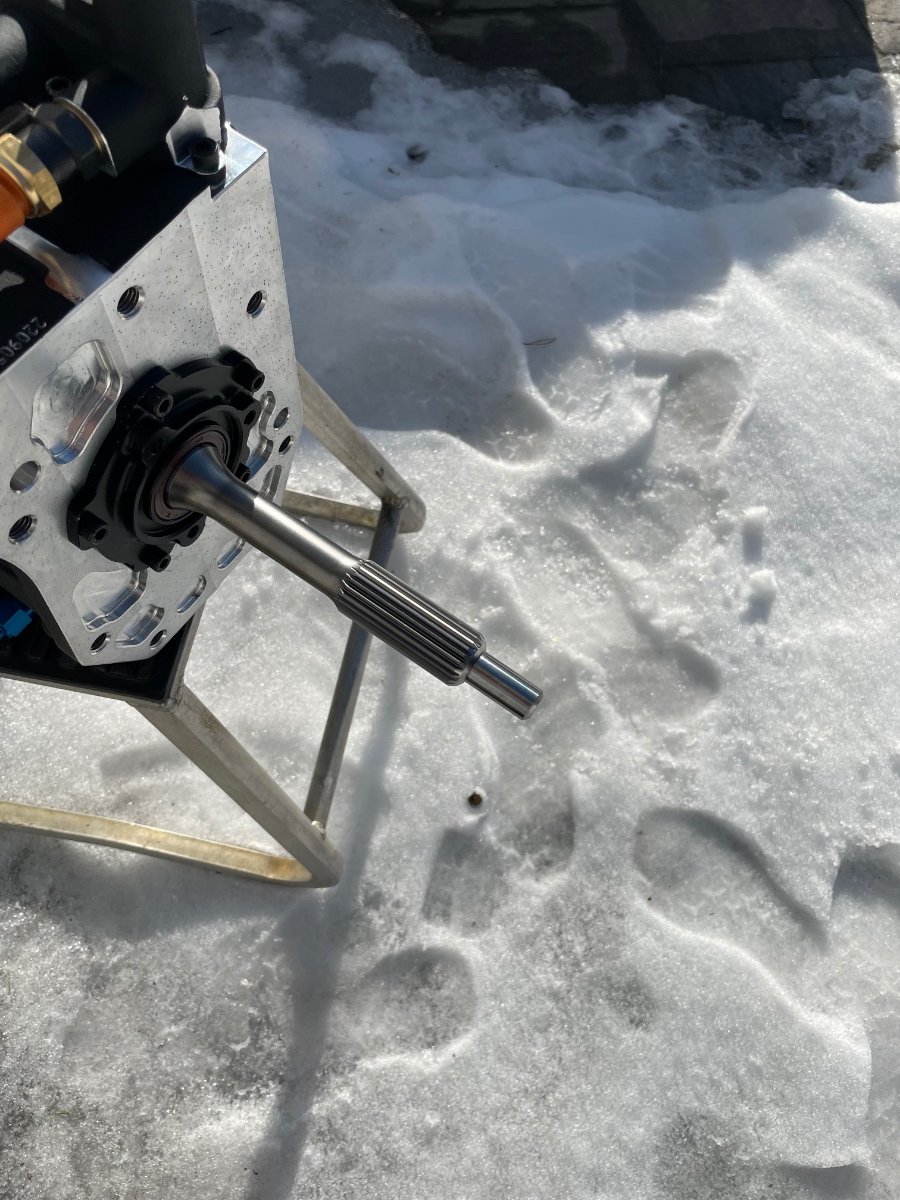
And the dimensions fit - the clutch plates end where the caliper base is, also the center bearing has a few millimeters air.
-
They do look like a match made in heaven! Clutch slave adjusted to touch:
-
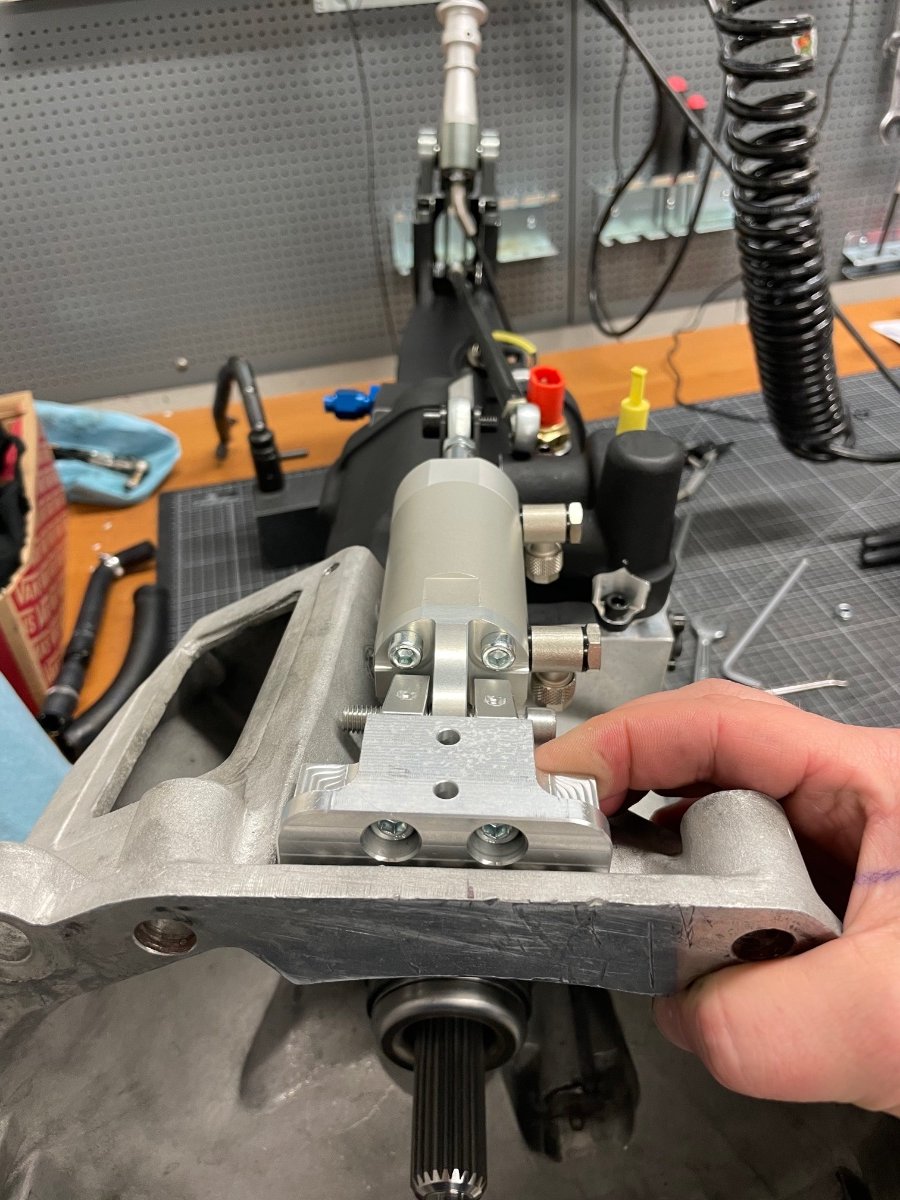
I added one 1 mm spacer into the actuator to reduce max stroke to 24 mm. While doing it I realized, that by turning the actuator piston shaft the uniball can be adjusted accurately… no half turn steps needed here 😙 I also repositioned the clutch input and bleed and simply filled the old holes with J-B Weld, then made a cover for the bellhousing - I did drop a screw in last summer.
-
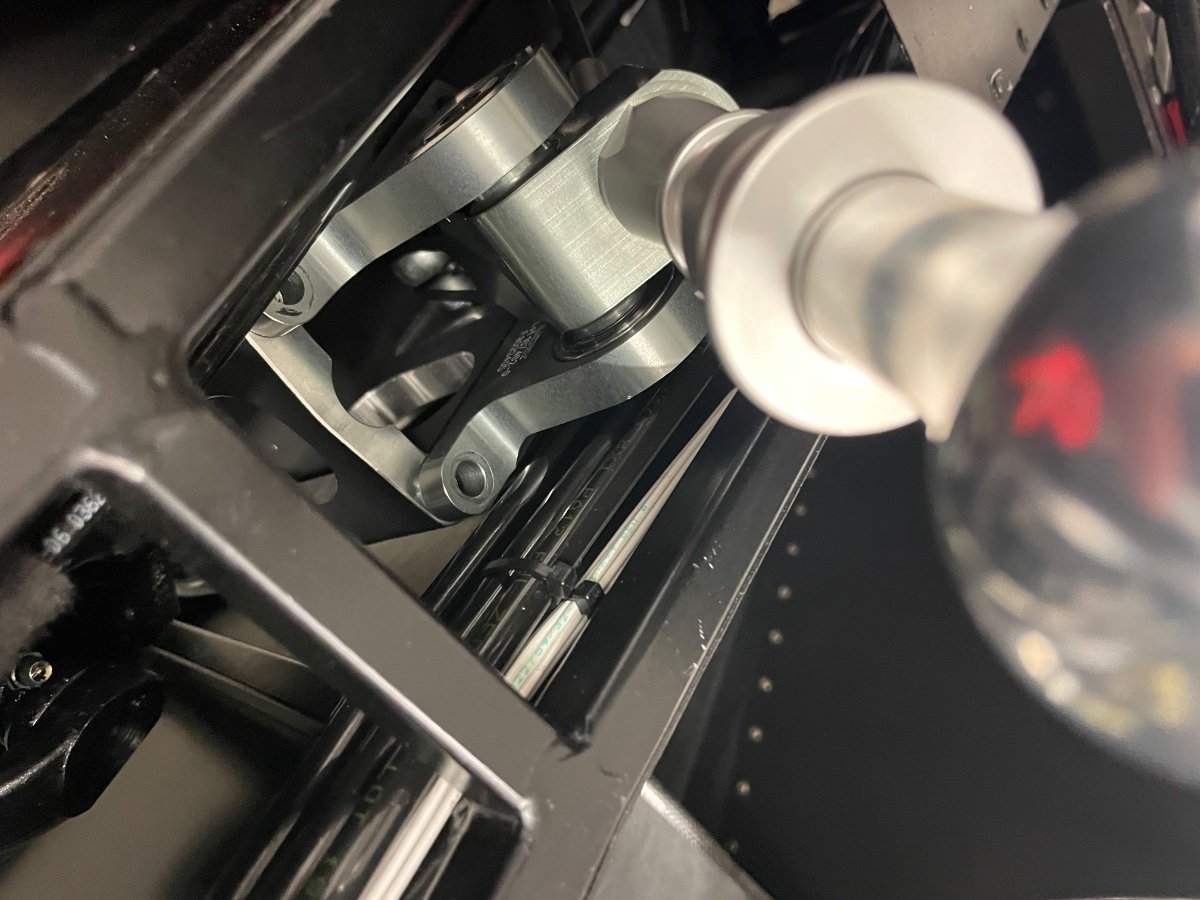
The actuator bracket is now mounted with 4 * M8 bolts to threaded holes and I also made a small steel extension so the uniball reaches the Sadev gear lever. Next I’m trying to work out the length of the stroke to match the Sadev - the thinnest spacer to limit the max travel is 0.5 mm and the M8 of the uniball has a 1.25mm pitch, so half a rotation of the uniball is 0.63 mm. So not that accurate. What I don’t know is, do I try to reach the Sadev lever movement just below its endpoints (to limit stress to it) or slightly over (to ensure a positive gear change)? Also an interesting finding, that one can’t change gears without the input shaft rotating. So no more easy gear changes engine off… The regulator finally found its place - on top of the actuator, this way I can keep full pressure in the long hose from the compressor and only a short segment of operating pressure to the valve block. And it looks cool.
-
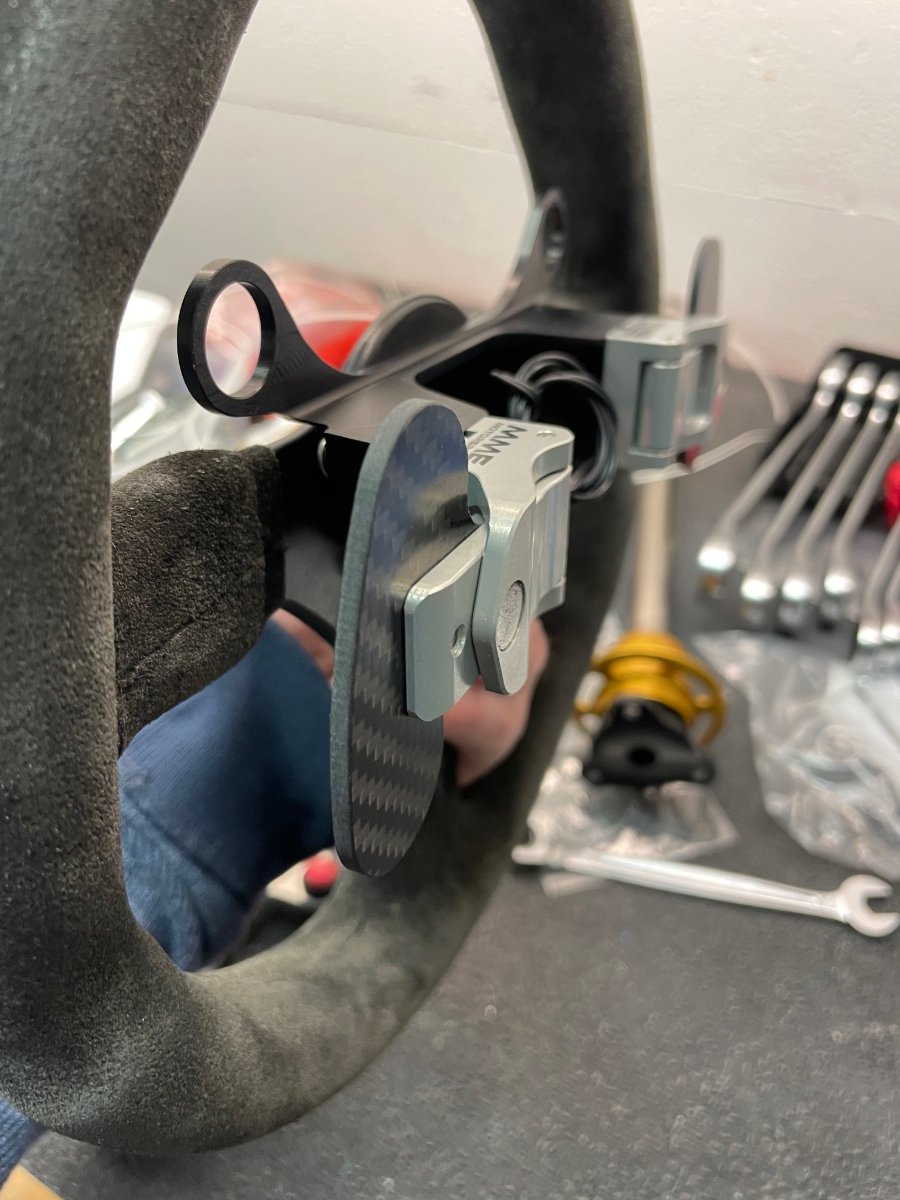
The gear shifter will move with the paddles. With the gear shifter I can also do full throttle upshifts (closed loop) and normal clutched shifts, and the only downside is, that I I have to keep the mechanical shift lock on the lever, so neutral/reverse only with the shifter and not with paddles for now. My main reason to keep the shifter is that I can test the car first without having to worry about the paddle setup / software. If I never end up using the shifter, then the current setup allows me just to remove the shifter and program neutral/reverse with paddles. I will anyway wire a clutch switch and a second N/R switch to the steering wheel, and both have to be depressed for neutral/reverse when using the paddles (without stick mounted that is).
-
I also made a bracket for the pressure regulator - space is really limited in this tiny car, so I think I’ll put it in the trunk as well. I saved weight by replacing the pressure cover with the bracket… 😎 And the pneumatic throttle blipper for downshifting found its place:
-
After more measuring I decided to go with the 25mm max travel version after all, as I can control the needed max stroke also with the angle of the gearbox lever. Mounting the actuator is a little tricky due to the bellhousing shape, but I think I now have a plan.
-
First check on the actuator placement. MME sent me accidentally a +/- 12.5 mm (25mm) actuator, while I ordered a 50mm actuator. The stroke can be reduced with internal spacers. I measured the Sadev lever stroke and it is actually 25mm in total, so this one *could* work, but with very little margin for error. Space is also limited above the gearbox, so I most likely need a rod extension to move it a few centimeters towards the engine for a more horizontal position. -> I’ll wait for MME to send me the longer version.
-
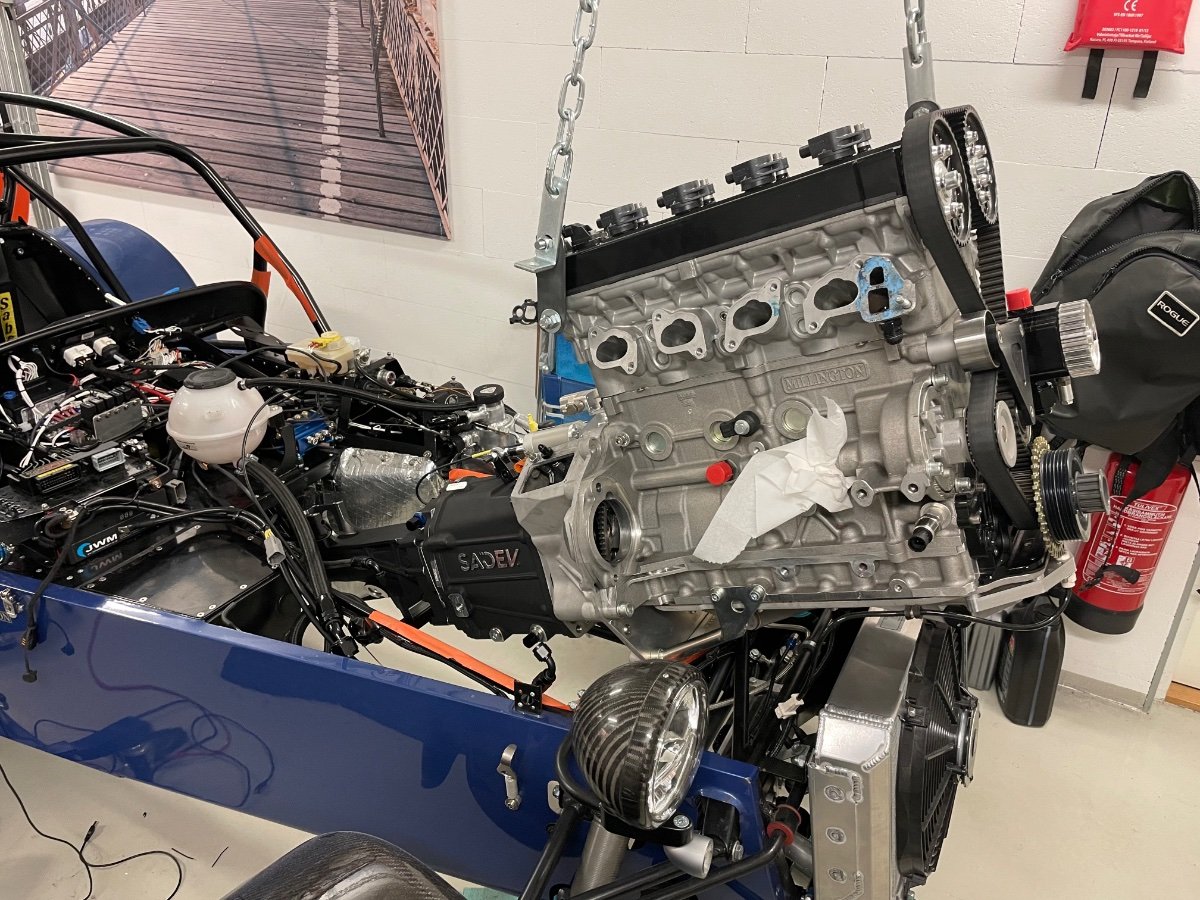
The Sadev price includes a custom input shaft - I was kind to them and specified an off the shelf shaft with a shortened center bearing tip, but they just delivered the standard. Thanks Sadev… nothing beats the feeling of using an angle grinder on your new 10k purchase.
-
And the mechanical parts of the steering are now sorted as well - it looks and feels great. Testing a new vacuum attachment for plate machining on the cnc seems to work fine for one off parts - I leave 0.12mm final material thickness, which keeps the vacuum intact and it can then be cut/removed with a knife.
-
Clutch slave adapter next… I really like the Turbosport setup, as the slave is on an M42x1.5 thread. The setup is attach engine to gearbox, then unscrew the slave until it touches the clutch, then back-up 2 rotations and lock it with a setscrew. The Sadev is designed for a Saab 900 / AP slave, so I need something like this: First operation was with a lathe to make this: Then with my Abene milling machine some flats for the setscrew and for holding it with a vice in the next step: And then the rest with a CNC: The result:
-
Ah, thanks John, I did not consider that! I checked and there is space, this will make it much easier. And the neutral/reverse button could go under the MOMO logo.
-
A small setback, as the speedo output on the Sadev was empty, even though it was checked that it would be functional at order. The first thing will be designing and making parts to fit my hydraulic clutch. The MME delivery arrived as well, lot’s of cool stuff in the house… The paddle system was for a 280-300 mm steering wheel, and I have a 260 mm one. So quite a bit of mods here as well, but that was no surprise. But I was hoping, that the top button mounts (indicators in my case) would be ok, but no space for fingers.. The quick release ring for the steering wheel won’t fit either, but it looks like a little material removal will do.
-
Finally!!
-
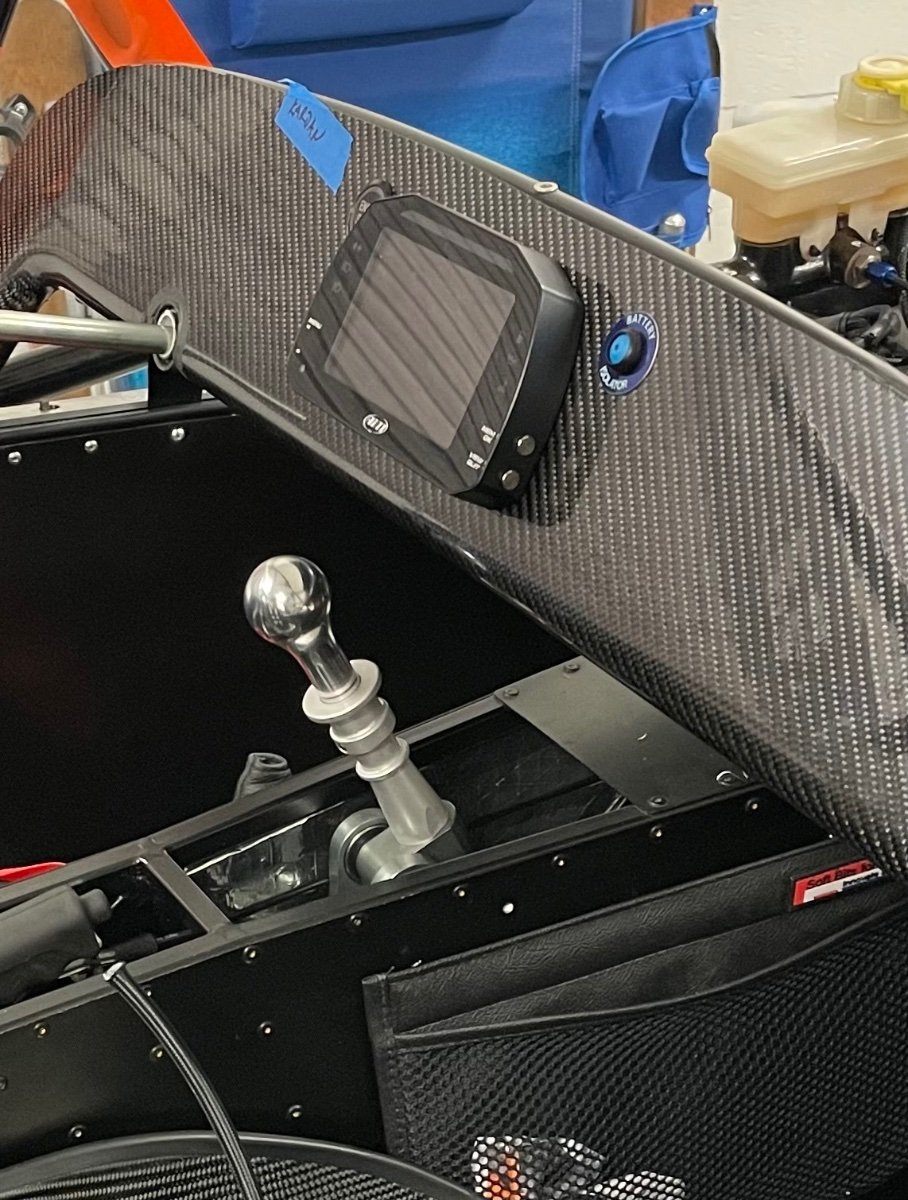
Happy days! The compressor is now controlled by the ECU: Compressor ON if air pressure is below 10 bar AND engine rpm over 500. The AIM display receives the Variohm air pressure sensor voltage (500-4500 mV) from the ECU via CAN (ECU Analog input channel) and uses then a math channel to convert it into pressure (bar).
-
Yes, a Formlabs here as well
-
Wow, that is a nice looking panel!