Rosteri
-
Posts
179 -
Joined
-
Last visited
Content Type
Profiles
Forums
Store
Articles
Gallery
Events
Library
Everything posted by Rosteri
-
As you pointed out 16 awg is just fine for 10 amps and 255 LPH is still a relatively modest pump, so at least I wouldn’t stress about it.
-
I agree, those TPS spikes are weird. But again, I troubleshooted 3 hours at a dyno $$ rate my camshaft trigger failure, which was just a result of the engine missfiring due to no fuel… 😉
-
John, the high pressure pump works at full speed all the time in connection with the fuel regulator, so engine idle/full speed shouldn’t make a difference if it stalls or not. But anyway, it is an easy check when you get the pump back.
-
John, my transfer pump turned off at the dyno (my fault), so the pressure pump struggled to keep up pressure (low fuel level in swirl pot) and it caused loads of sensor faults and ecu warnings due to missifire, which we unfortunately started troubleshooting before we noticed the fuel pressure. Pressure pumps are really bad in sucking, so I’d try without that collector mat first.
-
This is exactly what I tried to write - when reapplying, just attach the strip back in place as individual pieces and there will be no tension. The weights are not designed to have the needed spacing for 13” wheels.
-
John, at least with my 13” wheels none of the adhesive wheel weights that I had curved enough when attached like in your picture - they all fell off. One has to cut the weights into individual piece before sticking them on. Congrats on the first drive!
-
Yes, new discs have already been machined, just missing the cylinders.
-
Thanks for posting the pictures, very interesting!
-
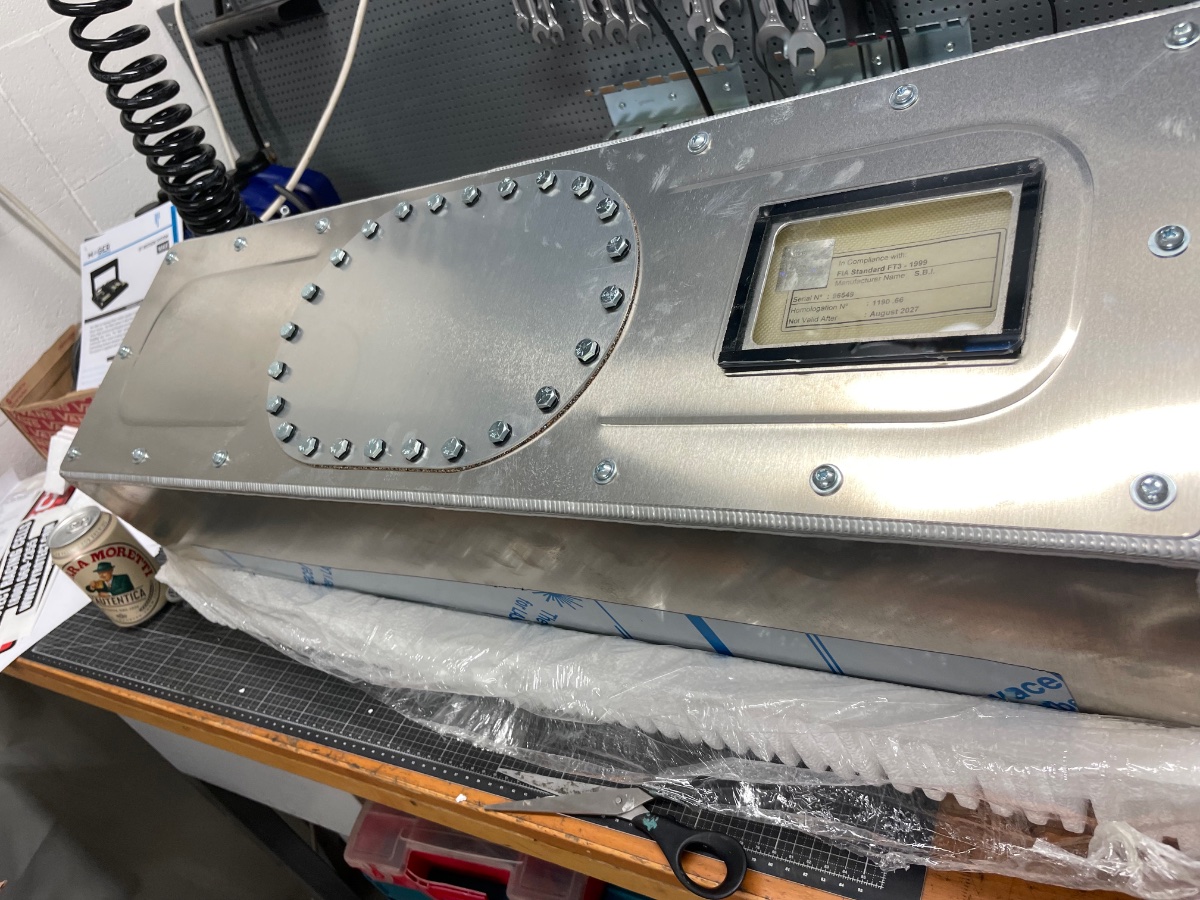
Just an opening to see the bladder information - the aluminium container itself is not meant to contain fluid, it just provides some physical protection.
-
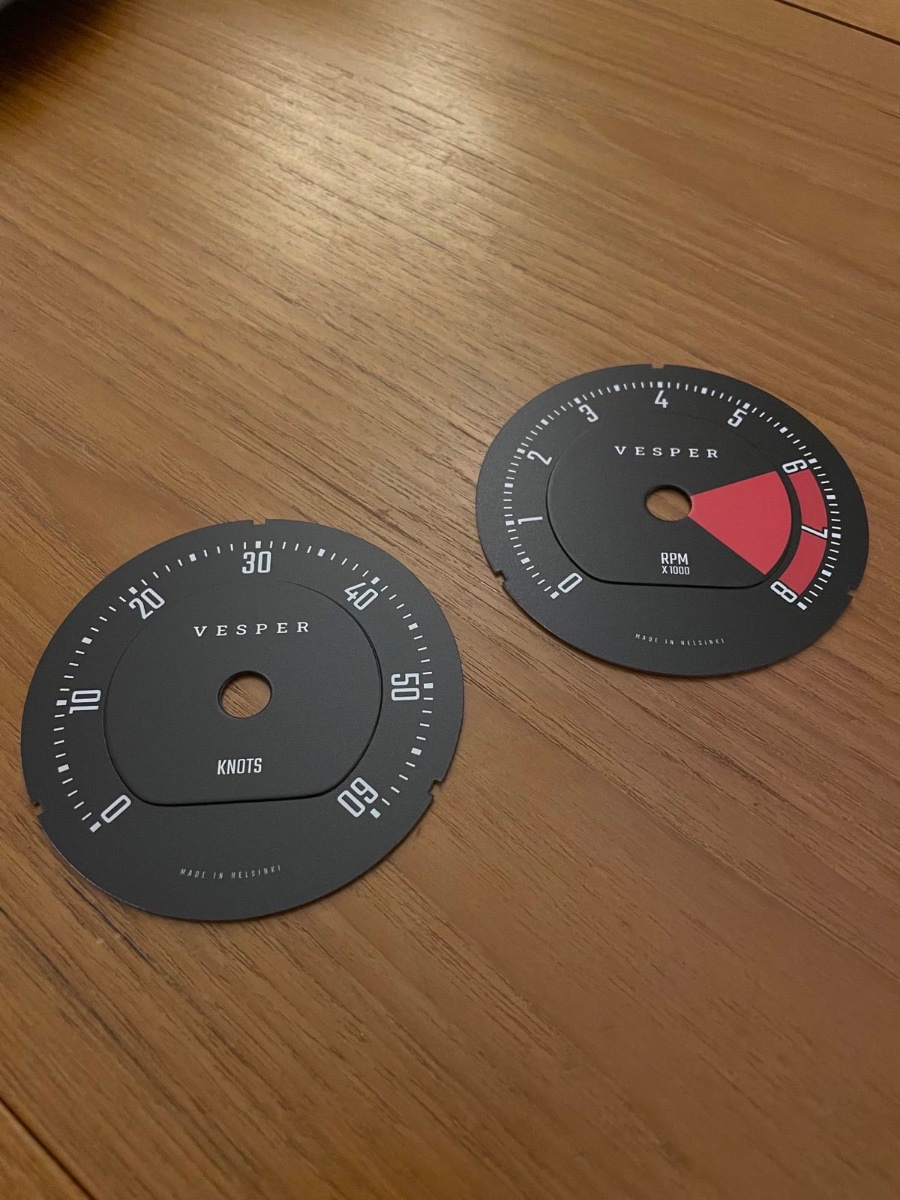
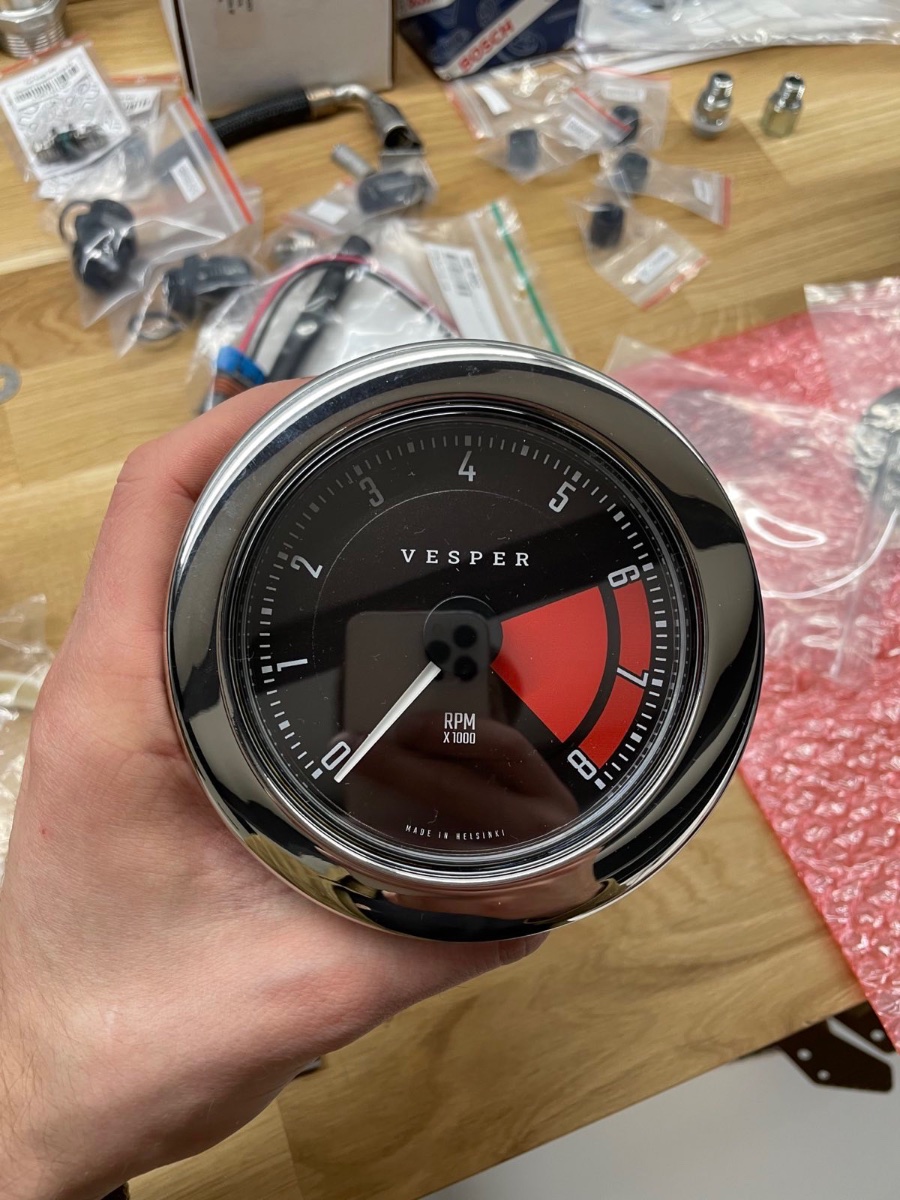
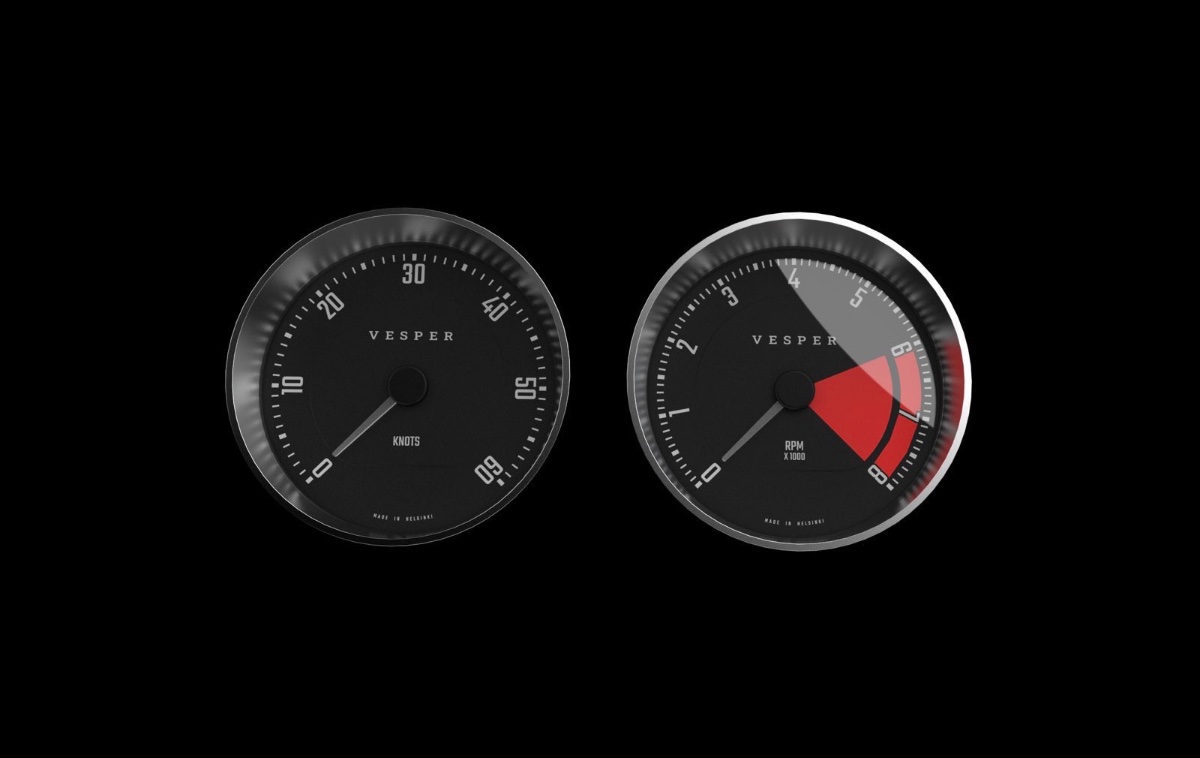
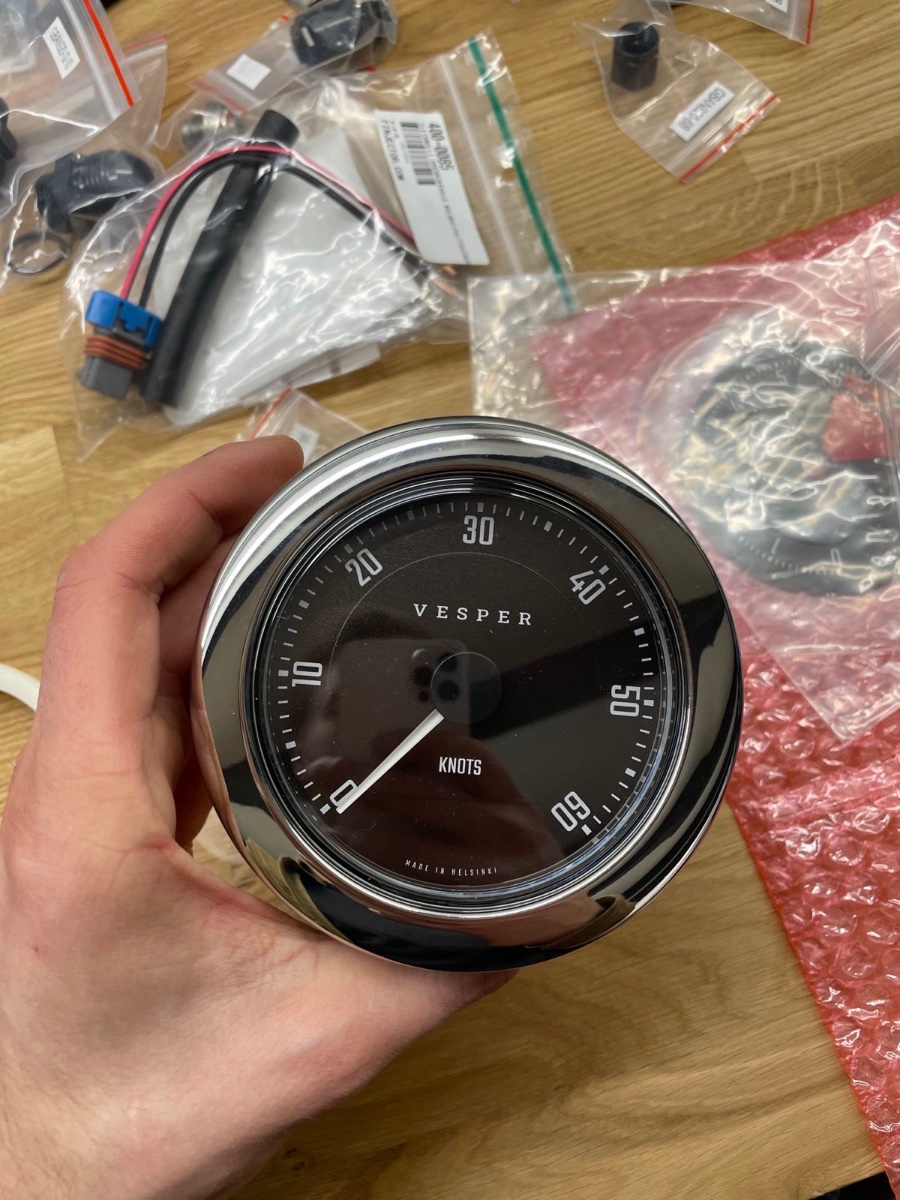
We made instruments for our boat project (Vesper) just as MV8 proposed, i.e. purchased new KUS GPS instruments, that have a removable screw on bezel and made new dials. I tried to find shops that would make the dials, but no luck. In the end we used a UV printer available for free at a local library and the base was a 1 mm clear acrylic. We had the dials still attached to a sheed with tiny tabs for alingment and printed directly on the acrylic. The quality is great, not good enough for a watch, but worked for the dials. Design: Prints: Assembly: For the bezels we might still make custom ones. And yes, we also made all the small ones, like oil pressure etc…

-
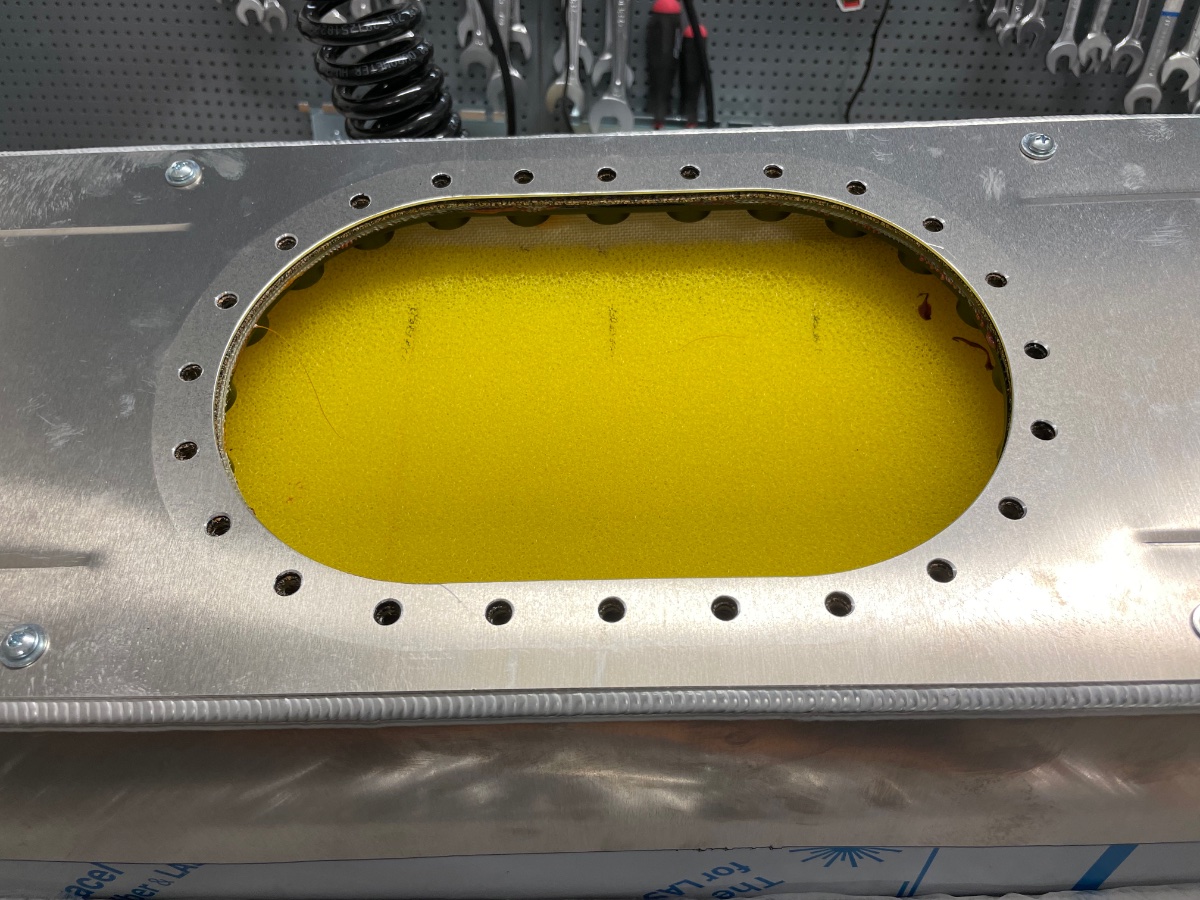
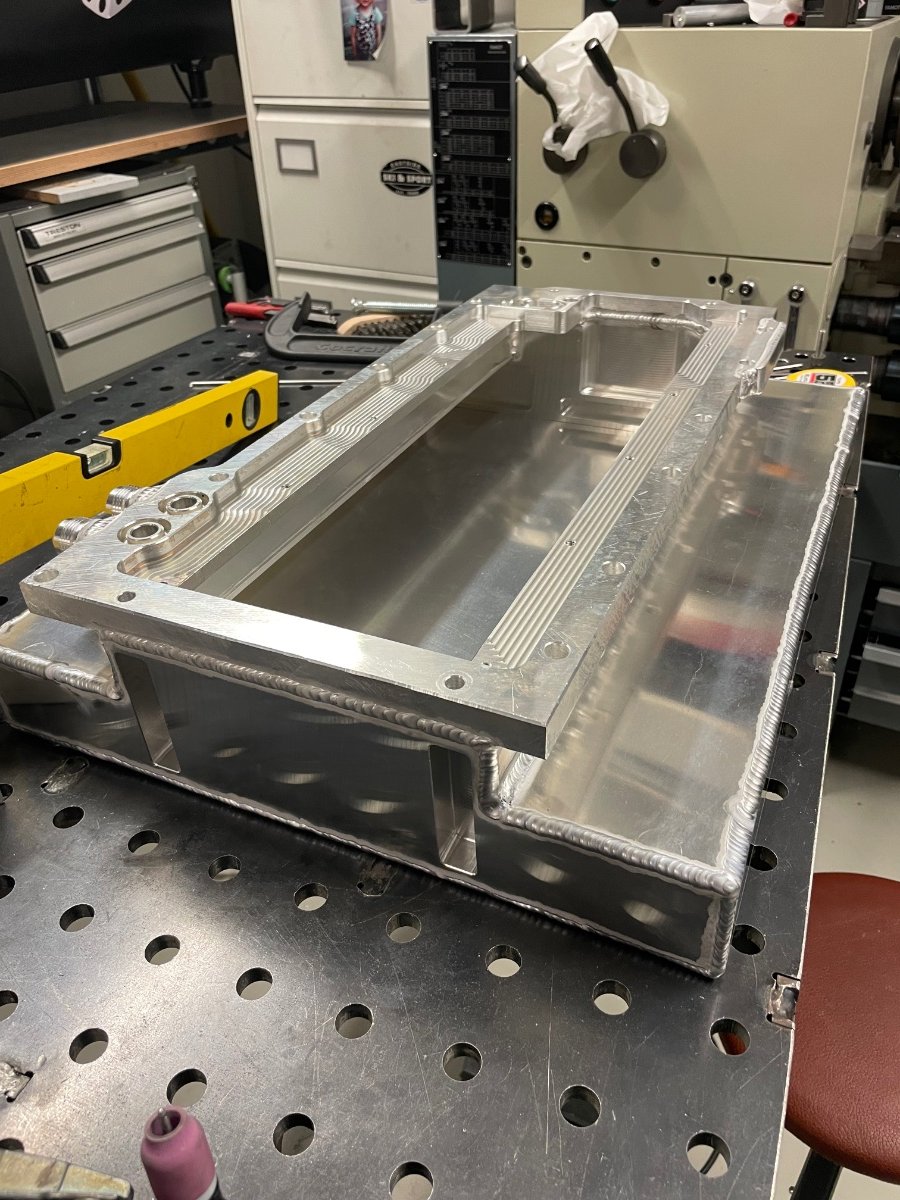
And the Pyrotect custom tank finally arrived - so far all looks good, I just need to find imperial socket heads to mount the the Nuke CFC Unit, which is designed for M6 socket heads. It didn’t even cross my mind, as Pyrotect sells standard tanks directly to Nuke as well. The welding is just awesome on it, but unfortunately it will be also a constant reminder of a level, that I will never reach… I’ll need to remove the roll cage from the 7 to swap tanks next.
-
And a fail - a mistake in the 3D file resulted in a very thin wall thickess at the corner. I didn’t do a cross section check on these, since they are not structural… baby, one more time…
-
Mika’s wheels have 22.9mm to the thread start, so if we can hit this, then no more wonky tightening issues. V, you might have to file the bosses down, if they are too long for your wheels or there is a variation. The bosses got an M8 thread first, so welding them on was easy: Which was then drilled out to 8.5 mm and a simple chamfer was added to the front side: A bit of sanding and a bead blasting next, then these are ready to go.
-
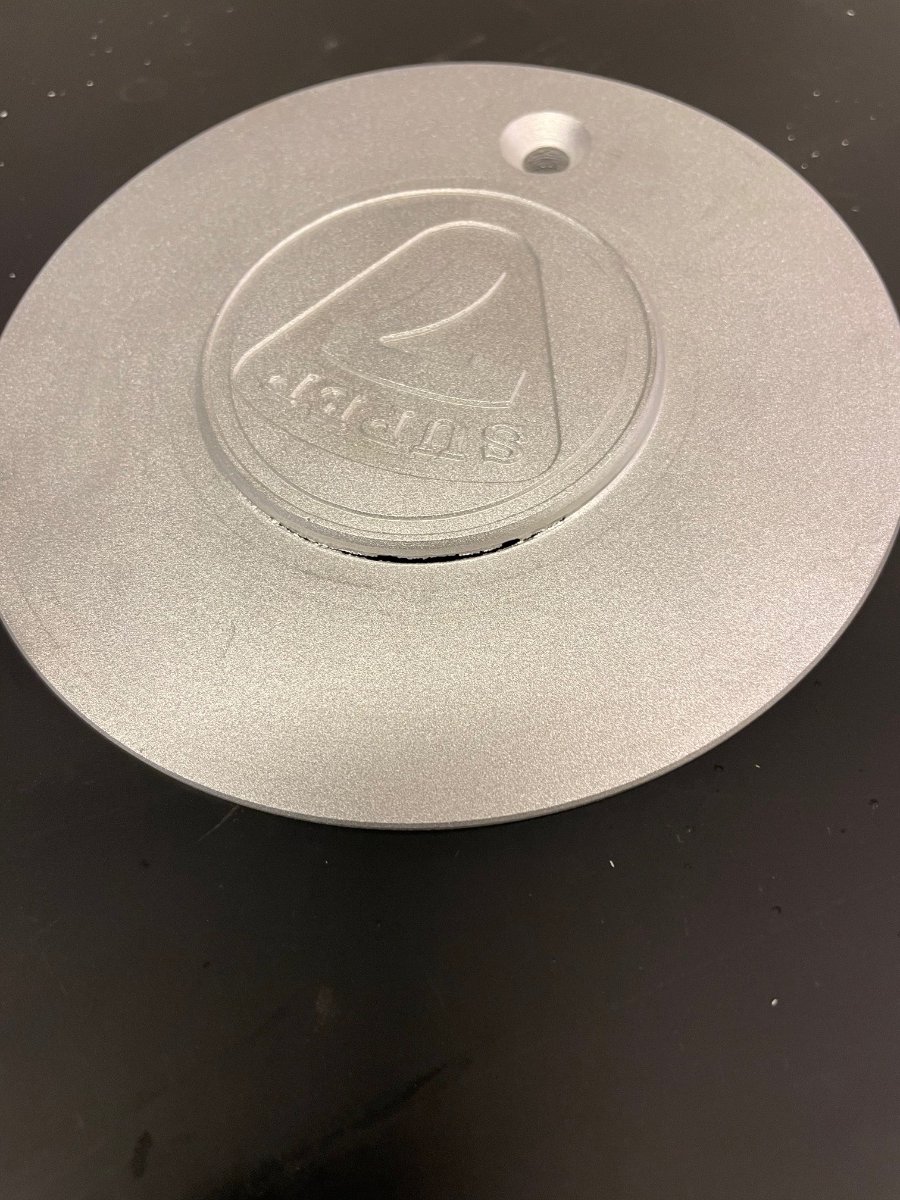
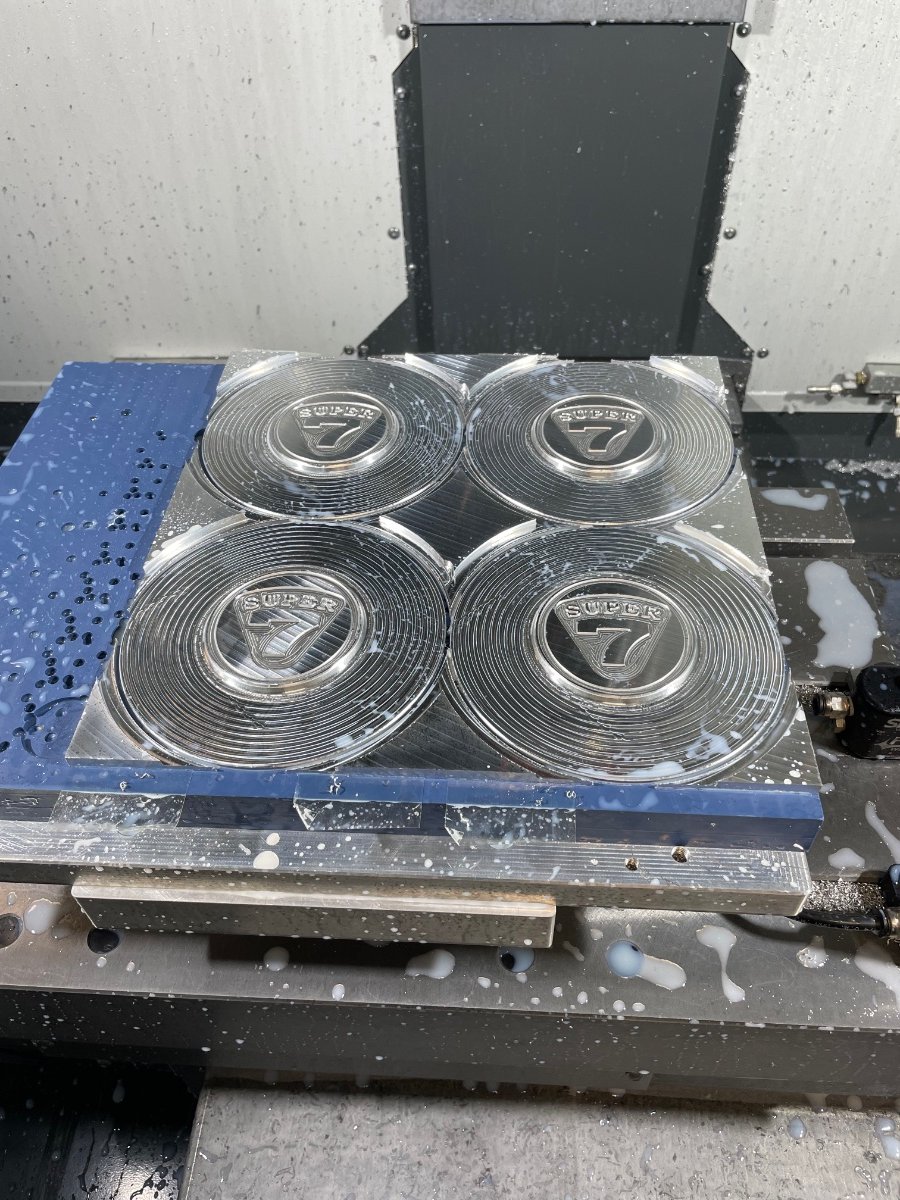
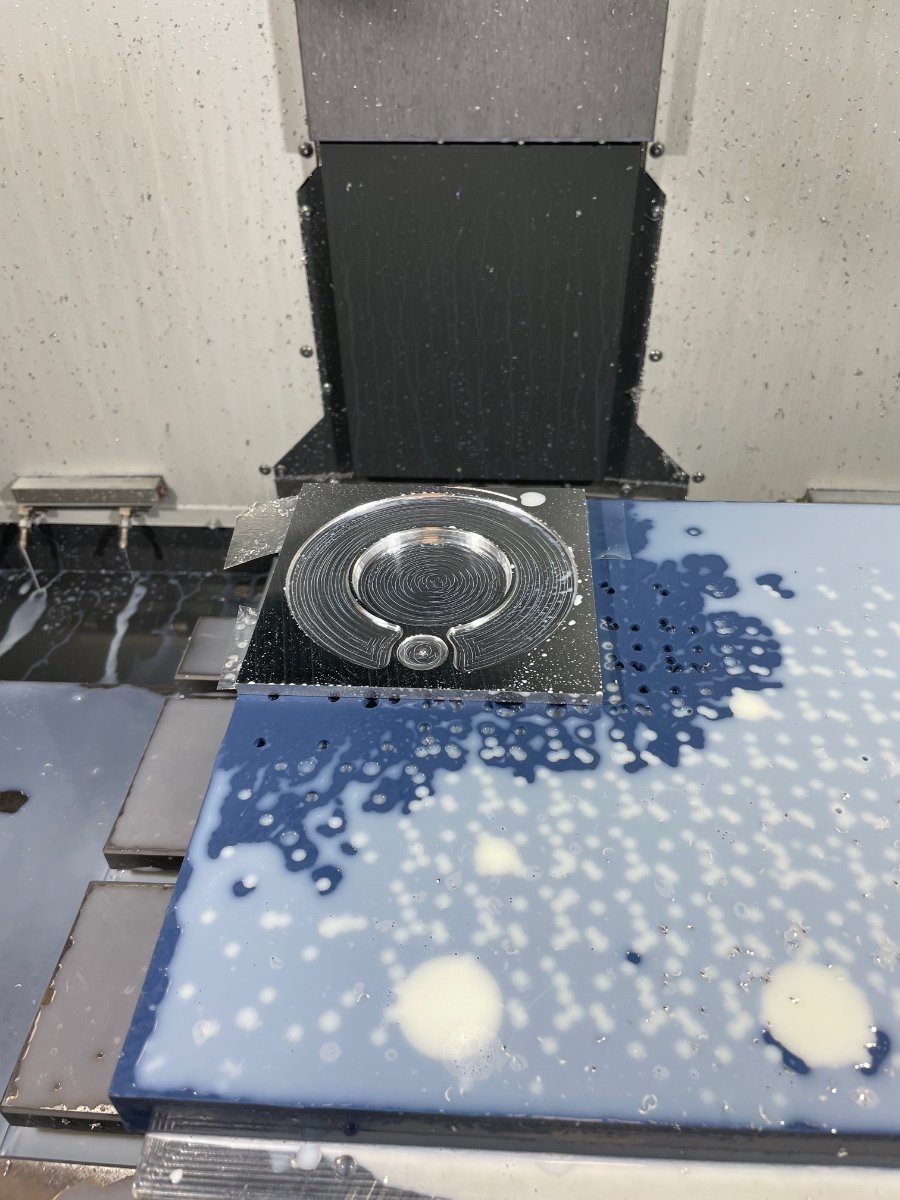
Thanks, now I know more of SLR center caps than I would have ever dared to dream about… Today I had finally some spare time and commanded the machine to make some chips:
-
The AIM installation looks great! I have the same ”doesn’t seem to be in the center” visuals with my gear change indicator, when not seated.
-
Yes, air cooling is fine, but the faster you cool it, the softer it gets. It is totally against everything we have learned with steel… It took me a few dripping connections (in very bad places) to start doing this. I’m sure you can still get quality washers, that are soft to begin with, but I am usually satisfied when I find the right size!
-
Also my strong recommendation to soften the sealing copper washers before final install - heat them glowing red (happens fast) with a small butane torch (a piano wire or old screwdriver works great to hold it in the flame) and drop glowing red into a cup of water. The copper washers sold today just aren't as soft as they used to be.
-
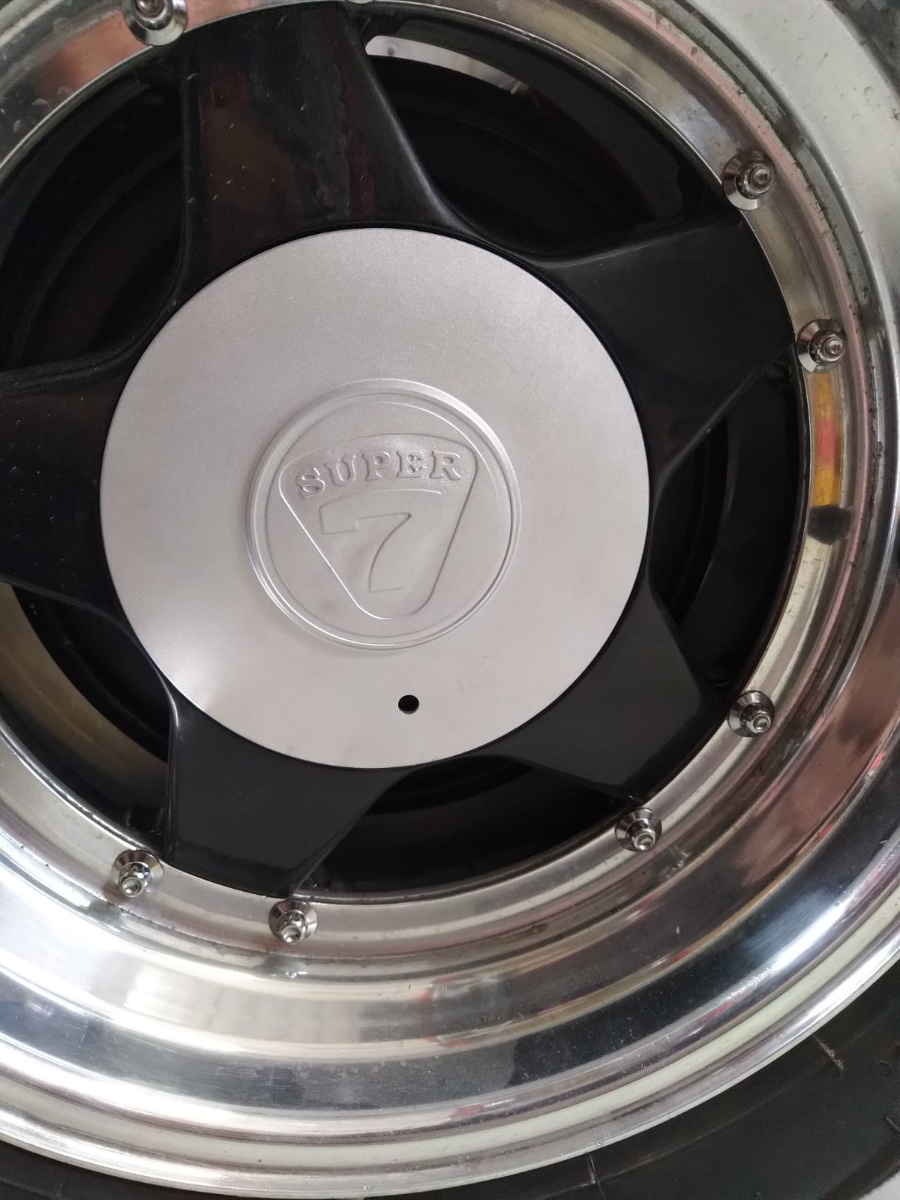
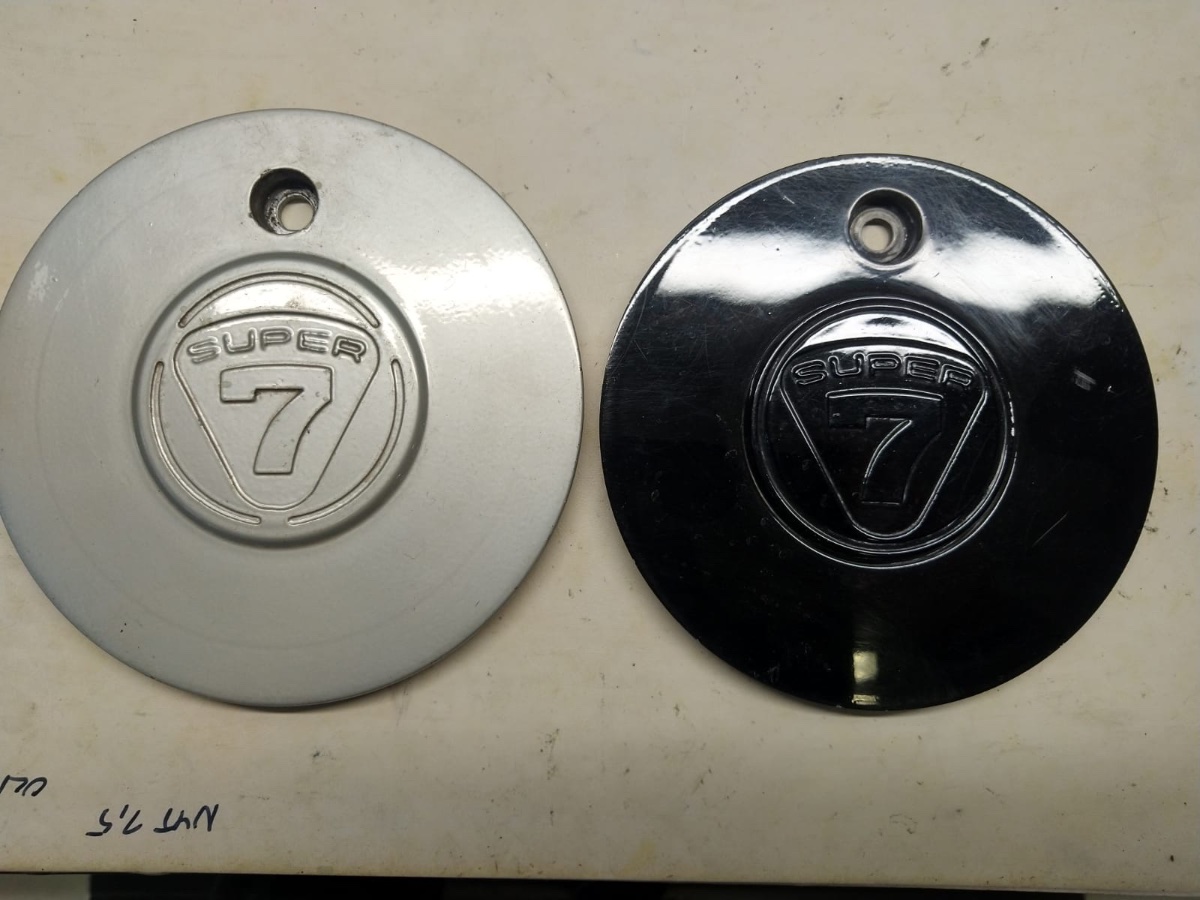
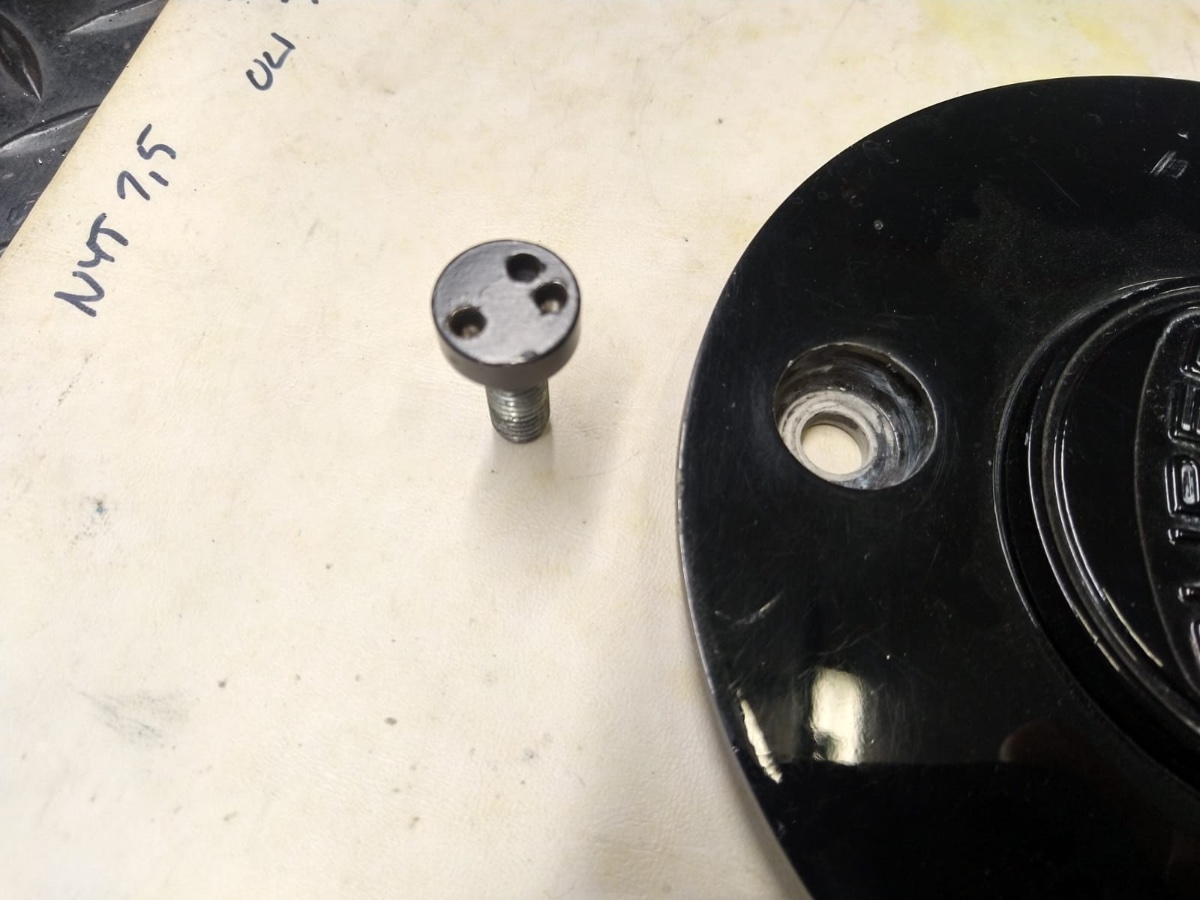
A test fit turned out ok: My friend had two original sets, one out of plastic and the other out of aluminium. The alu version is slightly larger in diameter with 159 mm - apparently there are different versions of the wheel. Also the attachment bolt has some sort of security feature…
-
Plan is to machine a round cylinder on a lathe ( x 4), weld it to the backside and only then chamfer from the front. Is it a 5 or 6 mm bolt btw? Yeah, the whole thing is quite a crappy design.
-
By the way, what finish will you do?
-
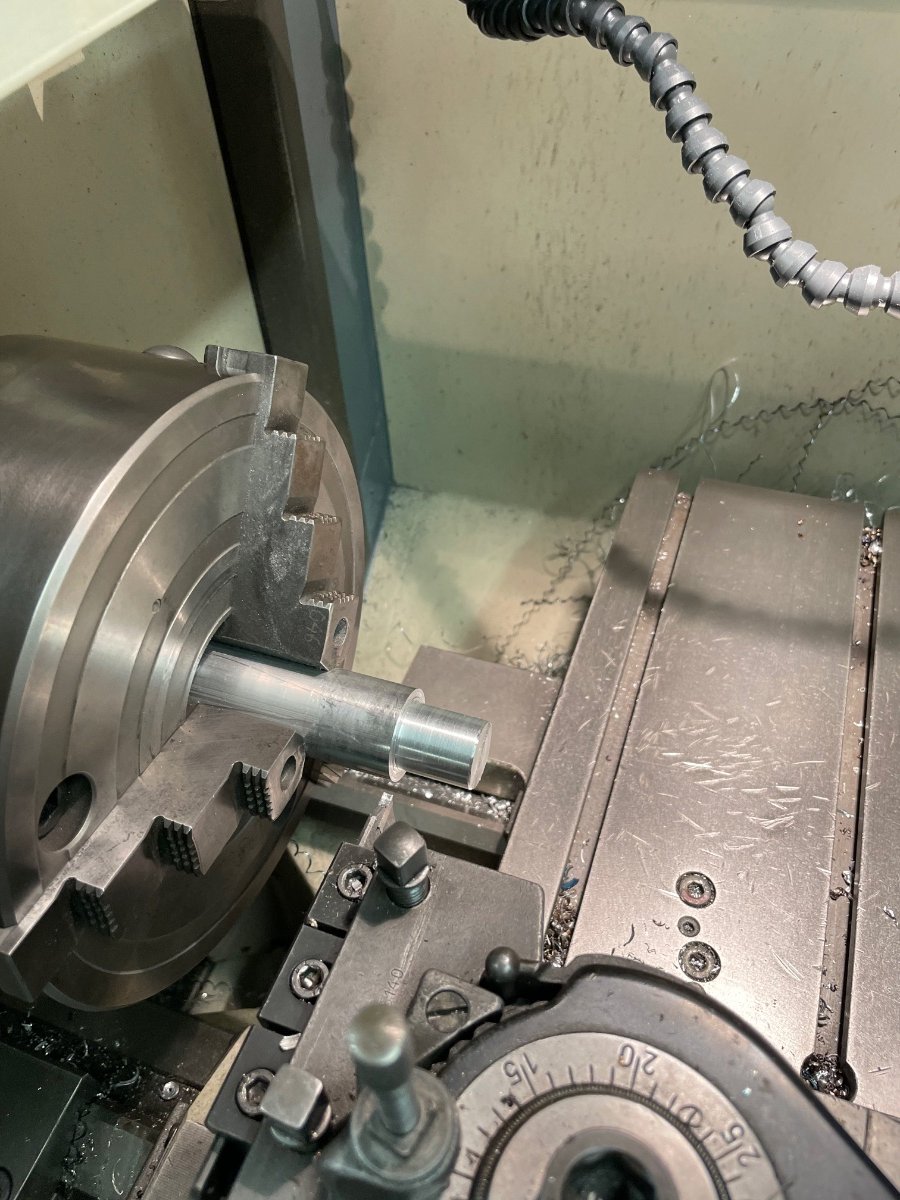
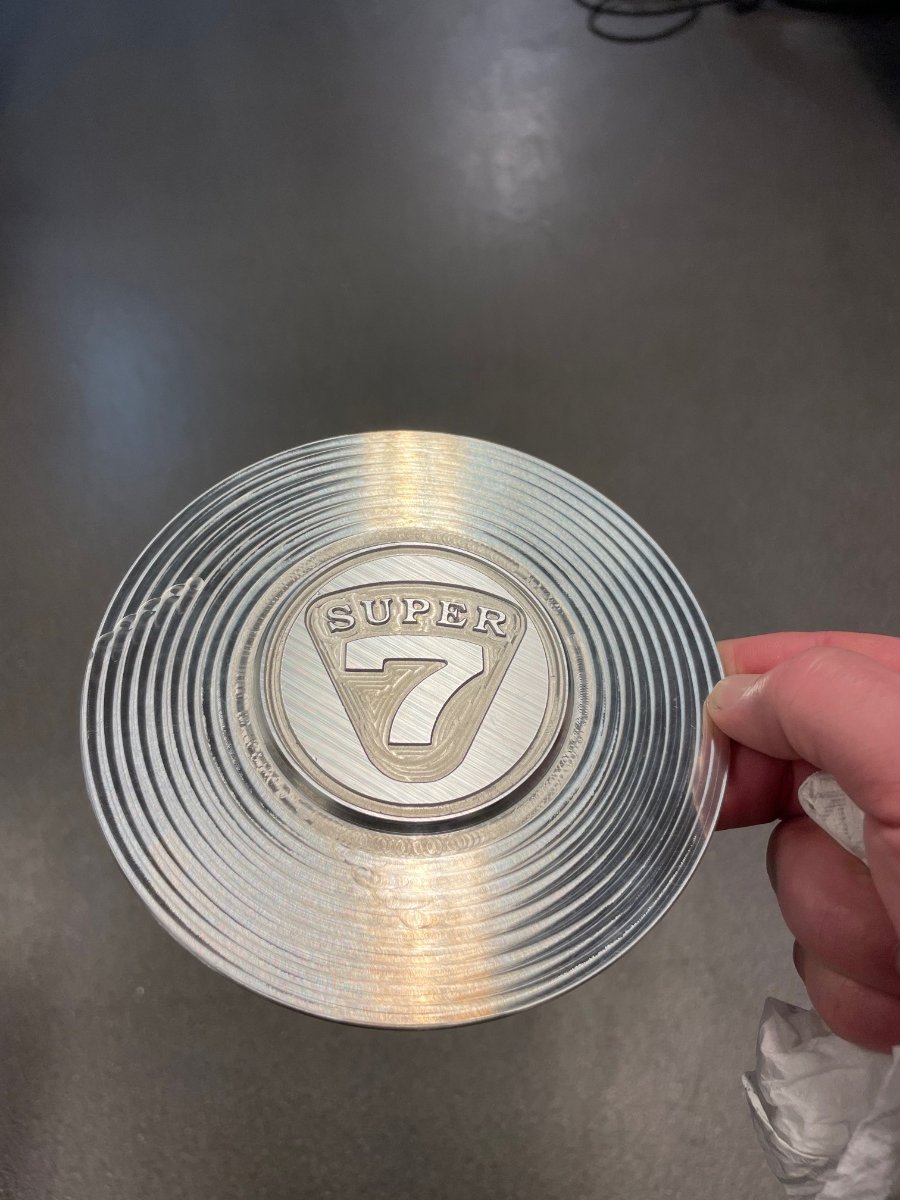
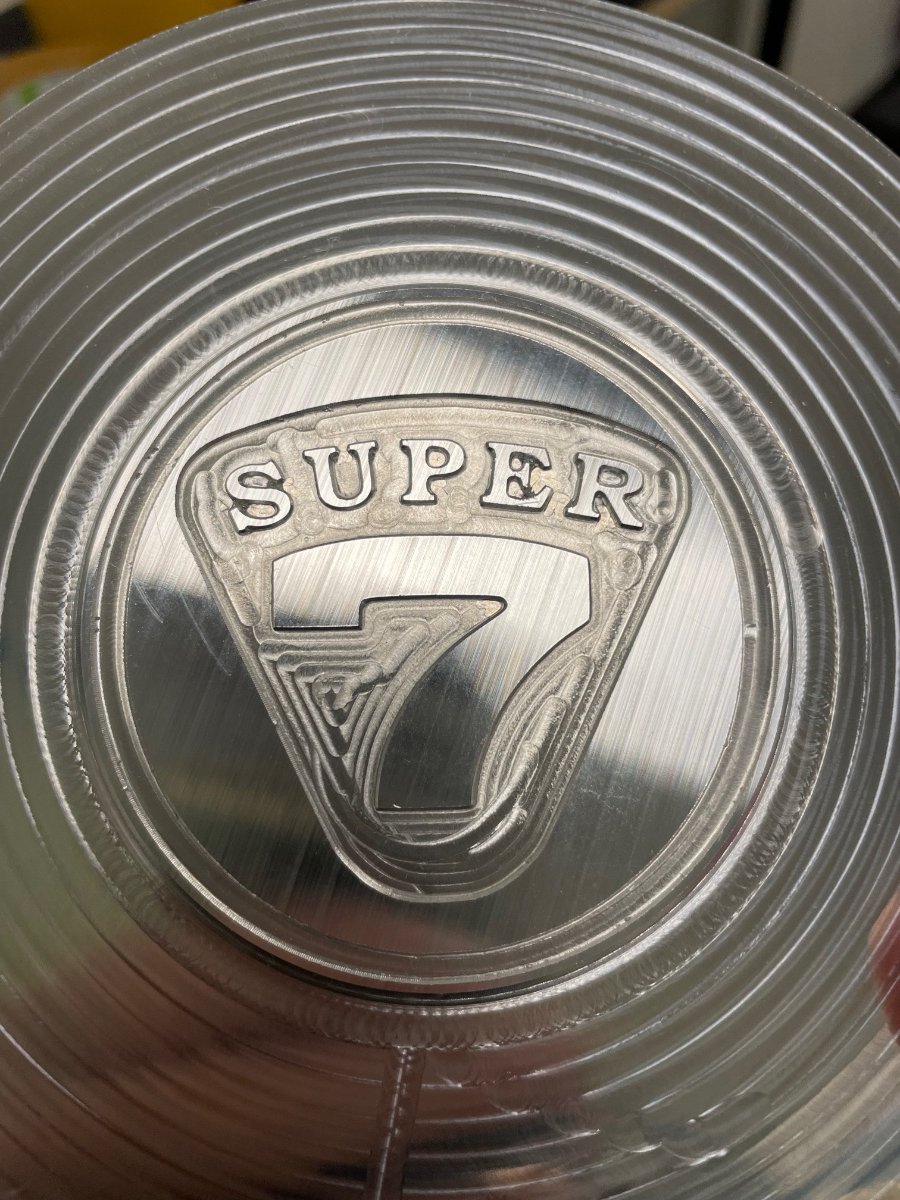
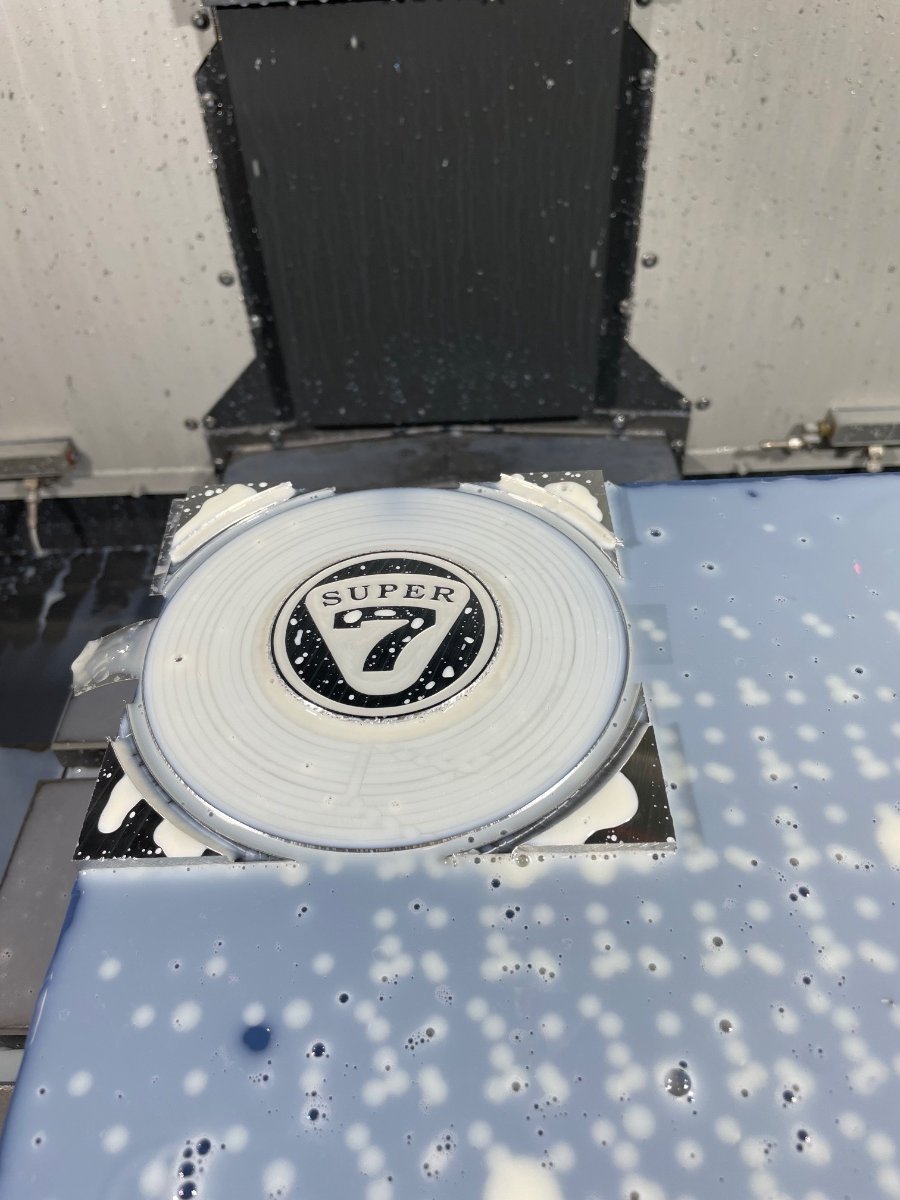
First test piece turned out ultra light… actually a little too light, as the aluminium I am using is not heat treated. The bead blasting almost went thru… but the logo turned out nice! IMG_7118.MOV Well, I’ll use this piece to check the dimensions next.
-
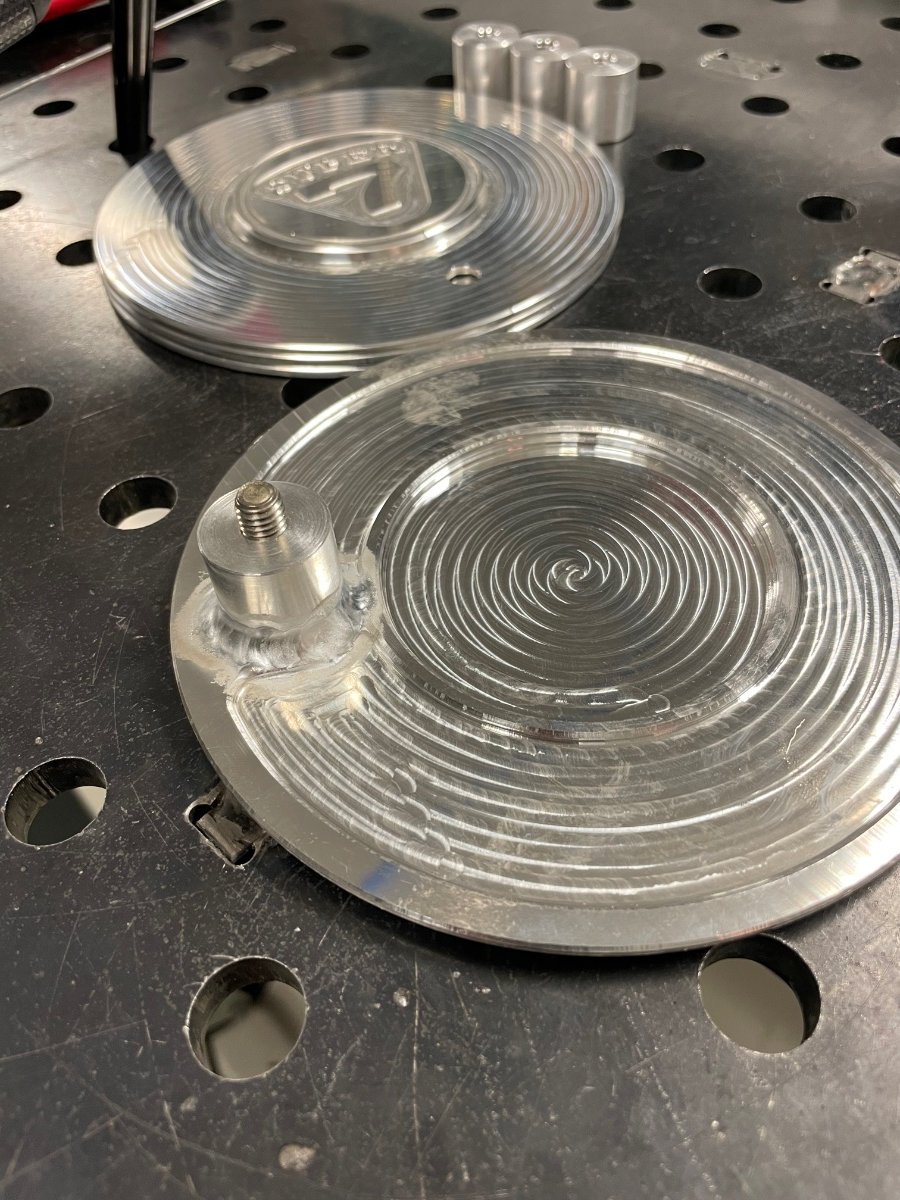
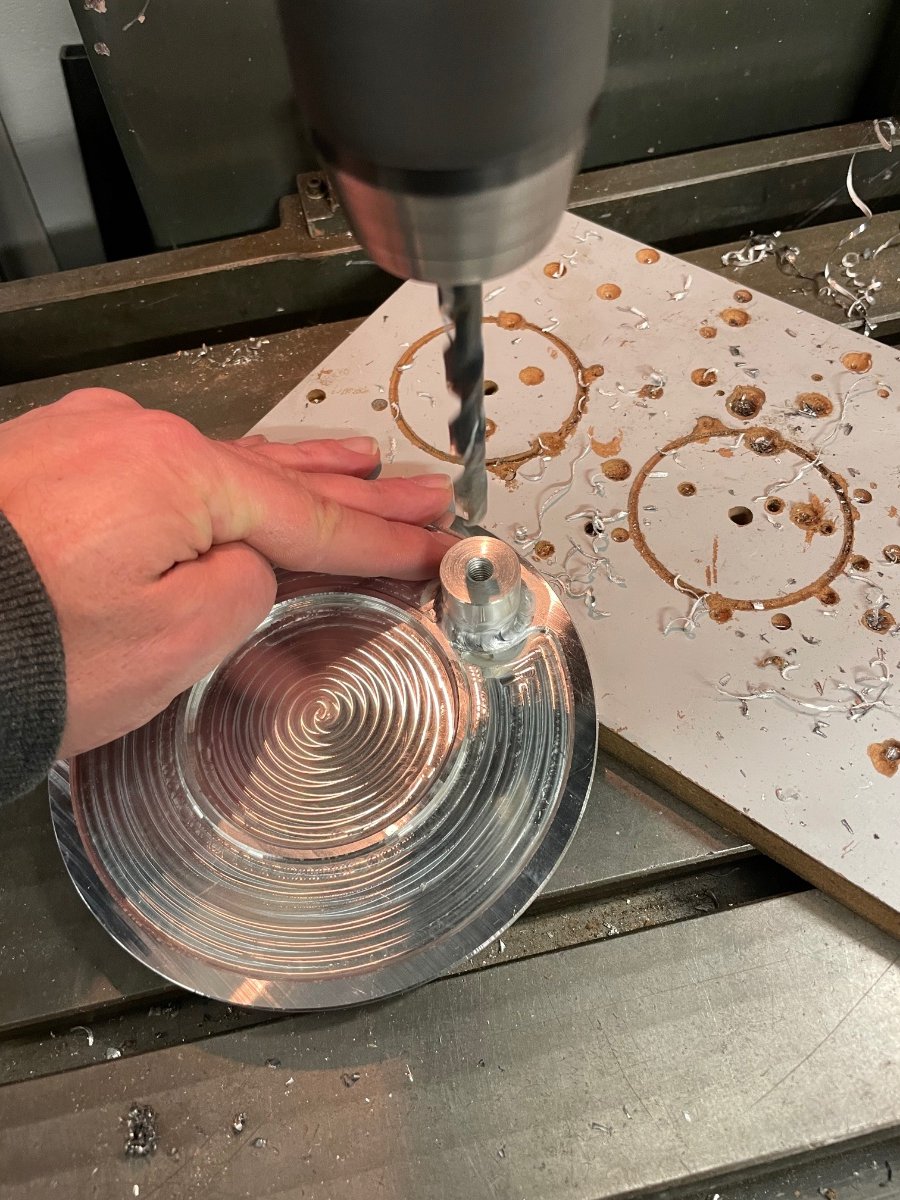
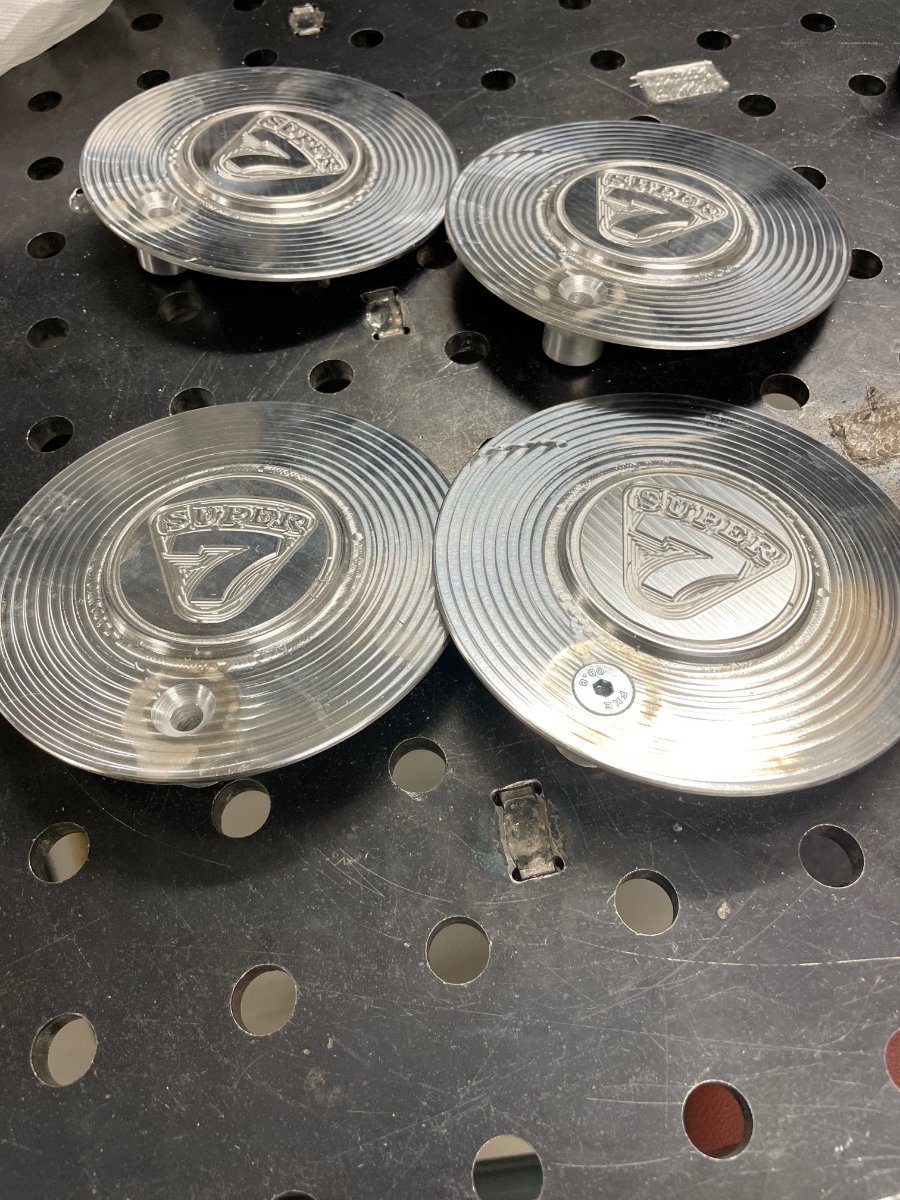
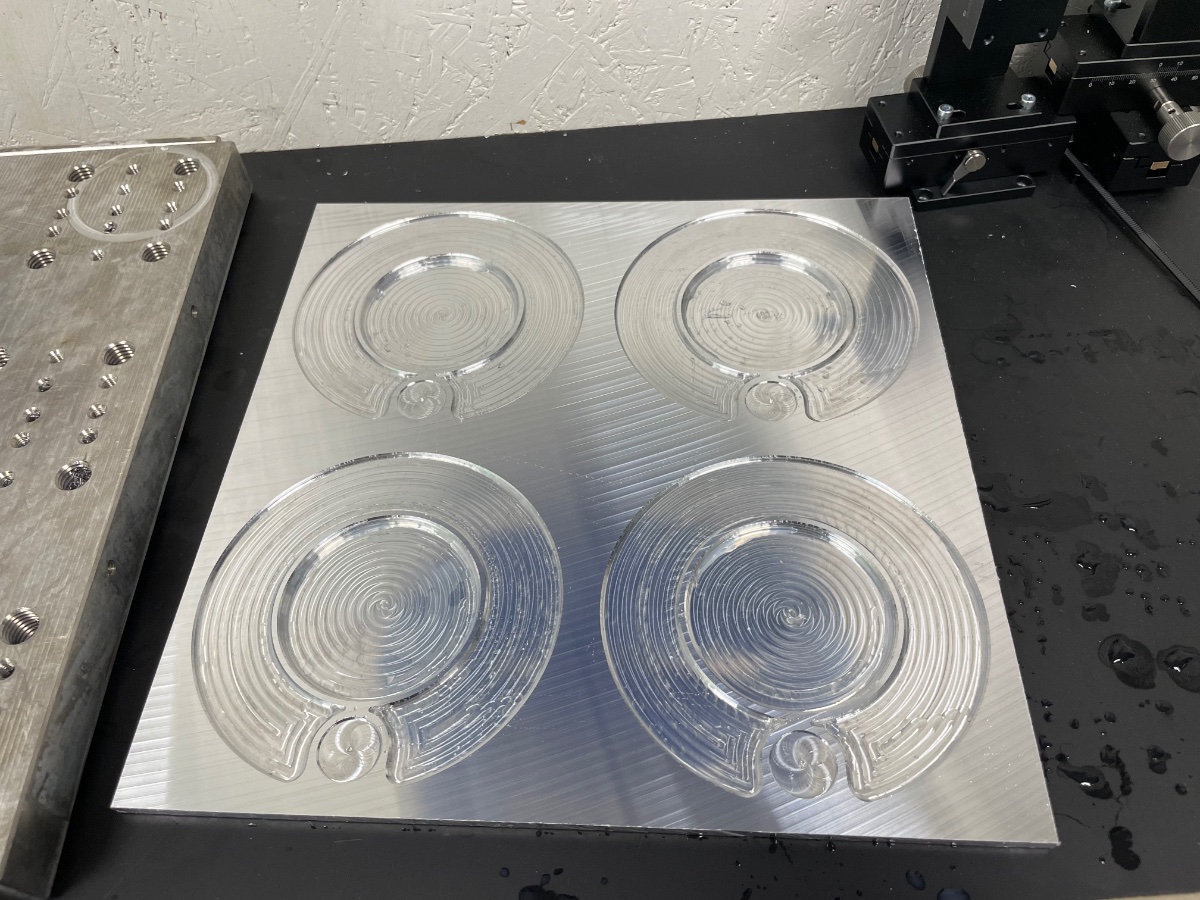
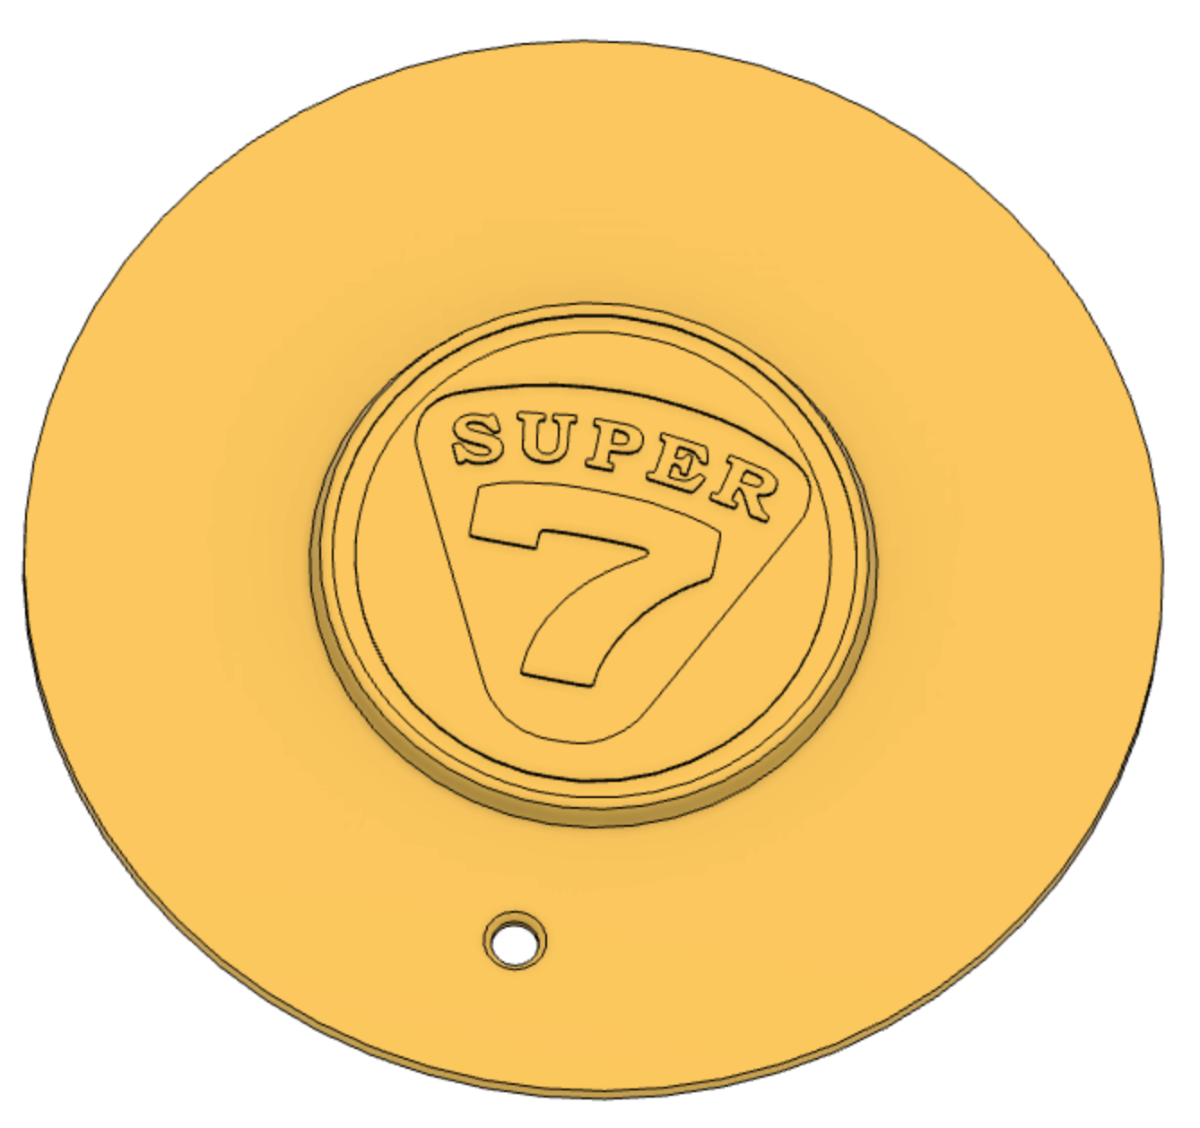
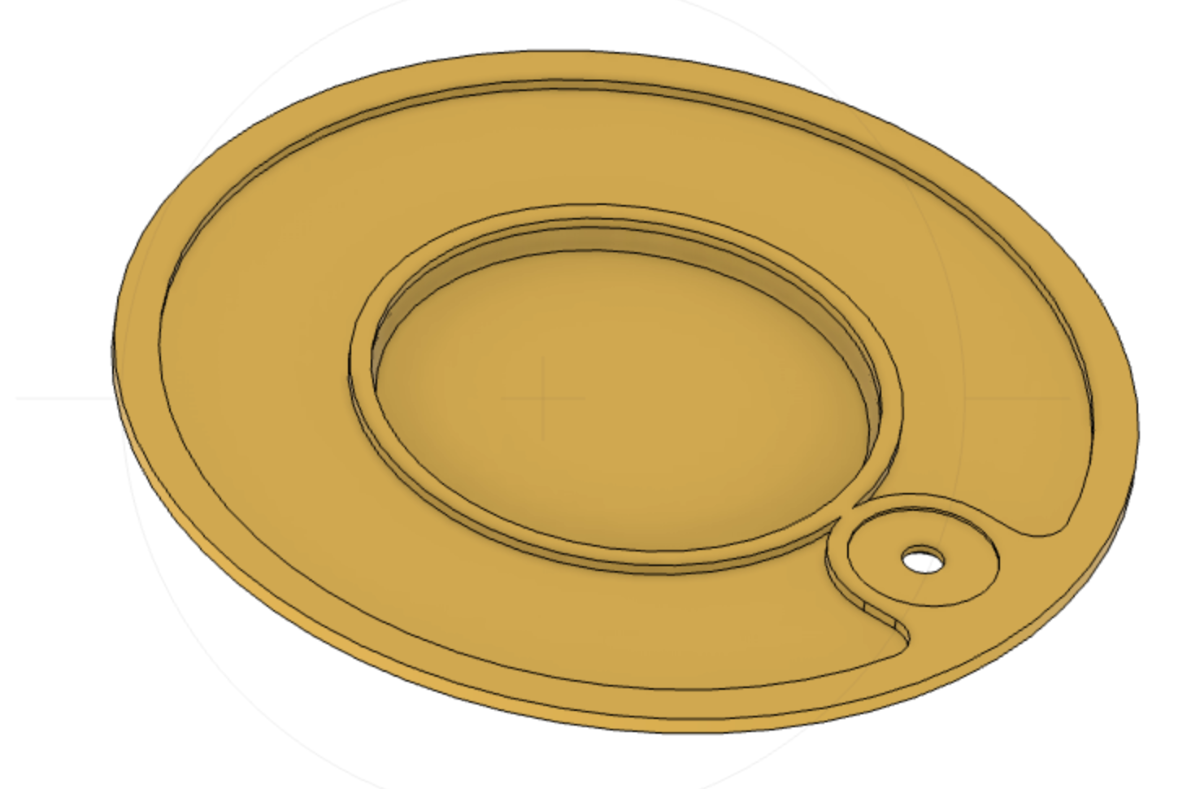
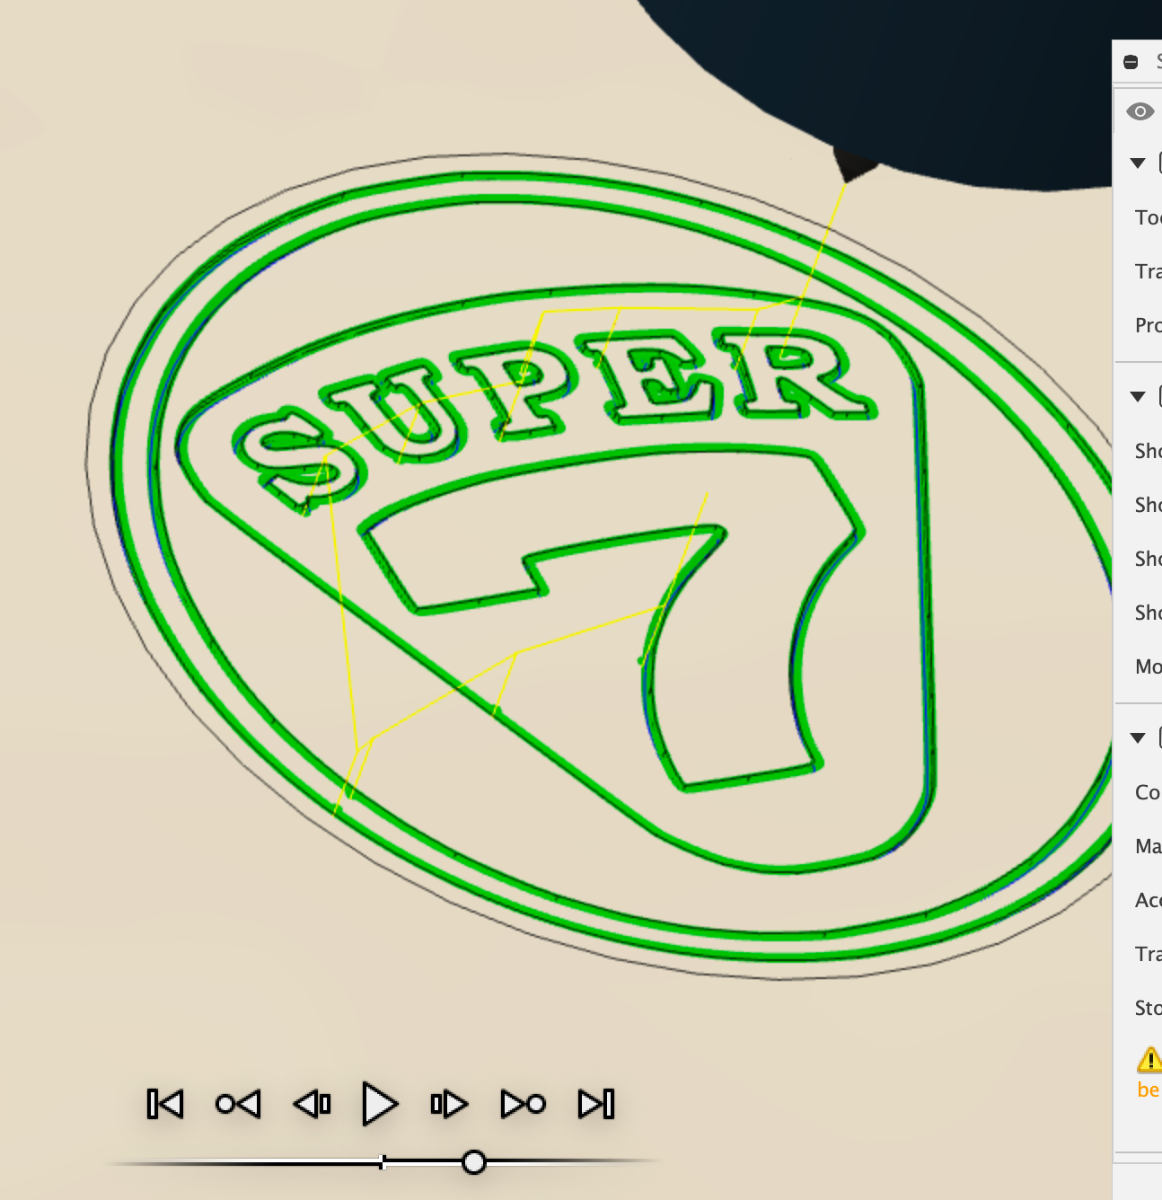
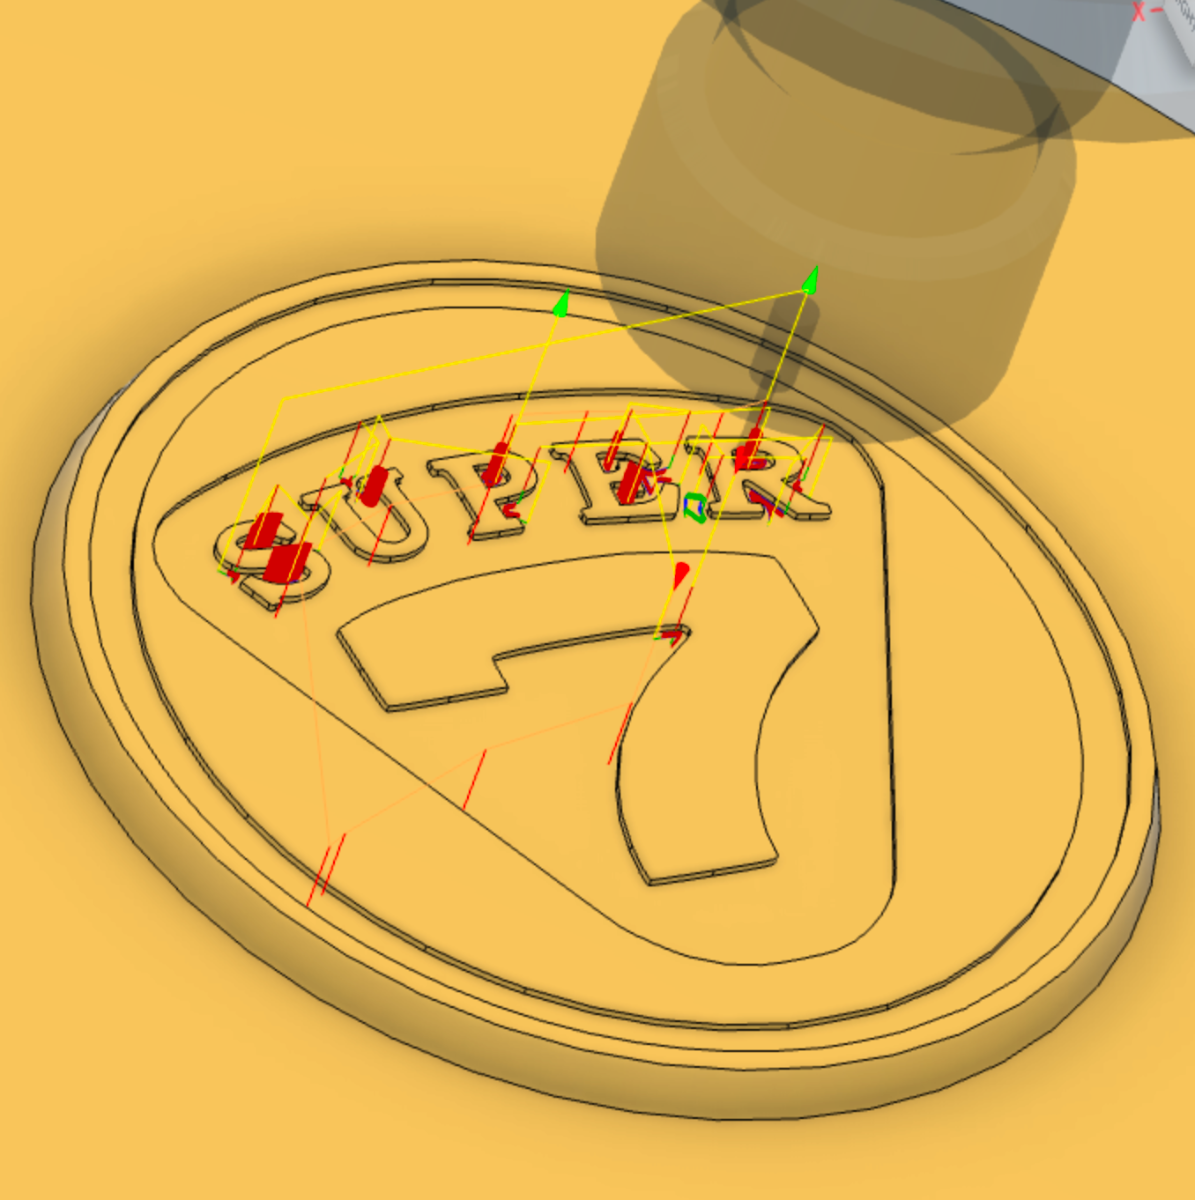
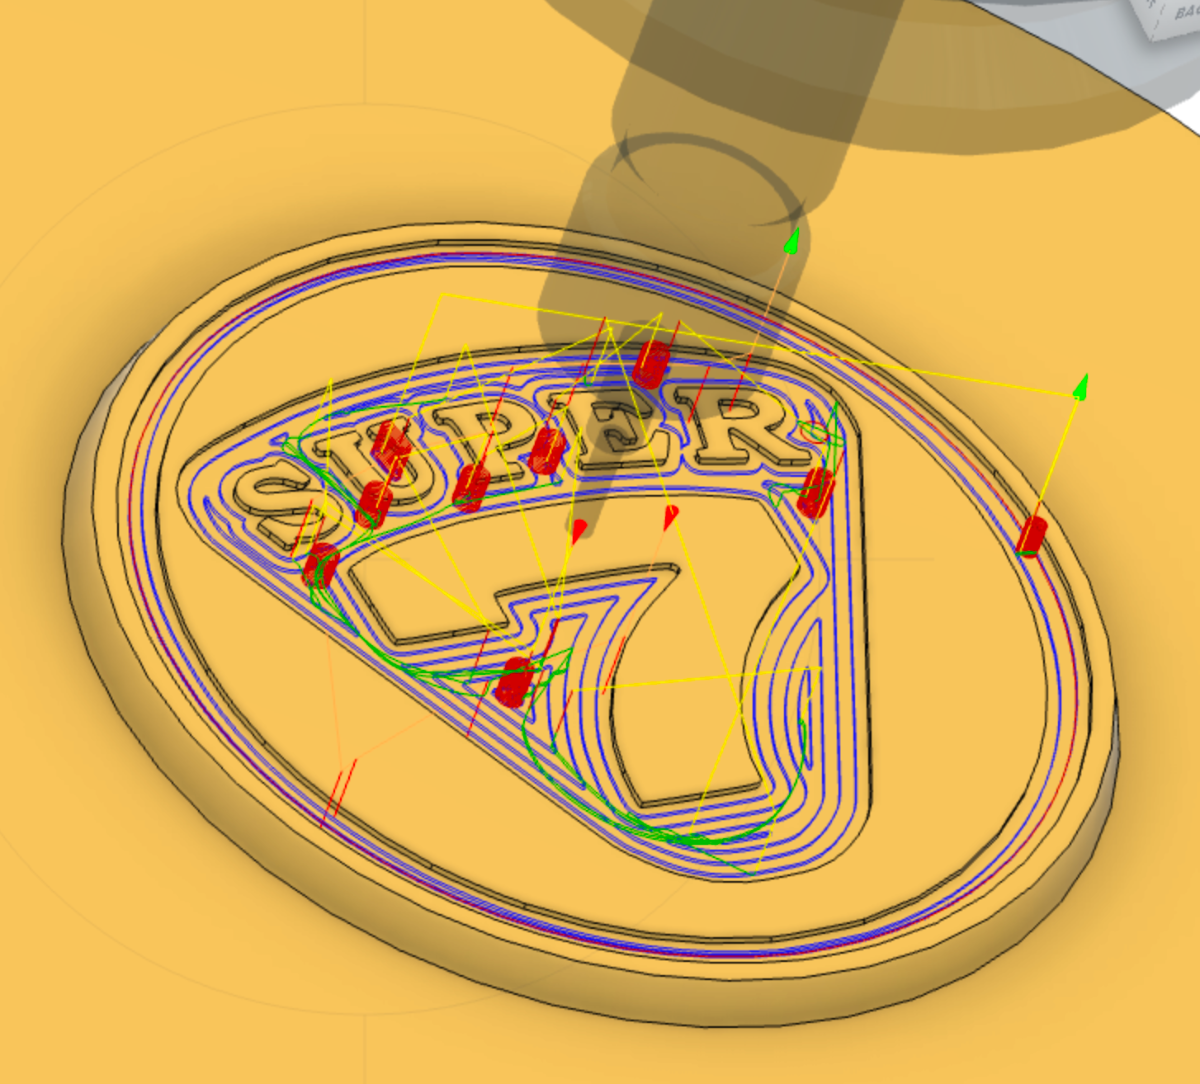
Vovchandr has those lovely SLR wheels, but no caps and since they are no longer available, let's figure out how we can make him a set. Original caps are 2 part, however it is easier to make them as one piece. I have the caps modelled now in 3D by using 6 mm thick aluminium plate as stock and also tried to make them as lightweight as possible: The Super 7 logo was the most work - the easiest would be just to have a circular recess and stick a domed 3D logo sticker, but let's try to do it first with machining. If the caps are painted/powder coated, then one could sand out the logo nicely! The Super 7 has quite small features, so the first operation with a larger endmill leaves areas that remain unmachined:: A tiny 1 mm bit should get most of the remaining material out: And perhaps finishing off a chamfer tool (sharp) to follow the lines and clean up any burrs: Vovchandr provided me with the dimensions, so next task is to make one and luckily I can testfit it locally first. Once the dimensions are verified, then I'll also post the step file of the 3D model here.
-
Hi John, why do you need an adjustable regulator? Touch it after tune and you run into trouble, a fixed pressure regulator is much safer in this respect. I recommend at least drilling the Radius adjustment screw and safety wiring it. That is some really nice PTFE hose!
-
-
-
The later T9 models all had the filler plug lower, also the Tracksport aluminium case has it at the lower location. I think 1.25L is just about right.