JohnCh
-
Posts
3,338 -
Joined
-
Last visited
4 Followers


-
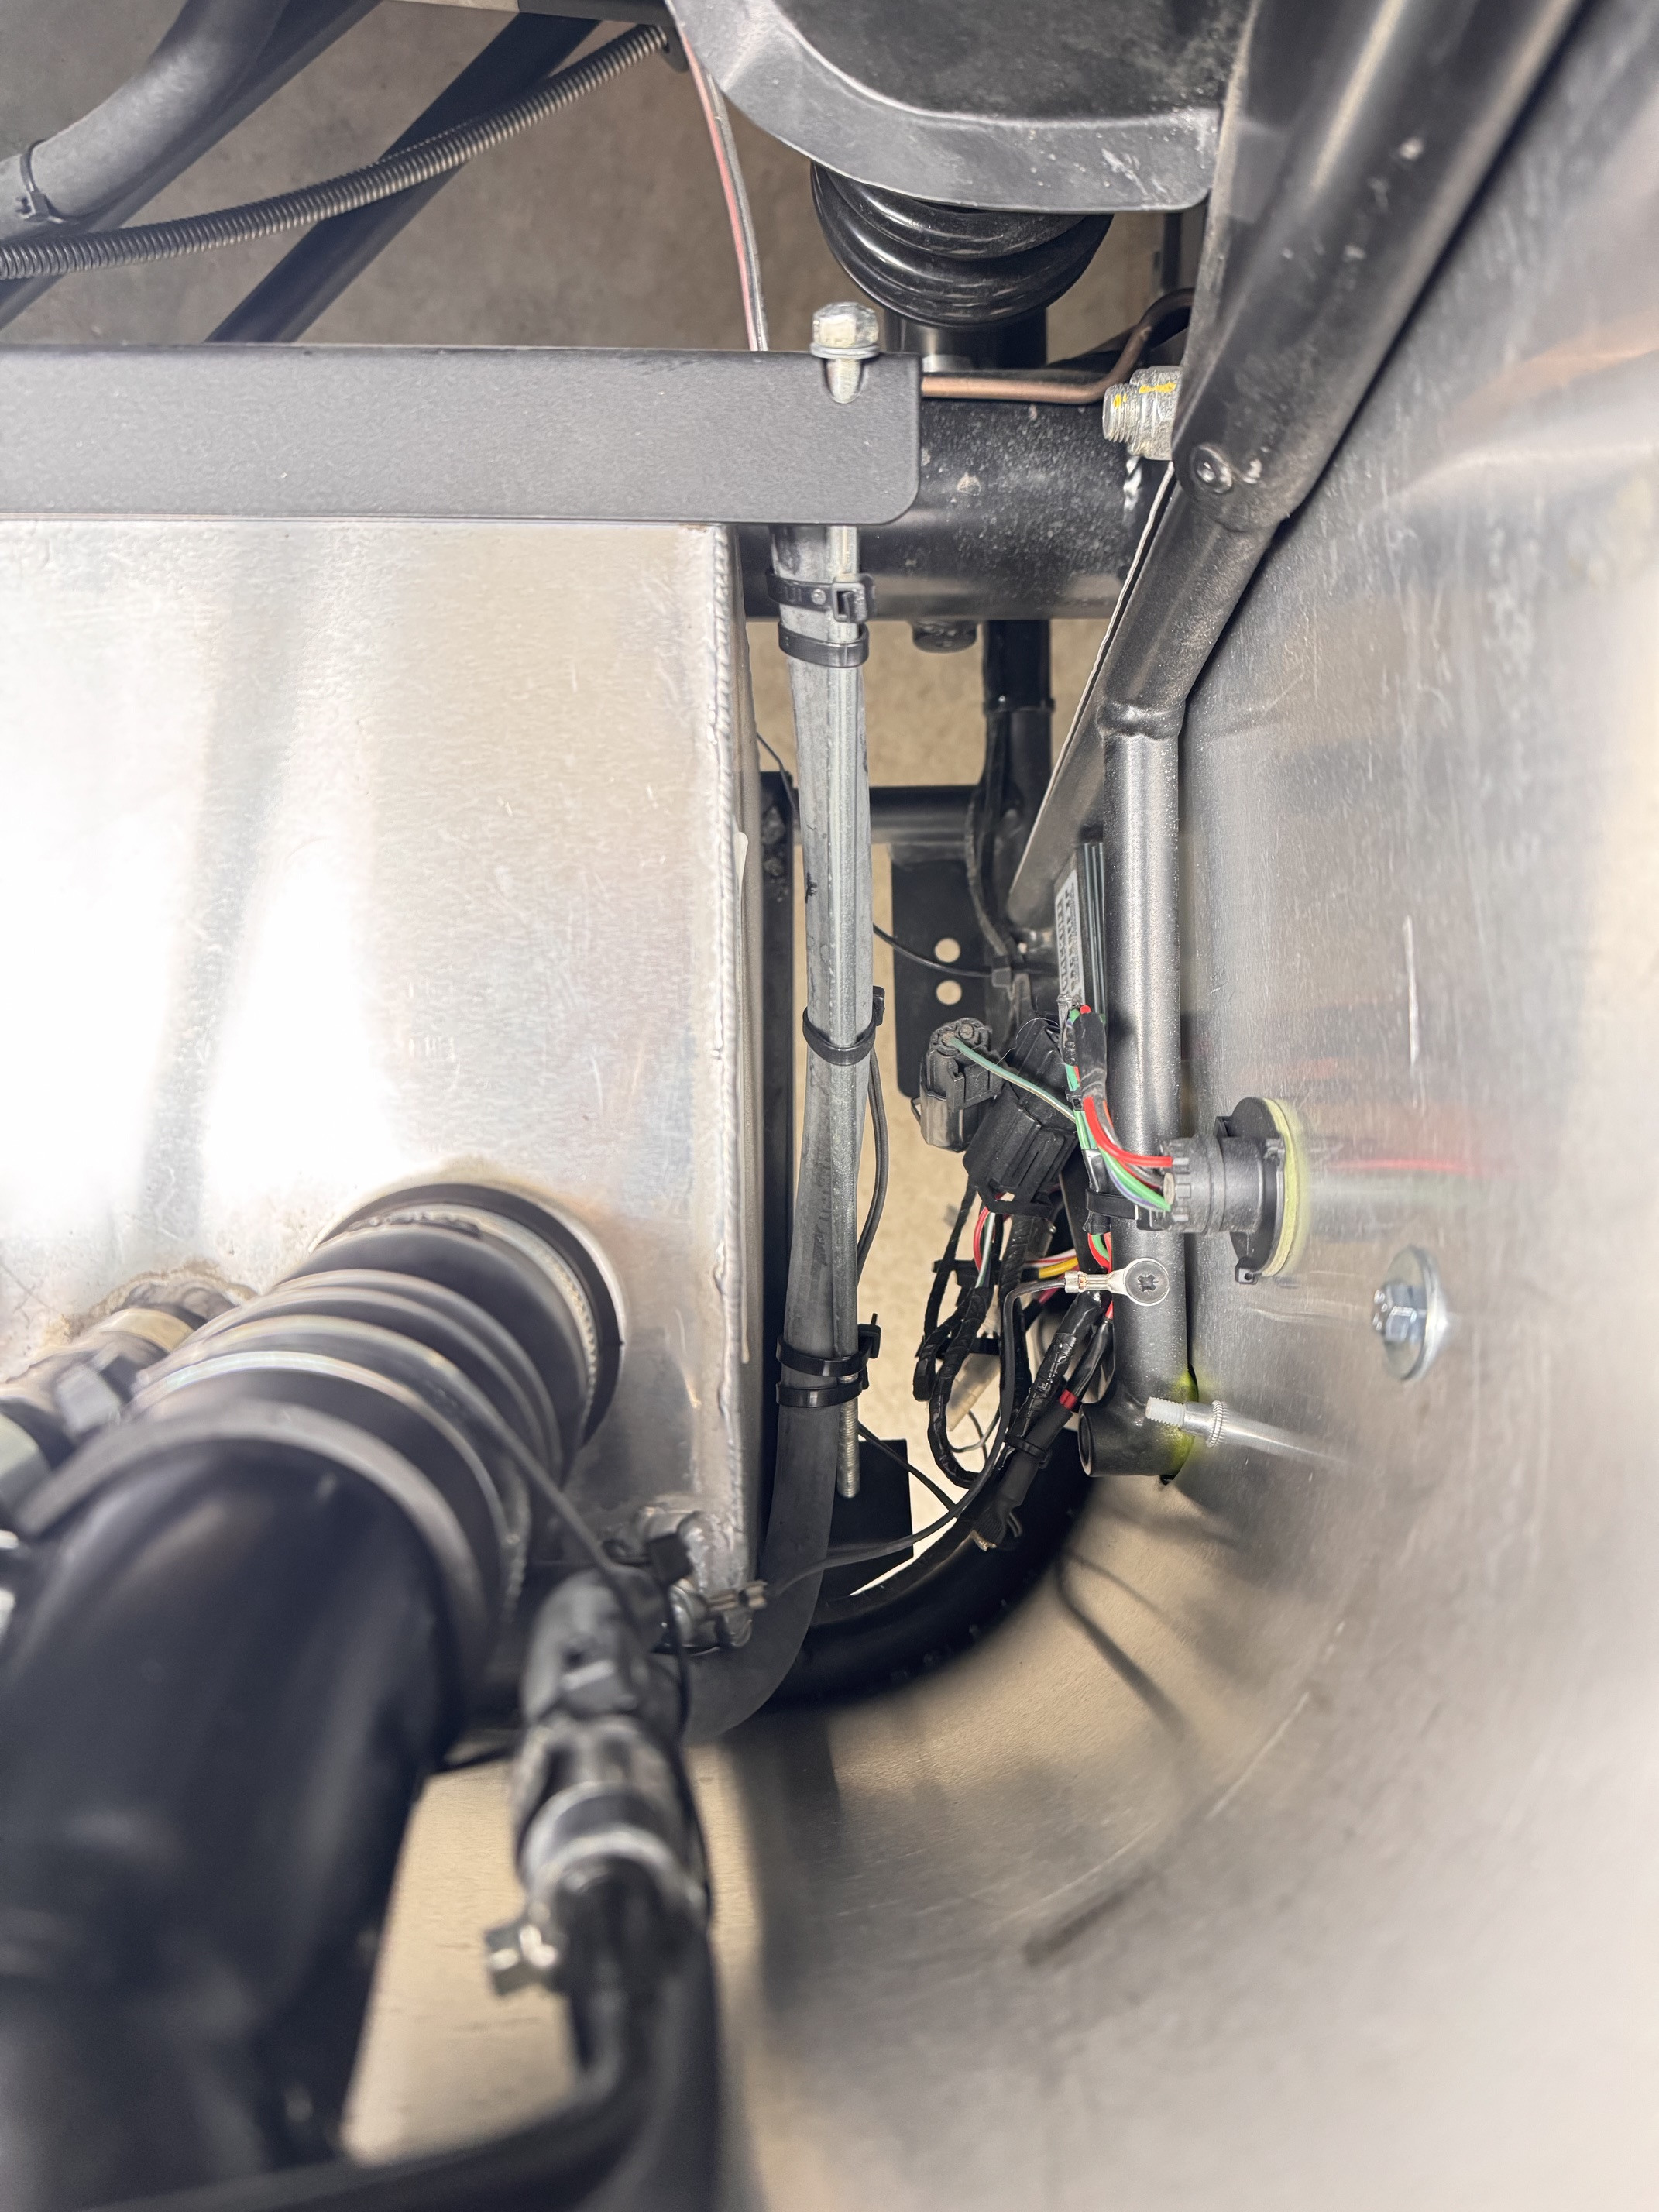
Just to add onto my earlier post, that hose next to the filler might act like a secondary vent. Although it enters the filler neck below the flap valve, if that's not particularly airtight, then air could escape through it and join the main vent system on the other side. @CBuff, I hit it with compressed air before taking photos
-
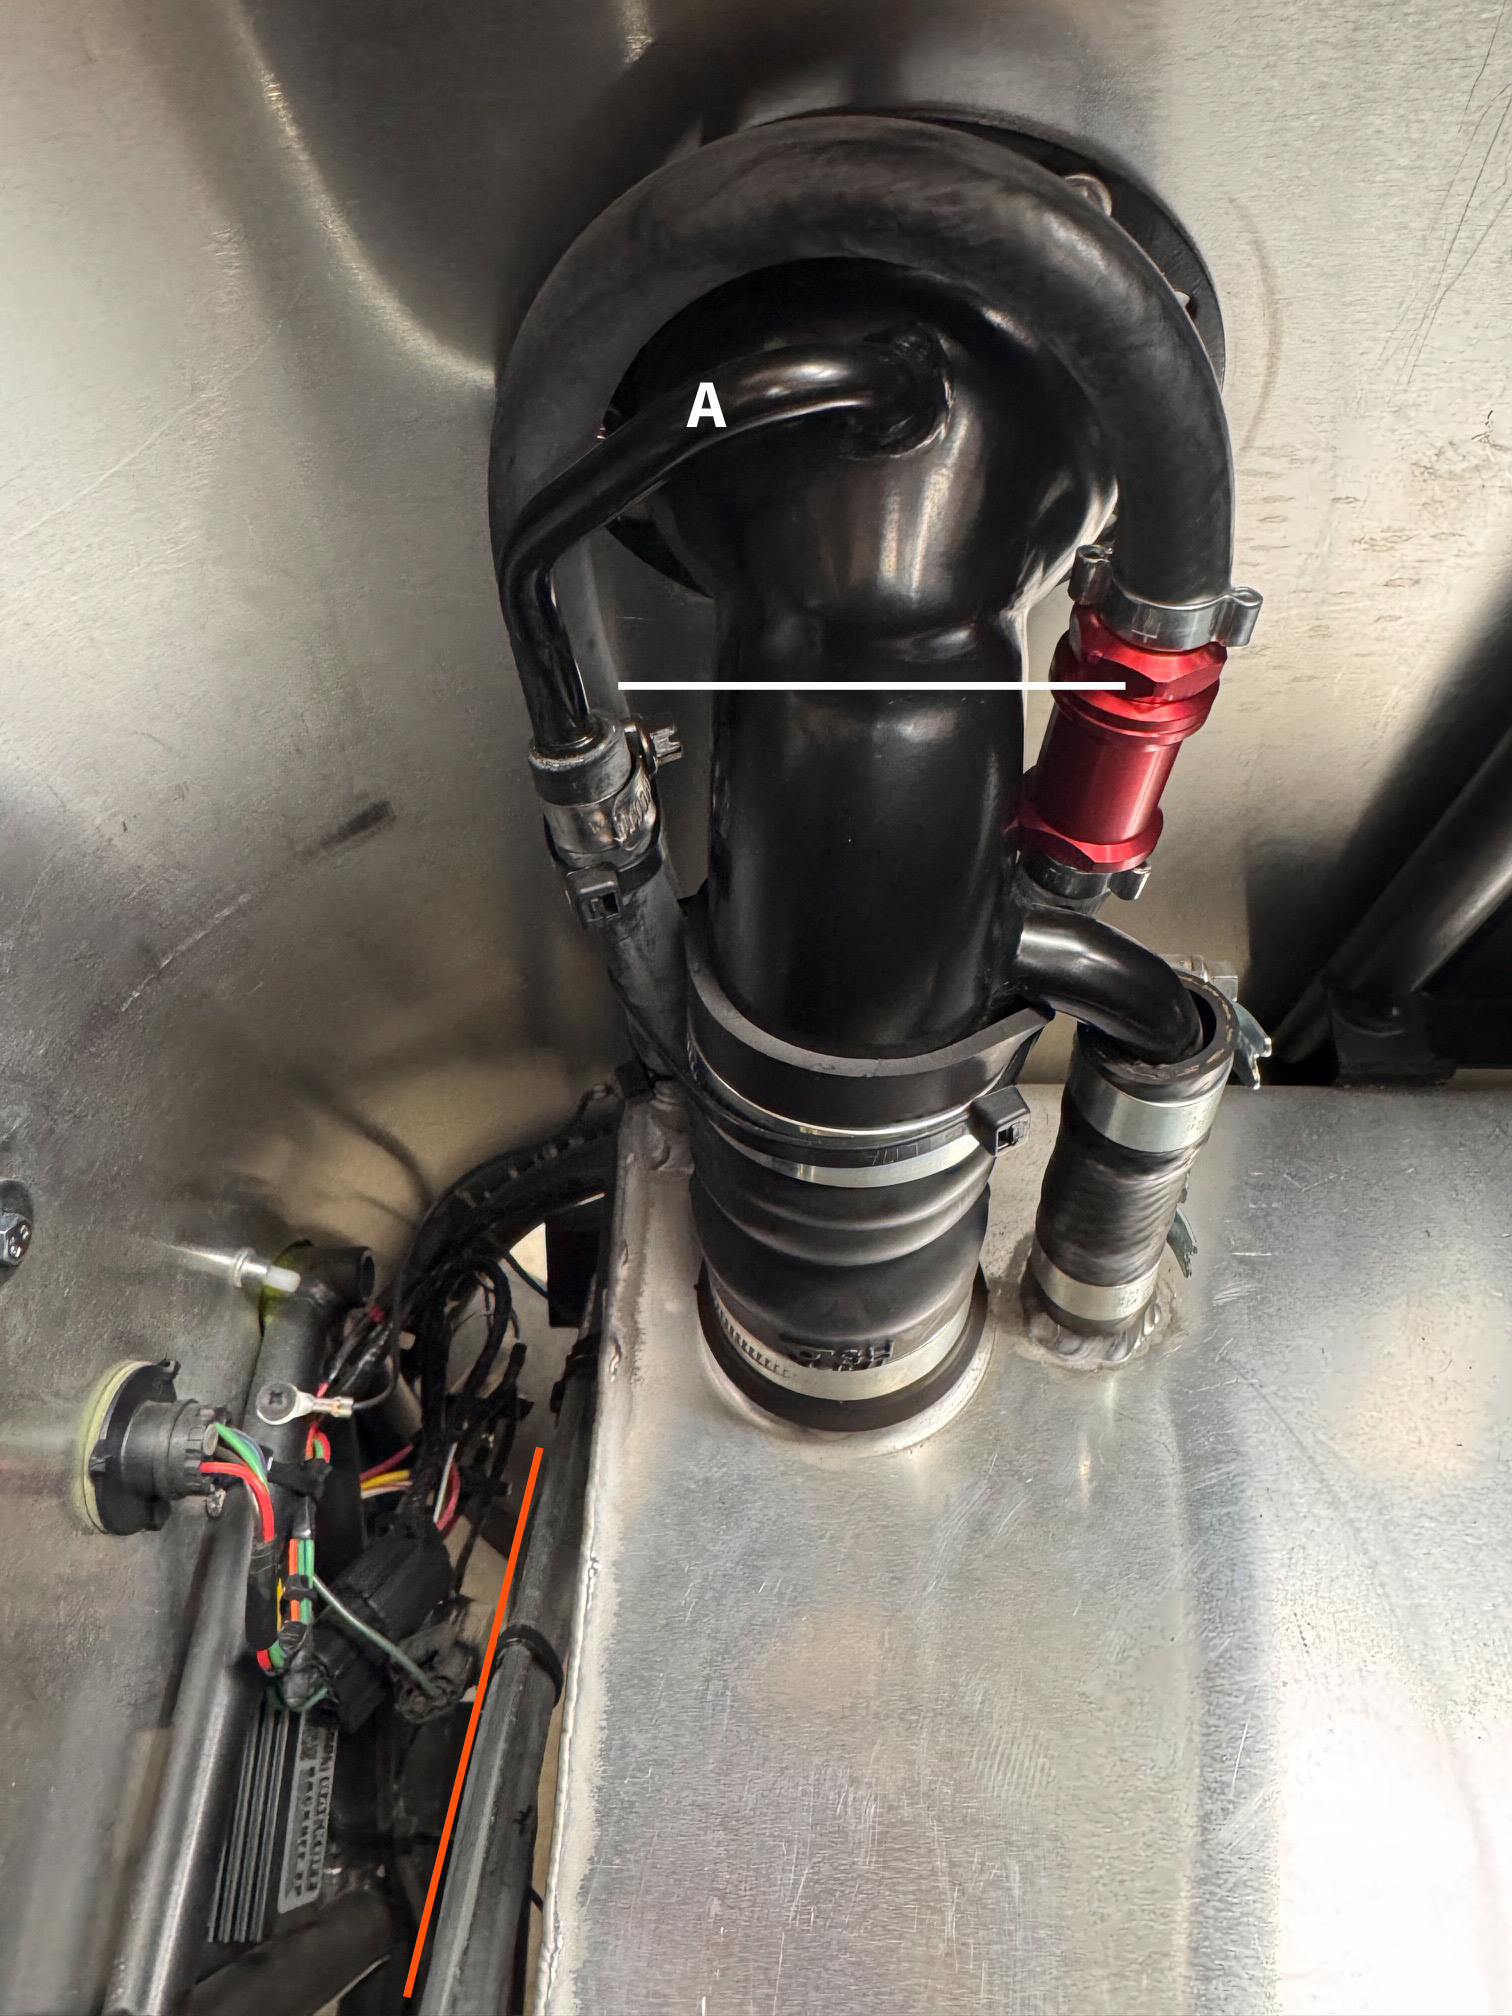
I was curious, so popped out my floor to take a look how my recent build is plumbed. The only vent is the one in the filler neck above the internal flap valve (shown roughly by the white line). The hard tube at point A connects to a rubber hose that loops around to the red rollover valve, then continues down to the bottom of the tank where it’s zip‑tied to the clamp rod (red line). From there, it follows the rod back up to the top of the tank and vents to atmosphere.

-
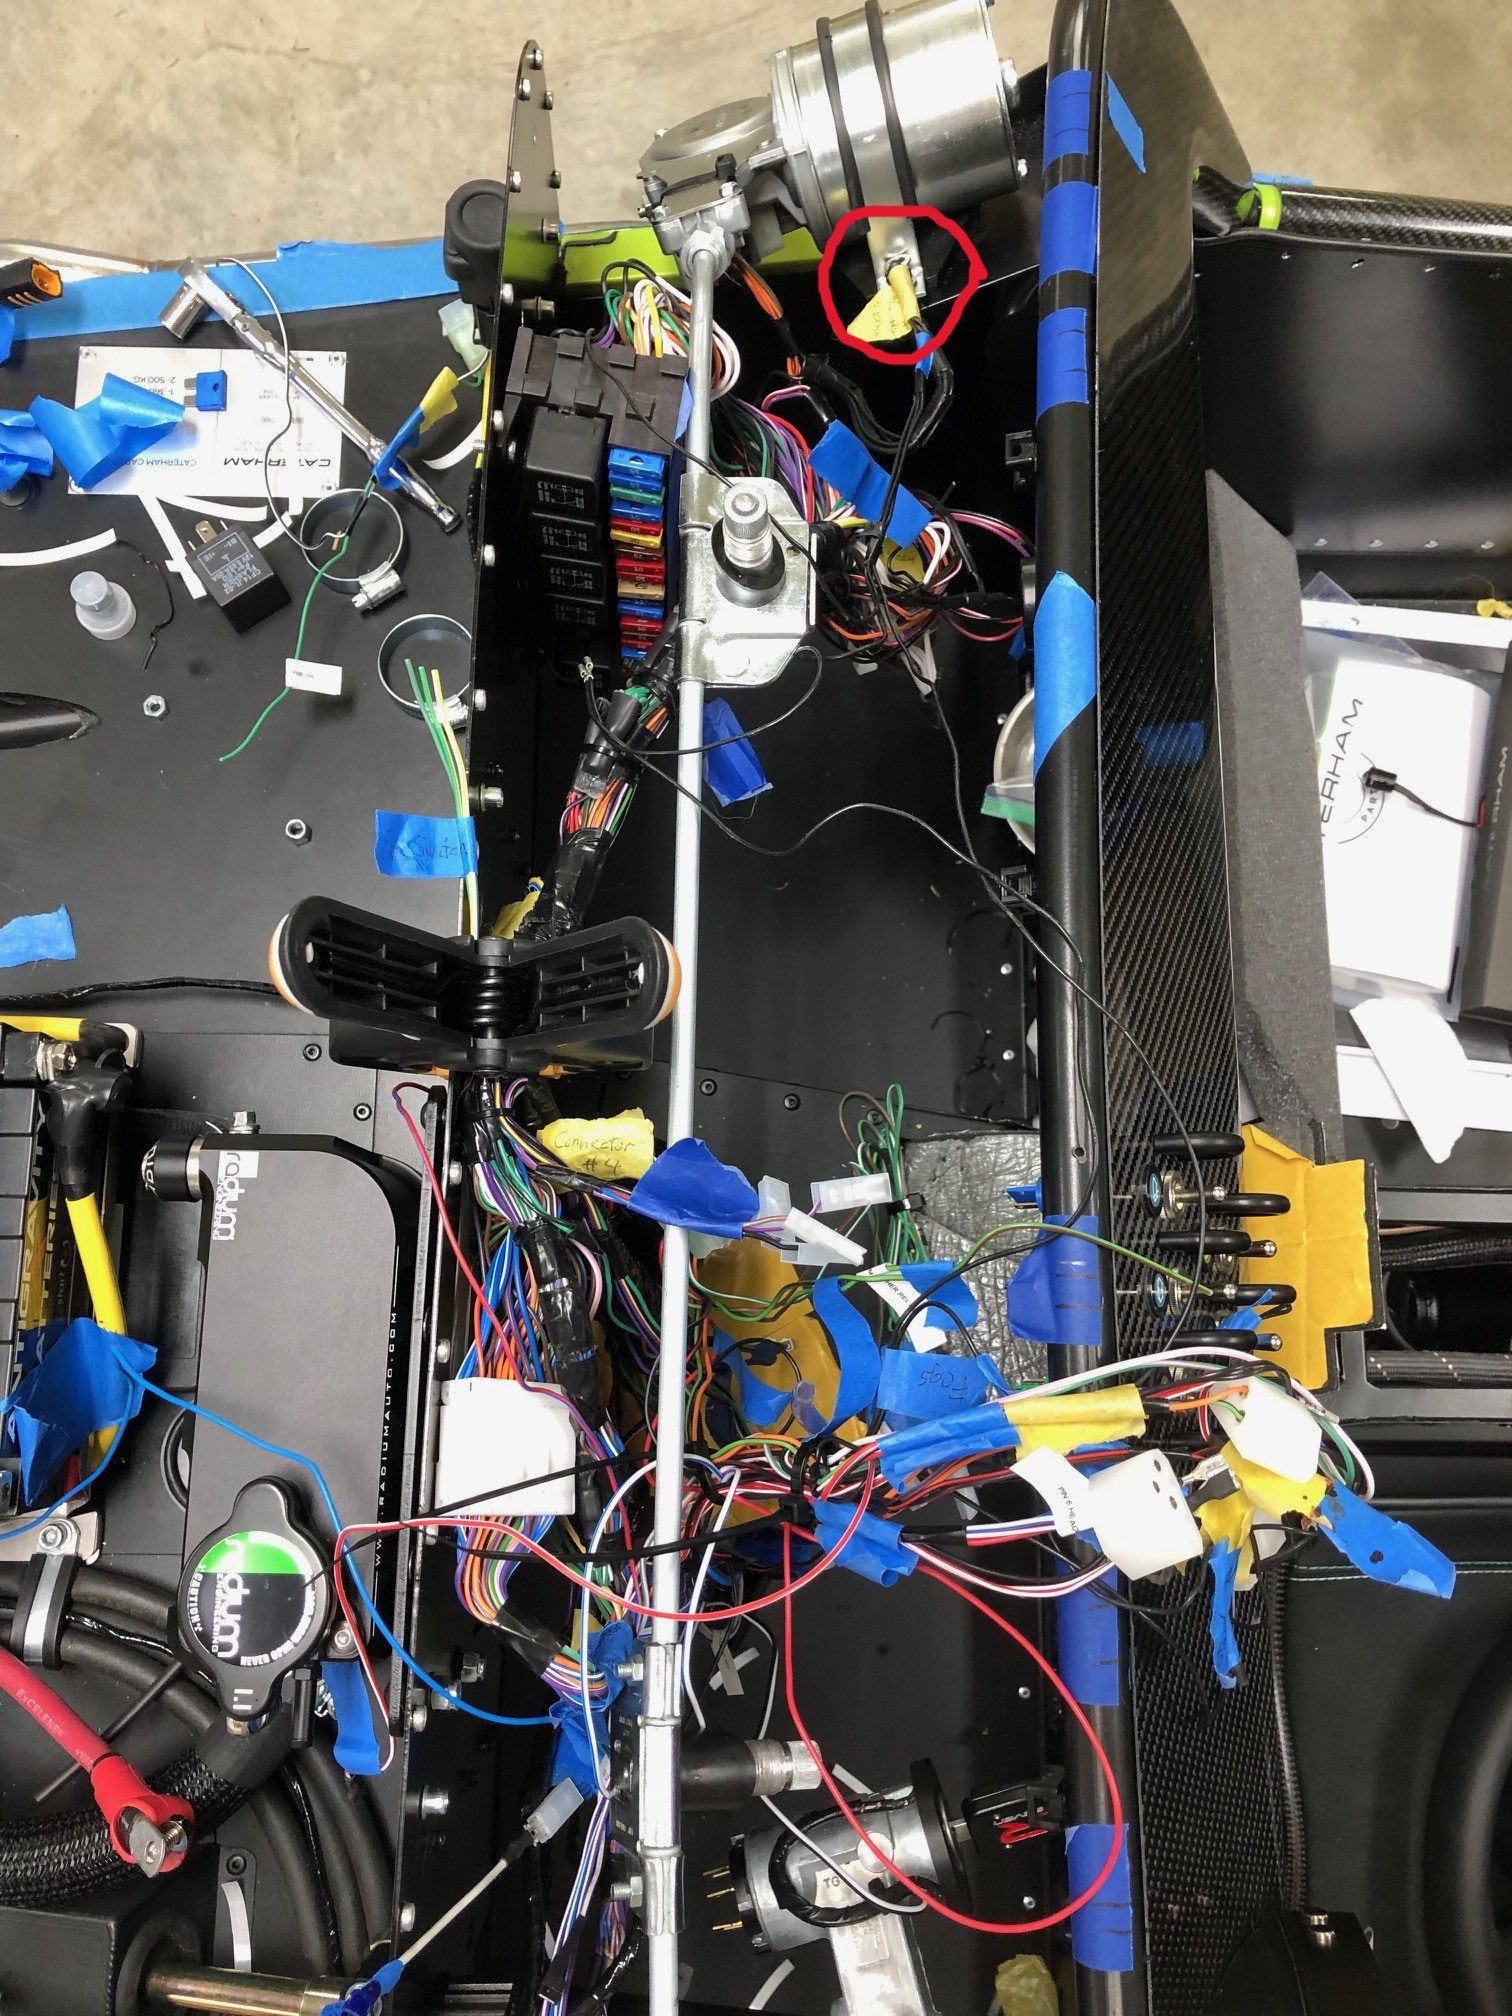
My first guess is the same as @wdb. One of the grounding points isn't tightened or the powder coating wasn't properly removed. There are three places where I'd run the jumper cable: The ground location at the back of the engine/bellhousing, the main grounding point on the shelf next to the battery, and the grounding point for the switches & gauges at the wiper motor attachment point behind the dash. The first two are easy to find. For the third, see this photo with the scuttle removed. The dash grounding point is at the top of the photo, circled in red. One caveat is that it's been a few years since I redid my under-dash wiring, so there may be a fourth point for a portion of that harness that I've forgotten about.
-
if you have a twin cam then your car is likely from the era when the dash was held in by rivets. if that's the case, and provided they also didn't glue it down, then @7Westfield's suggestion should be much easier.
-
Went for a blat with a friend today.
-
I agree this sounds like something done by a PO. Is there any evidence that the scuttle has previously been removed? I'd recommend using fishing like rather than wire. You're less likely to have an oops moment and damage the paint. Unless cars from that era used bolts to attach the scuttle, you will have a couple of studs sticking up that will block the line from reaching the middle section. However, depending on the material used, breaking the seal at both ends with the line may weaken it enough that you can safely slide in a plastic putty knife or trim removal tool into that area. You could also use a thinner, metal putty knife, but slide that in from the cabin side to minimize the risk of paint damage. Just be aware that the scuttle aluminum is thin. Try to avoid prying as that will likely result in some creasing or deformation. Any pictures?
-

Caterham Configurator & Spec Limitations
JohnCh replied to Exarkun1178's topic in General Sevens Discussion
Caerbont Automotive Instruments makes both the standard and Smiths gauges for Caterham. From a manufacturing perspective, I'd suspect the plugs and wiring are the same. If Caterham is unresponsive or gives a suspect answer, I'd go straight to the source. https://www.smiths-instruments.co.uk/projects/caterham-cars/ -
The audio on this one is pretty good. Never get to full throttle due to traction issues but running to 8k rpm. @Austin David if you remove the additional tracking info from the youtube URLs (after the ?), videos will embed.
-
I had to look for the video
-
Assuming it is still effective after all those miles, hence my parenthetical "working" proviso.
-
I love the license plate! An easy way -- or so I'm told -- to check if you have a (working) LSD is to raise one rear tire off the ground and rotate it by hand. If there is some resistance, you either have a plate type or torque biasing LSD. To check which type, raise both wheels off the ground and again rotate a wheel. If the other wheel rotates in the same direction, then you have a plate type. If it rotates in the opposite direction, then the PO probably installed a Quaife. I can second the value of a CAN gauge. I'm running an AiM display in my car and have a screen set up that includes Lambda and TPS. It's really useful when evaluating the map for drivability. Not as good as logging, but if something seems awry on a drive, you can quickly evaluate where it's happening without plugging in a laptop. As for the sound of ITBs. Yes! I have Jenveys sticking out of the bonnet. The sound is great, albeit rather loud. Having gone through a few different cam configurations over the years on a 2.0L Duratec and now a 2.4L Duratec, you can really hear the difference between cams with the ITBs. The more aggressive the profile, the louder and angrier the sound.
-
O rings for Caterham Crossflow Weber DCOE 40 Carb Mount
JohnCh replied to San Augustine's topic in General Tech
@ashyers turned me on to them when I was building my 2.0L Duratec engine. I've used them several times since then. -
O rings for Caterham Crossflow Weber DCOE 40 Carb Mount
JohnCh replied to San Augustine's topic in General Tech
This is my go-to vendor for O-rings. Huge number of sizes spanning many materials and their prices are reasonable. https://www.theoringstore.com/ -
Someone on lotuselan.net recently had a similar issue with UPS for an ECU and a wiring harness. They applied the same eight tariff classifications to both parts. Three of those classifications were free, two were 10% and the remaining two were 25%, for a grand total of 70%. I'm still fighting FedEx's invoice for tariffs on my package they lost. They finally responded this morning to the last two email I sent them over two weeks ago, where I politely suggested they pull their collective heads out of their asses. Their response to both emails read: Dear Valued FedEx Customer, Thank you for contacting FedEx Disputes. • The U.S. Supreme Court recently ruled that IEEPA tariffs charged by CBP were unlawful. We are assessing whether these invoices contain charges for IEEPA tariffs. • You do not need to take any action on these invoices at this time. The following link will guide you to recently posted information relating to the United States Supreme Court ruling and what it means for our customers - https://www.fedex.com/en-us/shipping/international/us-tariffs-impact.html Thank you, FedEx U.S. Duty and Tax Department (Enterprise Business Services) Progress?
-
This is a rose joint (aka Heim joint, rod end bearing). The bolt goes through the top, then through the spacer which is installed in the A-arm, and is held in place with the nut. To adjust camber, simply unscrew the bolt from the nut, lift it out, then raise the A-arm so there is sufficient clearance to screw the rose joint in or out of the arm. During this process, the spacer remains in the upright.