jevs
-
Posts
316 -
Joined
Content Type
Profiles
Forums
Store
Articles
Gallery
Events
Library
Everything posted by jevs
-
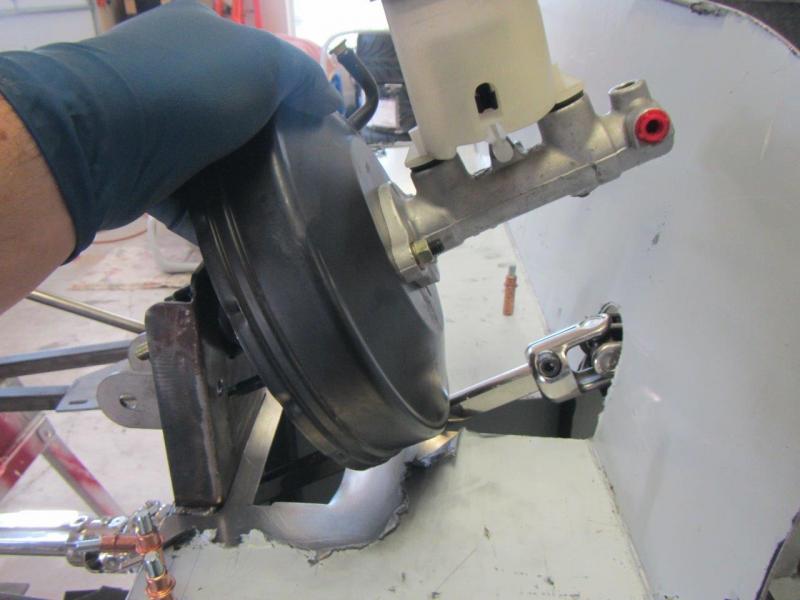
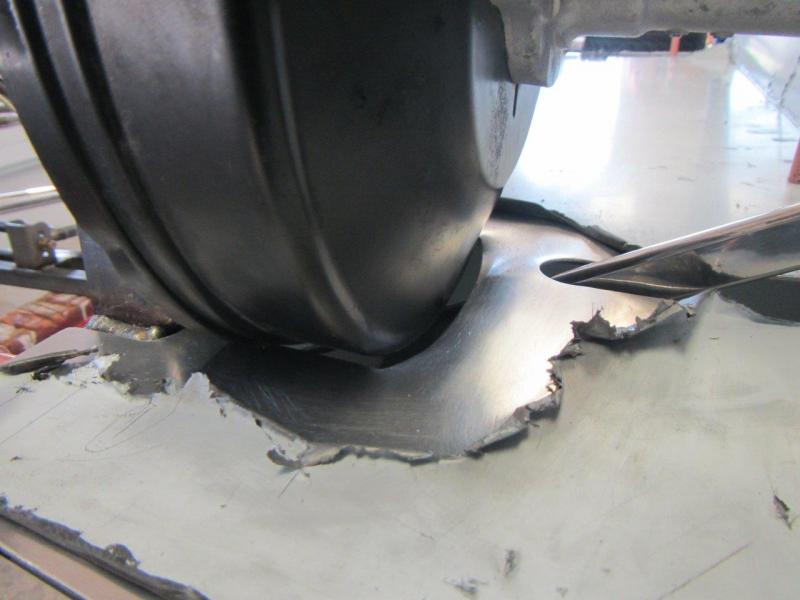
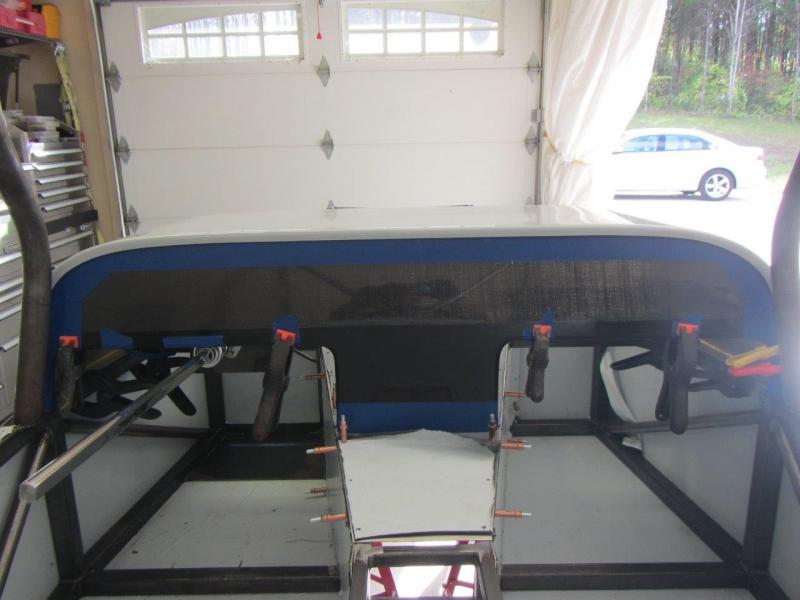
Making the fire wall fit around the brake booster. Brunton just cuts a big notch to clear this. I am trying to keep my stuff a little tighter. This way if I wanted I could just use a little weather stripping and make the cockpit pretty sealed off from engine bay. In order to make the brake booster easily removable, the bolt holes need to be ground out just a little at an up angle on the back side. This keeps the threads from getting scraped trying to get it in and out. The firewall panel has to be formed down between the booster and the steering so the booster can clear coming in and out. I just bent and hammered it, then sanded it out working from course to fine and ending with a scotch brite to get the marks and lumps out. It could be polished further at this point. I am not sure, but I may paint or powder coat mine so I don't have to deal with aluminum tarnish long term.

-
I just had a chance to look at the install video again. I can see that scott has a piece of aluminum hanging out. It is being used as a spacer between the hood and the frame rail in the front. So that answers one question. I still think there needs to be some rub protections. I will check out the Mcmaster part. If that can be "shaved to different thicknesses, they could be used to spaced the hood perfectly around the scuttle for a flush fit all the way around. Can those bumpers be removed. I see they are plastic. Seems like they might only like to go in once and never come out again without messing them up?
-
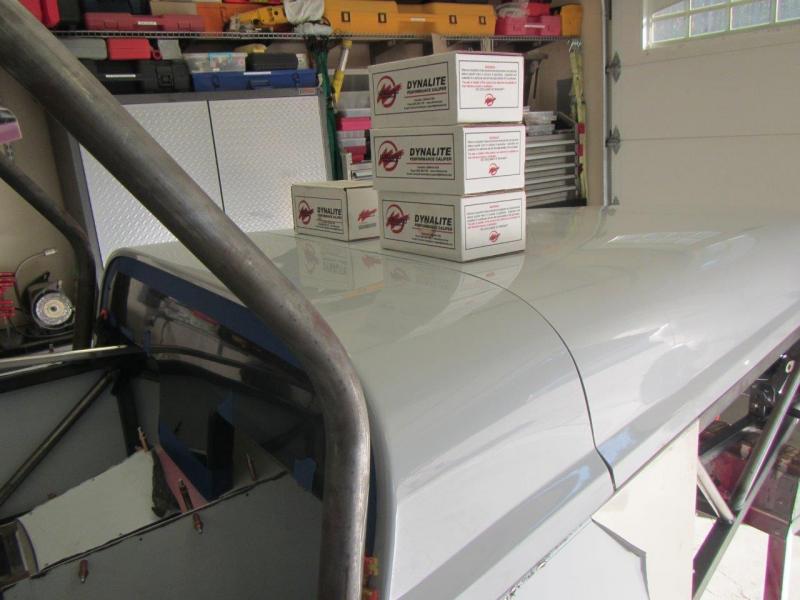
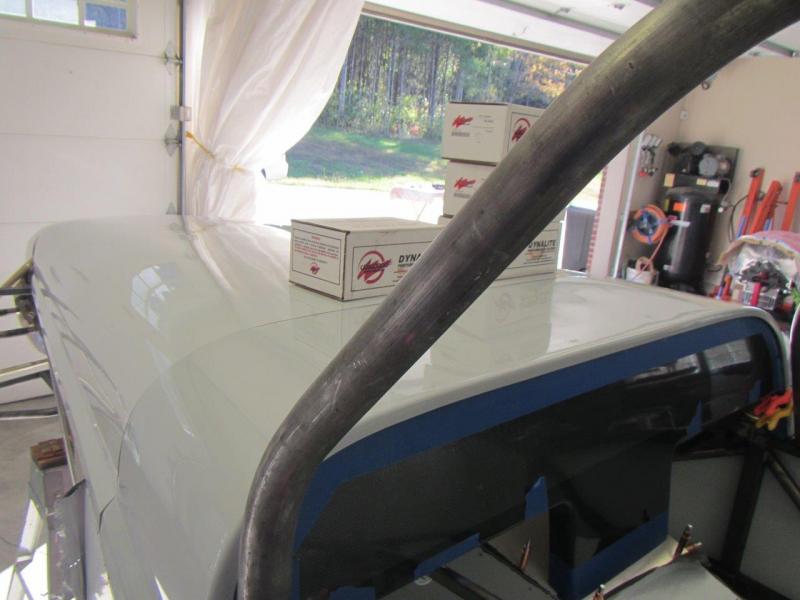
Do you guys let the bottom lip on each side of the hood just ride against the upper square tube? What about the fact that the back of the hood is riding on the side panel top lip and then transitions to the upper frame rail? This is a little step down, but the hood flange is just flat. I am not crazy about how the hood just rubs right on the scuttle and the frame rails. Most cars would have a cushion or suspension to keep it from rubbing through the paint. Just wondering what people have done. Or maybe I am over thinking it and these cars just have paint rubbed off everywhere after you use them? Seems crude. I guess you could lift the front up so there is a space the thickness of the side panel top lip all the way to the front? Just the hinges and the back would support it with a gap the thickness of the aluminum? Not sure what the intentions are for the design. Putting clear bra on the touching surfaces might be an option, but that would probably show abrasion as well, or wear through.
-
That looks like a GTM shifter. I have one of those assemblies in the basement . No good for a GTM of course...
-
What are people running for LS motor (V8) fuel filters?
jevs replied to jevs's topic in General Sevens Discussion
I think you would just have to get the pickup sock down into the sump area and then put a cap on the output. The internal pump seems like it would add a pound or two to the car and reduce capacity of the tank a little. I am not sure if it is worth it or not. It would hide some components and maybe look a little cleaner. Other than that, the only other benefits I can see are that it would be a little quieter and maybe the pump could last longer being cooled by the fuel. I have always ran external pumps on my fuel injection conversions just because it is easier to use the existing tanks etc. Since this is essentially a noisy race car with no creature comforts, sound deadening etc, I doubt the extra pump noise will make much difference to me. It probably won't be heard much when the engine is running? The other issue is that the sump area is at an angle, so you don't have a flat pickup spot. This may not be a real big deal other than you would have to just refill before you get down to your last quart You would need to do something different than the one xcarguy posted unless you modded the tank. However I think it could be simpler. Use your sump area as that bottom pan thing they have on that. So, I think it could be done, but the bad thing is I have a complete fuel system already. The only thing I really need is another low micron filter unless I choose to replace the summit 40 micron pre-filter with a better one also. -
toedrag brought it to my attention that the Summit filter called for in our setups is a 40 micron with just a round stainless mesh screen. This is being used as a pre-pump filter. This might be ok for that purpose, but it seems like it might clog quickly and from everything I have read is not adequate without a post pump/pre-regulator filter also. This one should really be 5 micron or better give or take from what I can tell. So, looking to get a discussion started on this. Unfortunately I think both of us already have what we thought was complete fuel systems. I know toedrag has ordered some stuff to try, but I know there are plenty of LS powered cars out there now, so I wanted to ask what others are using.
-
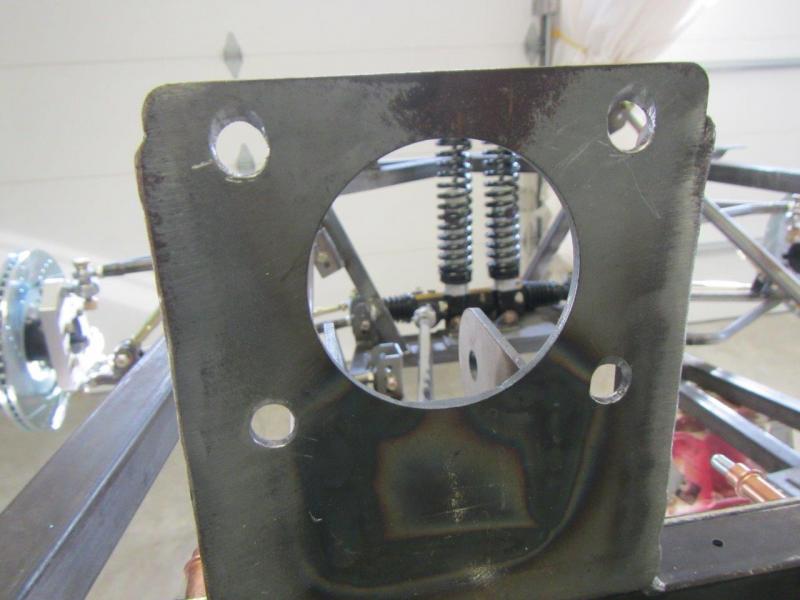
I just copied the way Brunton built the green XL. These are the holes they used.
-
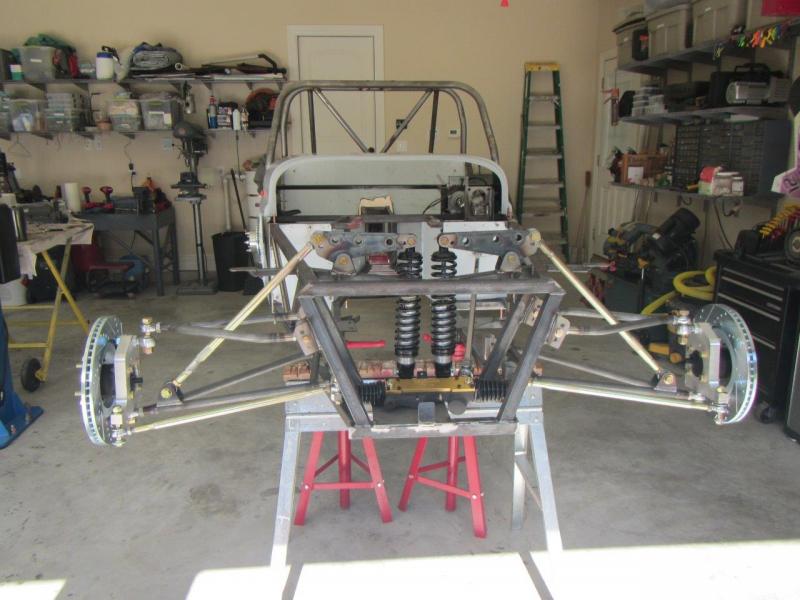
I spent a little time on the car this weekend amongst other things I needed to do. I got the front and rear shocks mounted. The drivers side lower bolt is a little too long and hits the steering rack, so I had to use 3 washers under the head instead of 1. Other than that, the shocks went in without any other issues. I did a lot of trimming and clean up on the scuttle panel. The dash side flange was all over the place as far as how wide the lip was, so I spent some time making it nice and even. I had to measure the smallest part and make the rest match. I trimmed a good bit off. The firewall side is also pretty unevenly trimmed, but I just smoothed out the curves on that side. I did not want to take too much off or there won't be enough to screw to the aluminum firewall. I also sanded down the inside of the front and back scuttle lips and tried to get the thickness of the flanges more uniform so they would sit against the dash and firewall better. Other than that, I just set the hood up to see how it was going to fit before I attach the scuttle. The scuttle has to be pulled in a little on each side, so I wanted to make sure the hood would still be ok. I think it will be ok. As always though with these fiberglass parts, how much time you spend is how good of a fit and finish you get. They never fit perfect without some work. The boxes in the picture are holding the hood down, or it is popped up a bit. I think just sitting that way for a bit or applying some heat will let it relax down.
-
I don't think that was the intention. I believe it was just because the tank was made as a simpler rectangular shape. You can ask Brunton, but I believe they were already thinking of doing this when I asked for it. The filler is also flat instead of being on an angle towards the cockpit of the car. Most fuel cells out there have no evap stuff on them or an air chamber for expansion. They just push it out if needed with a check ball if you flip (this tank does have the check ball).
-
Not sure what the capacity is. It should be bigger. I asked that the top be angled so it was flat when installed. Made no sense to me that it was angled before. Wasted space.
-
I think the aluminum shocks were the last of the parts holding up the Brunton shipment. I think they took a long time to get. I know the axles took a little while also.
-
I know I have not shown much progress lately, but behind the scenes I have been busy gathering parts for this project and another one I am doing. I now have everything but wheels that I know of to build the car completely. I also finished a bunch of house projects and some mods to my drill press. I am sure some stuff will still come up. But I am ready to start moving again I think. I finally got a scuttle! Now I can go back to building in sequence. I also got the rest of what I think is the last of my parts from Brunton. Pics of the radiator and gas tank. I need to check my inventory of fittings and see if I have everything to hook up this double radiator.
-
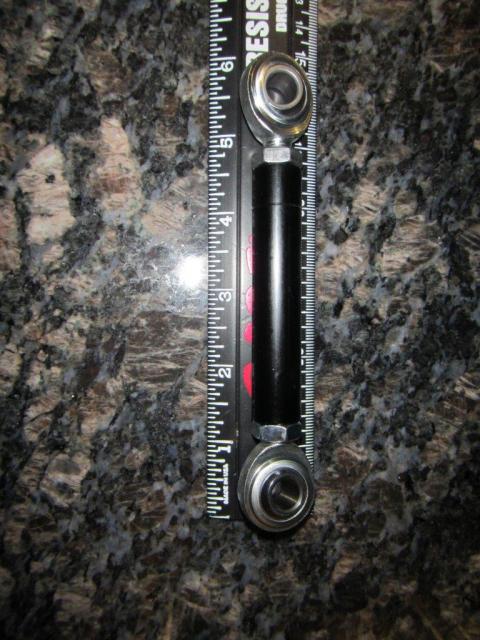
Thought I would post a pic of that throttle tie rod I mentioned in case anyone wanted to see it. The end at 0" is about in line with the ruler end, even though the picture makes it look like it is overhanging. The threads go near to the center from what I can tell. Maybe 3/16 not threaded in the middle. Hard to tell for sure. I think you could trim 1/2" off each end and be ok (make it 1" shorter). The ends themselves should still work with no trimming. So, long story short....I think this could be made shorter by an inch or so relatively easy. I think it is ok for me, but I know someone else was saying they needed shorter.
-
Brunton said a 3" rod. I see in their picture there was plenty of exposed thread on the heims. So, I assume the smallest 3-1\8" rod would work for me, so that is what I ordered. Any shorter and the heims will hit each other inside the tube I think. You could probably buy that smallest one and then trim the end of the rods and the threads of the heims if needed.
-
I cannot remember. The CBM part was a few thousanths larger than the hole. It was a light press fit. If you ordered off the site instead of by phone you might have got the wrong one. There was a part number issue on the site. Did it show that you ordered the part number I got on your invoice? I remember the guy on the phone pesonally made sure I got that part number instead of what was being called out by the same size selection on the site.
-
I believe 3/8 is what Brunton uses. If you think the bolt is too large though, you can simply get a shoulder bolt with smaller thread, or put a little sleeve in the hole of the heim for a smaller bolt. The 3/8" hole gives you options. You could use 3/8", 5/16", or 1/4" bolts. If you use 1/4, well, then you just have to use 1/4, which may be fine. I am not sure how much force/tension is on this stuff yet. I am not as far along as you. It does look like if you press on the pedal hard ("flooring it :)" ) that the bolt will have to take that force. Nothing on the pedal setup before the rod has a stopper that I know of yet. Bottoming out the GM cutoff pedal is the stopper I believe. That rod is aluminum too, which gives you a little tiny weight savings and no rust. Not sure about the ends. I would assume they are steel by the picture.
-
I know you already made your own link and probably don't want to go backwards, but I found and ordered what should be a suitable part available in a short length for the throttle. http://www.bmikarts.com/Racing-Aluminum-Tie-Rod-Kit-38-24_p_1492.html
-
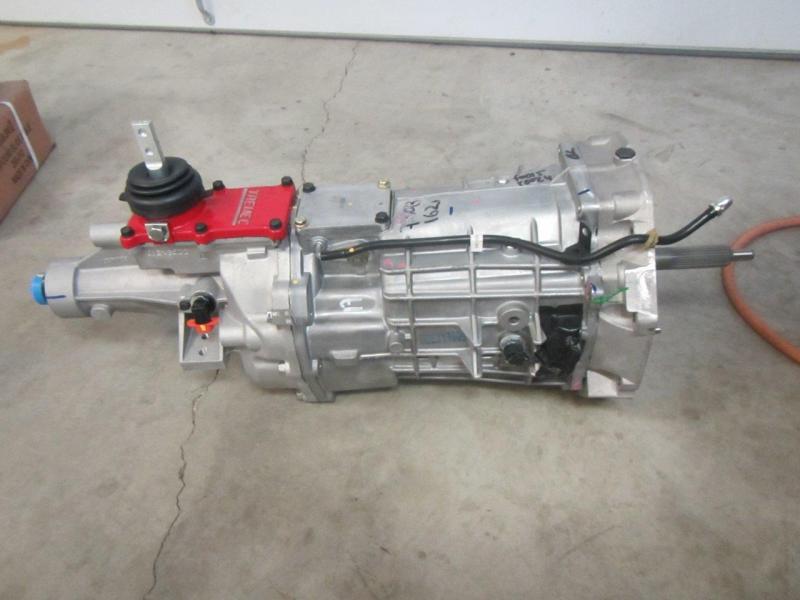
Those are the only parts you get from the transmission guys. However, I was supposed to get bellhousing to motor bolts and bellhousing to trans bolts. They were not in there. I asked for these, but they didnt come. I have the GM numbers if necessary. Scott said my aluminum shocks finally came, so I should be getting a pallet of parts soon from Brunton. This will give me all but little unforseen things to finish the car. Oh and my wheels, those are backordered until next month.
-
Longer than that. I ordered it July 30th shortly after I got the car. It showed up monday at work (have docks). I just got it home tonight
-
Transmission and parts arrived. I now have the entire drivetrain except the rear axles. I also got the spacers recommended in the #22 build for my wildwood pedals. I guess I will start mounting those next.
-
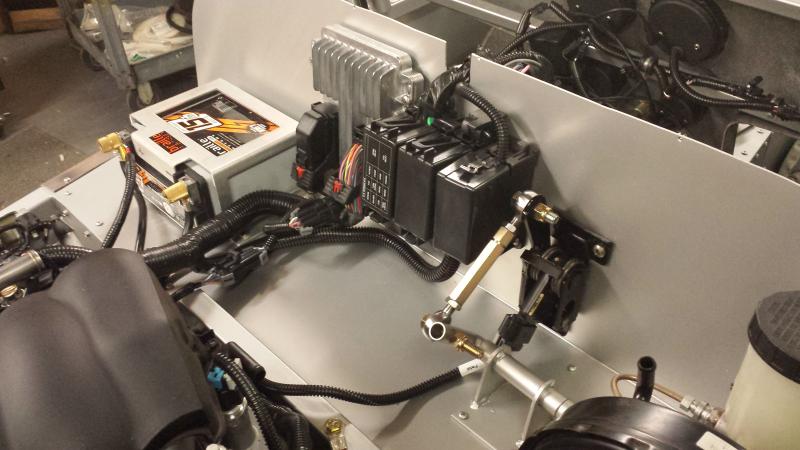
That is a bit different angle/throw than they use at the cut off GM throttle pedal. Curious if your planning to leave it there and like it better? I am working on gathering the parts for this. Sourcing a 3" rod for the heims is not fun (hard to find, but I did find it). I asked Scott if he can just sell me the heims and rod instead since they have to send me some parts soon anyway. I am waiting for a response to that. The extra adjustability might come in handy later, who knows. I also ordered those same spacers you used on the other pedals to avoid all the time wasting of making my own. I had a 15% coupon code for garage sale items so it was like $8.49
-
Land Rover Defender Rear Stop & Tail Light Units With Stainless Steel Screws (up to 1994 models) LED lamps for tail lights 1157 Red Tail/Stop Light 64 SMD LED The Signal Dynamics Penstar unit will also use these for turn signals First Inertia Switch, Electric Fuel Pump cutoff & Connector w/ 30cm cable. This will kill the fuel pump if there is an accident.
-
Front turn/parking lights Reverse LED lights Tires: TOYO Proxes R888 315/30ZR18 98Y TOYO Proxes R888 255/35ZR18 94Y RD
-
Trailer hitch fabricated and welded up. I used Curt part number 49506 for the receiver tube. The removable part is: 3594 Draw-Tite Sportframe Drawbar 4" Rise 2000# Kit I am waiting for the safety chain loop: 4234 Tow Ready (Cequent) Safety Chain Loop, Class I, 2,000 lbs. 5.625" L x 2.25" W x 0.25" H
-
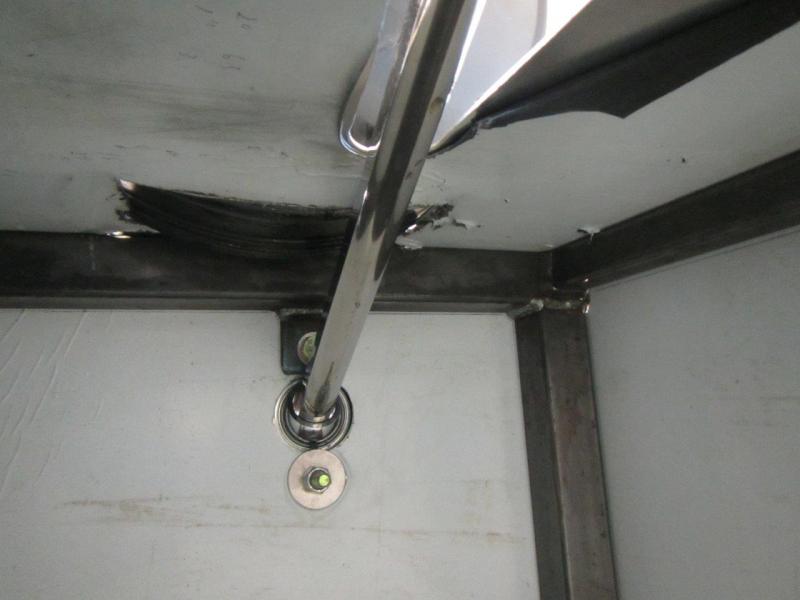
Steering all done except for the steering wheel. I need to get the seat and pedals in place so I know where I want it.