-
Posts
483 -
Joined
Content Type
Profiles
Forums
Store
Articles
Gallery
Events
Library
Everything posted by papak
-
All set. Thanks to all.
-
Just think about how much knowledge you are accruing... sometimes it is the process, not the result, that is most enduring.
-
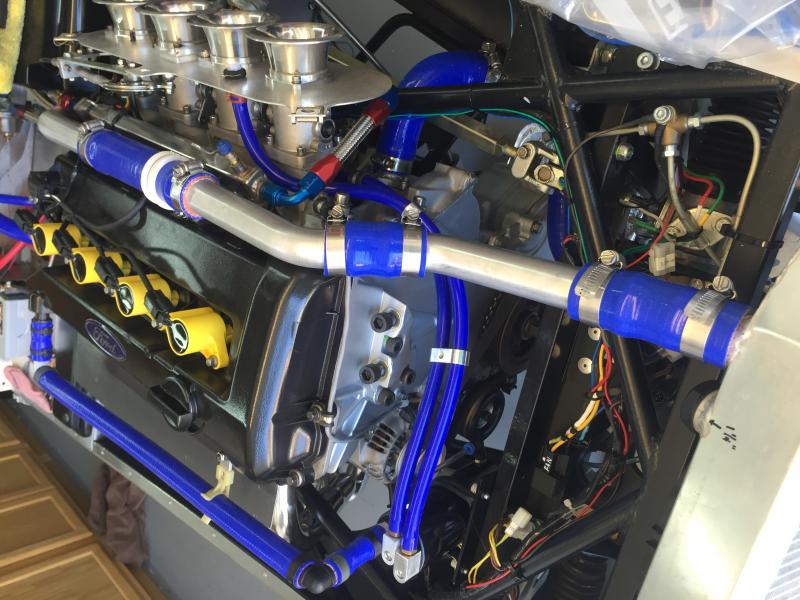
http://www.usa7s.net/vb/attachment.php?attachmentid=14837&stc=1http://www.usa7s.net/vb/attachment.php?attachmentid=14838&stc=1 I think I have it filed away somewhere. I'll post it over the weekend. If you are using the 1.25" aluminum tubing, I can loan you the flaring tool if you would like. It puts a nice ridge in the tube.
-
I found a local silicone hose supplier here in LA and used that along with some aluminum bends I found online. I did have to buy a flaring tool for the aluminum tube but the combination gives you a lot of flexibility in fitment. I think I got the bends from Summit or Speedway. Pegasus has the silicone hose but I got it cheaper locally.
-
You might try Tom Carlin (tbox56). Tom is the Birkin distributor. He might have a set for a Birkin that could fit.
-
If you want to replace the headlight switch with a toggle, use the Lucas 31788 (also shown as an SW42). This works as off/A on/AB on. This allows you to run the parking lights and headlights on the same with while retaining the high beam relay button. I have been speaking with Tom Carlin and we figure that I can use a simple on-off switch to control a five pin relay that will, in turn, control the power to either the hazard relay or the directional relay. The directionals will be the default and the hazards will be the switched circuit. I have spent a lot of time researching this and the only toggle switch I have found that will replace the headlight switch easily is the Lucas 31788. Everything else is usually a rocker or a pull switch. Ron Francis sells a toggle switch for a more directly wired hazard light system. It is a single throw/four pole switch. I will be using this as the on-off switch for ignition and other switched functions. If you are using a Typhoon ECU, you could wire the switched 12v supply to this switch but you would still need the un-switched 12v supply to run directly off the battery as the ECU needs power for about 5 seconds after shutdown to save the engine parameters to memory. The memory itself is non-volatile. While the fuel pump relay is powered via a relay from the ECU, it runs off the switched 12v supply. Consequently, the pumps lose power when the ECU is turned off.
-
This is the driest engine rebuild I think I have ever done. Nary a drop from anywhere. Nothing from the bottom of the bellhousing but an occasional drop from the output shaft seal when I park it facing uphill after a blat. I do have a fill plug on the top cover. I plan on replacing it with an Earls adapter and a -4 breather hose before I put it back on the road.
-
I may be wrong on the grade of lube. I'll have to check my notebook. There is only 1600 mi on the drivetrain. It's interesting because there is NO evidence of seepage anywhere else.
-
I recently noticed a pretty uniform film of oil on the top cover of my T-9. I know that there is a small breather hole in the cover (original from the manufacturer). Have I overfilled the gearbox? I believe that I have a liter or so of Lubrimoly 75-90 GL-5 in it. There’s is no leakage from anywhere else on the motor or the transmission. I guess that when I next pull the drivetrain, I will install a hose and route it to a catch can. Ant other thoughts on it?
-
I stand corrected. It’s Crower.
-
I have the Stage 1 cams. Whenever I do rebuild the motor, I will use the Stage 2 cams. They are listed for boosted applications but Tom Carlin (Birkin distributor) said that they work well with a normally aspirated Duratec with stock rods and pistons. I use a rev limit of 7000 rpm.
-
If you order from Crane, make sure that they understand the the cams are for a track car. Otherwise, they will adjust the grind to add 4 degrees of advance (?) for emissions. I had to adjust this out with adjustable sprockets. Pain in the ass.
-
Try Crane in San Diego. They have a pretty big database and will respond to phone calls.
-
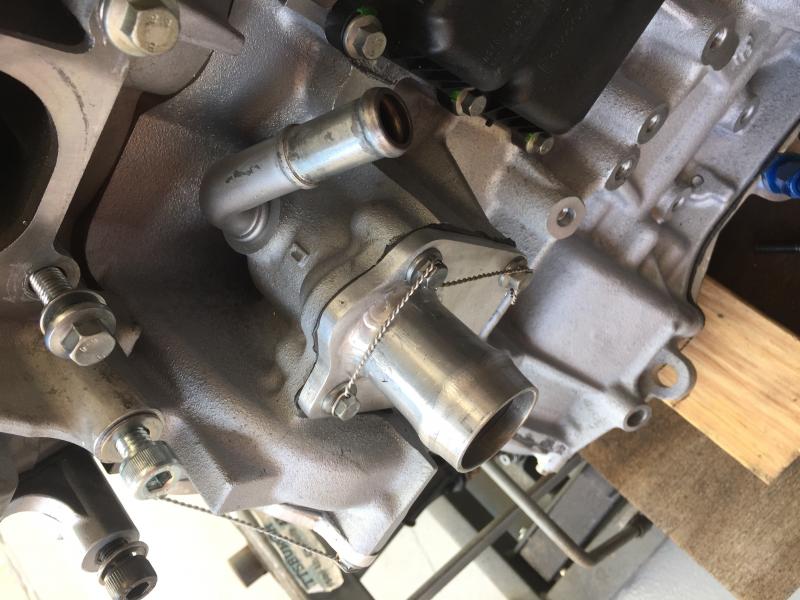
Try batinc.net. They show a plug in that thread with an o-ring seal. Probably just what you need. If you are nervous about the fit, you could drill one corner and safety wire it.
-
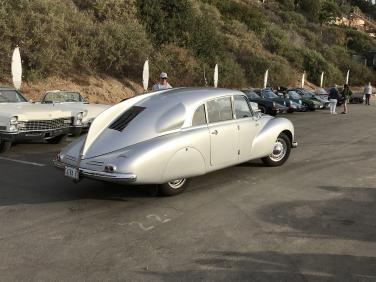
A nice turnout this morning following a beautiful drive up PCH at dawn.http://www.usa7s.net/vb/attachment.php?attachmentid=14740&stc=1http://www.usa7s.net/vb/attachment.php?attachmentid=14741&stc=1http://www.usa7s.net/vb/attachment.php?attachmentid=14742&stc=1http://www.usa7s.net/vb/attachment.php?attachmentid=14744&stc=1 Bear at with me as I’m just getting the hang of posting pictures. Yes, that’s a 1958 250 Testa Rossa!
-
I didn't have a problem with the relay. It was an LED capable relay. I experienced current bleed across the harness due to the lower resistance of the LEDs. The diode fix works perfectly.
-
When you take a look at replacing the rocker switches, let me know what you come up with. I wanted to swap them for toggle switches as I think they are pretty flimsy. It isn't a straightforward exchange. The way Birkin wired the lighting circuits seems unnecessarily convoluted. When I converted the tail light assemblies to LED bulbs, I had to add a couple of diodes to get things to function correctly. Were I to build another Birkin, I would simply order a wiring harness from Painless Performance or one of the digital systems.
-
The plan over the winter is to cut a new aluminum instrument panel and change over from a keyed ignition to a start button system (as well as cleaning up the wiring harness and removing a couple of unused switches). While I don't see this as particularly challenging, is there anything I should be aware of? I have a 40a start button, a guarded heavy duty toggle switch and a conventional cut-off switch on the way. I have lined up a local sheetmetal shop that will punch the instrument holes. Since there will be no key, I may also install a cell phone controlled immobilizer system. Since I converted to Brooklands screens, I no longer need the windshield heat or wiper switches. When I put on a flat bottomed Momo steering wheel, I found that it hid the directional and high beam indicator lights. This is an issue as I have a manual directional switch and an incredibly short memory. I would love to find toggle switches to replace the plastic rocker switches that came with the Birkin for the headlights and hazard lights but rewiring those circuits requires too many Tylenol. Any effective strategies are welcome.
-
It seems that you guys are approaching this from a purely "BDR" perspective. How does Porsche manage this? Many more seams and seals in an air-cooled motor and most Porsche owners are pretty compulsive about the purity of their garage floor. The same for Ferrari as well. Maybe call the guys at Quicksilver and ask them. I ran an Accusump on a track car for a number of years and used a manual ball valve to shut off the accusump prior to shutdown. It never leaked and I never had to question whether an electrically activated valve was functioning correctly. While it's not exactly the same application, perhaps this approach might work. More positive control than a spring loaded check valve. On the other hand, there are a number of truly essential check-valve controlled functions in aircraft that are very reliable. Maybe check Aircraft Spruce.
-
I pumped in .3-.4l of Lubrimoly GL-5 75-90 into it yesterday (til it ran out). I then stuck my finger in the upper fill port and pushed a bit out, hopefully to compensate for the angle of the diff while jacked up. My assurances that it was a precisely calibrated finger. Given that it's from a Subaru, I figure that is precise enough. When I did the original installation, I replaced the breather with a -4 hose that vents to the top of the boot. I should have it back on the road later this week (I originally jacked it up to replace an intermittent Facet LP fuel pump).
-
I checked on the a Subie forum and the fill is either 1.1 liters or fill to the bottom of the upper plug. Everyone seems to be an authority. I think I’ll fill to the upper plug and hold off on changing the seals as they aren’t slinging lube. Just a slight seep at this point.
-
I pulled the top plug on the end plate and can't feel fluid with my finger. This doesn't mean too much as the back of the car is jacked up and the clearance between the aluminum end plate and the diff is only about 1 ½". I show the correct fill amount to be .8 qt. I can't recall if this fills to the level of the top plug or not. Any info on this ?
-
I show a drop or two sitting inside the flare and a trail down the side a bottom of the housing. All of the seams are dry. It’s not “slinging” it to any extent. I’ll remove the upper plug this afternoon and check the level while I have it up on stands.
-
I picked up a used Subaru R180 LSD diff for my Birkin during construction. It was fairly low mileage (30k). I cleaned it up and resealed the side plates and rear cover. I also replaced the axle seals. Now that I have 1500 miles on the car, I found that both seals a leaking a little. It’s just enough to be a little messy under the diff. I show that this diff takes .8 qts of GL-5. Is this seepage evidence of overservicing or have the seals worn that quickly? I’ve got replacements but it’s a real pain in the ass to change them out if I don’t have to.
-
When I hook up the battery minder to the car, it maintains the charge at round 13.5v. Once I start the car and the revs get to around 2500-3000, I am showing 15v on the voltmeter. This is with no load other than ECU and pumps. The alternator is new, a small 40 amp unit from a Suzuki. There is a 50 amp master fuse in the charging circuit. I am running a small Braill battery. I have seen no issues arise from this to date other than some deformed tail light lenses (I have since changed to LEDs). I guess I could change the pulley but without some actual knowledge to base it on, it would be stab in the dark. Total miles are 1300 on everything. Should I be concerned?


