Brightonuk
-
Posts
348 -
Joined
-
Last visited
Content Type
Profiles
Forums
Store
Articles
Gallery
Events
Library
Everything posted by Brightonuk
-
Possible Another posable option by removing this top plate from the top of the trans will it give me access to refill the oil?

-
The issue for me is a part of the cassis framework in located directly over the plug otherwise I would have room to use a ratchet
-
That would work perfectly if I had enough room to fit the socket wrench (assuming the 3/8" would work) between the plug and the body but as I pointed out I have less than 1/2" to play with. I think cutting square rod to fit the plug opening and then an open ended spanner to turn the rod seems like the only way left to try, or just leave it be and assume that I don't really need to do this
-
Change of Plans get a metal bar from the depot 3/8" and 1/2" dia cut that down to a nub and see if one fits?
-
Well after looking a little closer and 2 hours of frustration I realize I need a square drive the 12MM hex did not work too big the 10mm hex are to small or a hex will not work with a square hole anyway? I am just stumpt at how to get to this plug out I have less then a 1/2" gap between the plug a a body structural rail situated directly over the plug. I found these an Amazon but I don't know if the 10mm in a square socket will work and as I have to butcher the socket to see if it will even fit I would preferer to get the correct size to begin with. https://www.amazon.com/CTA-Tools-2049-Square-Sockets/dp/B008TOHAVG/ref=asc_df_B008TOHAVG/?tag=hyprod-20&linkCode=df0&hvadid=312540934012&hvpos=&hvnetw=g&hvrand=3825463004270120153&hvpone=&hvptwo=&hvqmt=&hvdev=c&hvdvcmdl=&hvlocint=&hvlocphy=9011978&hvtargid=pla-641879711752&psc=1 Any pointers would be greatly appreciated.
-
Anyone know what dia Allen Wrench is used for the gearbox oil plug on a T-9 Just cut down a 3/8" to a stub and found it is to small?
-
I had the CIC one and was trying to find the company that made them a while back got a response from a member on L7 (but I am no longer a member) and he told me they went OOB a few years back. I have a SS Simpson exhaust now and was trying to source a heat shield CF but it came to a dead end my other thought was to purchase a CF sleeve and fit over the Simson but I am not sure how CF stands up to the heat.
-
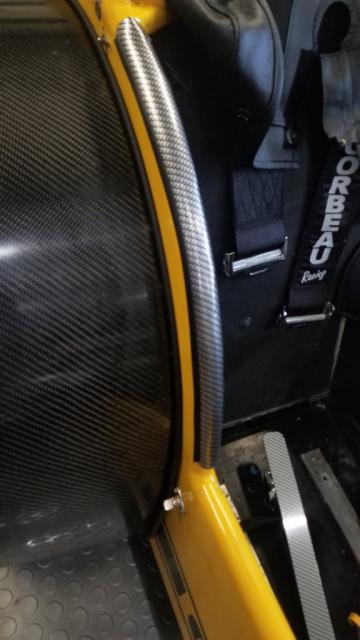
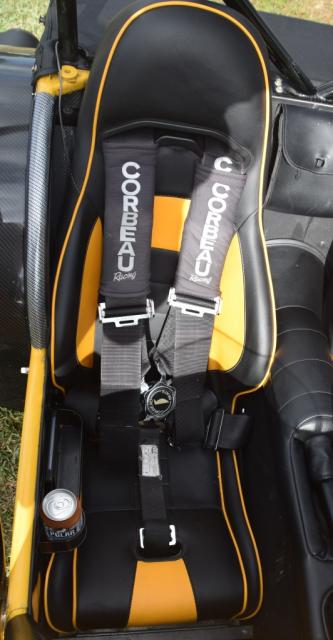
Yep and holds a call phone and wallet too
-
OK so not CF but does the job at a fraction of the cost
-
Its not the just the build but the effort in creating a stop motion video. Like he says took 8 hours to remove the engine an transmission where as most people have it done in an hour.
-
Used to be a Tesla P100D now it a Caterham Superlite...Honest that's my daily driver after turning in the Tesla So how's that working out for ya? Well it used to be a Tesla P100D now it a Caterham Superlite
-
Found this and it has to be one of the greatest restoration video's on You Tube The patience it must have taken to restore a car in stop motion Here's a break down of the work he put into the video
-
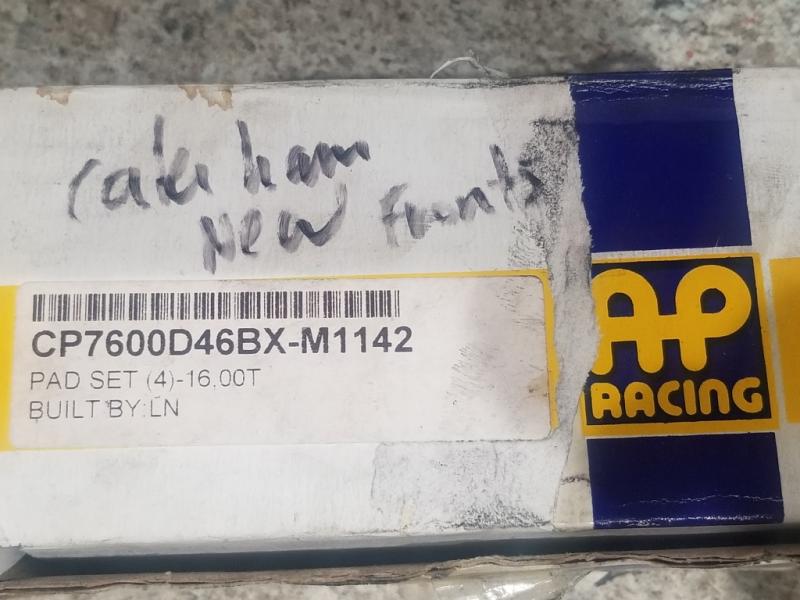
Full set (4 pads) Came with the car but will not fit due to the dog ears on the pads
-
KK just a silly thought came to mind..... that is if cold air = horsepower then why not plum a cars AC into the intake still drawing air from the outside but mixed with the cold AC would that not make for denser air (more Oxygen?)
-
Not really a Caterham question but I can someone educate me on the following question? I get that cold air holds more oxygen molecules which in turn = more horsepower which is why those aftermarket relocation filter don't work (if pulling air from the engine bay) Is there a point of diminishing returns when it come to air temp vs the amount of oxygen molecules in a given volume of air?
-
I am looking to upgrade my pads. The casting on the rear caliper is 0659/7 and stamped "Caterham" calipers on the front Any pointers to a good inexpensive option for the street and track (with part numbers) Thanks Steve
-
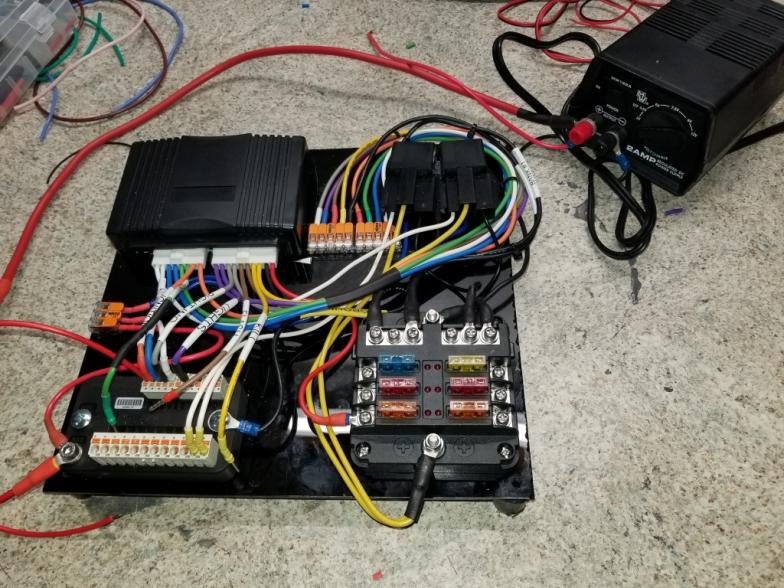
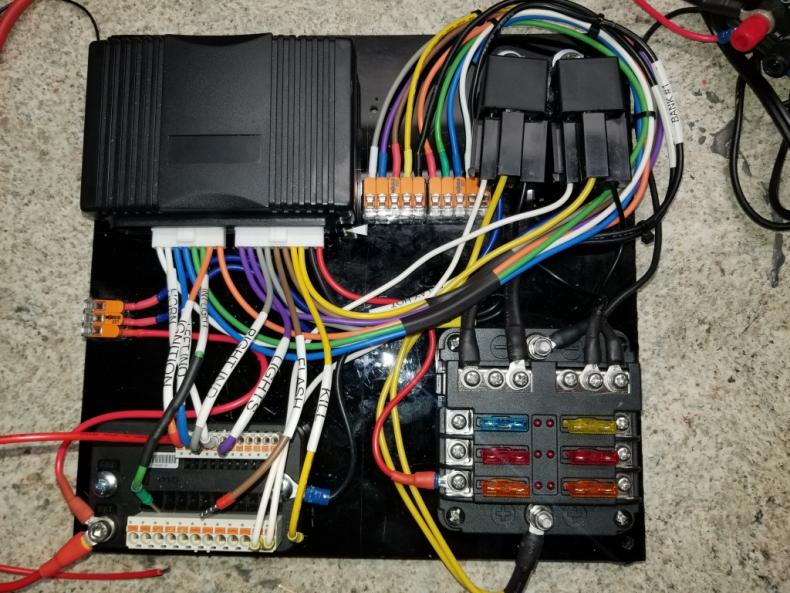
Yep finally got the M-ride to find the M-Unit I set the aux 2 to engage as soon as the ignition energizes so that is solved as I now have an Aux fuse box very impressed at the customization option in the M-Unit. The setup seem to be working with the inputs/outputs triggering with the wheel buttons. Jeff: Under "Handlebar Controls" on the M-Ride did you set these up or are they just used for the M-Button? Now the frightening task of rewiring the car.
-
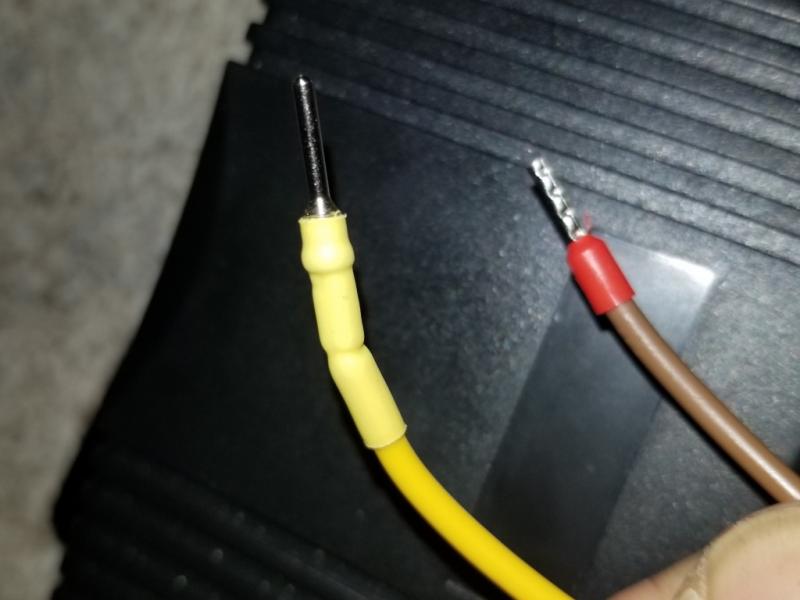
If you do go that route here is a good way to tin the wires I used it for any wires not terminated with Ferrules https://www.amazon.com/gp/product/B017LG2FUS/ref=ppx_yo_dt_b_asin_title_o05_s00?ie=UTF8&psc=1
-
I started with these: https://www.amazon.com/Insulated-Ferrules-Terminals-Crimping-0-25-10mm%C2%B2/dp/B07TYCKN4F/ref=sr_1_1_sspa?crid=GTF2BW8FTJ7I&dchild=1&keywords=ferrel+crimper+kit&qid=1611153136&sprefix=ferrel%2Caps%2C177&sr=8-1-spons&psc=1&spLa=ZW5jcnlwdGVkUXVhbGlmaWVyPUFHT0xBT0JGRVA3QzQmZW5jcnlwdGVkSWQ9QTA5NTc4MzgxSVlKMFVCTEU3TURaJmVuY3J5cHRlZEFkSWQ9QTA4ODcyOTQySkIyRjhQR0hKRUVPJndpZGdldE5hbWU9c3BfYXRmJmFjdGlvbj1jbGlja1JlZGlyZWN0JmRvTm90TG9nQ2xpY2s9dHJ1ZQ== If you want some of the above drop me a PM and I will send you a bag full as I have hundreds of the buggers I will never use. But ended up getting these (male) without the plastic butt which I think work better they insert in further and just added some shrink tubing https://www.aliexpress.com/item/4000924555523.html?spm=a2g0s.9042311.0.0.4e634c4d4kYqHx. You can also get them from "TE Connectivity" state side or just google Ferrule pins/connectors You will need a crimping tool and make sure it will crimp down to 20 gauge for the china ones. I have an Eastwood crimper with interchangeable dies which works out great
-
Jeff OK I guess I must use a kill switch as "Lock" needs 12v to turn on the unit, so I will wire as you did using a hidden 12v switch. I am slowly figuring this out but it is still a jigsaw puzzle, the Aux out is a little unclear how to get those circuits to energize once I flip the hidden "lock" switch without any other input. Another puzzle is how to use the "Kill Switch" it did not turn off anything when I grounded it?? I see you did not use this option. The wheel buttons all seem to work with the M-Unit just programing. How did you program the indicator flash option on the wheel to be constant/lock and control the flash via the M-Unit or timed flash through the wheel button and no input from the M-Unit? Here is the board now so once installed just loose the exiting fuse block and rewire to this one Any chance of some photo's of your install? Steve
-
Jeff As I am using an Aux out to trip a relay to the aux fuse box how do I get the M-Unit to send a signal as soon as it is turned on (without programing a button to it). The feeds from the fuse box are to the brain for the remote wheel buttons as well as the fuel pump and ECU so I need power to the fuse box to start the engine Thanks Steve
-
I am off my meds As Ive been fretting over the gear oil the T9 was still on my mind The Zetec oil drain plug idiot :banghead:
-
Anyone know the thread size for the T-9 oil drain plug in addition the copper washer? Just changed my oil and I cant stop the leak from the drain plug I installed a new copper washer but had to modify it a bit to fit over the treads. The drain plug looks a little worse for wear Lastly torque setting for the plug? Thanks Steve
-
OK may not be a Zetec but this has gotta be the best recording of a Caterham engine (I would like to know where his mike was)
-
My setup 2.0 Zetec overbored Not sure the specs on the overbore but running: JE Pistons 85mm Around a 11.1.Compression TMW Throttle Bodies Decked Block .0040" Oversize valves and followers Race Ported head Fidanza Aluminum Flywheel (8.5Lbs) Jet hot coated headers Kent Rally Cam MicroSquirt ECU Simson Exhaust