lg2k
-
Posts
44 -
Joined
Content Type
Profiles
Forums
Store
Articles
Gallery
Events
Library
Everything posted by lg2k
-
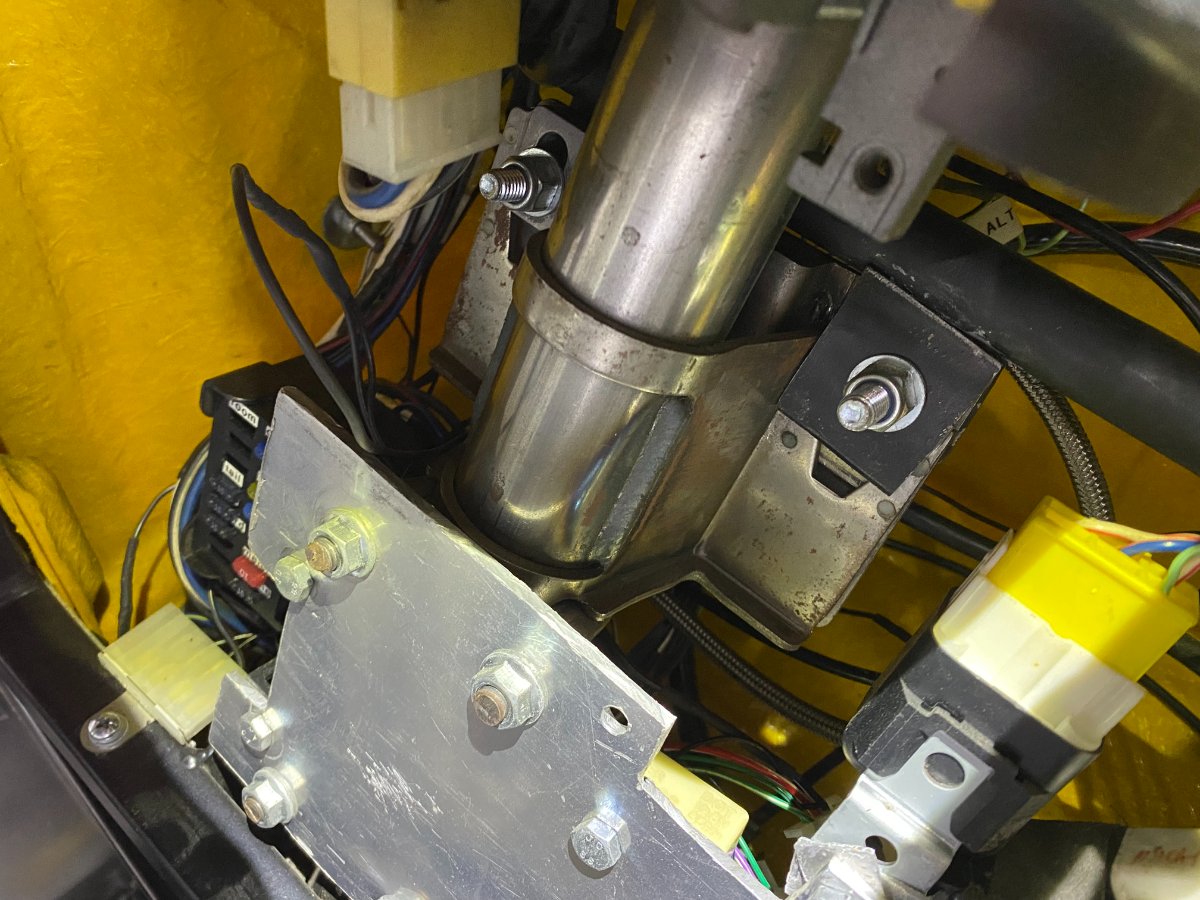
There is no slack in the steering at all. I have an NA Miata I still drive and I can't tell much of a difference in the steering between the two. I just think that being a Seven the steering should have more feel and I think having so many joints takes away from that but I've never driven any Seven other than mine to compare it to. I'm installing a VVT engine now to increase the power a bit and I'll see if I can make the new headers so that the steering doesn't have to work its way around the exhaust the way it currently does. We will see but I suspect I'll probably leave it the way it is. You're motivating me to start a build thread of my own as there are a few upgrades in the works. New engine, wide track suspension, quicker steering rack, etc..
-
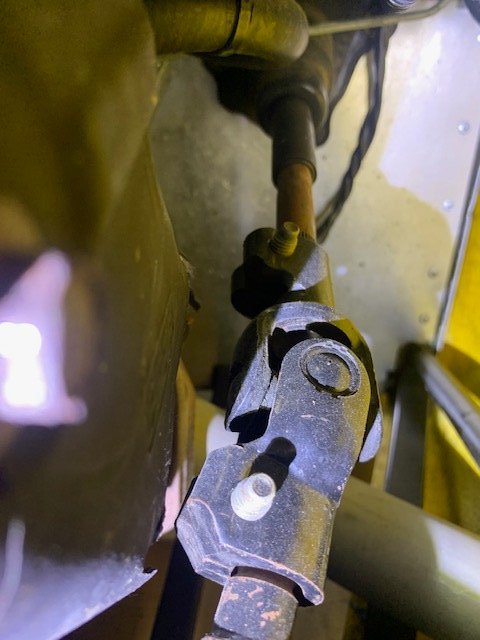
I don’t believe it! Westfield didn’t send you all the parts? ;-) My kit also had parts missing. Lol It’s been awhile but I think that upper spline is welded to the shortened Miata column.
-
This may help as well. Here is a picture of the Westfield steering parts in my kit. I believe I was missing some parts at the time (see last picture below). Below are pictures that I had but I'm not sure from whose build this is. Here is a picture from Westfield showing how it is supposed to go together.

-
I just took these really quick for you. Let me know if they aren't clear enough and I can retake them during the day.
-
I’ll post a picture later of how I did the steering. I don’t remember it being as hard as I thought it was going to be. I do wish it had less joints. This is one of the things I want to re-do at some point.
-
I'm really looking forward to this build. I hope to make a similar purchase one day. Love the other cars in the stable especially the 993.
-
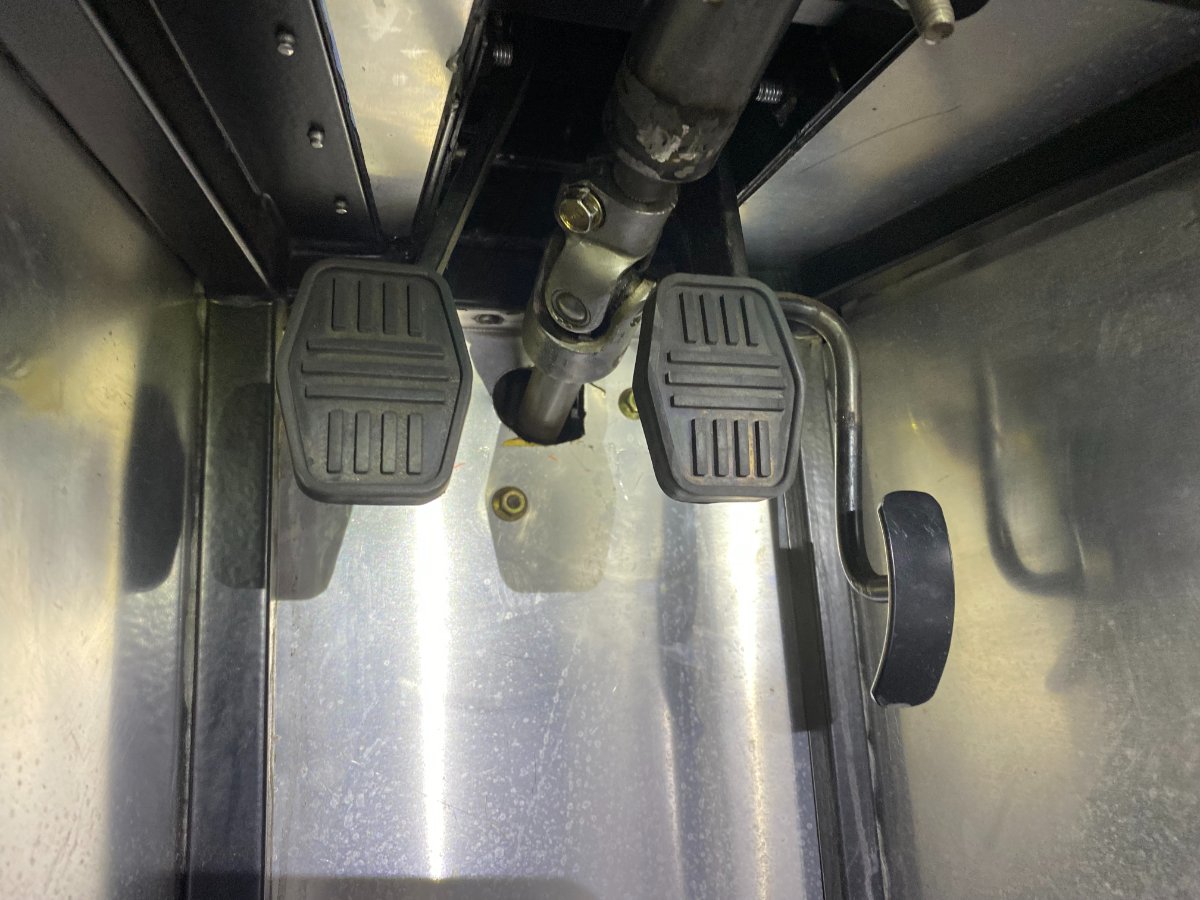
The steering wheel is pretty well centered. I don't remember having an issue with brake pedal interference. I took some pictures to better show you.
-
This was the part of my build where I had to go buy a welder and learn how to weld. I removed the steering column tabs and welded new ones to center the steering column. They were positioned exactly like yours and I ordered my kit in 2009!
-
I installed them on my Westfield and agree with this as well. To address the low brake light output I wired the fog light section to light up when hitting the brakes as well since they are exactly the same light as the brakes just on the the other side of the turn signal. This essentially doubles the light output. They are much brighter than the original units and I had LED bulbs in those. I like them a lot. They look modern while still looking like they belong on a Seven.
-
I have it installed and recommend it. I also recommend shortening the sump as it sits pretty low on the Westfield.
-
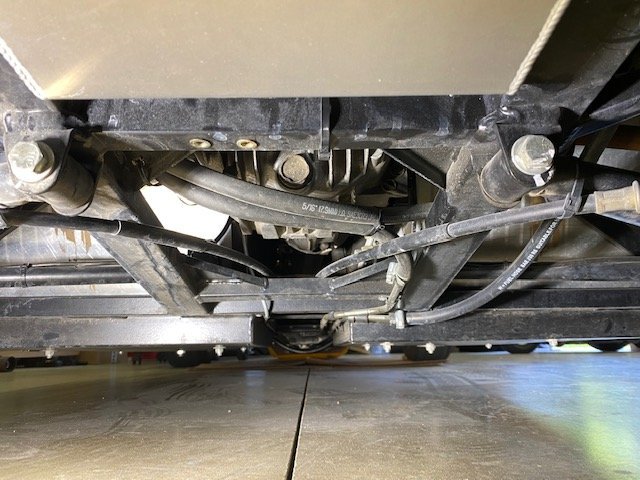
Are the diff mounts on the wrong side??? Or maybe they're on both sides but the bushes were only installed on the driver side? Or maybe it's just the brake lines that are in the way. It's been too long since I've built mine. You're making great progress. I had a huge delay on my build because many parts were damaged in shipment.
-
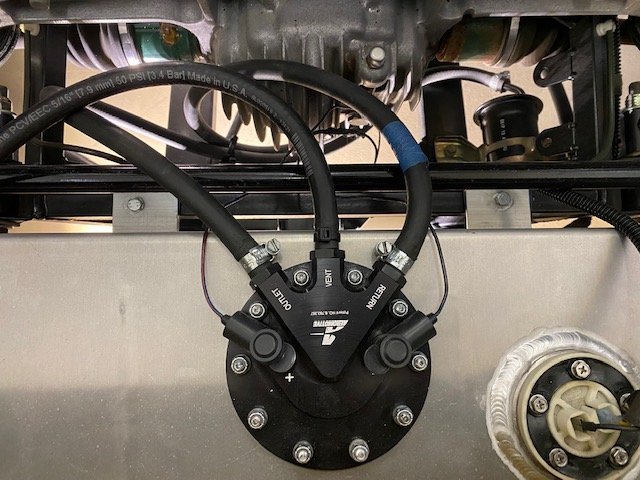
I forgot it also requires a second pump. The two options I considered were the Holly Hydramat and the Aeromotive Phantom 200 Stealth Fuel Pump. I thought the Aeromotive 18689 would work better but it didn't eliminate the starvation issue entirely.
-
Not a lot. While the fuel issue is really noticeable on track, on the road you have to be mindful below 1/4 full. I had to be careful not to accelerate too hard or I would get an annoying dash check. I think just adding a swirl pot fixes the problem. The brake lines look good. I didn't have to fit the 3rd line going to the charcoal canister so I used that one after messing up the first. I also got extra practice running the lines to the ABS unit which ended up working pretty well. There is a bit of a learning curve to it. I also bought a flaring tool and a Blue-Point bender. The Harbor Freight one sucked.
-
The fuel lines look good to me. The exact location they end up should not matter too much since the rubber hoses they attach to are flexible and the length can be adjusted. I hope you have better luck than me but the fuel system as designed is not great. The standard fuel tank sump was pretty useless. Below 3/4 full I would get fuel starvation on left hand turns and medium acceleration between shifts. I designed a whole new tank adding a much bigger sump in the bottom middle of the tank, an in tank fuel pump, and also added capacity to extend the range a bit and the problem has been solved 95%. I now get a bit of hesitation when accelerating really hard between the 1st and 2nd shift at less than 1/4 full. Cornering is good on track at any fuel level. Looks like a swirl pot is needed after all to fix the hesitation 100%.
-
Welcome to Florida. I had a similar problem before and it was the IACV (idle air control valve). I would also check vacuum lines, PCV, and related hoses.
-
Westfield Sport 250 Electric
-
Looking for owners on Gulf side of Florida
lg2k replied to wyowill's topic in General Sevens Discussion
Just noticed this post. I'm in Sarasota and have a Miata powered Westfield. I had never seen any Seven in person when I ordered and built mine. Around here I've only seen a Stalker and once ran into a Westfield Eleven of all things up in Odessa, FL a few years ago. -
Here is how I ran my fuel lines. I don't think the brackets are in your way.
-
I used the dimensions shown in this build which originally came from Flyin Miata. https://www.flickr.com/photos/23287408@N02/sets/72157603818053364/ Here is a picture of mine I took while working on it way back when. I don't remember if I put a pedal stop. I would have to pop the top and look.
-
Any recent Westfield Sport Miata builders here?
lg2k replied to DanM's topic in General Sevens Discussion
Hi Dan, I built a Miata based Westfield back in 2013 and am looking forward to following along on your build here as well as on the WSCC forums. There are a few "gotchas" along the way that are specific to the left hand drive versions. A couple that come to mind was the clutch pedal location having to be moved to adjust the motion ratio. Another was having to move the steering column tabs on the chassis to center the steering wheel. The routing of the steering shaft around the exhaust header on the left side of the car wasn't ideal as well. Nothing huge but there are a few unique issues that come up on the LHD version vs the RHD one. -
WANTED - Super Seven front grill emblem
lg2k replied to Bruce K's topic in General Sevens Discussion
A forum member used to sell them but he recently stopped making them. You can always go to the source, Caterham parts: https://caterhamparts.co.uk/nose-cones/27-grille-nose-cone-s3-7-logo-grey.html?search_query=grille+nose+cone&results=125 -
If you look at the end of the last video that was posted, it looks like the person is hitting the brakes when the outer edge of the lights are illuminated. It's not a big deal, I was just curious how they worked. I really liked how they incorporated the reverse and fog lamps into it all. The reverse light is now integrated into the license plate light. I never installed the fog or reverse lights on my car since I thought they were huge and ugly.
-
Has anybody installed these yet? Just wondering how they operate. It looks like the turn signal is in the center, the brake light on the outside and the fog on the inside but I'm not sure.
-
The Westfield Aerorace manual shows how they mount the 2 fuel pumps and swirl pot in Chapter 7 page 2: http://www.manikllc.com/manuals/Westfield_AeroRace_Build_Manual-2008-07-07.pdf They use a Facet Red Top for the low pressure fuel pump and a swirl pump like this one: https://www.pegasusautoracing.com/productdetails.asp?RecID=10247 I've never tried this setup but the Flyin Miata did fix their fuel starvation problem this way on their Westfield build which should be similar on a Caterham. Although it might bring the value down on your Caterham to use a design idea from a Westfield. lol ;-)
-
I have the same problem on my Westfield. On long left handers I get fuel starvation at anything below a 3/4 tank. The Westfield tank has a small capacity of 7 gallons. It has a tiny sump on the driver side but it isn't enough. I changed the external pump the car came with an internal Mazda Miata fuel pump but it didn't make any difference. It is worse in that it always leaks a bit from the top of the tank. I didn't know about the hydramat but even if I move the pump to the center of the tank I think the hydramat is too wide to fit between the two baffles. My second idea was to make a sump in the center of the tank and use a GM system from a Silverado. It has an internal sump as well and seems to eliminate the surge problem. http://forum.ih8mud.com/threads/in-tank-fuel-pump-conversion.394565/page-2 You can even buy the adapter to weld onto your tank so that the pump fitting is factory. http://www.vetteworksonline.net/catalog/product_info.php?products_id=89&osCsid=ek3akeqin32vu69kk850k5c4u1 Yet another idea is to do what Westfield does on their race cars which is use a high and low pressure external pump with a swirl tank. I should have probably done this before going with the Miata internal pump solution.