NVP66S
-
Posts
486 -
Joined
Content Type
Profiles
Forums
Store
Articles
Gallery
Events
Library
Everything posted by NVP66S
-
Buffy , wanting to earn some extra money, decided to hire herself out as a "Handywoman" and started canvassing a nearby well-to-do neighborhood. She went to the front door of the first house, and asked the owner if he had any odd jobs for her to do. "Well, I guess I could use somebody to paint my porch," he said, "How much will you charge me?" Buffy quickly responded, "How about $50?" The man agreed and told her that the paint and everything she would need were in the garage. The man's wife, hearing the conversation, said to her husband, "Does she realize that our porch goes all the way around the house?" He responded, "That's a bit cynical, isn't it?" The wife replied, "You're right. I guess I'm starting to believe all those dumb blonde jokes we've been getting by e-mail lately." A short time later, Buffy came to the door to collect her money. "You're finished already?" the husband asked. "Yes," Buffy replied," and I had paint left over, so I gave it two coats." Impressed, the man reached into his pocket for the $50 and handed it to her. "And by the way," she added, "it's not a Porch, it's a Lexus."
-

NJMP Lightning, July 5, USA7s run Group, Brunton Stalker
NVP66S replied to xcarguy's topic in Seven Videos
Wow. I'm impressed. BTW, the two bikes I ride (Honda 599 and Triumph Street Triple) both have redlines above 12,000 RPM and develop useful torque there. Good replacement for cubic inches. -
My comment is too late, but it's not relevant to a purchase decision anyway. :blush: I've never driven one, but I can give you details on how to turn it into a submarine, as a small company I used to work for did just that for a James Bond movie. The project engineer, a good friend of mine at the time, was driving a Lotus Europa with a Renault engine. He bought it new.
-
I followed the rise and fall of the Corbin Sparrow and Aptera. The founder of Aptera (Steve Fambro) is an acquaintance of mine. I think Elio has a good chance if they avoid management problems.
-
Oohhh. I really like this. It sends an important message in a way that they will remember.
-
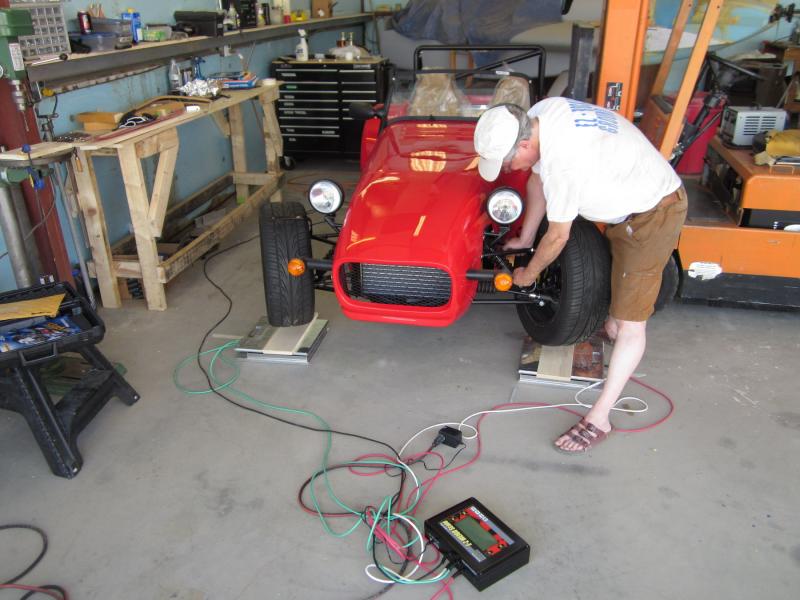
I got the photos of the scales. The light version is the car with 2 gal gas, and the heavy version adds me in the left seat. All with spare but no carpets.

-
I'm not ignoring you, Suspension Man keeps forgetting to get the exact numbers to me. I'm doing the carpet & vinyl interior parts now. What a huge difference in appearance! Dan
-
Something I learned in my first real job out of college: "When you're all done, nobody knows how long it took, but everybody knows how good it looks" Partially it was a race before hot weather set in. It's regularly getting up to 105 inside my shop. It's 5 months to the day since the crates arrived, and not quite done yet. It still needs the interior vinyl and carpet with custom cutouts for the shifter and handbrake. and a few other bits. I think there were 4 days during that 5 months that I did zero work. Sometimes only a half hour, but something every day.
-
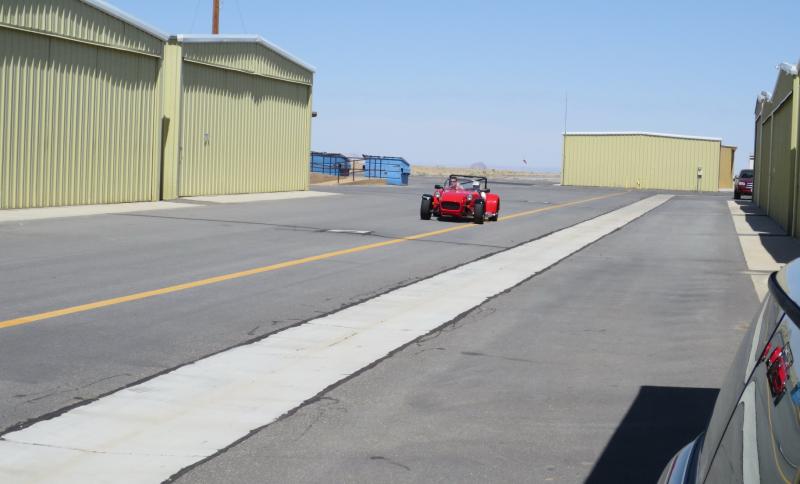
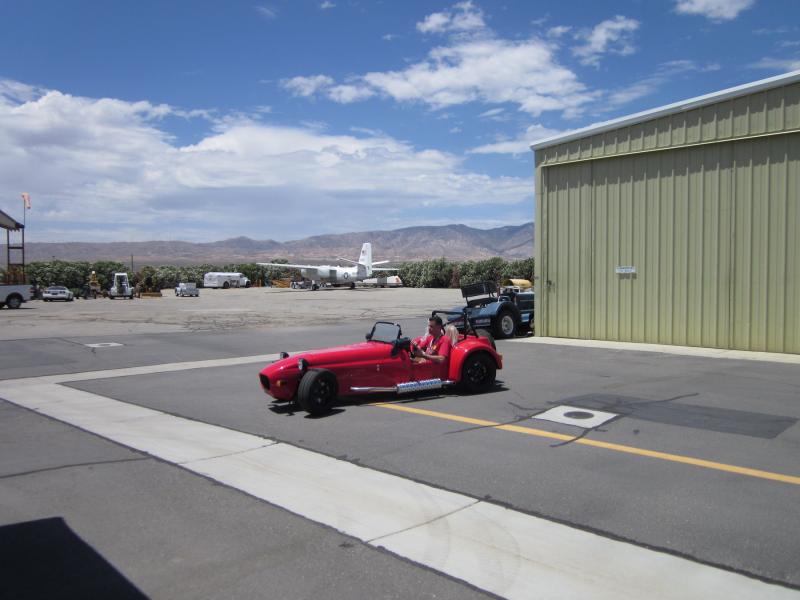
FIRST DRIVE!! :party: No license yet, so it's back and forth between the hangars. Brakes were crappy at first with new pads and rotors, but it only took a few stops to fix that. Now it will lock up all 4 and stop straight. It takes a bit more force than my Miata, but hey, there's no booster. The 2nd photo is Mike Valant, Suspension Man driving.
-
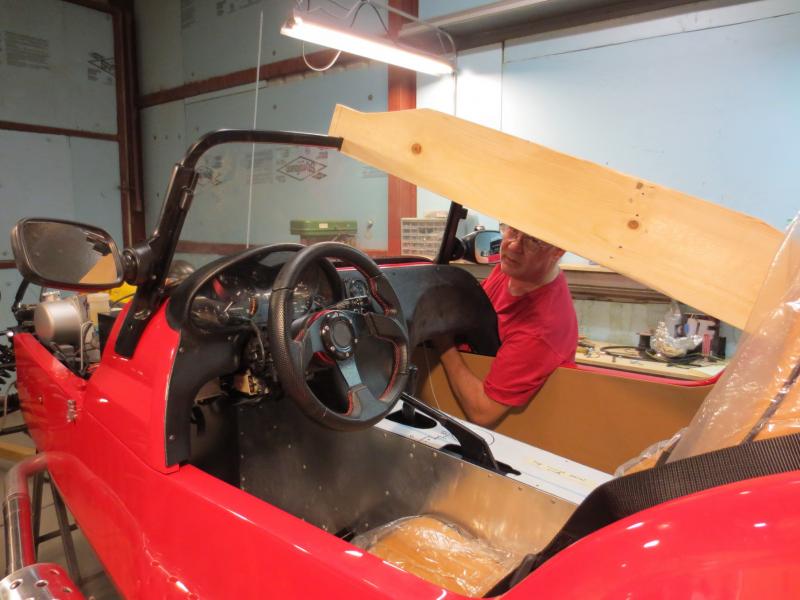
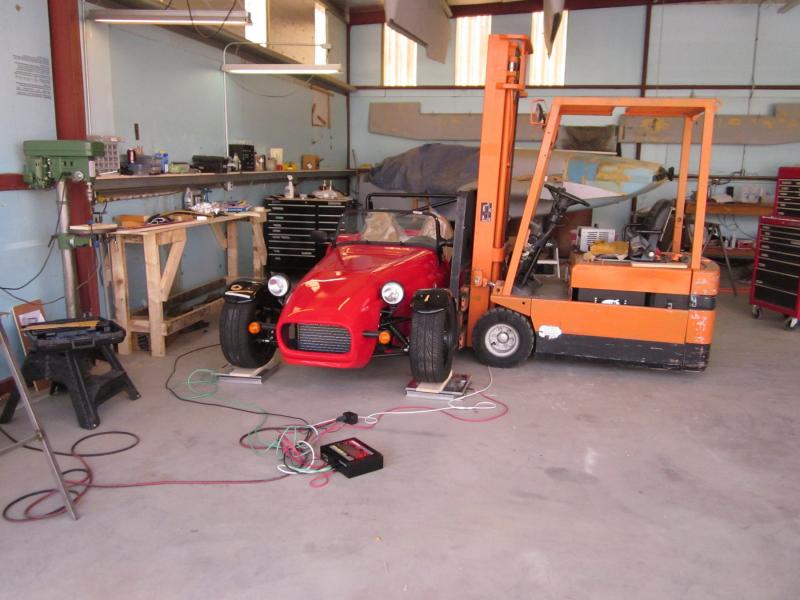
Lots of detail work in the past few days, but I keep forgetting to take the camera to the shop. I designed and made a battery holddowm clamp, and spent an incredible amount of time on a license plate holder. If you don't get the spare tire holder, the license plate is trivial. Just screw it to the body. I got the windshield sorta in place (no RTV yet) and the front turn signals wired. There's a single connector in the wiring so I can remove the nose easily. The first photo is me feeling for the windshield screws in there somewhere. I actually stuck the nuts to my finger with masking tape so I could start them on the screws. I was in the shop until 2AM because it's cooler then and because the Suspension Man arrived the next morning. I also arranged a forklift to get the car down off the stands. It took the two of us about 4 hours to set the corner weighting, ride height, front & rear camber, and front & rear toe-in.
-
I planned to keep the charcoal can with its actuators but removed it simply because it wouldn't fit in the space available. And Yeah, I'm probably gonna buy an adapter when I finally throw out that old laptop. But since I have no experience with an adapter, I can't comment on how well it works. As for location, I had the Mazda ECU there and the Megasquirt is almost as big. It's the location per the WF build manual. The car ran fine (still on the stands) with the Mazda ECU, but I was concerned about it commanding a too-lean mixture because the EGR components are removed. At least that's my opinion after spending several hours on line researching various ECUs. With this setup, I can reinstall the Mazda in a few minutes.
-
Got the Megasquirt installed and functioning. It's not exactly 'plug and play' but it was reasonably easy to program. I got the version specifically for the '95 to '97 Miata. It does need a laptop with a serial port, which many don't have. The white cable coming off the left side is the serial cable in case I need to fool with it after the scuttle is installed.
-
Very nice car. A year ago, I would have seriously considered buying it, which means I think it's priced right and excellent craftsmanship and in excellent condition. Is this a factory build? A potential buyer would want to know that.
-
I've been to Midland about a dozen times in the past 2 years, but haven't seen that museum yet. I figure that can wait until I'm there full time. Yeah, I'm old enough to remember Chapparral trouncing everyone else in Can-Am.
-
I've done Bouquet Canyon Road on my Honda 599. Definitely interesting. So is Angeles Crest to the East and Caliente-Bodfish to the North. If I only want 20 minutes of fun, I take 58 West from Mojave and exit at Cameron and follow the canyon twisties through the windmills to Tehachapi-Willow Springs, then Oak Creek back to Mojave. Tonight I spent about 3 hours fitting the front fenders to the stays. I might be 1/2 done with that task. Dang.
-
I'm building the car in Mojave, but the company I work for is moving to Texas in a few months. I travel back and forth now. I have an apartment and a building lot in TX and a Texas drivers license. I plan to get title and registration where I am moving to, not moving from. Then bring it back to CA for a few months of canyons and mountains before taking it back to flat land. The winds were up to 'only' 35 gusting to 42 knots today after a few days of higher winds. The hangar door has gaps and I have to vacuum every day to keep the dirt down. Plus the banging banging banging of the door drives me nuts. I'm really looking forward to building a nice workshop in Midland.
-
YOU'RE getting antsy??? Seriously, I think it will be down on the ground (that's a big deal for me; I have to borrow a forklift) and motoring under its own power by next weekend. I spent today, at least the part of the day when it was under 100F, reinstalling roll bars, wiring the sub panel, and scratching my head wondering if I should install the headlight risers. They're needed to pass the U.K. inspection, but they're ugly and I don't think I need them in Texas. Anybody know?
-
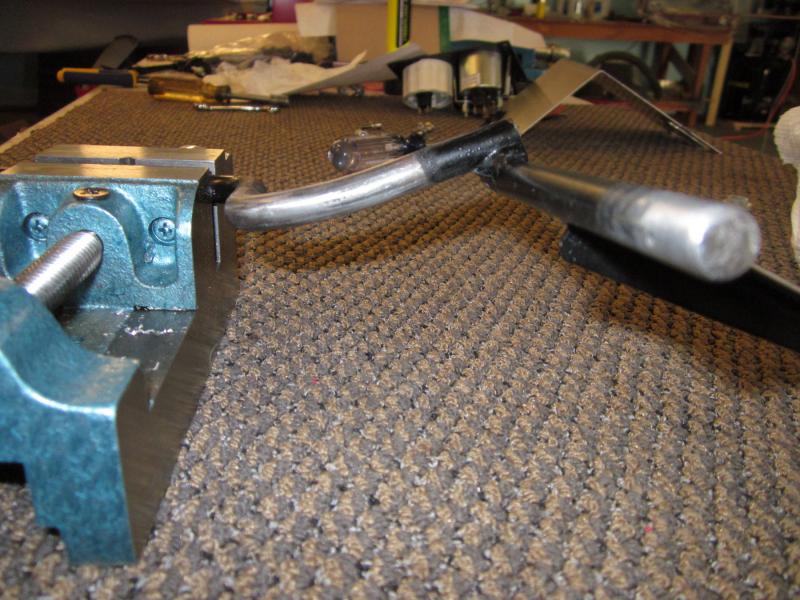
WF sent a very nice pedal box, with two problems. The clutch master needed to be moved an inch, and the throttle pedal sticks out about 2 inches from the other two pedals. I took the throttle pedal out and heated it with a MAPP gas torch and bent it back so I can do heel-and-toeing. The bar in the photo was straight as received.
-
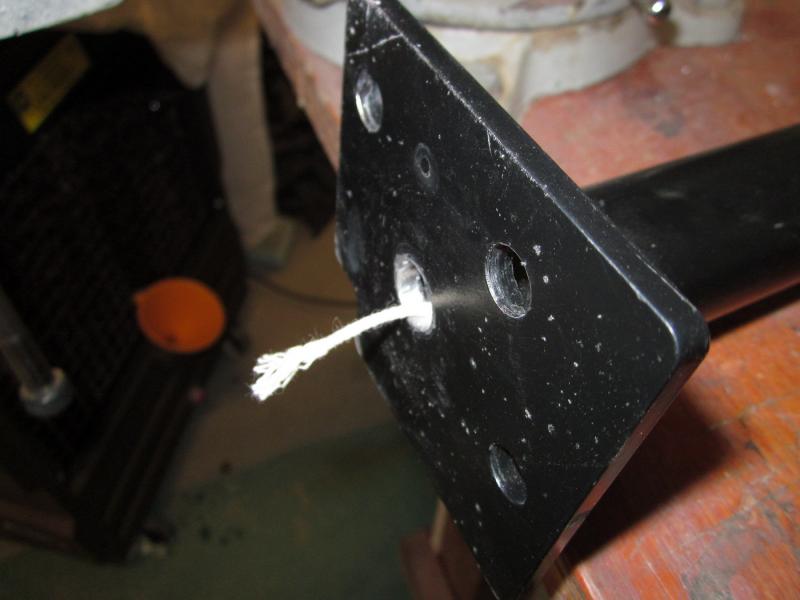
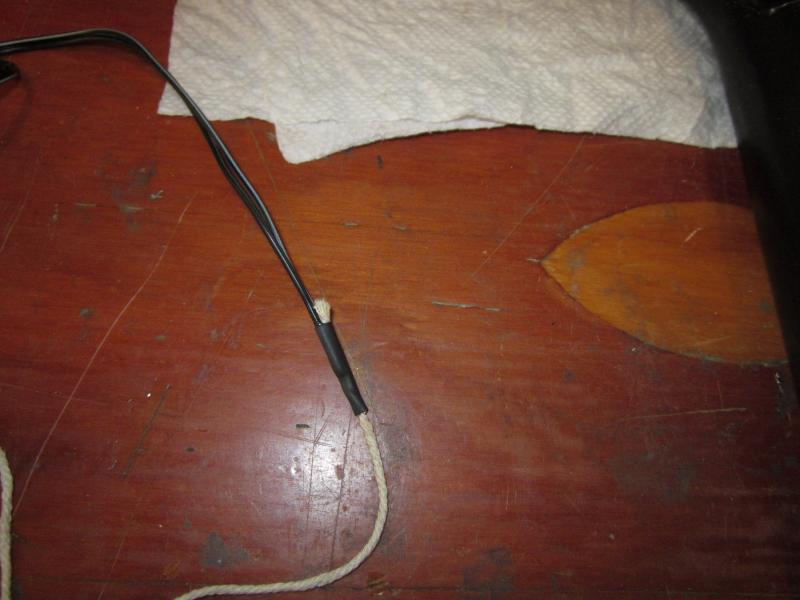
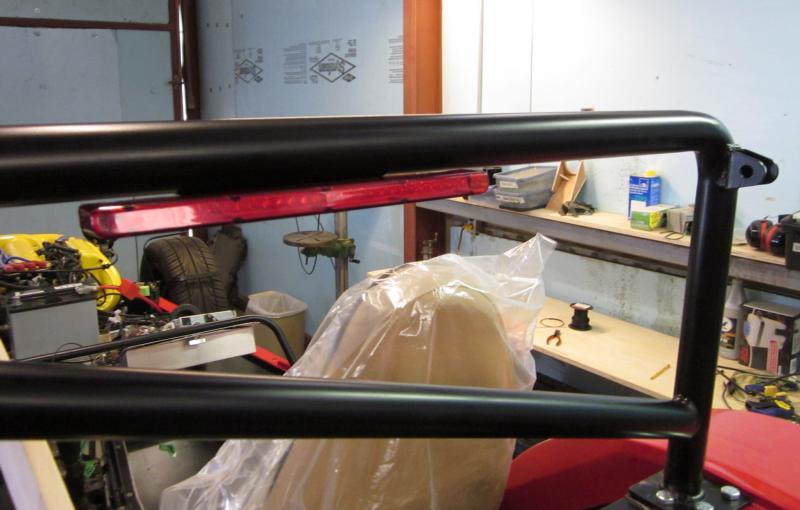
I bought an in-line LED CHMSL to mount on my roll bar. I ride motorcycle a lot and the key to safety is to be seen. There was no way I wanted the wiring to run down the outside of the roll bar, so I drilled through the welded steel base that comes with the WF kit. I have the RAC roll bar option which is the middle of three options, the third being a full cage. Back to my build. I drilled 3 holes on the bottom of the bar cross member and tapped the outer 2 holes to mount the LED array. Now the hard part; getting the wire from the top bar to the drilled flange. [insert long period of frustration here] But I got the idea of using lightweight fuzzy string and attaching the vacuum cleaner hose. Instant success! Tying a knot between the string and the wires didn't help, but adhesive lined shrink tubing was just the thing. So now the high third brake light is installed with the wiring dressed and covered by the boot box.
-
Here's an Amazon page URL for remote oil filter kits: http://www.amazon.com/s?ie=UTF8&page=1&rh=n%3A15684181%2Ck%3Aremote%20oil%20filter%20kit
-
Wow. I'm impressed, and I wouldn't worry about hogging the site. Dan
-
Thanks for the info and I really like what you did there, but right now I'm getting tired of building. I just wanna get it on the road. This car is getting a bump in trunk volume, but it will take the form of a wicker basket aft of the spare tire and above the license plate. That should be easy to implement. Dan
-
Hmmm. I kinda like those. If the WF lights give me any more trouble I may switch to those. Thanks.
-
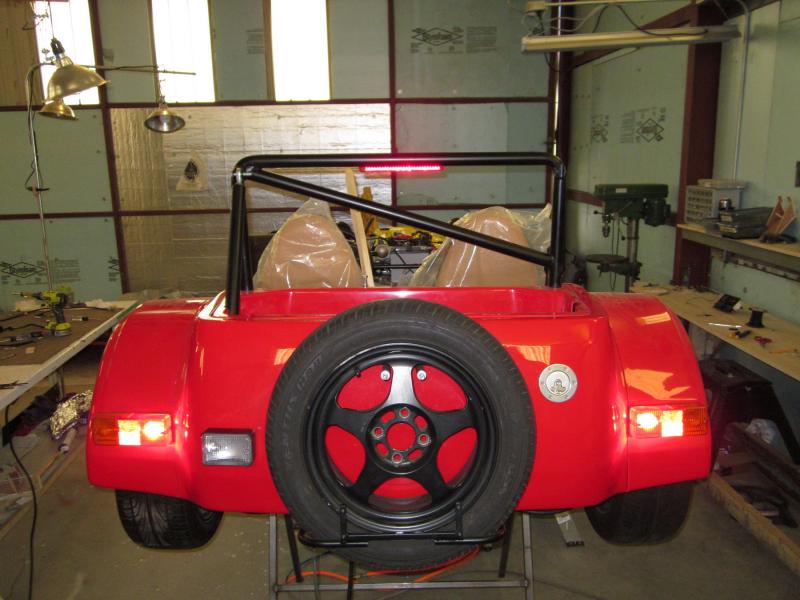
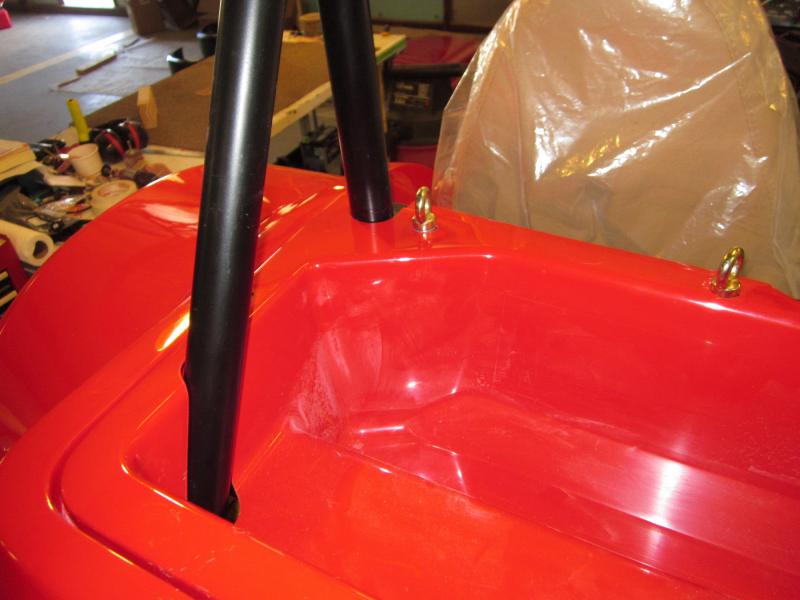
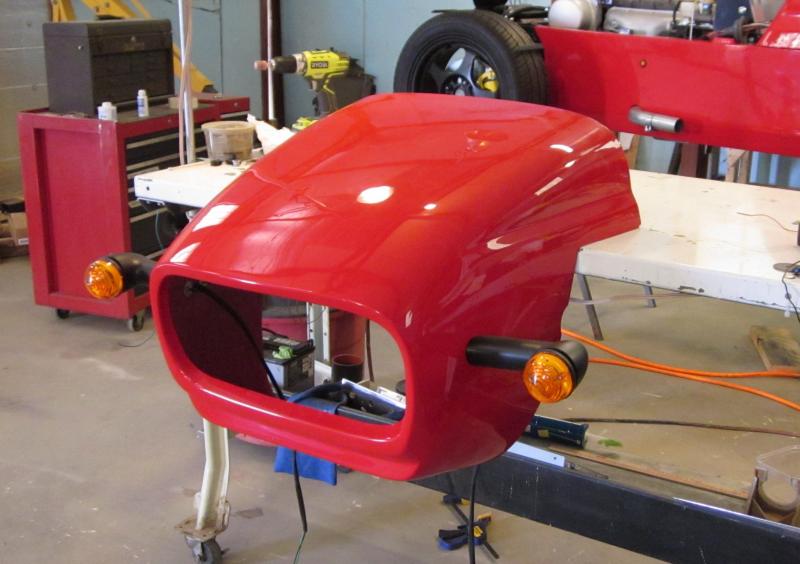
Today saw the 'trunk' and rollbar mostly installed. The box is smaller than standard because I got the optional 11 gallon gas tank. Normal is 7.5 gal and I plan to do some serious traveling. The roll bar is one step above WF's default and I highly recommend it. It's called the RAC roll bar because it passes scrutiny by that race sanctioning body. The rear support members unfortunately pass through the sides of the box, but WF thoughtfully included cut lines in the gel coat. Now I have to figure out how to make a lid. WF offers one but it is not compatible with the RAC roll bar. PS the car is red. It's the argument between the fluorescent lights and the digital camera that add the orange areas.
-
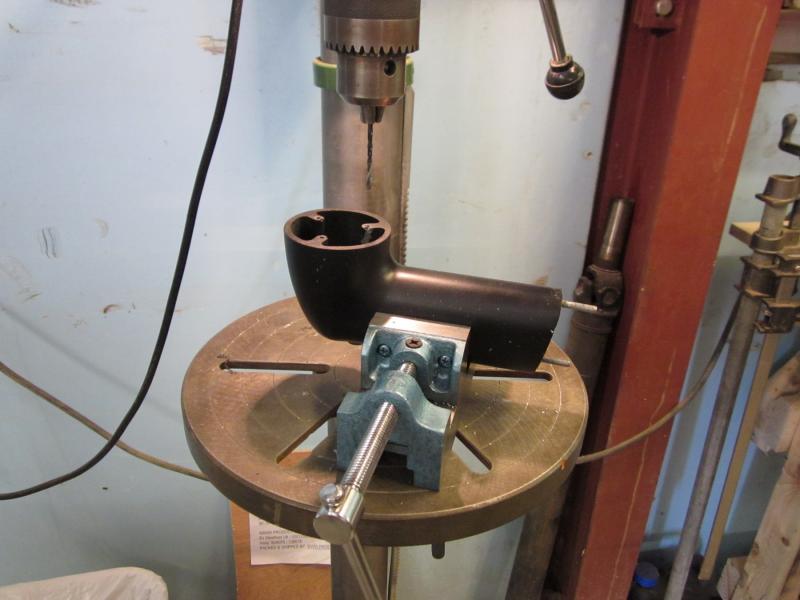
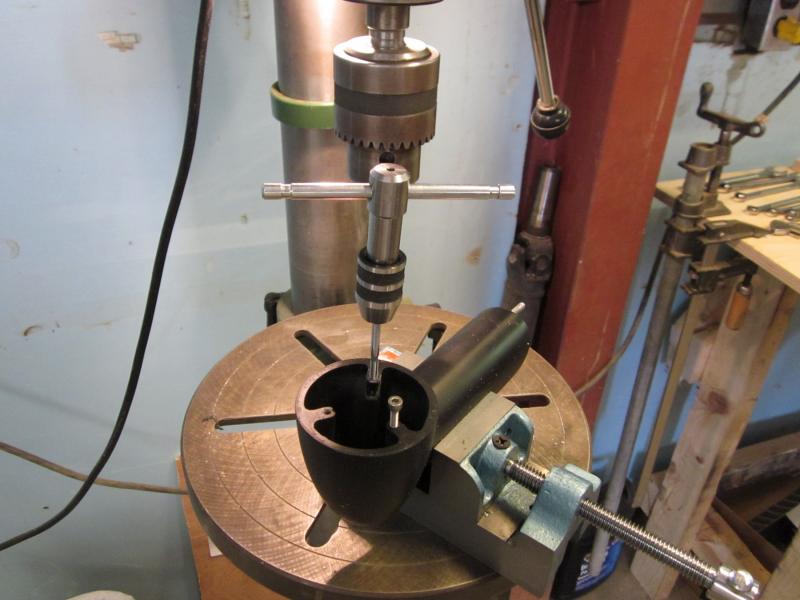
I noticed the left side turn signal looked like it was angled up. So I put the protractor level on it and that indicated 4 degrees off horizontal. The right side said less than 1 degree. I took the assembly off and did some sanding and filing. It's amazing how much time stuff like this takes. The lamp assembly comes separate from the black plastic horn and WF did not supply the screws. No problem, I have lots of miscellaneous screws. I chose some wood screws as there was no thread. Dang, the first one broke the plastic. So I epoxied it back on and drilled and tapped 4mm threads. There's that time factor again.