Ferrino
-
Posts
103 -
Joined
Content Type
Profiles
Forums
Store
Articles
Gallery
Events
Library
Everything posted by Ferrino
-
It does. It clarifies you meant “right hand traffic” and not “right hand drive”. Very different!
-
I think you meant "left-hand drive".
-
Do these halogen housings work OK with LED bulbs?
-
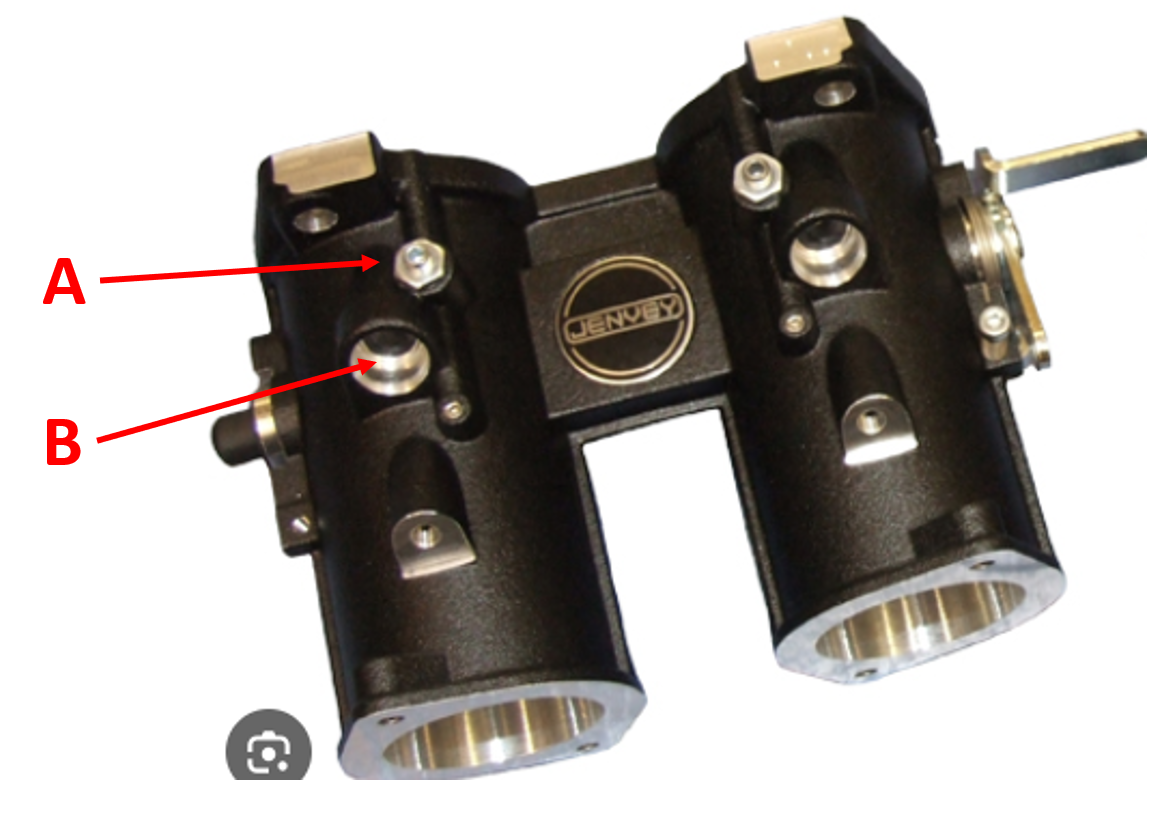
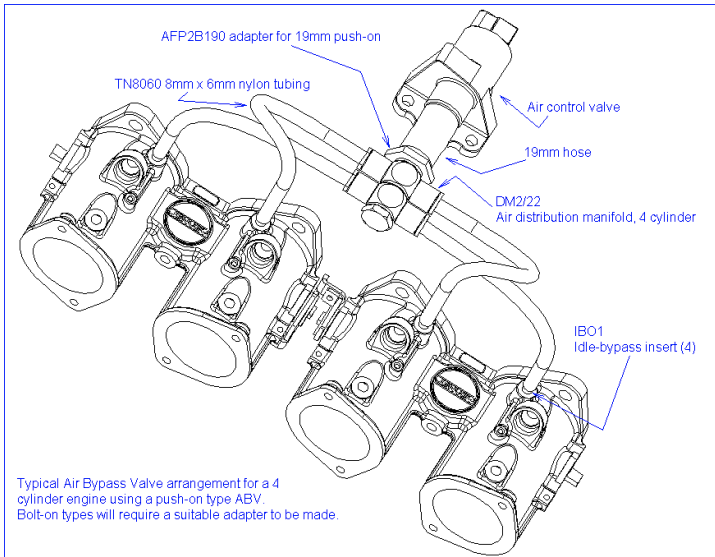
Trying to wrap my head around PCV, as I will hopefully be registering my 7 project under SB100 in CA in the not too distant future. My engine is a 2.0 Duratec with wet sump and Jenvey ITBs (direct-to-head). I have configured an "open" crankcase ventilation system, where the factory PCV valve has been removed and the crankcase vents directly into a catch can. My understanding is that, to satisfy the BAR inspection, I would need to pass a hose from this catch can outlet to a vacuum source on the intake (via a PCV valve). Fine. I have two questions about this process: 1. I'm not sure where the best place to source vacuum is on the Jenvey ITBs? I don't want to drill/tap any new holes into the ITBs just for inspection, so it seems there are 2 choices: A and B in the following pic. A is an idle air bypass port, so I believe I could pipe all four of these into a little collector/manifold (using some sort of hose nipple) and then link this to the PCV valve. In fact, it looks like Jenvey sells a kit to do just this, albeit for an idle air control valve instead of PCV - see attached. B is just the injector port, which is blanked off in my application (with an aluminum bung, because I'm using the factory injector port in the cylinder head). So I could do the same thing - drill and tap the aluminum bungs for nipples, without interfering with the idle bypass ports. 2. How savvy are the BAR inspectors when it comes to PCV? Could I avoid all this extra work by just shoving the hose into the air filter backplate? I'm guessing that won't fly, but thought I'd throw it out there!

-
This is still available.
-
Thanks - I appreciate the feedback!
-
Do you have any pics of the coverage of these rear wing kits, please? How is the durability with just PPF and no protectors, now you have some miles on it? Thank you!
-
Bump.
-
These are now sold.
-
Still available.
-
Still available.
-
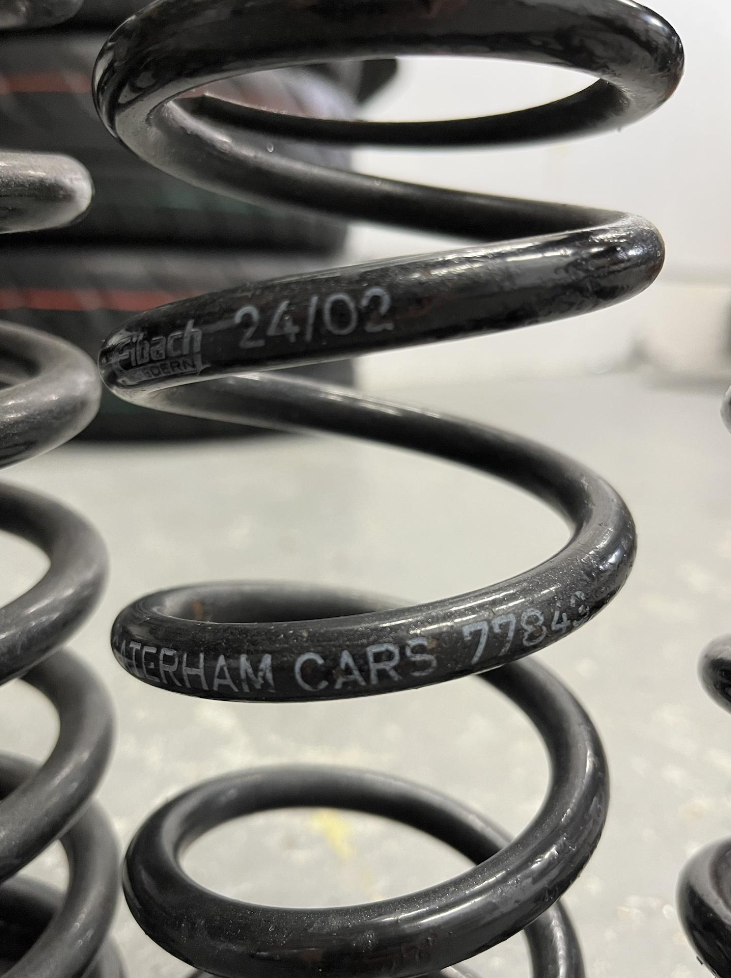
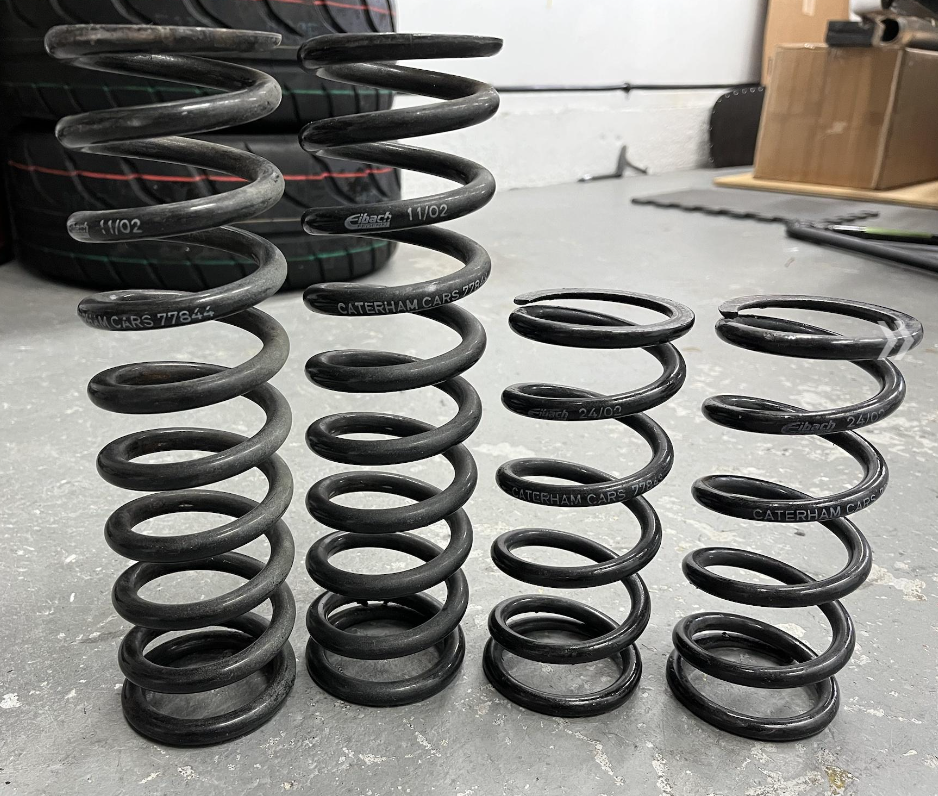
I have a set of four used Caterham springs for sale (originally fitted to a set of Bilstein De Dion race dampers). They measure 11" and 7" long in the uncompressed state. The ID is 2.25". Condition is good but they do have some overspray on them and there are some chips on the powdercoat, as you'd expect with use. Caterham part numbers are 77843 (fronts; 250 lb/in spring rate) and 77844 (rears; 215 lb/in spring rate). Here are the links to the parts on the Caterham website: Fronts Rears $150 + shipping, or collected from San Diego, CA.
-
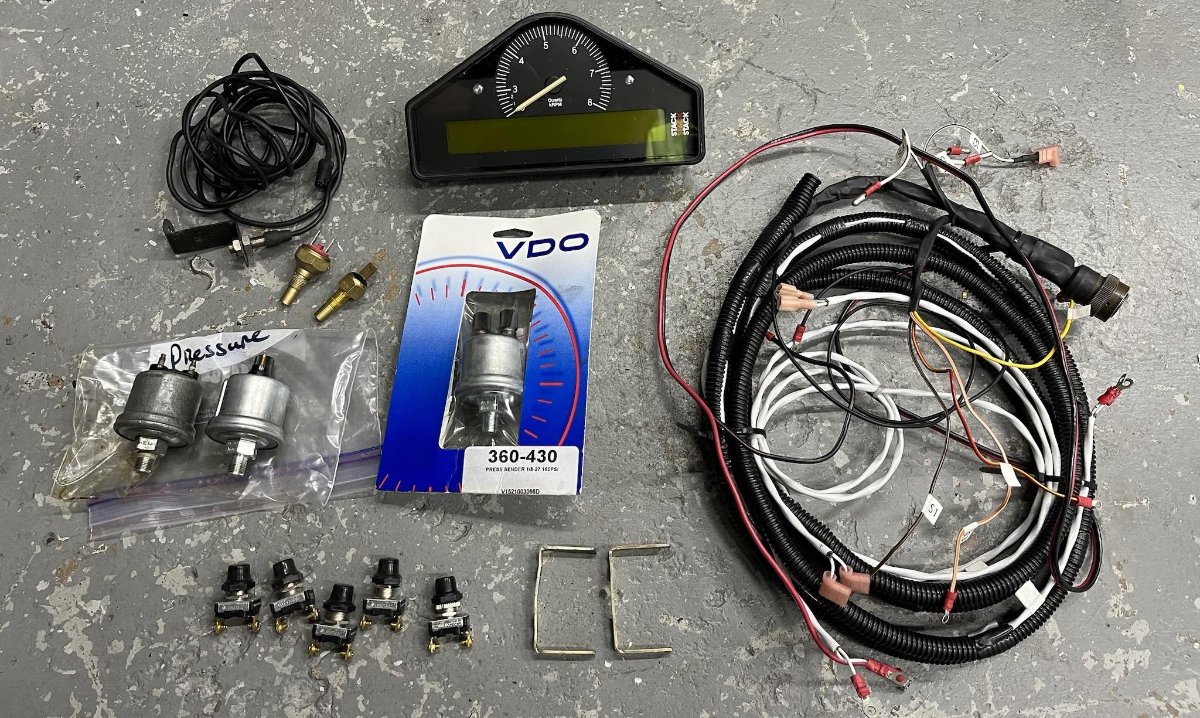
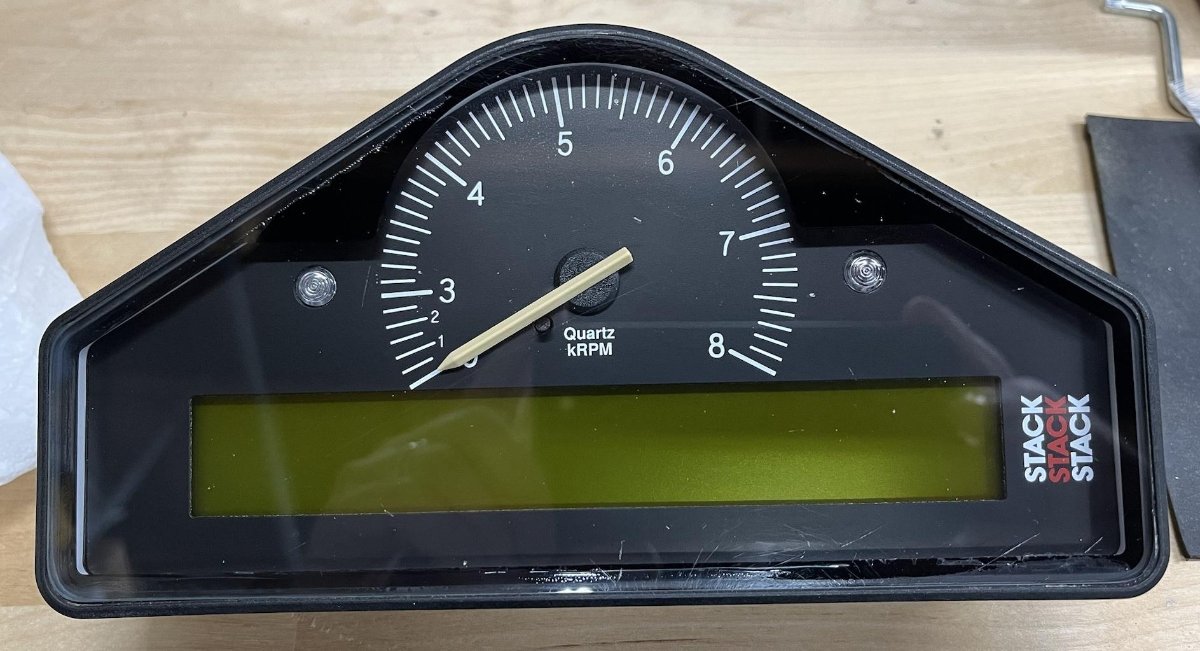
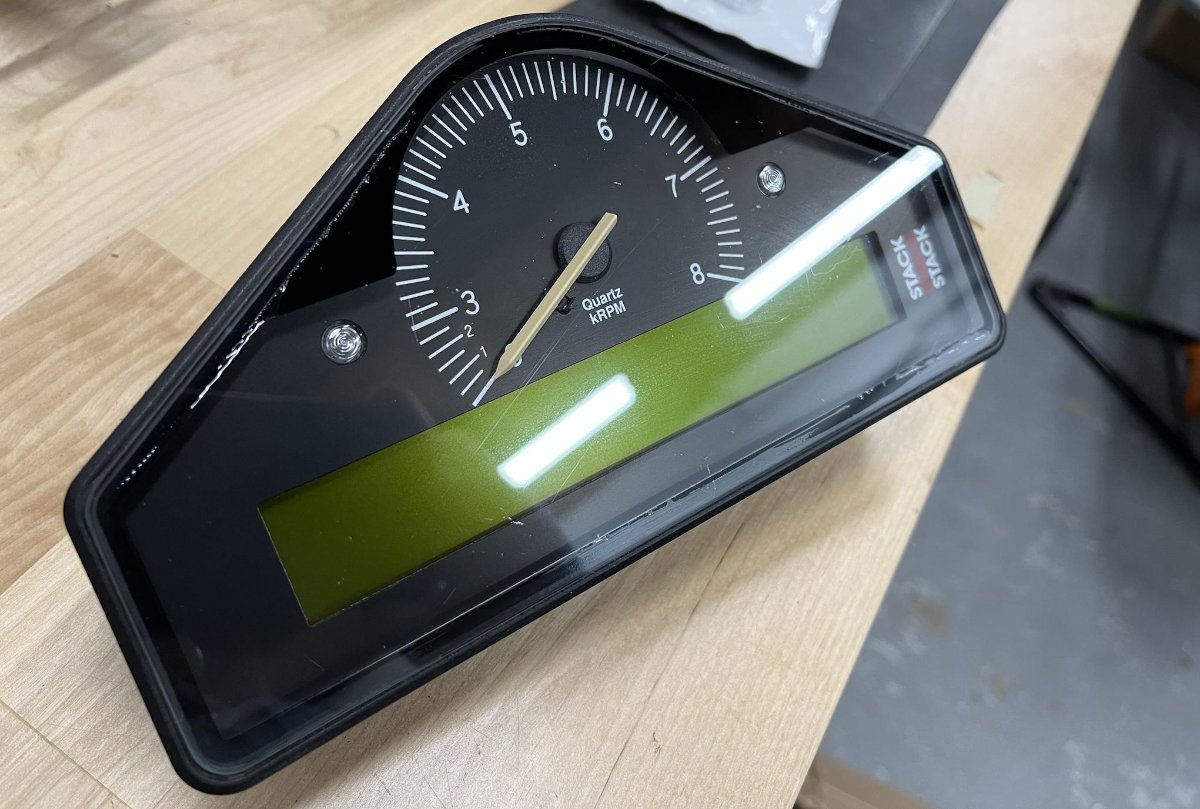
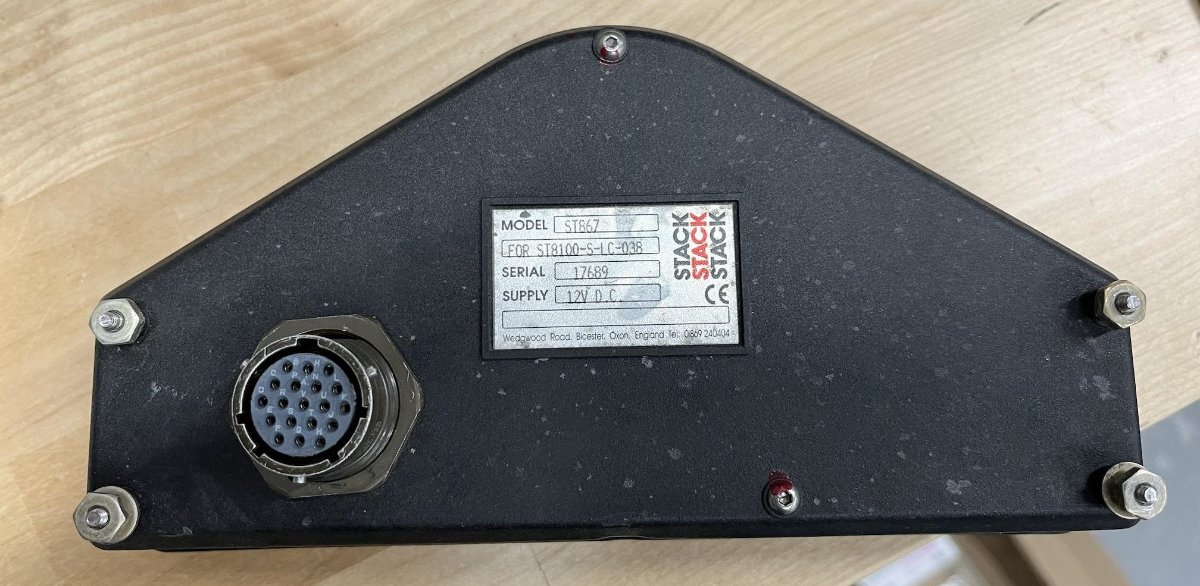
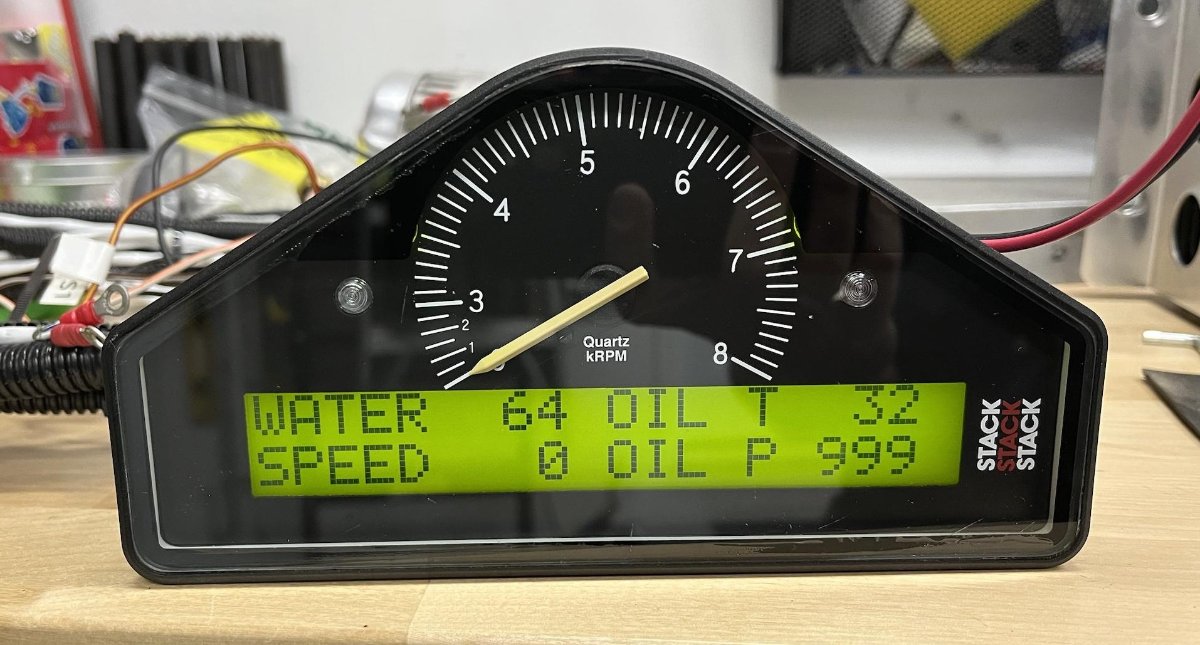
I have a used Stack ST8100 series race dash available. It was originally fitted to a 2002 Caterham 7 project I bought and in the end I decided not to use it as I wanted something with CAN connectivity with my ECU. I'm not very familiar with this unit, so please check out the Stack site here and the manual here. It comes with a wiring harness, three 10 BAR pressure sensors (one brand new, two used), two temp sensors (used), five switches (one is a spare), the U-shaped mounting brackets and the optional wheel speed sensor. I do not see a connector on the harness for the speed sensor, so I believe you would need to add wires for this (the manual has a wiring diagram). It's in good shape, but obviously has some scratches on the front, being 21 years old. Also, some of the black "masking" on the front panel (not sure what to call it) has deteriorated a little. I believe Stack still service these, so it would be possible to have the front panel replaced and resealed if you really wanted a cosmetic refresh. I did fire it up on the bench to test the back-lighting, text display and that the needle calibrates to zero. I also connected the sensors and could see the temps change and the low oil pressure warning. I'm happy to send a video if you'd like to see it start up. But I am unable to give it a more thorough test than this as my engine is not running yet. Asking $750. I'm in San Diego, if you want to see it in person.
-
Interested to hear the bad experiences with Westermann, since they charge a real premium for their products. Myself, I had a terrible experience with them about 18 years ago - not concerning the quality of the product, but rather some aggressive behavior from them when a shipping delivery went wrong.
-
Source for S3 rear brake caliper kits or replacements?
Ferrino replied to truckin-on's topic in General Sevens Discussion
I am restoring an imperial Caterham and had no Sierra rear calipers to start with. I bought a new set for 210 GBP, including shipping to US. They came from Bigg Red: https://www.biggred.co.uk/ Note: these are not made by Ford, but they reassured me that they had no issues with them at all (based on many sales) and were happy with the quality. Bigg Red has a good reputation. If I were you, I'd drop them an e-mail and see if they can supply a rebuild kit for your originals. Alternatively, slap your OEM units in the mail and have them refurn them - either with zinc plating or powder coating etc. -
It’s really nice to see your wideband O2 sensor mounted vertically (as intended). I know that alternative mounting angles can lead to failure. Do you simply pass the wires underneath the chassis and connect the plugs in the engine bay? I had considered passing the wires through a grommet in the side skin, but I don’t think the plug on the sensor end can/should be removed. Thanks!
-
I've recently been repairing the rear wing rivnut holes on my S3 (I actually had to relocate them slightly as well). I decided to replace all of them (since I had the interior panel off anyway and therefore access to all of them). I don't like the use of rivnuts here, so instead, I used a fastener which gets bonded onto the panel: it's basically a big washer with a nut. I bought them from McMaster-Carr in 1/4" size. I used a panel bond adhesive by 3M (08115): you could use an epoxy you like, though. I then use nylon 1/4" bolts to secure the wings. A lot more work than a rivnut, but looking at the damaged holes in your setup, I'd think you want as wide a fastener as possible.
-
Got it - my other fun car is an R53 and I understand the switches you're referring to. I actually reached out to SVC and they recommend a 25 amp fuse for the Lucas 14W wiper motor. I think that's a bit high, but if you read this post, you'll see evidence of high currents being drawn, which I would not want running through a switch, but rather a relay. Correct - at rest, the wiper motor still receives a +12V supply. Like I said, I prefer the wiring scheme which uses a crossover relay.
-
Thanks. I have all the hardware to install the motor and arms: I just wasn't clear on how/where to bend the tube. Why do you prefer not to reinstall the washer? I have never used wipers in a 7 before: are the washers just not useful at all? If that's the case, it will save me some wiring/plumbing to go without! If you prefer the toggle switch to a rotary, why don't you just use the 35927 Lucas off-on-on switch described? It seems to be readily available and be hooked up directly to the wiper motor (though I'd prefer to have wiper current going through a relay). Maybe I'm missing something, but you just need an ign-switched power supply (with an appropriate fuse) and then connect it to the wiper motor plug.
-
Thanks so much for the pic! I'm restoring a LHD S3 and have never had a 7 with wipers before. My new LHD wiper assembly came with a straight tube emerging from the motor, so I was looking to see how I should bend the tube (between the motor and the first spindle). I'm putting together a custom dash/wiring and am also looking to replace the ugly factory switch-gear for the wiper/washer. What I ended up with is a single rotary switch, which I think should operate the 2-speed Caterham wipers. Bonus is that a push of the button operates the wipers. It is a 10 amp rated switch, which I plan to power with a single relay. I think that 10A is sufficient for the Caterham wiper/washer. According to my notes, the washers will only work when one of the 2 speeds is in operation - I can live with that. And no intermittent wipe function: just slow or fast. The rotary switch I bought is a Cole Hersee 75226, which is spec'd for a dual wiper setup. I can't remember how I ended up choosing this, as it was months ago, but I did come up with a wiring scheme which I think should work with the Caterham wipers and a single relay. When I've mounted my wipers, I will try it and report back! I don't even have holes in my scuttle for the wiper spindles to poke through. I ended up contacting Arch Motors in the UK and they sent me a scanned hand-sketched drawing of where to make the holes - how awesome is that! Oh, and yes, the knob which comes with the switch is ugly as sin. So I picked up a pretty cool knurled knob which looks like this, to replace it:
-
Is there someone with a LHD Caterham chassis (preferably an imperial S3), who has a pic of their wiper motor assembly installed, please? A shot from above with the scuttle removed would be ideal, but even a glimpse from underneath would be useful. Many thanks!
-
Wow, what an amazing build - thanks so much for sharing it here! It's the first time I've been engrossed in a 7 build thread for a long time. Love the layout for the electronics and the modular AN-based fuel plumbing. What immediately grabbed my attention is that we are both using the same electronics: I am also using the Motogadget + AIM MXS 1.2 + EMU Black (albeit with a humble 2.0 Duratec!). I can't wait to see the SADEV pics! I had a couple of questions: - The bracket you welded near the accelerator pedal, with the 3 holes: are those just 3 alternative locations for the pedal pivot? - How are you etching logos into those anodized finishes (e.g. oil cap and steering wheel hub)? Is that by laser?
-
I wish there was a way to do this, but I have never heard of anyone successfully removing and reinstalling their aluminium skins (let alone fit painted panels!). If you went to the trouble of removing the skins to blast and recoat the chassis, you would naturally replace the aluminium panels with new, form them, weld at the 2 main joints, rivet to chassis and repaint in situ. Although this is an extreme example (by that I mean a very well used 7 from a very damp climate), you can see some footage of removing old skins here.
-
Hi all. I managed to crack my heated S3 Caterham windscreen glass when removing it from the frame (to paint black). It's still intact, so can be used as a template. I'd like to replace with un-heated glass and am thinking of having someone local cut a couple of these. Those of you who were able to get custom replacements in the US: were they able to match the thickness of the glass, so that the original rubber seal could be retained?
-
I'm interested in going without wing protectors on my fiberglass rear wings. What I don't understand is if I really need the custom-cut kits or if I can just get away with buying a large sheet and cutting my own. Is this the sort of material you can "wrap" around the edges or do you really need to have the cut pieces to perfectly match the painted areas of the bodywork. Not clear to me where the seams are on the cut items. Thanks!