dvl
Registered User-
Posts
106 -
Joined
Content Type
Profiles
Forums
Store
Articles
Gallery
Events
Library
Everything posted by dvl
-
Hi, For material sources, I use the following. Most of my wire, flame retardant shrink sleeve, and environmental splices (expensive butt connectors that require a dedicated tool from Daniel’s), boots, lacing cord, etc comes from Aircraft Spruce. Race Spec has a great cross section of wire, connectors, fuse boxes, tools, etc in stock. Pro Wire USA has been my primary source for Deutsch connectors. Pegasus is a great general source for wire, PDM’s, and other supplies. McMaster-Carr takes a lot of my money too. Bel-Metric is my source for double crimp OEM-type double crimp spade connectors. https://www.aircraftspruce.com https://racespeconline.com https://www.prowireusa.com https://www.milspecwiring.com https://www.mcmaster.com https://belmetric.com/electrical/double-crimp-spade/ I chose to use two Cartek 4-circuit PDM’s for simplicity, sparing, and experience purposes. There’s a spare Cartek unit in my toolbox, if ever needed. I seriously considered using a Motec PDM15 or PDM30, but felt that it was overly complex for such a basic car. In retrospect, a programmable PDM would have simplified some of the more complex hard-wired circuits in the car, such as the interaction and isolation of the flasher and hazard circuits or the fuel pump power circuit that turns on with the ignition, but shuts off if oil pressure is below 4 psi (but can be bypassed for starting and includes a bypass warning lamp). I designed and built the harness as two subassemblies; (1) power distribution and dashboard and (2) chassis harness. With that architecture, it gives me the option to change to a completely different PDM system, by rebuilding the power distribution and dash harness. I first started using the Cartek units, years back, to build a simple power distribution circuit for a vintage race car (ignition, starter solenoid, fuel pump, and electric fan). All of that being said, I should buy a Motec or equivalent unit to play with. One benefit of the 4-circuit Cartek PDM is that they are the same footprint and bolt pattern as a Lucas 7FJ 4-circuit fuse box. Cartek doesn’t mention it in their instruction booklet, but I assume it was originally designed to replace the Lucas 7FJ unit. For fusing and power distribution of circuits in my car, there is a Lucas 7FJ mounted on the opposite side of each Cartek unit (if one looks under the dash, they see two classic style Lucas fuse boxes). As a functional example, one circuit on a Cartek PDM is for ignition and is ground side switch enabled by a dash mounted ignition switch. The Cartek unit acts as an ignition relay and 10A breaker for the circuit. The ignition output from the Cartek unit feeds into a Lucas 7FJ. I have 4 fused ignition circuits that feed from the 7FJ. I hope this helps, Dave
-
Hi, This car is powered by a Ford Crossflow engine and doesn’t run a dedicated ECU. It does use modern, but vintage appearing, Spa Design Classic gauges (stepper motor drive and 3-wire sensors), two 4-circuit solid state relay banks by Cartek (UK-based race electrics manufacturer), a hazard flashing circuit, high beam indicator, etc, so there is a considerable amount of wiring in the car. From an engine and car sensor and warning or gauge perspective, the car has feeds for an oil pressure gauge, oil pressure warning lamp, 4 psi oil pressure switch on the fuel pump circuit, water temp, oil temp, ignition, tach, speedo (GPS pulse to reduce complexity compared to a wheel speed sensor), gauge peak recall selection switch and button, separate indicator and hazard warning lamps, high beam indicator lamp, and a fuel pump oil pressure switch override (prime) lamp. The minimum time to build a harness is about 20 hours of work (long weekend project), as compared to 200+ hours for this configuration. This harness has 200+ hours of work in it, from sketching out the diagrams (need to remake in Visio), thru routing each wire using the car as a form board, labeling, crimping pins, testing all circuits, removing the harness for lacing, shrink sleeve, and wrapping, etc. The first harness I built for the car took about a weekend of work, but only contained enough to run and have functioning gauges and brake lamps. It’s roughly what I would build a vintage race car. If one can justify the cost, quick discount, MIL-DTL-38999 type connectors are the best option. They are designed for 1000’s of mate/demates, are lightweight, environmentally sealed, mass produced, and available in countless configurations. This harness was build to a high end level of quality, but even then I couldn’t justify the cost of new 38999-type connectors. Deutsch DT and DTM connectors are OEM automotive grade, use pins similar to 38999 connectors, are environmentally sealed, and are a good balance of quality and price. Repinning is an option, but requires the right tools. Good quality crimp tools are expensive (approx. $300 each) although lower quality knock-off tools can be found for a lot less on Amazon. I can always justify the purchase of good quality tools, but between correct wire stripping and crimping tools, the expense adds up quickly. Building a full harness is a somewhat daunting and time consuming task, but is relatively simple if you do it one wire at a time and have the right tools. I hope this helps, Dave
-
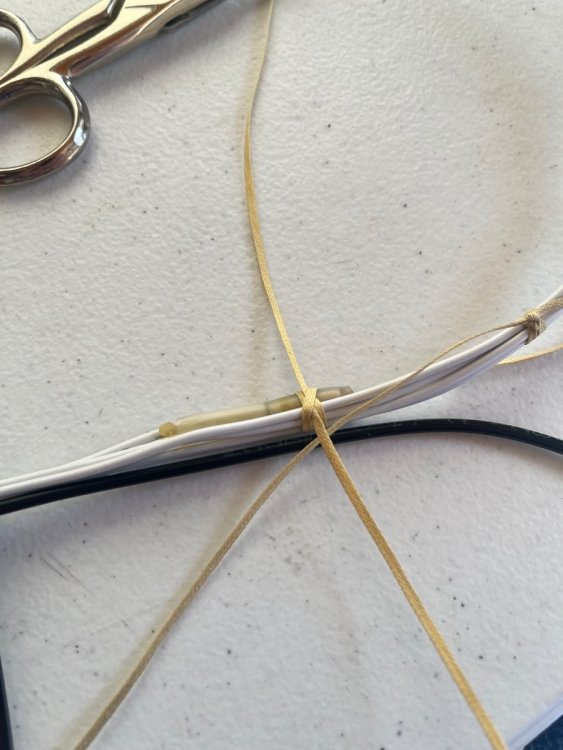
Hi John, You are correct about the benefits of using lacing cord over cable ties. I use cable ties sometimes in harnesses, but generally only those made from ETFE or PEEK, just like in the aerospace industry. The ETFE or PEEK cable ties are also considerably more expensive than lacing cord. The Advanced Auto Wire harness sounds like a great option. Thanks, Dave
-
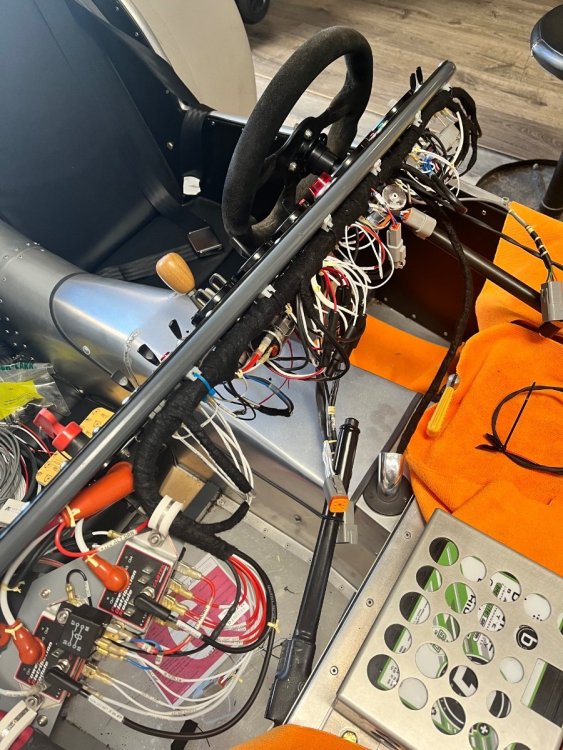
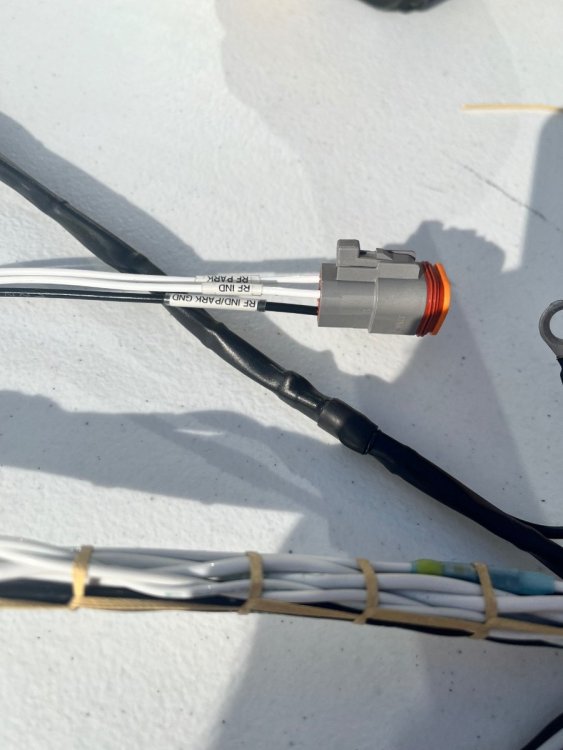
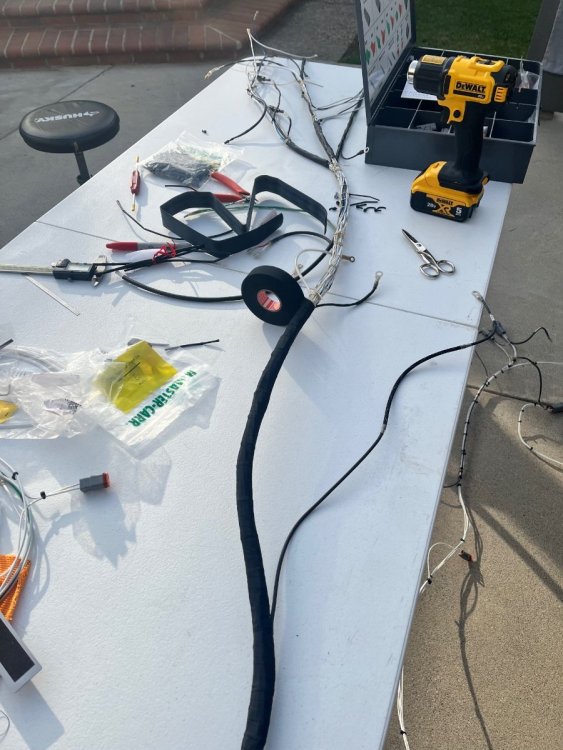
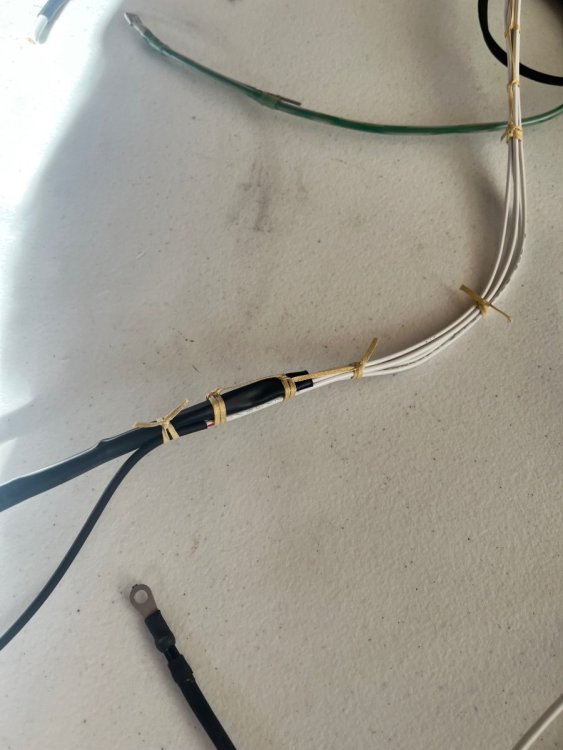
I recently completed building a new wire harness for my Seven, using manufacturing methods from the aerospace, motorsports, and modern road car industries. I’ve spent the majority of my career in the space engineering domain, so the harness is based on my experiences, learning, and observation of similar work over the past 25 years. This thread is being started to share my work and collaborate with others doing similar work. The design and construction philosophy was to build a highly reliable harness. From an architecture perspective, all high current functions are relayed (both solid state and traditional), ground side switching is used where pertinent, and the dashboard and chassis harnesses are separate subassemblies to aid in assembly, test, and future repair. This drove the use of ETFE insulated silver plated copper wire, aircraft type environmental splices, solder where necessary, high quality connectors with crimped pins, fire retardant shrink sleeve tubing, and lacing cord to secure the harness (as opposed to cable ties). I will add more detail, but for now please see the following pictures. The first image is of the complete dash harness. The subsequent image are some of the main harness fabrication. Thanks, Dave
-
Agreed. i have no worry about a 5-port pump or the crossover between 2 & 3. Your comment about an Accusump like device makes a lot of sense. I wonder if that was the original intent of the boss. Due to the proximity to the exhaust, I’d definitely run a silicone over fiberglass, Fire Sleeve type material, over an oil feed line. Dave
-
I just checked mine and the large boss on the left side, forward of the motor mount, is not tapped. I retrospect, I should have had it threaded. If/when I ever rebuild this engine, I’ll consider tapping it as the main oil feed and switching to a 4 port dry sump pump. Thanks, Dave
-
It’s been a few years since the motor was built. I do not remember if the left side boss is tapped, but will look this evening or tomorrow. I’m measuring oil pressure at the right side port near the oil pump. Dave
-
The crossflow in my Seven is build around one of these new Ford Motorsport blocks. It was assembled and dyno’ed by Ivey, based around a parts kit I provided (head and ported intake manifold by Tony Ingram, Carrillo rods, new Scat crank, CP pistons, dry sump pump, etc). The block is a thing of beauty. Dave
-
Original Lotus 7 shifter and related bits - free to a good home
dvl replied to craig chima's topic in Parts For Sale / Wanted
Hi Craig, Email sent. Thanks, Dave -
Hi Vin, Paypal is perfect. To which city will I be shipping it so I can get an estimate. Please DM me your address or email. Thanks, Dave
-
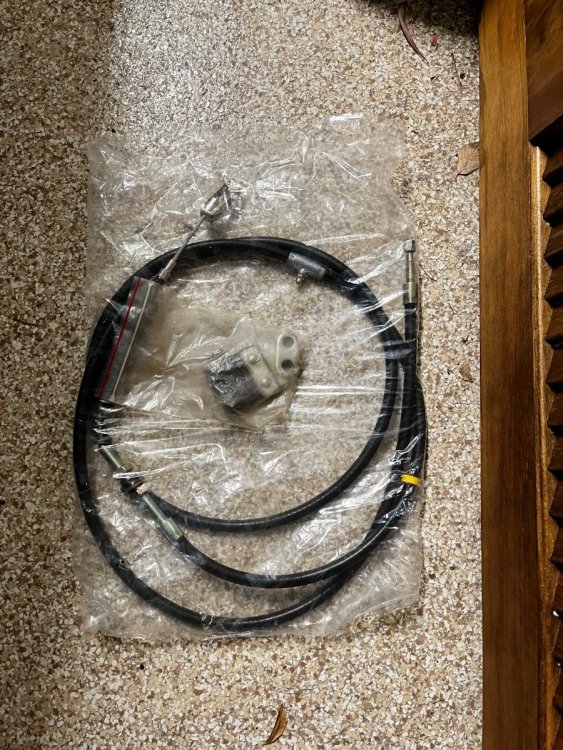
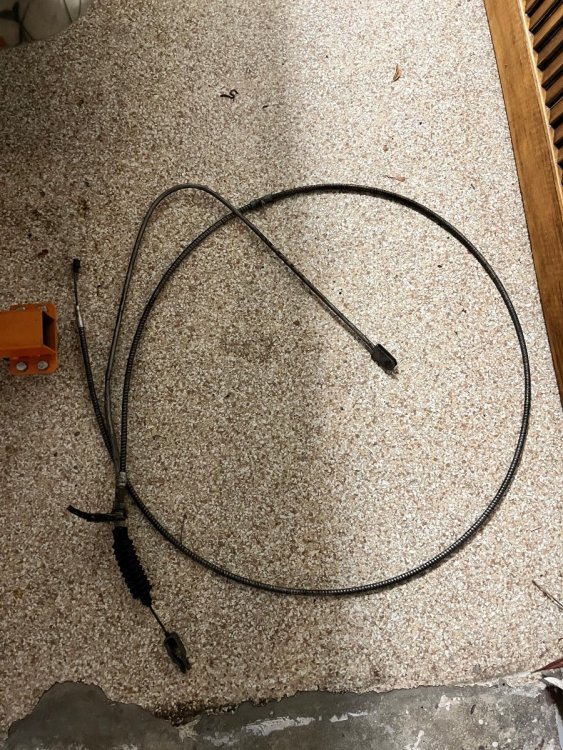
Hi Vin, Are you still in need of hand brake parts? I have the following available. I have rear disc brakes on my live axle Seven and never used these parts. 1. 1 used axle rod, cable, and pivot subassembly. It is from either an early Caterham or S3 Lotus. Acquired from Craig Chima years ago. The rod was bent for shipping but is easily straightened. 2. 1 new cable and pivot. Acquired from Tony Ingram years ago. Still in original packaging. Pictures attached. $100 +shipping for it all. If you are near Los Angeles, it is also available for pick up. I hope this helps, Dave
-
Wanted: Bellhousing to Mate T9 5-speed Gearbox to Kent Block
dvl replied to escondidoron's topic in Parts For Sale / Wanted
There’s a Cortina/Elan/Anglia bell housing to T9 gearbox adapter, available from the Milton catalog (miltonrace.co.uk). I’ve never purchased one, but I’ve been happy with their English Axle disc brake conversion brackets and have heard good things about their other products. I hope this helps, Dave -
Hi, That's a great bit of history. Did you receive my PM? I hope you are well, in the Louisiana area. Thanks and best regards, Dave
-
Hi, PM with questions sent. Thanks, Dave
-
Hi, You may want to call Check Point Automotive in Mar Vista, off Venice. The owner has a older live axle Caterham and tends to work on assorted interesting cars, in addition to BMW's (which is listed on their website). I've stopped in several times to look at his car and chat, as they are right by my house. If they can not do the inspection, they may know someone who can. i hope this helps, Dave
-
Ford Kent / 1600 Crossflow Inlet Manifold for twin Webers
dvl replied to Ross's topic in Parts For Sale / Wanted
Hi Bob, PM sent. Thanks, Dave -
Dean, I'm sorry to hear of your loss. My condolences, as well. Dave
-
Hi John, It sounds like you are way ahead of me on the engine. I'm excited to see your dyno results. I was attempting to tackle too many task concurrently (driveline and chassis), so I put the engine on hold while getting the rest of the car to a roller status. In the past 3 years (has it really been that long) I've purchased or fabricated lots of parts, rebuilt a transmission (Quaife internals, single rail Ford 4-speed), built up a Ford Escort based rear end, plumbed in the compete fuel system (fuel cell to FPR), completed the brake system (rear disc conversion on the solid rear axle), completed the interior, and a bunch of other tasks (such as converting some suspension links to spherical bearings, from bushings). I also decided to get married (amazing wife) and return to grad school (while working). Fun times. Anyway, I also bought a head (refurbished and ported big valve crossflow head by Tony Ingram). The head should support up to about 160HP, based on Tony's flow bench data. I couldn't justify the need or cost to build a higher flowing head. I'll be back to work on the car in a month or so (school break), and will hopefully finish the engine not long afterward. I may have to give up a little on doing everything myself and farm out the engine assembly, to make up time. That's the news for now. Time to continue on homework... Let me know how your dyno test goes. Dave
-
I have this unit from Retro Ford. The casting surface finish is somewhat poor and I have performed some machining on it to improve the fit and finish, but otherwise, the quality is reasonable for a low volume cast part. http://www.retro-ford.co.uk/shop/content/angliacortina-type-9-bellhousing-a003-0 I hope this helps, Dave
-
PM sent about the Costin book. Thanks, Dave
-
I'd call it an adventure. I believe James Whiting, in the UK, used to make a rear disc conversion for live axle Caterham Fireblades. A picture may be found in the archive section of his website. http://www.jameswhiting.com/page15.html For my live axle (Ford Escort axle) Seven, I'm using the Milton English Ford caliper mounting kit, for a Ford Sierra caliper (standard Caterahm DeDion rear caliper). I turned down the axle flanges to clear bell of a Ford Fiesta rotor, as well (recommended by Milton). For the master cylinder and front brakes I'm using a late model Caterham .700 bore master and Triumph Spitfire calipers. I placed a Tilton proportion valve on the rear caliper circuit, in case reducing the rear braking is necessary. The car is not yet complete, so I have not tested the brake system. I will go through the math eventually and verify the piston ratios. The parking brake is still in work. I have an under-dash handle, a Caterham cable to adapt an under-dash handle mechanism to a Sierra hand brake cable (found it on the Caterham website a few years ago), and a Sierra cable. The Milton kit included a parking brake cable mount, but I suspect I will have to fabricate some form of cable mount. I hope this info is helpful or at least supports that your idea sounds reasonable (well, reasonable to someone who would build a Lotus Seven replica from scratch, starting with not much more than an Arch chassis and a few pieces of body work). Dave
-
Hi Kevin, My wife and I live right on the Santa Monica and LA border. I do not know of a shop directly familiar with Sevens in the Santa Monica area, but there are few British car repair shops in the immediate area that might be worth calling. I generally recommend Tony Ingram Historic Racing (an old friend of mine), in Santa Barbara, Jeff at JAE in Goleta, or Frank Monise Motors in Montclair for Lotus and Seven related work or questions. They are all a bit of a drive from Santa Monica, but are extremely knowledgable. Someone from the California Caterham Club may know of other local shops. I hope this helps, Dave
-
I recieved the same spam from Bykajigo. He most likely doesn't own a Seven... Dave
-
The hydraulic clutch release bearing kit is sold. Thanks, Dave
-
The Tony Weale book is sold. Thanks, Dave


