All Activity
- Past hour
-
My 420R with roller barrels (and Caterham tune) gets crap mileage. 70mph cruise doesn't even get 20mpg. I think around 15-18. Always been that way. That's with aeroscreen, no doors, sticky tires.
-
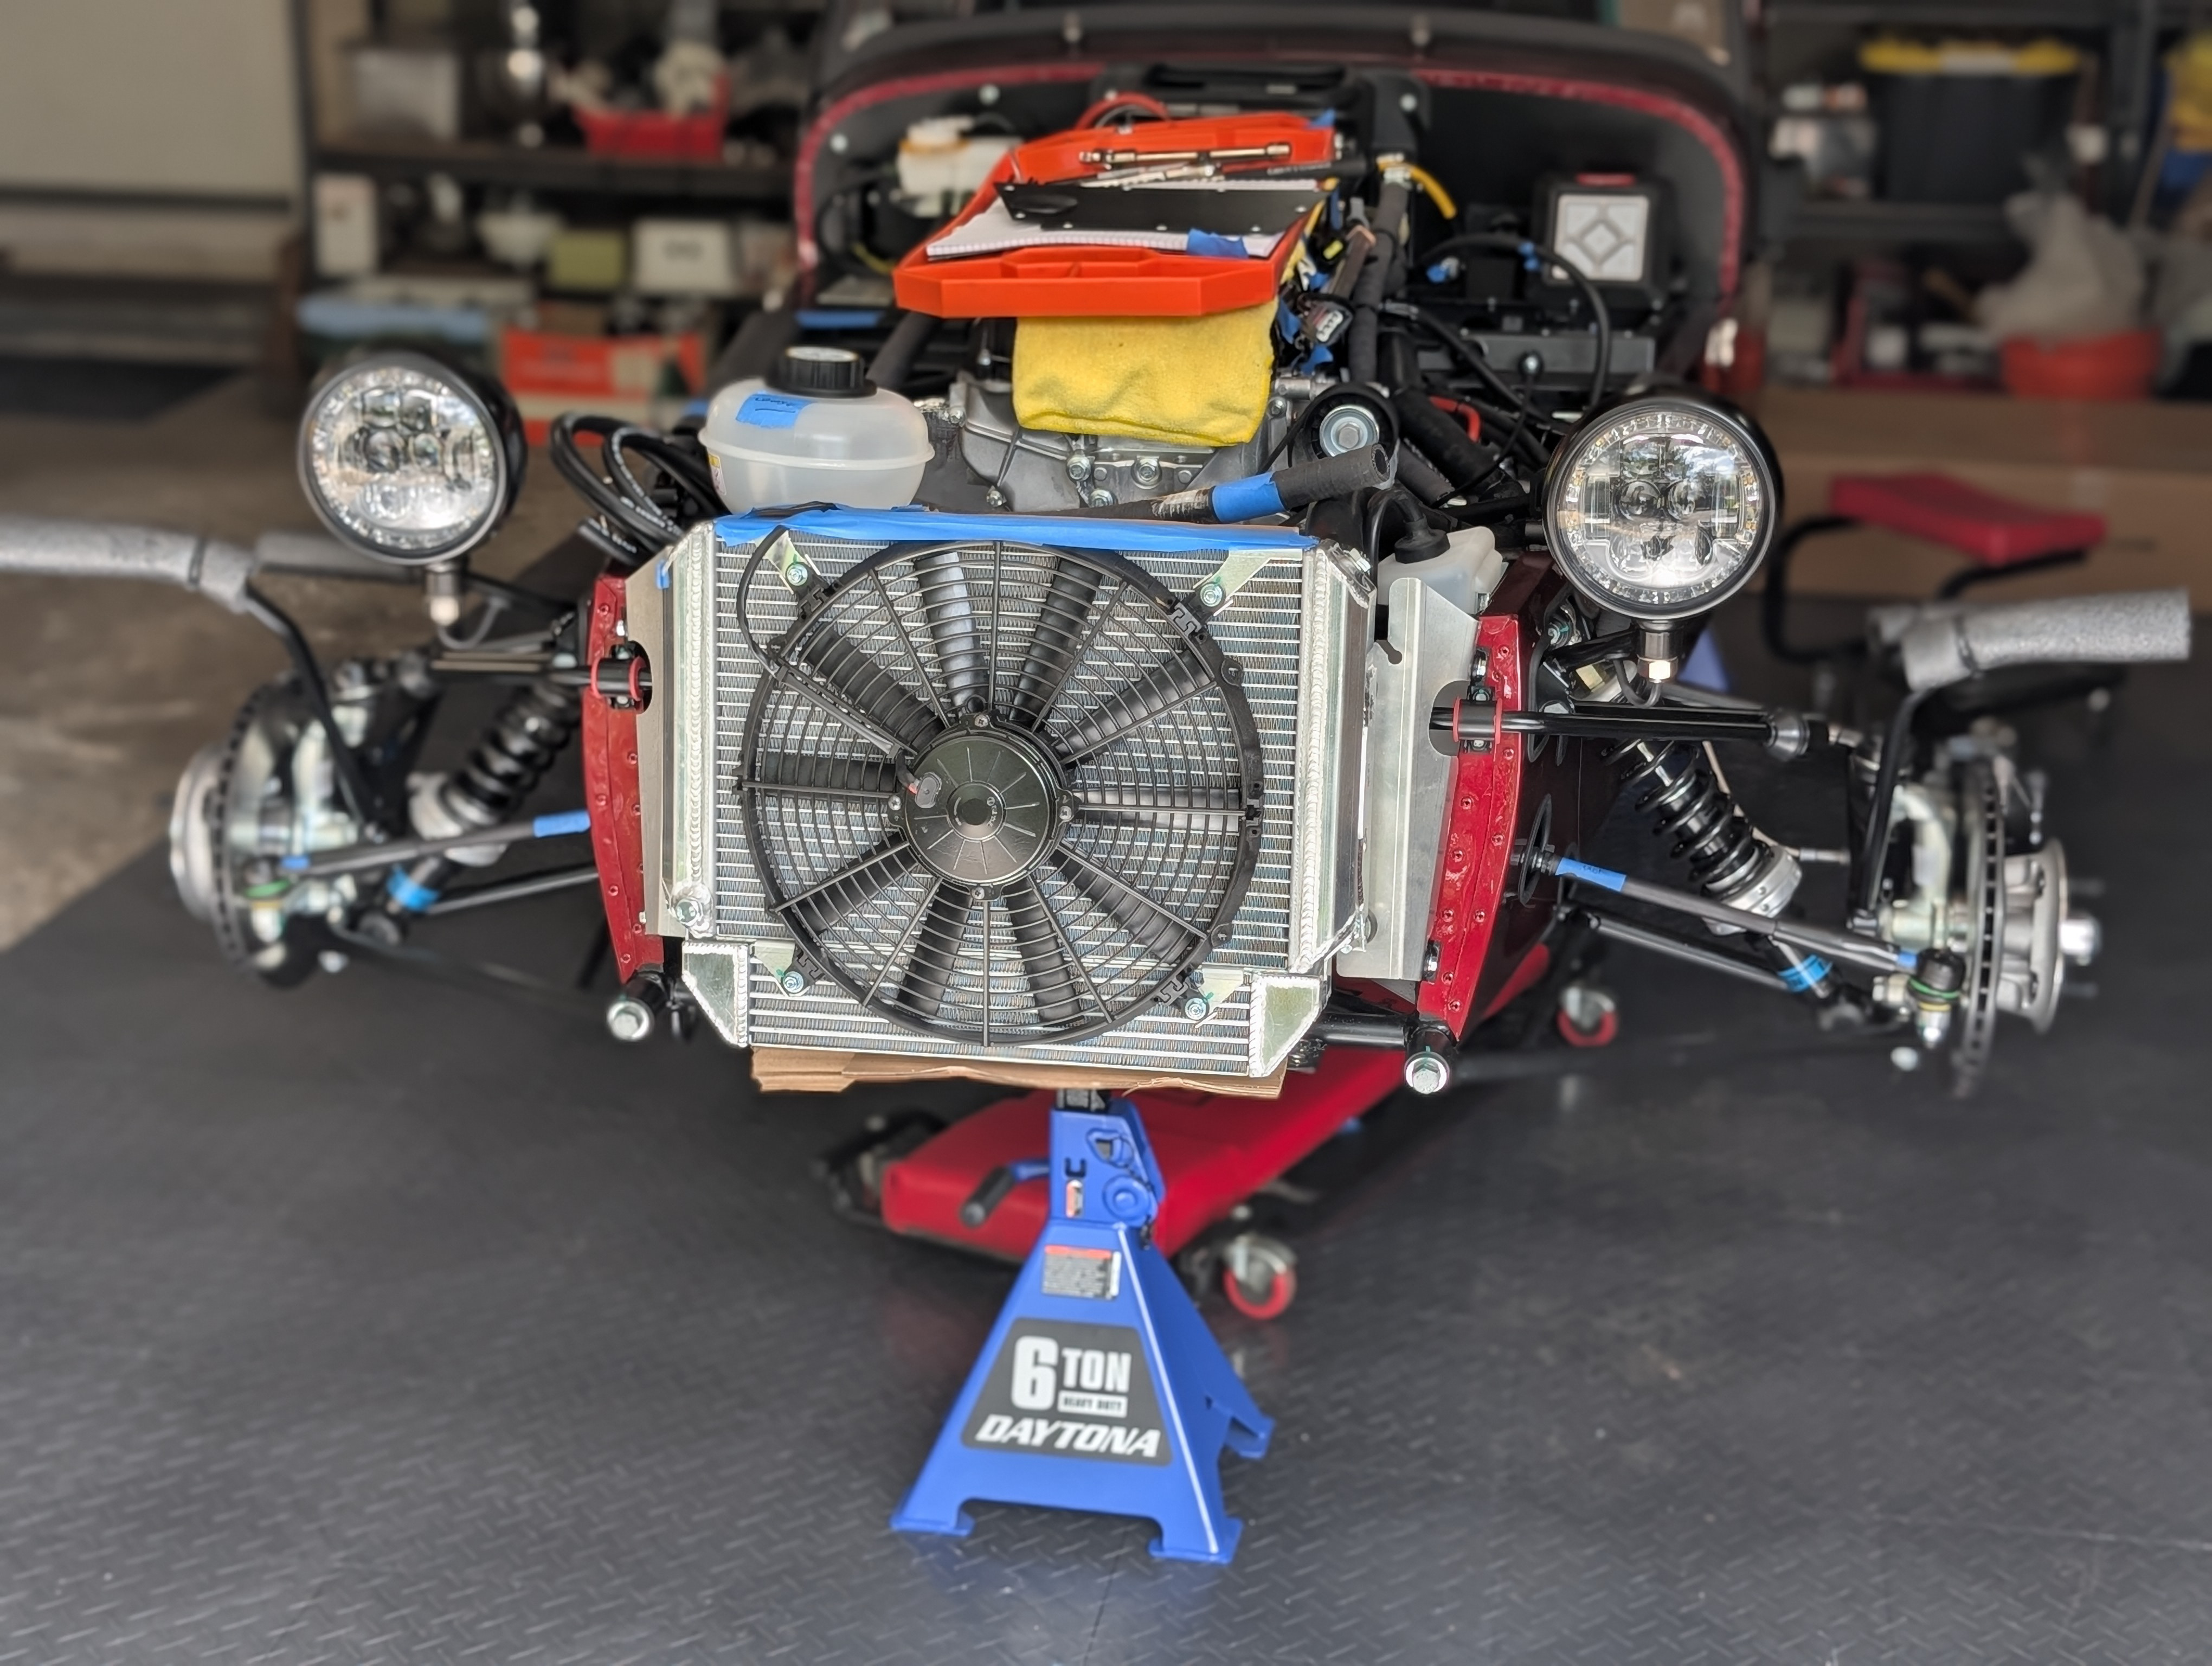
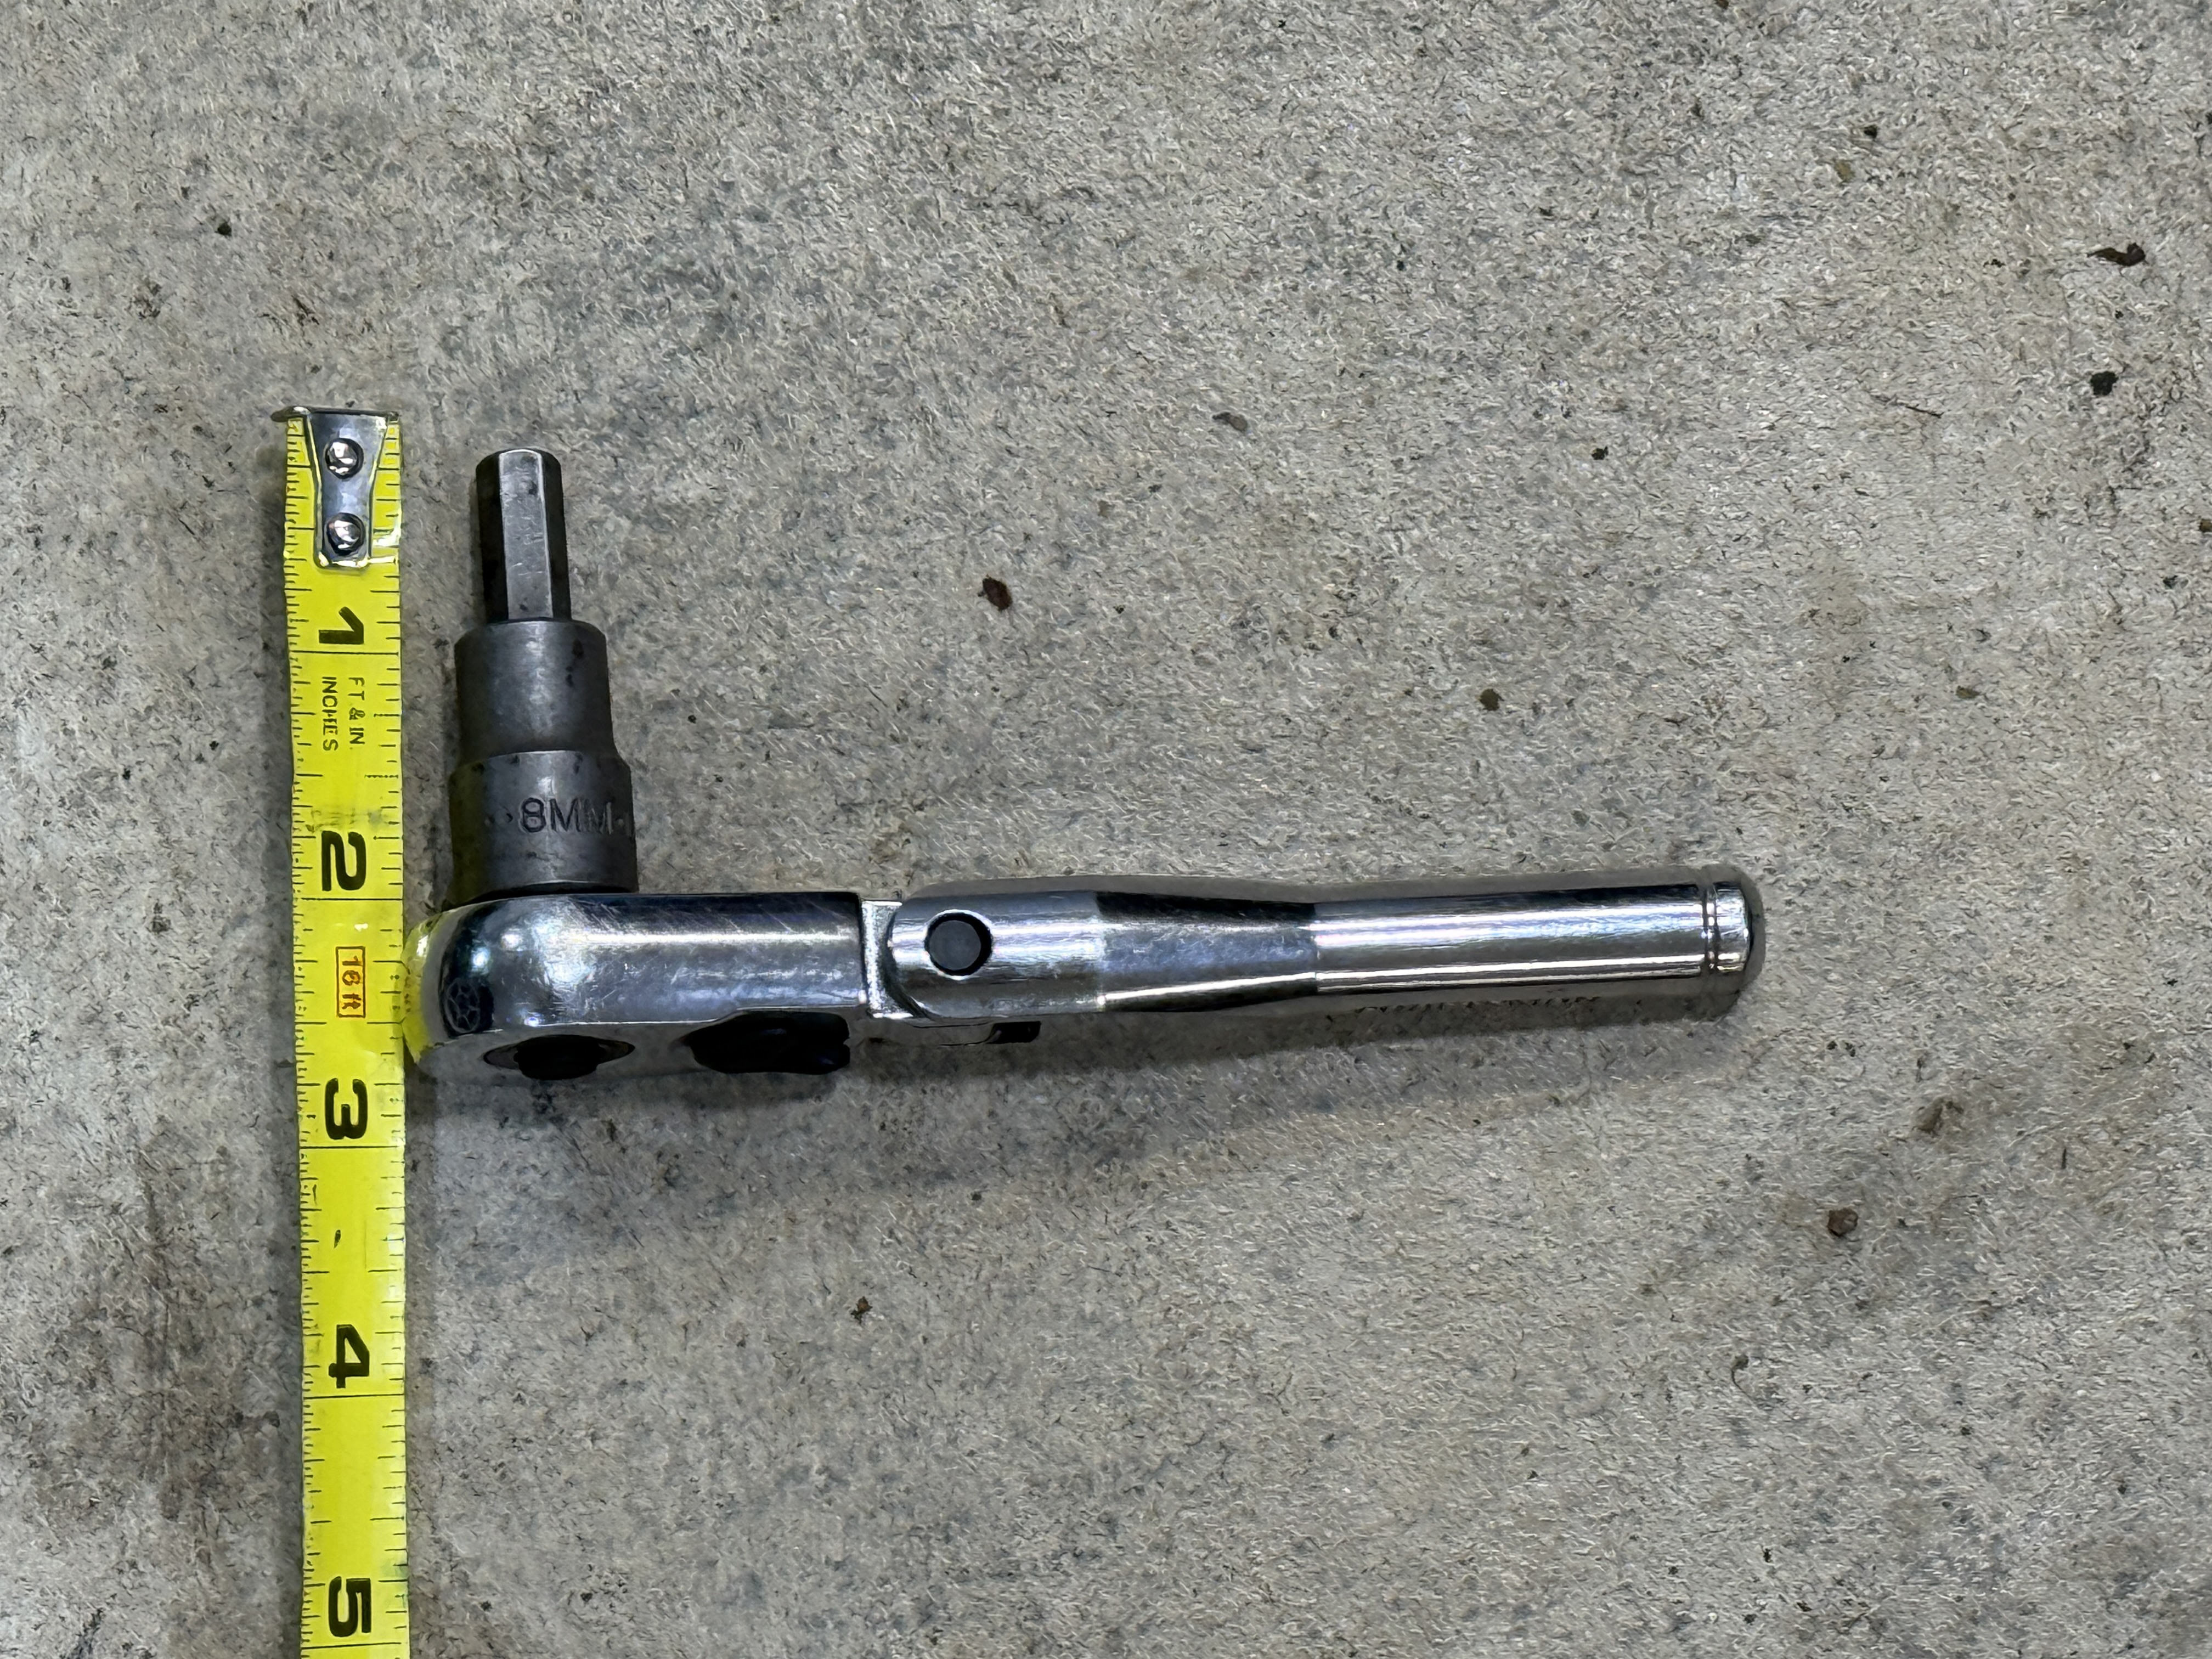
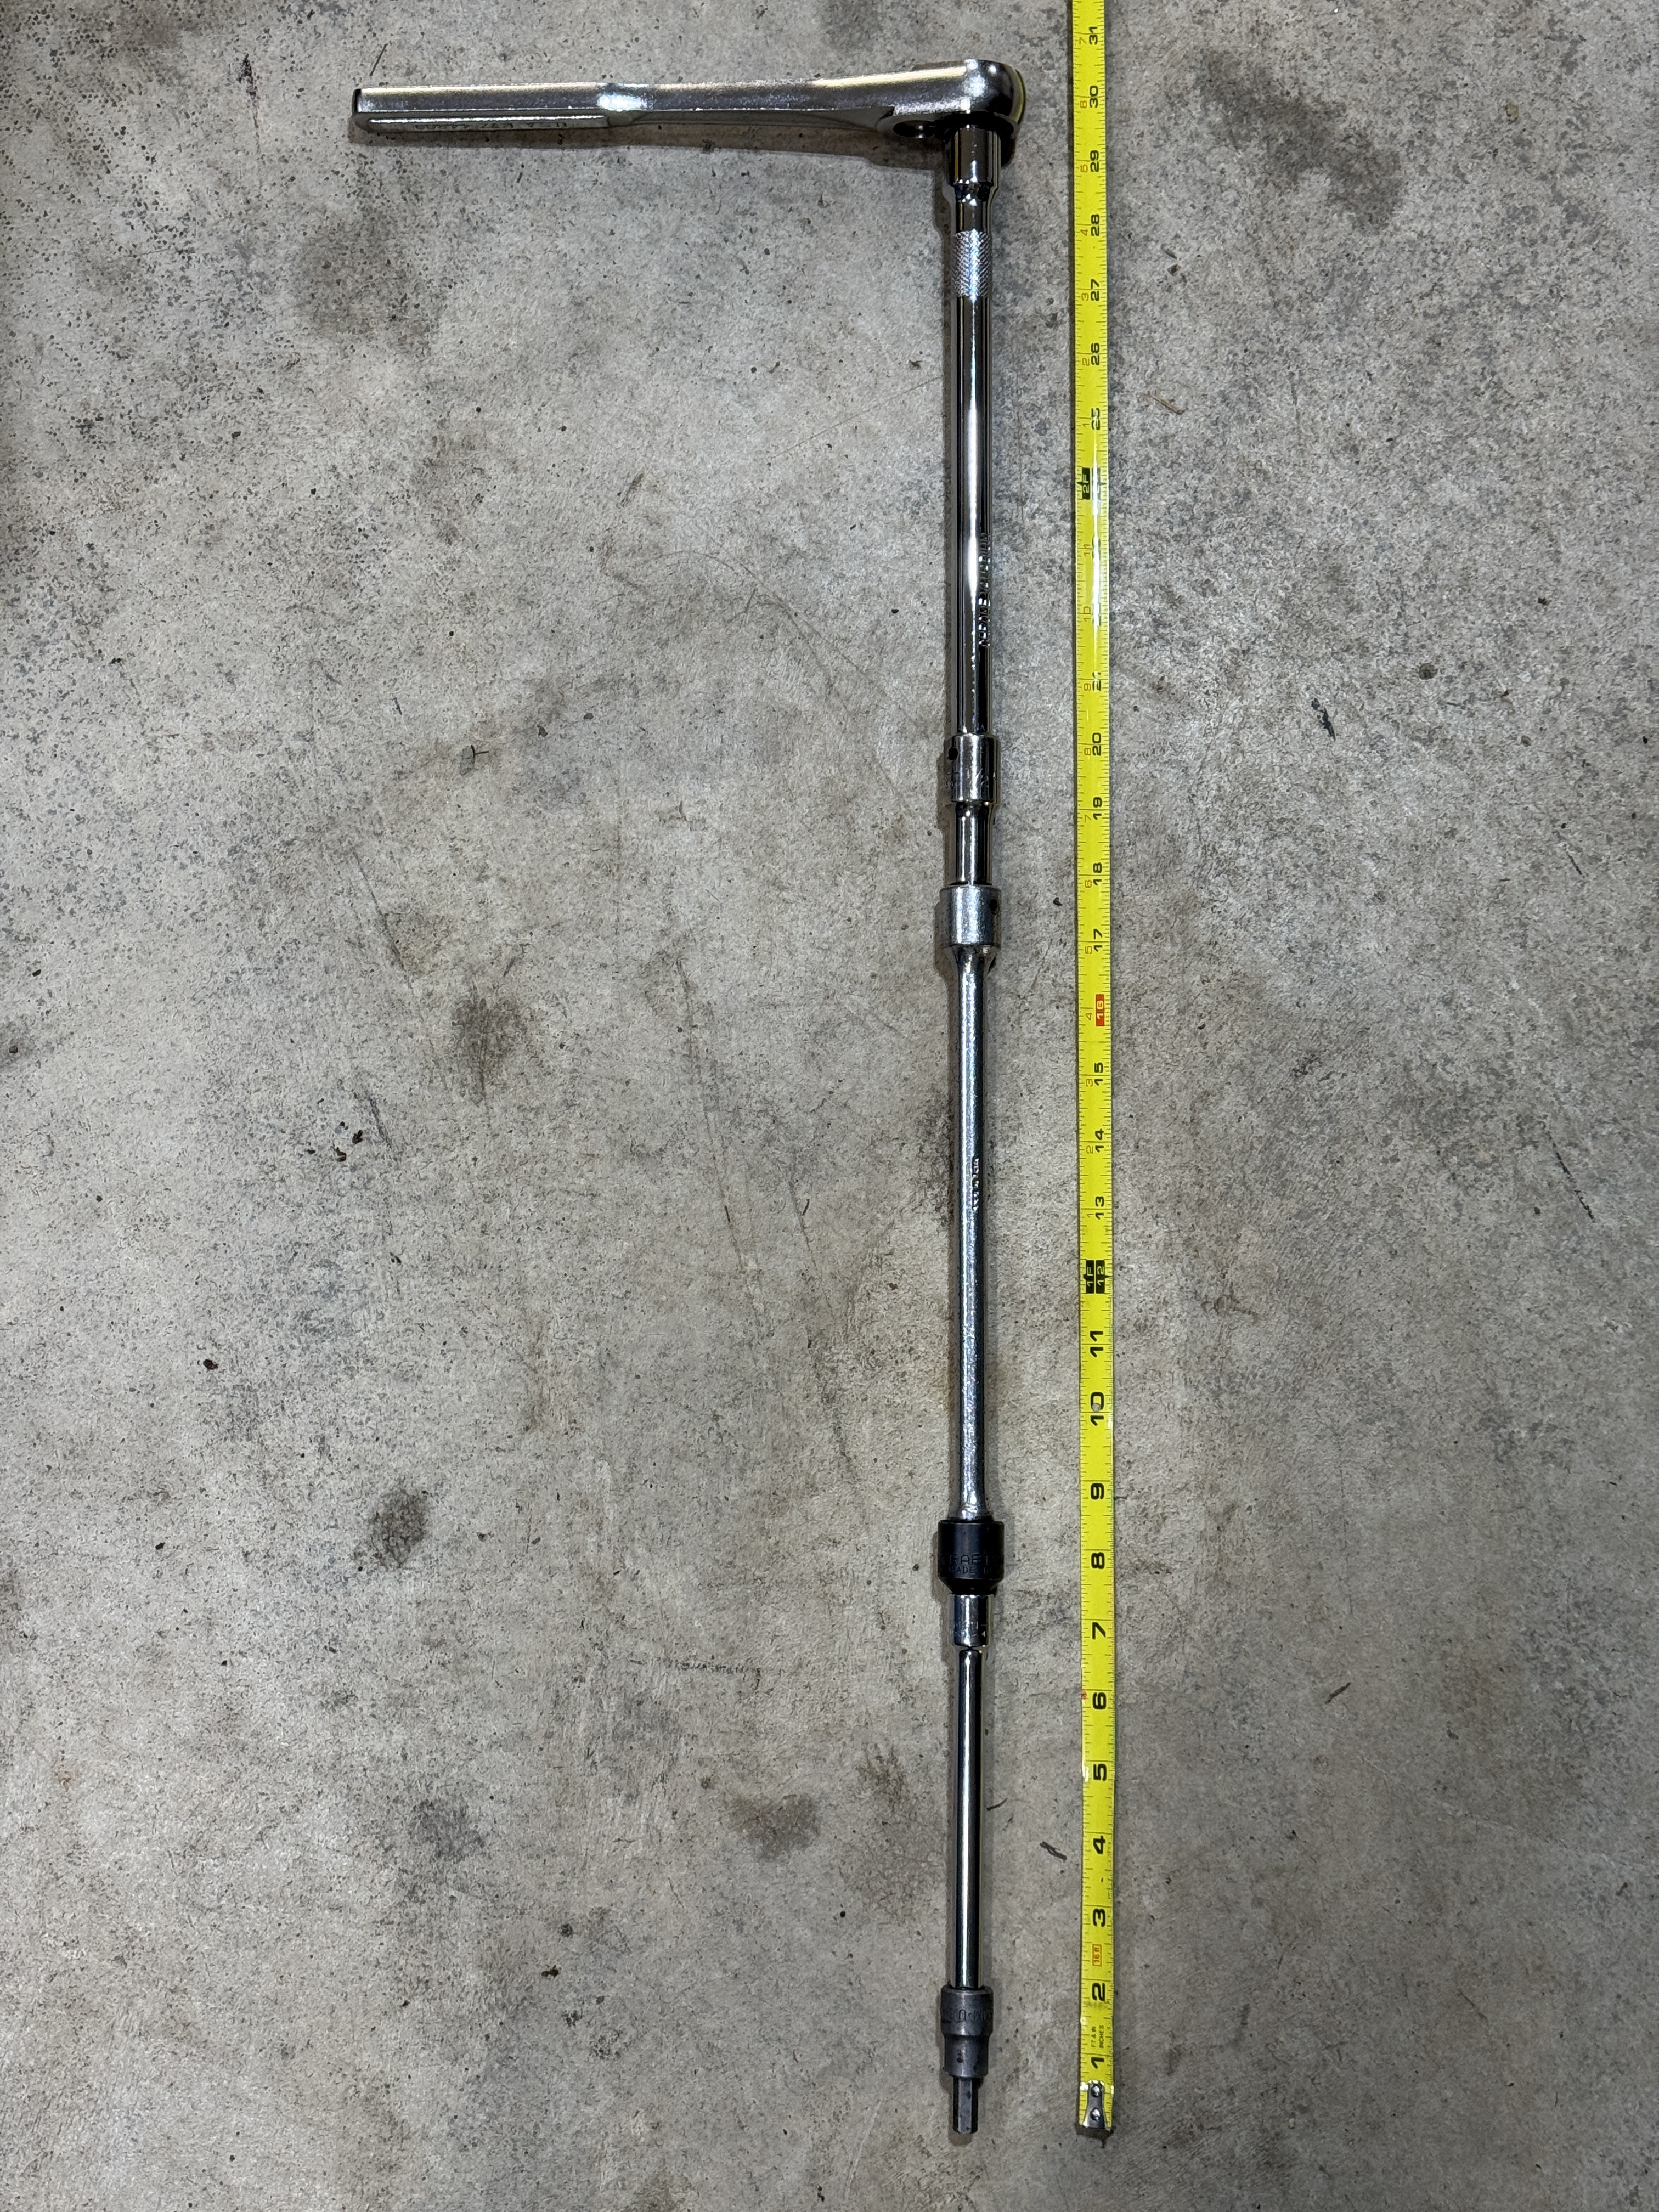
 The substitution of a hex bolt in the Birkin upper location is not going to work. Taking taking a Dremel-type cutting disc to an 8mm Allen-key-type wrench was a great help in for the Birken middle location, but no help for the upper. On the Caterham, there was plenty of room to reach all the bolts with an 8mm driver mounted on a 3/8" ratchet handle.
-
He has a problematic Zetec that is getting horrid mileage. Someone with a 420 should be able to chime in with their typical street mpg. As proxies, my Westfield, with a taller (3.62 vs. 3.92) final drive returned ~25 mpg when it had 420 cams with ITBs, and about 1-2mpg worse after changing to more aggressive cams. Highway consumption when touring was much better. The 2.4L Duratec in my Caterham is pretty thirsty, barely breaking 20 mpg in normal (back roads/around town) street use. Something would need to be wrong for you to go through 5 gallons in just 40 miles of street use in a stock 420.
-
I have news. I stumbled into what looked like the right thing at O'Reilly and found one in stock, stuck it in my Caterham and it cranks. There was one review there and the vehicle shown in the review was a 2000 Ford Ranger, so I went through all the engine choices until I found the one that returned the model that I already know works. Surprise: It's not the Ranger four-banger. Ford part that was in Steve's driveline he sold me: F32U-1131-AA - search for 2000 Ford Ranger XLT - V6 - 3.0L 2986cc 182ci GAS MFI vin U - 2 valve OHV or 2000 Ford Ranger Sub-Model: XLT Engine: 6 Cylinders 3.0L Vulcan GAS =========== Confirmed works, cranked the Zetec in my "Birkin-equipped" Caterham: O'REILLY BesTest Starter - Remanufactured - V613177 =========== Probably works: - Ultima Starter - Remanufactured - R613177 - Ultima Select Starter - New - N613177 Part # N613177 Line: USL - Bosch Starter - New - SR7559N Part # SR7559N Line: BOS - Bosch Starter - Remanufactured - SR7559X Part # SR7559X Line: BOS - Duralast Remanufactured Starter DL3264S - TotalPro Remanufactured Starter T3218 Shop All TotalPro - Raw Power New Starter ES3218S Part #ES3218S - AC Delco Gold Starter 336-1113A - NAPA Starter - Reman - Standard Part #: RAY 2449308 - Starter - Remanufactured Denso at NAPA Part #: DEN 2805104
- Today
-
What is his fuel consumption? I went from thinking I had a full tank (5g by my definition at the time) to empty in like 40 miles .
-
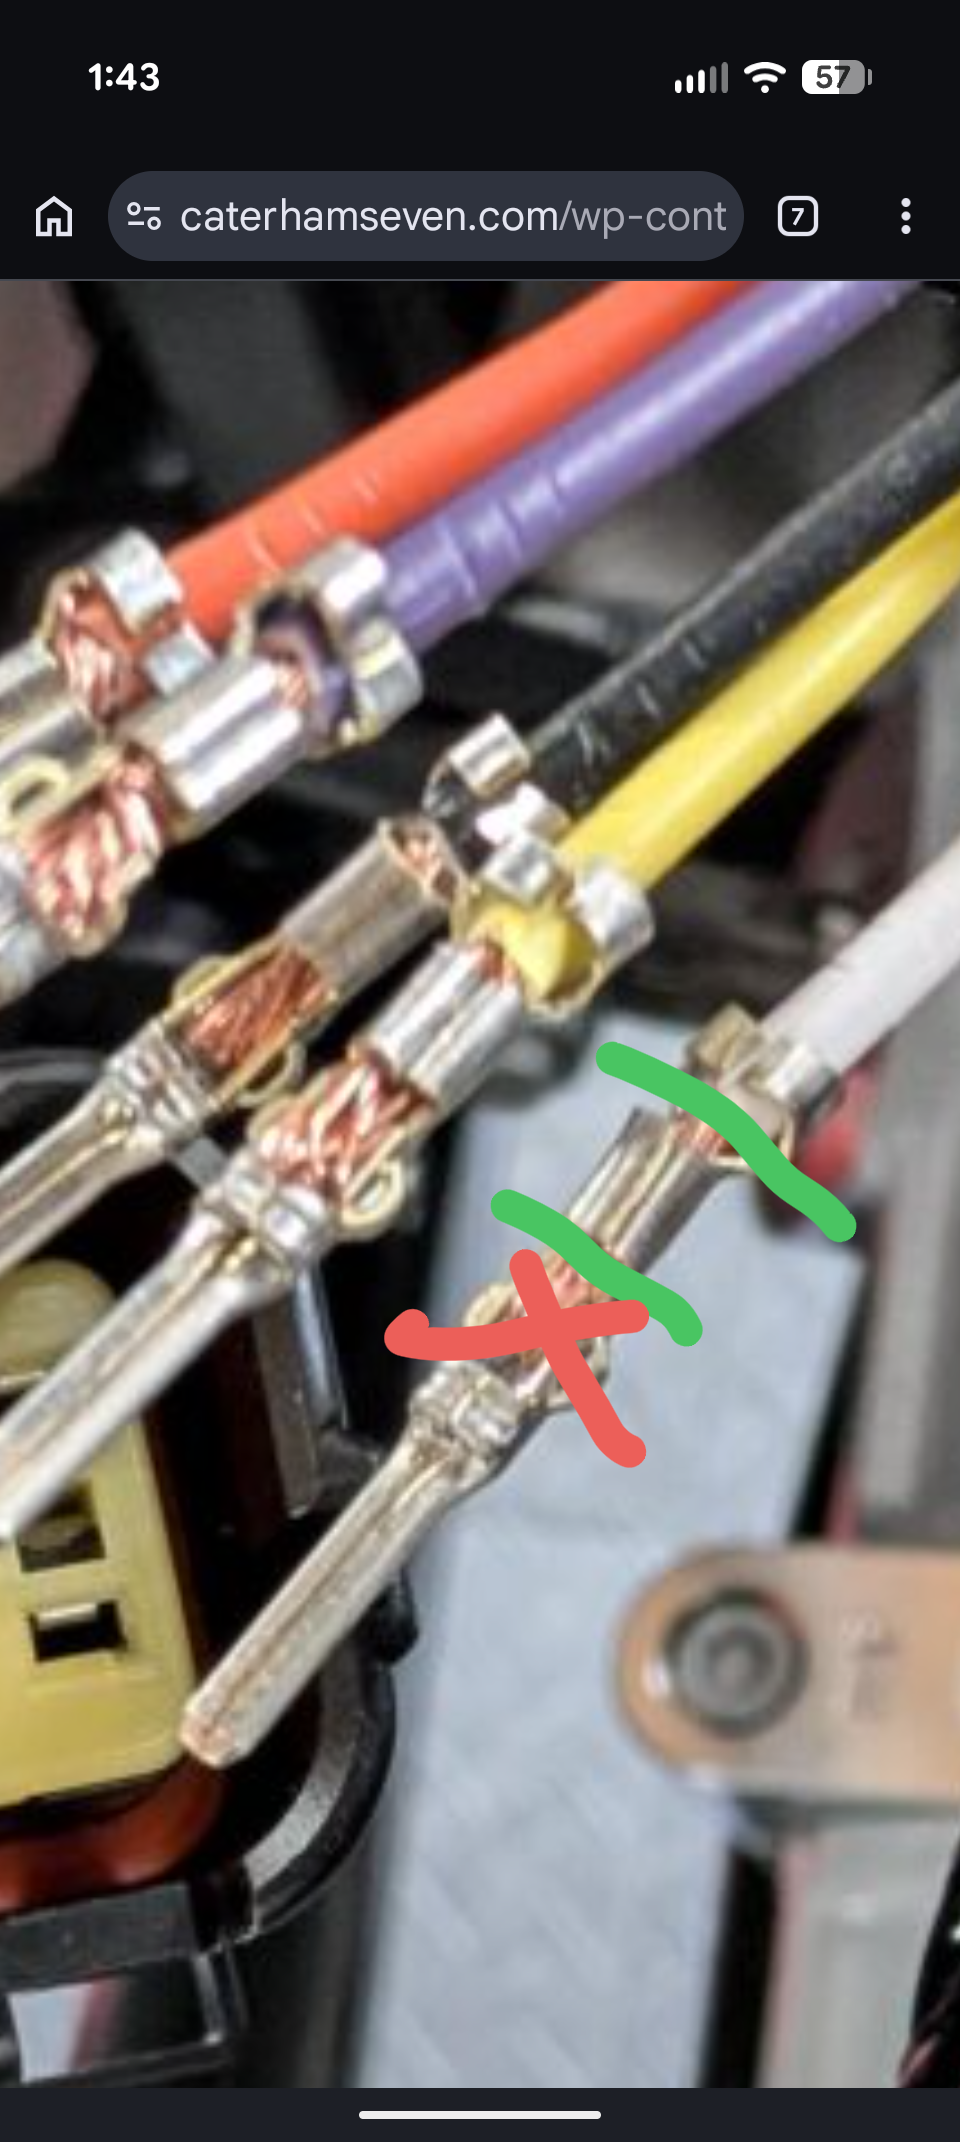
Done properly you only need a tiny section of wire, enough for the forward crimp on the pin, so cutting and re-pinning should only lose ⅓" or so of the wire. In the picture you only need the wire between the green lines ... the section I've crossed out is surplus (my sloppy work, too much bare wire on all the pins!) and in fact occupies the space that the connector's internal catch needs to click into in order to retain the pin.
-
BTW all the suggestions above are assuming your car is running well and you aren't getting @Vovchandr-like fuel consumption.
-
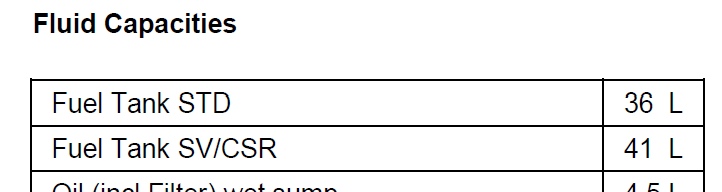
Caterham doesn't offer smaller fuel tanks, so even if they somehow managed to install the slightly smaller S3 tank in your SV, you would still have 9.5 gallons less ~1.5 gallons the fuel pump can't reach. That doesn't mean the tank wasn't crushed, but you that would be pretty obvious from beneath the car. From the owner's manual: It seems there are only two possibilities: The way you checked earlier that the tank was full was done incorrectly, or you have an issue with the tank. Although it's a little tricky to do because of the flap and the curvature of the filler neck, you could make a curved dipstick out of thick single strand wire or thin rod to confirm the fuel level. I have done this before when troubleshooting, but it took several attempts to get an accurate reading. I found putting painter's tape on the rod was helpful to see the actual level. Another possibility is repeatedly tapping the front of the tank going from bottom to top to see if you note a change in the thud that delineates the transition from fuel to air. I've never tried this myself, so the difference may be too subtle to hear. If you do attempt it, avoid the middle of the tank where the baffle is located. If you think the tank should be nearly full and the dipstick or thump test shows about half, then you know the issue is with filling it. If not, then there could be a blockage, or possibly an issue with the baffle, which divides the fill side and pump side of the tank. The foolproof method to confirm the fuel level is to remove the floor and pull the fuel pump/sensor assembly and do a visual check. However, that isn't easy as an uncut floor can be very frustrating to remove, and you need a special tool to remove the fuel assembly's locking ring. Fortunately, that tool is readily available and isn't expensive. My boot floor is currently removed, so let me know if you need pictures of anything.
-
Yeah you're right about the difficulty of threading the wires with vs without the pins. I did it with the pins as that's how it came already from the factory. If I have the wire length, then cutting off and recrimping the pins should not be a big deal. I'll see how it is when the pins come in and I fix my loose one.. if they work well with my crimper I might just redo it. I should probably heatshrink the wires too (I didn't previously).
-
Quick experiment with some black self-fusing silicone tape .... seems like a clean black out solution? And I know from past usage, this stuff is completely weatherproof.
-
Yep, your blog's definitely a help. The level of detail (including obscure stuff such as the part numbers for the Econoseal pins) is spot-on, and there aren't many blogs on LHD cars. I also found that the 5 wires wrapped in flexible, tight heat shrink to be pretty easy to get through the bracket. Shouldn't be hard to re-do if desired.
-
JFYI for those who might be interested, I've started advertising the car outside of USA7's for $26K.
-
I used an online calculator to try get a close estimate to my new tank capacity. I think I got close... https://www.vcalc.com/wiki/volume-of-a-tapered-trough Tom
-
@hahuang65 I am not sure how easy it would be from underneath, but if you can get the length, width, and height, you can calculate the approximate volume. Gallons = (LxWxH)/231
-
Curious why you'd remove the regulator. If the mechanical pump is maintaining 2-3 psi, maybe there is no benefit?
-
@Origin7 happy to, but what measurements would you suggest?
-
Can you get some rough measurements and calculate the capacity (roughly)? Then you know if you can only put 5 gallons in a 10 gallon tank, you have a problem. I am not exactly sure what that problem would be, but it's a starting point.
-
Thanks for the complement - like the car, the blog is a work in progress! Hopefully it's a resource for others as I've really leaned on blogs for help. And a record for me as my memory fades! FWIW, tightly bundled in heat shrink - and crucially, without pins - the 5 wires from the headlight were no problem to push through the bracket. I did slide the grommets off and spray silicone lube but I wouldn't worry about doing it again. For me the PITA and most time spend would be the need to replace the pins. OTOH if you didn't want to replace the pins, then the wires would be trickier to to be fed back and I'm guessing could only go through the bracket one at a time? That would also limit heat shrink to just the headlight end, not the full length? Regarding the look ... I don't think I'll really know if it looks weird until I put the nosecone, hood and front wings on. I'll try and remember to report back when I get to that point.
-
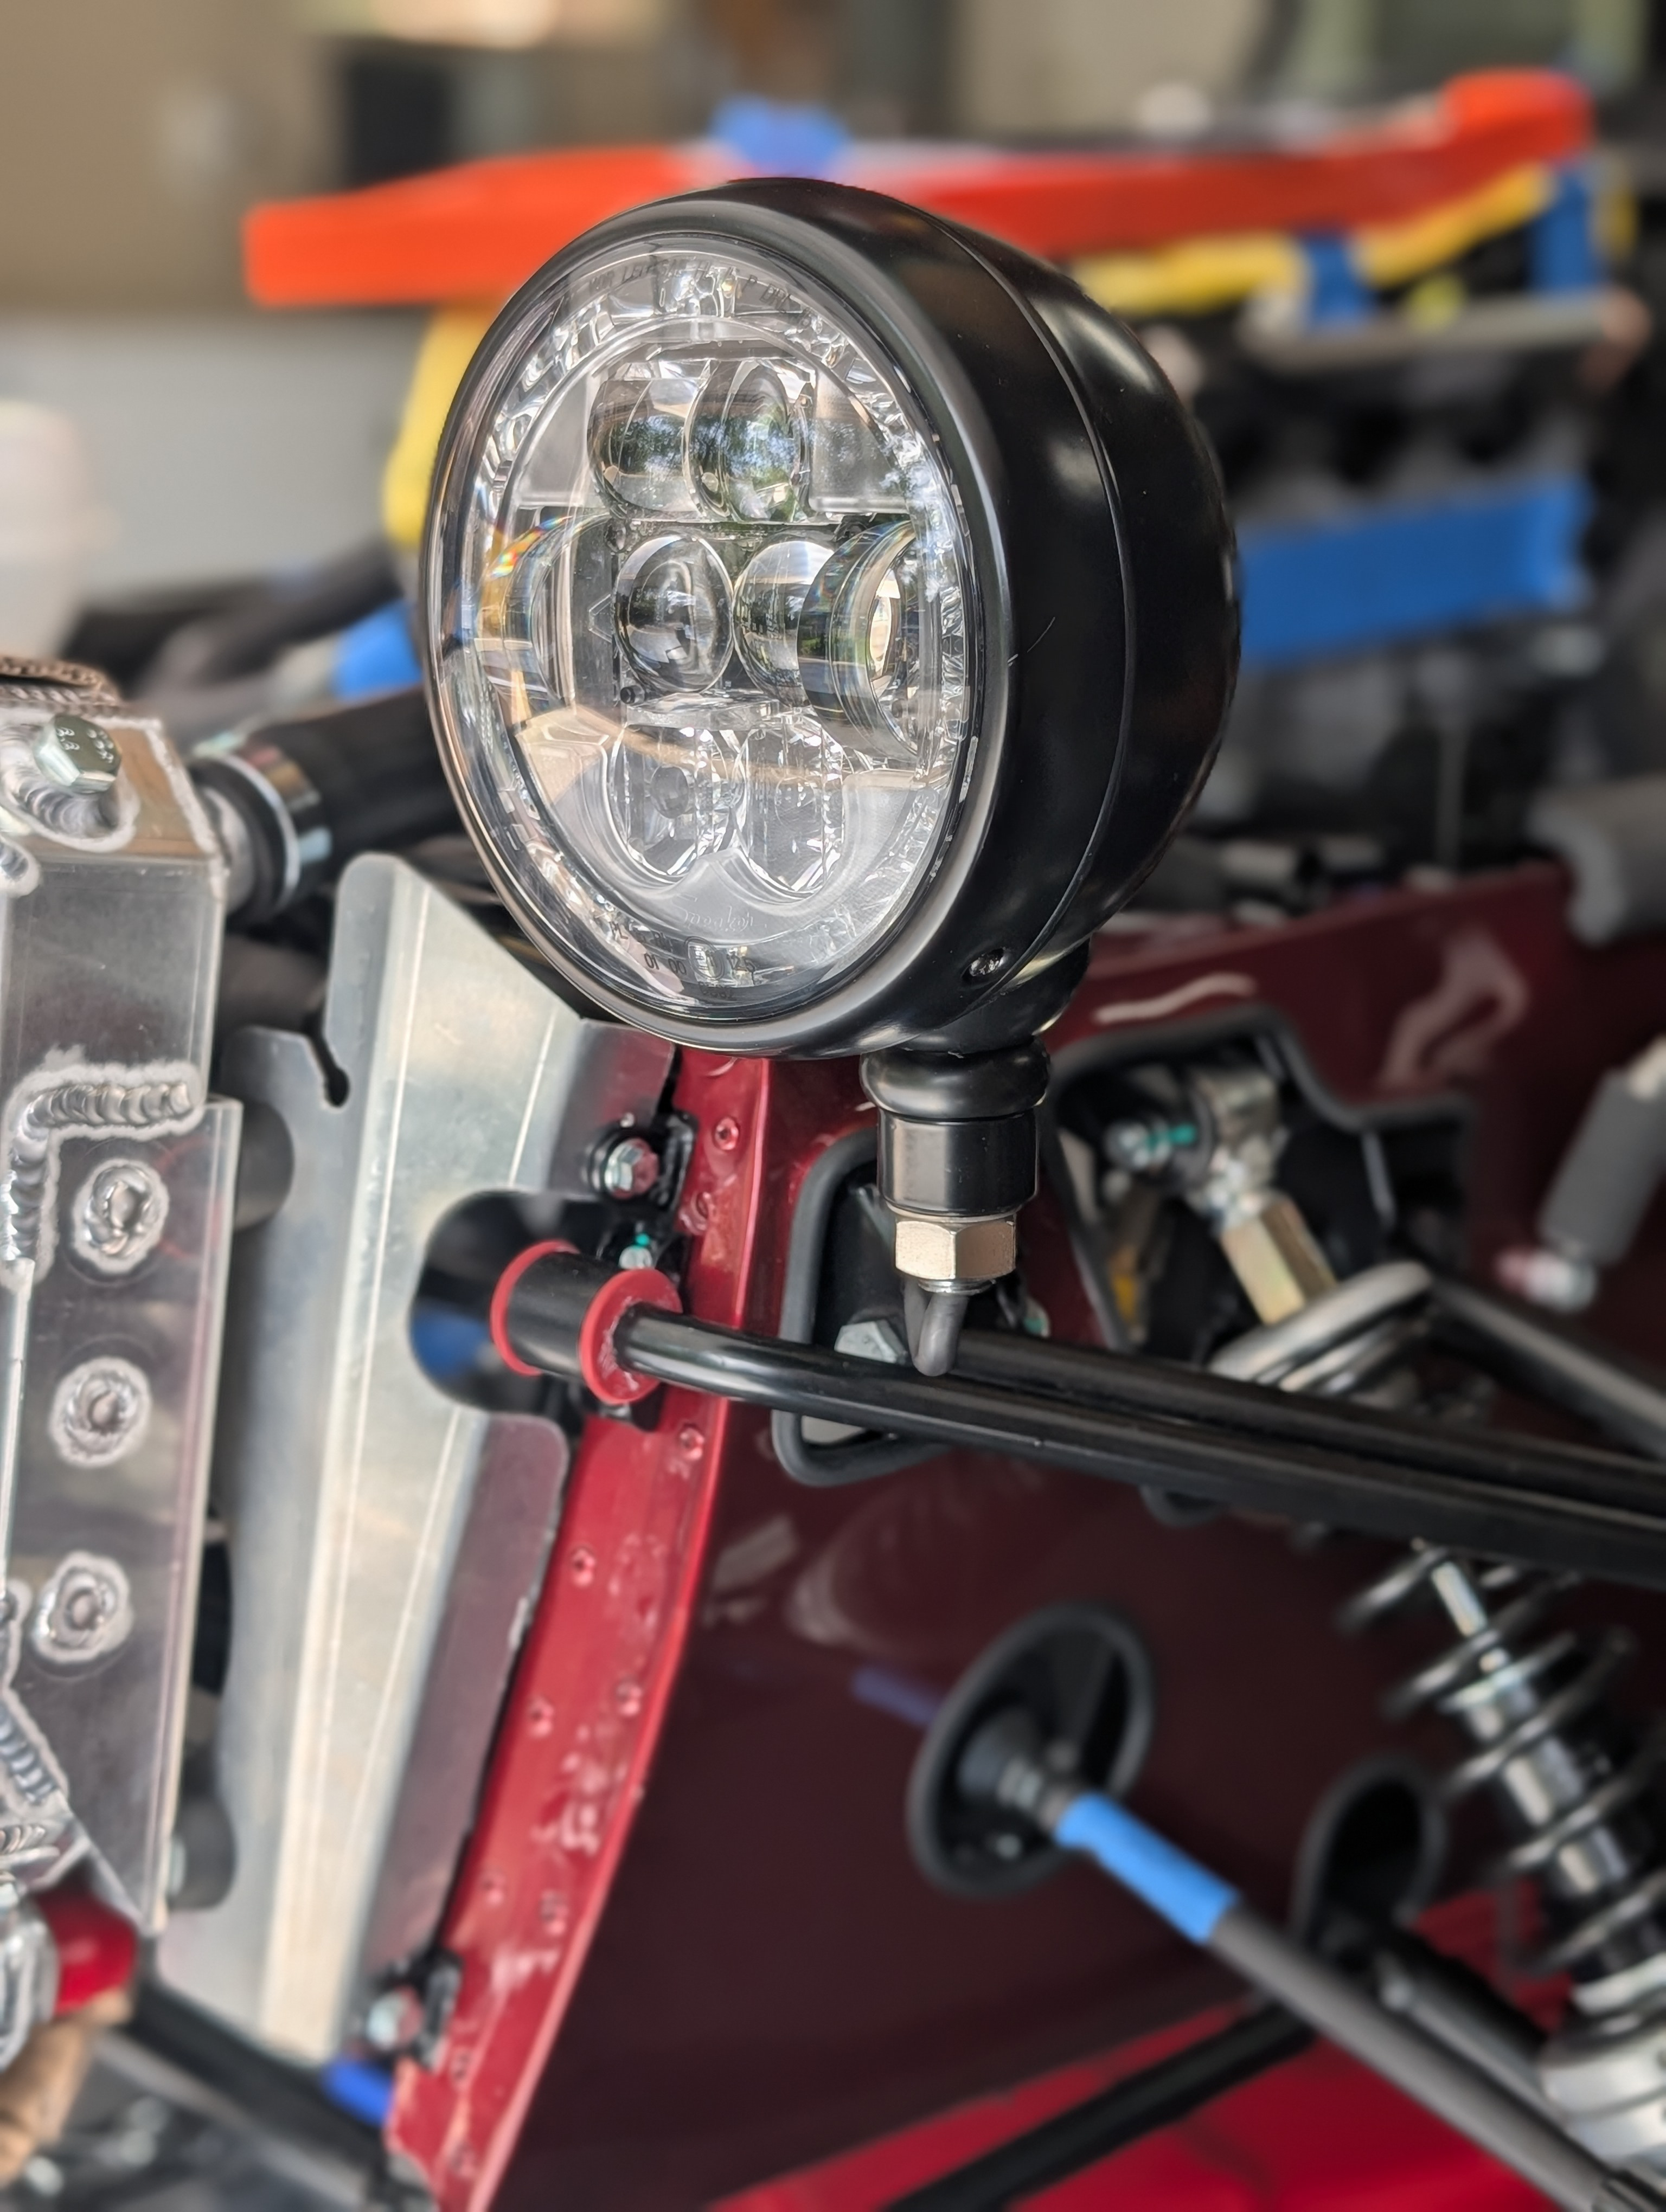
I wasn't aware that you've got a new blog going. You're doing a very nice job with it! The option of leaving off the indicator pods entirely hadn't occurred to me. It's definitely something to consider.
-
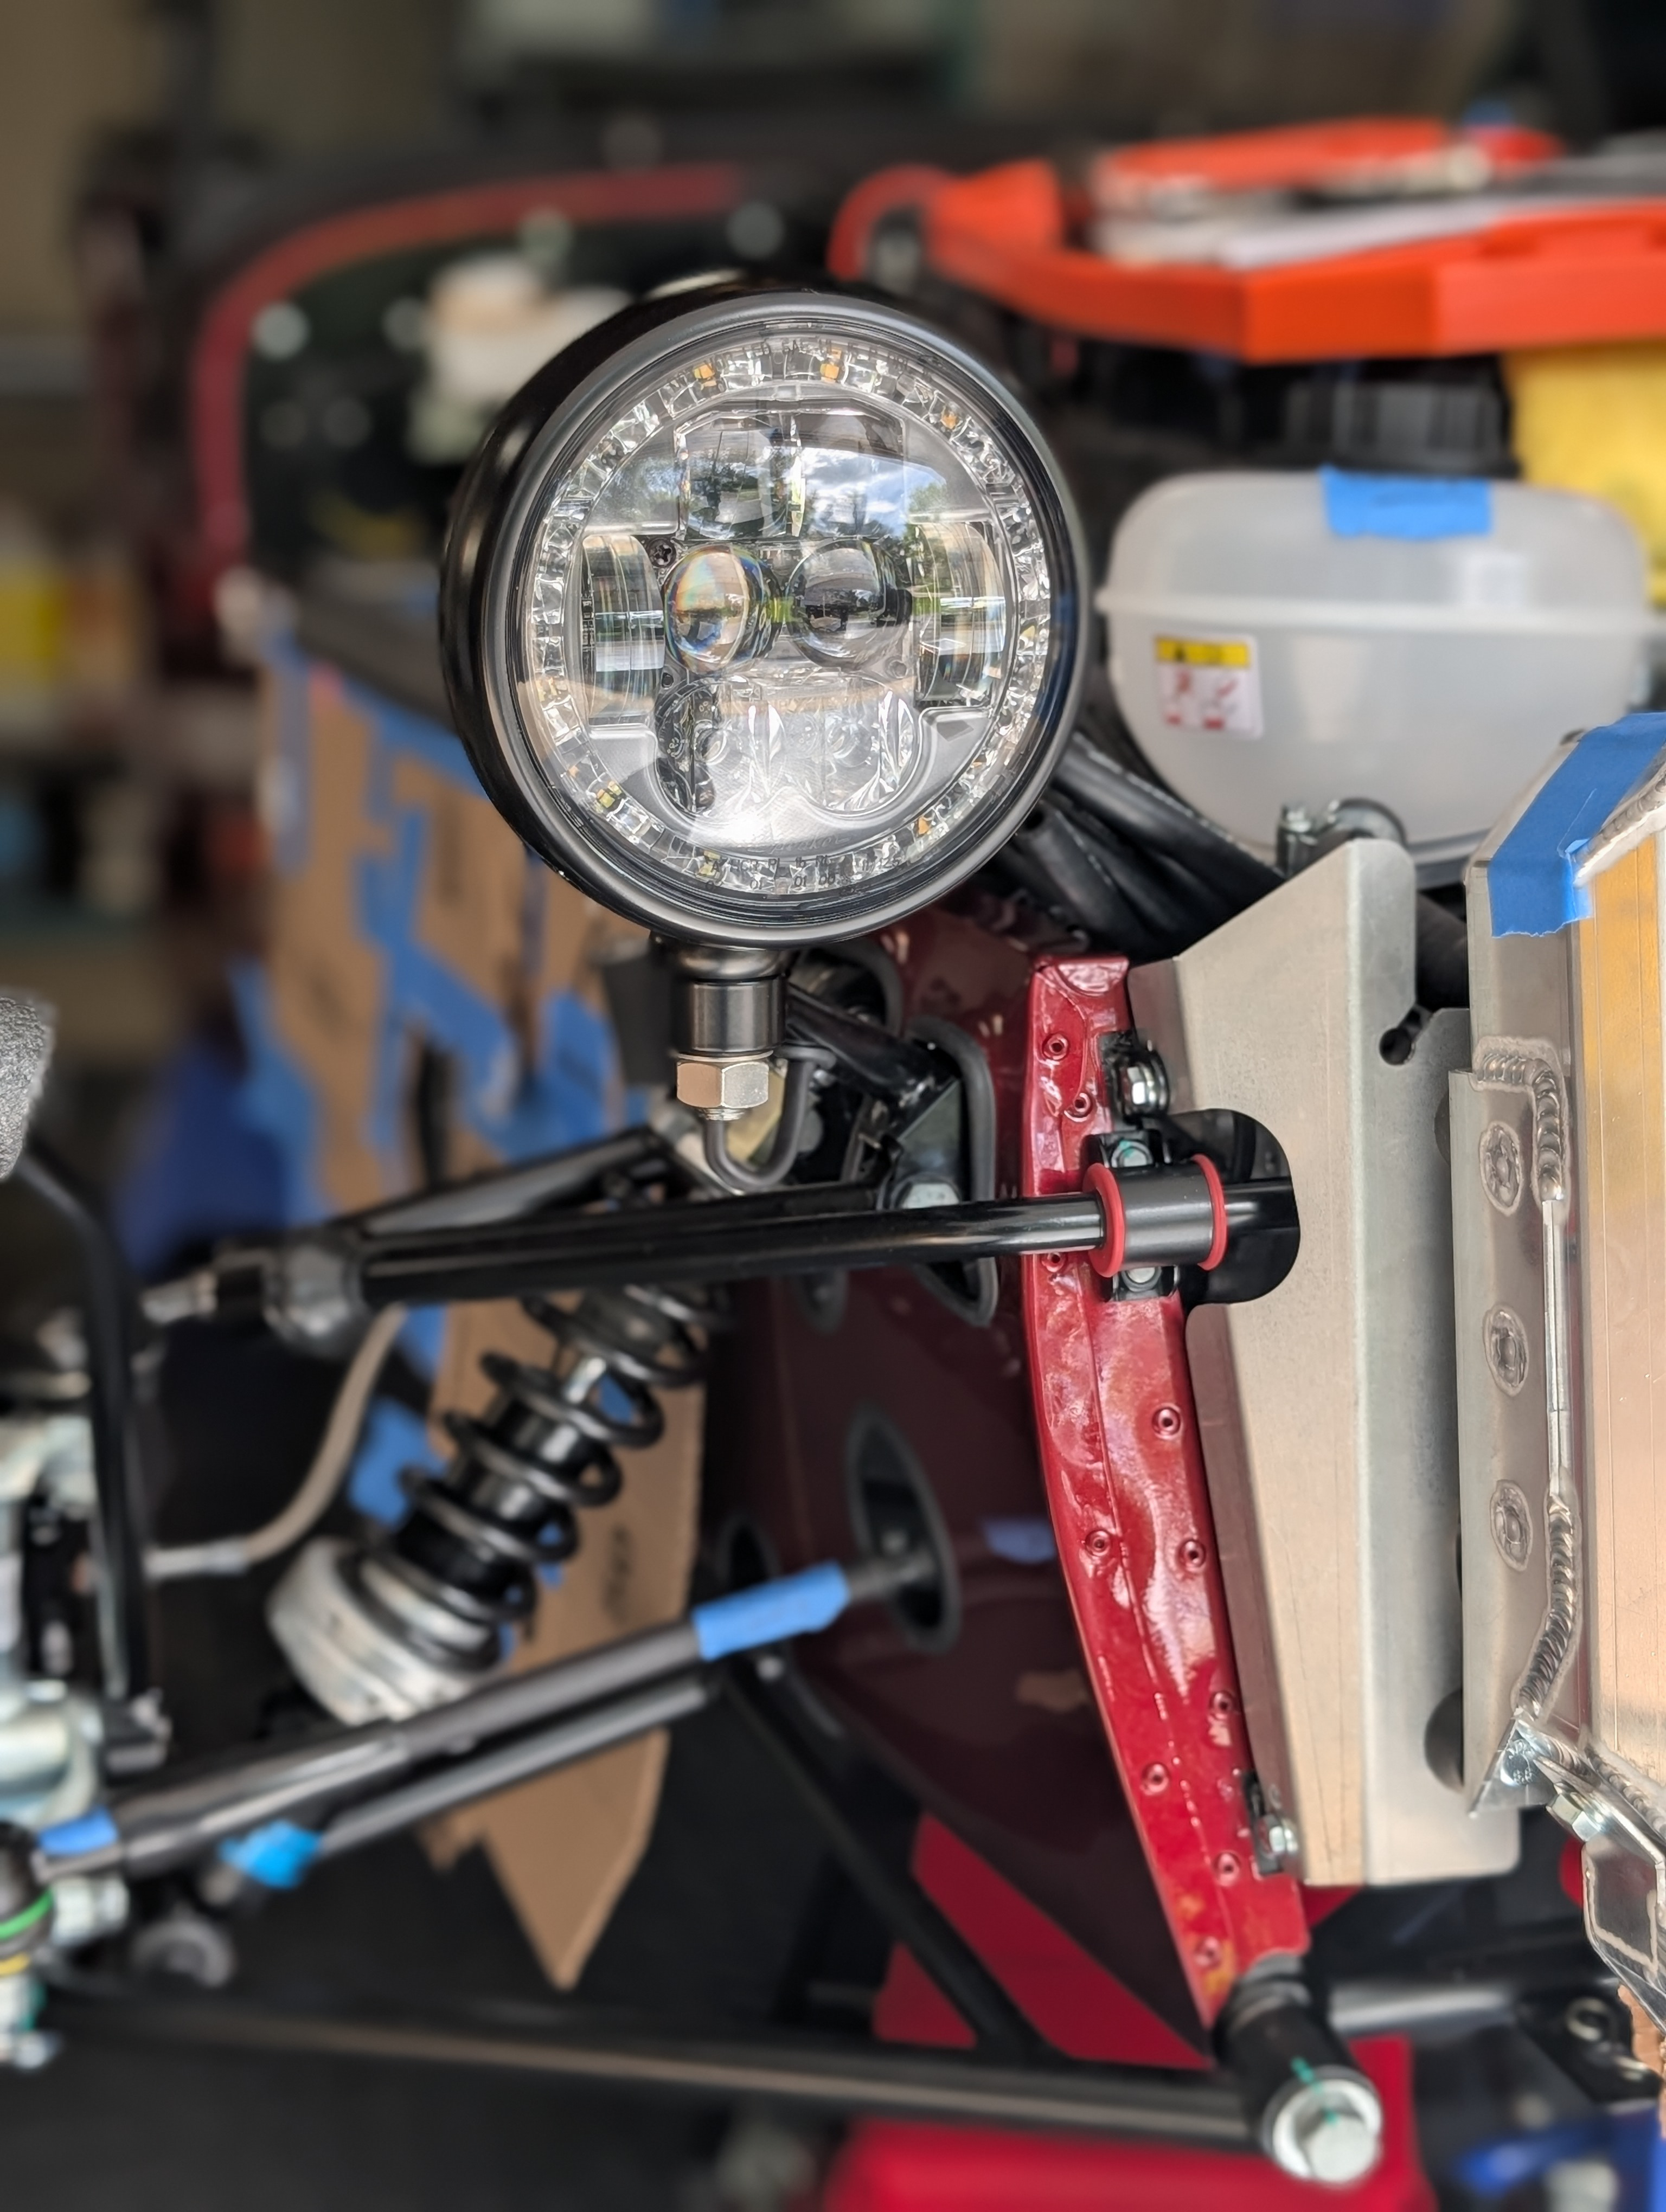
@chrisp993 your blog is very thorough and clean. Well done! I took a video time-lapse blog but the downside there is that there are no up-close video of what I did. To complement that, I just took hand-written notes in a notebook that I'm holding onto forever lol. I'd love to convert that to a blog one day, but as time passes, my recollection of what my notes mean are fading more and more. At the time, given I only had 2 or 3 hours to work every night after the kids went to bed... I just wanted to get the build done and documented JUST enough. Anyways, looking at your pic, I'm realizing that if I wanted to get off the pods, I'd likely have to pull the entire length of wires out of the chassis to remove the pods... re-threading those through the tubing and the chassis will be quite a pain. Not sure if I want to do that. Yeah, I found the spec on the pins but couldn't find anywhere to purchase them without buying 6000 of them. Thank you for the offer to send over some, but your link to Corsa is great. I'll just order a batch myself. Thanks again for being so generous. As far as blacking out those nuts... you could use a Sharpie for now... but given your thoroughness with the blog and build so far... maybe get the same spec nuts, and get them powdercoated, even cerakoted lol... and replace. I think overall I like the look without the pods from afar.... but looking close-up...the headlights look weirdly stood up and strangely tall. I'm un-sure if I'll commit to removing the pods, probably will be an in-the-moment decision when I re-pin the headlight.
-
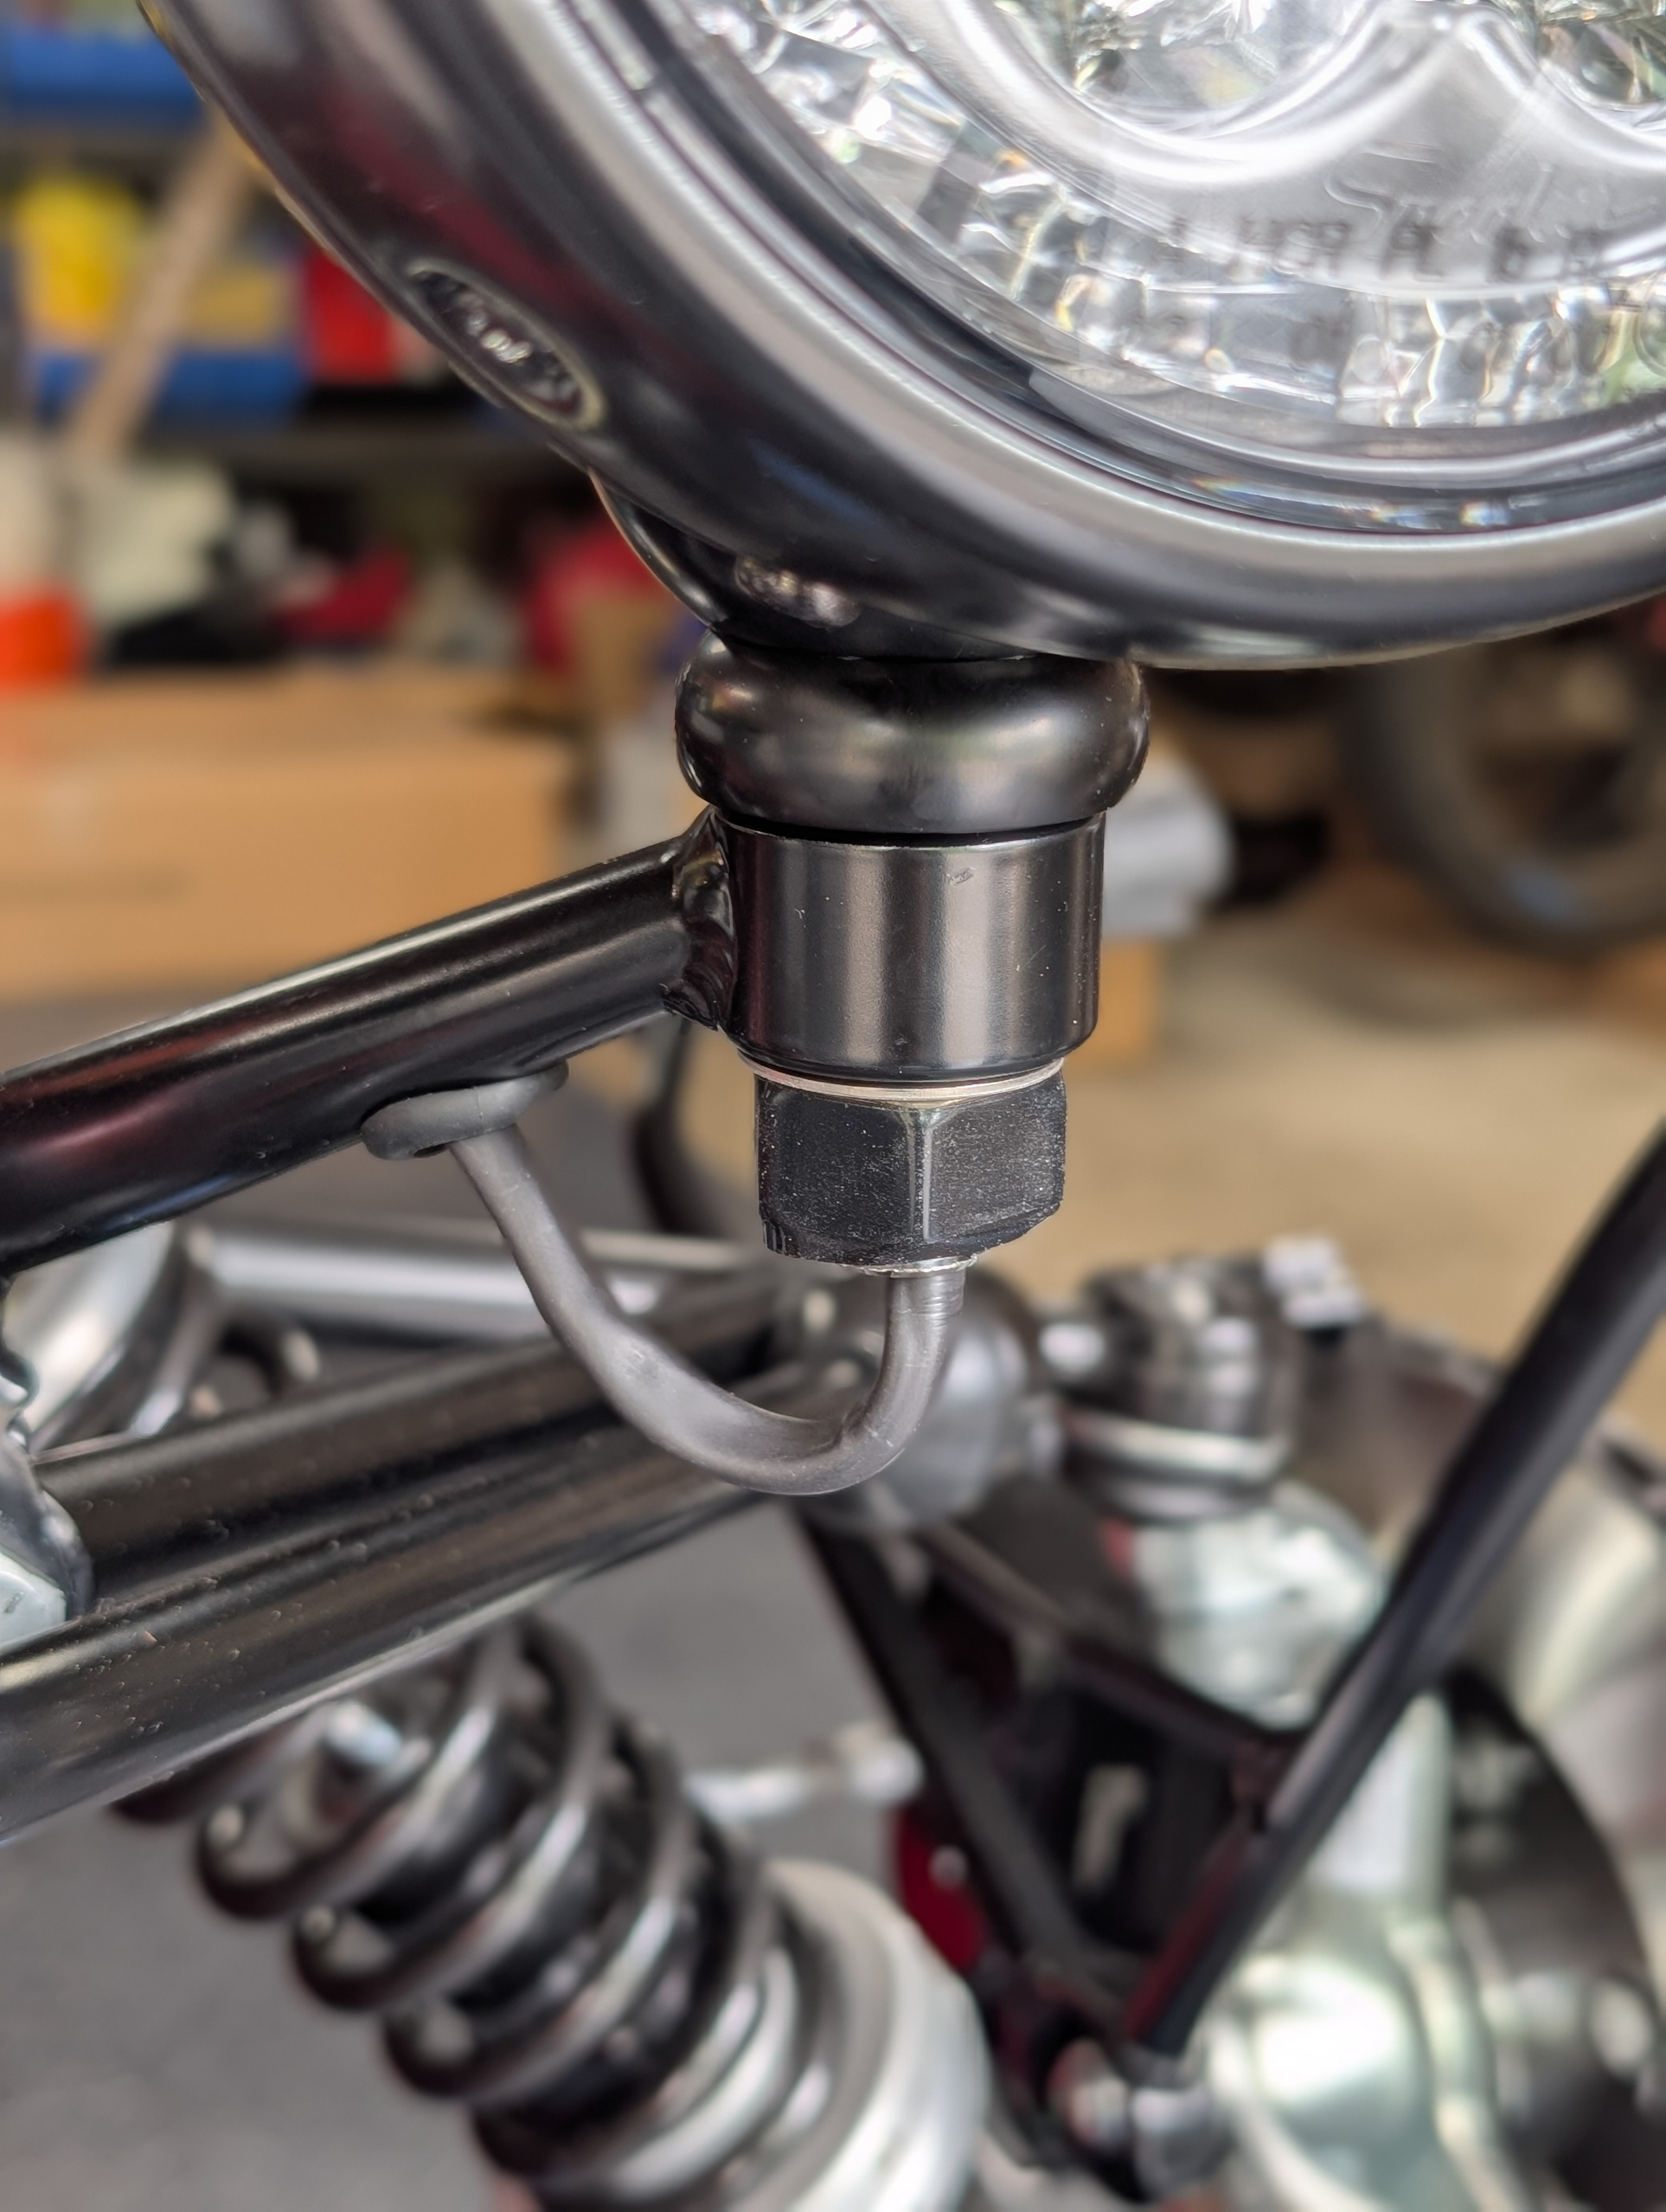
Gotcha. Sounds like you need to repin the end of the wire with a new pin? What parts did you buy? Check my blog post for the exact pin (which did match OEM) that I bought. Message me, I'd be happy to send you a couple of those pins in the mail if you think that would help? Car is still in build, but hopefully these give you some idea? I just need to black out that large nut!
-
@chrisp993 it's the crimp on the pin. i bought an Econoseal tool and pin pack off Amazon. It wasn't the exact right part. It still fits but poorly. It's loose and after about 300 miles of driving and vibration it appears to have fallen out. I was curious how the headlight and the front of the car looks without the indicator and pods
-
Howard, is it the crimp on the pin/connector in the engine bay that is bad? Can you tell if it's the chassis side or the headlight side of that connection? It is straightforward to remove the pin from the connector using a very small thin (like jeweler's) screwdriver, you just need to pull out the yellow guide and then release a small tab: video example. If the pin crimp is bad, you may be able to improve it by putting it in a crimp tool and trying to crush the crimp a bit more. Alternatively, the tool and some pins is maybe $40. When you ask how does it look, which part did you want a picture of?
-
@chrisp993 I need to rewire one of my headlights due to poor crimping on the connector and was considering doing the same. How does it look?
-
I also just completed the headlight wiring for my build - long blog post here - but the short version is that I ditched the indicator pods and went with aftermarket LEDs (integrated turn signals) and just took all the wiring through to the engine bay where I crimped on pins to match the factory wiring.

.thumb.jpg.9ffdd2cf708d472aae35e80097bfc46d.jpg)