JohnCh
-
Posts
3,406 -
Joined
-
Last visited
Content Type
Profiles
Forums
Store
Articles
Gallery
Events
Library
Everything posted by JohnCh
-
Tony Ingram is located in Santa Barbara. It might be worth reaching out to see if he has an opinion. http://www.lotus7.com/ -John
-
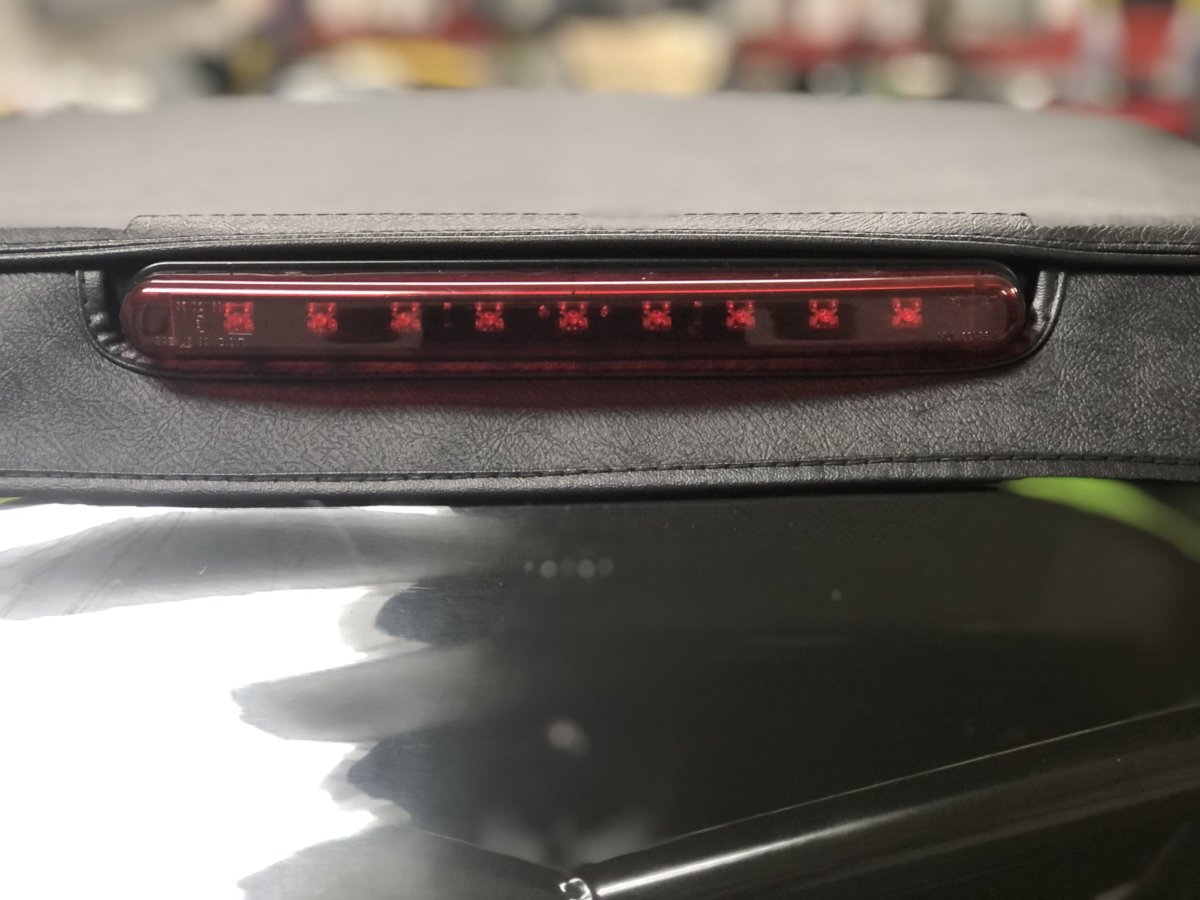
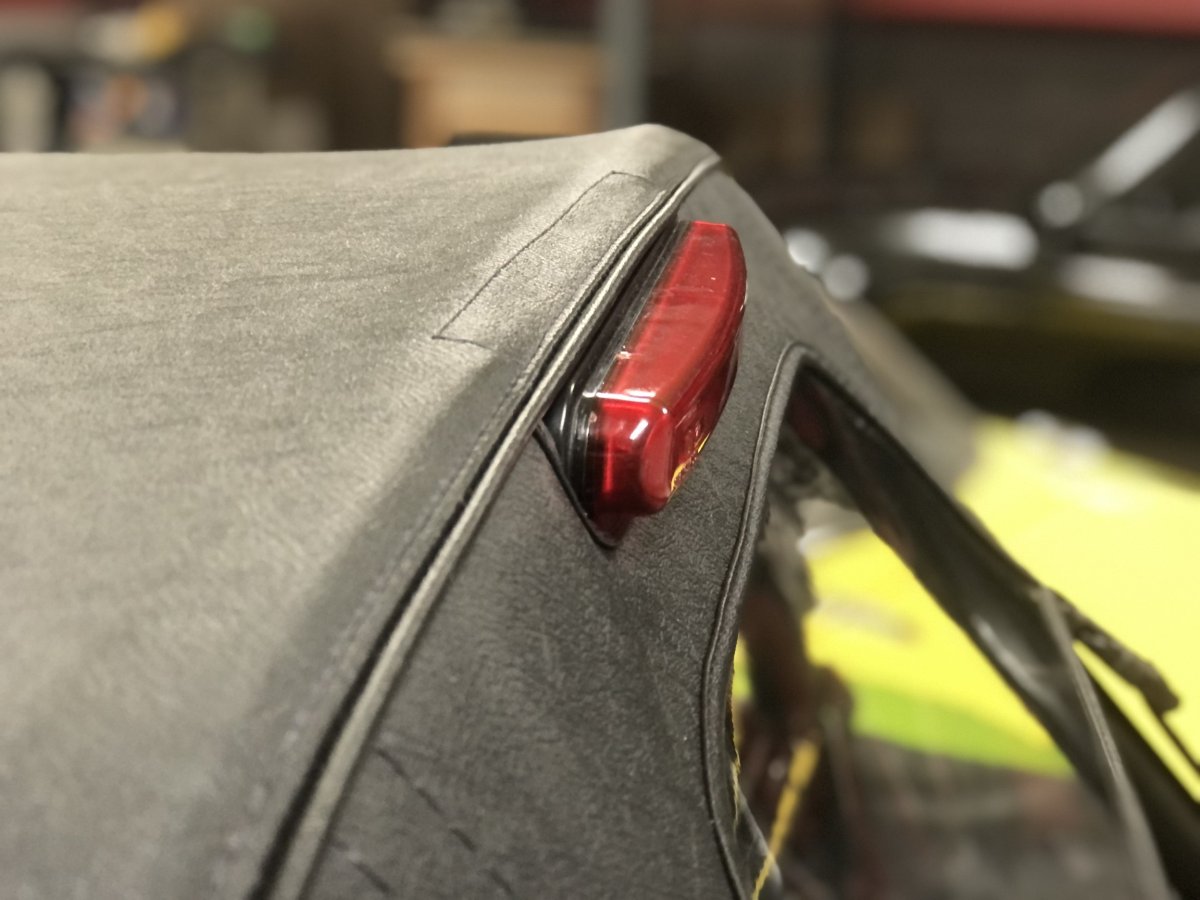
That underlayment is double the thickness of the chipboard, but clearly far more pliable given it's on a roll. The next victim should give it a try The half hood from Thundersport arrived today. The cutout for the 3rd-brake light turned out perfectly. I sent them a measured drawing and also photos with a seamstress tape measure showing the precise location from the windscreen frame. As you can see from the photos, they nailed it. I didn't expect it to come out so nicely given they weren't able to set hands on the car as per their original request; a proposal that was quickly dismissed once they understood the length of said drive -John

-
I've noticed a lot Caterhams have a very big gap, but I prefer keeping it tight, if for no other reason than the big gaps are another avenue for water to enter the engine bay. Despite the very tight gap on the Westfield, engine movement has been a non-issue over the years. I had trouble finding larger pieces of chipboard locally, so I opted for these smaller sheets from Amazon and taped them together. Worked fine. https://www.amazon.com/dp/B07BYWG8N5 -John
-
@Ferrino walked me through the process of using chipboard and recommended the air saw. Both worked great. If you are going with the big filter, I suspect an S3 will be a little easier since the filter pokes all the way through the bonnet necessitating a more uniformly oval cutout. With the SV, the rear section is partially shrouded which creates a more complex shape that can quickly go from just a little tight to way too big given how the angles work against each other. My best advice it to make the first cut intentionally too small, then put the bonnet in place to see if the location is off. In my case, the front was perfectly located despite the undersized cut. If I had cut the opening to the correct size in the first pass, the front gap would have been bigger than intended. -John
-
Definitely not. Flying a flag upside down is a sign of distress. Mounting an air filter upside down is a sign of frustration; a word that describes a large part of my Caterham experience to date -John
-
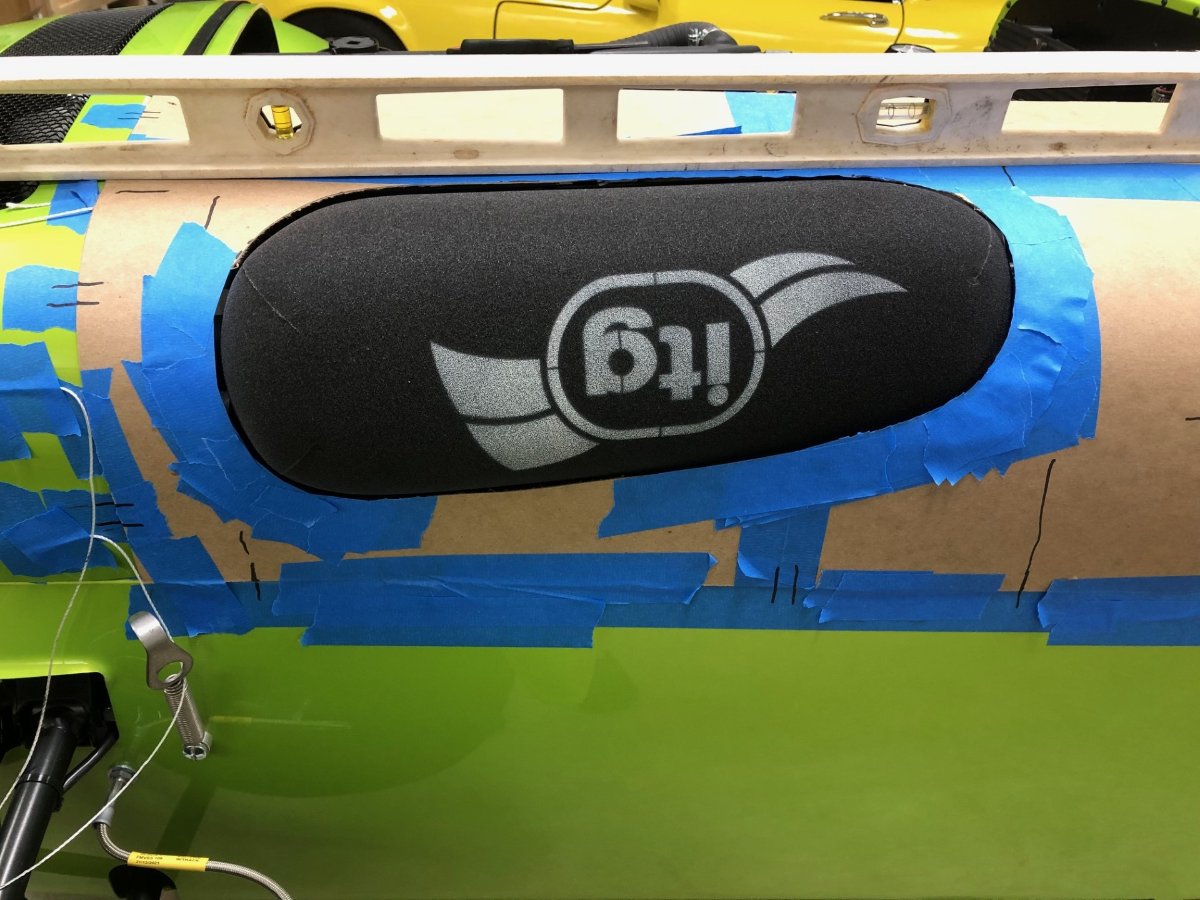
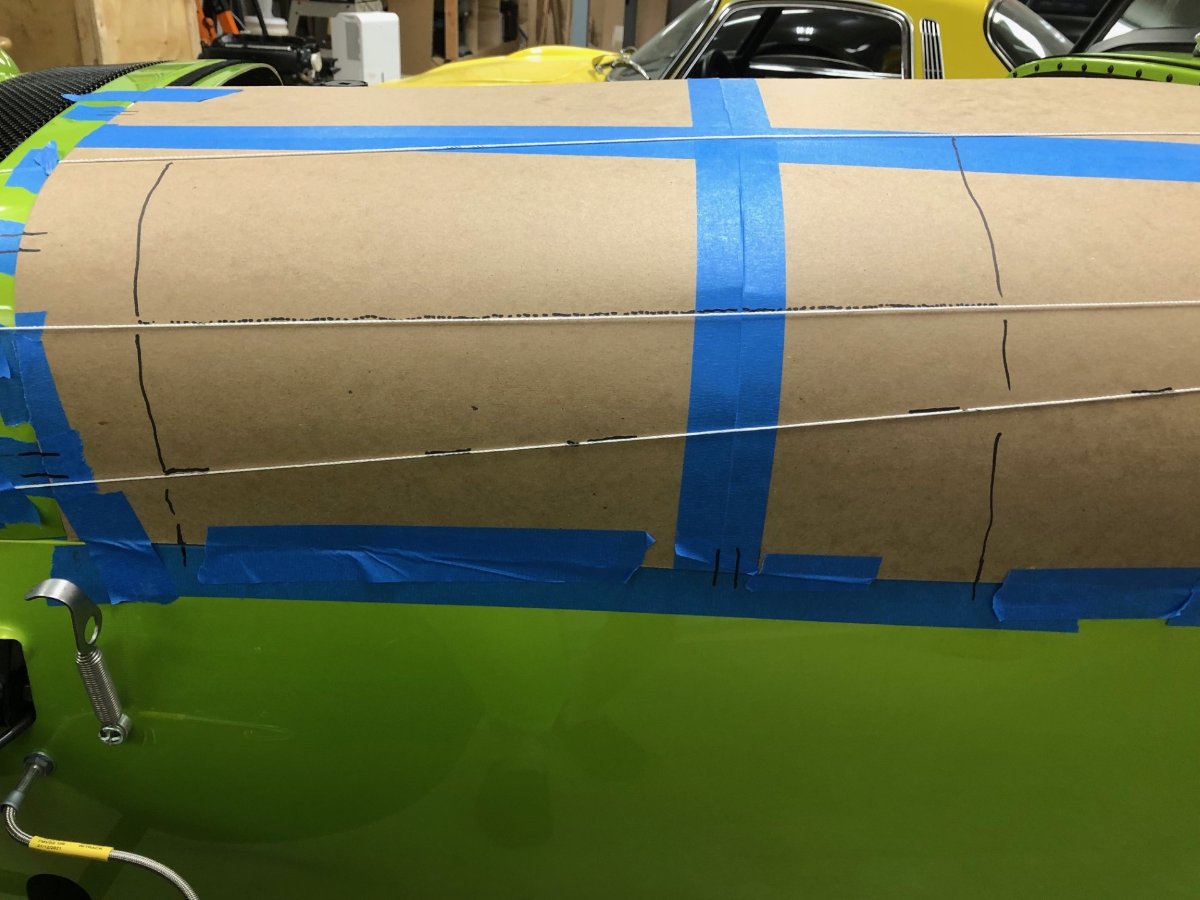
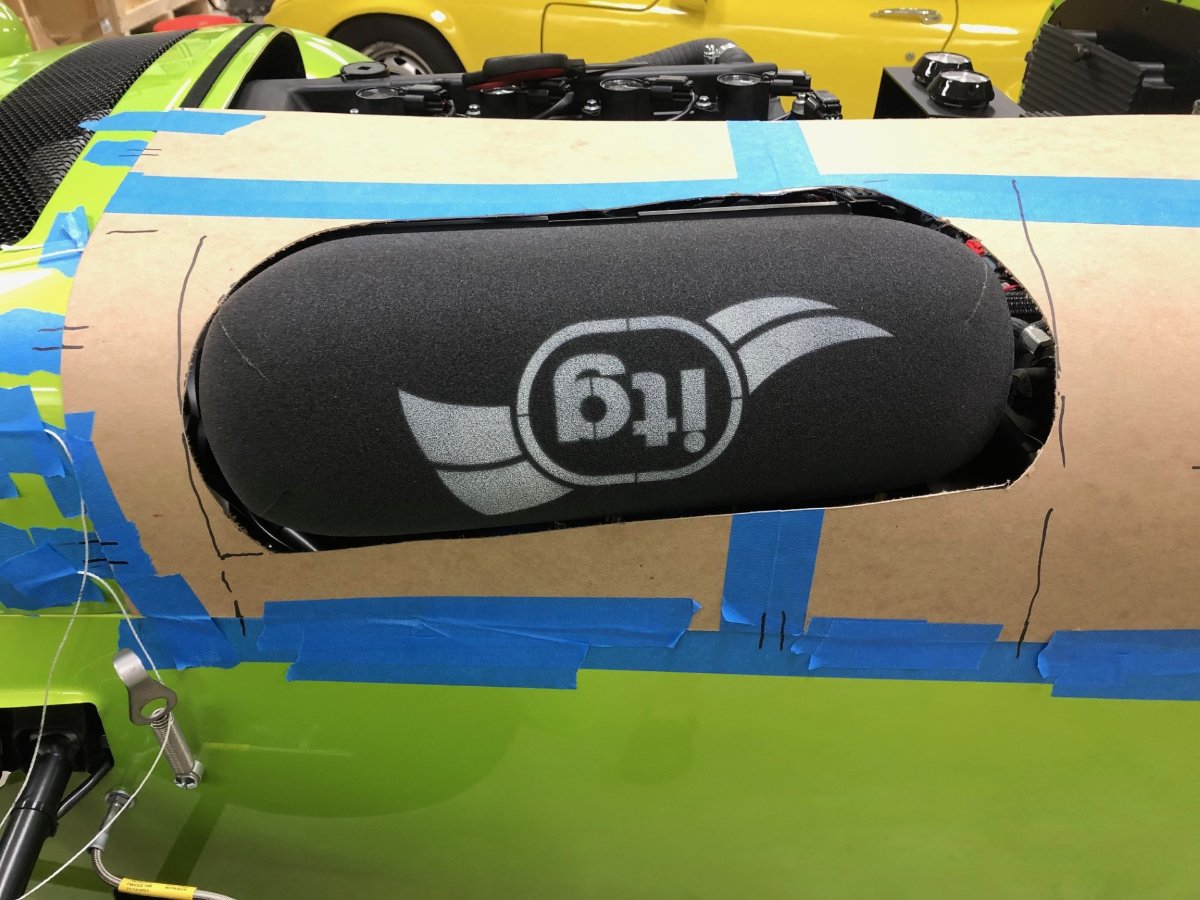
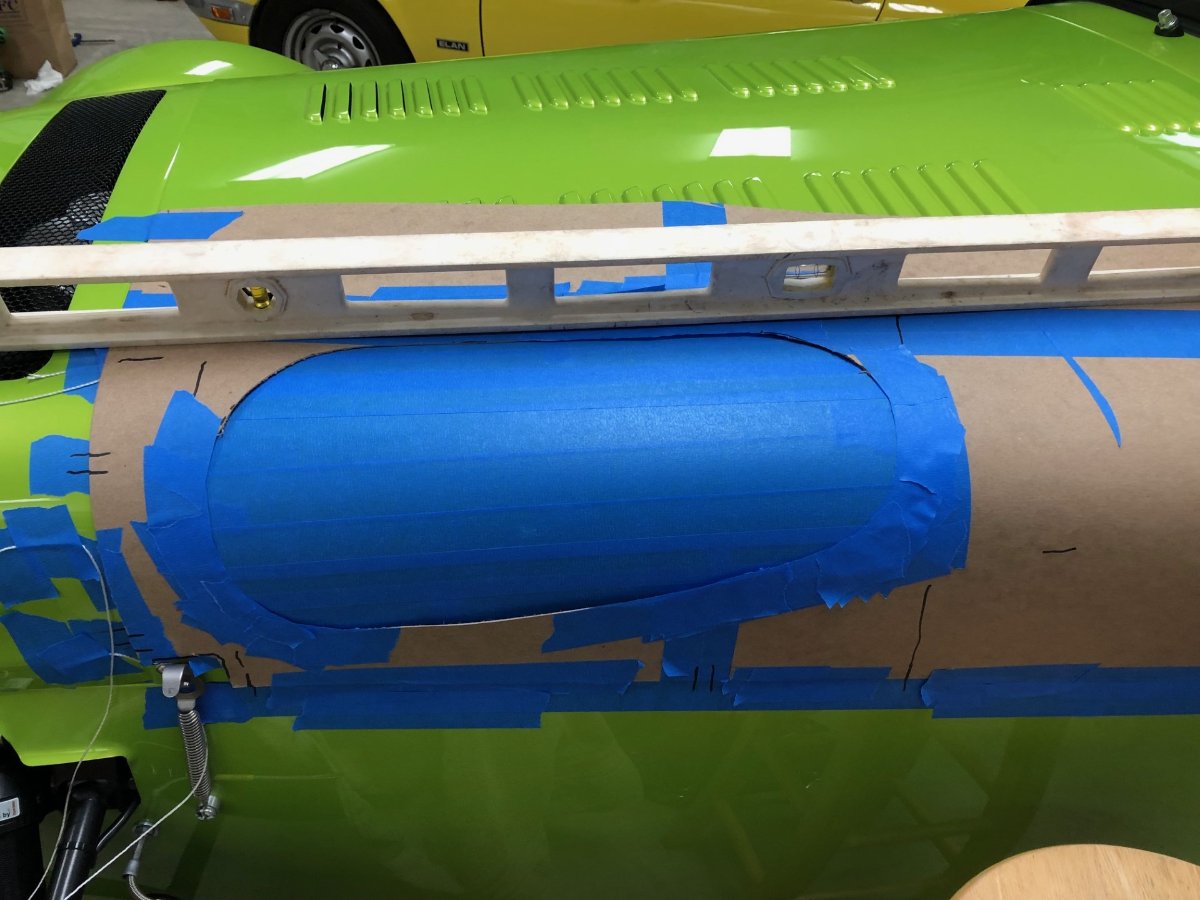
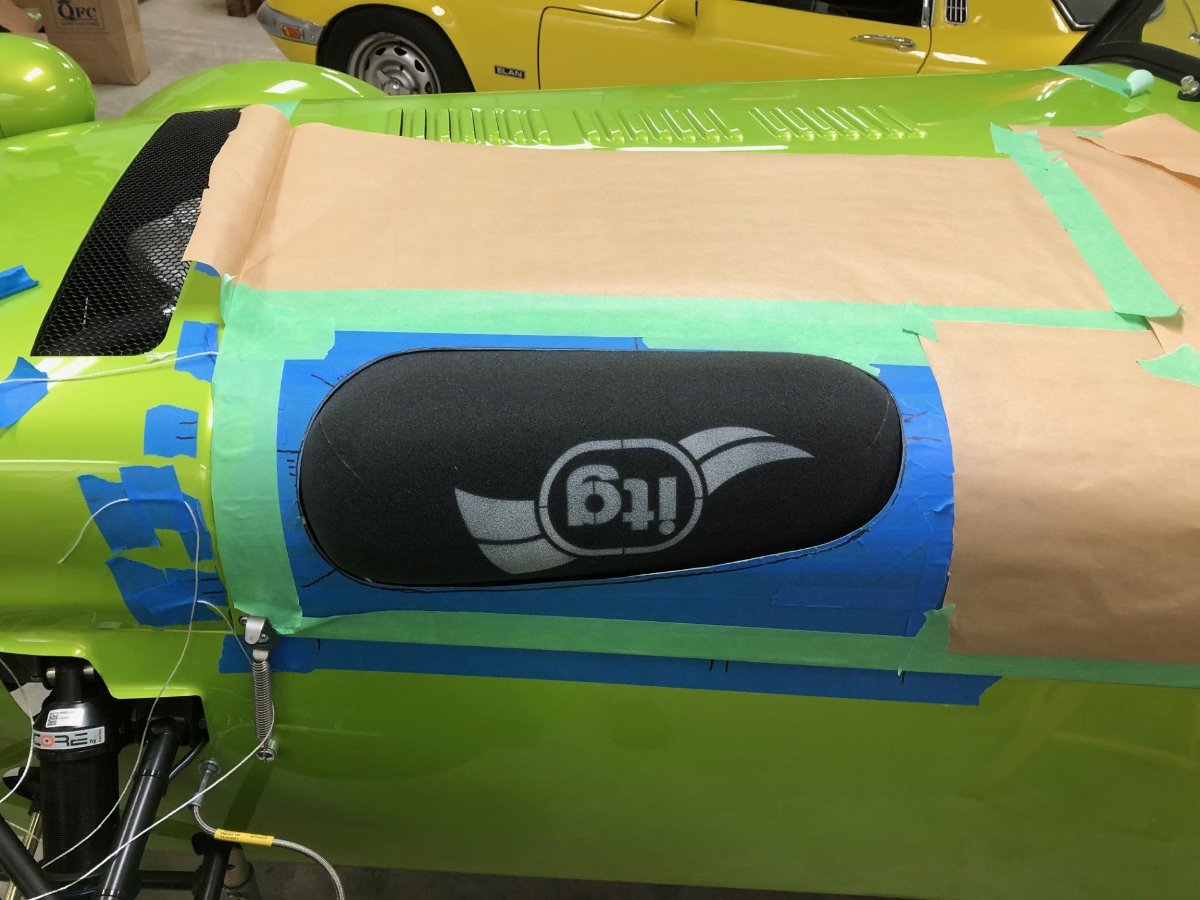
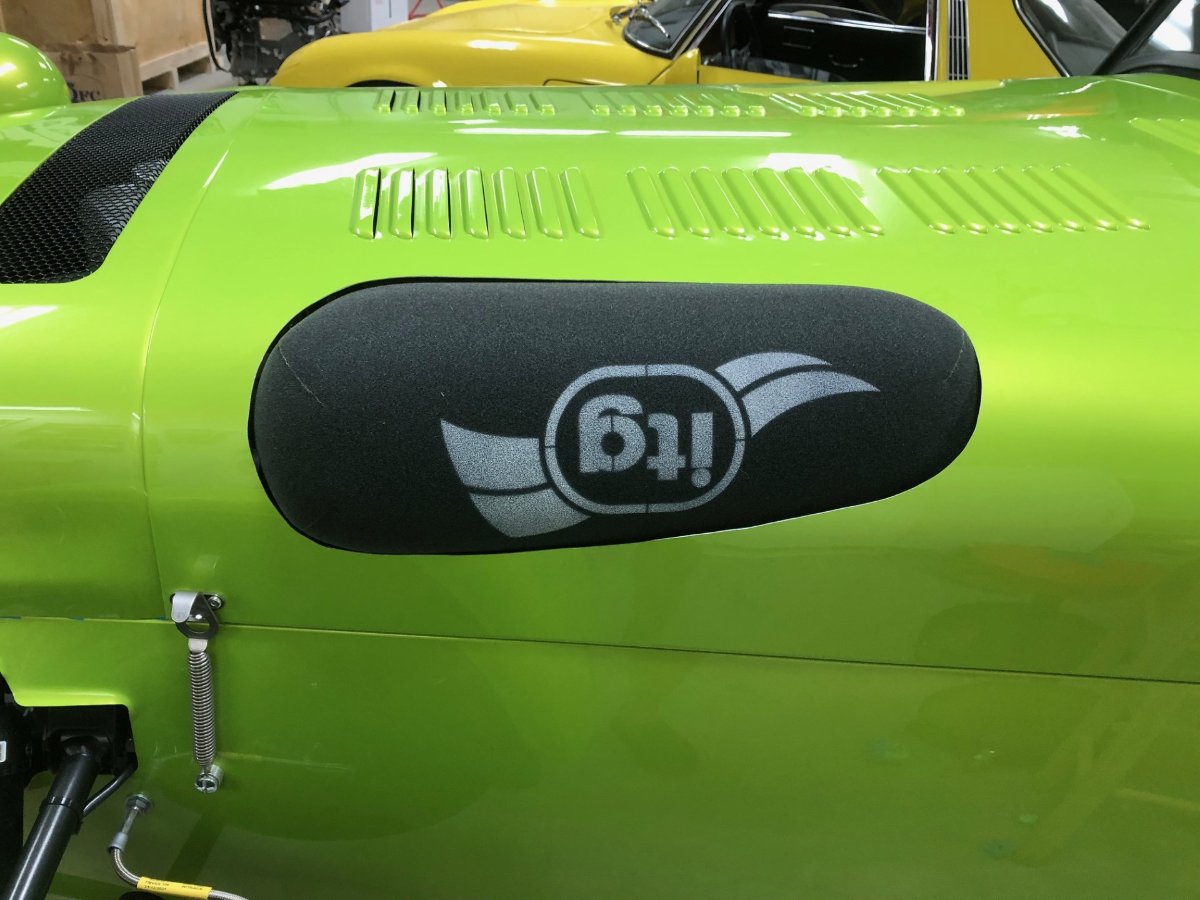
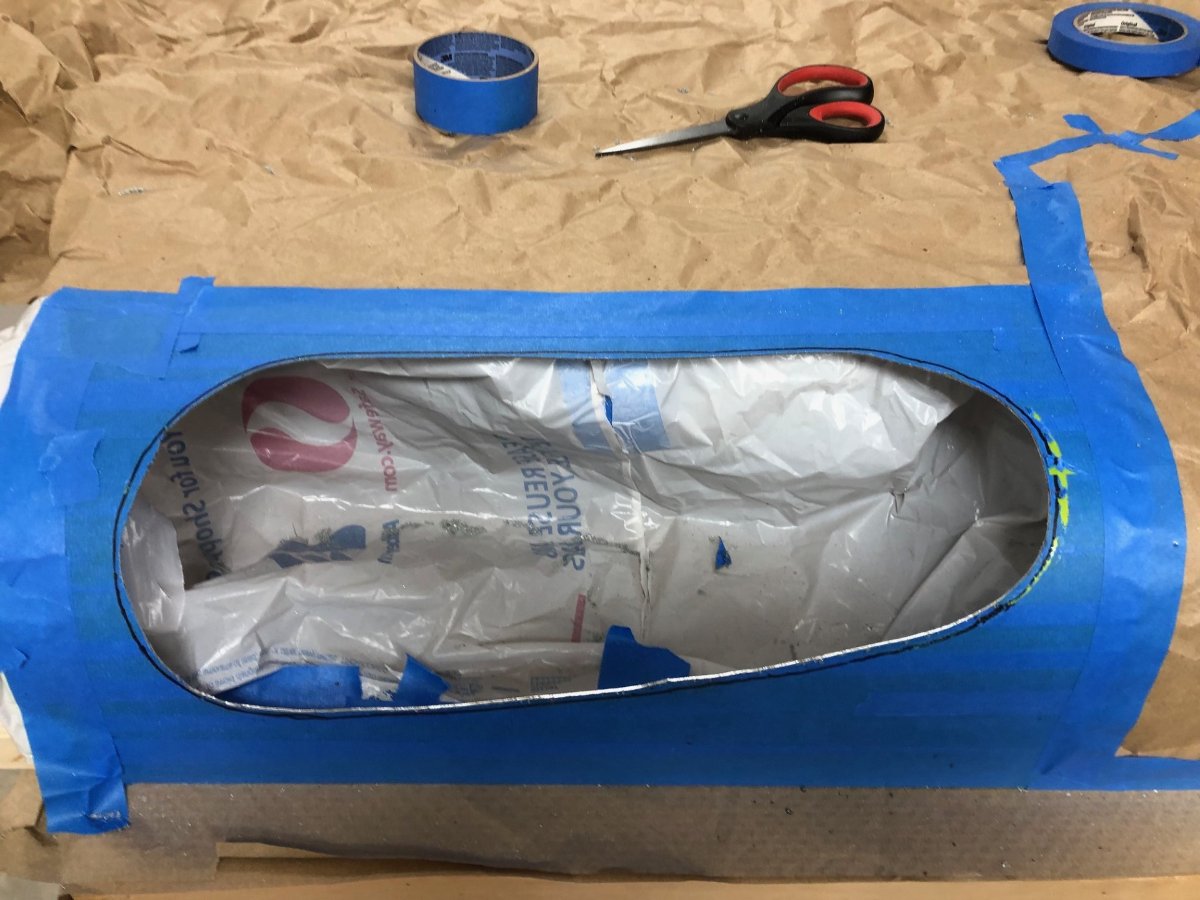
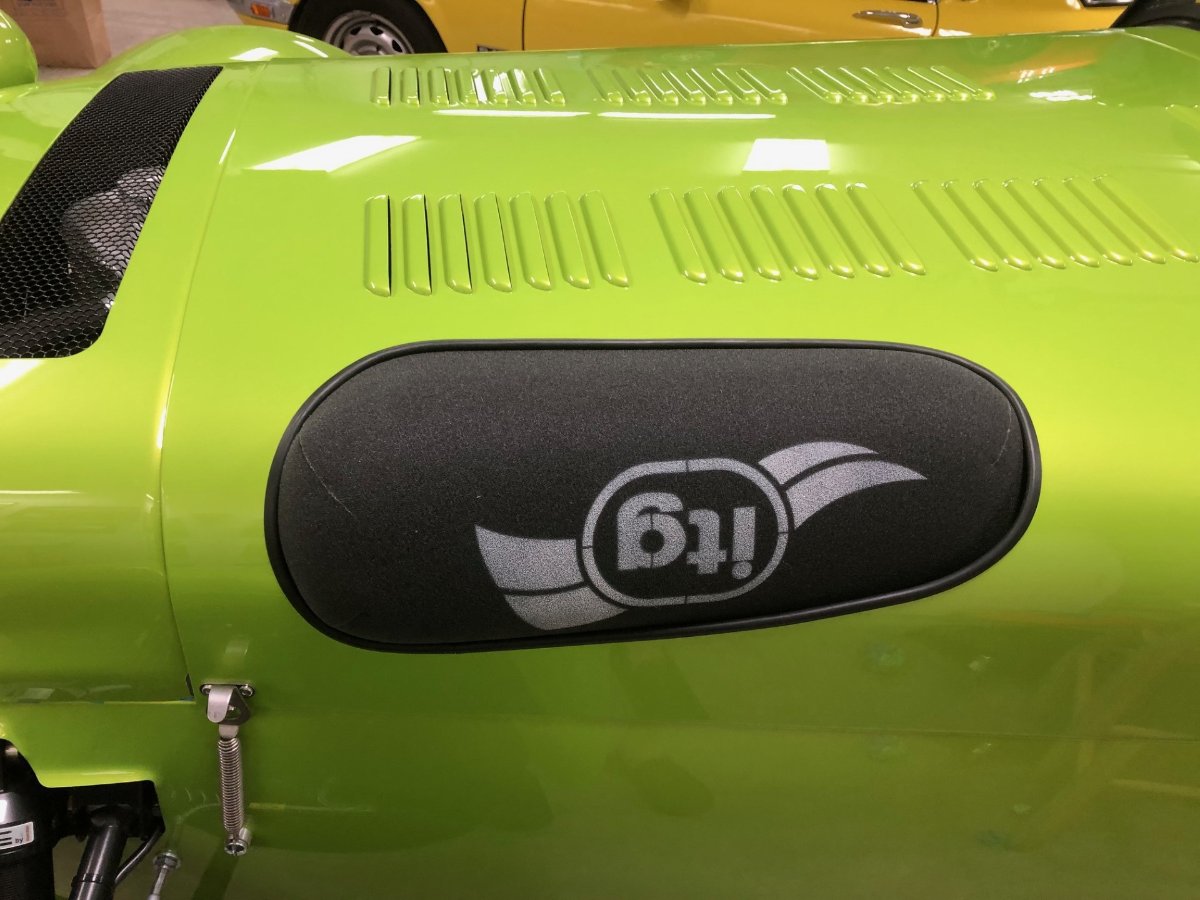
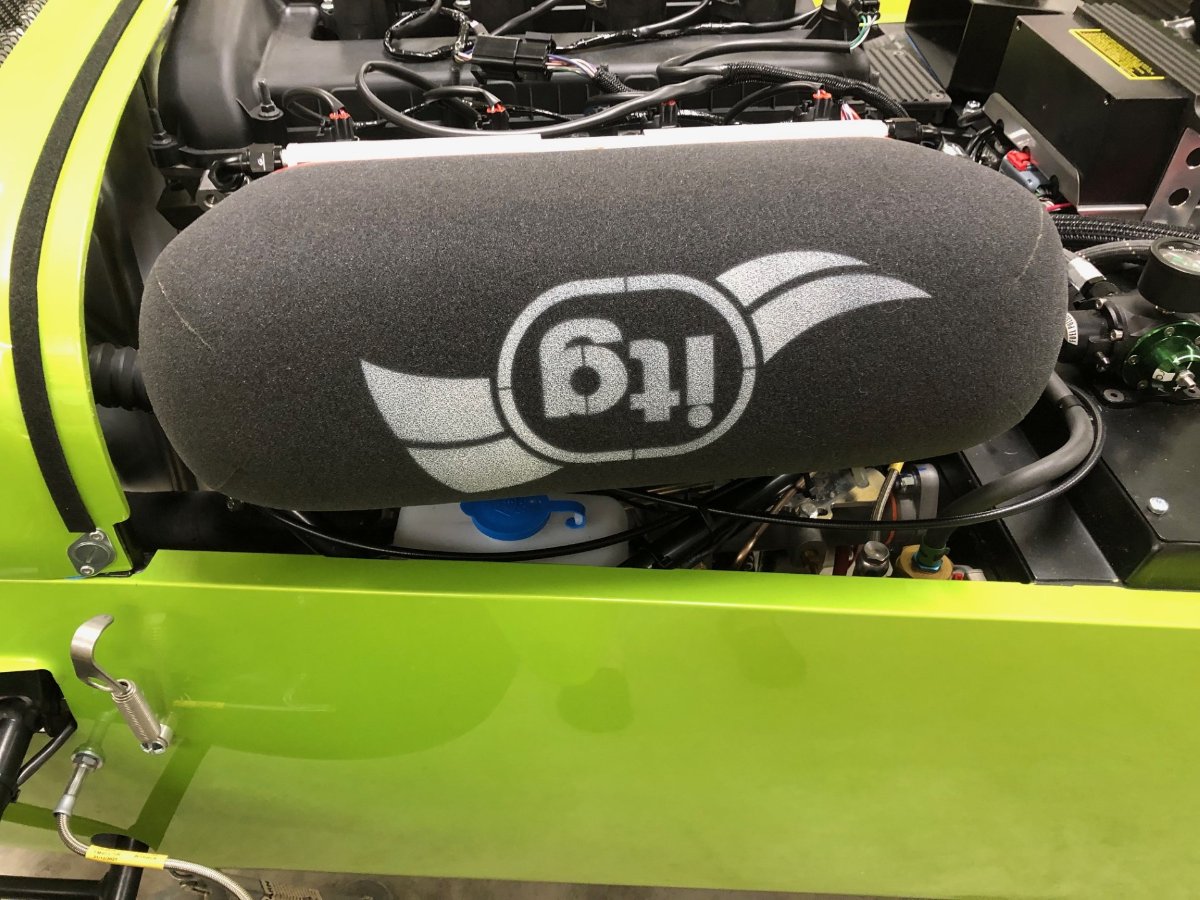
Those with better memories than mine may recall my initial plan was to build a cold air box fed by the intercooler scoop in the 620 nose cone. Space challenges and concerns that the amount of air reaching each cylinder could differ significantly given the limited space available for the cold air box, led me down the path of that old standby: a sausage filter poking out of the bonnet. Cutting the filter hole on the Westfield wasn't too hard given the bonnet is fiberglass; Get the hole reasonably close, then use a Dremel to carefully expand the opening until it's the right size and shape. The Caterham's painted aluminum bonnet, however, seemed like a bigger opportunity for screw ups. Let the anxiety begin... First step was installing the filter and marking its location in relation to the bonnet with a combination of strings and marker lines on the side skin. Chip board (cereal box material) was then fashioned into a partial bonnet, and the strings and marker lines were used to draw a rough, slightly oversized representation of where the filter would poke through. That section was cut out, the air filter was reinstalled, and the gaps to the filter were taped over then trimmed to shape. Next, the filter was removed, the bonnet installed, the chipbopard template laid over the top, and the shape of the cutout transferred to blue tape on the bonnet. This is where things got scary. A rough cut was made with an air saw, then began an iterative approach of fitting the bonnet, marking where more material had to be removed, then using either the air saw, files, or a 60-grit flap wheel in a drill to make those adjustments. Finally, some rubber edging was used to seal the cut edges. Next step is a test drive. -John
-
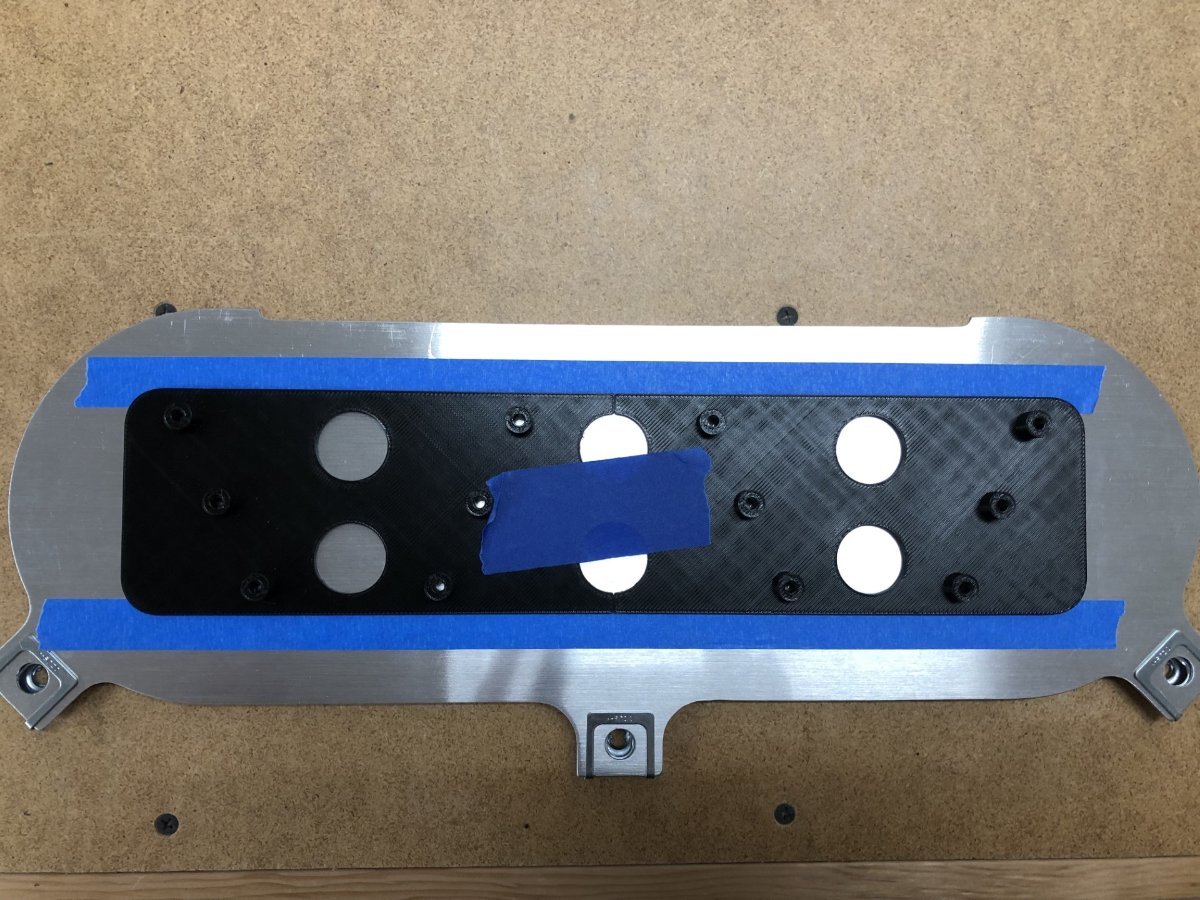
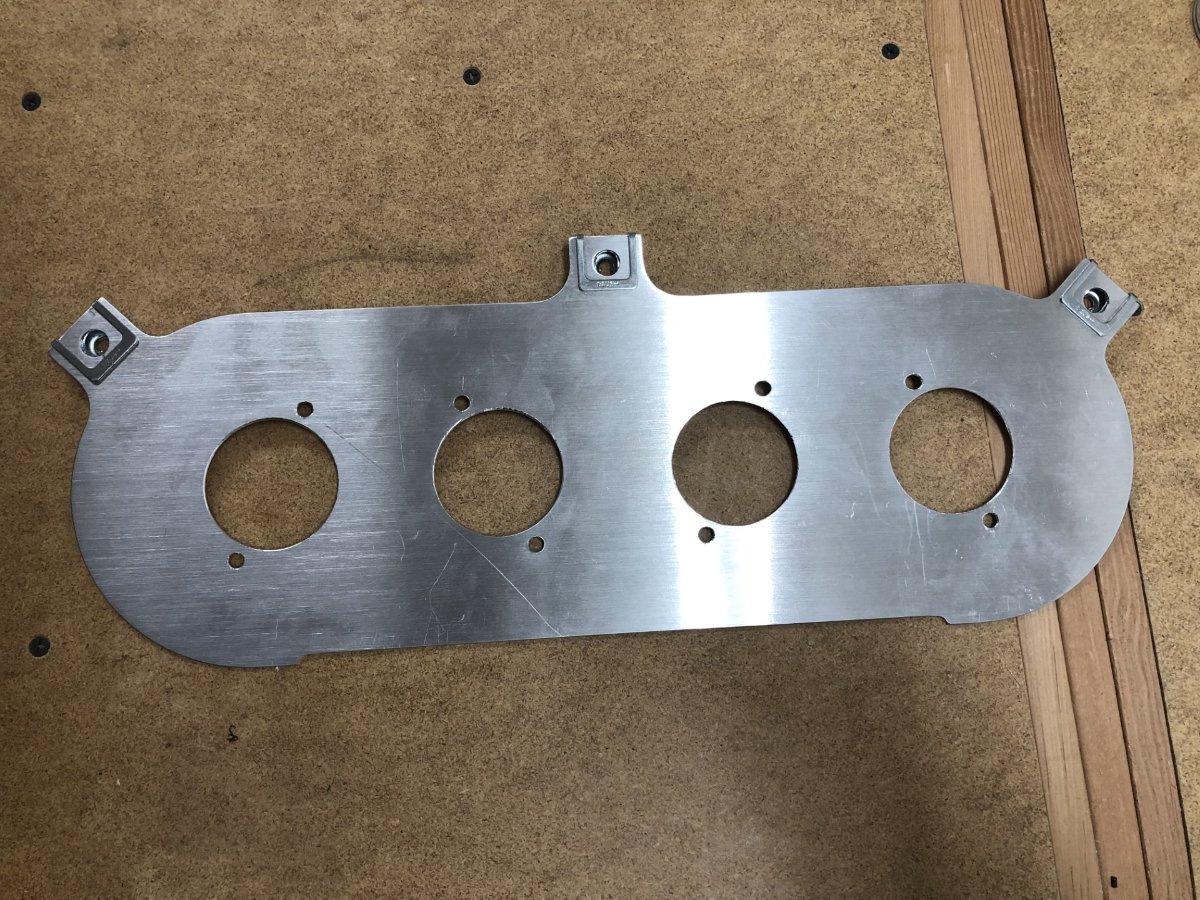
The front wheels have been rebalanced on a Hunter Road Force machine. According to the shop, some wheels have a slick-ish coating that must be cleaned off to avoid the weights falling off. Apparently neither Caterham nor my dealer's shop cleaned them well enough. I'll need to keep an eye on the rears to make sure those weights stay in place. The filter with logo arrived on Thursday. First step was drilling the baseplate for the Jenveys. One reason I chose the ITG over the Pipercross used on the Westfield, is the mounting system. The extra height of the 2.4L, means mounting either brand right side up would place the 1/4 turn fasteners very close to the bonnet. To eliminate any possible rubbing issues, my plan was to mount the filter upside down (one of the reasons I special ordered a no-logo version). The bottom portion of the ITG mount is cleaner looking and more compact than the Pipercross. Since that would be the top in my installation, I went with the more compact design. A drill template for the various holes was printed to ensure that portion went well. I still need to add 2 more holes for the air temp sensor but wanted to do that last since I knew room would be tight and I wanted to have the baseplate in place to figure out the location. -John
-

Driving with no center console: reduced buffeting?
JohnCh replied to TurboWood's topic in General Tech
@TurboWood have you had a chance to test this yet? Thanks, John -
Yes on both counts. Mazda founded the site in 2005 and drove a V8 Rotus named Frankn7.
-
yep, just wanted to call that out in case you were going to give that a shot. I forgot that you mentioned the Banner is doing the same thing. It's unlikely you have two duff batteries, so ignore my comment. Given the Banner is back in place, and you have the voltage drop info when cranking with that battery, maybe reach out to Caterham's build support alias and ask if that is an issue? They might have some troubleshooting ideas. I've found that Lee is helpful with oddball questions.
-
One thing to be careful of is that Antigravity specifically states not to use it in conjunction with a normal battery. Relevant section from the user manual: "COMPATIBILITY. The product is only compatible with 12-volt stock systems in vehicles. Do not attempt to use product with any other types of batteries or in series or parallel with another battery, or interior electronics could be damaged. Use with, or Jump starting other battery chemistries may result in fire, explosion, injury, death or property damage. Contact the battery manufacturer prior to attempting to jump start the battery. Do not jump start a battery if you are unsure of the battery’s specific chemistry or voltage." You're using the stock cables, so they should be more than sufficient. If it is wiring related, it could be a damaged wire or a poor/dirty connection somewhere. I'd go through the entire system, including the battery disconnect, with a multimeter and see if resistance is higher than expected at any point. Another possibility is a duff battery. Might be worth asking AG. -John
-
Thanks to @Christopher smith, this is now live in the Downloads section:
-
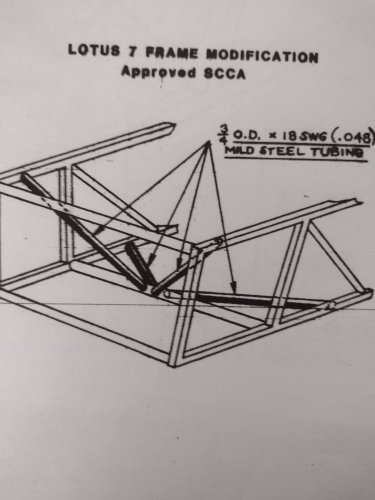
Version 1.0.0
75 downloads
In-period SCCA-approved chassis mods for the front of the Lotus 7 -
I just checked my car. Same battery, starter, and ECU as your car, but it's a 2.4L and has 12:1 pistons. My Easimap and at-the-battery readings were both about 13.2v before cranking, but only dropped to 10.5v. The only other difference I can think of on my car that could affect this reading is I'm running a slightly larger, 4-gauge 12v+ battery cable. I believe the stock cable is 6 gauge. It might be worth double checking your battery connections to ensure everything is up to spec. -John
-
Be afraid. Be very afraid. Rumor is @Croc is going for at least 5 drinks tonight -John
-
9.5v sounds a little low. I know that the Emerald ECU requires a little more than 9v (don't recall the exact value) in order to operate. I wonder if you are hovering around or below the min mark for the 9A4? I'll try to check the voltages on my car later today to see if they differ substantially from what you reported.
-
I have that same battery in my car, and it has started a few times with no issues (new build and not yet driven). What voltage is Easimap showing before you crank and what about while you are cranking? Does that differ from multimeter readings at the battery? Is the engine block ground connection ok? Also, make sure the plug to the ECU is fully seated and verify the crank sensor connector pins are all fully seated within the plugs. I've seen the latter issue with a different sensor on a 420R engine loom cause some problems. -John
-
Yep, I don't think we'll see him again. I sent him a PM yesterday thanking him for his understanding the extra due diligence given the sensitivity of the content. As with Bruce's PM, it was read yesterday but no response or acknowledgment followed. Although there could be a valid reason for his actions (medical emergency, realized he forgot it was his wedding anniversary, alien abduction, etc.) it doesn't take that much effort to simply reply with a perfunctory "thanks" especially to Bruce who helped him out. -John
-
Great photos! Do you know what led the owner to disassemble the car when it was still relatively young? And not to derail the thread, but is that an Elan project I spot in the first photo? Thanks, John
-
Looking forward to following this! -John
-
Given the sensitive nature of the information, you may find people reluctant to share it with someone who joined USA7s specifically to make that request. Although you may be a legit Caterham owner with a verifiable online history elsewhere, we have no evidence that is the case. -John
-
My preferred shop can do the wheels at the end of next week. The plan is to drop them off Thursday and pick them up either the next day or Monday. My no-logo air filter saga continues. A few pointed conversations with Pegasus were required to go from the answer "ITG is prioritizing this" to receiving actual dates. It turns out ITG made the initial error and did a no-logo filter on a JC55S rather than the JC50S I ordered. Physically, the JC55 is 2.5" longer and a very tight squeeze. ITG has already produced the correct filter (good) but then put it on a slow boat across the Atlantic yesterday (bad). That's a 2+ week journey, plus time for Pegasus to receive, unpack, repack, and ship to me, which puts me at over 3 weeks before I can even begin to cut the bonnet. Given the trickle-down effect from this -- I need the filter before I can start driving the car, find and fix any subsequent issues, adjust the tune, schedule a dyno session to finalize the tune, etc. -- that extra 2+ week delay could really impact my plans this summer. Therefore, I decided to bite the bullet and have them send a logo filter today which will arrive in time for me to attempt the bonnet cutout next weekend. Once the no-logo filter arrives, I'll have a very low mileage ITG JC50S-125 for sale at a good price. Just in case anyone needs one. The order is in with Thundersport for a modified half hood that will work with the 3rd-brake light. I was initially told that specific brake light works with Caterham's weather gear, which I took that to mean the factory half hood as well. Bad move on my part. Once I saw how the half hood attaches, it was clear the brake light would prevent it from cinching down. Thundersport initially said they were unable to modify one to fit, but after asking if they could simply add a cutout for the light and stating I was fine if it wasn't quite as watertight in that area as normal, they agreed. Thundersport also makes the transmission tunnel covers for Caterham. When ordering my kit, I upgraded the standard faux carbon vinyl transmission tunnel cover to the black leather version from the Signature catalog and now need a matching piece of leather for my glove box. Thundersport has agreed to include that with my order, eliminating the need for me to visit various upholstery shops trying to find something with matching grain and color. -John
-
Thanks guys. The shop I normally use for my cars does road force balancing and are really thorough. I had considered using a different shop closer to home, but probably worth ensuring it's done right. The plan is to have both front wheels redone and I'll instruct them to rotate the tires as needed to minimize weight and optimize balance. In other news, still no word from Pegasus on air filter status despite calling when they opened this morning. I'll try again tomorrow. FedEx confirmed with Caterham that the seat runners and aero/windscreen quick change brackets are lost. To Caterham's credit, they sent out the replacement items first thing yesterday morning and they arrived here about an hour ago; 1 day arrival from the UK. Of course, the package looks like it was vigorously kicked around the FedEx facility, but fortunately nothing inside was fragile, so no damage despite their best efforts. -John
-
Hi @Rosteri I followed your earlier comment which is what led me to look specifically at that aspect on both the Caterham and Westfield. Thanks for that! Thanks for the tips on how to redo this without rebalancing, but this comment is why I'm considering it. My confidence in the quality of the initial job is not high.
-
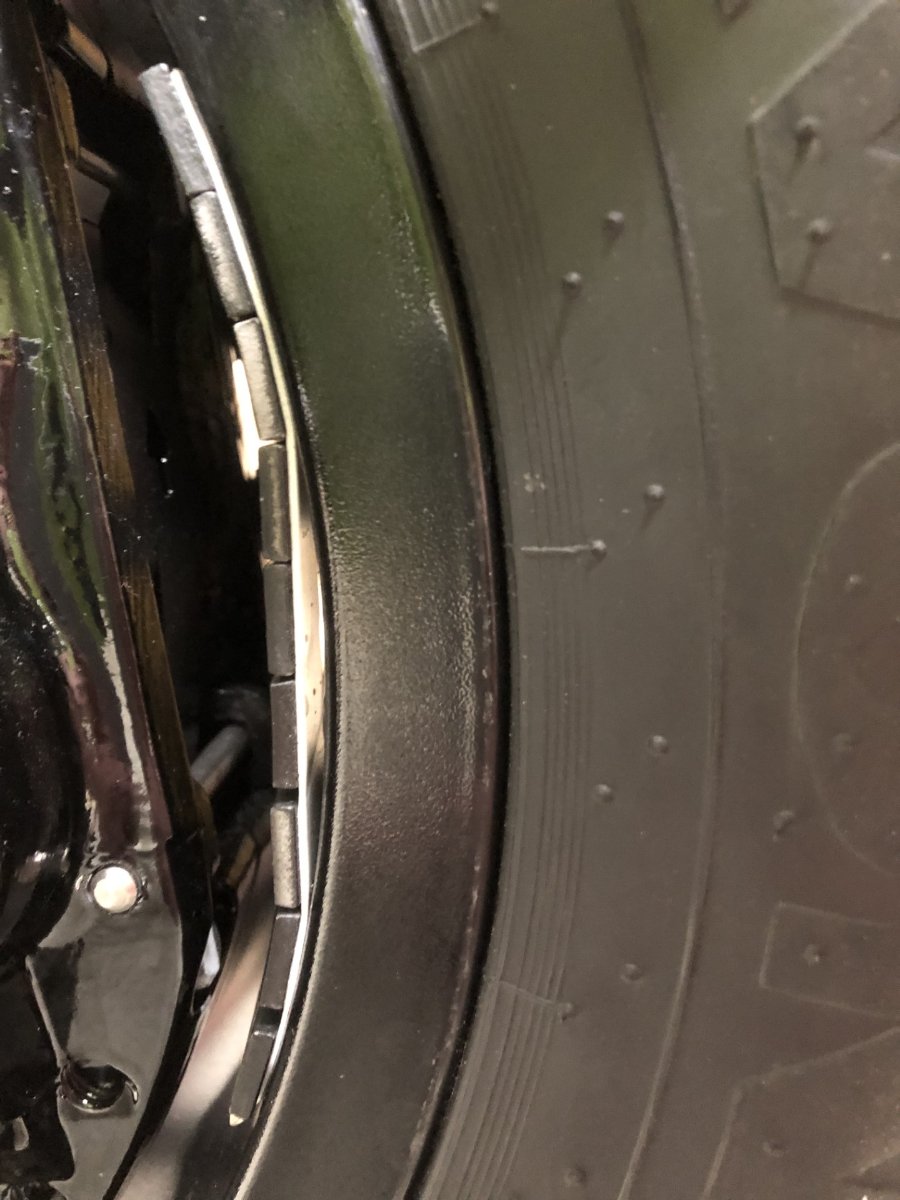
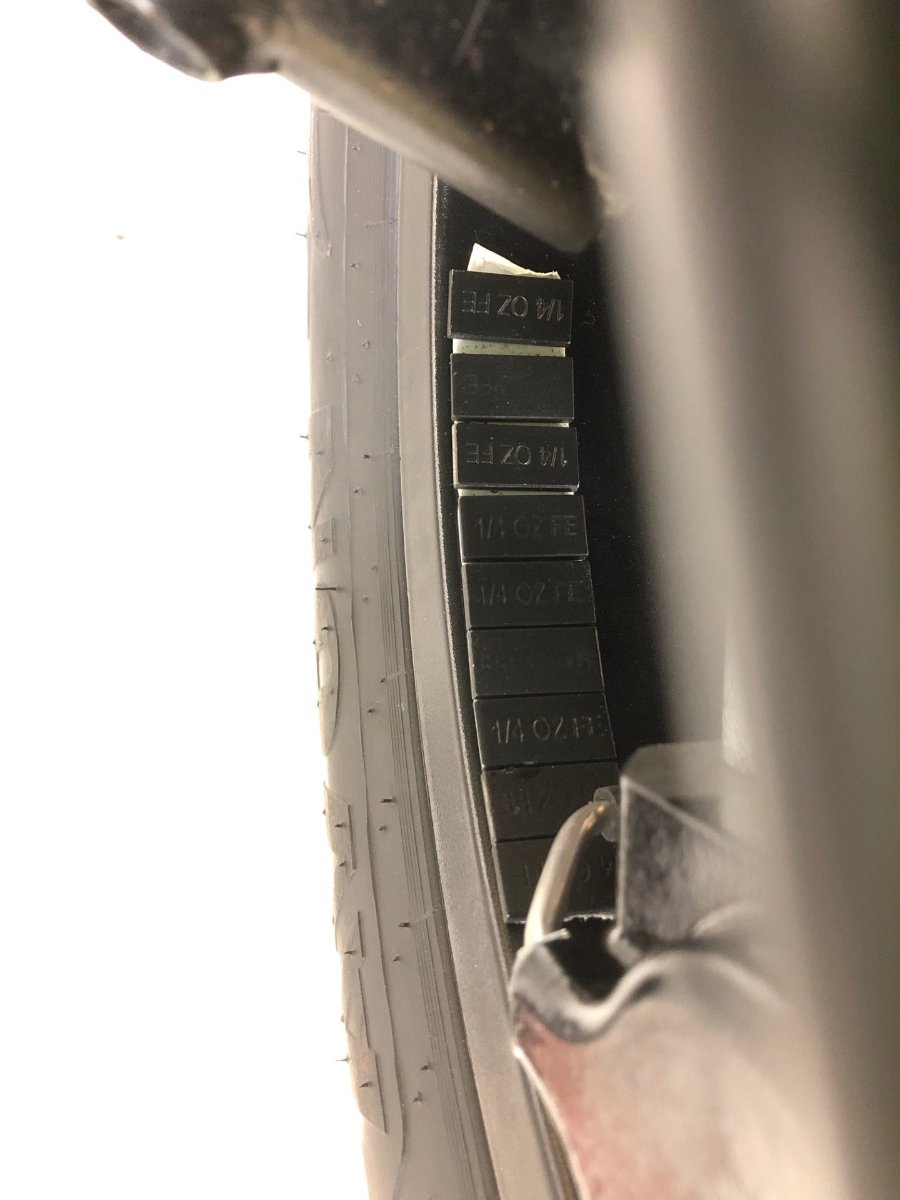
I just took a look at the Westfield's 13" wheels -- also Caterham wheels BTW -- and it looks like the weights are slightly different than what either Caterham or Beachman's shop used. It could very easily be an optical illusion, but the both the weights and the foam appear to be a little thinner and you can see a comfortable triangular gap between each weight indicating they are conforming to the circumference. I just checked the other wheels on the Caterham. The rears both look fine, but the other front wheel...not so much. I'm no expert, but that doesn't look right to me. Looking at the weights from above, it appears the foam is stretched between the weights due to the tight circumference and potentially from forcing the weights into position, and that tension popped the middle section away from the rim. -John