-
Posts
3,266 -
Joined
-
Last visited
Content Type
Profiles
Forums
Store
Articles
Gallery
Events
Library
Everything posted by JohnCh
-
@Bruce K I'll shoot you a PM for next steps on debugging this. Now back to people posting about their other cars -John
-
I've seen your post show up four times in succession, followed by a near three-hour gap, then repeating three more times. Croc's post has only showed once for me. Although I've been deleting your duplicates, you might want to examine if you were doing anything differently when submitting them. Different device, browser, stuttering, shots of tequila, etc. -John
-
No need to remove the lock. Usually just rotating the wheel so things line up is enough, but you may need to turn the key while doing it to release the lock if you've triggered it. Hopefully that's the issue. -John
-
Sounds like you are hitting the anti-theft steering lock mechanism. Have you tried rotating the wheel while gently pulling once you hit the stop? -John
-
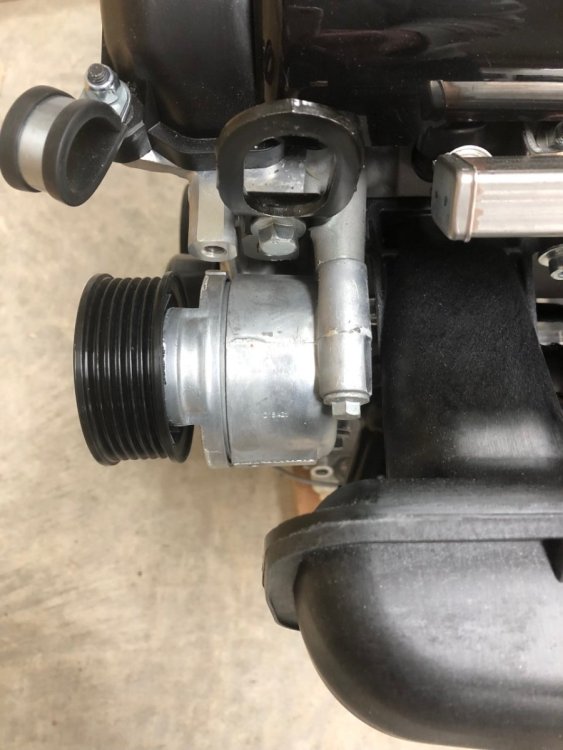
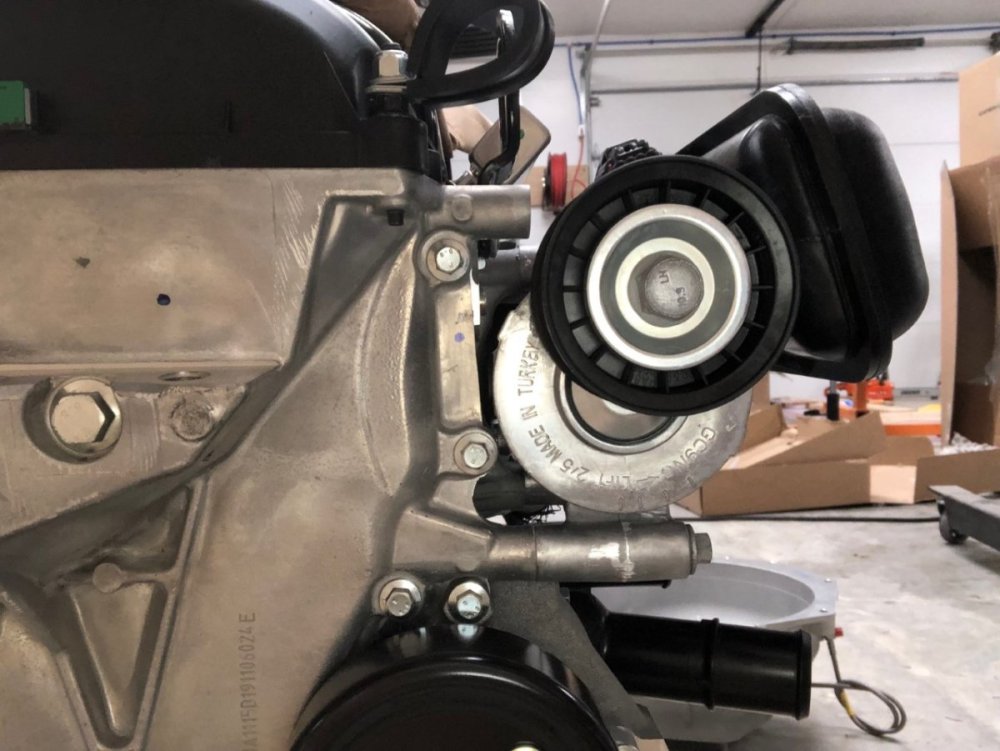
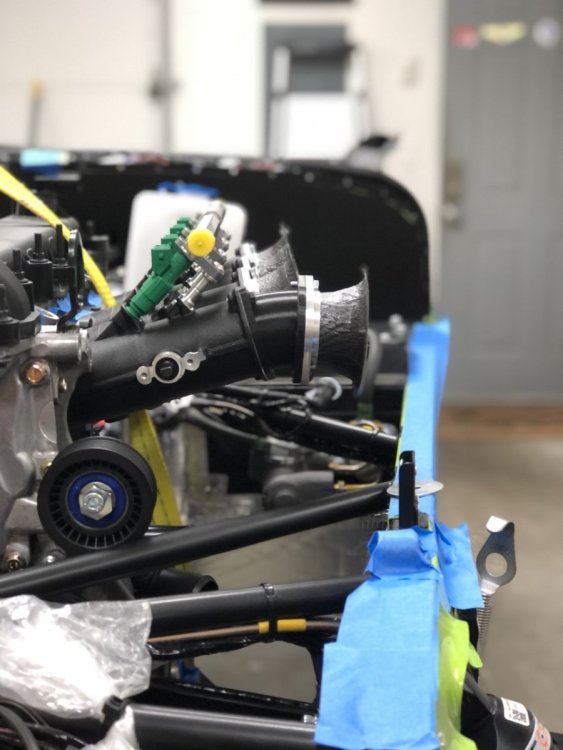
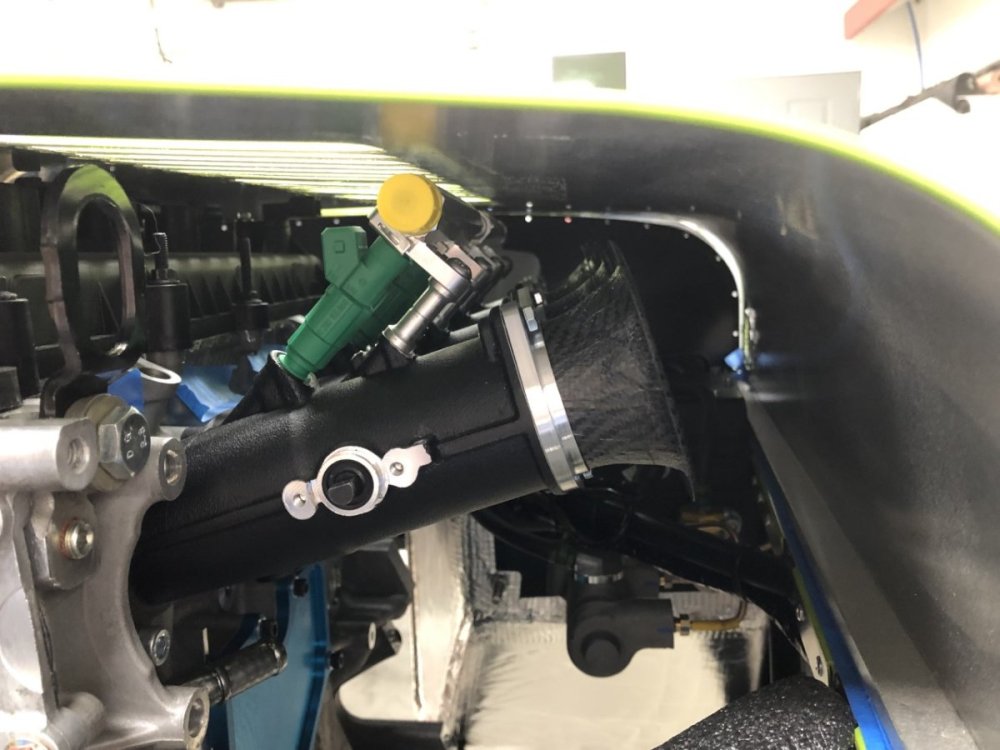
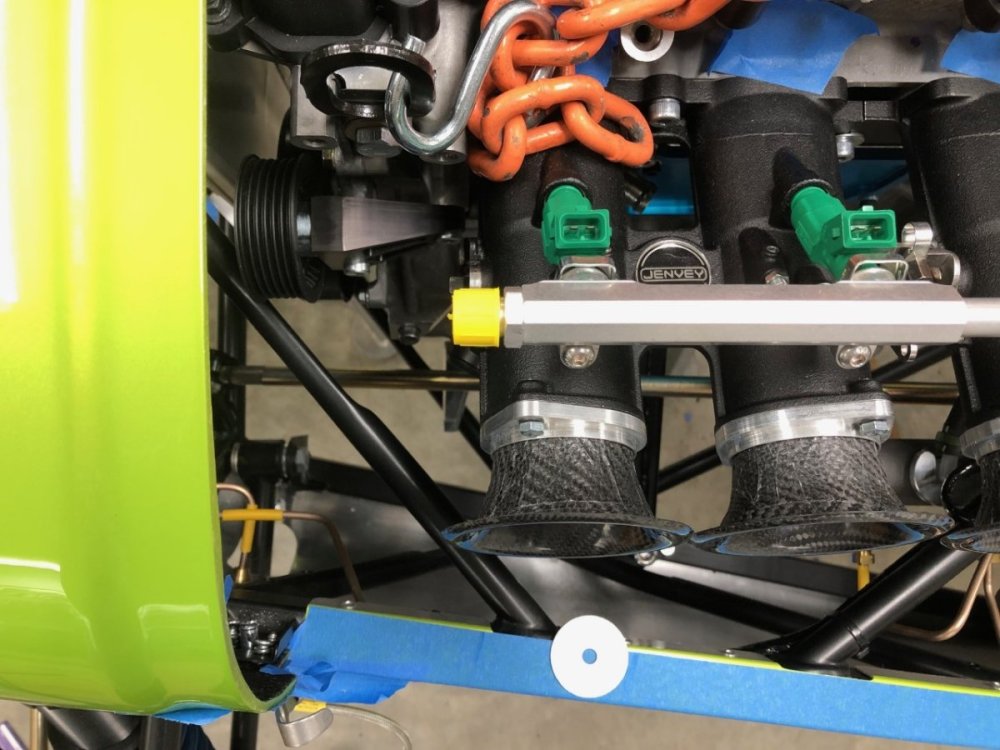
The part number used on the 420 engine is 3M5Q-6A228-AE. Here are a few more photos to help you visualize the interference with the current Jenveys which might help answer your question about your SBD TBs. Front view of tensioner. Similar to yours but there is no forward-facing bolt. Top view of the tensioner. Note where the top mounting bolt is in relation to the 420 intake runners This picture shows that same bolt boss in relation to the edge of the Jenveys and the throttle shaft. -John
-
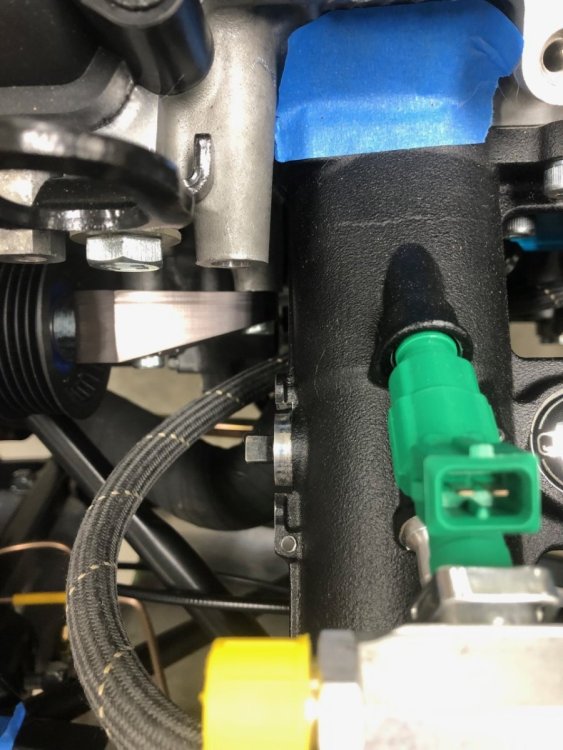
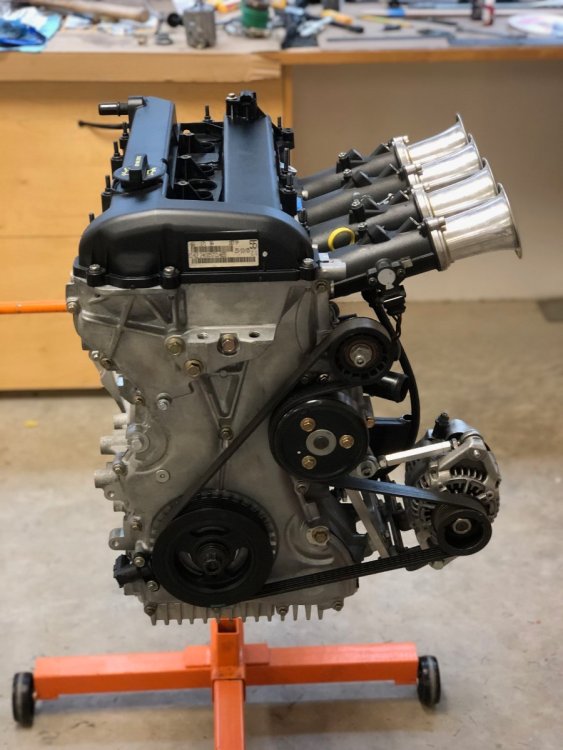
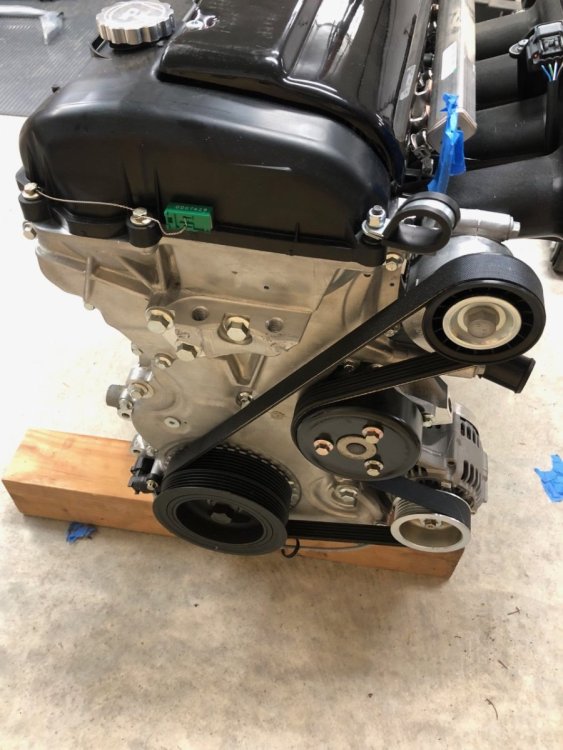
I've run the Raceline tensioner on my 2.0L Duratecs since '04. Picture below shows that setup on the most recent engine. Although the belt gets very close to itself, it has never been an issue. For the Caterham with the 2.4L I had planned to do the same but discovered that clearance between the pulley and one of the chassis tubes is really, really tight. They didn't touch but until the engine was in its final position with the trans on and mounted to the chassis, it didnt inspire a lot of confidence. I don't have a great picture to show the gap, but these two will give you an idea. The fix, if needed, is very simple: just a flat metal plate that bolts to the stock block locations and is drilled to mount the tensioner ~3/4" higher. I considered using the Ford self-tensioner as fitted to stock Caterhams but discovered it won't fit with Jenveys. It's a large, bulky part and attempts to occupy the same space as the left-side throttle shaft. The first photo shows it in place on the 420 engine. If you look closely, you can see it uses the two top mounting bosses, whereas the Raceline only uses the lower bosses. Couple of other points. First, the 2.3L block is 13mm taller than the 2.0L. I suspect that when the tensioner wheel is lowered by that amount relative to the chassis, the clearance reduces further so although it isn't a consideration for you, I/m mentioning it for anyone else reading this who has a 2.0L. Second, Raceline uses a different bellhousing than Caterham which shifts the engine back in the chassis about 20mm. This renders the potential interference with their tensioner moot as it would now sit well back of that chassis tube. -John
-
The end of this build manual from 2015 has a wiring diagram that might be helpful. If the factory eventually provides you with something, please let us know as this is a pain point for a lot of us. If you post the issues you are having, someone here might be able to point you in the right direction for troubleshooting. -John
-
I live in a world of SUVs driven by smart phone using, latte swilling, multi-taskers who consider themselves exemplary drivers. I want to mount that third brake light as high as possible. For the Caterham I'm using this setup from Beachman Racing: http://www.beachmanracing.com/rollbar-mounted-light. It requires 4 holes drilled in the bar; 2 for the mounting screws and 2 for the wiring. This is similar to the setup I have on the Westfield. I'm not concerned about impact to structural integrity. The holes are small. If I'm in an accident involving sufficient damage that someone would even raise that question in the post-accident investigation, I figure I'd be dead whether the holes were there or not. Threading the wire through the bar in the Westfield was a challenge, but it was doable. I suspect the Caterham will be similar. I'll post the process once I get to that point. -John
-
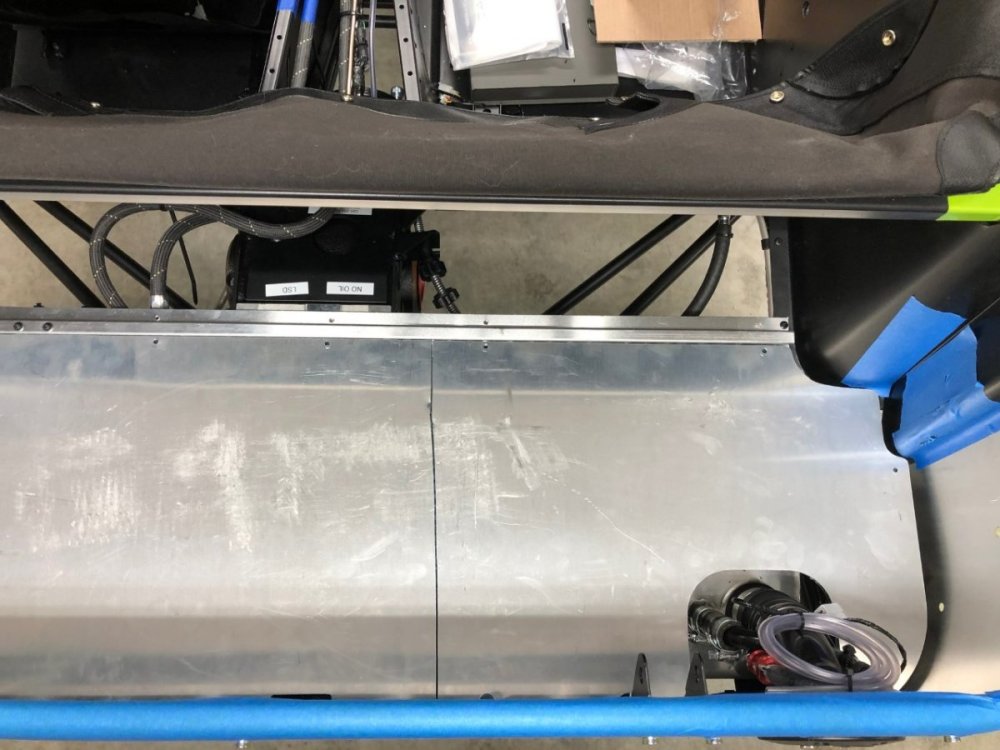
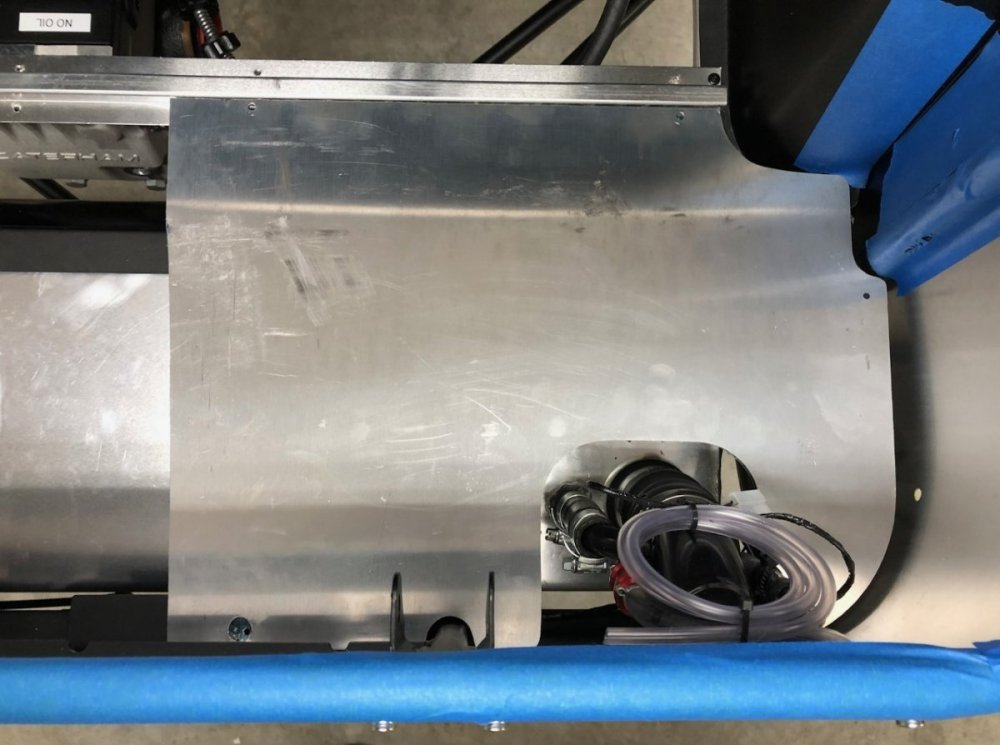
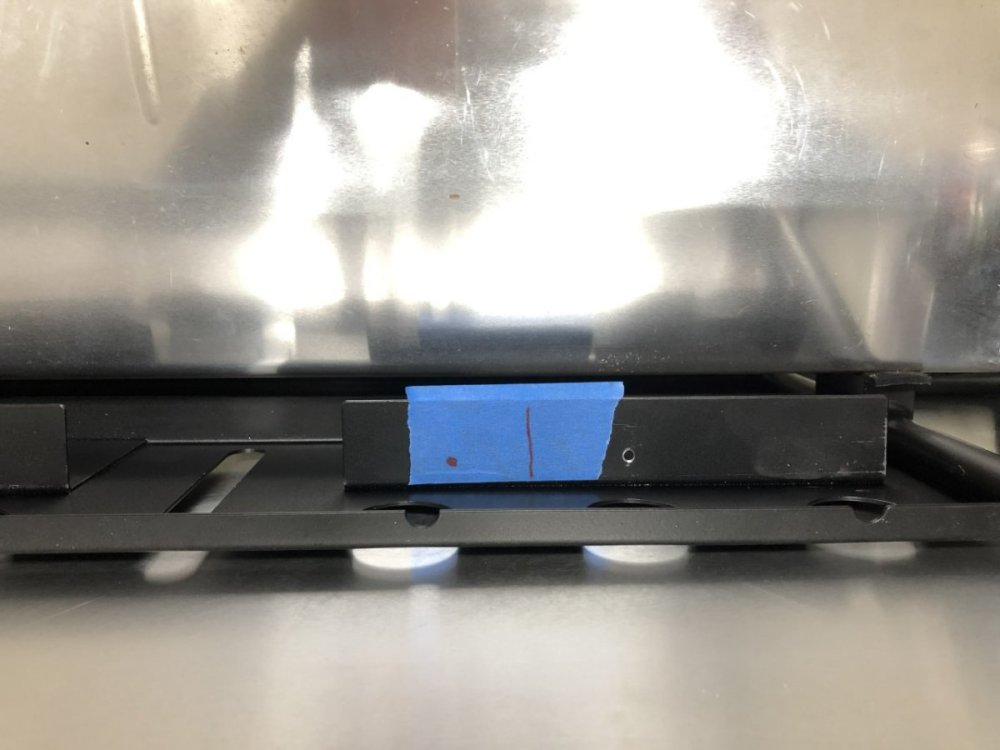
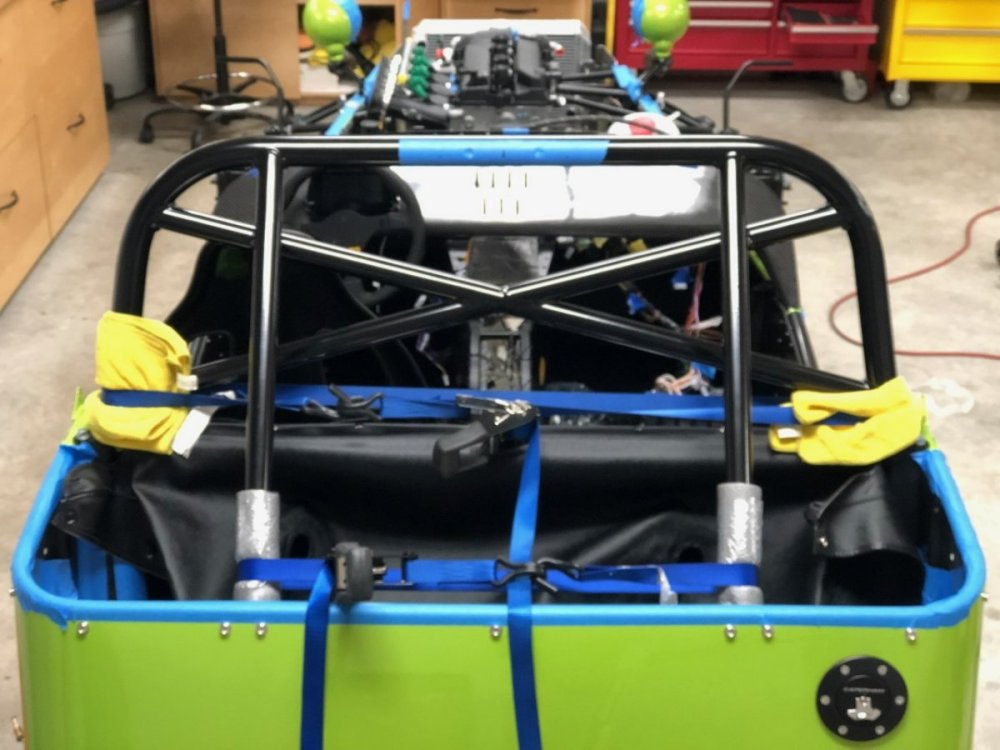
Anyone who has removed the honeycomb boot floor can attest that it's an exercise in frustration. It's one of those there-is-absolutely-no-way-in-hell-that-can-wiggle-out-without-bending-something moments until suddenly….it's out. Looking at the supporting frame, there is no apparent reason why Caterham doesn’t simply cut the floor into two pieces so it's easy to remove and install when you need to access the fuel tank. Since they didn’t bother to do it, I did. This was my first experience cutting honeycomb. It turns out that when using a thin jigsaw blade, the blade can twist within the honeycomb, creating a bevel cut and pulling the saw into the guide while slowly pushing it over despite the use of clamps. Unfortunately, I didn't catch this early and ended up with a cut that is anything but straight. Not a big deal given it's only a cosmetic issue and isn't visible when the boot carpet is in place. The honeycomb floor is now quick and painless to remove and there is no impact to the rigidity of the floor. This photo shows the right side of the rear frame for the boot floor. The red line on the tape shows where the two sides will meet once it's cut in two. The next two photos show the boot floor after the cut. First, with just the right side in place, then with both sides. With boot floor cut and fuel plumbing work done in the back, it was time to install the rollover bar. Taking a tip from a build blog, before blocking access with the bar, I ran a harness bolt into each harness fitting to make sure they weren't gummed up by paint. They were fine, but it was clear the person who drilled the aluminum strip in the back of the boot cover that sits over those holes was having a bad day. The holes for the passenger harness bolts were partially blocking the threads, and it appears they tried drilling those holes a few times, because they were not a shape one would confuse with round. Removing it from the car then cleaning things up with a file and it was time to install the rollover bar. As others have found, bolt alignment was off. In my case, a pair of ratchet straps were required to move things around enough to get all six bolts in place. Tomorrow I'll drill the holes for the 3rd brake light and prep and paint the aluminum mount. -John
-
The kit includes all the parts necessary to build a running car. Lead time is a combination of demand outstripping supply which results in a waiting list, supply chain issues, and my opting to wait another few weeks to ship with two other cars and save several thousand dollars in shipping costs. If you want to learn more about the Caterham assembly process, from what the build entails to all the included parts down to the fasteners, check out the latest build manual and the detailed build blog linked to below. Caterham Assembly Guide v2.3 Caterham Detailed Build Blog -John
-
Thanks, I made the one in the Westfield and it turned out well, but I would prefer the part to be powder coated or anodized rather than painted and doing so for a single part is expensive. If I can't find a US source for the 2" PCD spacers, then I'll just buy it from the UK and bundle it with some other items that are difficult to source here or significantly cheaper over there.
-
Ah, I misread that and thought the comment about making it heavier was referring to the stock knob not a new one you have already fabricated. But yeah, experiment -John
-
Personally, I'd experiment to determine which I prefer. Even if 9 out of 10 people here state they prefer the stock weight, if you prefer heavier, then that's the right answer for you. Perhaps tape different amounts of lead weight to the stock knob and try it out? -John
-
Yes, I'm aware, thanks.
-
The Caterham prices are on the high side. Those same switches (Apem) are available for less from other sources such as Car Builder Solutions in the UK or through various electrical supply houses in the US. The stock exhaust will hold things back. In theory it will cap the fun in the 250-260hp range, which is fine for now. Phase 2 of the build -- if needed -- will be a custom exhaust and appropriately sized Raceco silencer which should increase power potential to the 270-280hp range.
-
Sorry, I should have mentioned this is for the 3-hole style.
-
I'm trying to locate a 1" spacer for my steering wheel, but the only ones I can find in the US are drilled for a 1.75" PCD whereas the Momo uses a 2" (50.8mm) PCD. That larger size is readily available from multiple sources in the UK, but before I commit to international shipping, I want to rule out a US source. Any leads? Thanks, John
-
I'm not too proud to admit having a little exhaust envy upon seeing the car. -John
-
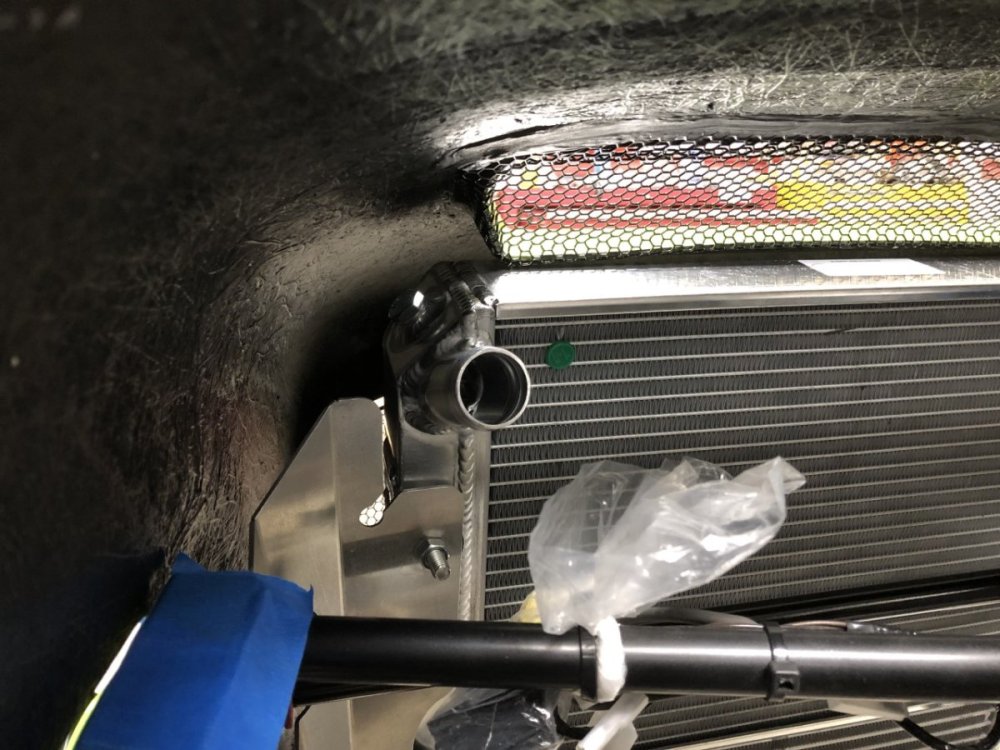
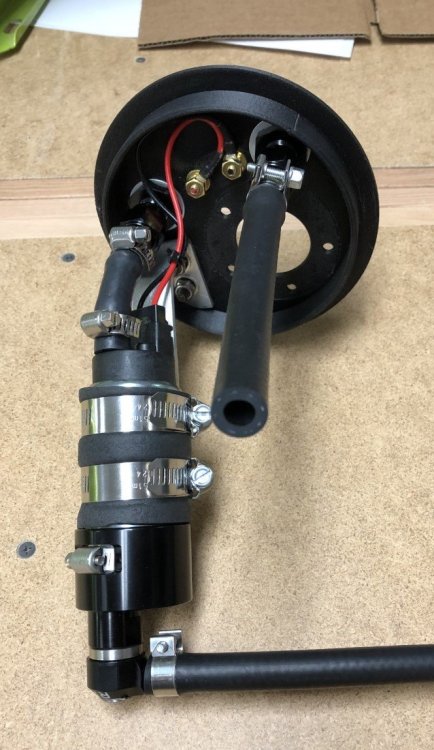
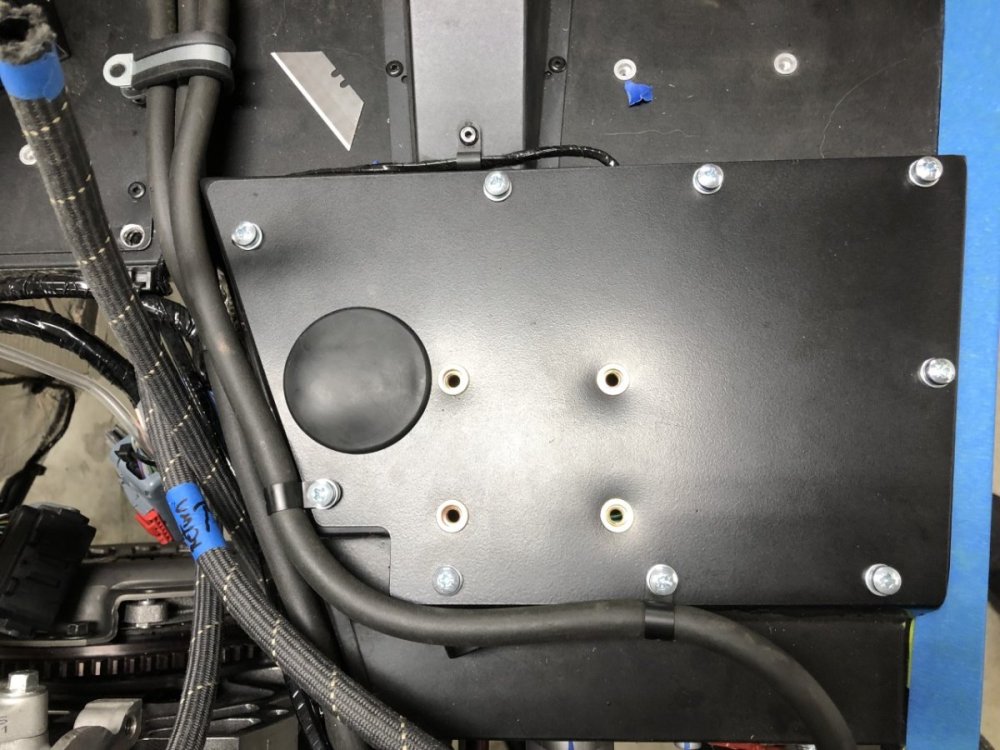
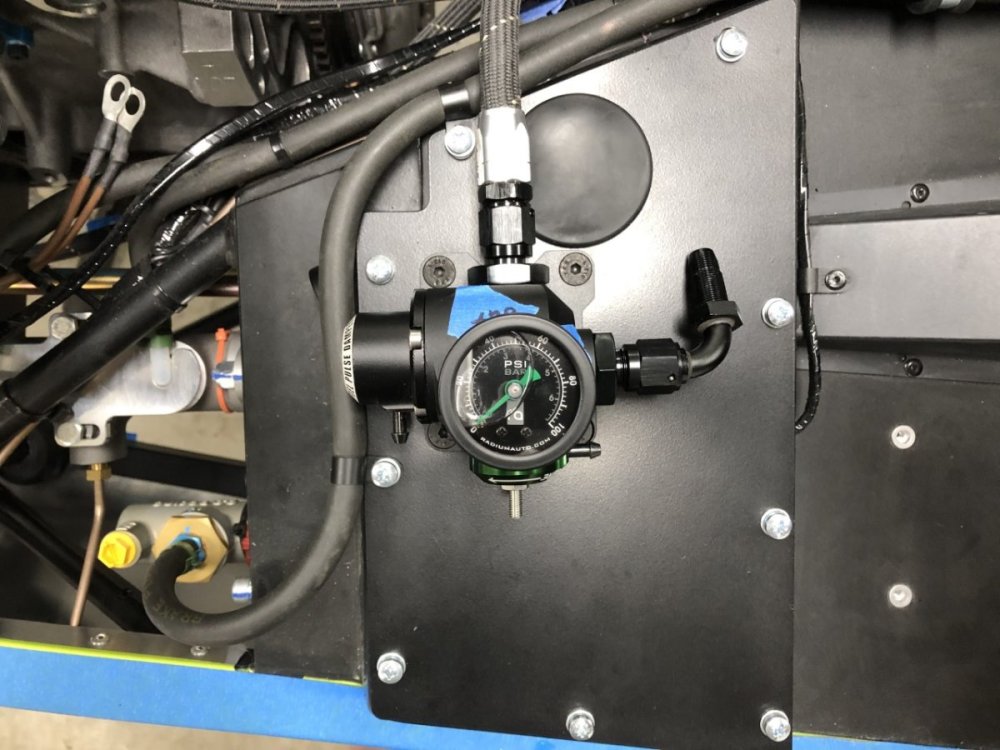
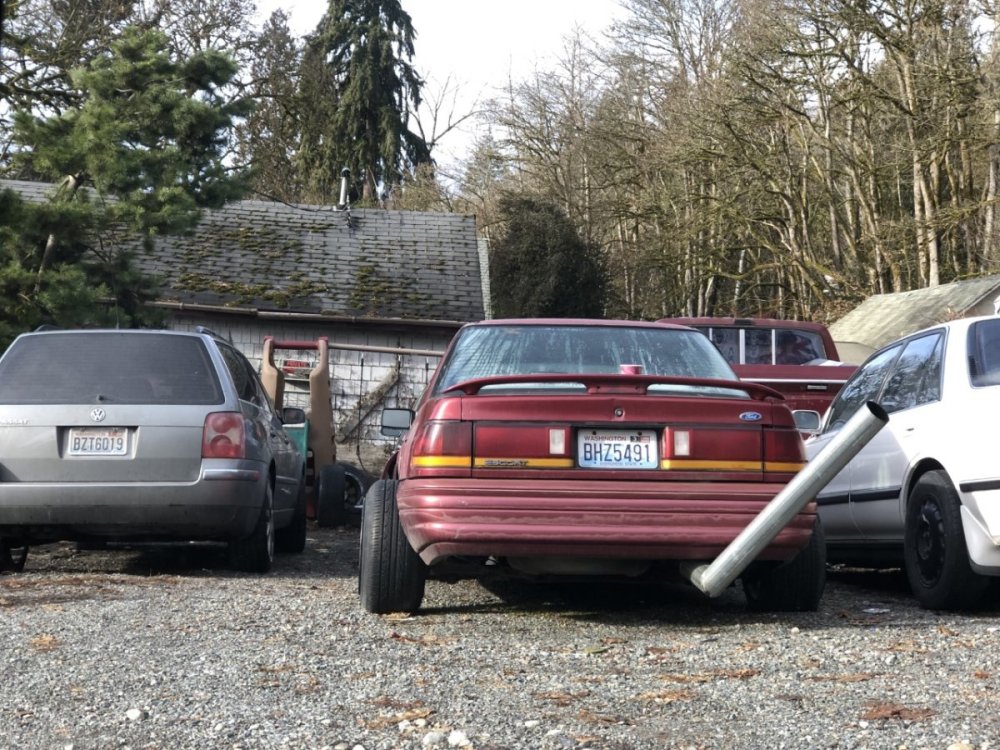
A few quick updates. After confirming with Bruce Beachman that something was amiss with the radiator brackets and not the chassis tabs to which they attach, I clamped the brackets to the bench and tightened the angle to 90 degrees. Before doing so, I checked the angle of the two bends that should combine to form the 90-degree angle to see if one of those was out. It appears they were both off by about 3 degrees which together made the big difference. At least the person who makes these was consistent with his errors With that locating the radiator correctly, there is still some minor interference between the bottom corners of the grill covering the 620 intercooler scoop and the top of the radiator. Given the grill is metal, this seems like a potential wear point for the aluminum radiator. Before attempting to lower the radiator a few mm or file down the grill, I might just put a piece of foam rubber between the two and monitor it for wear. If it's not an issue, then leave it. If the interference is destroying the foam rubber, then correct it. A couple of missing fittings arrived which allowed completion of the in-tank pump assembly sans fuel sender followed by a test fit with the Hydramat in the tank. Everything seems to fit just fine. Rivnuts were used to mount the FPR/Damper to the pedal box access panel. The return hose is fitted, but I'm waiting on plumbing the line from the fuel rail until another 90-degree fitting arrives. This photo is somewhat build-related since I came across this car while running an errand to pick up a part. Umm….. -John
-
Follow the link below to the help guide on sending a PM. if you are having trouble after following those steps, feel free to contact me for assistance using the Contact Us link located at the bottom of any page. -John
-

Driving with no center console: reduced buffeting?
JohnCh replied to TurboWood's topic in General Tech
I've never heard of those. I'll need to research them. If they work, it shouldn't be too hard to print up something that would mount to the windscreen frame. Thanks, John -
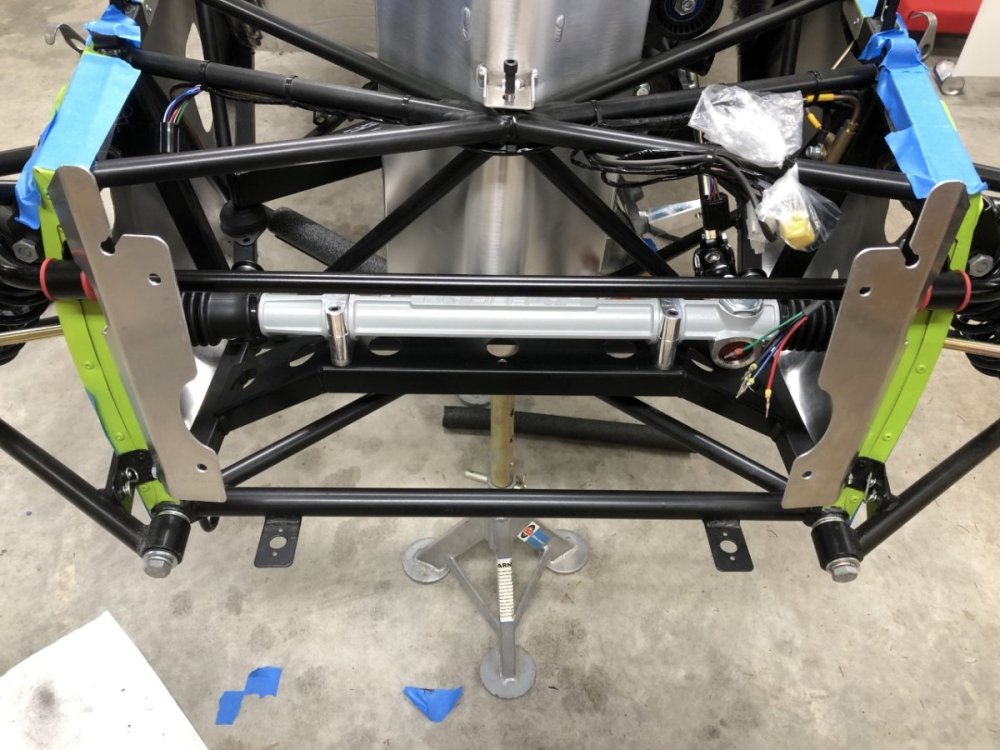
I worked a little more this morning on clearancing the nosecone cutouts for the front lower wishbone bolt heads, then attempted a temporary radiator install so I can begin working on cold air intake packaging. To my surprise, the radiator brackets are not bent so the two mounting planes are 90 degrees apart (photo 2). This seems like it will put some additional stress on the radiator when the bobbins are torqued (photo 3). Is this normal or should the front of the brackets be parallel to the radiator? Thanks, John
-
Thanks, that mostly makes sense to me, but I'm getting hung up on this comment: Tracing wires, it appears the YG wire is controlled by the fuel pump relay which is triggered based on a switched feed. Assuming that's still the case with your rewire, then it seems a rare occurrence when the key is turned but the engine is not running for more than a few seconds unless there is a problem: i.e. the safety issue you mention. I just want to make sure I'm not missing something. @Croc I hadn't thought about a clear coat and professional refinish. Definitely something to consider. Can any Seattle-area members recommend a place on the Eastside for this? As for finger clearance, the wheel position in that photo has tons of clearance, however, it does reflect the positioning based on the 1" spacer I plan to add between wheel and hub. Thanks, John


