JohnCh
-
Posts
3,406 -
Joined
-
Last visited
Content Type
Profiles
Forums
Store
Articles
Gallery
Events
Library
Everything posted by JohnCh
-
Henry, it's frustrating, but it should be an easy bolt to source at the local hardware store. Thanks Greg, but I'm hoping it's the full throttle experience that will be the conversation piece The gasket for the oil filter adapter is handled. It's a standard Ford part and should arrive in a few days. Of course, that is offset by the realization that I never obtained the O-ring size for the Jenveys (they seal the DTHTBs to the head). Although the current ones appear fine, they are older and could be on the way out. It seems prudent to pop in new ones, which is easier to do now then after the engine is installed. I'll call Jenvey in the morning to see if they'll provide me with the size, then I'll source them here. I spent more time looking at the dipstick this afternoon. I'm beginning to think it might be worthwhile to have that engine mount modified to provide more room for the fitting and avoid headaches down the road. On the surface it seems as simple as cutting out a small section that's interfering and having some material welded back in to seal it off, but I want to ensure that I'm not compromising strength. I'll take some pictures later and ask for feedback. -John
-
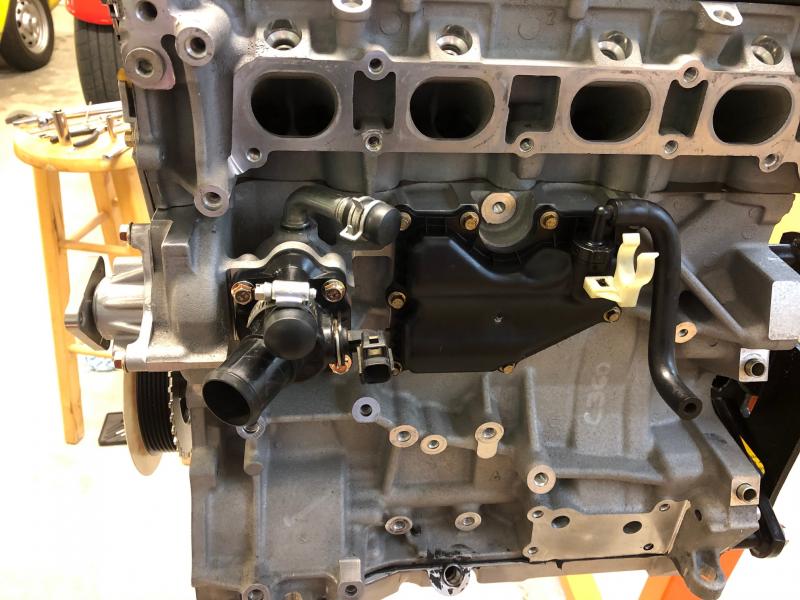
panamerico, I am happy about that and am saving my worrying for something that needs it. I'm sure that something will be along soon Today I installed the front cover, crank sensor (the alignment tool is still in place in the photo below), water pump pulley, idler pulley, valve cover, torqued the crank pulley bolt, and temporarily installed the alternator, driver's side engine mount, DTHTBs, dipstick, and still-to-be-gapped sparkplugs. With tape on the injector & exhaust ports, and the oil filter take off, the engine is sealed from debris, and no longer requires a cover. And most importantly, it looks like an engine again! One reason for temporarily installing the above parts was to figure out which items I forgot to order and what fixes I missed. First, I can't find the gasket for the Raceline oil filter adapter. I saw a note to ask Peter about it before placing my original order, but didn't write down his response. It's not on the manifest from them, and oddly I can't find the old one (I intentionally didn't throw things away). Hopefully it's a Ford gasket, or I can find the old one. I have a feeling he may have said to reuse it or use sealant which is why it wasn't ordered. I am also missing one of the bolts for an engine mount. Not a big deal, but kind of strange -- it's not in the bag marked "engine mount bolts" or on the tray with the mounts themselves. When previously test fitting the custom dipstick, clearance to the engine mount was feeler gauge tight. What I didn't realize until the alternator mount was in place today is that it is also slightly touching that part. Again, not a big deal and something a die grinder will correct. I also need to fabricate the upper mount for the dipstick now that the DTHTBs are in place. At this point I'm planning a staycation the week prior to the 4th of July, and targeting that week for the first drive. Fingers, and other body parts, crossed. -John

-
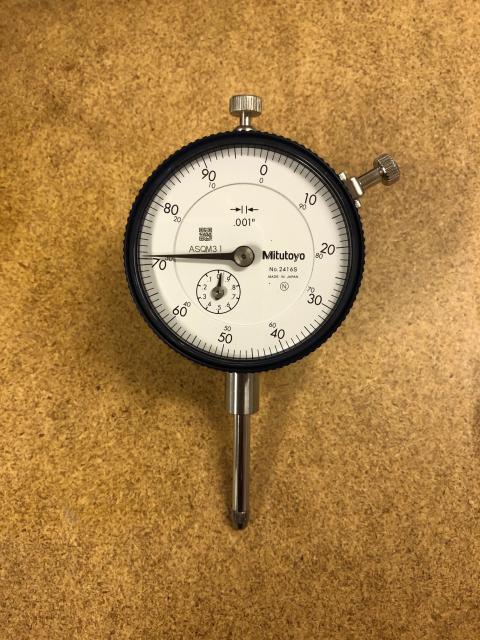
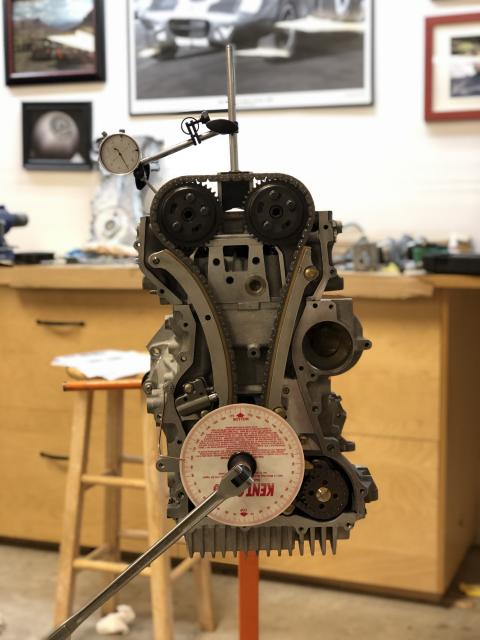
After posting the above, I contacted Amazon, explained the switch was stuck and would not turn with hand pressure and asked for my options given my desire to have a replacement quickly. I had suggested cross shipping and offered to pay for the new one now and they could wait to credit my account until they received the return, but was told it wasn't an option because the item was unreturnable. However, I then learned that Amazon's definition of unreturnable in this situation is different than mine. They mean they will send me a refund via gift of Visa card, but they don't want the item back. This seemed a little too good to be true, and somewhat illogical for an $80 part that was likely repairable. But no, the agent was very clear and even sent an email stating the item was mine to do with as I pleased. Apparently the cost to ship, receive, and deal with any kind of warranty or restocking kills the margins more than simply giving it to me gratis and taking the write-off. The replacement was immediately ordered and the gift card arrived about an hour later. Given I now own the Noga, I decided to force the issue with a set of large Channel Locks and a sacrificial bit of rubber to protect the switch from cosmetic damage. If it broke, it broke. Cranking really hard, and just reaching the stage where I was thinking of giving up, there was a loud "crack!" and the switch broke free. It now rotates as expected, but is occasionally sticky at the end of its travel, so not perfect. But certainly good enough. Setting the timing still took a while, but the process was significantly easier with the new equipment and very repeatable. If anyone goes through this process, I can recommend this set up: Mitutoyo"2416S" Dial Indicator Noga DG61003 Regular Duty Dial Gage Holder Anytime Tools Dial Indicator Extension Stem Rod Set Once TDC and cam timing were confirmed, reconfirmed, and reconfirmed again, cam bolts were torqued, which was followed by a final round of confirmation just to be safe. Next, the front main seal was replaced, and final prep and test fit was completed for the front cover. Only potential snag is that the top of the front cover is no longer flush with the top of the head due to the clean up of the head and block. It's only a 10/1000" difference which I'm hoping the valve cover seal can accommodate. If not, I'll probably just need to apply a little sealant at the step between the two surfaces. -John
-
The Noga articulated holder for the dial indicator arrived today It's beautifully made and incredibly easy to adjust: turn one knob and all the joints loosen allowing for very easy setup. Just one problem: the magnetic base is broken. The knob won't turn. I've verified there are no special tricks like pushing in or pulling out the switch and even found an online video review that showed the switch flips very easily, but I can't get it to budge by hand. Using a wrench for leverage might be enough to break it free...or just break it. Looks like this is going back for replacement -John
-
As usual, Croc is correct. Apparently 3 were made. The Ghia emblem on this car doesn't have the script underneath it like the car in the original photo. Looks like wheels are also different. Very cool. -John
-
The badge on the rocker behind the front wheel looks like it could be Pininfarina. Are you able to make out any detail on the hubcap center in the original photo? -John
-
I toyed with drilling & threading then plugging the port for the elbow after it returned from the machine shop, but didn't want to risk metal shavings getting where they shouldn't. Although not as elegant (nor as light) the silicone caps will work. They are ordered and should be here by the end of next week. Provided the dial indicator holder shows up tomorrow and no other issues arise, I should have the engine buttoned up this weekend. -John
-
Andy, I just answered my own question, but thanks for prompting me to look. HPS makes a silicone heater bypass cap that should last significantly longer. I'll do a little more digging, but I will probably order those tonight. Thanks, John
-
I am and I treat them as replacement items. If there is something longer lived that can dead end those unused connections when using a water rail, I'd love a pointer. One is 5/8" and the other is 3/4". Thanks, John
-
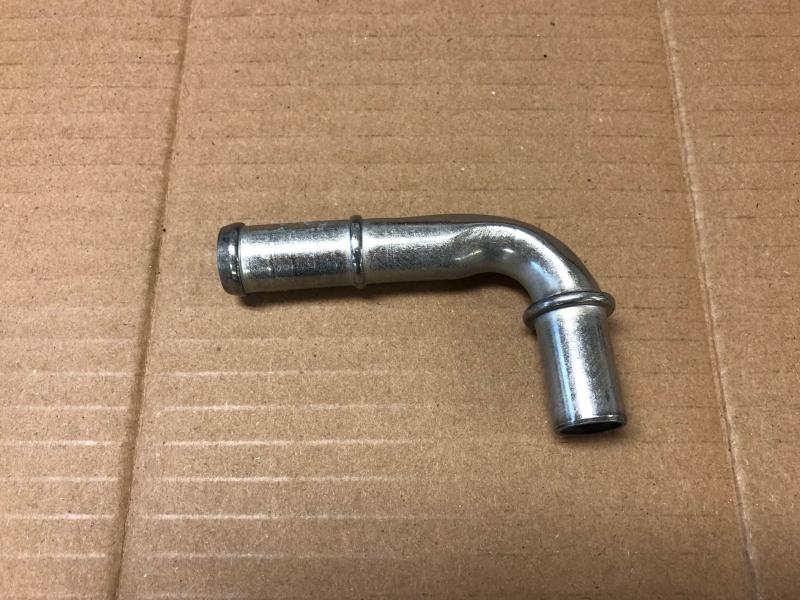
The coolant elbow and thermostat housing gasket arrived today. The latter fit perfectly. The former, not so much. The tolerance for the original elbow is loose enough that I can push it half way into the port above the thermostat housing before needing to apply a lot of force. The new one, however, wasn't going anywhere from the start. This is an issue given the head overhangs the port a little (see photo) meaning one can't bear down from directly overhead. Pulling out the calipers revealed the new elbow is 0.003" wider at the base. Argh. Looking again at the old one, I decided the scratches that led me to purchase the replacement weren't that bad and had a decent shot of working with the help of the Loctite. Given there is a reasonable chance I will need to install a thicker head gasket to reduce the compression ratio (I'm on the edge for local gas) I can redo the elbow then if it is seeping. -John
-
When I read the green/gray color combo, I though "hmm..." but seeing the photo, I agree with Croc. Looks really good! Hope we can convince you to follow Greg's lead and start a build a thread. -John
-
I think Greg may have been alluding to the graphics package. Not exactly subtle... -John
-

The Regular Summary of Classified Ads of Se7ens Found For Sale
JohnCh replied to Croc's topic in Cars For Sale
Another Caterham has landed on BaT. Nice looking, older car with the rare-ish Vauxhall engine. They are a little heavy, but the head flows great and they can make big power. https://bringatrailer.com/listing/1991-caterham-super-7-3/ -John -
The Mitutoyo arrived yesterday. The quality and precision is an enormous step up from the cheap Summit item. Think well set up se7en suspension vs. a stock mid '60s American luxury sedan. Yes, they will both go around a corner, but only one has enough additional movement to make the change in direction seem more like a suggestion than a command. I will probably still find a way to screw this up, but I'll need a new scapegoat. -John
-
The wet sump is flush with the bottom of the bellhousing, so the delta you have between your dry sump and the bottom of the bellhousing is the clearance you gain up front over the wet sump. The advantage is that a bad hit won't result in a holed sump and the loss of oil in the middle of nowhere (which I've seen happen on USA2005), but as you note, the bellhousing could still take a significant hit if you run over a large rock or speed bump. Not perfect, but still an improvement. -John
-
I decided to do a few quick jobs this morning over coffee: attach the block breather cover, install the coolant elbow removed by the machine shop, and install the water pump and factory thermostat housing. When prepping the elbow for the Loctite sealant, I noticed a couple of deep longitudinal scratches on the portion that presses into the block, which must have happened during removal. Unfortunately they are deep enough that I'm not confident they won't lead to coolant seepage, so a new one was ordered. It simply isn't worth the risk given it's an easy to find $10 part. Next, I discovered the new gasket for the thermostat housing is wrong. The shape is correct, but when attempting to press it into the groove, it was clear that it's marginally thicker and the circumference is about 3/16" - 1/4" longer. There was simply no way it would fit. Doing some searches in parts databases, it appears the part number changed for the 2012 model year. Oh well, another part to order. -John
-
It's a touch under 2-3/4". The dry sump definitely makes a difference at the front of the engine, but unless you also switch to the smaller bellhousing that area becomes the low point. I considered making the switch as part of this rebuild, but by the time I added up the costs for dry sump, tank, plumbing, bellhousing, new flywheel it requires, and the shipping from the UK, then stared blankly at the engine bay trying to figure out how to make it all fit, I decided to save that project for a future upgrade. -John
-
I have what could be a very long update, but I'll spare everyone the drivel, keep it short, and cut right to the chase. After a significant amount of frustration setting, then resetting cam timing with no consistency, I finally discovered the root cause. The cheap dial indicator and magnetic base set up I bought back in 2007 is randomly inaccurate and is at it's limits working with the angles required by a DOHC engine. After wasting parts of the last two weekends questioning my competence and sanity (full disclosure: the jury is still out) I went through a methodical series of measurements with the engine fasteners torqued and confirmed the inaccuracy. The primary culprit is the dial indicator which has significant lateral play that impacts repeatability. The magnetic base dial holder appears stable, but the arms are barely long enough to work with the Duratec and are fiddly to adjust. Although this isn't directly causing the repeatability issues, it makes the lather, rinse, repeat aspect of setting cam timing incredibly frustrating. This doesn't help. Lesson learned. Don't by a cheap $32 set up from Summit Racing with good reviews and expect it to work well. After a little research I've ordered a Noga magnetic base with fine adjustable arms, and a Mitutoyo dial indicator. The saga continues. -John
-
I think a lot of people don't like them simply because they don't care for the aesthetics. Nothing wrong with that. How do you feel about that aspect? -John
-
Kudos for calling it a bonnet. To achieve elite status, you'll need to start making aluminum a 5 syllable word. I still struggle with that one There is some truth to rocks ejecting over the bonnet with mud flaps. I live down a long gravel driveway. When driving it at low speeds, a small piece of gravel will occasionally kick up and land on the bonnet. However, I've never noticed this occurring on the road. -John
-
No, I don't have a sense of humor, and I'm borderline pathologically vindictive. I smell a ban coming... Okay, that scores you some points and pacifies my ban finger. Now back to our regularly scheduled build updates from Greg. -John
-
I also did mud flaps. I cut them to size out of a pair intended for a truck and attached them to the base of the fender with the same style dome head fasteners used to attach the fender to the stays. They work well, but over the years they have arched backward a bit from air flow and should probably be replaced. I suppose I drive too fast If you look closely, you can just make one out in this picture. Edited: one advantage to working from home is I can pop into the garage to take photos. I've replaced the picture mentioned above with a couple of closeups. Quality isn't great, but I'm supposed to be working at the moment. -John
-
Depending on where you drive, the stone guards can look worse for wear after a while and will really stand out if the rest of the car still looks good. Murphys' Law indicates that if you make them hard to remove, you will want to replace them relatively soon. If, however, you make them easily removable, they will still look good many years from now. -John (Murphy's Law Disciple)
-
The Regular Summary of Classified Ads of Se7ens Found For Sale
JohnCh replied to Croc's topic in Cars For Sale
I don't like this type of bullshit on the forum. Lightguy, you fired the first shot and Apex responded. As far as I'm concerned, you've both had your say, and this discussion is finished on the forum. Period. Revisiting will result in deleted posts and a very long time out. -John -
Glad you found it when you did. A press fit without an additional mechanical fastener does seem a bit odd given the pressure involved, but I don't see a groove or other indication of a fastener in the white plastic housing. Do fingers from the fitting go through the slots in the white plastic? Perhaps that's enough? Interested to see the resolution. -John