JohnCh
-
Posts
3,406 -
Joined
-
Last visited
Content Type
Profiles
Forums
Store
Articles
Gallery
Events
Library
Everything posted by JohnCh
-
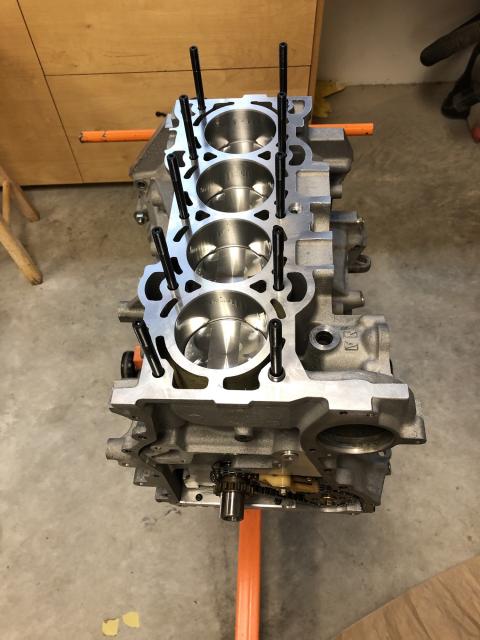
Thanks Andy. I think the issue is isolated to those threads, but I am being careful with every fastener I tighten. Made more progress today. And experienced more frustration. The sump is now on and no threads were stripped in the process. Next up was the oil pump chain drive system. I didn't have a tool to hold the oil pump gear in place while torqueing the bolt and didn't have any metal stock on hand, so I fabricated something out of an old, unused metal wall track for an adjustable shelf system. Looked odd, worked great. Had a bit of a WTF moment when installing the ARP head studs. Ford uses torx head bolts, but ARP uses studs with washers and 12-point flared nuts. Step 1 in the instructions is to install the 10 studs finger tight. When installed this way, nine of the studs were 3" above the deck and one was nearly 1/2" higher. My initial assumption was that port needed another pass with the thread chaser I fabricated from a used head bolt, but that was not the case. Long story short, after trying the chase in that port, then in others, and swapping studs between ports, no combination resulted in a stud in that port aligning with the others. Then came an ah-hah moment. Per my calipers, the diameter of the threads is about 4 thousands wider on the ARP studs then the Ford bolts. Apparently there was a tiny amount of gunk deep in the recesses of those threads that the chase couldn't quite reach and that was creating additional friction for the ARP studs. It only took a little more than finger tight torque to screw in that stud further, so I opted to do that until the height above the deck matched the others. Next, the threads, washers, and nuts were lubed and the head was dropped in place. It was then I realized these were 12mm 12-point nuts, and my 12-point sockets start at 13mm. Sigh... Deciding to step out of my isolation bubble, I donned my hazmat suit, and braved the social distancing dance at my local Ace Hardware. Deep well 12-pt socket in hand, it was finally time to attach the head. Ford calls for tightening the head bolts in 5 steps: 5 lb-ft, 11 lb-ft, 33 lb-ft rotate 90 deg, and finally rotate another 90 deg. ARP, however, states to torque to 60 lb-ft in three equal steps. I decided to err on the side of caution and do a blend: 5 > 11 > 20 > 40 > 60. The first two passes were done with my small torque wrench which tops out at 18 lb-ft, then the medium torque wrench was pulled out for pass three. While tightening the first nut it was quickly clear that I had gone a bit past 20 lb-ft without a click, so I rotated that nut back to a little under 11 lb-ft and retorqued it to that level. Testing the medium torque wrench on a nut and bolt in the vise, it took a lot of torque to reach the 20 lb-ft reading. Going to 30 lb-ft seemed closer to double that figure, and when attempting 40 lb-ft, the bolt snapped. Okay, that's not going to work. A new medium range torque wrench is on order. The delays continue... -John

-
I don't think that's it. The hole was not drilled, and the outside of that thread bundle is smooth, whereas the Heli-Coil has threads on both sides. I'd expect some of the ridges to remain. Also, the resistance when hand tightening that bolt was the same as the one next to it. If a Heli-Coil was put into an unthreaded hole, even if it was drilled to the correct size, it would squeeze down and create a smaller threaded opening for the bolt. The other possibility is something happened to the engine before I bought it. It was purchased as a factory line take-off. Ford would remove engines for QA and then sell them to a handful of companies who would resell to customers. When the engine arrived it was clear that it had never been fired, but a corner of the coil pack mount at the back of the head was broken, so not pristine. Perhaps they over torqued the bolt in that hole on the assembly line and pulled it off, or perhaps did that during QA? -John
-
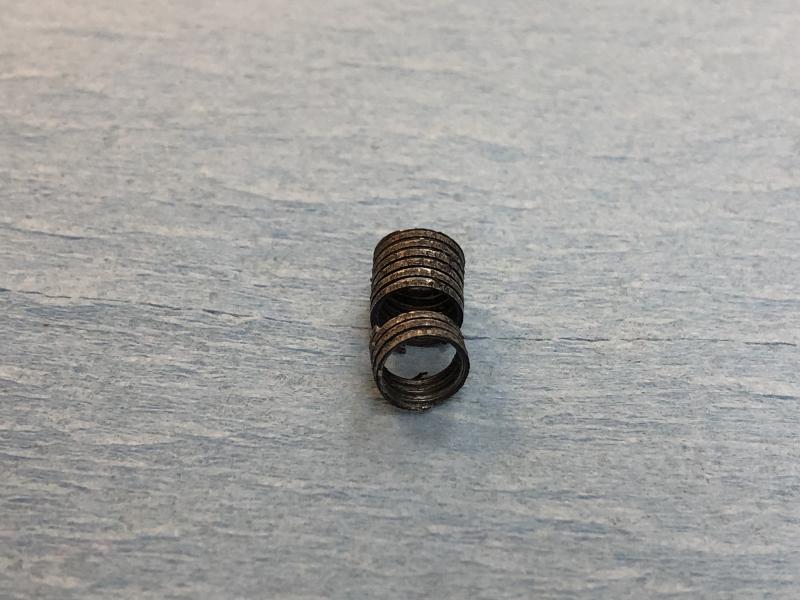
Internet crapped out at my house this morning which made work difficult given the lack of cell service on the property. While waiting for the muppets at the Internet provider to get me back online, I decided to head into the garage and affix the sump to the block. It's an easy job. What could go wrong? Yes, there I go again with the foreshadowing... Raceline calls for torqueing the 11 fasteners to 15 ft-lb, whereas the Cosworth CSR 260 manual calls for 25 Nm (18.4 ft-lb). I compromised and set the torque wrench to 16 ft-lb, then laid out all the clean fasteners, did a quick practice run with the sealant to make sure I could put down a proper bead, wiped the mating surfaces with mineral spirits, and temporarily attached the front cover to ensure the sump would be properly aligned while torqueing it down. Then it was time. Other than the sealant can puking out a big slug of sealant after hitting an air pocket, things were going fine. Sump was placed on the block, and all the fasteners were snugged a little over finger tight. Then it was time for the torque wrench. Starting in the middle and working my way outward in a circle, I had one bolt left before the job was done. It's one of the two long bolts at the back of the block. Starting to apply torque, it snugged a slight amount -- perhaps reaching 5 lb-ft -- but kept turning without tightening further. Uh oh. Fearing the worst, I backed out the bolt and removed this from the threads. The bolt was barely more than finger tight, yet the threads from the block stripped right out. No idea what happened. Metal fatigue from prior installations? Damage from the machine shop (did they use that port to bolt down the block during any of the machining work)? Or just bad juju? Regardless, it happened. Fortunately I have the correct size Heli-Coil kit on hand and after thoroughly taping up the block, the hole was drilled, tapped, and the Heli-Coil installed. That was enough fun for today, so perhaps I'll try installing the sump again tomorrow. -John
-

The Regular Summary of Classified Ads of Se7ens Found For Sale
JohnCh replied to Croc's topic in Cars For Sale
Given it's a dealer, I'm surprised they didn't spend time polishing off the labeling someone did to the dash. Sure, that person's penmanship is leagues better than mine, but it only adds to the amateurish vibe. Interesting claimed history though. If true, that will offset the mismatched gel coat for some bidders. The fact it has a Weber head Big Valve engine will also drive some interest. -John -
I'm curious, what is the max advance you can get without clocking the distributor? -John
-
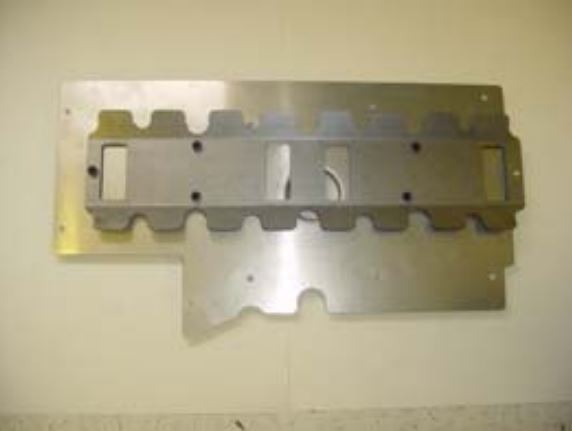
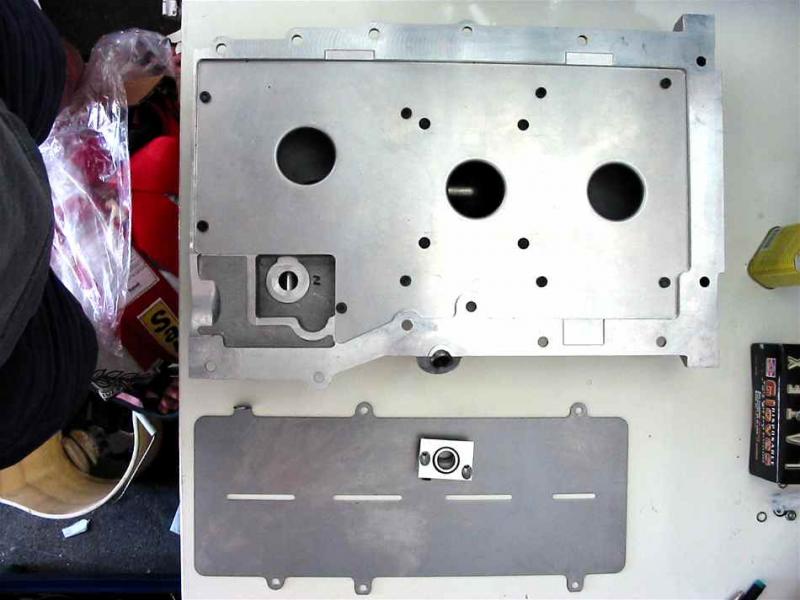
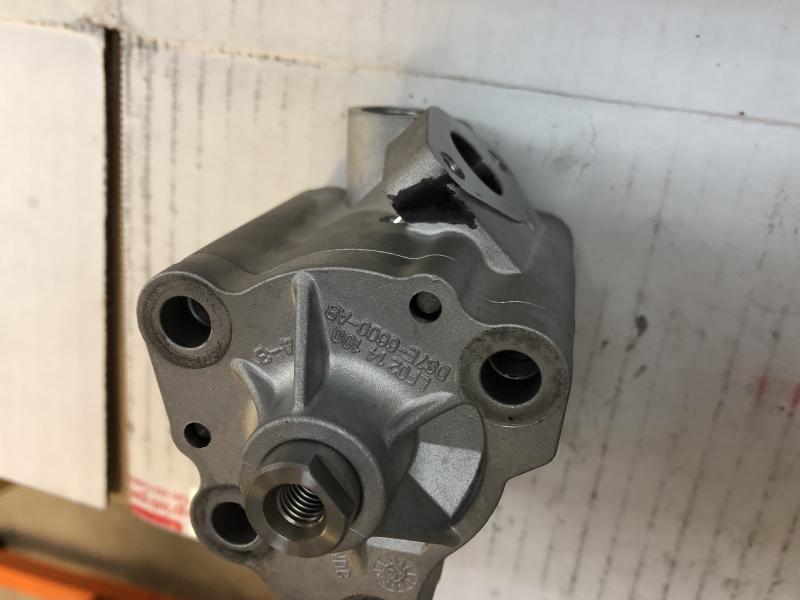
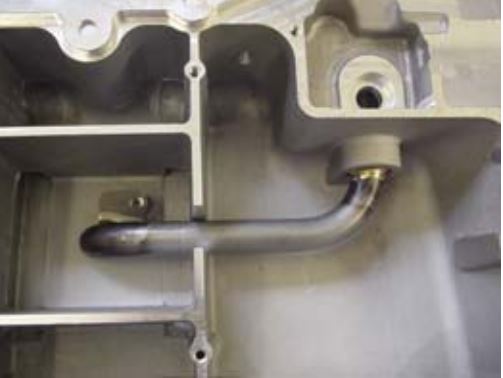
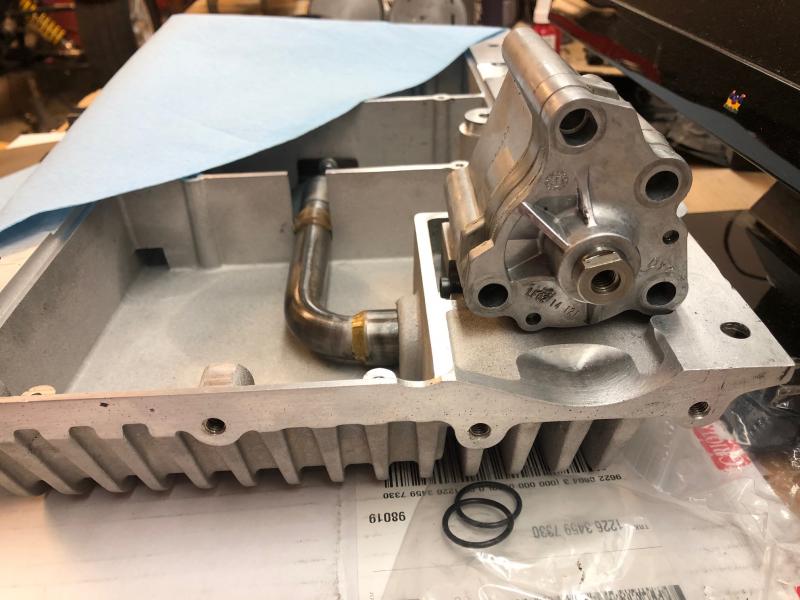
I wasn’t able to devote much time to the engine last weekend, but did make a little progress and dealt with a couple of minor issues. With the proper o-ring/gasket for the now infamous oil pump to sump wedge connector in hand, the plan was to install the oil pump, assemble the sump, and seal up the bottom end. First problem was uncovered when attempting to attach the windage tray to the mains girdle. One of the key differences between the early Raceline sumps and the current generation is the windage tray was redesigned and now attaches to the sump baffle plate. In contrast, the original tray is secured in two planes: it bolts to the mains girdle via five M6 bolts, and to the wedge via an M5 bolt that goes through a tab bent 90 deg downward. The pictures below show my original sump bits when they arrived in 2004 and Raceline's current windage tray attached to the baffle plate (shamelessly stolen from their instructions.) Quite a different design. During the initial install in 2004, I had to slightly elongate the hole in the tab to align it with the threaded hole in the wedge. Interestingly I had to do that again this time. It was only off by hundredth or two, but it was just enough that the bolt wasn’t perfectly perpendicular to the hole and consequently wouldn’t cleanly grab the threads. A few strokes with a file and things fit correctly, so out came the Loctite 270 and the windage tray was affixed. Temporarily. Yes, that’s foreshadowing… Next step was test fitting the sump. Not expecting any issues, I was surprised to see that the oil pump side of the sump was standing about 0.02” proud of the front of the block. This should be flush to achieve a leak free seal of the front cover. Sliding the sump back and forth, it was clear it was hitting the front of the oil pump. Added to the issue above, it appears that that new oil pump casting differs from the original by a couple of thousands. Not a big deal for a normal installation, but unfortunately I don’t do normal. In the first picture below, black Sharpie identifies where material had to be removed from the pump. Although it’s a simple fix with a file, it required removing the pump which in turn required removing the windage tray. The more astute among you will ask yourselves “hey, didn’t he just Loctite that in place??” Why yes, yes I did. And yes, the Loctite was starting to set. Fortunately it was early enough in that process that no heat was required to break the bolts free, but it had begun to harden and required chasing the remains off of the bolt and bolt hole threads to ensure reassembly and toque readings weren’t affected. Second photo shows the material removed and the oil pump installed. With that problem fixed, it was time to seal the sump, but I really needed a beer, so pushed that off to next weekend. -John
-
If it stops working after a while, it could be heat related. A failing connection can go intermittent as the joint expands from heat. After you shut of the car, does it take a while for those items to start working again correctly? If so, I'd be tempted to remove the scuttle and carefully use a heat gun on suspected joints to see if you can track it down that way. -John
-
I've gone from 14" to 13" and the biggest differences I noticed were identified by Croc: improved breakaway characteristics and ride. I read an article many years ago talking about why, aside from the rule book, F1 cars were on 13" wheels. According to the author, very light vehicles run into issues with short, stiff sidewalls due to the low air pressure required. As the car corners and the tire deforms, that deformation takes the path of least resistance. If the tire has short, stiff sidewalls and low air pressure, that deformation happens in the tread which buckles in the middle, decreasing the contact patch. If, however, the sidewalls are taller and softer, it happens in the sidewall as tire engineers intend. -John
-
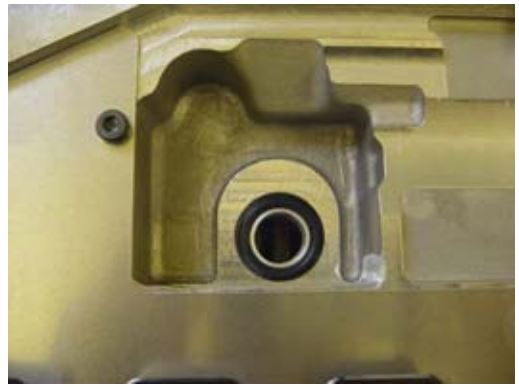
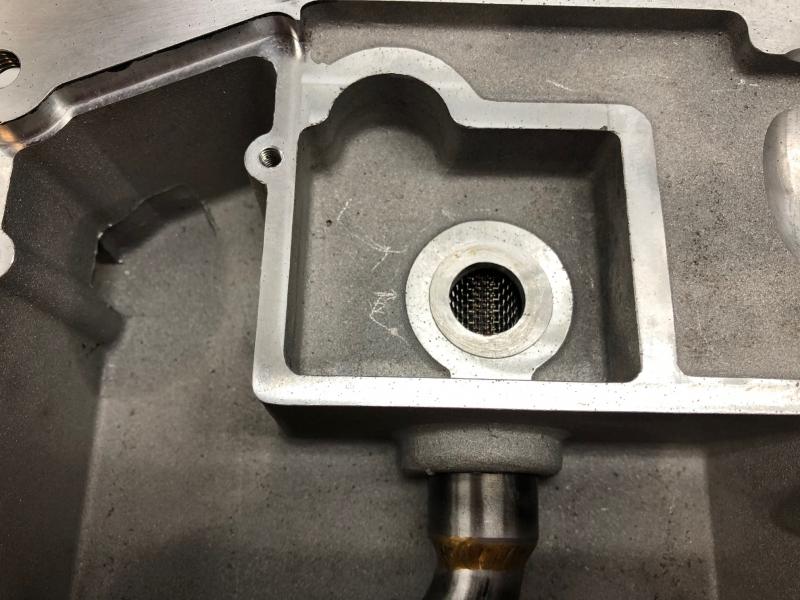
Interesting. I wonder if there are more than two versions? According to Peter, the wedge without an o-ring groove on the sump side has to be used with the thimble assembly, and that requires the top of the port to be opened up from 16mm to 24mm. If you didn't have to do that machining and you are using the thimble, then there must have been an interim version. The photos below were taken from the most current installation instructions and show the assembled thimble, port with larger top section (have to look hard to see the step), and the thimble in place. -John
-
Thanks, but I'm set. The o-ring (actually a gasket) arrived and is the correct part. I'm curious about your update kit comment. Are you referring to the oil pump/oil pickup interface, or do you mean a balance shaft delete kit for the 2.3L? My wedge was machined correctly, it's just that they changed the design after the first dozen sumps and that gasket was no longer used. To convert to the new one would require machining the sump as well to allow the thimble assembly to fit. Thanks, John
-
The part arrived and I just did a test fit; we have a match! Hopefully I can spend some time in the garage this weekend assembling the engine. Which reminds me, has anyone started a pool yet on when I discover the next blocker to that process? -John
-
Thanks. I took the comment that the honeycomb has to be fitted prior to the fuel tank to mean that dropping in from above is difficult due to space constraints. -John
-
I'm surprised Caterham doesn't supply the boot floor in two pieces so it can be easily removed from above for maintenance access. I did my floor that way when building the larger custom boot box, and it has come in handy on a few occasions. Glad you figured out the assembly order of the roll bar and suspension before it was too late. -John
-
Good point. In the future, when pointing out that something isn't that difficult, rather than say "It isn't brain surgery" we can say "It isn't rebuilding a Duratec." -John
-
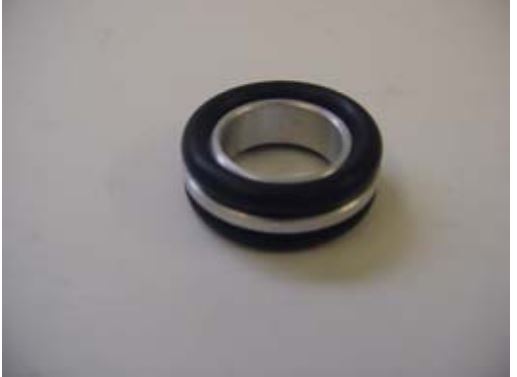
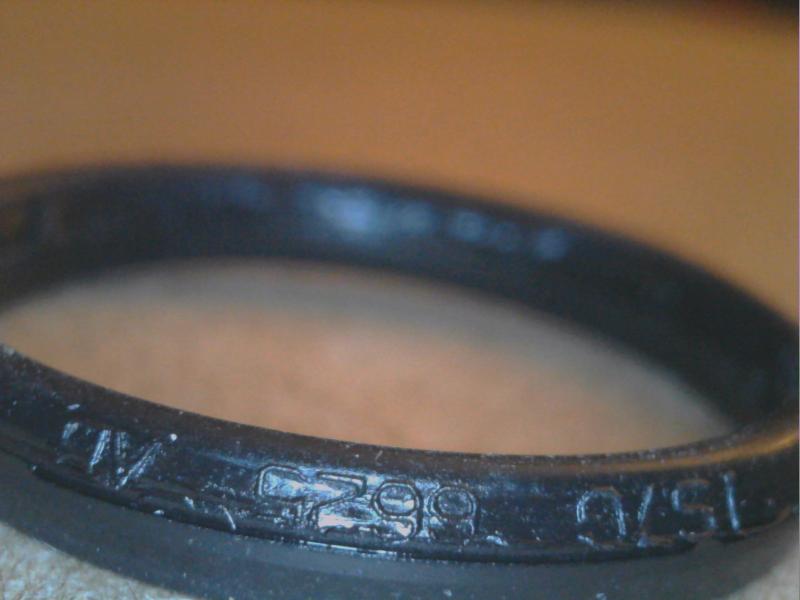
Thanks to prompting from another forum member, I may have had a breakthrough on the O-ring issue. He asked if it was possible the old O-ring was really two stacked O-rings that created a virtual oval. Although certain that wasn't the case, thinking about it, I vaguely remembered the O-rings were pretty distorted, so out to the garage for another look. One O-ring was pretty flattened, but the other was more wedding ring shaped and upon closer examination appeared to have tiny numbers molded into the side. These weren't legible with the naked eye -- or at least not mine -- but a USB microscope shows 1S7G 6625 AB. Closest I can find online is 1S7G 6625 AA, which differs only in the last letter. Apparently that simply designates the version number. Fingers crossed it's the right part and arrives in a reasonable timeframe. -John .
-
Thanks for checking Skip. Sounds like it's time for Keith to update their website. Their Exocet FAQ includes the following; "WHY SHOULD I BUY FROM FLYIN' MIATA INSTEAD OF EXOMOTIVE? Well, we're very friendly and quick to respond. You also get 5% off most of our parts for the next year when you order an Exocet, which can save you a bunch of money as you finish your car." Sounds like the correct answer is "You shouldn't!" :jester: -John
-
Hi Skip, according to their website they changed the Catfish to referral only, but they still list the Exocet as something they sell directly. Did that change? As for the Westfield, they haven't advertised that on their website for a few years and are no longer listed as a dealer on Manik's site. -John
-
Nah, I had to stop doing that a couple of months ago. Given the frequency, my doctors feared I was at risk of developing CTE. These days, I just scream obscenities at the top of my lungs followed by very heavy drinking. In fact, I'm having a big ass martini right now. -John
-
Your best bet is to visit Miata.net which is a major Miata forum in the US. They have a Sponsors page that features a number of companies that could fit your profile. BTW Flyin' Miata was a dealer for the Westfield SDV that was based on the Miata and I believe they are still a dealer for the Exocet. -John
-
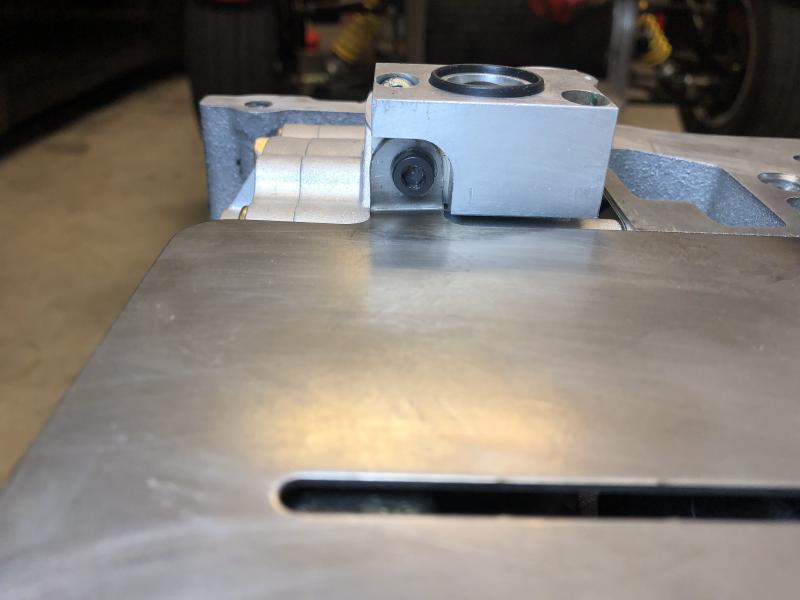
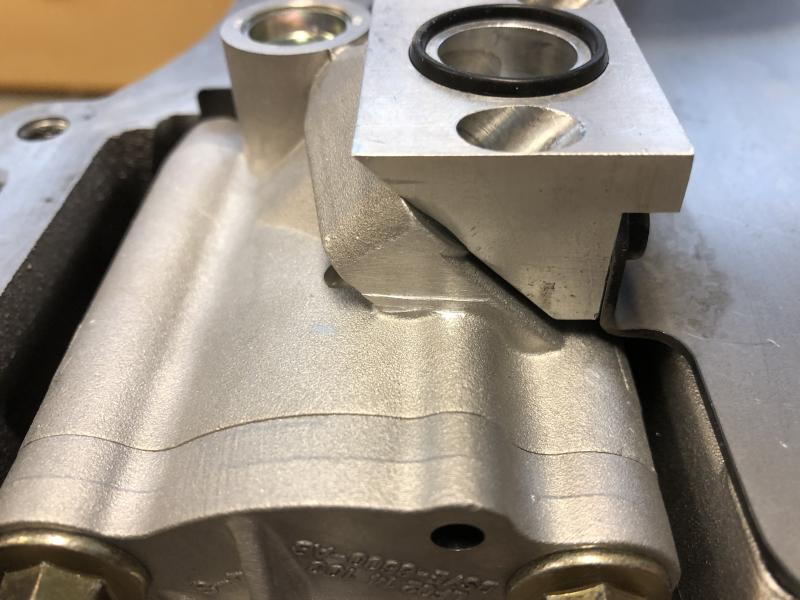
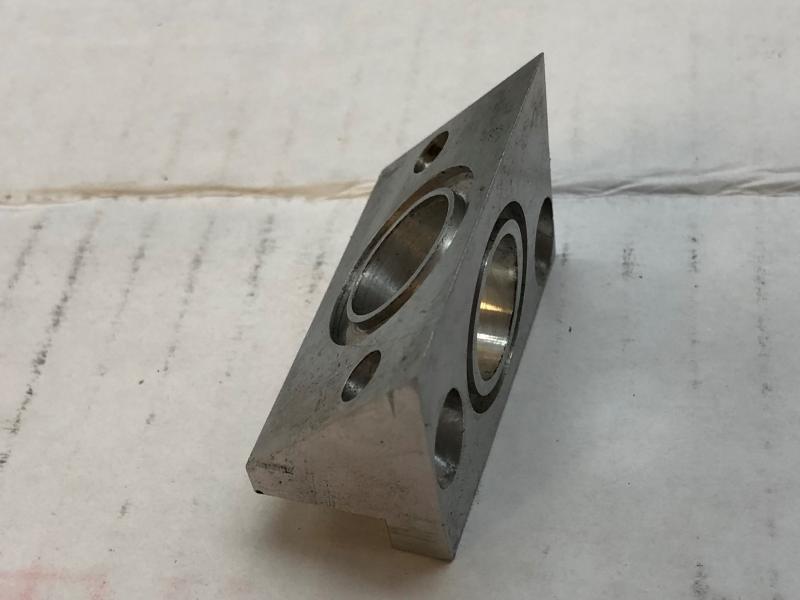
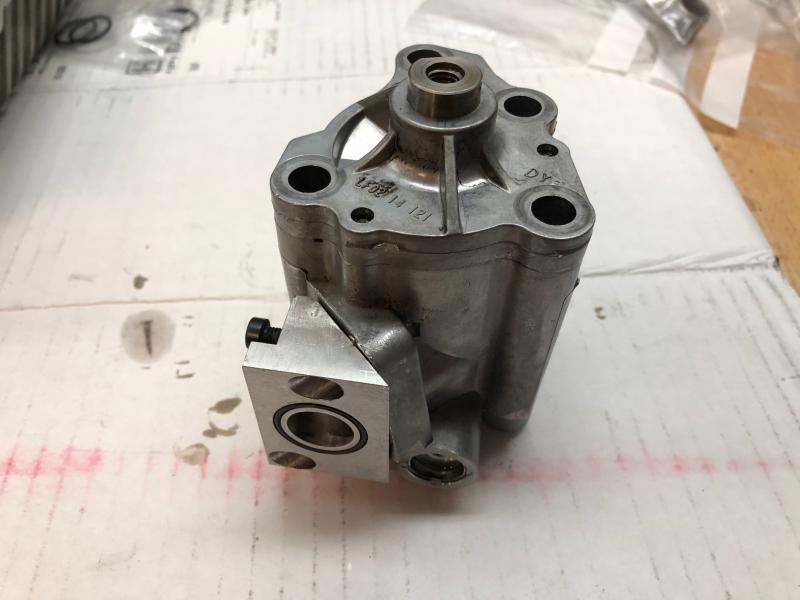
Those of you keeping score at home may remember Issue #3 from this post where I identified that Raceline had changed the sump design since my early unit and had supplied some O-rings in my rebuild package that were not utilized in my version. Peter explained they changed the connection method between the oil pump and the port at the top of the sump that leads to the oil pickup. Both versions make this connection via a wedge-shaped aluminum block that bolts to the oil pump and seals that area with an O-ring, but these wedges differ on the sump port side. My version has grooves cut on both faces of the wedge to accept O-rings, but the new wedge only has a groove cut into the oil pump side. The sump side is machined flat and seals to the sump via an O-ring assembly that is pushed into the sump port. This assembly, which Raceline calls a thimble, consists of s very short aluminum tube to allow oil flow, with O-rings fitted to the outside at each end. To accommodate this approach, the sump port is drilled to a much larger diameter and is reduced down to the correct size via the thimble. Apparently this newer design made it easier to assure that the hole in the wedge and the sump port are perfectly aligned. These photos show the sump port, wedge, wedge temporarily attached to the oil pump, and the pump/wedge assembly sitting on the sump port. Things turned interesting on Saturday morning when I started to assemble this area. After removing the old O-rings on the wedge, I discovered that the grooves are cut to accommodate two different size O-rings. One looked like it would accommodate the 2mm x 19mm O-rings I was supplied, but the other was a smaller diameter and the groove was much larger. Out came the calipers to measure both grooves: O-ring 1 Outer Diameter = 23.52mm Inner Diameter = 19.66mm Groove Width = 1.93mm Groove Depth = 1.98 - 2.21mm (this varied a bit) O-ring 2 Outer Diameter = 23.88mm Inner Diameter = 18.08mm Groove Width = 2.92mm Groove Depth = 1.32mm Looking at groove 1, there is a problem. The groove is deeper than it is wide, and is not machined to uniform depth. That means that an O-ring which will fit into the groove won’t protrude above the surface and create a seal. I connected with Peter at Raceline this morning and shared the pictures and measurements. He seems to recall they used an oval cross section O-ring from a Zetec oil pick up tube, but will have to do some digging to confirm. Looking on RockAuto, the Zetec in the Focus doesn’t appear to use O-rings for the pickup tube and digging through websites of O-ring suppliers and manufacturers, no one seems to make oval cross section O-rings. I ordered some plastigauge this weekend and will use that to determine the actual clearance between the wedge and sump port. If it’s really tight, liquid gasket may suffice which is the easy solution. If the initial design really did use an oval O-ring that is now unobtanium, then a trip to a machine shop to recut the groove may be the answer. This build remains…um, interesting. -John
-
I had the same thought. Prior to those tweets I had no idea he was a car enthusiast. Learn something new every day... -John
-
It's a long shot, but do you have 4-pots up front with inner bleed screws that you didn't bleed? -John
-
The Lotus Elan forum has a very active thread where people chime in with brief updates on what they've recently done to their Elan. Let's see see how that concept works here. Doesn't matter if it's a repair, maintenance, upgrade, taking it for a drive, or just sitting in it making vroom vroom noises while drinking your favorite beverage and waiting for local lockdown orders to expire. If it's tied to your se7en but you don't feel it warrants a dedicated thread, then share it here. Since I already have a long, active thread about the current damage I'm doing to my Westfield, I'll start things off by admitting I sat in the car today during lunch -- I plead the 5th on drinking a beverage and making vroom vroom noises -- and reminded myself of that aspect of the driving experience. I can't wait to get this sucker back on the road. On a more productive note, I also played around with placement for a USB port. My objective is to keep it hidden when not in use, but easily accessible when the phone needs power, so I'm thinking about affixing it behind the dash with velcro. When needed on tours, simply pull it down and plug in the device. Ok, who's next? -John
-
Back when I looked into this, the exchange rate was far less favorable than it is today. If I were looking for wheels now, I'd be very tempted by a 3-piece from Image Wheels. Lots of choices in design, size, and offset, and the billet versions are very light. At the time they quoted a 13x6 at 8.6 lb. -John