NSXguy
-
Posts
207 -
Joined
Content Type
Profiles
Forums
Store
Articles
Gallery
Events
Library
Everything posted by NSXguy
-
negative- they fit good; no rubbing

-

Tracsport T9 Semi Helical Gearskit Options
NSXguy replied to PJJackson's topic in General Sevens Discussion
Yes “big tooth” gears will be noisier than standard gears but less noisier than straight cut gears. It’s the trade-off for the increased torque “handling” capacity. No free lunches as the saying goes... oems use helical gears(and lots of them) to give quietest, smoothest gear engagement for your normal road driving but at an expense. A bigger tooth (and fewer) is an upgrade for spirited or Motorsport, with its own noise compromise. Then straight cut for pure Motorsports/ ultimate performance but then you get all the noise. so in short, what you are experiencing is normal. You will typically hear the gears more at idle and low load. -
that's a beautiful ride. You'll enjoy it!
-
The Toyos are a good enough alternate while waiting for the novas (if that’s the ultimate desire). Even caterham (the company) have offered them on new cars since Avon supply dried up.
-
That’s awesome and I agree on track is one of the best ways to experience the full potential of a 7. I know it’s a hike, but hope you can join us at NjMP next year, dude.
-
sent Josh a message- he’s usually pretty responsive.
-
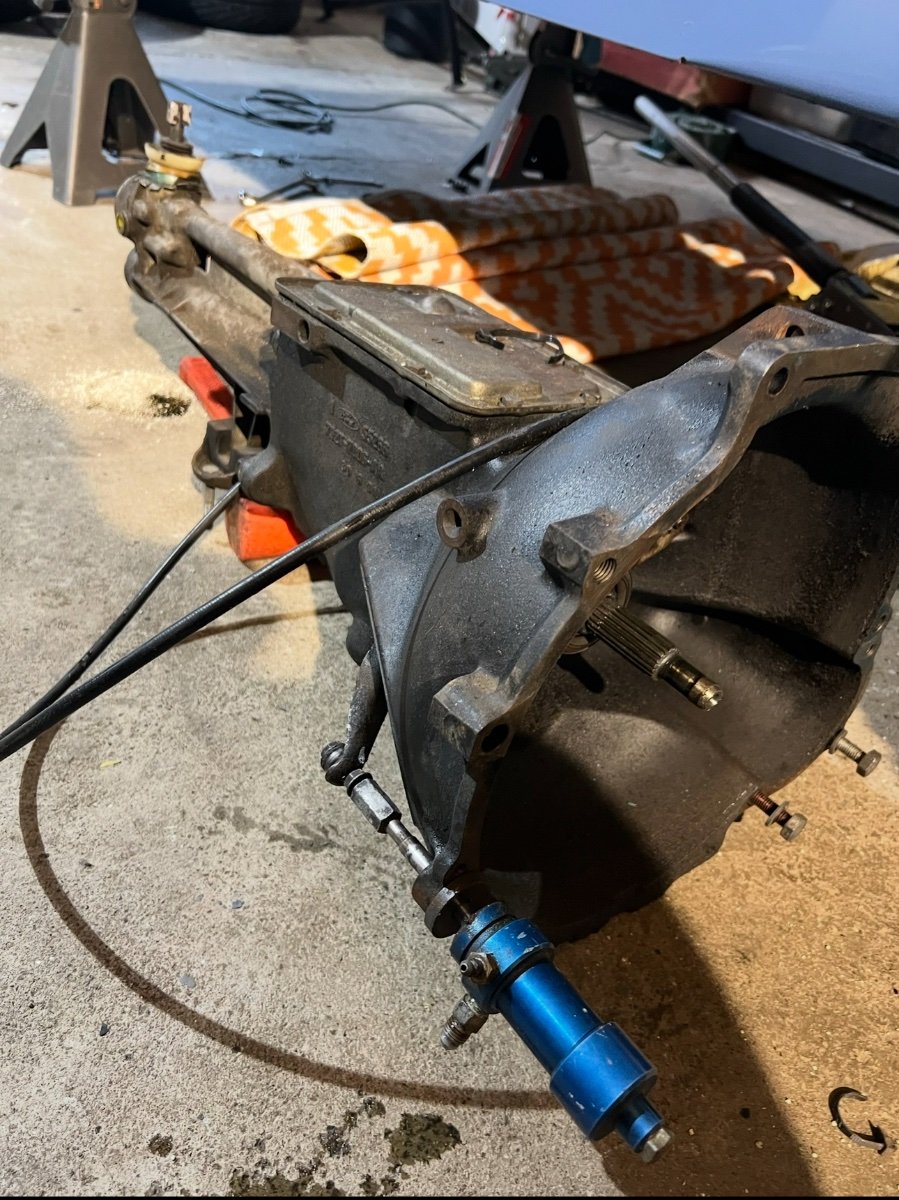
Correct- have shared similar observation before that it wasn’t a coincidence that many period lotus and caterham 7s have this typical blue pull-style slave cylinder installation/conversion. The web is littered with exhibits. Now we have proof in documentation of the bulletin. Thanks for sharing . Most of those installs would be pushing 40yrs in service and should be considered to be past useful life and in need of replacement.
-
Crossflow Cooling System -Overflow Tank or Expansion Tank
NSXguy replied to KS7's topic in General Tech
there’s really no need to “upgrade” the cooling system especially for a mostly road driven 7; unless you just want to, of course. It works well in current configuration even in a track situation- I can attest . For your cooling system baseline I would say: -replace the thermostat -new gasket on the housing -new cap (I believe 13lbs) -new 50/50 mix ford green coolant, -the overflow hose to the overflow tank - if overflow tank holds, no need to replace unless for aesthetics -probably won’t hurt to flush the rad (and heater heatexchanger) while everything is off -water pump is fairly inexpensive; would throw a new one in as well (while you’re in there) -make sure you put enough coolant and bleed system thoroughly should provide lots of trouble free miles and smiles, at least for the coolant side. I have a more comprehensive checklist for a “new to owner” analog car baseline process. -
I’ve never carried a spare, did away with the carrier and associated weight pretty much soon after getting the car. Personal preference/risk appetite; but the amount and type of miles driven never warranted. I’m currently on 13” minilites on Toyos for street/track. Before that I ran my (now) spare set of 14” panasports on falken rt615k (195/60)- they were good street tires wet or dry… I thought the fell off pretty quickly on track though.
-
Crossflow Cooling System -Overflow Tank or Expansion Tank
NSXguy replied to KS7's topic in General Tech
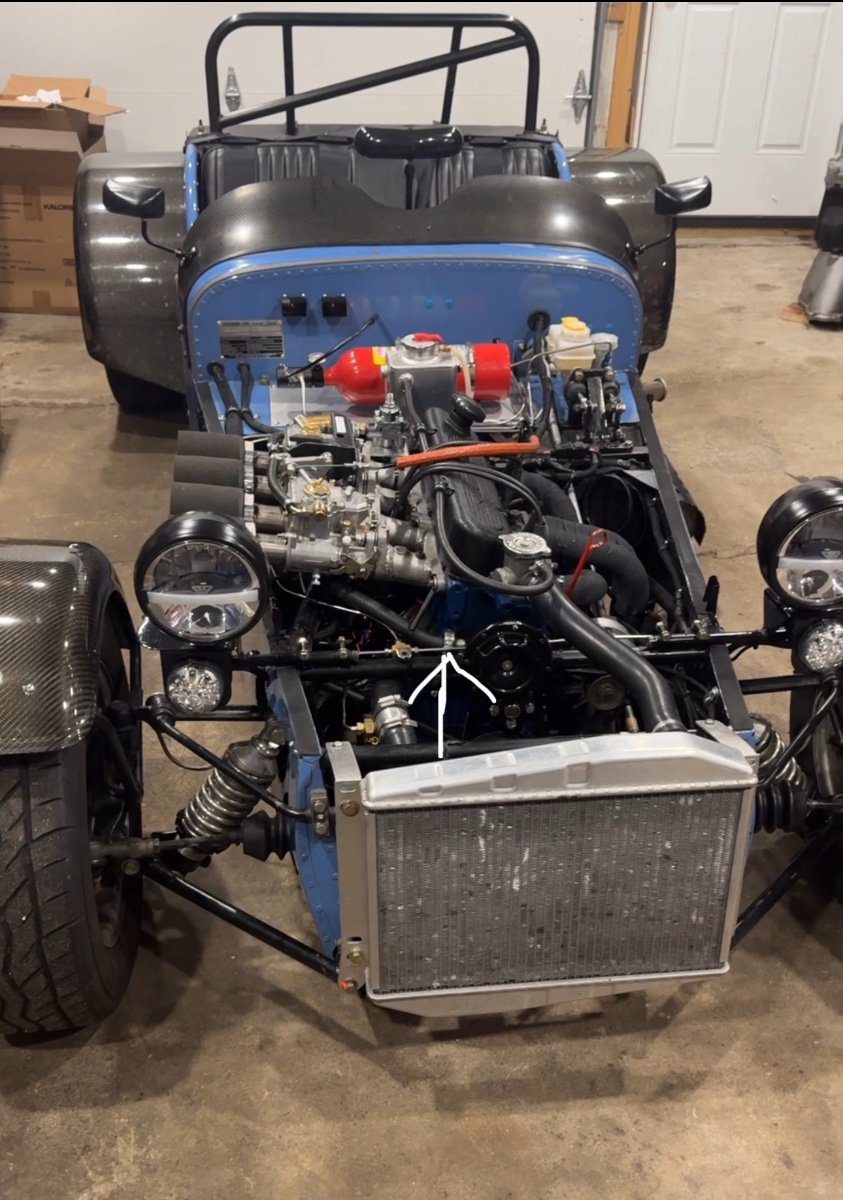
for your visual interest… Sharing some photos from when I did a closed system. I have since removed as I wanted to declutter the engine bay and simplify. Either system (open or closed) works well if properly installed. as MV8 mentioned, Tee off the heater hose circuit or if no heater then just connect to the water pump neck (reference the photo with the arrow ) and route the line (larger ID) to the bottom of the expansion tank. Smaller ID hose will go from nipple on existing thermostat housing to small nipple on expansion tank you’ll want to cap off the existing thermostat housing with a non pressure rad cap and then use a ~13lb rated cap at the expansion tank. some expansion tanks have a purge/air bleed nipple as well.
-
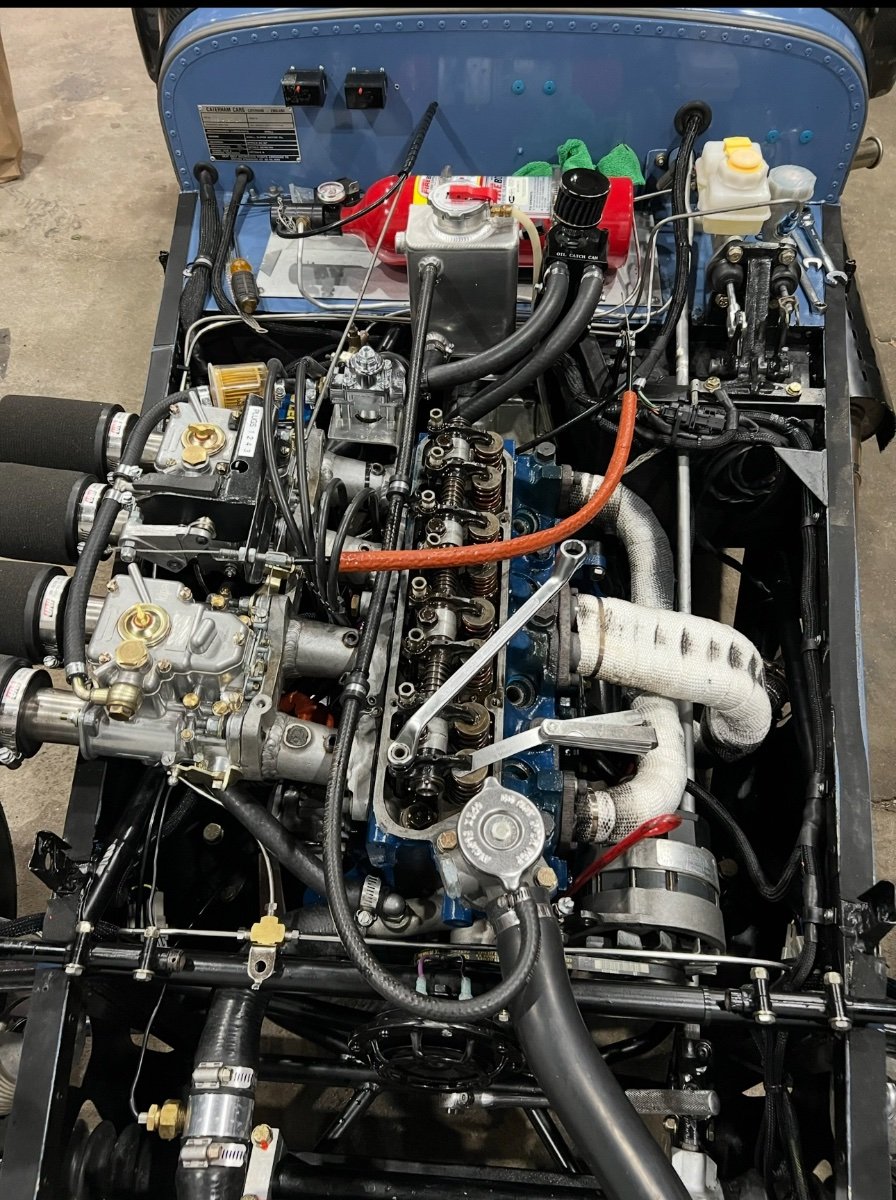
Not a short list i admit, but... -Fuel swirl pot (major considering would be where to place the fuel swirl pot (in the rear or reluctantly but more convenient in the engine bay) -low pressure lift pump -high pressure fuel pump -fuel filter -high pressure rated fuel lines supply and return (thankfully i already ran hard lines when i refreshed my 7) -fuel pressure regulator -Fuel injectors Ignition (distributorless wasted spark or modify spare dizzys for cam signal to do sequential spark and fuel) - Crank trigger kit (either DIY or order online) - Ford VR crank sensor - Ford coilpacks Air intake -DCOE style induction units with TPS (although i've considered a custom plenum and single TB... will try not to get carried away) -Throttle cable mounting (unless DBW is utilitized, then just wiring to TPS and PPS) Hardware & wiring -New wiring harness, fuses, relays and sensors (IAT, water, TPS, 2x map if doing plenum with TMF) -Related - Driveline considerations; Gearbox is rebuilt so should be good and clutch is newer so should handle load just fine -other bits and bobs, misc hardware to make everything fit. Engine management - Multiple options(lots inexpensive or even good second hand), but will likely wire to accept emtron SL4 as thats what i have running the cossie and it's a solid package( probably overkill but i already have the ecu) If i do a plenum and single throttle body, i can then set it up for DBW with emtron's proprietory TMF air flow modelling strategy (which i'm using on the cossie) for oem level performance such as cold start/idle/part throttle driveability as well as increased flexibility on torque modeling/delivery... again depends on how carried away i want to get. ITBs would probably be the quickest solution to launch with and then next winter if i wanted to play around with plenum/DBW, can do that. Plan would be to keep power and loading in a way that doesn't overwhelm the standard rear end. I would think a reliable 150/160 is feasible on a 16XX the race spec Xflow.
-
I don't have any problems with my Dcoes and efi conversion is not difficult for me other than allocating the time. I will happily buy the bits from the overwhelmed fellow to potentially save some costs :-)
-
No solid plans, but i may get tempted to efi the old trusty xflow before spring time... We'll see.
-
Thanks and looking forward to it. Date saved.
-
I'm very luck to have an older neighbor who appears to "keep watch" overnight for any and everything that happens in the vicinity. But i do have Harbor freight locks on the trailer wheels as an added layer.. for the one day he's off his game and dozes off lol
-
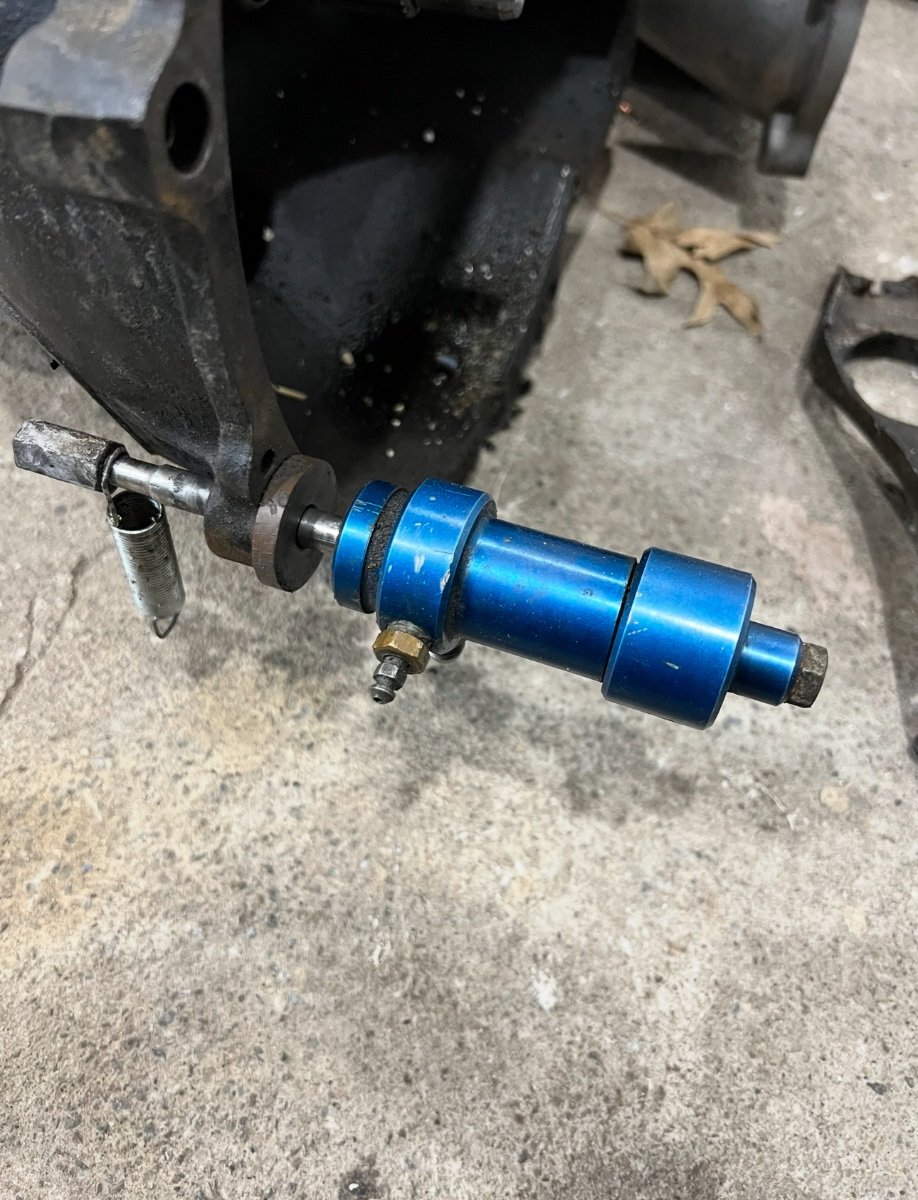
That's a good obvservation. I definitely agree that ideally, an engine mounted bracing should be the goal. While not impossible to do on a xflow (easier on other engines), practically a bit more involved on a x-flow due to availability/proximity of existing mounting locations/threaded holes/bosses for a bracket. I suspect it is for this reason that many of the Xflow 7s cylinder installations i've observed are as they are and don't come with a rear brace; which still works OK but IMO not ideal for the optimal performance. In my case, I did consider a few engine mounted alternatives when doing the "upgrade"; but not wanting to implement an exotic solution, opted for the simpler setup pictured. As a hedge, i purchased a spare cylinder in case the rigid mounting resulted in premature/accelerated failure, but so far have not needed it as the unit has worked reliably through many years of normal city driving and several days of hard driving on track. YMMV- By no means the only viable approach; one can expect with an assembly prone to more vibration, or overly compliant mounts, results might vary. And of course, a concentric slave cylinder eliminates these concerns, but comes with its own set of trade-offs. such is the nature of the beast. I would say, as an improvement to my original install, rubber bushes can be added for and aft of the heim joint or on the mount/bracket for some damping.
-
Help picking a tow vehicle and trailer for my Caterham
NSXguy replied to savagete2860's topic in General Sevens Discussion
Thats a lovely setup. i would rock it. -
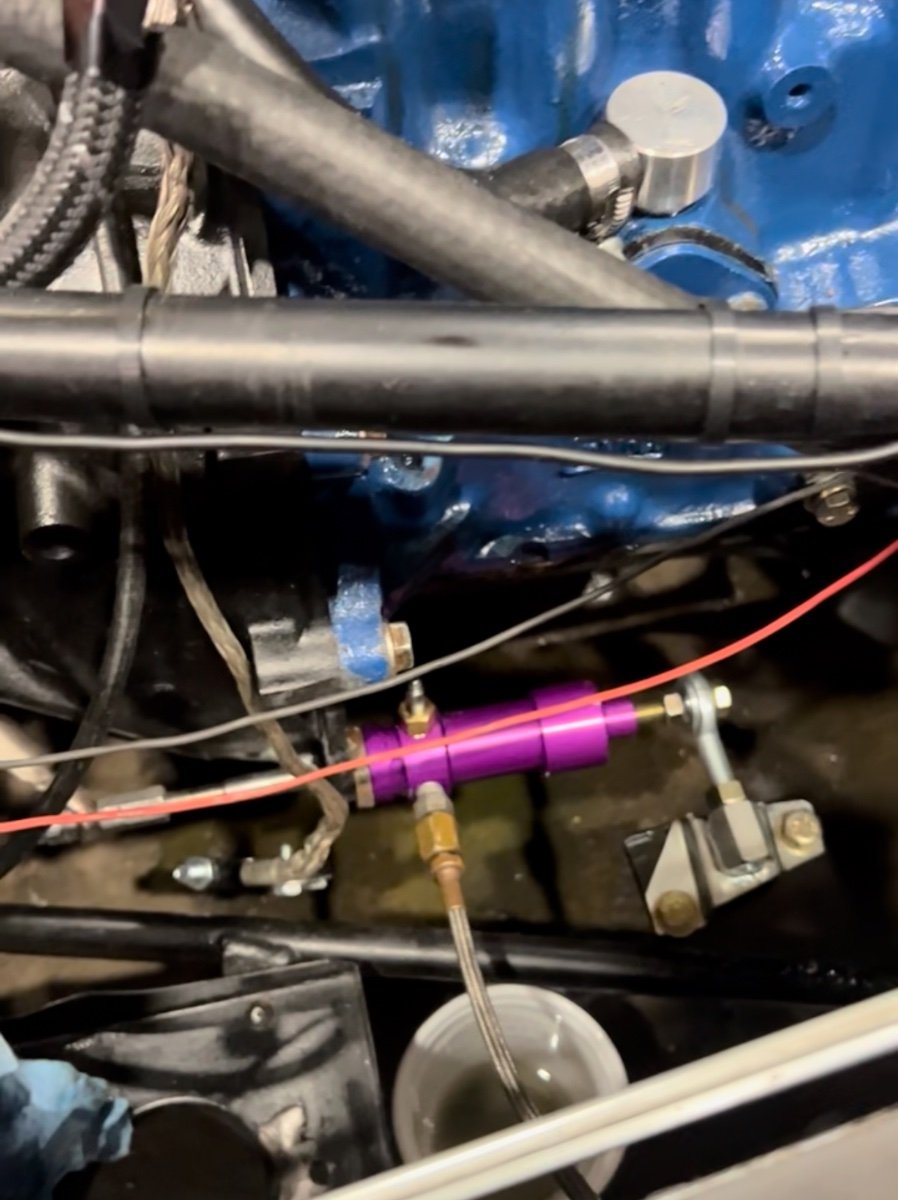
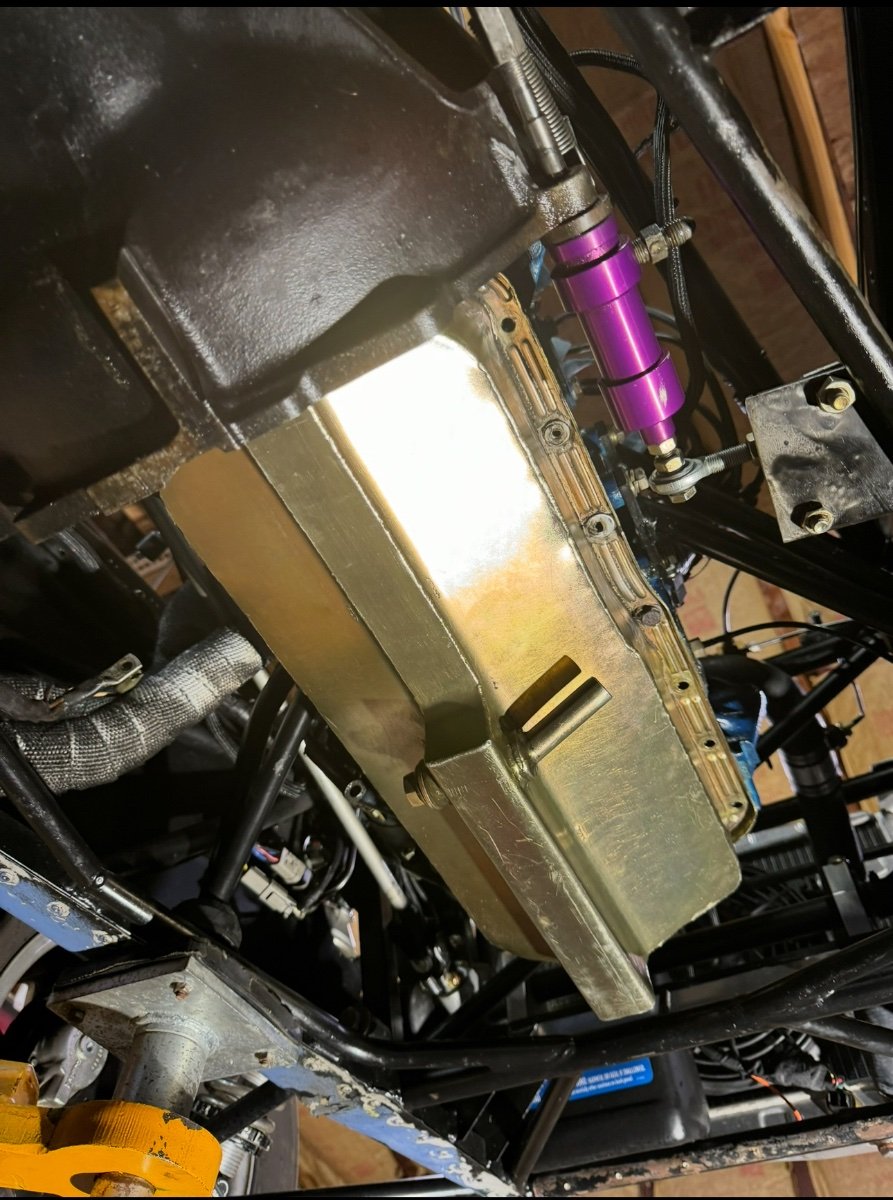
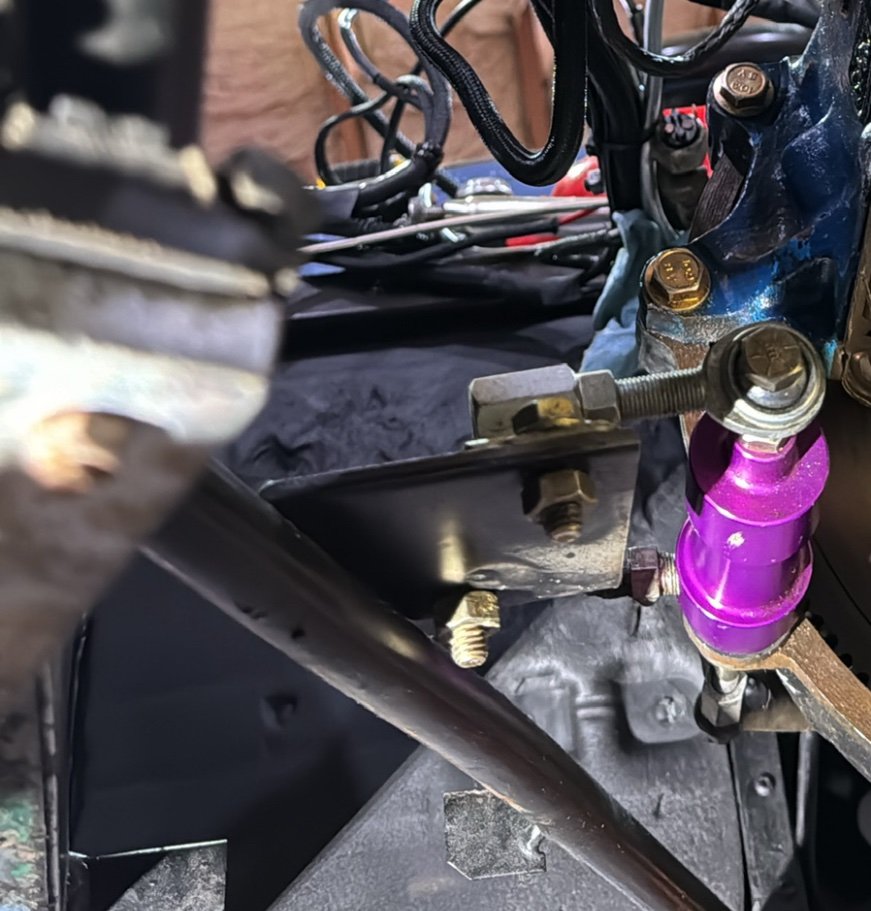
I had the same blue one when I first purchased my 81 cat. Swapped it out during my baseline process as it was leaking like yours(it’s probably a very old unit). i installed the speedway unit and decided to fab a plate and purchased a bracket and threaded heim joint to support the back of it for a more robust install. The original configuration/assembly was prone to flex. (Refer to attached photos) links to bracket and heim joint: Hyperlink to clutch slave cylinder bracket Hyper link to clutch slave cylinder heim joint
-
Chris from Redline Components can sort you out. He's very knowledgeable on the early 7s and would be the best 1 stop shopping solution for all the bits you need. Granted, I haven't ordered anything from him in many years so not sure how/if the shipment/tariff shenanigans have affected his desire to send stuff here, but email is the best way to contact him and list the items you want. Redline Components: https://redlinecomponents.co.uk/
-
I like to do a full baseline whenever i acquire a new analog/classic car, especially if i don't have a full history or high confidence on the state of the car. It's a great hedge against getting stranded on the side of the road. So i'll share a few things i would recommend; I personally go deeper than this but this is probably a good rational place to start and you can add/subtract as you see fit. Fuel system. -Replace any existing rubber fuel lines (i believe they'll be 5/16" or ~8mm) -replace fuel filter- NAPA PN 3002 -Check operation of pump if electronic, confirm fuel pressure. Webers like <3psi -go through Webers and clean/recondition. -i would diassemble but if not comfortable; check internal filter. floats, jets at a minimum. clean any gunk at bottom of bowl. Brakes: -Replace lines if needed. -Refill with new Dot 3/4 and bleed. -inspect front caliper for proper operation. pad likely good as they go a long way on a 7. -Is rear Dedion or Live axle(looks to be newer chassis based on X brace in nose so could be DD). Either way. same as front. if live axle, check brake shoes, adjust hand brake. if dedion, check calipers/pads/handbrake -Older 7s had a hydraulically actuated brake pressure switch. confirm operation and replace if necessary. don't forget to bleed this location as well if it has a nipple as it may affect rear circuit. Hydraulic clutch: -Check and replace line if needed. -refill with Dot 3/4. -CLICK following Link to slave cylinder replacement - HYPERLINK TO REPLACEMENT SLAVE CYLINDER -Adjust clutch pedal if necessary to suit. Coolant circuit: -Drain fluid. flush engine and radiator and replace with new green Ford motorcraft or equivalent coolant- 50/50 mix. -replace coolant lines- to heater and rad (can order from UK or piece together from hoses at NAPA) -check and replace thermostat and cap. -Inspect waterpump (relatively inexpensive), so i would just replace if been sitting in coolant for a while. HYPERLINK TO REPLACEMENT PUMP -Check- operation of fan switch. doesn't seem to be connected in photos. Can have on a switch if desired. Ignition: -check distributor cap/rotor and leads. This is one of those items that would leave you stranded. I would recommend replace for -peace of mind. -Replace spark plugs - Champion plugs work well. (N6YC) or Autolite AR51. -Confirm timing with timing light. -Firing order FYI- 1-2-4-3 Oil: -drain and replace - Use Valvoline VR1 20/50 -Napa oil filter - PN/ 1516 Assess Engine Health: -If you have boroscope; doesn't hurt to put one down the bores to gauge. -Do a compression check. -Do a leak down check. -Check and adjust valve clearances. Drivetrain: -Depending on gearbox, may not be able to access drain plug. If so can suck out from the top. Refill with new Redline 75w85 GL-4 fluid or equivalent. -Drain and replace rear diff fluid (will depend if LA or Dedion). Either way should be able to use 75w90 GL-5 Redline or equivalent Suspension: -Check all bushings for wear and replace as necessary. Can order any new ones from Chris at Redline Components (UK) Electrical: -Go through relays, fuses. ensure everything works as intended. I decided to add standalone circuits for high load components to help with reliability. Hope this helps, Dez.
-
First thing i always ask if i'm helping diagnose something is; has this always persisted or did you make a change(hardware or calibration) before the engine started the intermittent starting issue? If your cold start and warm up enrichment is off, i would refrain from cranking too many times hoping for it to start. Cold starting is a high stress/wear state generally. If it's injecting too much fuel and washing cylinder walls without ignition you don't want to be cranking excessively. For an engine to start from cold, you need enough fuel enrichment(not too much, not too little), so enough prime pulse and cranking fuel, enough air and right spark and timing. All those have to dance in harmony for start to happen so it's just a matter of finding which one of those factors is not showing up to the party or not dressed properly (malfunction or not getting signal). Verification (a Multimeter/Timing light works here): If your pump is priming, which it appears to be doing, you can verify that your injectors are receiving signal and spraying during cranking (can verify physically or check voltage at injector when cranking). i suspect they are working and flooding your cylinders due to all the cranking i saw in the video. Next you want to ensure the charge can be ignited; you can check your coils are firing during cranking (again, can do physically by setting up a test with grounding coil/plug to a ground; or if not comfortable with, check voltage at coilpack while cranking). Another simple issue could be fouled plugs from excessive cranking and enrichment (remove plugs and check to verify- see if they are overly sooty or wet). I doubt the fuel system will drive the signal to the red light next to your speedo. It's more likely it has to do with ignition related status or some other condition/signal . I'm not intimately familiar with 620 architecture and glanced through the thread BUT watched the videos. Thats the basis for this reply. Another thing you can do is verify crank/cam sync - but it's a higher order test so i would suggest you do the basic ones first and report back. If you had access to the ecu programming via data connection/logging diagnosing would be easier. but some of the factory ecus come locked out. So I recommend working through the clues as they present, if it starts repeatedly and immediately when the red light is illuminated, then look at the wiring diagram or trace the wires to determine if correlation=causation; what it's for and what components are linked to it, then follow the clues from there until you arrive at the root and can either replicate the condition at will, or determine what controls the lights illumination.
-
You’re welcome.
-
i shared this last year on another thread as a replacement alternator for Xflow powered 7s. You might want to consider if applicable. https://www.amazon.com/dp/B00ZYNNBH2?ref_=ppx_hzsearch_conn_dt_b_fed_asin_title_2
-
It turned out beautiful! Though it also appears that the restoration took quite a toll on your co-driver
-
You're gadget master!! I will order one as well and play around with it. Comparing values against other stand alone gauges. I can see this being a neat tool on track if the data proves reliable.