anduril3019
-
Posts
147 -
Joined
-
Last visited
Content Type
Profiles
Forums
Store
Articles
Gallery
Events
Library
Everything posted by anduril3019
-

Looking for Lotus twin cam mount patterns
anduril3019 replied to Healeyracer's topic in General Sevens Discussion
From the pic it looks like the mounting points are close and the standard Lotus or Caterham type mounts would work. I'd mock it up to be sure. MV8 mentioned the XKE mounts, you can find them at most Jag/British parts suppliers: https://bpnorthwest.com/jaguar/mount-engine-jaguar-to-1971/?srsltid=AfmBOoqDKjDGDW_xK-NKfiNC1KEGSeQ9LjDxc2DI0gqZhte16fSMHKLQ Not sure if the FF mounts will help or not, but they may be a starting point. -
Looking for Lotus twin cam mount patterns
anduril3019 replied to Healeyracer's topic in General Sevens Discussion
The mounting bosses on the left side of the 711M block are about 3/8" thicker than other ford blocks, but they are often milled down to match earlier blocks if an engine is being replaced. Just make sure you double check if using other mounts or engines for reference. -
Looking for Lotus twin cam mount patterns
anduril3019 replied to Healeyracer's topic in General Sevens Discussion
I've used this at Send Cut Send, it's not dimensioned but I was happy with the fit. The bolt holes are 11/32 for 5/16 bolts. I'd print one on paper and cut it out to test fit before you commit to steel. Illustrator file and pdf. Motor Mount Side Plate.ai Motor Mount Side Plate.pdf -
I can also confirm it's a real deal. (Mine are also still sitting in a box! )
-
Starting at @ 0:55 is about how my wife describes my project to her friends. (she's a good sport) Now jump to 2:17 and I just remind her, "But look how much fun we'll have...!"
-
http://www.blueskyracing.com/index.htm
-
Are there many Lotus produced Seven owners on this forum?
anduril3019 replied to EdWills's topic in General Sevens Discussion
With all the unknowns on tariffs, as well as NOS items getting harder to find, it's a good idea to capture and reuse as much of your original smoke as possible. -
Extra points for the Campy logo.
-
Are there many Lotus produced Seven owners on this forum?
anduril3019 replied to EdWills's topic in General Sevens Discussion
Also not many home-built or "Locosts" on this site. Locostusa.com has been the home for that niche, but there are often tech issues with the forum, partially due to waning interest and/or participation. I'm a locost builder, leaning toward original Lotus style, and glean something of interest here almost daily. -
FWIW I inquired about a set of wheels I'm thinking about from retroford.co.uk and got this reply: We frequently send parts to the US and have had no issues with shipping the goods. We do not charge any taxes on the goods when exporting; you would need to organise the import taxes/duties to be paid with the shipping provider (typically UPS or FedEx). Additionally, all goods imported in to the US from the UK will now be subjected to a 10% tariff on the value of the goods.
-
I came across this article on lotuselans.net about repairing capillary tube gauges and it seemed like fun to give it a shot. I just happened to have a water temp gauge I bought cheap on ebay thinking I might use the face and needle on another gauge, so it seemed like a good candidate for repair with nothing to lose. The article on lotuselans.net seems to be based on some other articles with good details: https://forums.lotuselan.net/t/smiths-dual-oil-water-temp-gauge-repair/24987 https://mgaguru.com/mgtech/dash/dt102b.htm#:~:text=Measured diameter of tubing on,is used for electrical wiring). https://www.ply33.com/Repair/tempgauge#:~:text=Do not use a torch,fit for the old capillary. I won't rehash the links above, for more "how-to" detail, read those first, but here are a few things I ran into. The first thing of note is the article suggests finding a cheap mechanical gauge at Advance Auto Parts for $15. That was in 2018. I didn't look too hard, but the best I could do was about $30 for a Dorman gauge on Amazon. One thing to watch for, some of the gauges advertised as analog, or mechanical, use an electronic sending unit and wire that is covered with a metal coil that looks like a capillary tube, don't get one of those. If there is any tube left on the gauge, I think the best way to attach the new tube is to sleeve and solder as mentioned in the article. Mine had a very short stub left so I first tried to de-solder and remove it, but felt like it was getting too hot without releasing the solder. So, I filed the stub flat and drilled it out. The new tube measured .050" diameter, so I drilled the gauge back out with a #55 (.052") drill. That proved to be too tight, and the next best thing I had on hand was a 1/16" drill, so, a little loose, but in the end it worked. I drilled it about 3/16" deep and made sure the ID was clear using a sewing needle. The next step was getting cold water to keep the bulb contents (ether?) in a liquid state. Out of curiosity, I wanted to see what temperatue difference I could get between plain ice water, and salted ice water. Plain ice water got down to about 33° by my kitchen thermometer. I took that chilled water, strained out the ice, and was able to dissolve about 1 1/2 tablespoons of salt in it. After adding fresh ice, the temp dropped down to about 25°. The next step was chilling the bulb and cutting the tube. I was able to work the coil shield back a couple of inches and expose the capillary tube. I cut it with a cutoff wheel so as not to crush it, then dressed the end and cleaned it out with the sewing needle. I tinned a section of the tube before cutting thinking it might ensure I didn't clog the tube with solder. After cutting the tube, I was trying to push the coil back a little further and got a little spurt of liquid out the end of the tube, I must have compressed something. So care is warranted, and safety glasses! Now is when I found my drilled hole to be too small. The tinned end fit fine in the 1/16" hole, not too loose. Since it was hard to de-solder in the beginning, I was worried about getting enough heat into it with a soldering iron and no flame, but it actually soldered pretty quick and seemed like a well flowed bond. Now is when I wished I'd thought of some kind of strain relief. I'll add something after now. After what seemed like a successful connection, on to testing! As my water temp rose to around 100° there was no needle movement, the gauge starting at 90°. So, I figured, oh well, nice try, and was deciding whether I would try again or not. But as the water temp rose, the gauge started to move! At boiling temp, it's within a few degrees of my thermometer. Probably not as accurate or responsive as a modern gauge, but good enough that I can call it a working gauge! I compared it to a working dual gauage I have, and temp read about the same. All-in-all, I'm calling it a success!

-
- 4
-

-

-
I have an old adjustable drafting triangle. Not doing much drafting duty these days so it lives in the shed.
-
Never assume what may or may not interest others! I'm building a Locost and after reading your post, I had to run out and measure my seat back angle. It's 63.5, so I guess I can't call it a replica anymore.
-
Looking for a rabbit hole to go down? Try The Internet Movie Car Database Lotus 7 (Mark VII) page here: https://www.imcdb.org/vehicles.php?make=Lotus&model=Mark+VII&modelMatch=2&modelInclChassis=on
- 1 reply
-
- 3
-
-
Here are mine. Looking at them now, I'm not sure why I didn't use stainless steel. But as far as the work from SendCutSend is concerned, I'm completely satisfied. In terms of cost, it's always a personal calculation: How much time will it take me to make them myself with limited tools, will they look as nice and function as well, etc.. There's also a pretty significant per item cost savings for higher quantities.
-
Nice! I made almost the exact same parts through them, but all 1/16" thick, I like the thickness variety of yours.
-
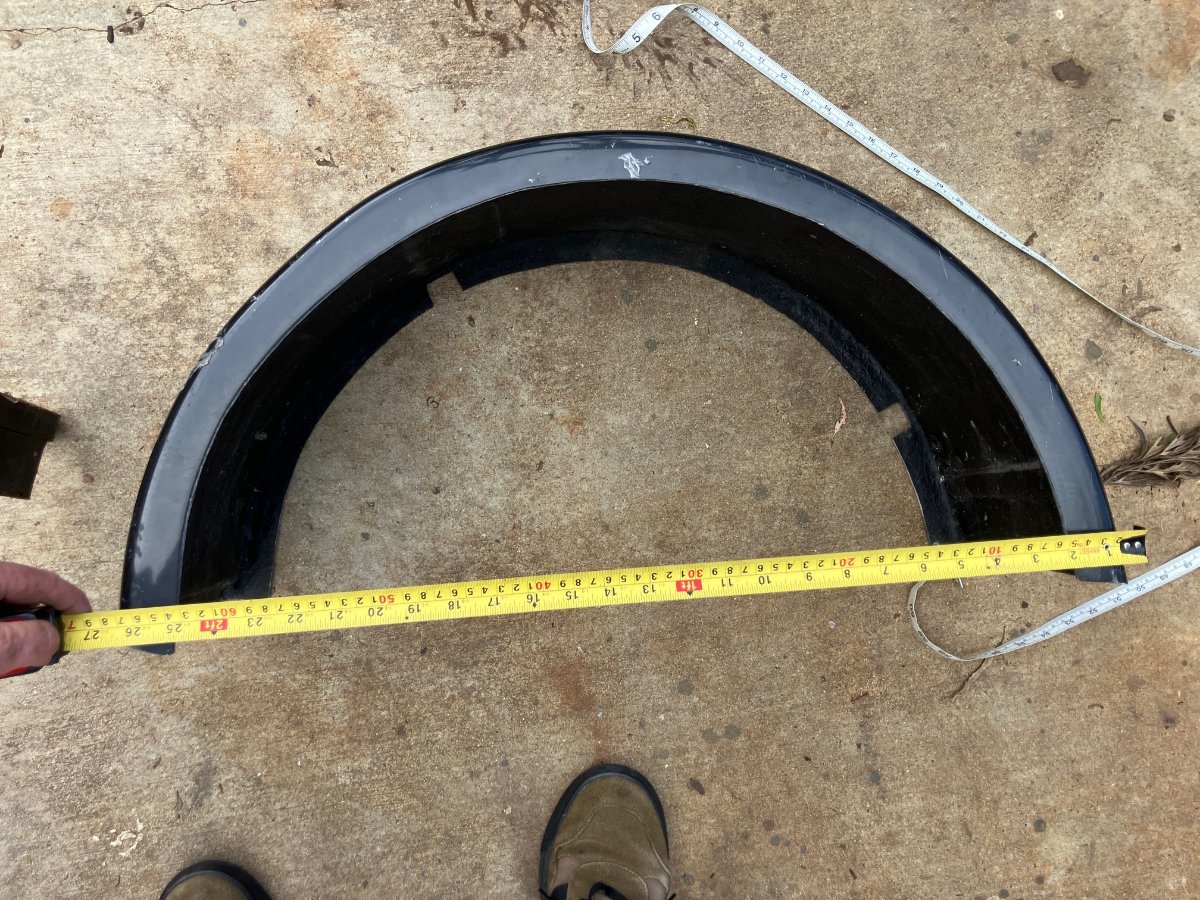
These are 10" wide x 40" long x 26" diameter. They are in good shape, what looks like damaged fiberglass is just stretch wrap that has decomposed. They came off of a Caterham with 13" wheels, mounts are for Caterham/Triumph uprights.
-
I may have a set. I can send you dimensions tonight. Can you explain what you mean by "not long enough"? Are you measuring diameter?
-
Same here! It will be a while before I can use mine, but looking forward to comparing notes with others. The fixture is basically just a way to get consistent readings on either side of your phone without button interference. Something similar could be made pretty easily, but I decided to give their fixture a try. I'd suggest steel conduit or aluminum tube. PVC is too flexible, it makes it hard to get your string tight enough.
-
Great minds... One of my goals is to get mine done while my dad can still drive, or at least go for a ride in it. Seems to have a few years in him still. Photo is circa 1967.
-
The slippery stuff is supplied through the #1 rocker stand to the hollow shaft (plugged at both ends) which then feeds each of the rockers. The oil then passes out through the small hole in the top of each rocker and splashes around to lubricate the pushrod tops and valve stem tops and guides. The solid spacers don't really rotate, except from vibration, and the thrust on them from the rockers is minimal, so the oil bleeding out the rocker pivots as well as the external oil flying around is plenty for the spacers. With the type of steel rocker stands you have, typically all four are drilled for oil feed, even though only one is needed. They are rare, but I have seen sets with only a single stand drilled for oil, which means no oil will get to the head if that stand is in the wrong position. (ask me how I know )
-
New Member: looking to build a 7 series 2 from scratch
anduril3019 replied to Gordy's topic in General Sevens Discussion
I'd say it's time to start a build thread over at locostusa.com. In the spirit of previous posts, even if you go with an existing chassis plan, you'll still have hundreds if not thousands of decisions to make along the way. As you ask questions online, research first, then try and be specific, using drawings and photos when possible so that there is an answerable question. Will this approach work? Maybe. It cold be awesome, or, it could kill you. I wouldn't deviate from proven designs and practices without the ability to validate the engineering, or at least without having access to someone willing and able who can. This isn't meant to discourage you but, again, as others have said, to encourage you down a path that has a chance of success! -
New Member: looking to build a 7 series 2 from scratch
anduril3019 replied to Gordy's topic in General Sevens Discussion
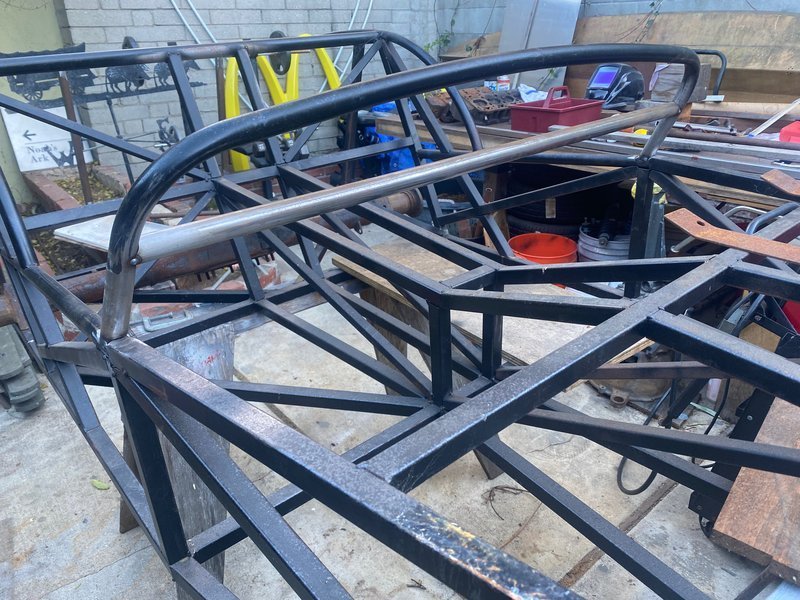
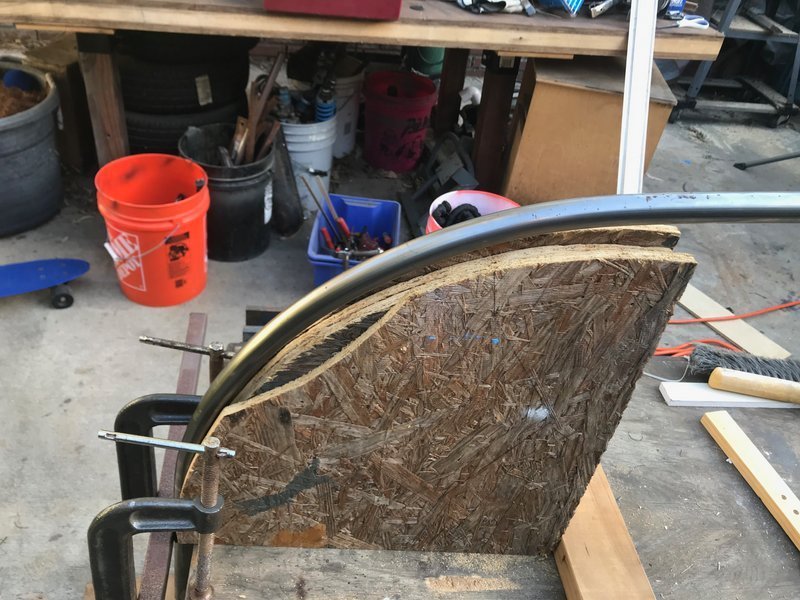
I was able to make this work for my rear tubes and dash hoop ends, I found one for under $100. https://www.ebay.com/itm/196324279196?gQT=1 Worked great for the 3/4" tubing but it won't do anything like what @11Budlite is showing for roll bar hoops or side impact bars. The curved tubes at the cockpit sides are 1" dia., those I bent by hand. Besides those few tubes, everything else on the chassis is straight.
-
New Member: looking to build a 7 series 2 from scratch
anduril3019 replied to Gordy's topic in General Sevens Discussion
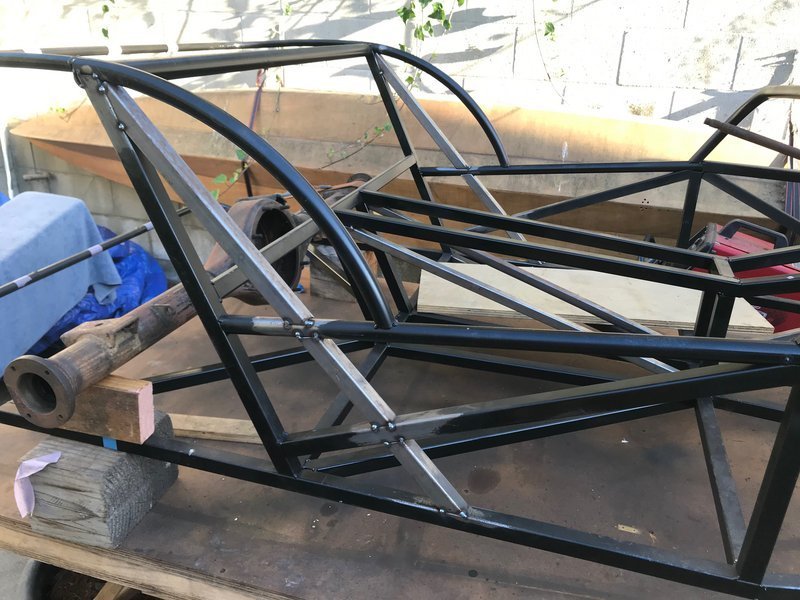
All good advice above! Here's a good place to start: https://www.locostusa.com/forums/viewtopic.php?p=117246#p117246 https://www.locostusa.com/forums/viewforum.php?f=42 I bought my first piece of steel about 5 years ago and now have a chassis that's 95% complete, as well as about 80% of the parts I need to finish. I've also got a family, a full time job, and a side business. So far, I haven't fallen into the 90% of stalled builds category, but can easily see how it happens. Realistically, I'd like to have it on the road in 3-5 years. I enjoy the parts sourcing, problem solving, and fabrication, so make sure you find the right balance between process and getting a finished product. Go for it, and don't be afraid to adjust as your time and resources allow. https://www.locostusa.com/forums/viewtopic.php?f=35&t=24456 -
Well said. Just like anything else, Artificial Intelligence requires Authentic Intelligence (or Actual Intelligence?) to use well.