-
Posts
477 -
Joined
Content Type
Profiles
Forums
Store
Articles
Gallery
Events
Library
Everything posted by papak
-
I ran one in my 944 when I was racing (POC, PCA). After talking with a couple of friends with CSR cars, I opted for a manual ball valve and actually wrote out “start” and “shutdown” procedures just as we had in the Boeing. Once rehearsed a few times, process worked perfectly. In my case, a -8 hose ran from the front of the engine through the valve in the cabin (adjacent to the gear shift) to the spare tire well in the trunk. The system worked great and was trouble free as long as I had the car (5 years or so).
-
Thanks! I'll order a set.
-
How wide is the film at the top? My wide body Birkin is similar dimensionally to an S3 but the rear fenders may be a bit wider. I only see the 3M film advertised in 6” widths. I really don’t like seams.
-
I checked their website. Any idea what the difference is between “large” and “L-shaped”?
-
Does anyone have a source for precut 3M rear fender film?
-
What is the thickness of the 3M film you are using? I never sprayed the inside of the fenders but haven’t noted any starring or cracks in 5,000 mi. Now my stone guard protecting the sump is a different matter!
-
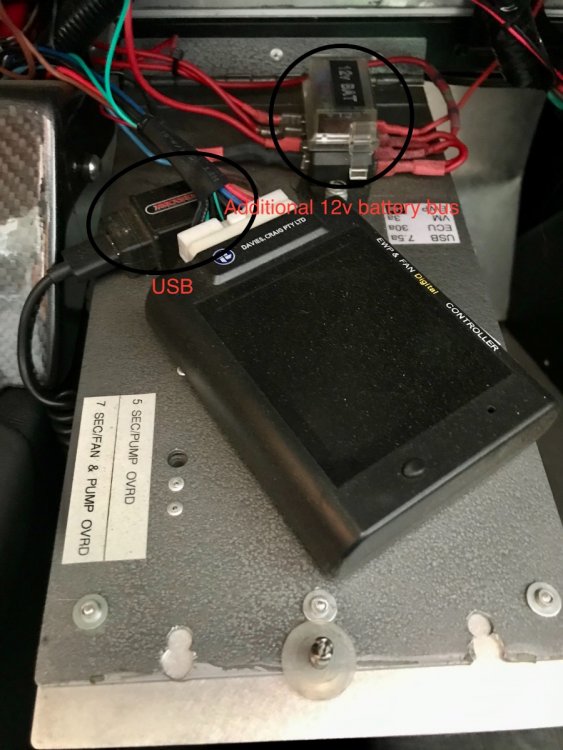
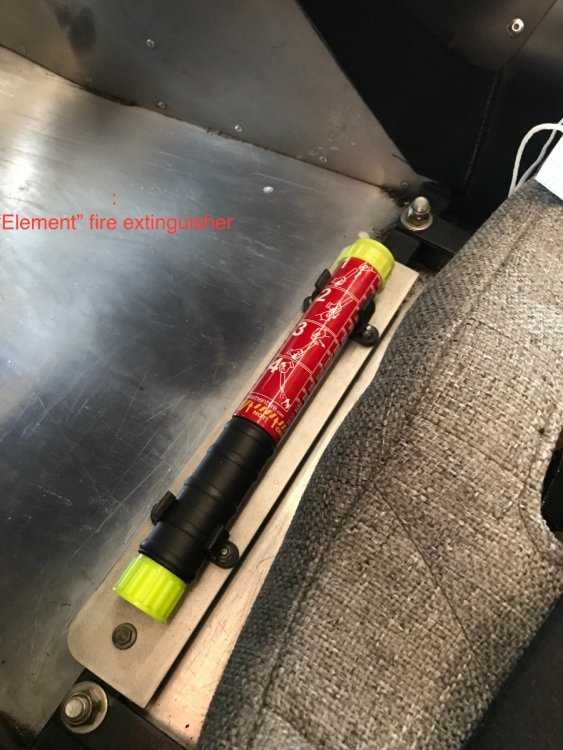
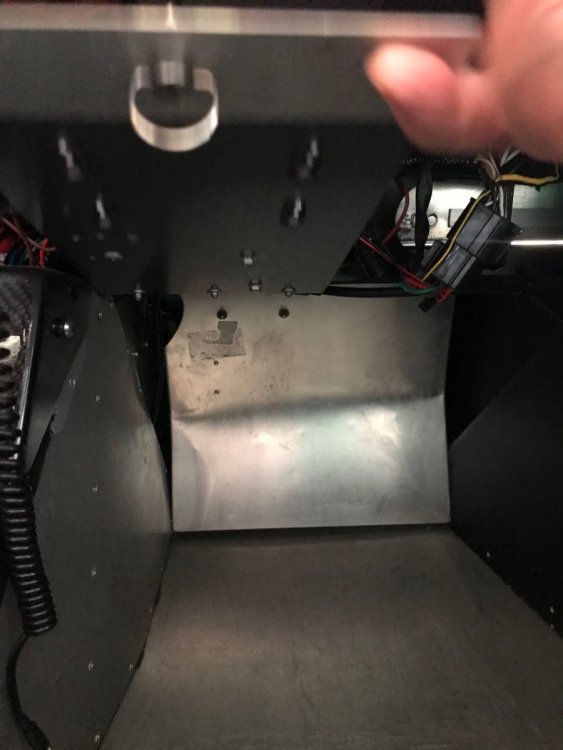
Picture #1 shows the hinged underdash panel. In order to simplify the wiring a bit, I added a small 12v accessory fuse panel. This panel hinges at the front of the scuttle support. The USB port is a generic motorcycle part Picture #2 shows a Deltran (Battery Tender) Lithium Ferrous Phosphate battery. 3.2 lbs as compared to 9.6 for a Braille. Picture #3 shows an Element fire extinguisher. Double the range and duration of a 2.5 lb powder or Halon. weighs less than 1lb. Picture #4 shows my 3rd brake light. This is a motorcycle unit mounted on some ⅛" aluminum stock polished and cut to fit on the front side of the spare tire bracket. I added a programmable flasher that is set to flash 15 times before going solid red. Also a motorcycle part. Picture #5 shows the panel at the front of the passenger footwell. Passengers will regularly use this as a foot rest. Unfortunately, this forms the rear wall of the electrical compartment and that is small enough without compressing it further. I plan on riveting a thicker aluminum doubler to this in the next week or so. Maybe 5/32" if I can find some scrap at the local metal supply. Picture #6 shows the roll bar mount on one side. You will most likely have occasion to remove the roll bar and it is a huge pain in the ass to refasten (at east mine is). This is due to the fact that the rearmost fastener installs from the top down (as the forward one does) into a threaded boss at the end of a triangulated chassis support. On my chassis, these two triangulated supports didn't exactly line up perfectly making it a two man job to reinstall the rollbar. I fixed this by running a bolt up through the chassis support and securing it with a locknut on top as shown. The trailing supports for the rollbar are a bit misaligned as well but are more manageable. If you can swing it, consider getting a "Quick-Lift". It securely raises the car 19-20". Engine/transmission installation is easiest from the bottom up. I modified a small transmission lift to slide the engine/transmission under the car and raised nearly into position. The transmission clears each side of the chassis opening by about 3/16". Remove the reverse light sender from the transmission before installing. Ron Francis sells a neat pigtail connector for this switch.
-
Will do tomorrow.
-
You could mount it on the face of the dash or, like I did, fabricate a hinged panel under the dash. Works great and out of site. Where are you located?
-
Clecos are key to doing good rivet work. Also helpful are having two cordless drills, one for the drill bit and one for a larger bit to remove the flashing. Always mark the rivet holes with a tapered punch. The drill bit won’t “walk” on you. Definitely get an electric rivet gun. I’ve worn out 2-3 manual riveters already. I wired in a USB outlet under the dash for the cellphone. Label all of the wires that you can. Only a matter of time before you lose track. Learn to build your own AN hoses. The fittings from Summit Racing are easier to use. Get a pressure test fitting for piece of mind. I’ve never had a hose fail once I tested it. More will come to mind…
-
I agree with Birkson on his comments. Over time I have replaced a number of the multi-wire connectors with connectors. Look online for the crimping tool. I found a local source for the connector housings, seals and metal connectors. Definitely run a tap through any threaded fitting. Do the same on the engine but you will need "bottom" taps. these are available from McMaster-Carr (your new best friend). They are also a great source for ss metric nuts and bolts (also try Bolt Depot) As for the headlights, you can use a coupler nut along with an allen head bolt "lock-tited" into the bottom. Then simply cut an allen wrench down to fit. My first differential came with a viscous LSD. I blew that up on the first track day. I ended up getting a rebuilt R180 with an AP Suretrac LSD from a fellow who rebuilds them for Subaru off-road guys. As I recall, we dig welded a nut onto the differential filler plug. Much easier to manipulate in the narrow confines. Definitely go for the VDO GPS driven speedometer. You can then plug the speedometer drive in the transmission tail shaft to eliminate one potential leak down the road. Bulletproof accurate and it doesn't care what size tires you use. When you download the build manual, you soon realize that it about 3 models old. Tom is a wonderfully patient resource. He makes all the difference. Where in California are you located? I'm in LA if you are nearby and want to stop by.
-
If you plan on tracking the car, have Tom install a master cutoff switch and an SCCA approved roll bar. Much easier to deal with during the initial build than later. Tom's advice is "spot on" when it comes to options. Completed my car in early 2017. I am now slowly swapping out suspension hardware for stainless steel nuts and bolts. No salt on the roads in SoCal but there is a lot of sandblasting that takes place in a car that is this close to the ground. With the stone guard installed, you will only have 2" of ground clearance. You acquire a new awareness of potholes, speed bumps and road debris! I have a new stone guard on the way from Tom as I have pounded out the dents on mine too many times. I presume Tom is adding a low profile cam cover. The car was initially designed for the 2 liter. The 2.3 and 2.5 sit an inch or so higher in the chassis and would otherwise deflect the nose cone and bonnet. What differential and LSD have you chosen?
-
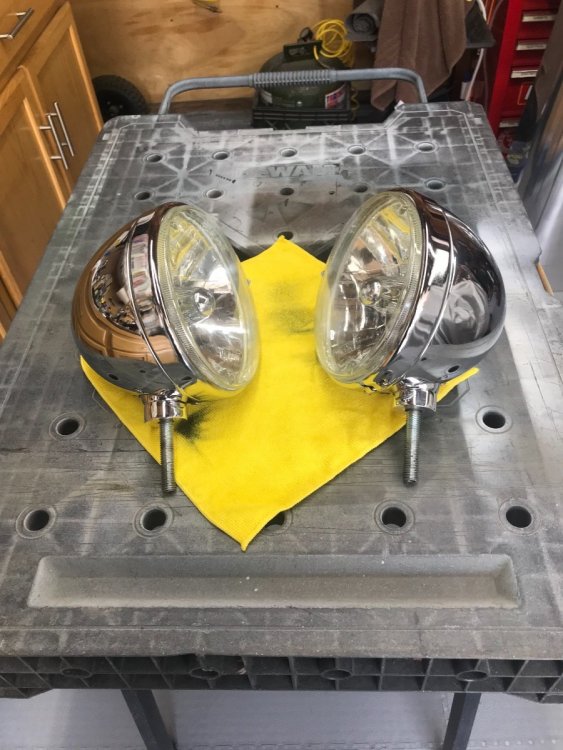
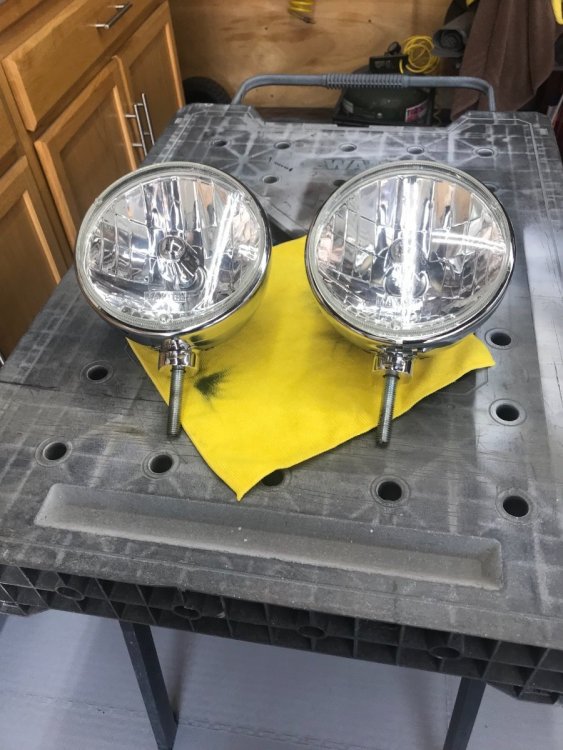
Wrapped things up today. I like the lower profile. These assemblies are slightly more rounded as well. There is a small (3w) high beam indicator light on the top of each housing. The Nord-Lock washer is evident in the first pic. The ss braided hose is from a hot rod supplier. Teflon lined to prevent chafing. It provides a nice detail to the car.
-
I have a pair of 7” headlamp assemblies came with my Birkin. They are in excellent condition, no corrosion, no dents or scratches. I simply replaced them for size (went to 5 ¾” units). I figure the change is worth at least 1 mph at the top end. $50 + shipping.
-
Fastg found the link. Available from McMaster-Carr and others. They work great and are reusable. Perfect for an application like a headlight mount that is susceptible to vibration and the elements. I also swapped over to 18-8 SS nuts and bolts.
-
My Birkin came with 7" headlights. I have taken my time in considering going to LEDs, rectangular housings and other options because they REALLY hang out there in the breeze. As tight as I get everything, they still go a little out of adjustment after a couple of freeway drives. I finally found a nice 5 ¾" unit (replacement for earlier Harley) that meets nearly all of my criteria. Smaller, similar visual appearance, same H4 bulb and the chrome finish is much better. I am mounting them about ¾" lower as well. I think I may also have solved the adjustment stability issue by using "Nord-Lock" lock washers. I'll provide a few more pictures as I complete the installation over the next day or two.
-

Closed PVC/CCV system with Duratec?
papak replied to KnifeySpoony's topic in General Sevens Discussion
Picture #1, cam cover to catch can Picture #2, catch can, two lines in, one from the cam cover and one from the stock crankcase vent plate. The third line goes to the intake backing plate. Picture #3, intake backing plate fitting. The catch can was probably $10 on eBay and included the fittings. I added a lever operated drain valve on the bottom. All of the other hoses are silicone. -

Closed PVC/CCV system with Duratec?
papak replied to KnifeySpoony's topic in General Sevens Discussion
The final inspection on my car took place at El Camino College in LA with an experienced auto mechanics teacher. An absolute breeze. He remarked that hardly anyone presents an SB100 car that is shabbily built. I don’t even think he even noticed the vent system I had worked so hard on. The bonnet was off for maybe a minute. -

Closed PVC/CCV system with Duratec?
papak replied to KnifeySpoony's topic in General Sevens Discussion
When I was building my Birkin/ 2.3l Duratec, I was advised that I would need a vapor return to the intake. When I routed the vent line from the rear of the cam cover, I ran it through a catch can and from there to a nylon fitting in the air filter backing plate between the 1 & 2 ITBs. I figured that I could easily remove it after certification was complete. To my surprise, however, it does capture some moisture from the vent process. The reality is that most of us don’t drive these cars frequently or often enough to prevent and/or “cook off” moisture buildup in the crankcase. In 5,000 mi. I haven’t seen any measurable evidence of oil mist or buildup inside the backing plate. I periodically drain the catch can and get maybe ¾ oz of beige foam and oil. I really like bone dry motors and view that as one indicator of a successful build. Now if this was an R-1350, an oil burn of LESS than a gallon per hour would warrant concern (22 gallon oil tank). Part of the Pratt & Whitney corrosion prevention program. -
That was the historical point I was relating.
-
When I was going through the process with my car, I was told that the rules were changed a few years prior to address the abuses of the “retro-rod” shops (ie, Boyd Coddington, Chip Foote, et al). On the first business day of the year, they would go into the DMV and grab most of the sequence numbers based on their proposed production for the year. It became very challenging for the rest of us to obtain a number. While the current process seems onerous, it does require the applicant to produce a physical chassis at the start of the process, something that didn’t exist under the old SB100. The new SPCNS rules are definitely kind of pedantic but they ultimately help the home builder at the expense of the professional shops.
-

Looking for a carbon fiber aero screen for an SV chassis.
papak replied to Nick OTeen's topic in Parts For Sale / Wanted
I’m looking for one as well. The price to import one is a bit steep. I may put a mold together to make one myself. -
Try mcmaster.com, belmetric.com or ti64.com. The last one is probably the closest to what you need. You can also try grainger.com or pegasusracing.com
-
Home Depot
-
I just use the cut up tee shirts in the Bag-O-Rags at HD. Lint free and softer than the towels. I sbspoke with a fellow years ago who prepared concours cars for clients. He only used cotton flannel. He bought it by the bolt. I'm not quite that anal (yet).


