-
Posts
483 -
Joined
Content Type
Profiles
Forums
Store
Articles
Gallery
Events
Library
Everything posted by papak
-
That was the historical point I was relating.
-
When I was going through the process with my car, I was told that the rules were changed a few years prior to address the abuses of the “retro-rod” shops (ie, Boyd Coddington, Chip Foote, et al). On the first business day of the year, they would go into the DMV and grab most of the sequence numbers based on their proposed production for the year. It became very challenging for the rest of us to obtain a number. While the current process seems onerous, it does require the applicant to produce a physical chassis at the start of the process, something that didn’t exist under the old SB100. The new SPCNS rules are definitely kind of pedantic but they ultimately help the home builder at the expense of the professional shops.
-

Looking for a carbon fiber aero screen for an SV chassis.
papak replied to Nick OTeen's topic in Parts For Sale / Wanted
I’m looking for one as well. The price to import one is a bit steep. I may put a mold together to make one myself. -
Try mcmaster.com, belmetric.com or ti64.com. The last one is probably the closest to what you need. You can also try grainger.com or pegasusracing.com
-
Home Depot
-
I just use the cut up tee shirts in the Bag-O-Rags at HD. Lint free and softer than the towels. I sbspoke with a fellow years ago who prepared concours cars for clients. He only used cotton flannel. He bought it by the bolt. I'm not quite that anal (yet).
-

Birkin Direct - A visit to Eagle, Colorado
papak replied to Croc's topic in General Sevens Discussion
I picked up my kit at Tom's shop back in 2015. It was a great road trip with my wife. We arranged for a 12' enclosed U-Haul trailer in the Vail area for the tow home to LA. Tom was in the smaller shop back then but it was just as busy. As I recall, he had a partially completed customer car in progress at the time. He was very gracious in taking several hours to explain some of the "unique" aspects of the assembly process. The continuing customer support that Tom provides is remarkable. He has to be the most patient man in our little world. -
The Birkin bell housing uses a somewhat proprietary mount for the annular slave cylinder as well as a spacer/adapter for the T-9 gearbox. You could probably get all that from Tom Carlin.
-
I have a 6" Porter Cable polisher and random orbital as well. I recently got a Griots G8 small diameter polisher as I have aluminum seats that I want to work on and the individual areas are pretty small. It's perfect for the job.
-
The Collings Foundation has restored a number of warbirds and for years and uses Nuvite aluminum polish as do Gulfstream and Bombardier. This is available from Aircraft Spruce (they also stock a number of interesting bits and pieces for folks like us) or directly from Nuvite. Not cheap or over-hyped but it really works. There are a number of youtube videos on the process but take the time to view a broader selection because the guys who produce these videos tend to be somewhat highly opinionated on their personal approach to this. The basic process is as follows: 1. Buy several packages of microfiber clothes from Costco or Amazon. Remove all the labels and tags and wash them in Woolite. Do not use fabric softener or dryer sheets! Get a 6" random orbital polisher with the black or orange foam pads (get extra pads). Griots sells a very effective foam pad cleaning solution that works. 2. You will need two grades of Nuvite, coarse © and smooth (S). Check their website for application guidance. 3. If you have very dull or heavily weathered aluminum, you might need some G6, an even coarser grade. This stuff really works. The initial goal is to polish off the machine or mill finish so that there is no visual granularity remaining. From that point on, you are just working on refining the mirror finish. While all of the aluminum one my car is 6061, the bonnet is a different variant of 6061 and was more challenging to get a nice as the rest of the car. It just requires persistence and patience. I have tried other brands and while most of them work ok, none seem to work as well as this stuff. When I was flying a Gulfstream, my mechanic contacted the Gulfstream finishing shop for guidance. This is the stuff they use on new Gulfstream jets brightwork. Once you have polished the car a few times, it gets easier and easier. Mine is down to an hour of hand touchup every month or so. One of the points of pride in these cars is that they are hand built. It just takes more "hand' at the of the build.
-
I took another look at tiles and found a tile sold by "armorgarage.com". ¼"thick PVC with a better locking style than the others I had seen. They weigh about 4 ½ lbs each (19.5x19.5"). I don't see them sliding around. The quotes for polyspartic and epoxy were pretty high by my estimation ($2500-3500), perhaps because of California environmental considerations. I know that when I last exposed the floor (8-10 years ago), I purchased a high quality solvent based epoxy on the East Coast and brought it back on the jet. It was unavailable in SoCal. The tiles are half the price of the coating quotes. I don't have the hot tire issue as I usually let the car sit outside a bit when I get back home. I'm much more concerned about abrasion tolerance (floor jack, etc.) I'll take B/A photos
-
Just starting the process of having the garage floor recoated. I applied two coats of a solvent based epoxy to a properly prepared concrete floor about 10 years ago but after two builds and a lot of repairs, it is looking pretty worn. I keep going back and forth between epoxy and polyspartic/polyurea. Do any of you have any "real world" experience with either? I've pretty much ruled out the tile options.
-
I registered mine under SB100 a few years ago in LA. It's kind of a "dog and pony" show but it all worked for me. Most everyone was actually pretty easy to deal with. Most problems arise from the fact that currently, they only do a couple of hundred a year and few DMV folks are familiar with the process. The best networking for the process is through the Cobra forums. I have been told that in SoCal, the office to go to is in Thousand Oaks. There is a Cobra builder over there and a woman in the DMV is very familiar with the process due to then number of applicants that come through her office. When I did it in the Culver City office, they had to make repeated calls to Sacramento for clarifications and explanations. It took a LOT of patience! The CHP guy was kind of grudging and dinged the sheetmetal while installing the VIN placard. Feel free to PM me if you want more info. I still have all the records and notes of the process.
-
-
Try aerostriaght.com. Give them a phone call rather than trying to find what you need. I found the owner very helpful.
-
Since I’m already wearing a helmet most of the time I’m in the Birkin, I thought I’d move to a wind deflector from the Brooklands I have now. Thanks
-
They do a great job! Used them for years for restoration and odd fitments. They even refitted my vintage Formula Vee.
-
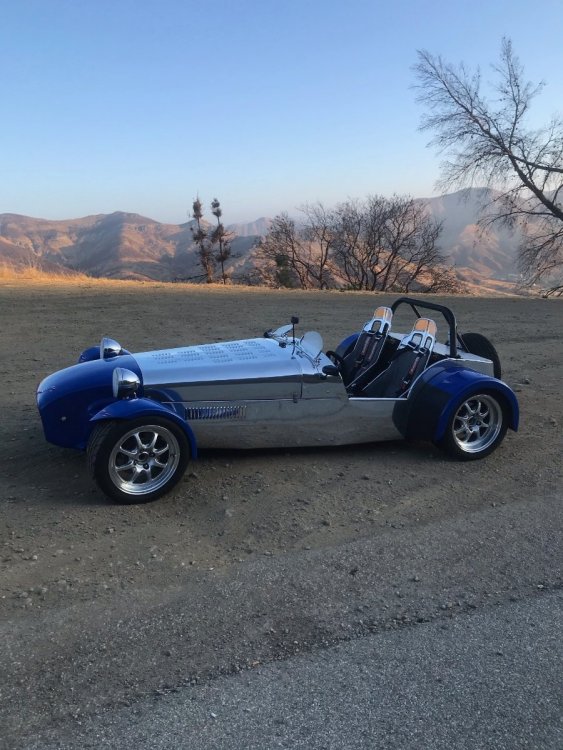
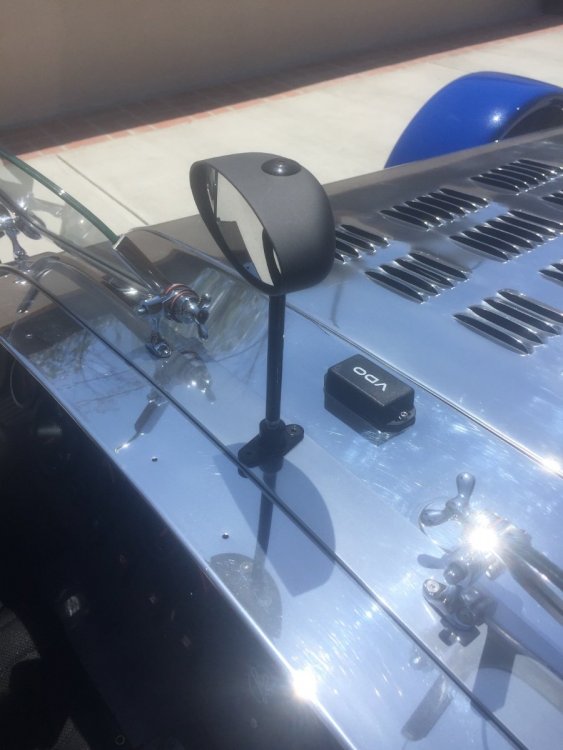
The only aluminum on the Birkin thats a real pain to polish is the bonnet with all it's louvers. I'm in the market for a small diameter polisher (2-3" diameter). As can be seen from the attached photo, the sections between the sets of louvers are pretty small, 1" and 2". When polished by hand, it is challenging to avoid scratch marks. I was looking at the Griots units (G3 and G8) but wonder if there are any reasonable alternatives (other than painting it). Everything I see online is a "no name". (the dog is useless but sweet)
-
Check Wilwood. They may offer one.
-
I finally have the GoPro working well with a decent array of settings thanks to YouTube. Anyone have any experience or tips to get better sound quality from the road videos? I have attached a bit of “dead cat” material to the mike’s on the case but it didn’t seem to help much above 20 mph.
-
Took one this morning through the Malibu hills. Much needed! The weather was beautiful. I was really surprised to see so few cars out and about. The CHP speedtraps on PCH weren’t making much money today. I even got a couple of “thumbs up” from a couple of cops!
-

Unusual take on a Caterham by an owner in Singapore
papak replied to Vovchandr's topic in General Sevens Discussion
I lived there in the mid-70s for a while. Not nearly as insane on the costs but private cars were clearly only for the affluent. With so few and such narrow roads, it’s clear why the taxation is so high. Even then, I was provided with a chauffeur driven car for work and compensated for my taxi usage as a disincentive to leasing a car. -
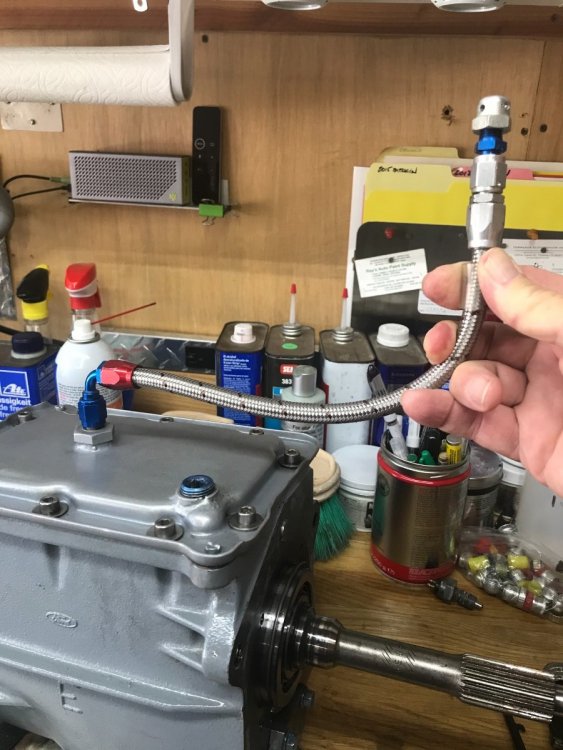
Good job! The vent for the transmission is that pin hole in the bump on the top of the cover. Take care to push brake cleaner through it to make sure it is clear. It serves to provide a fine oily mist on the top of the transmission over time. The British anti-corrosion program!
-
When you look at the top cover fill port in my photo, 1.25l measures 6” down on a dipstick from the top lip.
-
That’s exactly what it is. There is another in the opposite corner. If you choose to weld in a bung when it is removed, consider doing so in the right front corner (looking forward). That will allow you to fabricate and use a dipstick to check lube level. It should also be pretty close to being accessible from above. As you can see in the accompanying photo, I also added a remote vent. If you do this with the transmission installed, be very careful to NOT move the shift lever while the top cover is removed. There is a sheet metal structure attached to the inside of the cover that serves as the guide for the selector shaft and if moved, you can easily lose the internals of the 1-2 synchronizer. Don’t ask me how I found out! According to Chris at BGH Geartech in England, 1.25 liters is about right. Ford recommended 1.6 l for a while but that often produced seepage at the rear seal over time. In the second photo, you can see that the fill plug is lower on the boss in my transmission. Earlier case. The later ones that were set up for 1.6 l have the fill plug located higher on this boss. I’ve never had a problem at 1.25l. The rounded protrusion on the bottom of the case holds a magnetic disk. You will never know if there is anything on it until you completely disassemble the gearbox. Gotta love some of these engineers.


