MV8
-
Posts
2,303 -
Joined
Content Type
Profiles
Forums
Store
Articles
Gallery
Events
Library
Everything posted by MV8
-
Cool running walk around of an S1 with Coventry Climax (sounds like a motorcycle). Interesting top mount slave cylinder, aluminum drum brakes all around and bias ply tires.
-
An oscillating tool is great for tight spots that a hack saw, band saw, or reciprocating saw can't reach. Works fine for cutting aluminum with the right blade. I use normal tools for the most part then a sonicrafter for the last little bit. All the major tool mfgs sell their own version these days.
-
If the wheel box location on your car is not closer to the windscreen vertical frame, the arms and blades are not longer, and the blades do not mount at a different angle on the arm, then the s3 gear should work. The gear determines the stroke from how far the link pin is off center, how far the spring moves back and forth in the tube, and ultimately how far the arm will swing back and forth. Hopefully the difference in spacing they were referring to is between the wheel boxes. It would help to know how many degrees the system is so you could make a template for minimum wheel box distance to the vertical frame.
-
The 2015 assembly guide for a 420 shows M8x40 cap screws to 20nm with nylocs. A 3/8 bit can cut the shoulder so you don't remove the paint trying to remove the insert of you want to go with 5/16 grade 8. If concerned about strength, use socket head screws or metric 12.9 or sae grade 8, partially threaded and a same grade nut.
-
I found in an early owners manual the motor described as "DR2" and having a self parking feature. This would be the single speed motor sourced from the pre-69 mini among other applications: https://www.minimania.com/part/GEU7714-DR2/Single-Speed-Wiper-Motor-Dr2-Mini--Morris-Minor-Less-Gear I think all the cats with a washer switch have an intermittent wipe relay box and two speeds.
-
Looks like it would be an on/off toggle, no self-park, not intermittent, and one speed. The gear stroke is probably less than a 115deg sweep. I'd work backwards from the appropriate wiper arm to determine the wheel boxes with the right pin type. Newer, more common motors with more functions could be used with just a toggle but the stroke could be critical with a fixed windscreen frame to wiper box distance. A three position toggle could provide two speeds. Self park just means operating it to allow it to park before installing the arms. Intermittent is a bit more complicated.
-

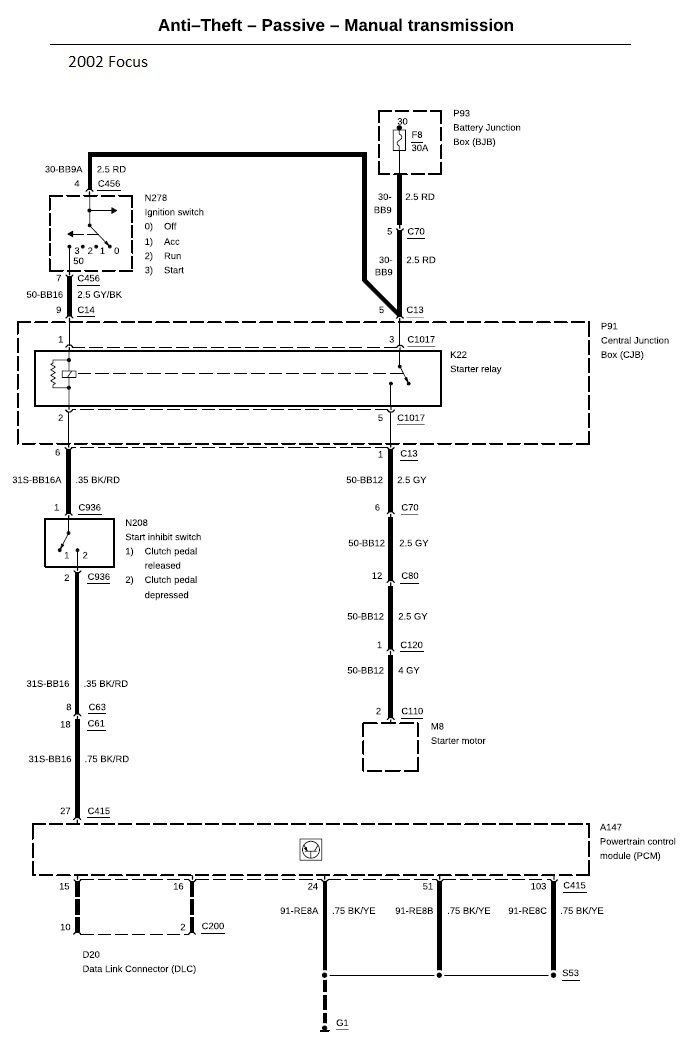
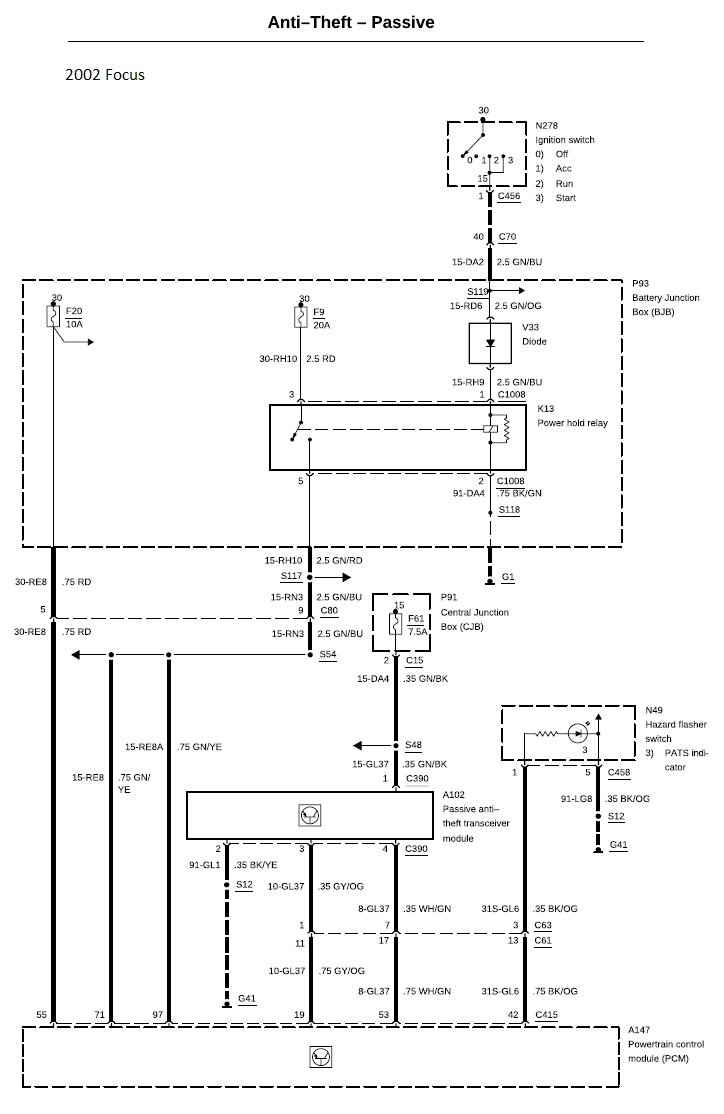
computer for 2002 thru 2004 Ford 4cy fuel injected SVT
MV8 replied to HUTCH's topic in General Sevens Discussion
Consulting only gets you part way. How did you determine that the ecu does not have pats? -
computer for 2002 thru 2004 Ford 4cy fuel injected SVT
MV8 replied to HUTCH's topic in General Sevens Discussion
Hutch, I am a Master ASE and your responses don't make sense. More ideas are not the answer. I'm sure you are very good at whatever you do or did when working. There is no shame in not understanding newer drive trains designed to make you dependent on the industry. Please take it to a professional, pay the price, and be back on the road. The longer it sits and the more you tinker with it, the more it will cost to repair. -
I see no flaws in that. I'd probably use a main relay to feed pin 30 and let the headlight switch toggle 87/a between DRL and low beam, using a separate relay for high beam.
-
What do you want to know? If you have the full harness, it should be straight forward. The DRL controls the high beam bypassing the headlight relay (red/wht).
-
The can location can be high or low if it won't be configured to auto drain back to the engine. The can should have a clear path to drain with a pan close to the port or hose so as not to make a splash, spraying oil drops everywhere. There should be a block vent on the exhaust side as well as the valve cover vent. Hoses should be compatible with hot oil, like automatic transmission hose. They will still have a shorter life than typical hoses and will need replacement when they get stiff/hard. A leak under the nose sounds like something else. A cleaning followed by a shorter drive should help locate the source of the leak. I'd probably fit a basic, quart can with a small filter on top, quick release drain valve just above the bottom chassis rail in the corner opposite the exhaust (curb side) and connected to the valve cover with metal line down the block or firewall and compatible rubber hose as needed. I'd drain it when checking the oil. If there is seepage around the filter on top (maybe from cornering splash and too full), it needs draining.
-
If you want to keep worm drive clamps, they are available fully banded so as not to damage soft silicone hose. If a hose clamp is too big/too long a tail when tight, the excess can be trimmed. I use spring T-bolts for boosted applications so the clamps don't loosen from the heat and pipe expansion cycling. Be sure to order the max size based on the loose hose od versus the pipe od.
-
The VDO "Classic" temp gauge is very close to the AC unit in every way. Just needs a custom face marked 40-110 instead of 40-120c.
-
computer for 2002 thru 2004 Ford 4cy fuel injected SVT
MV8 replied to HUTCH's topic in General Sevens Discussion
A repair shop may be a better choice. I thought it was at the upstate Ny Cat dealer? Is the fuel pump running? Crank sensor pulsing? Temp sensor in tolerance? "Yuns waaan I should top up the humanera halogen fluid?" -
computer for 2002 thru 2004 Ford 4cy fuel injected SVT
MV8 replied to HUTCH's topic in General Sevens Discussion
Depends on many things. I'd be surprised if they could not but these are over 20 years old now. Dealers often are not willing to work on old cars. -
computer for 2002 thru 2004 Ford 4cy fuel injected SVT
MV8 replied to HUTCH's topic in General Sevens Discussion
Again, I suggest you take it to someone qualified like any other profession (i.e. doctors, lawyers, pilots, etc).
-
I don't know how much electrical work you want to do. I see the fitment issues as a result of the fuse/relay block length. However, those are four, separate fuse blocks that slide together to form a single. You could slide them apart for two, shorter blocks. They also don't need to be rigidly mounted. I'd avoid a hinged/swinging block assy as the wiring needs to lay a certain way to prevent damage from repeated swinging (bundled together to run the length of the hinge with rub protection and secured at the ends so the twist is spread over as much length of wire as practical). For the panel to face the seat by rotating the mounting face 90 deg, a strip of .050" or thicker 3003 half-hard could be formed into an L shape over two 2x4s C-clamped together and "slapped" (across the grain) with a third 2x4 about a foot long or you could use a 2x2x1/8 aluminum extrusion (home depot) across the footwell and bolted to the firewall. A window in the firewall (drilled corners, offset tin snips, and flat file/debur tool) would work well with a strip of angle to rotate the block, riv nuts, and an cover overlapping about 3/4 inch on each side but I don't think you will be able to get to it once everything else is added under the bonnet.
-
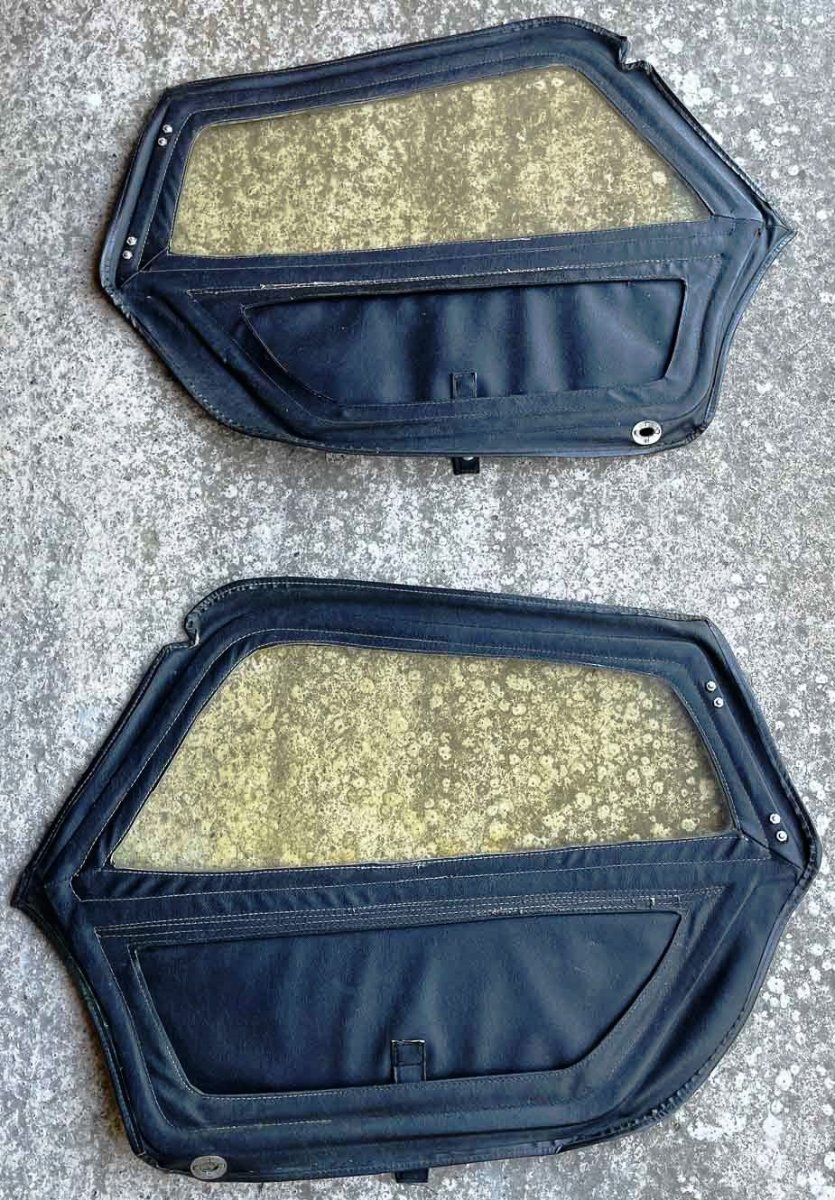
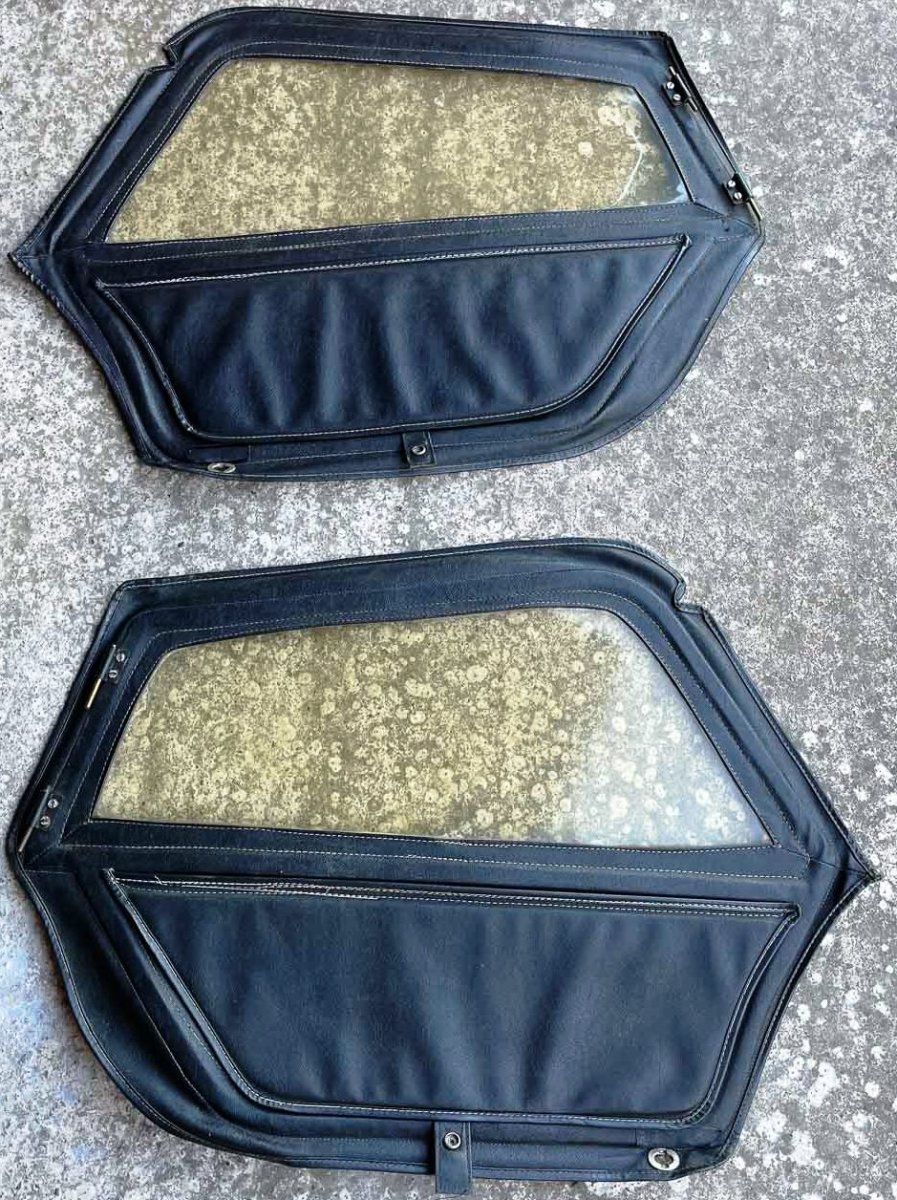
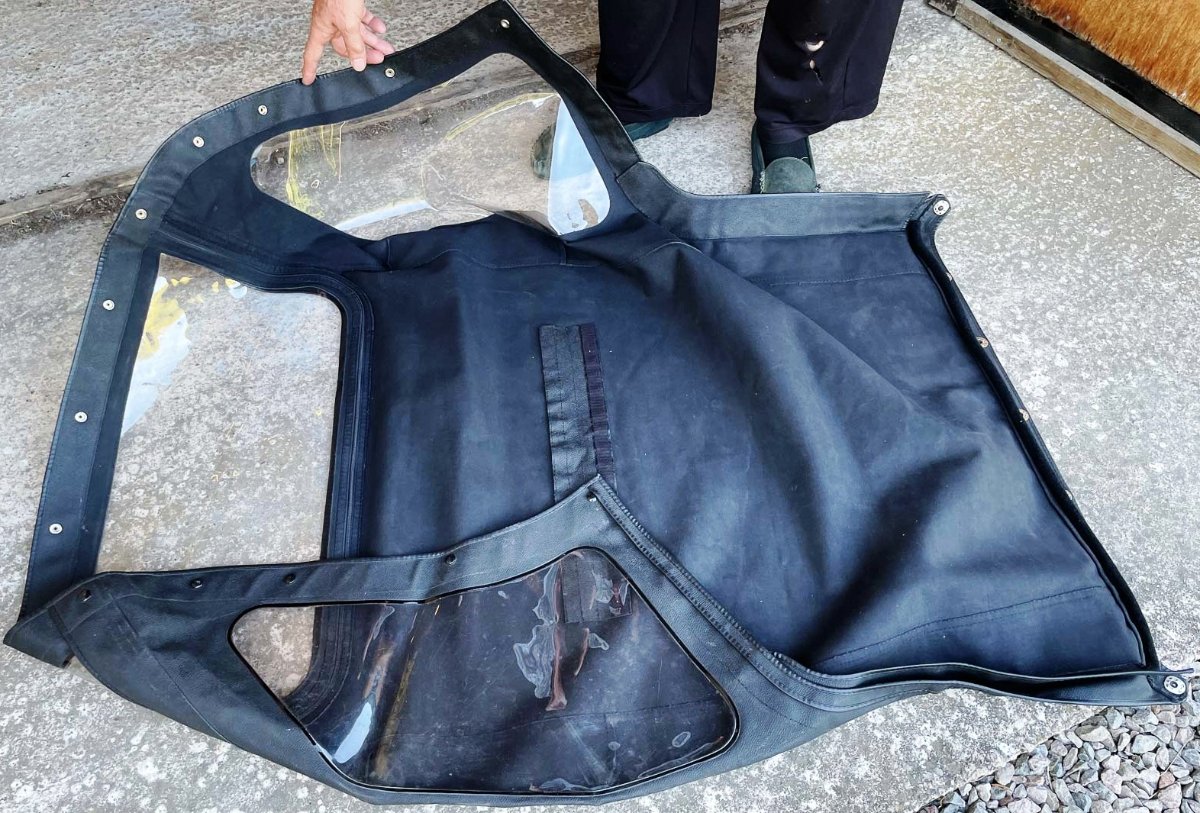
If you can't buy, I'd expect 1x0.250 steel strip frames based on what I can see. With Senc's dims and a good upholsterer you should be golden.
-
computer for 2002 thru 2004 Ford 4cy fuel injected SVT
MV8 replied to HUTCH's topic in General Sevens Discussion
Sure it does. Also, PATs involves more than key recognition but I understand if you want to go with what sounds likely based on your experience. -
computer for 2002 thru 2004 Ford 4cy fuel injected SVT
MV8 replied to HUTCH's topic in General Sevens Discussion
Depth of experience (different problems of course): -
FWIW, these are not my parts.
-
computer for 2002 thru 2004 Ford 4cy fuel injected SVT
MV8 replied to HUTCH's topic in General Sevens Discussion
What year and model caterham do you have? If they can't get actual efi schematics from cat, you'd be better off with a shop that works on older efi systems regularly and have the diagnostic equipment. However, I'm sure they are great at caterham specific chassis work. It sounds like they have done their best. Cut your losses, politely collect your car, and take it to a shop with ASE techs and older ford EFI experience. I suggest a shop like Eric O.'s (South Main Auto, NY): https://www.youtube.com/c/SouthMainAutoRepairAvoca It's hard to find qualified people with time to figure it out. -
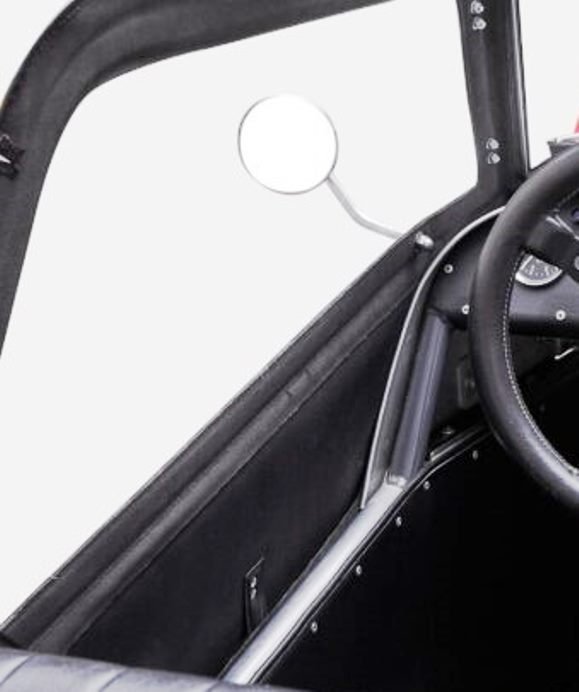
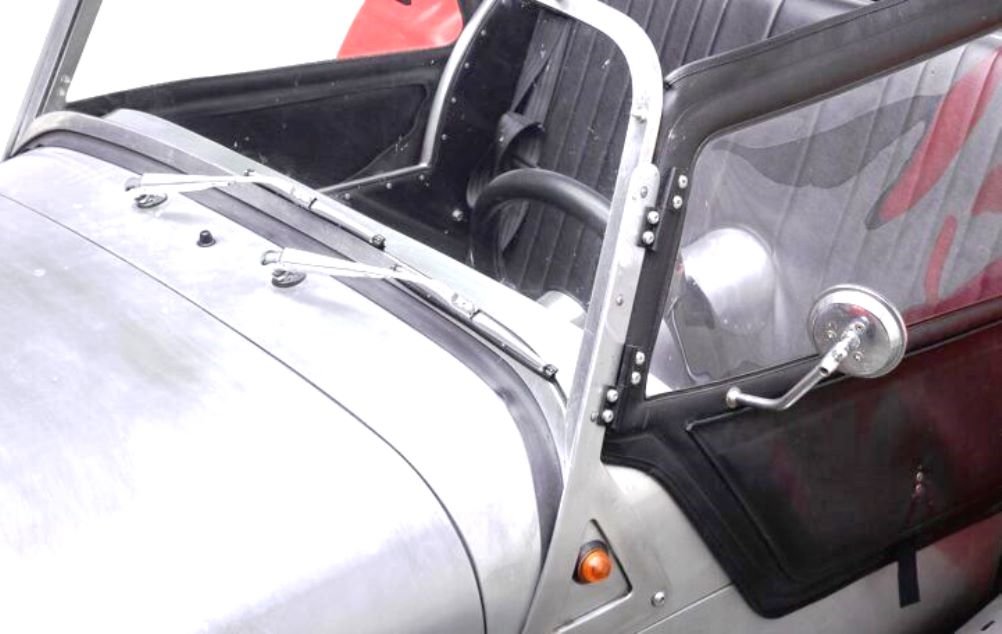
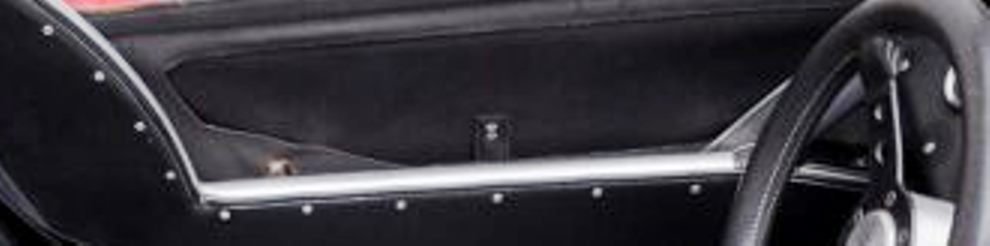
These might help. Do you need a interior pic also with doors installed?
-
A new, similar plug with sae thread can be found from an industrial hydraulics supply. If it were metric thread, a similar plug is available as a replacement oil drain.
-
Rear brake caliper rubbing on radius arm/forward watts linkage
MV8 replied to KnifeySpoony's topic in General Tech
Push-pull the dedion tube from side to side while observing the A frame bushes and joints at the attachments to see if the lateral movement is excessive versus the tube rocking normally on the center joint. An inch longer top arm on the bellcrank of the watts would probably be enough, have no significant effect on the watts system, and could quickly be returned to original if you don't mod your original bellcrank. Fabbing a new upper link is another alternative but it would need to be heavier. A jig for the existing arm length would be drilled, then an essentially identical arm made but either: A) about six inches of solid rod would be bent to clear the spring and caliper and inserted into the tube ends or B) simply bent to clear (slightly longer tube so slightly heavier). I wonder if the upper link clears without the watts system. I'm guessing the standard upper link is the same length as the watts kit upper link.